Nickfromwales
-
Posts
31011 -
Joined
-
Last visited
-
Days Won
330
Everything posted by Nickfromwales
-
Some manufacturers say the first 800mm - 1000mm in copper, in case the boiler overheats and sends super-high temp water out for a few seconds. Plastic pipe and fittings have very low pressure ratings at very high water temps.
-
Hepworth do a 6m length in a straight run. LINK People have been soldering pipes longer than they have been pushing fittings onto plastic pipes I've been plumbing for nearly 30 years, and I would use copper in this instance over plastic for sure.
-

Beam and Block floor and ventilated void vs Timber Frame
Nickfromwales replied to BartW's topic in Foundations
So what is your rain screen going to be then? -
Combining an air-water heat pump and solar thermal
Nickfromwales replied to Garald's topic in Solar Thermal (ST)
A very rough check would be to run them at 40oC flow temp from the gas setup. If the house won't get up to temp, you're going to need bigger rads. You may also need larger bore pipework to get a higher volume of the 'cooler' water circulating around the system. -
Combining an air-water heat pump and solar thermal
Nickfromwales replied to Garald's topic in Solar Thermal (ST)
Get a glass of warm milk and have a bedtime read -
Oil to ASHP. Can I? and do my numbers workout?
Nickfromwales replied to pacemaker1000's topic in Air Source Heat Pumps (ASHP)
Hi. Not garbage, but missing some key points to better calculate your comparison A CoP of 4:1 would be achievable if the flow temp to the heating emitters is very low, but with rads in the mix you'll likely be up much higher. When the temp goes up, the CoP goes down, and it goes down again when winter removes a significant amount of heat energy in the air. Lots of things change these numbers, such as the amount of insulation under the UFH, the fabric and ventilation heat loss of the house ( how many kWh of heat are required to be input to keep the house at 21oC when it's bitterly cold outside ) and more. The oil will be a difficult beast to replace, especially in a home which is not efficient and highly insulated / excellent glazing etc, so maybe consider going for a Grant Hybrid ASHP with an integral oil burner for the bitter parts of the year when the HP cannot quite keep up. LINK -
Just solder the joint and move on with your life I've done thousands of soldered joints, water / gas etc and it's perfectly fine. You're waaaaayyyyy over-thinking this. Solder it up, pressure test it at mains for 24 hours, and get it in the ground.
-
Are solar panels worth it with my roof and sloping direction?
Nickfromwales replied to MrTWales's topic in Photovoltaics (PV)
Not magic, maths and sense. -
Planning Water Feed for En-Suite Bathroom
Nickfromwales replied to MortarThePoint's topic in General Plumbing
Please don't, it's carp compared to Wavin Hepworth ( aka Hep2o ). 15mm for shower feeds, yes. -
50mm liquid screed UFH with Sunamp as storage
Nickfromwales replied to westcoast's topic in Underfloor Heating
I’m not saying to over heat it, but without a decent amount of ‘thermal heat capacity’ you cannot store heat energy and slowly release it, as you do with your storage heaters. Getting the whole house and internal ambient materials / surfaces up to the desired temp then becomes an event, rather than a constant. Uneconomical by comparison eg between thin screed over a little bit of insulation vs passive raft. -
50mm liquid screed UFH with Sunamp as storage
Nickfromwales replied to westcoast's topic in Underfloor Heating
PCM58 is called that for a reason . With an ASHP you can heat an UVC to 55oC, but the immersion heater can then push you way past that to 85oC for a huge increase in stored heat energy fir the same capacity device. SA wins on physical size, UVC wins on not being a single trick pony. SA fails by the sheer number of failed units I’ve had to exchange or repair vs UVC’s. -
50mm liquid screed UFH with Sunamp as storage
Nickfromwales replied to westcoast's topic in Underfloor Heating
You’d still be using the ASHP for DHW, via an UVC, would you not? With such a thin screed there will be a very short “thermal time constant” so you’d be stuck with buying electricity on demand. Expensive option if you don’t have a passive raft / similar to invest cheap heat into and leave it leak into the property, as it’ll be 1:1. If you have other plans for DHW, you could still just buy a cheap ASHP for heating and get close to 1:4 or at least 1:3. With electricity prices rising, I’d not go direct with a thin screed tbh. -
Watt hour were you up until?
-
Are solar panels worth it with my roof and sloping direction?
Nickfromwales replied to MrTWales's topic in Photovoltaics (PV)
Elementary, my dear kW’stson. The car can only charge at a certain rate of knots. To absorb sporadic pockets of excess solar PV the charger needs to be in ‘eco’ mode, and the car tethered whilst this is happening. A domestic battery is fixed, and is dedicated to absorbing these ‘opportunities’, and will be the simplest and best option if capturing solar PV revenue is the remit. Most people will be wanting to drive places during the hours of daylight…. 100% sound advice. -
Are solar panels worth it with my roof and sloping direction?
Nickfromwales replied to MrTWales's topic in Photovoltaics (PV)
They don’t live with you The actual loads will be the vampire loads of a typical house. Stuff that you cannot be bothered to unplug, or switch off, or put into ‘power-saving’ mode. So a £3k system in my house would probably pay back its capital investment 3x over in its useful lifetime. -
Praise be!!! Someone has finally said it. This haas been my advice to clients for a long time, even more so where the source of DHW is from PV or an ASHP.
-
OSB / Plasterboard bathroom walls
Nickfromwales replied to MortarThePoint's topic in General Construction Issues
Agreed, which is why I always tank / make bombproof every single bathroom job I do not like cement board, as it doesn’t comply to the uneven nature of stud walls etc. Last time I used it, to an architects spec, it was bonded with Sikaflex as well as screwed. Never had a bathroom fail, and I learned fast back in the day through insurance work. A good way of knowing what ‘not to do’ was to take note of what had been done ( which failed, sometimes catastrophically ) and not repeat it. -
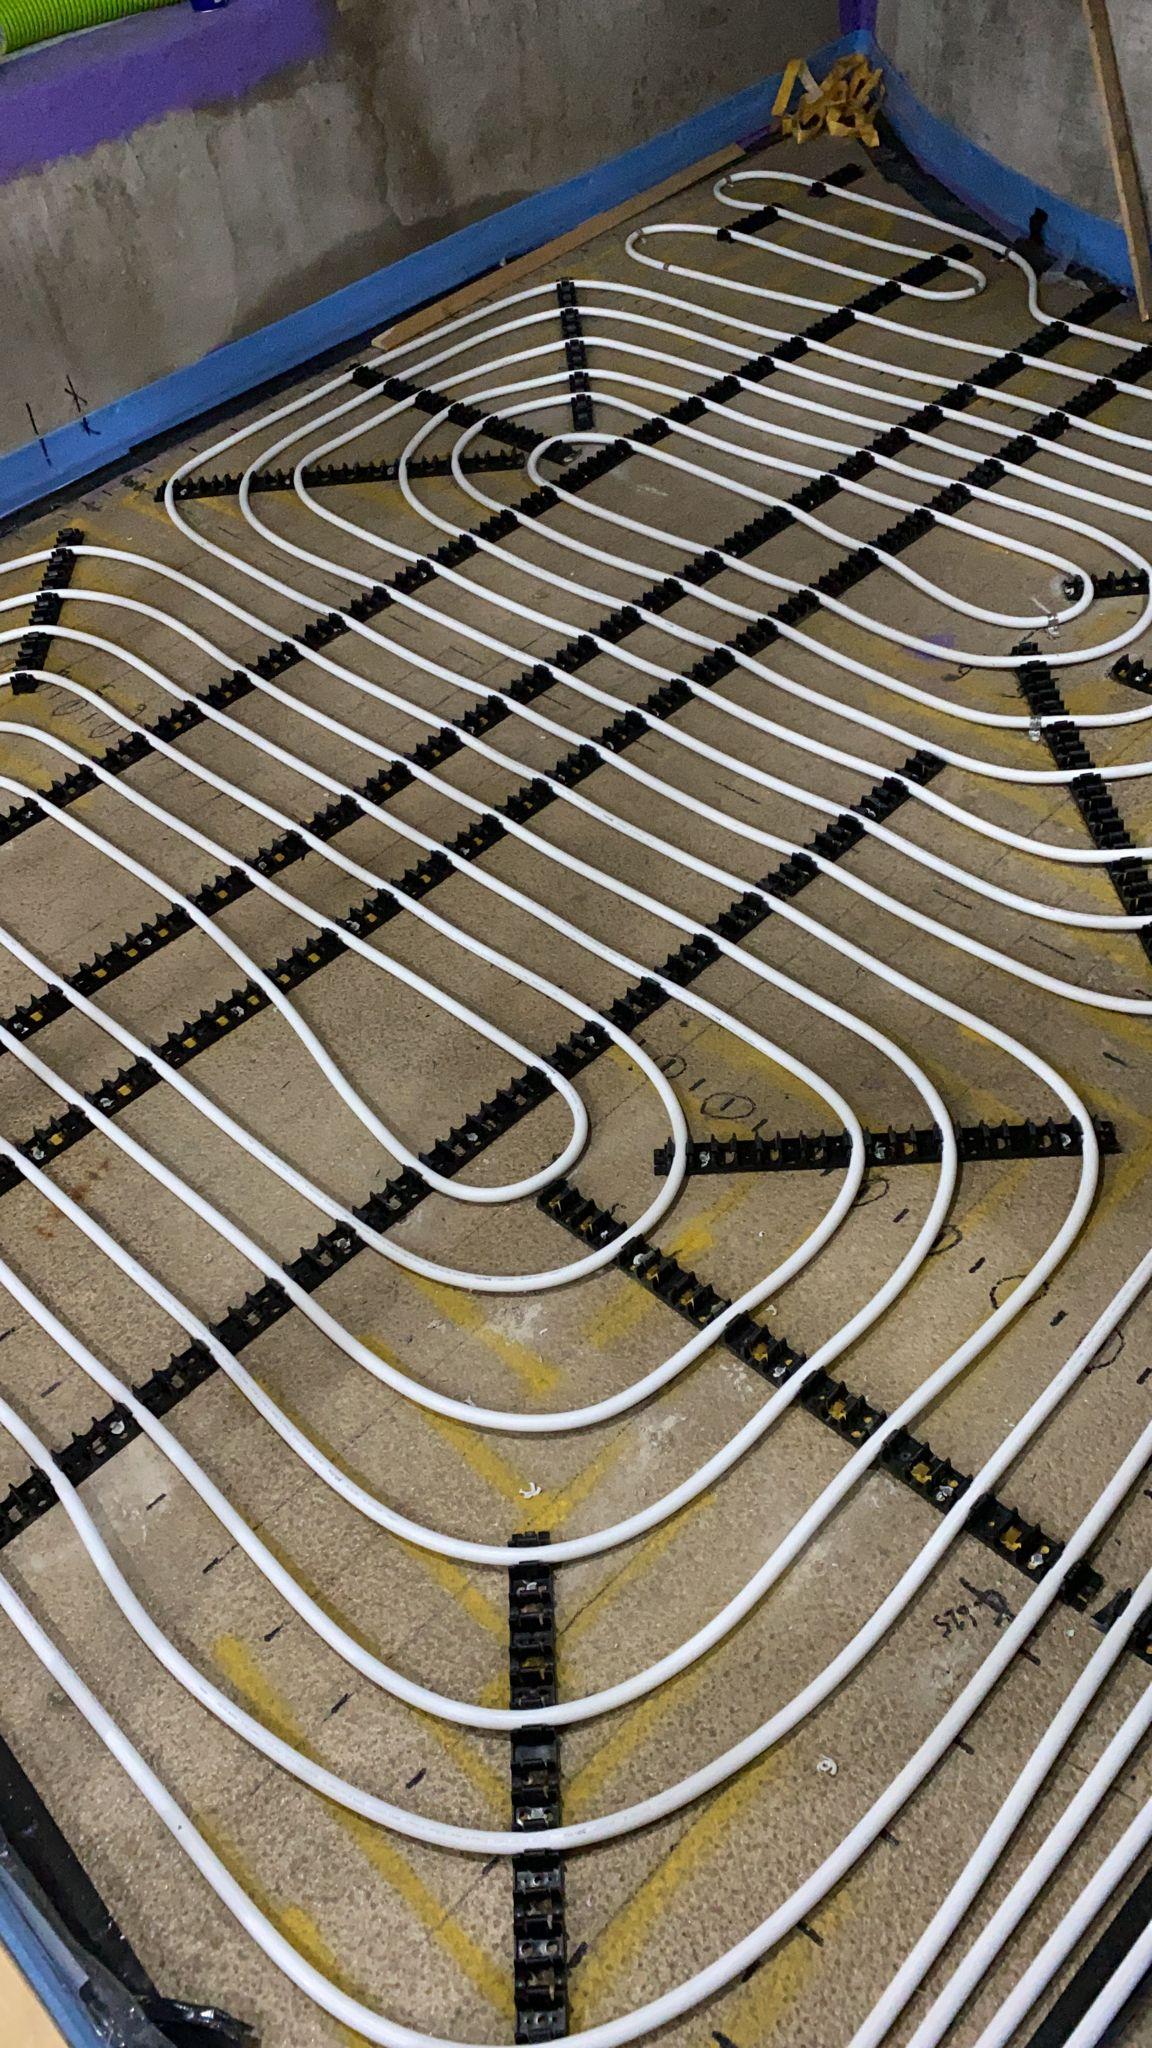
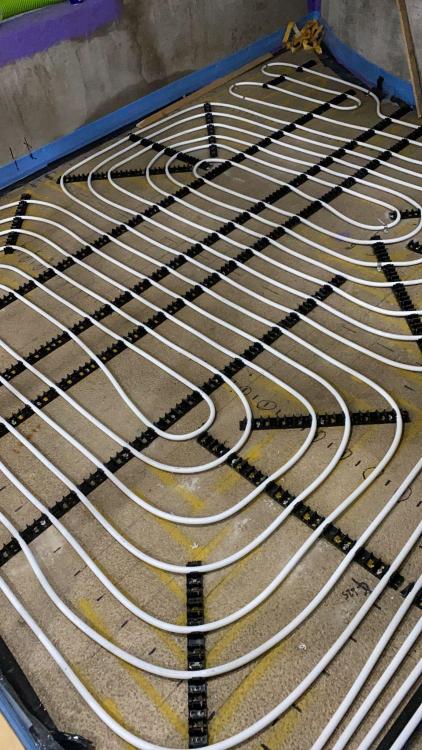
Gas nailed onto concrete, with clip rails.

-
Yes, yes it is. There’s a magical, almost mystical fountain of youth that it pours out from. The more In drink, then less old I feel., ”All hail the ale”.
-
Simple solution is 3x2 studs, the right way round, and double up at each stud with 2x 3x2’s glued and screwed together. Shallower footprint, more insulation, stronger than a 4x2. And deffo no need for noggins then.
-
OSB / Plasterboard bathroom walls
Nickfromwales replied to MortarThePoint's topic in General Construction Issues
Because they will all be tanked. -
OSB / Plasterboard bathroom walls
Nickfromwales replied to MortarThePoint's topic in General Construction Issues
In absolute honesty, no need. Most use an off cut of the wall / board material, so you’re on the money -
And congrats on popping your 1k cherry
-
Times that by 22 and you’ll realise what a real problem you have……..
-
So you can get an early start checking for whether I said KwH or kWH or anything else i can do to keep you from relaxing. K-Wh