Nickfromwales
-
Posts
31387 -
Joined
-
Last visited
-
Days Won
346
Everything posted by Nickfromwales
-

Rate the pre plumbed cylinder install!
Nickfromwales replied to jfb's topic in Boilers & Hot Water Tanks
Looks busy, but the plumbing looks neat / well executed. Too much going on there to comment tbh. “Carry on!”. -
The 27kW Stiebel is a very impressive unit. I’ve a 27kW gas combi, and there is very little in it. I’d be quite happy with that 3ph heater in my own home. 30kW instant is just too big, requiring a jump to 40a/ph. 32a/ph on the 27 is fine.
-
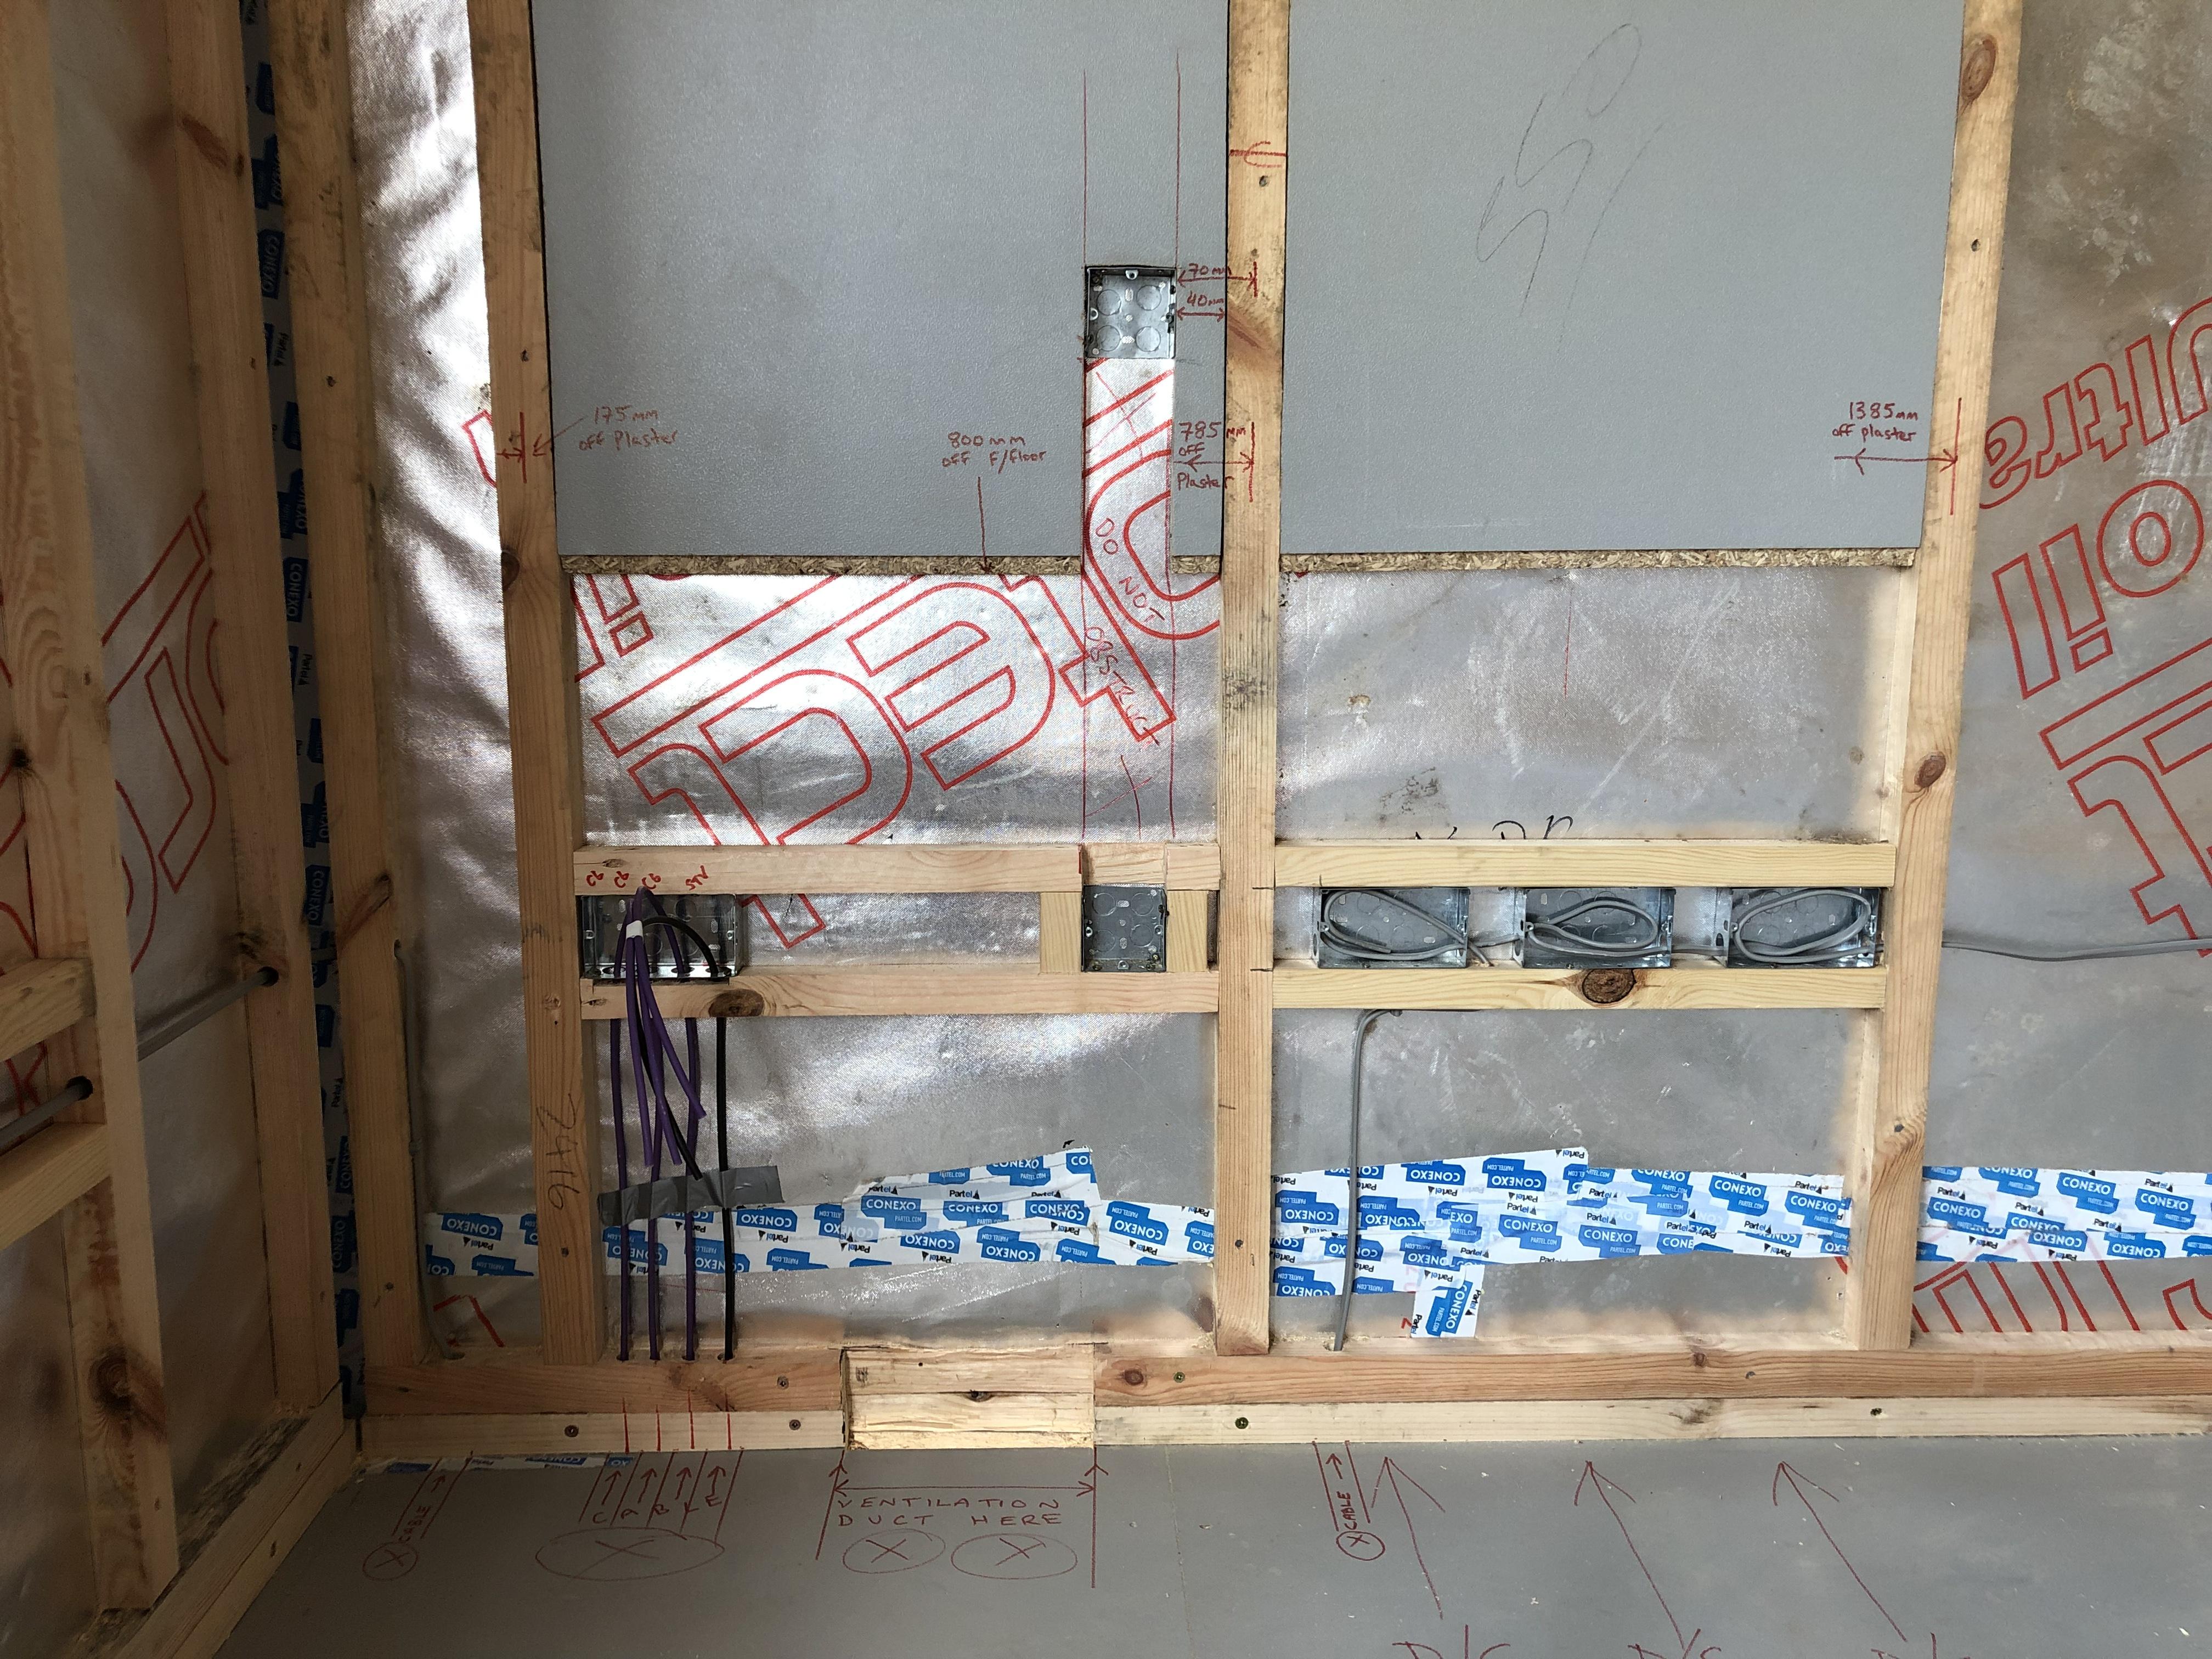
This is how I work with this type of system. I run more of the counter ( service ) battens horizontally, so they can be fixed side on thus not needing to fix through the membrane, and then the boxes get drilled and screwed up and down into the horizontal timbers. The Egger board was installed to take the wall mounted TV’s, so they could be fitted with the correct depth / length screws so again the membrane didn’t suffer damage from any such retrospectively installed equipment. Injecting 330 foam all round the Egger board would offer further insurance. The sparky should drop down and go through to the next room in the joist void imo, or create a penetration with a conduit which can be filled with Illbruck 330 foam and made airtight accordingly. As said, you must lead on this, as most trades still have little to no experience with airtightness disciplines / products etc, and you should be prepared to provide them with the correct foam / tape etc if you want this doing correctly.
-
Stains On Wooden Floor Caused By Underfloor Heating?
Nickfromwales replied to stanmoor's topic in Underfloor Heating
If recently refurbished, do you know if they let the screed dry properly before the floor went down. A day per 1mm is the norm. Maybe they’ve put the floor down too soon and water is still evaporating. Either that or you’ve got a leak. Is it a sealed and pressurised heating system? If so, there should be a pressure gauge ( on the boiler perhaps ) that will tell you if the system pressure is staying in the system. -
When I was called out to a job where 3 of these identical pumps were installed I contacted Grundfos as all 3 had seized impellers. This was a bit over a year ago. When I was sent a pdf for the recommended installation positions it was defo showing not fitting them ‘upside down’. The reason was that air bubbles would constantly be pulled downwards into the pump body but would try to rise to escape, thus causing issues with pump longevity. In 3 decades of heating and hot water installation I have only ever seen 4 pumps fitted this way. All 4 were kaput. Other pumps I’ve installed ( in what is an industry recognised orientation ) ‘the right way up’ have been in in some installs for coming up to 20 years. I can’t pull up the info, and cannot argue with the literature you’ve posted, but no plumbers I’ve ever worked with / for would accept a circulation pump installed this way. The way your setup is installed does not promote self purging of air, and is not as the manufacturer of the manifold recommends you install it. Instead it promotes air being drawn down into the loops where it will eventually sit and cause air locks. I concede to your posted info and confidence in this being fine.
-
@PeterW I used the ° symbol 😇. “I’m a real boy now!”
-
Indeed. So, do NOT remove the mixing set, as that is there for failsafe at the very least and it is a bad idea to remove this and then rely solely on the heat source to deliver safe and reliable flow into the floor. Also, your pump being upside down is not great. Look at the manufactures installation guide and that setup has a big ❌ against it as it will cause the pump to wear out prematurely. The plumber detached the pump head and rotated it 180° to make it look right, clearly demonstrating that they knew it wasn’t done properly.
-
UFH manifold pump and radiators on first floor
Nickfromwales replied to Joshua Graham's topic in Underfloor Heating
There are manifolds to do this out of the box.
-
Reducing heat loss through the keyhole of an exterior door
Nickfromwales replied to november romeo's topic in Heat Insulation
We did speak previously, about you not drinking before lunch? -
Reducing heat loss through the keyhole of an exterior door
Nickfromwales replied to november romeo's topic in Heat Insulation
How about a key, which is physically compatible, can be fully inserted and left in the “hole”, which has a bit of felt / neoprene as a plug to stop the draft…………but is an uncut blank from a locksmith ( ergo it cannot be used by a burglar to unlock the door )? -
Connecting up an EV charger 3 phase 22 kW
Nickfromwales replied to WWilts's topic in Electrics - Other
That’s what we’re installing next week ( Zappi 3ph 22kW rapid ) and have installed a 5-core SWA to surface mount in the new double car port. Why are you getting involved with this / speccing cables and not the installer / sparky? -
Solid floor cracked/ broken near skirting board
Nickfromwales replied to Monty2468's topic in General Flooring
Perimeter ( expansion ) insulation is only really necessary on a heated slab? A bit OTT if it isn’t heated IMO. -
Solid floor cracked/ broken near skirting board
Nickfromwales replied to Monty2468's topic in General Flooring
Liquid DPM first, and flick some sand over it whilst wet to provide a key. You don’t want to bring damp up to the surface and then try and hold it back from there, far better to keep it out of ( below ) the new filler material. -
Those setups can only be plumbed it as a left handed arrangement, whereas your plumber has gone against this for possible convenience of plumbing it in..... And the isolators ( red and blue valves ) should be between the rails and the mixing set, as per above image, eg so you don't have to drain down the loops to service the mixing valve etc or the pump and then risk getting unwanted trapped air getting into the rails / loops.
-
I'd be more concerned as to why the input group and the pump are completely the wrong way around?!? The pump is pumping upwards, and the words IVAR are upside down, showing that the water that should be being 'sucked' through the input group is in fact being pushed backwards against it. Like that.
-
Not sure, but cowboys are usually found on horses
-
From a discussion about my frozen sprouts defrosting, to wellies. “Only possible on da good ol ‘hub” lol.
-
Those ones are only good if you get yourself in deep shit with the DNO……
-
Depends on the number of inputs and the max loading of your inverter. Best to speak to their tech support dept tbh, vs risk damaging anything.
-
You don’t need one? You just flick off the isolator in the CU to simulate a power out / work on the domestic electrical system. Needing to isolate the mains to the CU is something you’d be engaging a qualified sparky for, and they’d just snip / retain / reinstate ( so it looks intact ) and move on to the next job.
-
One here.
-
Robert Llewelyn goes into a bit of detail on the Fully Charged YT channel. IIRC, you’ll have a 5 - 7 second delay, then the Tesla will disconnect from grid and bring you online from the batteries. I can’t recall the max throughput but I expect if the house is drawing more, then a circuit breaker will trip to protect the BMS. Assume it’ll be down to you to go turn the hob off before switching back on.
-
That’s exactly what I’d do, I doubt I’d be on my own there. Plus, folk will buy batteries, and charge them prior-to each outage. Power restrictions, managed by increasing the cost of energy consumption by an order of magnitude when x number of units have been ( over ) consumed at set times per day, would be a little more rational imho, switching the juice off I think would be irrational, much for the reasons above. Human beings are selfish and fragile little things, so will just engineer consuming more before / directly after to compensate for the inconvenience…….thus negating any initiative to stop the problem in the first place. If you make something painfully expensive, beyond how expensive it already is deemed to be, then people will protect their purse accordingly. Rationing power could work well, but increasing cost/unit at a set time each day would of course would be difficult and unsympathetically indiscriminate, ( but simply switching it off is just barmy afaic )…….barmy, but deliciously simple and almost irreplaceably effective. Yikes.
-
Yup. Also you don’t have to keep moving lights room to room with festoon. I just provide those for my clients for each new build as it’s much easier to have the whole place lit up. Just remember to NOT go through the frame / structure, instead just go through thoroughfares and through doorways so you don’t have to keep pulling them out and retreading them. Or lend them to cocks who return them cut into short sections who did the above and realised it was then too late to get them out without cutting ( destroying ) them 😐. What makes life bucketloads easier, is to fit 110v trailing sockets on the end of each string, so you can daisy-chain one to the next and so on. Because they’re LED’s there is little to no problem with voltage drop, just limit it to 3 strings per run. I can even plug in a power tool at the end of the 3rd string for a quick source of 1110v power for sporadic use.
-
Are there liquids / solids going through that zig-zag or is it just a rising vent?