Leaderboard


Popular Content
Showing content with the highest reputation on 01/19/20 in all areas
-
All sorted. Was, as I suspected, a failed bypass valve. Plumber just cut and capped the bypass pipe as there is a rad in the hallway with no TRV that will act as the bypass.2 points
-
Fortunately there is no CIL in Cambridge (nor thankfully, did I have S106 mention in my planning permission). Always good to re-iterate that pitfall. Thanks @Temp.1 point
-
These details might help too - https://www.rationel.co.uk/media/1708641/rationel-auraplus-typical-interface-drawings.pdf1 point
-
Just fixing some expanded mesh to the outside with big head Hilti nails would be a pretty quick and easy way to provide a secure attachment for EWI adhesive. Hilti nails will drive into pretty much anything, just a matter of selecting the right ones for the type of concrete. It would be easy enough to just use Hiltis to fix internal battens for an internal service void, too.1 point
-
In addition to what @Stones said - look at buying a very good SDS drill as you will need it..!! Concrete blocks like these will have some interesting grades of aggregate and you may need to get something such as a Bosch GBH SDS or similar as a normal SDS drill will just bounce off. Concrete screws would be useful but I don’t think you will get them to hold properly in this sort of material so you may have to drill and plug every hole for battens.1 point
-
We opted for the lower power version ourselves when we ordered and seems to work fine. Interestingly, if we had opted for the next unit up, capable of dealing with a higher population load, the only difference was pump size (the physical tank itself was the same). I can only surmise that the opposite would therefore work as well - for a lower population load you would have a perfectly functioning system with a lower powered pump.1 point
-
We had custom cills folded and painted as we needed to bridge 140mm of EWI. Managed to get them (folded and painted to match our windows) for around half the price of the Rationale ones. We simply offered the cill up into the groove on the underside of the window frame, then closely fitted the EWI underneath to support the cill, foaming what gap remained. Rock solid.1 point
-
You'll be fine cutting into the EPS for the shower waste. That's exactly what I provided for on my passive slab for a wet room. i did post on this subject on e-build a few years ago but don't have a copy of that post to share. So, i have provided details again I made provision for a wet room in the Ground Floor WC, though at the present, the shower former has not installed and it tiled over. I checked all this with the SE (Hedley Tanner) and the cutout in the foundation slab was formed with EPS before the slab was poured - see attachments. The plan was to install an ACO shower former and the shower drain at some time in the future, when required. We just have to remove the existing tiles and temporary EPS, rearrange the existing posh cloakroom into a wet room and lay a new tile floor with the former and drain . The waste drain will be installed in the top level of the EPS - really no different to the various conduits installed in the EPS for the kitchen island electrics. 1528-01 Foundation Plan- REV A.pdf Eastcroft Aco Wetroom gully 2.pdf
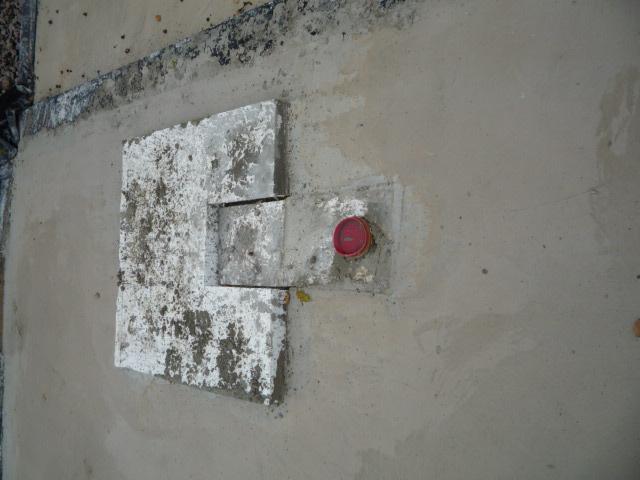 1 point
 -
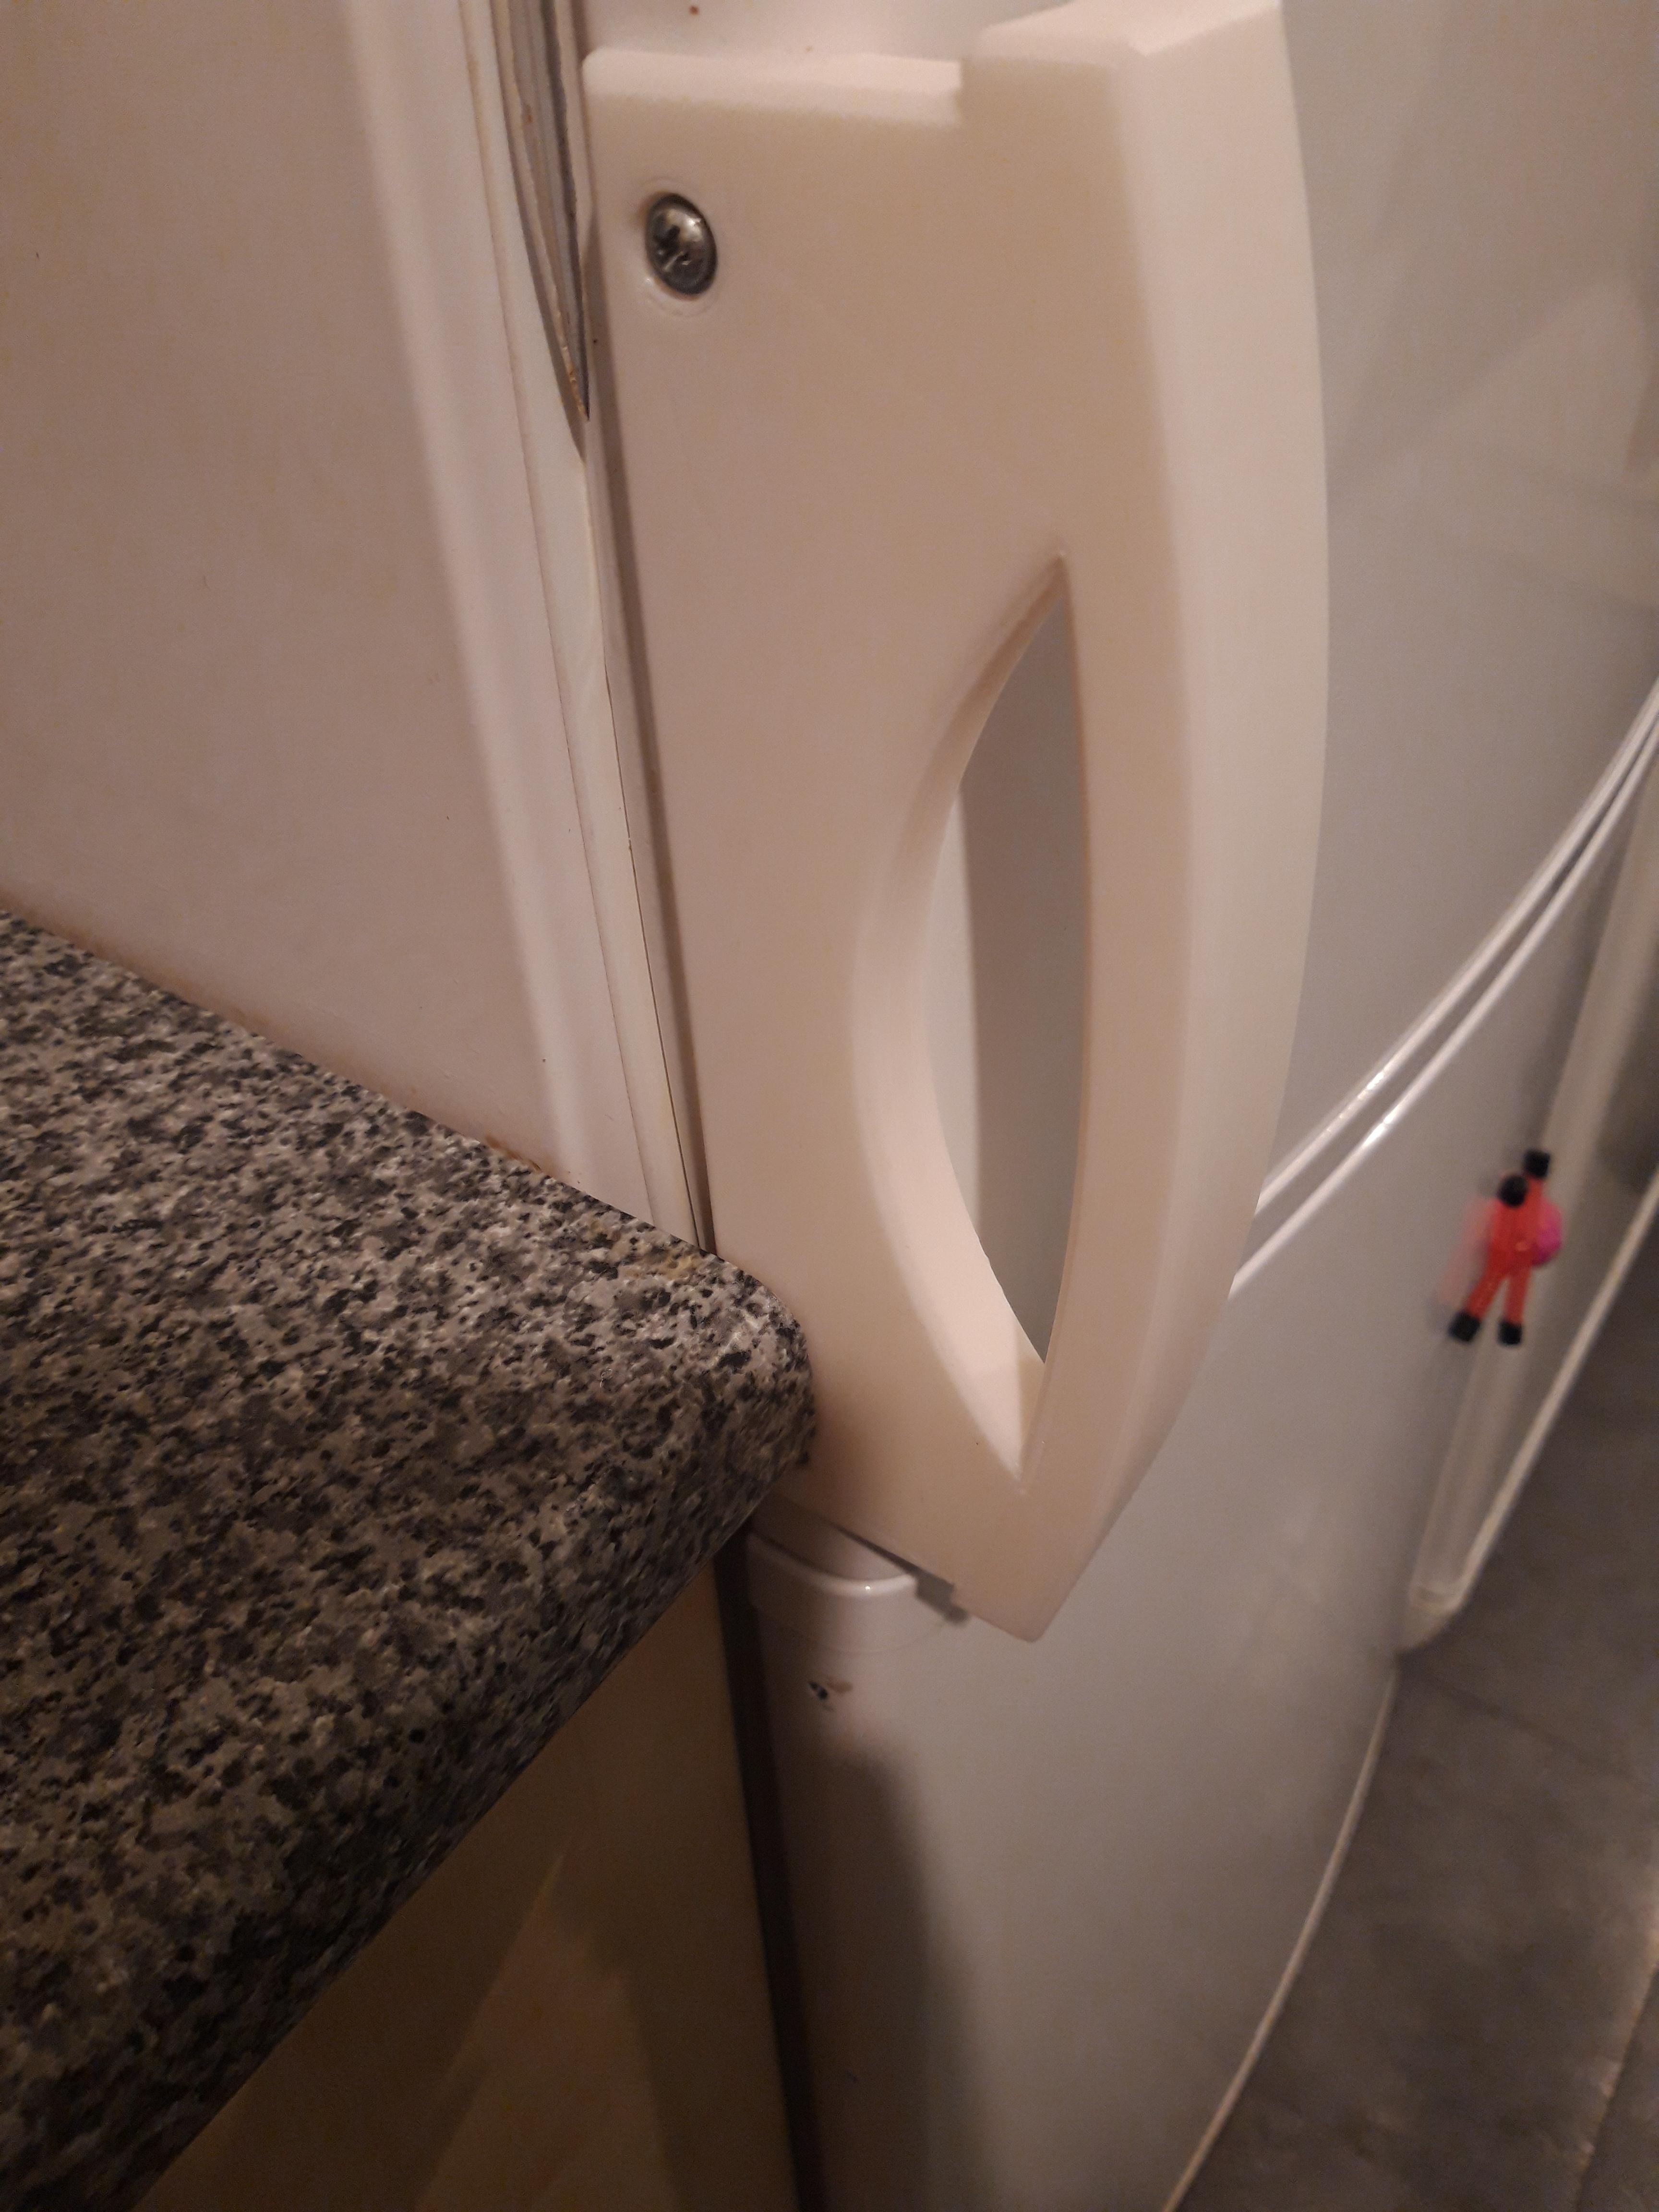
We have a winner! Well, other than it's off white compared to the fridge paint. Albeit simplified from the original it's so much smoother etc than the previous print! Pity about the split in the seal... The profile isn't a bad match either:
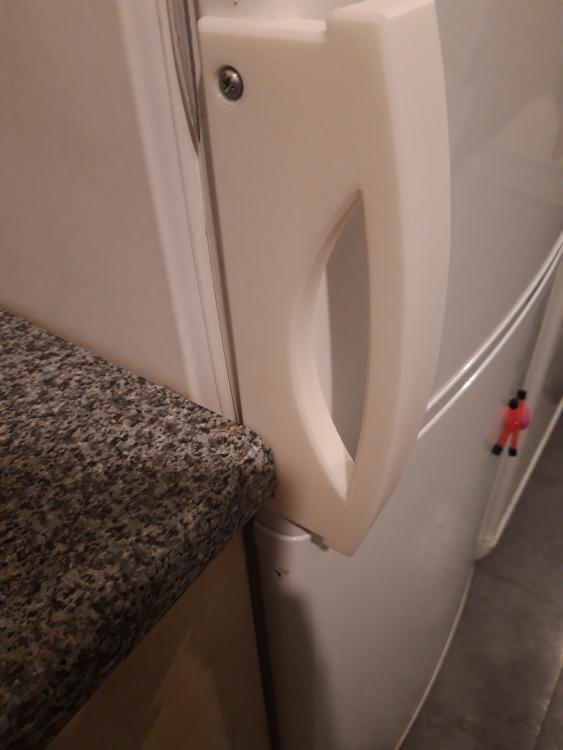
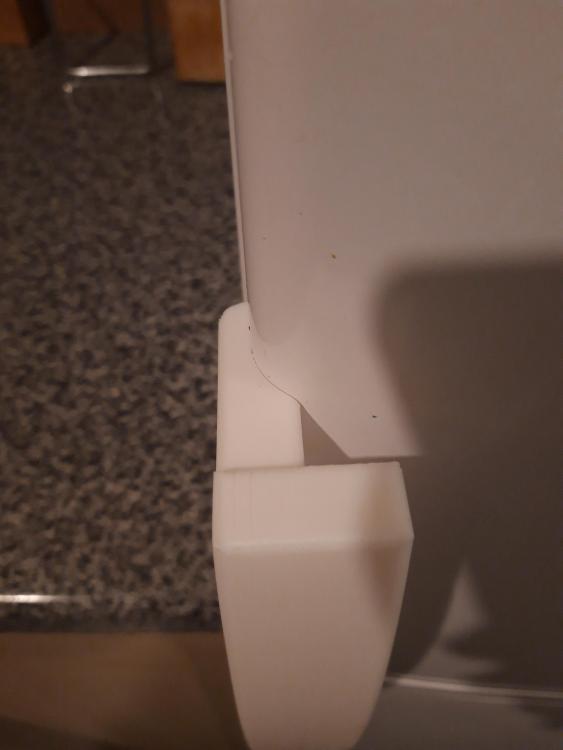
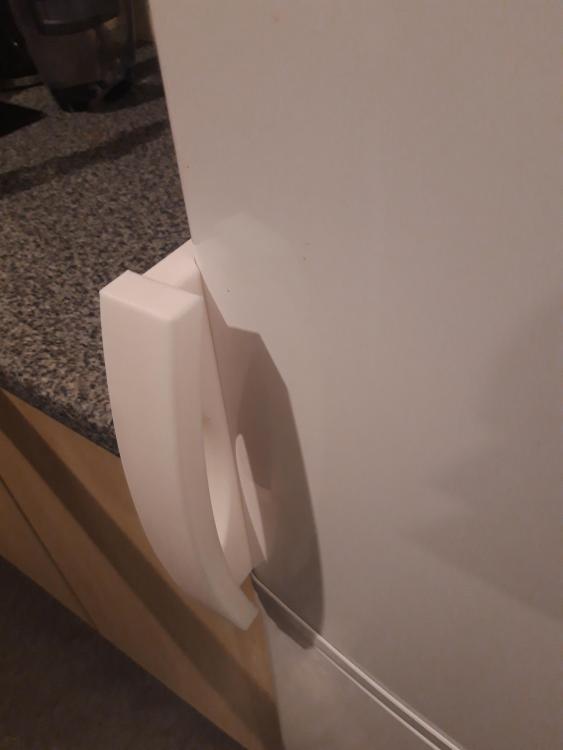 1 point
 -
That’s part of the idea mate. Film and blog the whole thing.1 point
-
No problem! We fitted the battens when we put the windows in. I've just dug out the installation drawings that show the general principle; hopefully you can get some timber in there to fix to one way or another.
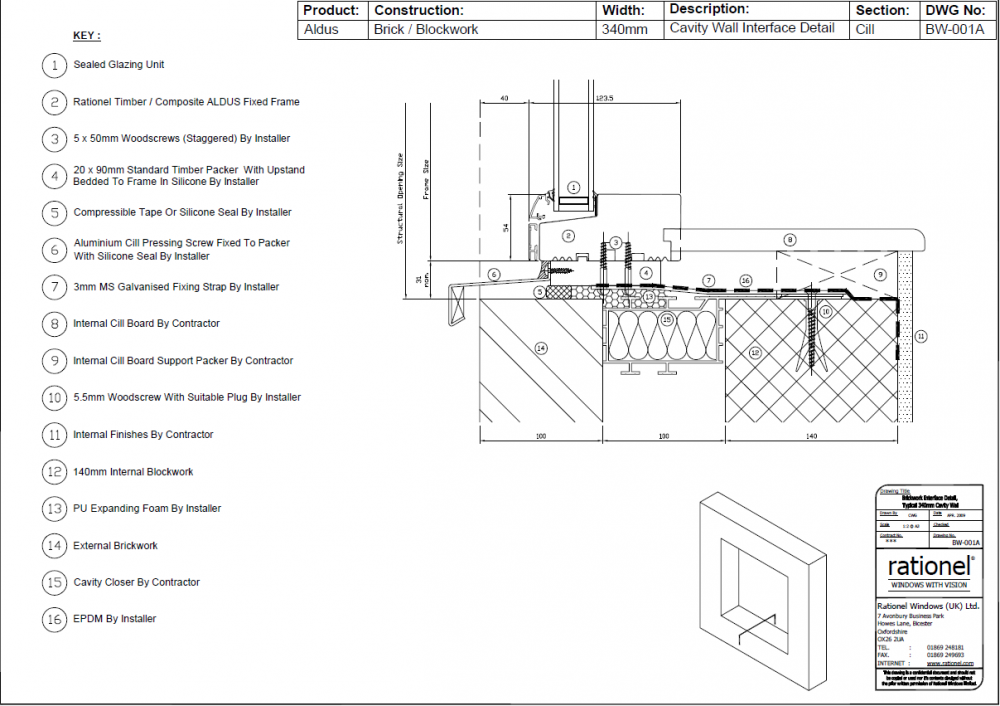 1 point
 -
Why not, that’s exactly what you would have done if you had of created a drop down in your slab before you poured it, you are just creating the drop down after the pour, abit backwards for a new build, but exactly what you would do for a Reno. Have you not thought of forming your sloped section like @Onoff did by hand with some shutters as a guide. I will I’ll be leaving 3 lower sections in my floor and hand forming the trays ready to tank. It really isn’t very hard.1 point
-
Thanks yes that is on the agenda but we might redo the kitchen next year so will get a new hood and everything.1 point
-
If it was installed with an OLEV grant, then it's mandatory that the smart connectivity be fitted and working. If it was fitted without an OLEV grant, then no need for the smart connectivity, and arguably it will be a LOT better without it. On one of the Tesla forums there are many reports of flaky smart charge points, badly designed apps, unreliability, etc. Having read many of these I started a thread asking whether Tesla owners (who, as a subset of people, probably lean towards anything with a bit of tech in it) and the results were overwhelmingly in favour of dumb charge points: https://teslamotorsclub.com/tmc/threads/are-smart-charge-points-worth-having.177611/1 point
-
Really glad to hear it's all working well (and sorry for the delay in replying to the PM - my inbox here seems to fill up quickly!). I can confirm that since Sunamp resolved the issues with the controller firmware and sensor chain, our Sunamp UniQ eHW has been working very well indeed. The difference between the way it performs now, and the way it performed before the controller change is like night and day. We're now finding that our Sunamp is charging a bit during the E7 boost time, as our PV production does the usual and falls off the October cliff, although we've pretty much had 100% solar provided hot water until fairly recently, so we can't complain. We're on target for a sub-£80 annual hot water cost, which seems pretty reasonable, as we don't skimp on using hot water at all.1 point
-
We have a UNiQ eDual12 pcm58 which we use with a myenergi Eddi. We had a lot of early problems, partly poor communication with Sunamp (now a lot better) and partly with the controller, now replaced. Once fixed we have been 100% solar powered with only one recent tepid shower because we were seeing how long it would last without charging (4 days) So now all is happy with that, and a lot of thanks goes to JSHarris! We also have 2 x Dual4 pcm34 batteries, heated by a low temp Daikin ASHP, that went through the same problems as the pcm58 battery, but are now working with their new controllers, albeit never used in anger. In retrospect these were a mistake for various reasons (some ours), especially as each one was comfortably more expensive than the big battery. However, now we’ve reached the week when there is typically going to be insufficient solar to power the big battery and we’re starting to fire up the ASHP again for ufh, we’ll be experimenting with using the smaller batteries to preheat the water heading to the big battery. Will report back..... (Situation is a new energy positive certified Passivhaus)1 point
-
Yes, I did, just so I had the option to isolate close to taps etc and not have to drain out a pipe full of water. The isolators at the manifold were mainly of use when commissioning, when it's handy to be able to finish one section, then test it, before moving on to another room.1 point
-
Yes, exactly like that. You can add reducers for the pipes you may wish to run in 10mm, and if you want absolutely minimum interference between circuits you can run the supply pipes to each manifold to both ends. @PeterStarck has a photo in his blog of this:1 point
-
On the subject of manifold systems. Yes very handy. But finding the right location that does not use up lots of pipe or make the runs longer than they need to can be a challenge. I solved that by putting the manifolds above the ceiling of the utility room. There will be a mini loft hatch arrangement to access it. Acceptable in a utility room but probably not in any other room though.1 point
-
Yes, but the advantages are significant, as you also lose any interaction between things like the wash basin and shower, or toilet and shower, if you run separate pipes (a toilet is fine on 10mm too). Running pipes from a common manifold fed with a fat pipe gets rid of pretty much all the interactions you can get with flow rates varying as taps are turned on or off, toilets are flushed, etc. If running plastic pipe, then the cost difference for all these extra pipes is pretty tiny. If running copper, then 10mm pipe can be PITA to run, especially if trying to feed it through posijoints, as it will snag on every web.1 point
-
Right, we have Three wash hand basins and the furthest is in the downstairs cloakroom, I designed the house so that all pipe runs for hot water are as short as possible, I also piped these in 10mm plastic pipe to reduce lag time and the flow rate is more than adequate. The cloakroom tap gets hot water in less time than it takes to squirt soap from the dispenser. I think different solutions are for different situations/houses. In an old Victorian house with long copper pipe runs instant hot water devises at basins might be best.1 point
-
I did just this, mounted an “in built wall cabinet” on two fence posts 2 mtrs away from where it was going eventually in a garage wall (didn’t want a plastic box on our pretty brick cottage!), DNO connected it up with double socket and rcd fuses for use by builders. When the garage was finished I simply moved the box into the hole left by the builders and moved the fuse box into garage. During the foundation stage we buried a suitable cable from this into the cottage ready for its wiring. Never bothered to get DNO to move it and when they connected up the temporary box I told them what I was going to do and they said what a good idea. Just make sure the temporary position gives you enough cable to swing it into the final position.1 point
-
I think it's best to split out hot water from heating altogether, when thinking about things initially, as they have different requirements. Heating only needs low grade heat, 40°C is more than enough. Hot water needs higher grade heat, you can get away with about 50°C, but if using a Sunamp, or a water filled thermal store, this needs to be ~65°C. An ASHP is ideal for heating (and cooling) the house, as when run at modest temperatures (say, ~40°C) it will be very efficient, so will provide heating at around the same price as mains gas and a boiler. For hot water a Sunamp is probably the most efficient thermal store available, but it needs to be heated to ~65°C to charge. This means it will happily charge from a boiler, or from electricity (either from the grid or excess PV generation), but won't charge from a normal[1] ASHP, as most ASHPs really don't like working at that sort of temperature much. You can provide heat, cooling and hot water from an ASHP using a hot water cylinder (a bit larger than you'd normally fit if it was heated by a boiler), but the heat losses from the hot water cylinder will be a bit higher than from a Sunamp. The ASHP will run with a COP of around 3 to 4 when running the heating or cooling, and this will drop to maybe 2.5 to 3 when running the hot water. The COP is a measure of efficiency, the ratio of electricity in to heat out, so relates to running cost. 1 There are some ASHPs around that will deliver hotter water. Daikin make a hybrid, their Altherma, that includes a boost gas boiler that can be run from LPG or mains gas. This allows the ASHP to heat to lower temperature for heating, with the hot water being boosted to a higher temperature via the gas post-heater. There are also CO2 ASHPs in the pipeline that may be able to operate well at ~65°C, but these aren't that readily available yet.1 point
-
True, and the real issue is that the ASHP varies the amount of power it draws pretty much all the time, and that cannot be synchronised to times when the PV system is generating an excess. It's dead easy to get an immersion heater, or other resistance heater, to just absorb any amount of excess PV generation, up to it's maximum rating. Makes resistance heating a great deal easier to interface with a solar system.1 point
-
The basic Sunamp is just a thermal store, like a hot water cylinder, that can be heated by either a boiler or their version of an immersion heater, depending on the model. The version we have has the internal immersion heater, so is just like a water-filled thermal store with an immersion heater, but is smaller for a given heat capacity and more efficient, as the heat losses are a lot lower. Heating water using a Sunamp with an electric heating element is very slightly cheaper than heating a water filled thermal store with an electric heating element, because of the lower losses. An ASHP is a whole different matter, as the inability of most ASHPs to produce really hot water (about 50°C is as high as most will go) means that the hot water storage capacity needs to be greater (as there will be much less cold water mixing to get to a comfortable temperature for use). This makes any comparison between the two pretty challenging. Very roughly, a 9 kWh (10 kWh max) capacity Sunamp is about the same as a 210 litre hot water cylinder that's set to work at about 65°C. Because a hot water cylinder running from an ASHP will be running a bit cooler, it needs to be larger in capacity to give the same amount of hot water, probably aroun 250 to 300 litres. An ASHP providing hot water at about 50°C may run with a COP of about 2.5, so every kWh of hot water will use about 0.4 kWh of electricity, plus a bit for tank loss, so maybe 0.5 kWh of electricity. However, you cannot run an ASHP with excess generation from solar panels, so you don't have the advantage of getting a fair bit of free hot water for a fair bit of the year.1 point
-
Having nearly finished a Logix build under the occasional supervision of someone widely accepted as an ICF expert, I have a layperson's take on these... I am staggered an SE would mention any of this TBH! 1. Typically you would never inspect the poured ICF wall. Your SE should be engineering the steel in the walls to the point that crack widths become largely irrelevant except in relation to water penetration (which itself should be a non-issue). A good SE would realise that the concrete will be a LOT stronger than the stuff they make blocks out of (our mix came out at around C68 for the basement walls - 10× the compressive strength of dense concrete blocks). As for waterproofing of ICF, tell them you will either go with a waterproof concrete (like we did), or simply render the outside of the house... 2. A 25mm diameter steel bar can take a LOT of load, and you can get 6+ into a 158mm ICF wall with little effort so long as you assemble the blocks around them... the biggest problem then is making sure that the concrete pour properly fills any voids between bars. Beyond that diameter you are getting out of the realms of rebar and into dedicated members (as they rightly point out), but then you benefit from not worrying about the pour filling voids between members, so it's swings and roundabouts. Don't forget that (provided you have lifting gear on site) you can thread ICF blocks onto bigger horizontal steel members with the steel in midair. 3. Forget about fixing kitchen cupboards to the ICF walls. Line the walls with either a double layer of Fermacell or a single layer of 18mm or thicker OSB/ply (screwed to the ICF webs) behind 15mm moisture resistant plasterboard. Either approach should be more than sufficient to hold up a few wall cupboards using e.g. 5x50mm wood screws. Why would an SE care how you hang cupboards - that's nothing to do with them?!?! 4. Uhm, surely that's the job of the architect and the SE? Is the SE seriously trying to dodge that? 5. I would expect the SE to produce drawings to show where to tie the rebar, and doing the tying really isn't a very skilled job. Clearly this SE hasn't been on any ICF build sites, or they would know how easy it is to tie rebar... I did nearly all of the lintels, including one over a set of 6m wide bifolds, on my own (and that included 4no. 25mm rebar, 7.2m long, with 35 H12 links around them, all set into 2 courses of Logix 6" blocks). It's helped by knowing that typically links are placed either singly or in pairs per web spacing in the ICF blocks. If you want some photos and exemplar SE drawings to see how they marry up, I can provide them from my build. As for pouring of concrete, I don't think it is massively skilled either. It's more about understanding the process. The bigger problem is obtaining enough bodies to help, because really you want 2 people moving the pump hose around, 1 person or more vibrating the concrete behind the pump hose (carefully so you don't damage the ICF blocks), one person indicating when each circuit of the pour has reached a suitable depth, and one person looking for blowouts and bulging. I had helpers on each pour, because it's a 4-6 man job, not a 1-2 man job. FWIW my first SE was worse than useless when it came to ICF construction... he was specifying steel that could never work within the limitations of the blocks. He wouldn't listen to me, so I took my ICF expert to talk to him. Wouldn't listen to the expert, so I had the ICF company phone and email as well. When he still refused to listen, we parted ways, and I found an SE with ICF experience. The difference was night and day. 8 weeks of grief with the first SE, and under 1 week turnaround with the second SE, plus plenty of phone and email assistance afterward. Happy to recommend our SE though, via PM, if you can't find one you are happy with. Also, speak to the ICF firms - they will have a list of preferred SEs that they have a working relationship with. HTH. Neil.1 point
-
Solar PV would be 'interesting' with that shape of structure. All electric would be a neat solution, but its down to heat loss figures and matching the solution with the problem. Best to do a proper analysis on overheating as cooling ( with that huge amount of glass ) could be more of a consideration than heating ! The biggest issues will be on the upper two floors, so be 100% diligent in your investigations. Too early to have a stab at whats going to be best TBH, but I think you'll do well not to have to have active cooling on the upper floors, annoyingly just to deal with the peak months for solar gain. This could be mitigated largely with a good solar reflective coating / film as some have done with good results, and I think I'd start there. I don't think it would harm to run this through PHPP even if your not going that route, just to get a well defined breakdown of risks and requirements. A SA for DHW is a no-brainer, just to get away from G3 and discharge pipework more than anything, but with a heat sensitive house you also want too actively reduce standing losses from any such device. An ASHP is likely, as you'll need a fair bit of heat in the winter, but you'll also have a means to provide active 'cooling'. You could also go for wet duct heaters / coolers in the upper floors to accent the ambient eg do away with UFH for the very upper floor at least. Wet duct heaters for the gym may be attractive too, so you could run cooling just there whilst doing some thing called exercise. I'll google that later, maybe1 point
-
Are you or anyone you know a member in Costco? they do a twin pack of 3.6m x 4.8m heavy duty tarps. They're definitely not the cheap rubbish that a lot of sellers say are heavy duty and IIRC around £201 point
-
I've bought various tarps from these people - https://www.tarpaulinsdirect.co.uk/tarpaulins/tarpaulins/supergrade-tarpaulin Their 'supergrade' tarps are quite serious - I've got a couple that are holding up well after a few years of heavy use. The budget ones are a bit flimsy but cheap. There are various options in between.1 point
-
Used siding here1 point