Leaderboard


Popular Content
Showing content with the highest reputation on 06/14/16 in all areas
-
Sometimes questions are raised as to whether it's worth increasing insulation levels and often there seems to be confusion as to what the "ideal" level of insulation is, or even what a "good" or "reasonable" level of insulation might be. I'm not sure whether or not the non-linear impact of improving insulation, in terms of the effect on the heating requirement, and hence running cost during cold weather, is widely understood. I've heard comments like "it's not worth improving the insulation from 0.16 W/m2.K to 0.12 W/m2.K because it would be 30% more expensive and only reduce the heat loss by 25%". Most of the time this is incorrect, because homes have heat sources all year around, from the occupants, incidental heating from appliances, solar gain and even pets (a medium sized dog is probably a four-legged 40 - 50W heater). So, I thought a really simple example might help some gain a better understanding of this non-linearity, and illustrate better why some are so evangelical about trying to improve insulation levels (and reduce ventilation heat loss, too, but I'll get to that another time). Let's build a pretend house, that for simplicity has no doors or windows and is a rectangular single storey box with a flat roof. For simplicity we'll assume it's on raised piles, with an air space underneath, just so we can use the same insulation level on all six sides and to make the sums simple. All I'm doing here is making a comparison, so this is a valid way of illustrating this effect. In our rectangular box house we have an average of 100W of incidental heating, coming from things like internet kit, a PC, a cordless phone base station, a TV, a phone charger, a few lights and a handful of intermittently used kitchen appliances. This is a pretty low figure - I struggle to keep our house background load below about 200W, without any lights on. The box houses two adults, giving out around 80 - 100W each and a dog, so lets say there is 220 W of heating coming from the occupants. The box also has a heating system that can deliver whatever power is needed to maintain a temperature of 20 deg C inside, and its night time, so there's no solar heating of the walls. Outside it's 5 deg C, a chilly winters night. This rectangular box is 10m long x 10m wide x 2.5m high inside, so has a total wall, floor and roof area of 300m2 and an internal floor area of 100m2, so fairly average in size (a bit bigger than our current 3 bed bungalow). So, we have a temperature difference between the inside and outside of 15 deg C (20 deg C - 5 deg C), an internal surface area of 300m2 and a constant incidental heating level of 320 W (220 W from two adults and dog, 100 W from electrical appliances and lights). First, lets see how much heat we need to put into this box from the heating system, if we have U values for the walls, floor and roof of 0.2 W/m2.K (K is degrees Kelvin, the same units as degrees Centigrade when only temperature difference is being compared): The total heat loss power, in Watts, can be calculated from the U value, the area and the temperature difference, so for this first example we get 300m2 area x 15 deg C temperature difference x 0.2 W/m2.K U value = 900 W. There is 320 W of heat coming from the occupants etc, so the heating system would need to deliver 900 - 320 = 580 W in order to keep the house at 20 deg C under these conditions. If this were by direct electric heating, then the heating cost would be about £2.09 per 24 hours. Next, let's see how much heat we need to put into this box from the heating system, if we have U values for the walls, floor and roof of 0.1 W/m2.K , in other words, we've made the insulation twice as "good", so might think we've halved the heating cost: The total heat loss power is now 300m2 x 15 deg C temperature difference x 0.1 W/m2.K U value = 450 W. This is what we'd expect, double the insulation effectiveness and halve the heat loss. However, when we now take away the incidental heat gain from the occupants, etc, of 320 W, the heating system needs to deliver 450 - 320 = 130 W in order to keep the house at 20 deg C under these conditions. If this were by direct electric heating, then the cost would be about £0.47 per 24 hours. So, by doubling the insulation level we've decreased the heating cost by about 78%, not the 50% that might have been expected. This is a very simplistic example, but it does illustrate why doubling up in insulation can give a far greater benefit than might be expected. It also shows why, when you improve the level of insulation you can reduce the heating requirement down to such a low level that for a lot of the time you don't need any heating. In that last example, turning on a few extra lights could heat this imaginary box home to a comfortable temperature on a cold night, whereas with only half the insulation it needs something that delivers 446% more heat.3 points
-
I haven't run anywhere!! I ran a euchre league on line for years and am well aware everyone has differing opionions, and different ways of expressing themselves, it's good to hear all sides of debate and as stated earlier some want to acheive the best spec and some want to do the bare minimum. As for me I'm still not totally convinced as to what method I will choose to use, more research needed and as I get mor ,information I will come back here and ask questions, you are knowlegable people, I'm a baker I can help you on bakery products but as for house building I'm learning every day. So its all good listening to everyones opinions offers a wide choice of options!!!3 points
-
A complete overhaul of the building control system has to be a start. How many houses in a development are actually inspected, 2%6%10%, who knows. How about checking them all and having teeth to punish the serial offenders. Then you can lower the target regs for u values and be in the knowledge that if they aren't met then the developer gets penalized heavily. Once you start to lower the regs then you are into the realms of improving airtightness which in turn makes mhrv more of an option. But it all starts with building control regs and how they are enforced and this comes from government which jump to the tune of the major developers.2 points
-
Knauf Earthwool Frametherm 35 is the product you want, available on a roll, or batts. Batts are probably better for a roof.Conveniently available in 90mm thickness and 2 layers nicely fills between 195mm timbers. I am using the roll version in my walls:
 2 points
 -
I apologise for the way I came across. All I can say is that I received a fair bit of what can only be described as "hate mail" when Ebuild closed, because someone was spreading a false rumour that I was somehow responsible for it's closure (I was not, in any way shape or form, but some don't let the truth get in the way of an excuse to let rip). As a consequence I know that I'm taking things here more personally than I should, at the moment. I'm trying not to, but frankly it's not easy when you've been vilified by people you've never met, for something that's not your fault. The tone is a problem, you're right, and I think it arises from telling the same tale over and over again. In this case the original material, and many of the other versions, was roundly condemned as not performing as advertised many years ago, and some of us were involved in very long discussions about it, on the GBF and on Ebuild. The manufacturers gained a pretty poor reputation for misrepresentation, had approvals withdrawn because they were based on false data, in effect, and had to change adverts. It was such a scandal that a letter went out to all building inspectors warning them of some of the shortcomings and that some claims that the material could be used in thin layers and be compliant with Part L1A were not true. It comes down to trust and reputation, and when manufacturers have repeatedly marketed a product with misleading claims then personally I would mistrust any claim they make about any product. This particular thick insulation fleece product, that happens to have foil layers, is a mid-range performance insulation, if the data given is accurate, and it does seem as if this manufacturer has taken heed of the condemnation they've had from some authorities in the past and made an effort to produce a better performing, and very much thicker, product. By the manufacturers own certification data it's performance is significantly worse than high performance sheet insulation, like PIR or PUR foam, but it is a bit better as an insulator than mineral wool, and that may well make it a reasonable choice for some applications. It's very low decrement delay means it really needs to be used with a high heat capacity layer, but then that's also true of PIR or PUR foam. My concern is whether or not the manufacturers data can now be trusted, given their track record. Maybe it can, maybe it can't; people need to look at the long history and make up their own mind. I think those of us who've been around a fair time and done a bit of research into how different materials perform do need to make a greater effort to not allow our frustration at the same topic coming up yet again show, as although it's a repeat event for us, it is often the first time the person raising the issue has come across it. This message has been noted, not just by me, and I'll certainly try to tone things down when one of these relatively frequently raised topics comes up in future.2 points
-
Another week of hard work by the builders and the foundations are complete. Type 1 up-fill (only 100mm or so required) was spread then compacted down with a vibrating roller. A final layer of quarry dust was added to finish the blinding. In keeping with previous comments about a clean and tidy site, you can also see the digger spreading type 1 around the foundations. Internal drains and ducts are added, DPC / Radon barrier laid and 150mm PU insulation fitted. Whilst doing all this, the concrete wagon stopped by and the strip founds for our garage were put in. The plumber subsequently put in the UFH pipework, over 1 KM of it! A track system was stuck down (black lines you can see) onto the face of the insulation and pipework clipped in. Individual clips direct into the insulation were used where required. The following day, an hour of light drizzle forecast, the main concrete slab was poured. Two wagons and just under 14 m3 of concrete with glass fibre mixed through. Again, a concrete skip and crane were used to move the concrete from wagon to foundation. You'll notice the twin (scaffolding pole) rails running the length of the foundation. They had simply been set as guide rails for the vibrating leveler to run on and were removed once the main vibration runs had been completed. The next shot shows the slab ready for power floating later in the day. Unfortunately, it kept on raining which meant a 0430 start the following day for my builder. He did a cracking job power floating the slab, which is now beautifully smooth and level. The final stage before building the walls can start, is painting a radon barrier ( the green paint you can see ) on the concrete core of the ICF block. Apart from a bit of unwanted news - 3 week delay for our windows due to a summer factory close down - things are moving in the right direction. The walls should go up this week so we are going to see big changes over the next few days.1 point
-
A busy week on site has seen us transition from foundations to solid structure. First order of the day, getting prepared - ICF blocks, braces, window formers and other equipment moved onto the slab. Building the walls up - basically a giant lego kit! Blockwork finished and scaffolding going up. Although the ICF blocks interlock with each other, the walls themselves (6 blocks high) are subject to a lot of movement. To counter this and secure them for the concrete pour, adjustable braces are fixed to the slab, and to tracks bolted into the plastic ties that form the core of the ICF block. Timber sheets are bolted over internal and external corners for additional strengthening, Timber window formers are fixed into place inside and out to prevent movement during the pour. Rebar is used to reinforce around openings; and finally, any gaps or damage to the ICF blockwork is sealed with expanding foam; Erecting the ICF took two days, with all the preparations taking another two. Concrete was finally poured on day five, using exactly the same method as per the foundations. A hoistable skip attached to a crane, was filled with steel fibre reinforced concrete. The builders worked their way around the walls in three circuits, filling to a depth of 2 1/2 blocks on the first two passes, and finishing the depth of the last block on the final pass. Again the same hopper was used to run along the top of the block wall and direct the concrete from the skip outlet down into the wall. A vibrating poker was used to help settle the concrete. A lot of work went into getting the concrete to flow around the window openings. To ensure full fill beneath the windows, the builders cored holes in the window formers and manually topped up the concrete in areas where required, again using the vibrating poker to ensure the concrete filled any gaps and settled. Having filled the ICF core, the final things to be done were floating the surface of the concrete in readiness for the wall plate, inserting lengths of rebar into the gables in readiness for the final sections of ICF being built when the roof goes on, and checking all the walls were true. Two separate rounds of checking the walls and adjusting the bracing were made, to ensure any movement in the curing process was countered. In this picture you can see the curing process in action - water from the concrete being forced out of the joints in the blockwork; Around 22 m3 of concrete went into the walls. The builder had ordered an additional 1 m3 but it wasn't wasted, being deposited in the garage foundation (it's a useful tip - have somewhere prepared where you can deposit / use any spare concrete) All being well, the roof goes up this week.1 point
-
Now that almost 50t of rubble and soil have been excavated from the old bungalow I'm looking to get some further quotes in for UFH. Looking to DIY this with a plumber doing the final connections to boiler etc and helping me commission. I've had a 2-3 quotes in already but just want to cover all bases. This is who I have contacted so far: Wunda Nu-heat Continental (UFH1) Boulder Anyone obvious that I have missed or is worth trying? I've also contacted local plumbing supplier but I'm finding more and more that the locals prove to be more £££. I recall NickfromWales is always recommending someone, but I can't find my notes about whom that was now....Byron @ Boulder? Thanks! OB1 point
-
There are several threads here discussing buying from elsewhere in Europe, because you get better value, and, in some cases, a greater choice or better quality products. I've just been looking at the price for a part for our MVHR, a "Sommerbox" that is a 5 minute slot-in replacement for the heat exchanger to gain better cooling in the summer. I got hold of the part number from Genvex (who are always very helpful, BTW) but Genvex don't sell direct so I asked two of their suppliers for prices. Here are the prices for comparison: UK supplier - unit price £174.00 inc VAT for the part, plus £30.00 inc VAT for delivery, giving a total of £204.00 inc VAT Danish supplier - unit price £128.82 inc, VAT for the part plus £62.48 inc VAT for delivery, giving a total of £191.40 inc VAT Now this was a VAT reclaimable item (I think), so the ex VAT prices including delivery would be: UK supplier - total price = £170.00 Danish supplier - total price = £153.12 Looking at just the unit price, ex-VAT, as the Danish supplier has to charge more for delivery to the UK, whereas the UK supplier presumably gets better rates for bulk shipment, then the prices are: UK supplier - part only price, ex-VAT = £145.00 Danish supplier - part only price, ex-VAT = £103.06 Given that both the UK and the Danish supplier are authorised Genvex dealers, and so are almost certainly getting the same sort of price from Genvex, what's the justification for the UK unit price being 40% higher than the Danish supplier price? My understanding is that the cost of living, doing business etc in Denmark is similar to the UK, may even be a bit higher, as their VAT rate is 25%, rather than our 20%. The only conclusion I can reach is that the UK supplier is upping the price because they can, which is most probably because people aren't shopping around to get a better price.1 point
-
Yes, they almost convinced me about their floor science too. Almost bought one on their retrofit systems (Lo-pro) for my uninstalled slab until I started reading up on here (well ebuild). Nu-heat have a very slick site, easy quoting layout and I can see how people just click'n'buy. Not against their product(s) but they seem keen to flog you something that will work but cost you the earth to run! And yes, Barney, the prices are sky-high (more than double what others are quoting me!). Even mentioning that NickfromWales is my best friend won't get me far with Nu-heat! I'm sure there is lots of bling bling that's not required in some of these quotes. Still waiting on some other quotes to come in. Will post them here for future reference and googlers.1 point
-
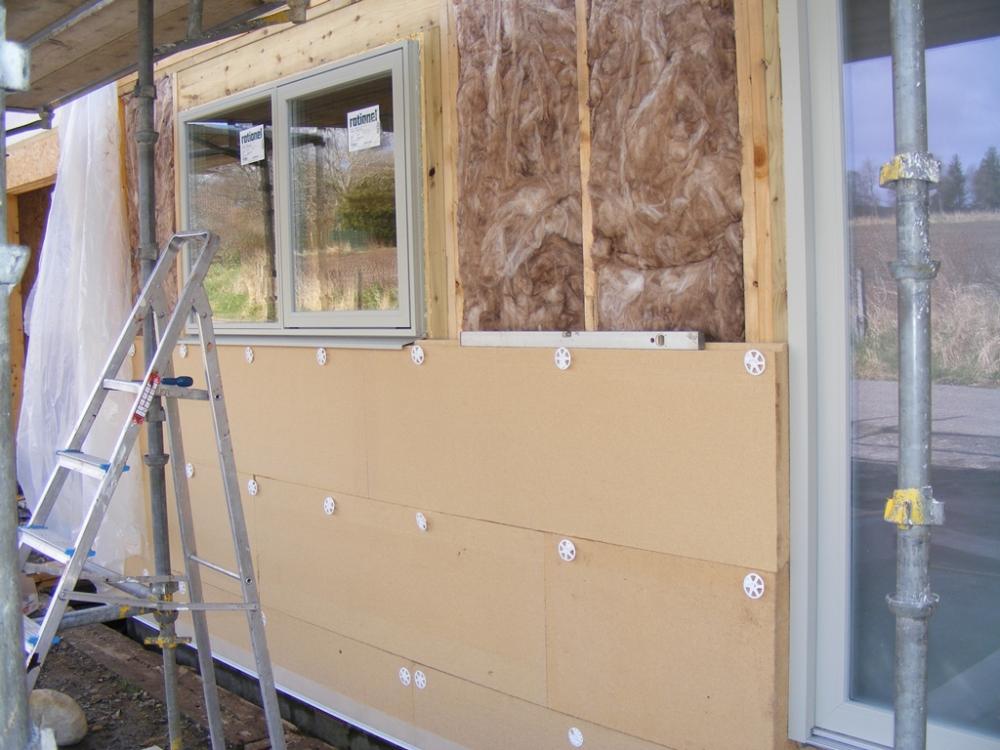
Yes it's a lime based render system. No problems at all so far. We have used LESS materials than estimated so far. Base coat is called MC55W and is mixed from a powder. As it starts to go off, a fibreglass mesh from a roll is pushed into the wet render. Next day a primer called DG27 is painted on, it's a bit like PVA. Then the top coat called Silikon top is applied, that comes pre mixed in tubs. You can get different colours and different textures. Temperature has to be above 5 degrees for 3 days after application. No problem at this time of year, even up here.1 point
-
My prediction - England gets kicked out of Euro 2016 later this week after further violence - and this leads to a decisive swing towards the Leave side...1 point
-
Mineral wall batt and Frametherm are the same thing ... Just get them to confirm the density1 point
-
But a problem identified sooner than later .1 point
-
The cheapest price I got was from SIG in Inverness. I believe they are a national chain so worth a try?1 point
-
Try www.secondsandco.co.uk for bargains but you might need to wait several weeks and keep checking until the stuff you want comes up. Very cheap, though! Wickes are surprisingly cheap for insulation, they might sell it as a loss leader.1 point
-
Price all the different thicknesses up and price the different lengths of screws you would need. If it was me I would be looking at a minimum of 50mm and if the budget allowed then as close to the 100mm as I could get would be my aim. What you will save by not using the TX gold stuff will help towards covering the extra cost. You can also use 500gauge polythene as a vcl. It doesn't have to be a £200 roll of some fancy brand variety. Again suit your budget. Some builders use it some don't. Some like it some don't. But it would be better than nothing.1 point
-
Yep pretty much that. It has to be the higher density roll not just your standard loft type stuff. It's specific for this application. The thickness of the pir( Kingspan,celotex all the same) will depend on your budget. The thicker you go the better it will be but will cost more. If you tape all the joints it can act as a vcl. I taped mine and put a separate vcl in as well. Jeremy used to have a spreadsheet on Ebuild where you could play about with figures and see the difference in 50,60,70,80,100mm of pir and then weigh up with what your budget allows. Not sure it has made it over here yet. After the pir then if you are going for a service cavity then it's done if not then plasterboard screwed through to the truss.1 point
-
+1 JSH & Declan52 200mm dense mineral wool (0.035 W/mK) underdrawn with 25mm PUR should give approx U=0.16 W/m2K (rafters at 600mm c/c). Use 30mm PUR if rafters at 400mm c/c. Ian1 point
-
One of the high density earth wool type products. Very easy to fit as it springs out and fills the rafter. Not as bad to work with itch wise as it was years ago. cuts with a hand saw. Mine was from knauf but there are others available. If you cross batten the roof on the outside and use a breather tile membrane you don't need to leave an air gap so you get the full depth. 200mm of this type of product will get you a u value near 0.16 so you could get away with 50mm pir under the rafters. Then your vcl and a service cavity if you want then your plasterboard. And as has been mentioned before the insulation underneath and the plasterboard buy it separately will be much cheaper.1 point
-
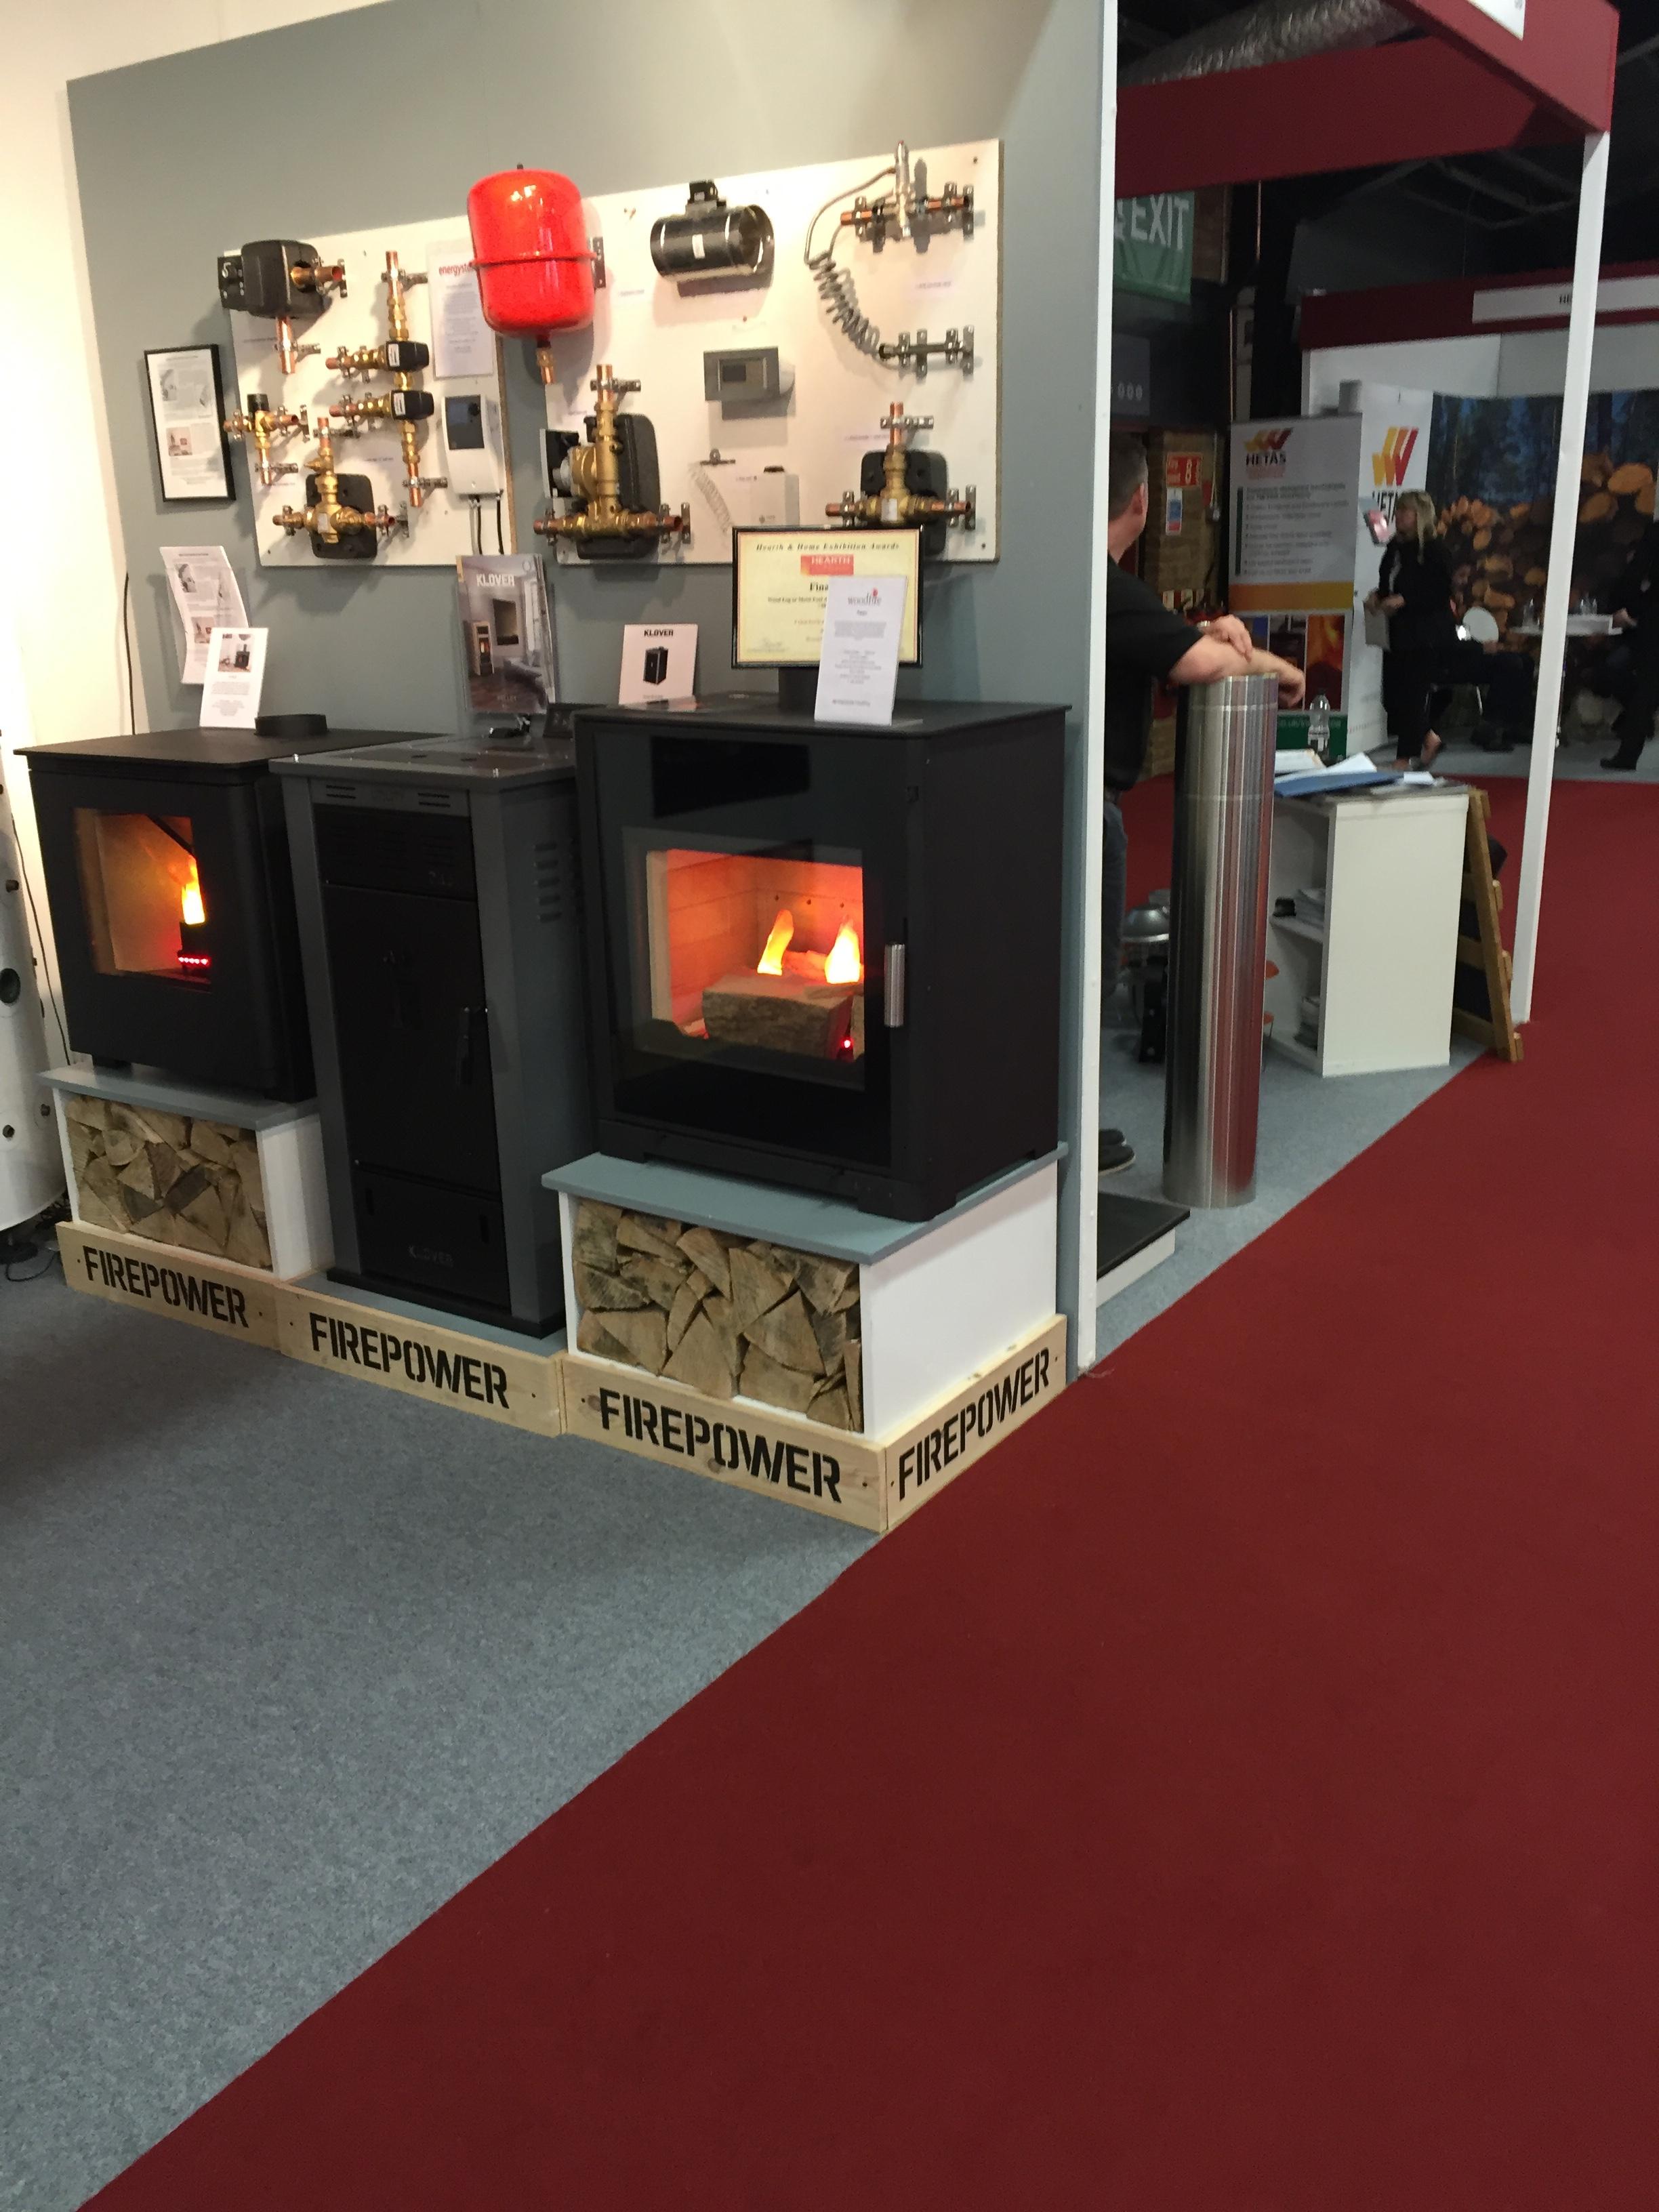
This one, it's 10kw to water though!
 1 point
 -
200mm mineral wool between the rafters is cheap, but won't get you to 0.16 W/m2.K without some additional insulation inside or outside to both mitigate cold bridging through the rafters and to give the needed level of insulation. It's a reasonably good choice for a roof, though, as it has a medium length decrement delay (better than foams and other very low heat capacity insulation) and it is easier to fit than cutting foam to fit and then going around filling all the gaps with expanding foam. I don't have my U value calculator here on this machine, but would guess that you'd get between 0.18 and 0.19 W/m2.K with just the mineral wool, so you'd need to add a layer of higher performance rigid foam insulation either over the rafters or under them. If the latter, then you can possibly use a foil-coated board and tape the joints to also give you the necessary VCL internally.1 point
-
Well, I think it's very nice. Don't you listen to that cruel Welshman.1 point
-
Which DPM are we talking about..? the one that sits inside the EPS..? I would be inclined to cut it back and bond it to the front of the remaining slab using a decent liquid DPM product and not worry about it.1 point
-
We have a rubber ramp on ours and it does stop some rain but it does struggle sometimes like at the weekend when we had 30mm inside around 90 minutes ..! Was this I think http://www.garagedoorseals.co.uk/p-black_rubber_garage_threshold_seal.htm I would grind off the first 40/50mm as a slope to give the door a chance first though and remove the EPS and replace with a linear drain. That does create a thermal break of sorts too1 point
-
This stopped the water ingress into our old garage. http://www.weatherstop.co.uk/1 point
-
I will throw this in for discussion, I might be wrong: WHY do you need to keep the EPS upstand at the entrance to the garage? I would consider cutting it away so your concrete ramp from the drive up to the garage abuts directly to the concrete slab of the garage. yes it creates a cold bridge to the garage slab, but it's a garage, does that matter? As for water under the garage door. That's a problem in our present house. I kept thinking what's needed is a substantial rubber strip or something, on the lines of a TINY sleeping policeman, perhaps just an inch tall. I am sure I have seen such things screwed to floors where a roller door comes down to meet it, but I have never found anything for sale (but I didn't look very hard) The side door, lay your paving level, but incorporate a drainage channel between the slabs and the garage floor.1 point
-
1 point
-
Did the hairdresser offer cash back? I think you'd qualify for 100% Anyhoo, get the questions rolling, we've got a forum to fill1 point
-
Nice hair cut Hi, and welcome 'back'.1 point
-
Baker? 2 bacon and cheese puffs and a split donut please You've just validated your lifetime pass1 point
-
And there in a nut shell is the problem for any forum, members trying to convey the right tone in written form. It's not easy getting it right 100% of the time, and each of us will no doubt have caused offence or upset or been offended or upset ourselves in equal measure. We are after all, only human. I was chatting to a fellow self builder earlier tonight, discussing amongst other things how frustrating it can be researching build techniques online and there being so many different ways to do things, and so many different points of view, as it's only natural for members to make comments which validate their own choices. I've taken the view that there is no such thing as a silly question, as it such questions which end up generating thought provoking discussion and from time to time innovative solutions. I'm on my sixth build and still learning...1 point
-
I believe the problem, that crept over from ebuild, is the tone of the language used. For example, using the term "Snake oil" humiliates a person that might have been duped, There were too many opening contributions from Newbies" asking for them "to be treated gently", this indicates the fear people have to ask questions in the first place and they have drawn that conclusion from listening to the manner in which questions are answered. I have felt humiliated by responses in the past and I have thicker skin than most. I hope this warning from NSS is heeded on this new forum. Please no more personalisation against professions or products. It is not what is said it is the way it is said. Jeremy please do not assume that people are making personal attacks against you. You have turned the comments from NSS as personal against you and last night you made it sound like I was making personal comment against you and nothing could be further from the truth, but you expressed it in a tone of conflict; simply not needed. I thoroughly enjoy learning from this forum and share most of the points of view expressed but detest unnecessary conflict and criticism. I experience too much of that in my personal life and use the forum to escape from conflict.1 point
-
I was temporarily co-opted on to a a working group set up by three adjacent parish councils, that was set up to deal with a big planning application to turn Boscombe Down airfield into a commercial night air freight airport (it has only ever really operated daylight hours, and then fairly infrequently). One consequence of this was that I ended up on the planning committee, and one application sticks in my mind. It was a local farmer, who had purchased a new forage harvester and wanted planning consent to close his existing farm entrance and create a new one 50 yards up the road, that was both wider and a lot safer, as it was on a straight stretch of road rather than on a bend. The application also included the relocation of a public footpath, that ran up the existing drive entrance. I had read the application before the meeting, could see no reason not to recommend approval, so said so. The proposal would improve road safety, allow the farmer to get his new machinery in and out more easily and actually made the footpath align better with one on the other side of the road. We had one, very vociferous, objector on the committee. Not knowing him at all, I asked why, given all the benefits the proposal had, he was objecting. It turned out that he'd been (quite rightly) told off by the farmer for walking across his land with his dog off a lead (it's a mixed farm, arable and sheep). This was, apparently, a valid reason for objecting to a perfectly acceptable planning application.....................1 point
-
Agreed. As I stated, freedom of speech and an entitlement to an opinion is a fundamental requirement to be able to engage, and be engaged, and thus learn from the subsequent exchanges. That's what I like about this particular community. Toddling off won't achieve anything tbh, and as your opinion is one that offers content and inspires debate I'd ask that you stick around and continue to participate accordingly. You may not be my cup of tea, and I may not be your cup of tea, but the world needs tea, that's for sure. Nobody here is perfect, but were quite happy to admit it .1 point
-
If you search in Google "xTWO, Gießener Str. 42, 35410 Hungen, Germany" - they get mixed reviews from purchasers #justsayin1 point
-
Cheers Declan, 2 -3 months was the sort of timescales I was thinking. Will need to enquire how much it costs to erect. Cheers for the number Kev. I'll give them a shout early next week.1 point
-
Excerpt from a previous thread. A member asked..... Following on from discussions regarding the desirability and availabilty of low output room sealed wood burners I have been looking at the alternatives. I need something that will satisfy our desire to have a "real fire" while at the same time having a controllable output of around about 2kW. Has anyone looked at using bioethanol burners as a compromise solution in this situation ? Do I need to make any special allowances for flue-less fires in the house or should a standard MVHR system be able to cope ? Are there any building regs to consider ?1 point