Jenki
-
Posts
832 -
Joined
-
Last visited
-
Days Won
7
Everything posted by Jenki
-

Use of Portable Air Conditioners / Heat Pumps?
Jenki replied to Ferdinand's topic in General Self Build & DIY Discussion
Looks similar to a product I was looking at today. I opted for a split unit and fingers crossed it keeps us warm.... Heres the link drastically reduced .. https://reyfurniture.com/product/electriq-14000-btu-portable-air-conditioning-unit-mobile-air-conditioner-and-heat-pump-energy-a-plus-pus/ -
Wood. Burning stove for the Windy Roost Static
Jenki replied to Jenki's topic in Stoves, Fires & Fireplaces
@SteamyTea I Think you've done your bit to save the planet, quick call and a local refrigeration guy will connect for £120. If I do the install work... cheaper than buying the twin wall and heat deflectors.. and I can sleep easy at night knowing that my heating is green. ( gas fired / nuclear / coal electricity🙈)- 14 replies
-
- 1
-

-
- the windy roost
- occumster
- (and 1 more)
-
Wood. Burning stove for the Windy Roost Static
Jenki replied to Jenki's topic in Stoves, Fires & Fireplaces
There is a picture on the manufactures site and it shows a 4" hole. so assumed this. I could use the hole ion the floor where the fire is... I don't have access to free wood / so would have to buy that in as well as coal... -
Wood. Burning stove for the Windy Roost Static
Jenki replied to Jenki's topic in Stoves, Fires & Fireplaces
seen this one reduced, a newer model available it seems? https://reyfurniture.com/product/electriq-14000-btu-portable-air-conditioning-unit-mobile-air-conditioner-and-heat-pump-energy-a-plus-pus/ -
Wood. Burning stove for the Windy Roost Static
Jenki replied to Jenki's topic in Stoves, Fires & Fireplaces
I'm interested in all options. do you have any suggestions / recommendations for a "cheap" monobloc A2AHP? https://reyfurniture.com/product/electriq-14000-btu-portable-air-conditioning-unit-mobile-air-conditioner-and-heat-pump-energy-a-plus-pus/ seen the above its very cheap any thoughts -
Wood. Burning stove for the Windy Roost Static
Jenki replied to Jenki's topic in Stoves, Fires & Fireplaces
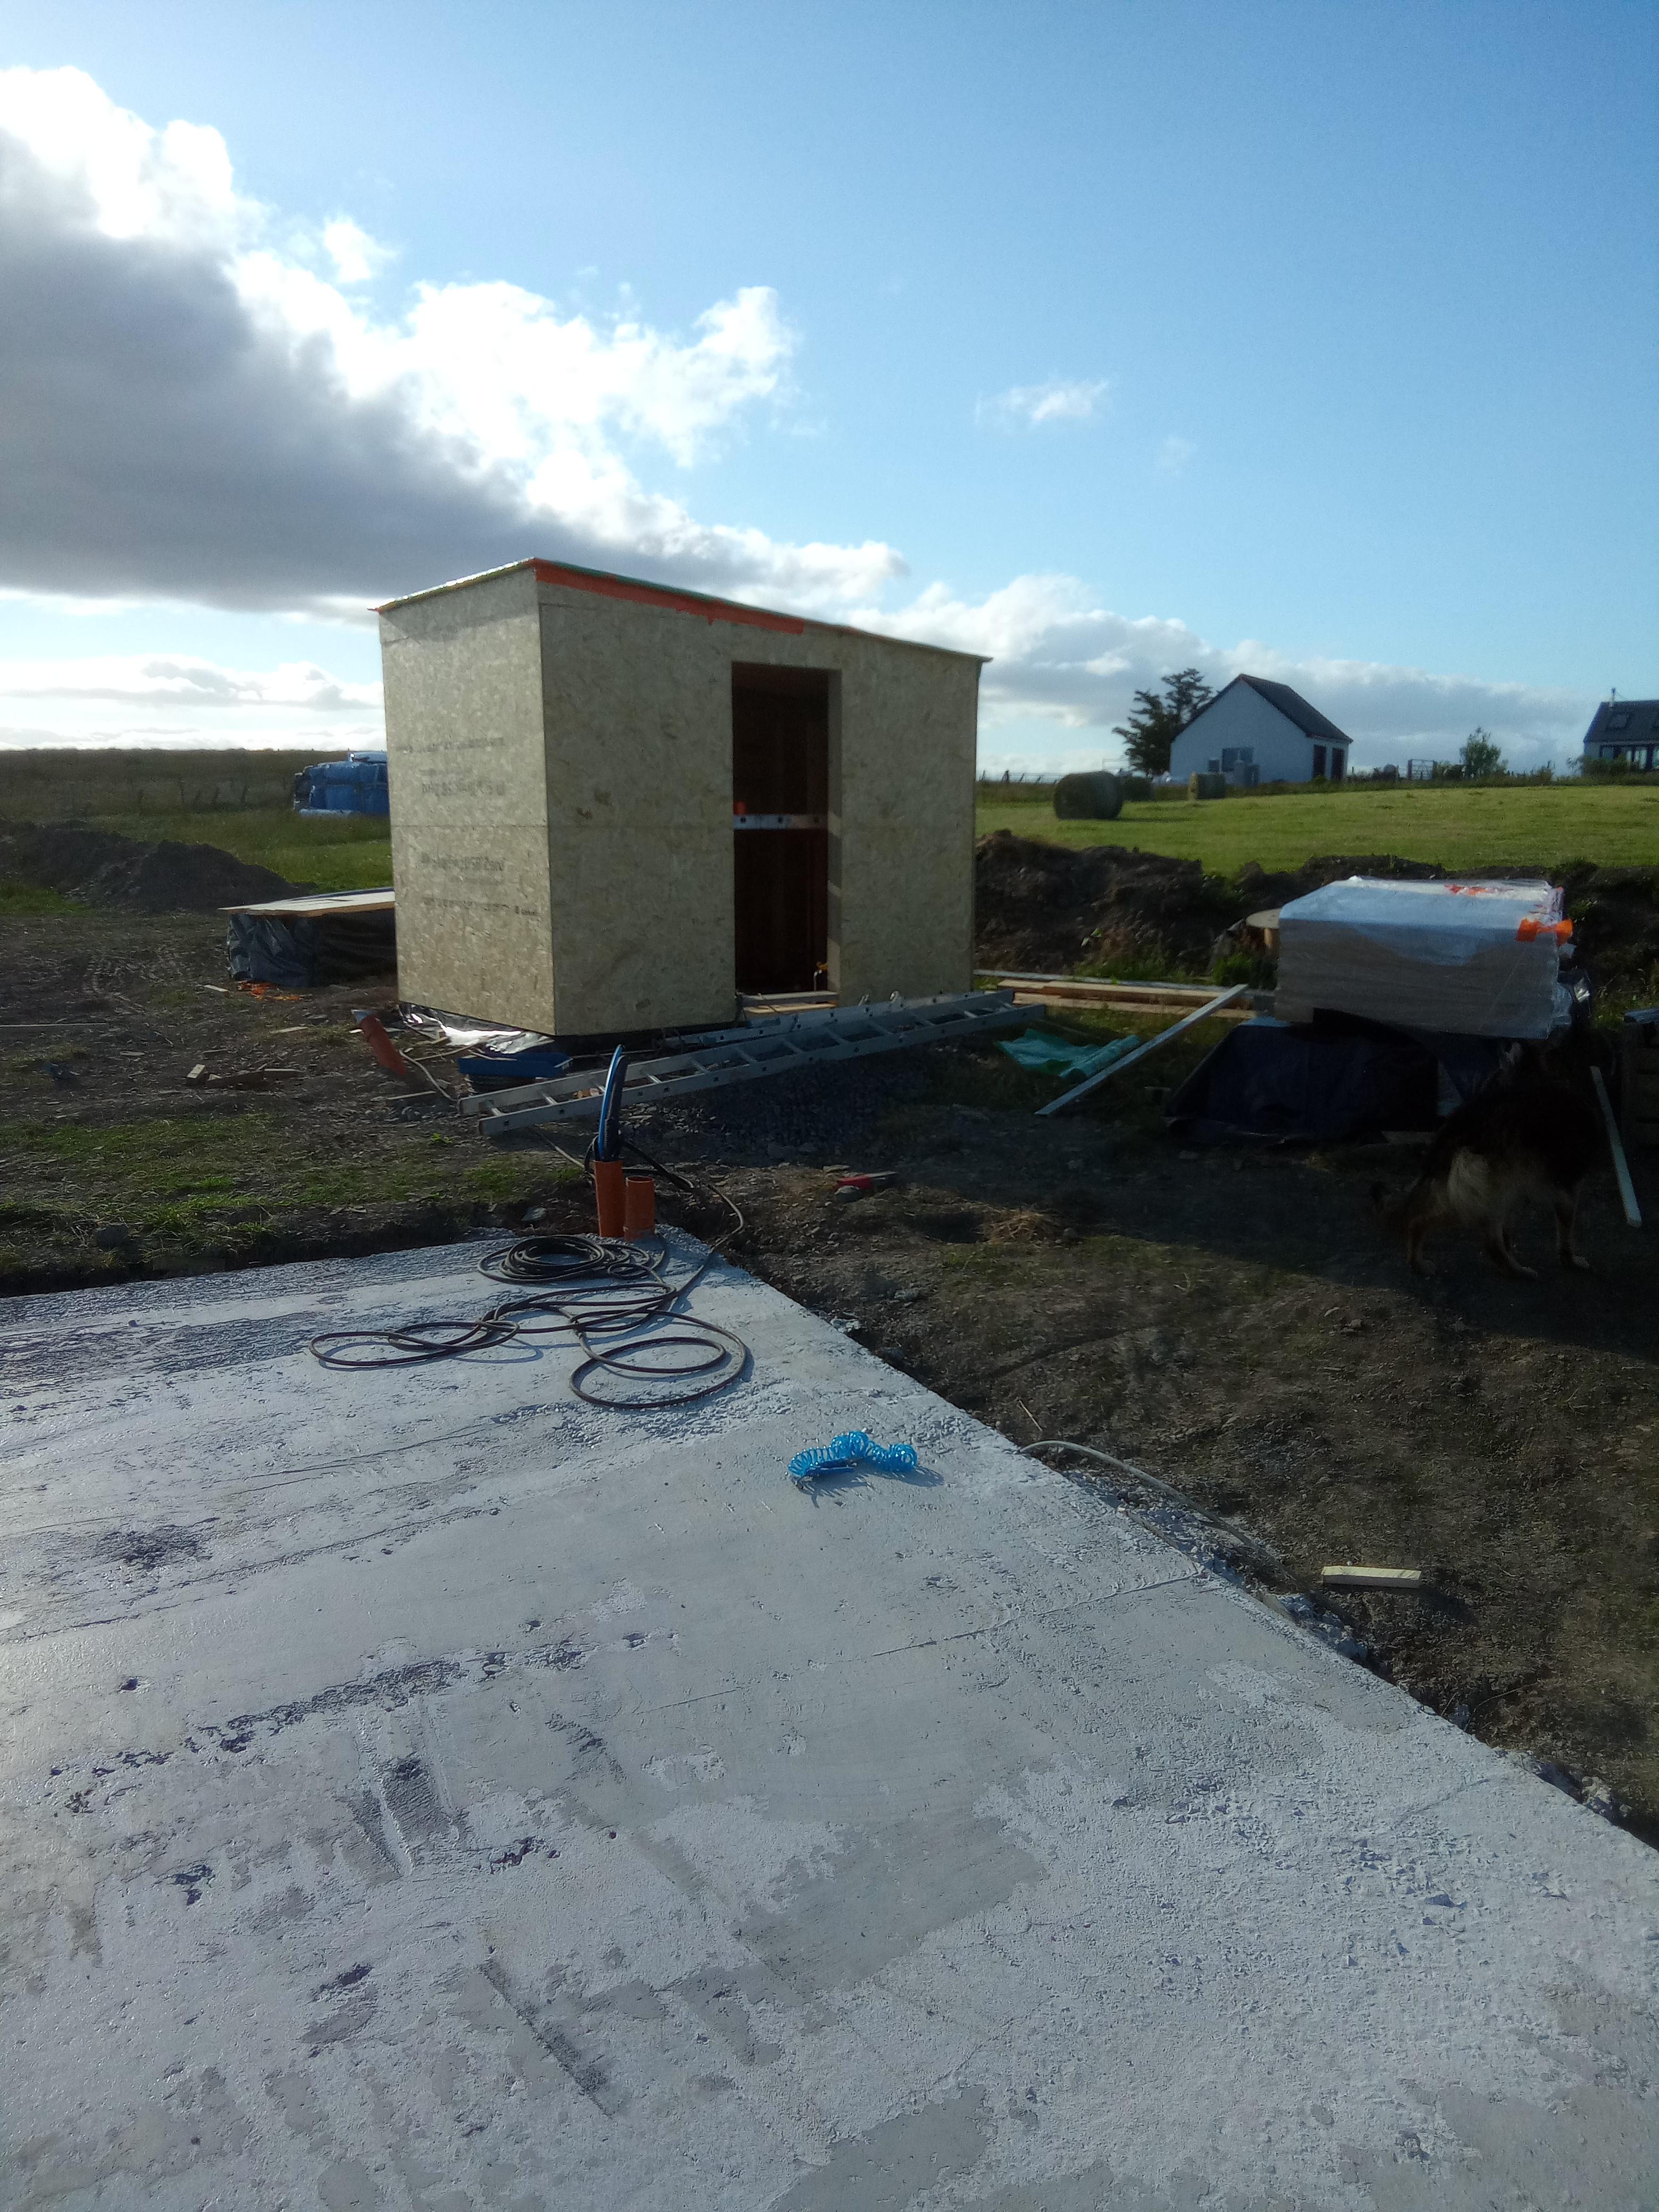
Our project includes some pods/ cabins and an amenity block. This amenity block will be initially used for the purpose you describe. Washing machine / dryer and our work clothes. I've been building this, this week but it's not attached to the static.
-
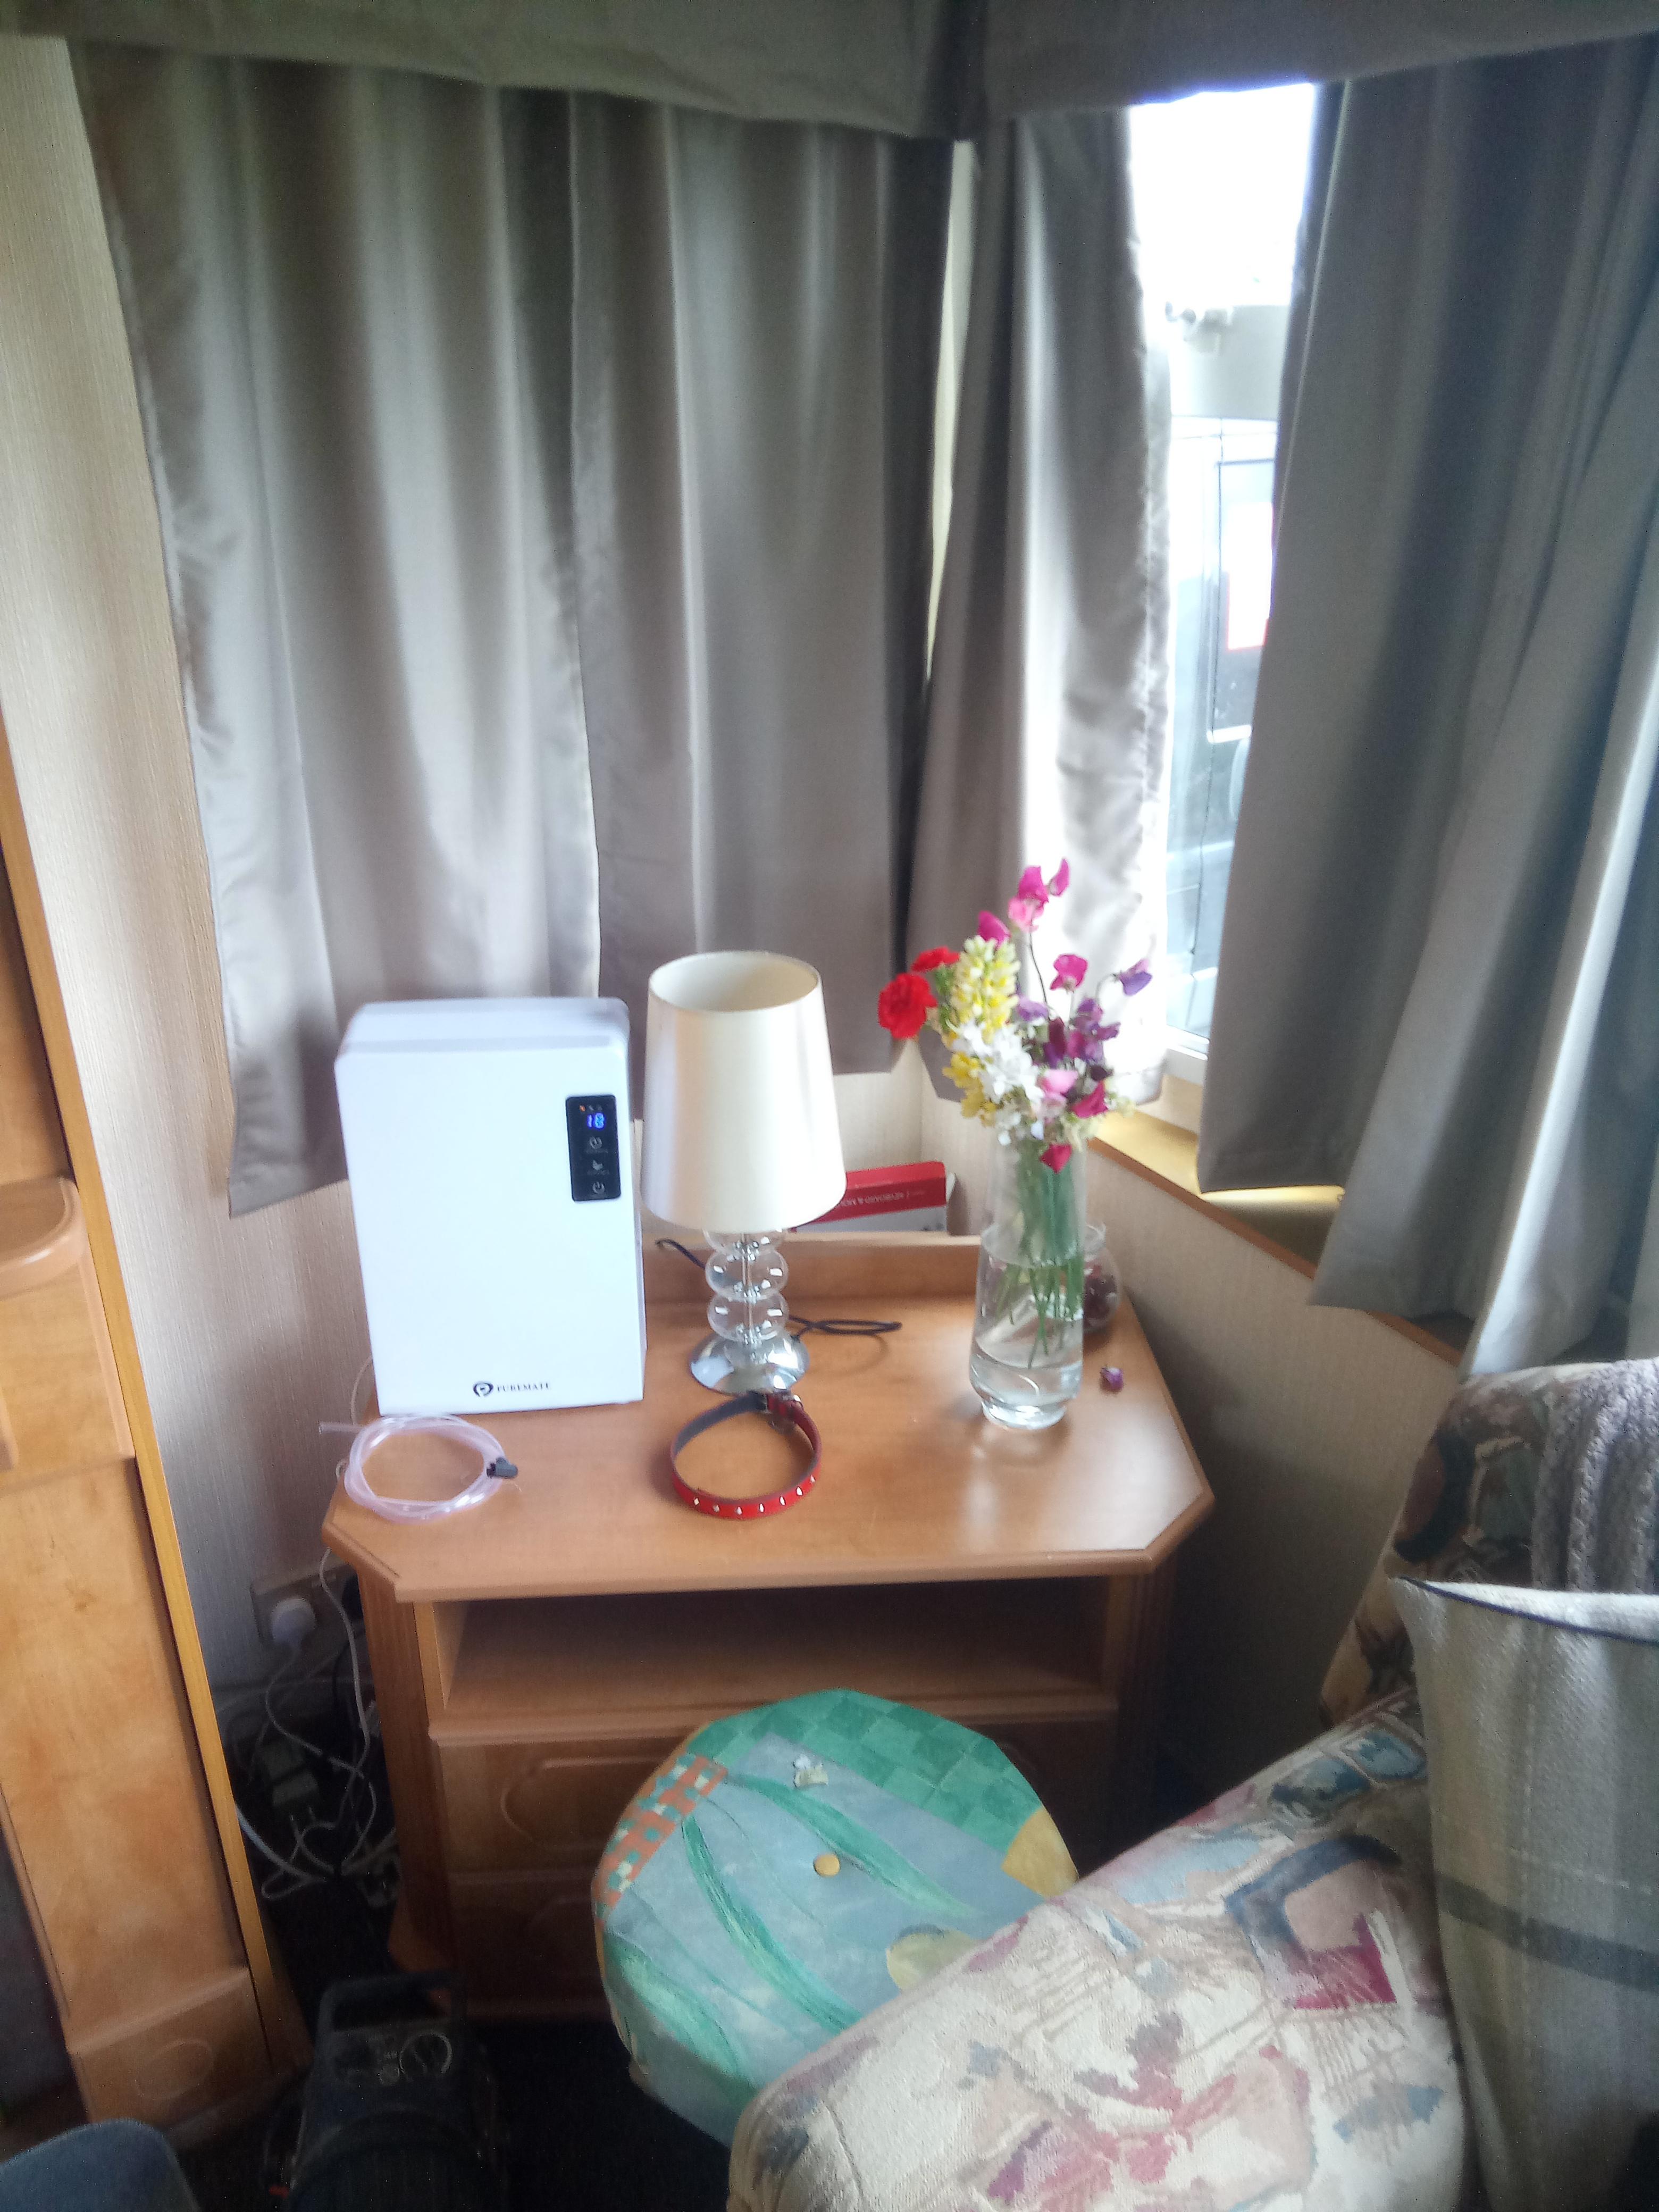
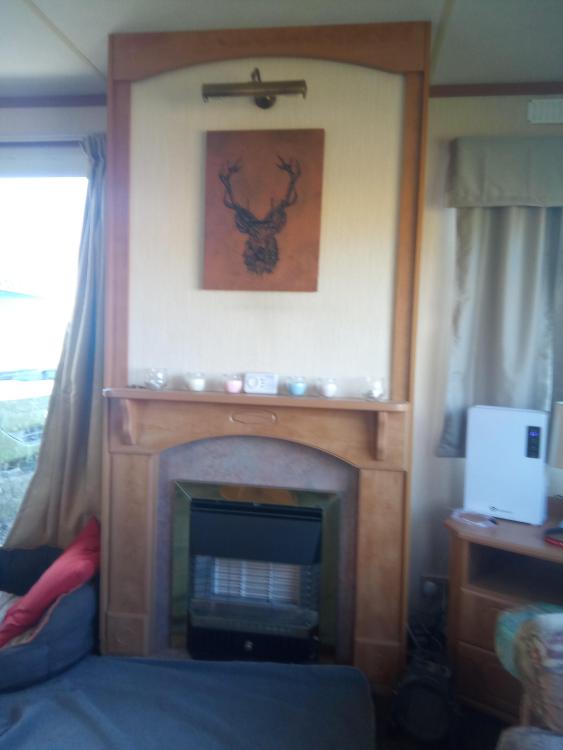
Its obvious I will need to improve the heating in our static. ( As well as the drafts). This fire can be on for an hour and you wouldn't know. I've been offered a 6kw (wood burning stove) for free, that will fit, but thought I'd seek the advice of those who've trod this path previously. Background: We don't have any wood lying around except the offcuts from framing. The 2kw heater does get the place warm. My plan is to remove the fireplace and wooden sides, install a base probably some form of paving. A heat shield at the back. The stove flue will be a short iron adaptor and then twin wall as soon as I can. Existing through the enlarged existing hole on the roof I've got a cheap thermometer so can check the surrounding temps. Is 6kw too large, I know I don't need to fill it to the brim but? Any suggestions for a cheap but acceptable heat shield. Any other suggestions before I take the plunge. It's been lovely up here the last few weeks but the caravan still drops to 15deg overnight. Winter will be long and hard if I don't sort this. Also any tips on improving the drafts on the single glazed windows? Thanks in advance.

-
My site has bed rock at shallow levels (300- 450mm). For my house ( insulated raft) I did as previous suggestions and dig out the house plot. I made my excavation 3 meters wider and longer to allow for scaffold and room around the build and stripped off all the soil until I hit rock. There is a slope on this, but it's all rock ( Caithness flagstone). The intention is to raise the lower corner with free draining hardcore, compacted with vibrating roller to end up with a level plot for the EPS. SE and BC have no issues, no requirement for load testing etc. The rock is going no where and neither is the compacted rock.
-
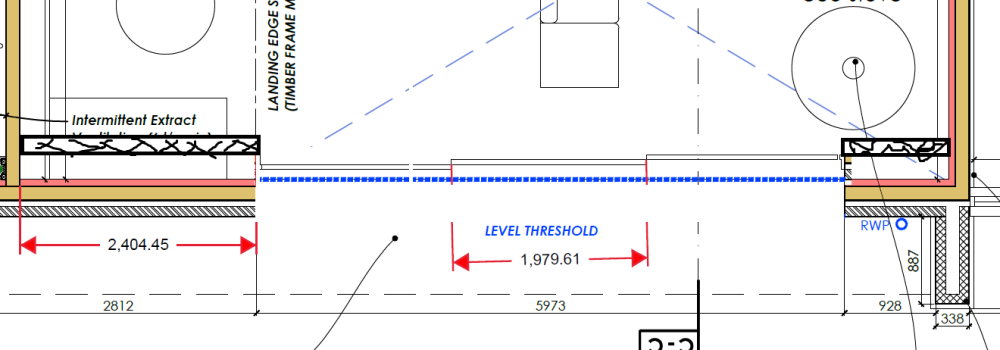
On my build I'm planning a DIY insulated raft. How can you achieve 300mm all around the raft?(edit: I'm talking about the sides) Is it stepped? otherwise I visualise a big chunk of EPS visible at ground level, not even thinking about door thresholds?
-
I was advised(planning in place. ) I could install water, electricity, clear the site, dig/ create access road, dig holes for drainage / treatment plant. all without the building warrant. So for me I got a considerable amount of work done prior to the Warrant. Then my first meeting with the BI gave me the option to show where I was at, and agree his next inspection.
-
Simple extension, should I DIY the application and plans?
Jenki replied to Jilly's topic in House Extensions & Conservatories
@Jilly I drew my own house and pod plans for my new build in Scotland. I did get a site plan drawn as it was around £90 and will double up for de-crofting the house plot. I've some experience with cad and in the building trade. But it's definitely doable. I paid around £350 for a package and just got on with it. Took some trial and error bit I was happy with the result and more importantly then obtained planning consent. And we're used for some of the building control. (In Scotland you need a certificate of design, some were drawn by the structural Eng. I'm sure I saved a fortune. -
Shorter drainage run - to save me some digging!
Jenki replied to lstevensuk's topic in Waste & Sewerage
Move A to pick up the clay pipe at the corner of the extension, just below A and to the left. move the pipe connecting A closer to the new extension line, Id run that drain in the same trench as the footings. you may need a rodding point or IC at the rear corner of the larger extension box. Have you confirmed the clay pipe is where it is shown as dotted.? -
Hi. where in Caithness? We're building in Occumster nr Lybster. With reference to the concrete asbestos pipe, we ran our road over a 3" asbestos/ concrete pipe. We had to expose the pipe to confirm the depth luckily the pipe was laid in a blasted trench so we were given permission to continue. The connection was straightforward. Have you seen the wayleave documents for the pipe? If they haven't got an agreement the ball could be back on thier court.
-
I Cant wait to rid of that Bull***t.
-
how about thin wedges, use two on top of each other (folding wedge) these are 1-3mm so you will be able to use these, then possibly solid glazing packers. on the diminishing gap. I think 0-3 mm will disappear with weight / sag / shrinkage anyway Or Grout (the same used to bed steel columns etc, it will flow, but you will require a moat, and some clean up after. You could use low expanding spray foam to "seal" the larger gaps, then a bead of mastic. The foam will stop spiders, but not anything that will want to eat it. https://www.gbplastics.co.uk/Products/Horshoe_frame_wedge_packer_glazing/WP1-3
-
Alternative, depending how visible this will be, but rubber roof products can work really well. Edit... Discard this, sorry re-read the title of the post. This won't work don't know what I was thinking 🙈
-
Can I get a rest bend to go through an existing external wall?
Jenki replied to lstevensuk's topic in Waste & Sewerage
++ For above. Stub stack durgo / air admittance valve. My suggestion to go parallel and a sweeping bend was due to being unsure where the beam and block in the extension was height wise . My solution only requires 5 inch. But if it fits taking a few courses out then great. -
Laser Level/Builders Level...
Jenki replied to Mulberry View's topic in General Self Build & DIY Discussion
You can pick up a dumpy level (optical) for 50/60quid, a cheap tripod and staff for similar. not difficult to get to grips with and very accurate. only issue is its a two person job. The rotating levels and receiver can be used by one person. This is my approach, I put a master stake in the ground and set some other slaves stakes dotted around at the same level with the dumpy level. Then use the laser on my own to do a lot of the setting out, I can always check the laser against the master and slaves stakes. Once happy I then re check with the dumpy level. takes a bit longer, but not as long as pouring concrete at the wrong level. -
Can I get a rest bend to go through an existing external wall?
Jenki replied to lstevensuk's topic in Waste & Sewerage
I Think you will struggle to get this tight into the corner. You really need to use a swept rest bend at the bottom of a stack, this aids both solid and liquid to exit together, with sharp 90 deg. bends you can get separation of liquid from solid, i.e. leaving the solid waste behind, ultimately resulting in blockages. Poor drawing time... but this might work, run a rest bend along the internal wall(under the floor, then put a sweeping bend to exit in to the extension under the beam and block floor.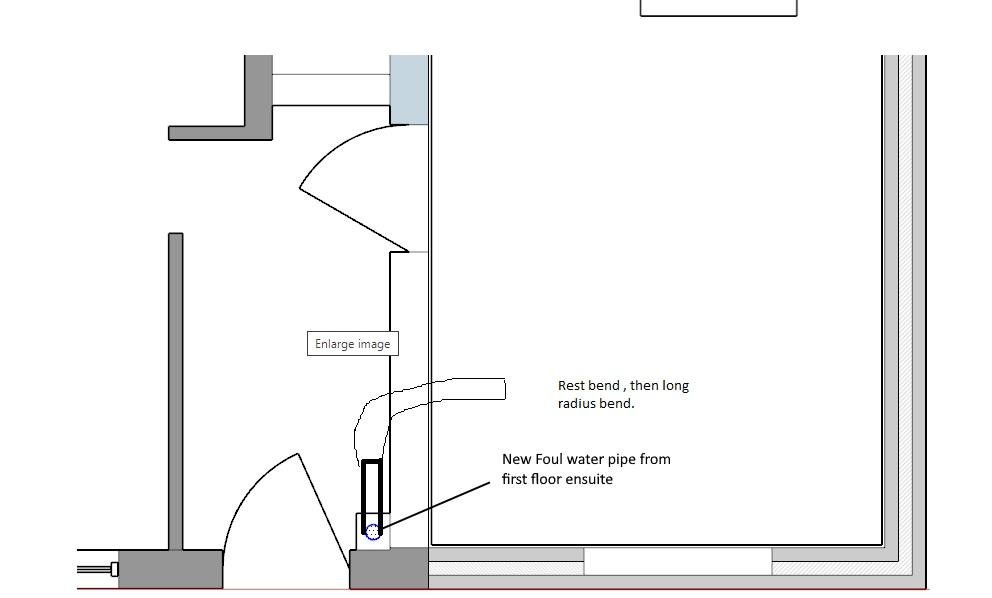
-
The benefit of soakaways is to slow down large deposits of rainfall to help reduce flooding down stream so to speak. just letting it run can have massive consequences in lower lying areas.
-
This is a flow meter, its used to balance the flow through the individual loops of pipe. In the above photo, I would suggest this, and the loop to the right are off. as the red disc is at the top. 0 (or close to zero) flow.
-
My Pods are about 5 Cube, Slab and thickened edge foundation cast in one go (insulation on top to form a floating floor) even at £10/kg (which I think is more realistically £20+) that's £40 / cube or £200 extra, plus the extra Cube for thickening the slab (£100) so minimum £300 extra per slab. mesh is around £280 per pod. There is the labour side, but that's my time. When I looked for costs for these fibres I was getting prices of £22 to £30 per KG. so old school it is - this is typical UK construction resistance to change and adapt - costs money. - I was asking a few builders merchants if they can supply large qty's of EPS 300 and EPS70 for my DIY insulated foundation and the response - its too cold up here so we don't use Jablite.
-
Ok, to close this thread. @saveasteading and @Gus Potter suggested Fibres as an alternative . The main house slab - Sika advise that as this is an insulated raft Fibres are not a suitable replacement for the A142 / A252 mesh as it is not a ground bearing slab. For the two pods, they were happy to supply a spec for these, if Increased the slab depth by 50mm to 150mm. I did this, and the result was to use 4KG of fibre per M3 of a HPP50 fibre, (initial goggleing suggest £20 / Kg) so the upshot is little saving. @GavH Allan's of Gillock have provided a reasonable quote inc delivery. - Thanks A142 - £5.90 / M2 A252 - £9.28/M2 as of June 2022
-
Adding extra insulation to the wall service-void?
Jenki replied to Dreadnaught's topic in Timber Frame
It's easy to chase out the insulation when your looking at the back of the board. But to first fix, and then start chasing out the boards to suit before you fit them will end up a PITA. -
Excuse the poor cut and pace job, but I still see issues with Air tightness. At the sides of the doors where the pocket is, when the doors are closed there will be a gap internal and external into the pocket void? maybe "sealed" with brushes, and wipe seals? but not air tight. You will also have 2x width of sash opening internally waiting to accommodate the opened doors? what do you do with that space?