lstevensuk
-
Posts
44 -
Joined
-
Last visited
lstevensuk's Achievements
Member (3/5)
0
Reputation
-
I have the dewalt but the tracks are rubbish - bought the festool tracks and a real game changer
-
Lintel under wall plate - or better option?
lstevensuk replied to lstevensuk's topic in General Construction Issues
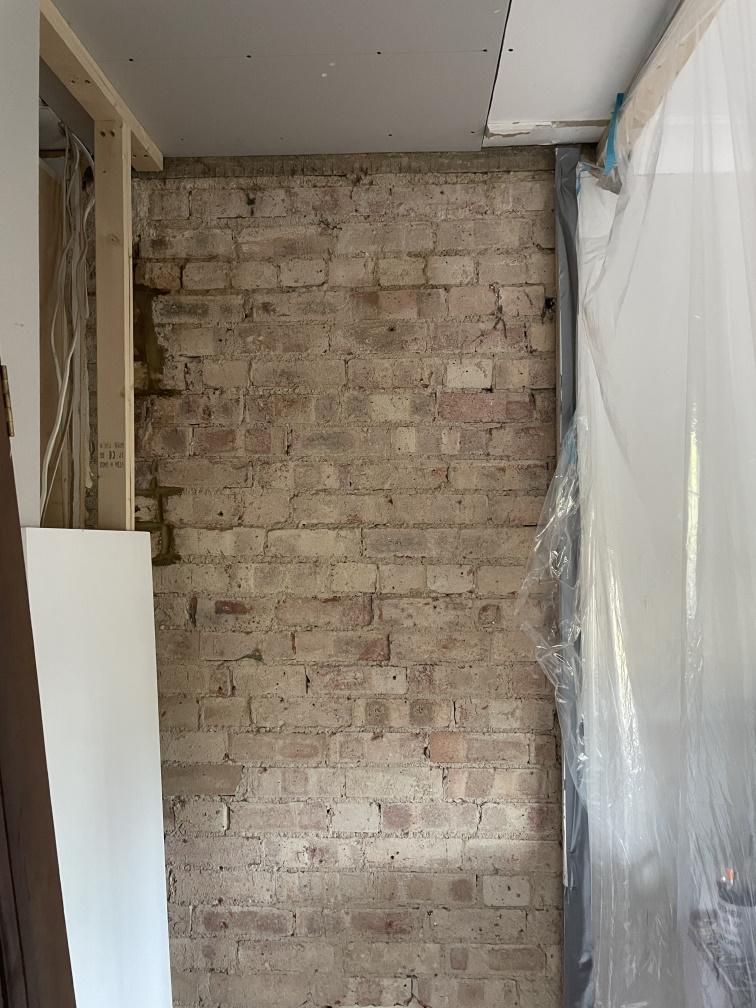
Thanks @Marc Will have a look into that steel. Wall plate has the 3 trusses sitting on it from main roof. It's just going to be a hallway into new bedroom, head height should still be plenty. Old pic but should show what I mean.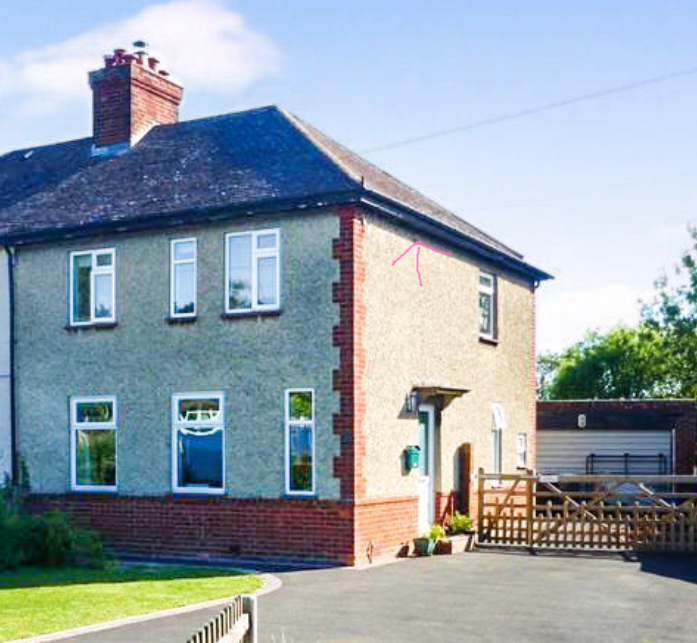
-
Lintel under wall plate - or better option?
lstevensuk posted a topic in General Construction Issues
Was going to tackle the cut-out through to my new extension this weekend. I was thinking of removing the outside section and putting a single 100x140 Lintel under the wall plate. It would form a kind of door header. Anyone think of a neater idea?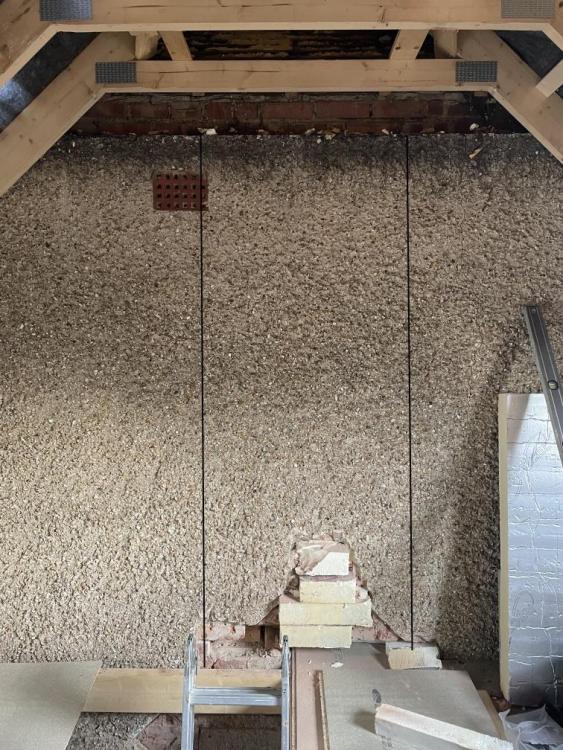

-
External Insualtion - How to calculate U-value for 1930's house
lstevensuk replied to lstevensuk's topic in Heat Insulation
Ideally it needs to match adjoining property which has 90mm. What happens if you can’t meet the 0.30 requirement? -
As part of my new extension I'm having the existing 1930's pebbled dashed house insulated and rendered with 90mm EPS and render. Building control have just asked me this question on it: Please provide confirmation that the existing wall being insulated with the EWI will achieve the required U-value of 0.30W/m2K and will not create an interstitial condensation risk. How do I work out the u-value? I tried the tarmac calculator and rough guess came out about 0.28. Also what's interstitial condensation and how do I know if I'm at risk?
-
Thanks @markc, we used both
-
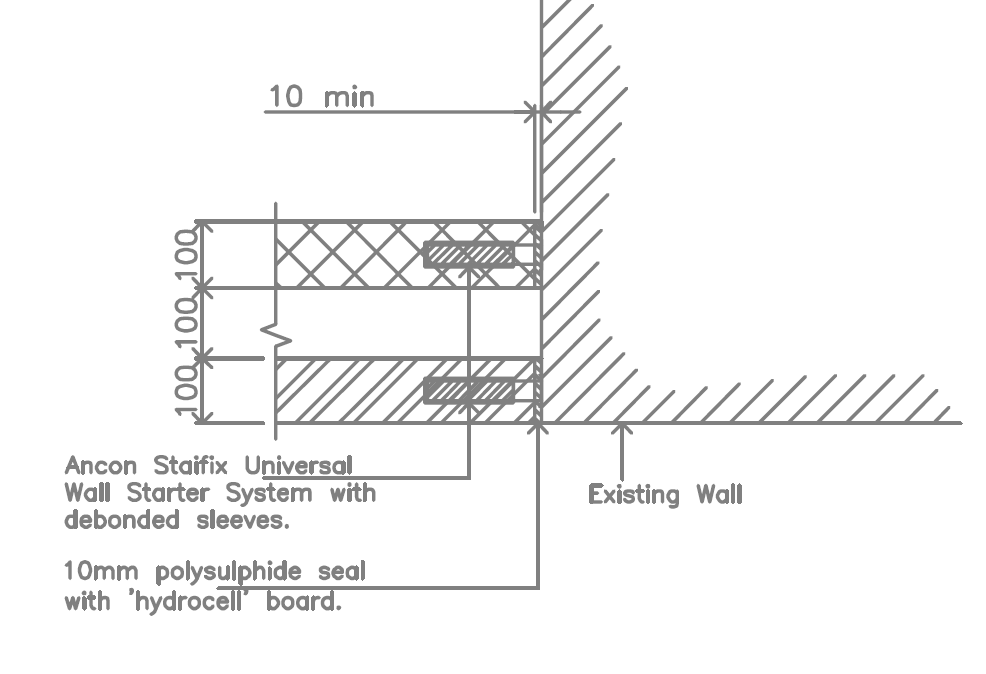
My bricky is just about to start on the external walls and has questioned the need for the hydrocell board (is this movment joint?) and the debonded sleeves. He feels they both did the same thing and to only use the debonded sleeves. Any pointers?
-
I've managed to get it much close by using 140mm insulation, I'm still 10mm out on the inside wall.
-
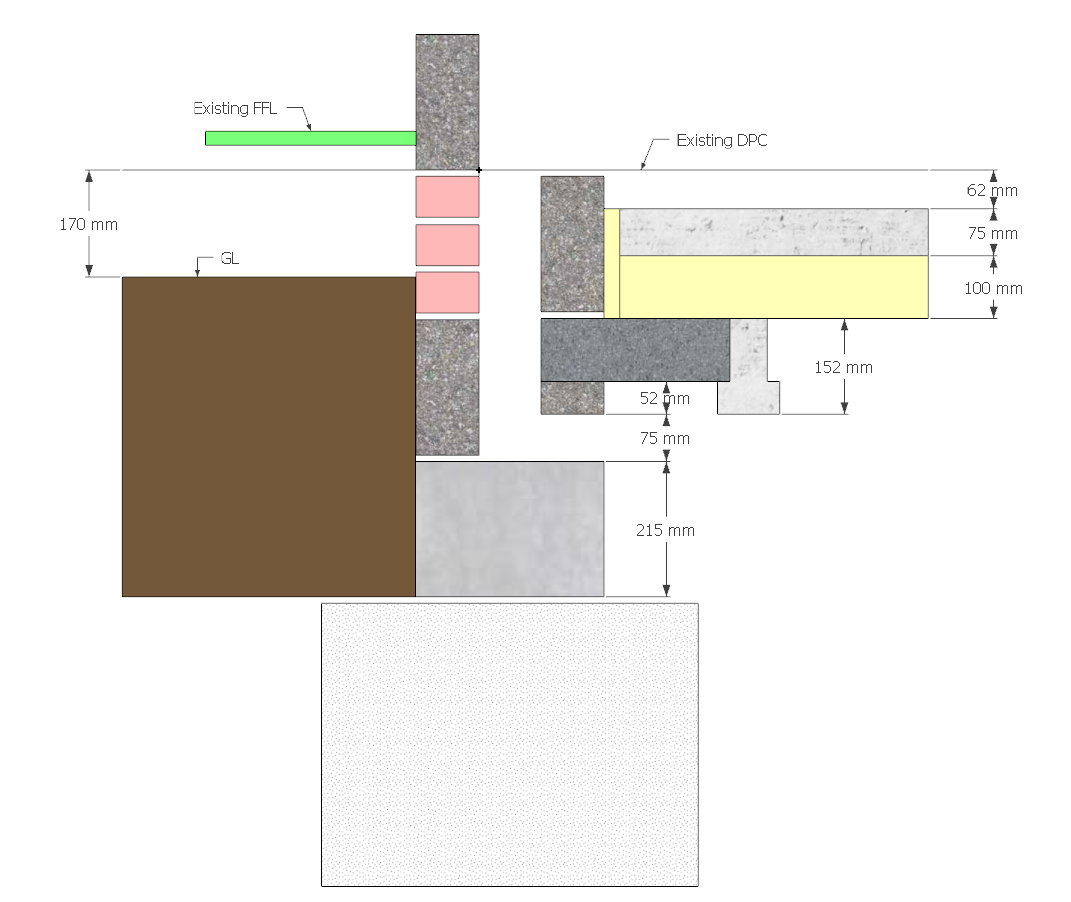
Ah well spotted @Canski slight error there on my part. That is the existing FFL (22mm chipboard on a suspended floor). Have redrawn (bit more to gain now)

-
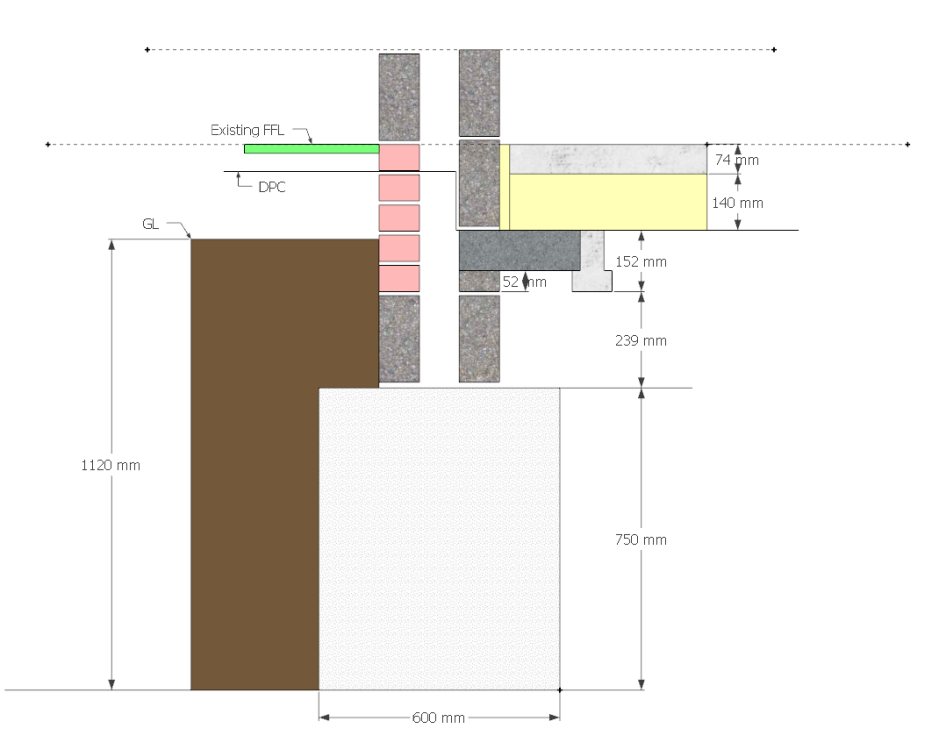
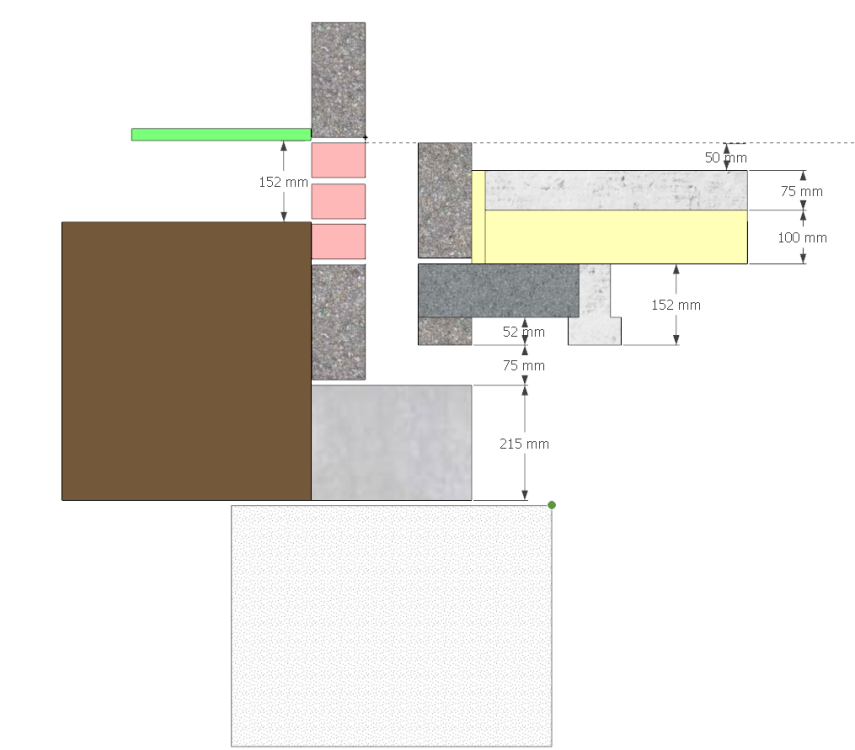
My SE just gave me a generic cut & paste footings details, so I thought I'd try and design it to new regs. However what a nightmare to match it to existing levels. I was digging a test hole today in 30c and it just got me thinking about it and I needed a rest. I could make the PIR 150mm but what do I do about the 75mm gap under the slip brick? I guess I don't even need the foundation block, could subsitute for 2 blocks or remove all together?
-
Shorter drainage run - to save me some digging!
lstevensuk replied to lstevensuk's topic in Waste & Sewerage
Thanks @saveasteading have moved out. There is a slim chance a car might hit that point. Are you saying point A can just be a rodding point? Understand about the depth calcs. I'm basically trying to get the drains in first so at least we have a functioning house whilst the main works happen. Have added some footings detail.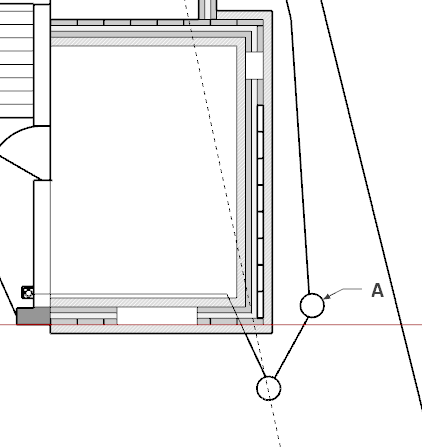
-
Shorter drainage run - to save me some digging!
lstevensuk replied to lstevensuk's topic in Waste & Sewerage
More like this @Carrerahill ? Thanks by the way for the input.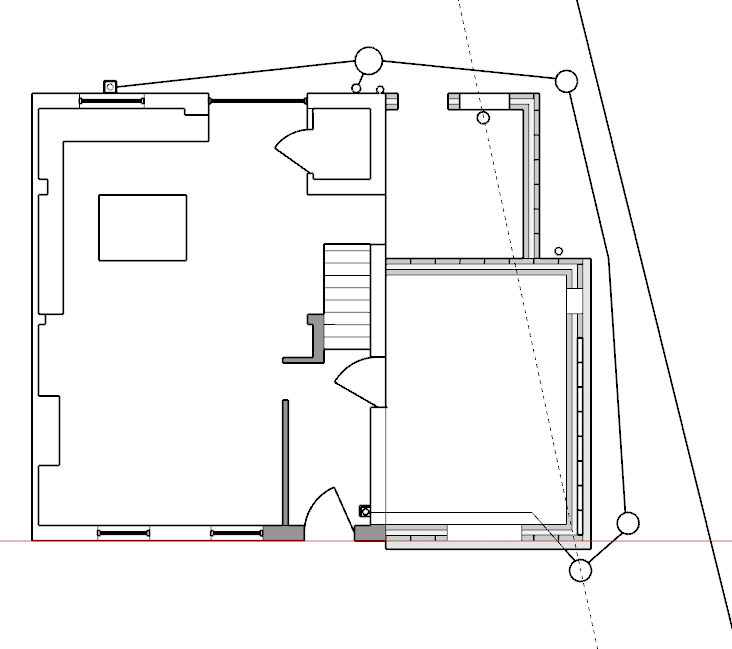
-
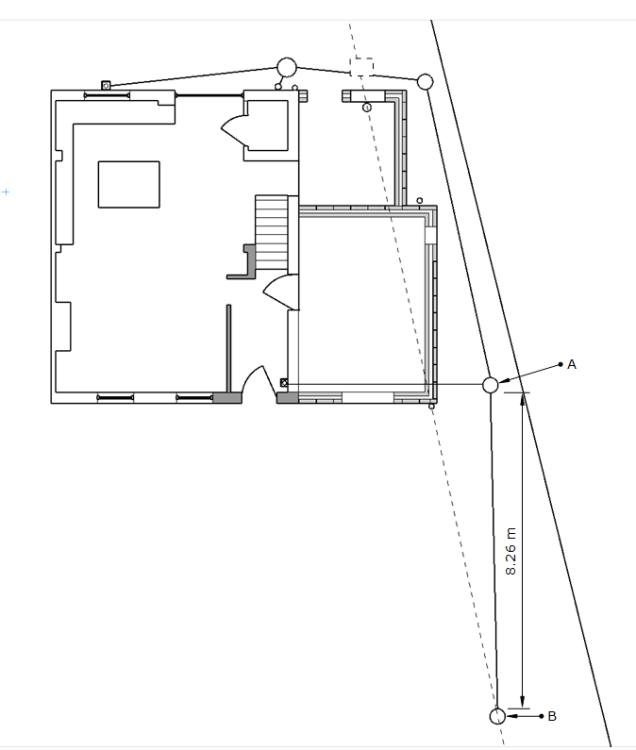
Shorter drainage run - to save me some digging!
lstevensuk replied to lstevensuk's topic in Waste & Sewerage
Point A is about 700mm deep, B about 850mm More like this? Sorry @Carrerahill just seen your reply, will try and sketch that out..
-
Shorter drainage run - to save me some digging!
lstevensuk replied to lstevensuk's topic in Waste & Sewerage
@cwr sorry should have said B is the existing access point -
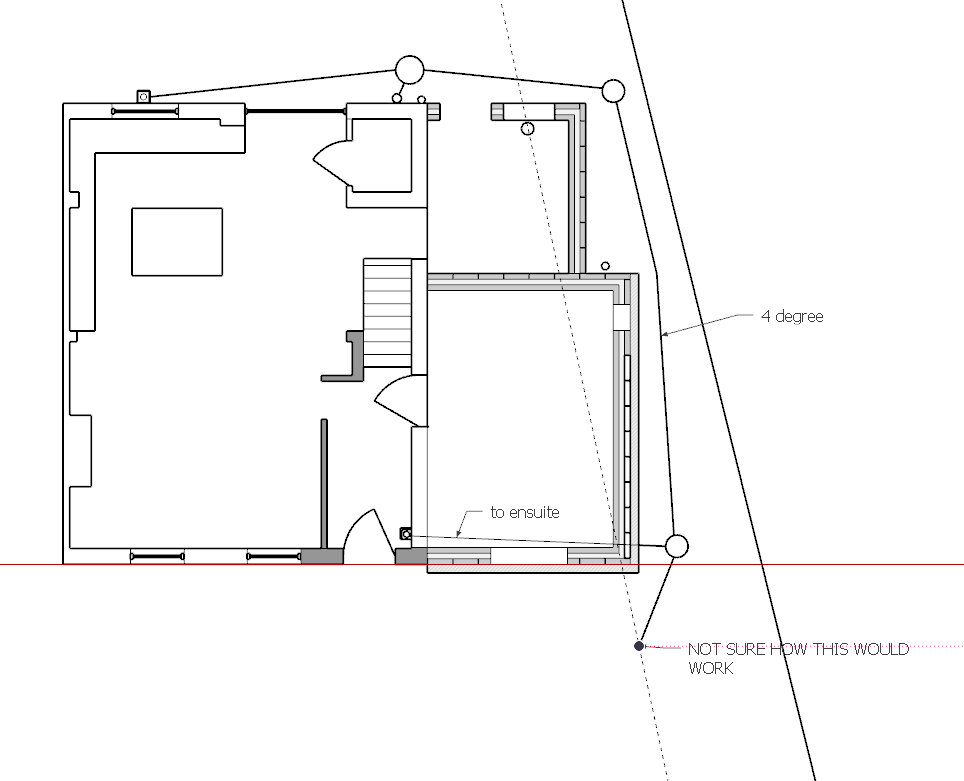
Trying to save a bit of digging and mostly the fairly new tarmac driveway. The dotted line shows existing clay drainage run. The solid line the new drainage run around the outside of the extension. Can I get from point A onto the old clay run sooner? Or am I better, as shown, digging the trench from point A to B.