Gus Potter
-
Posts
2155 -
Joined
-
Last visited
-
Days Won
26
Everything posted by Gus Potter
-
Thanks CC45 for the encouragement, stuck my head above the parapet here.
-
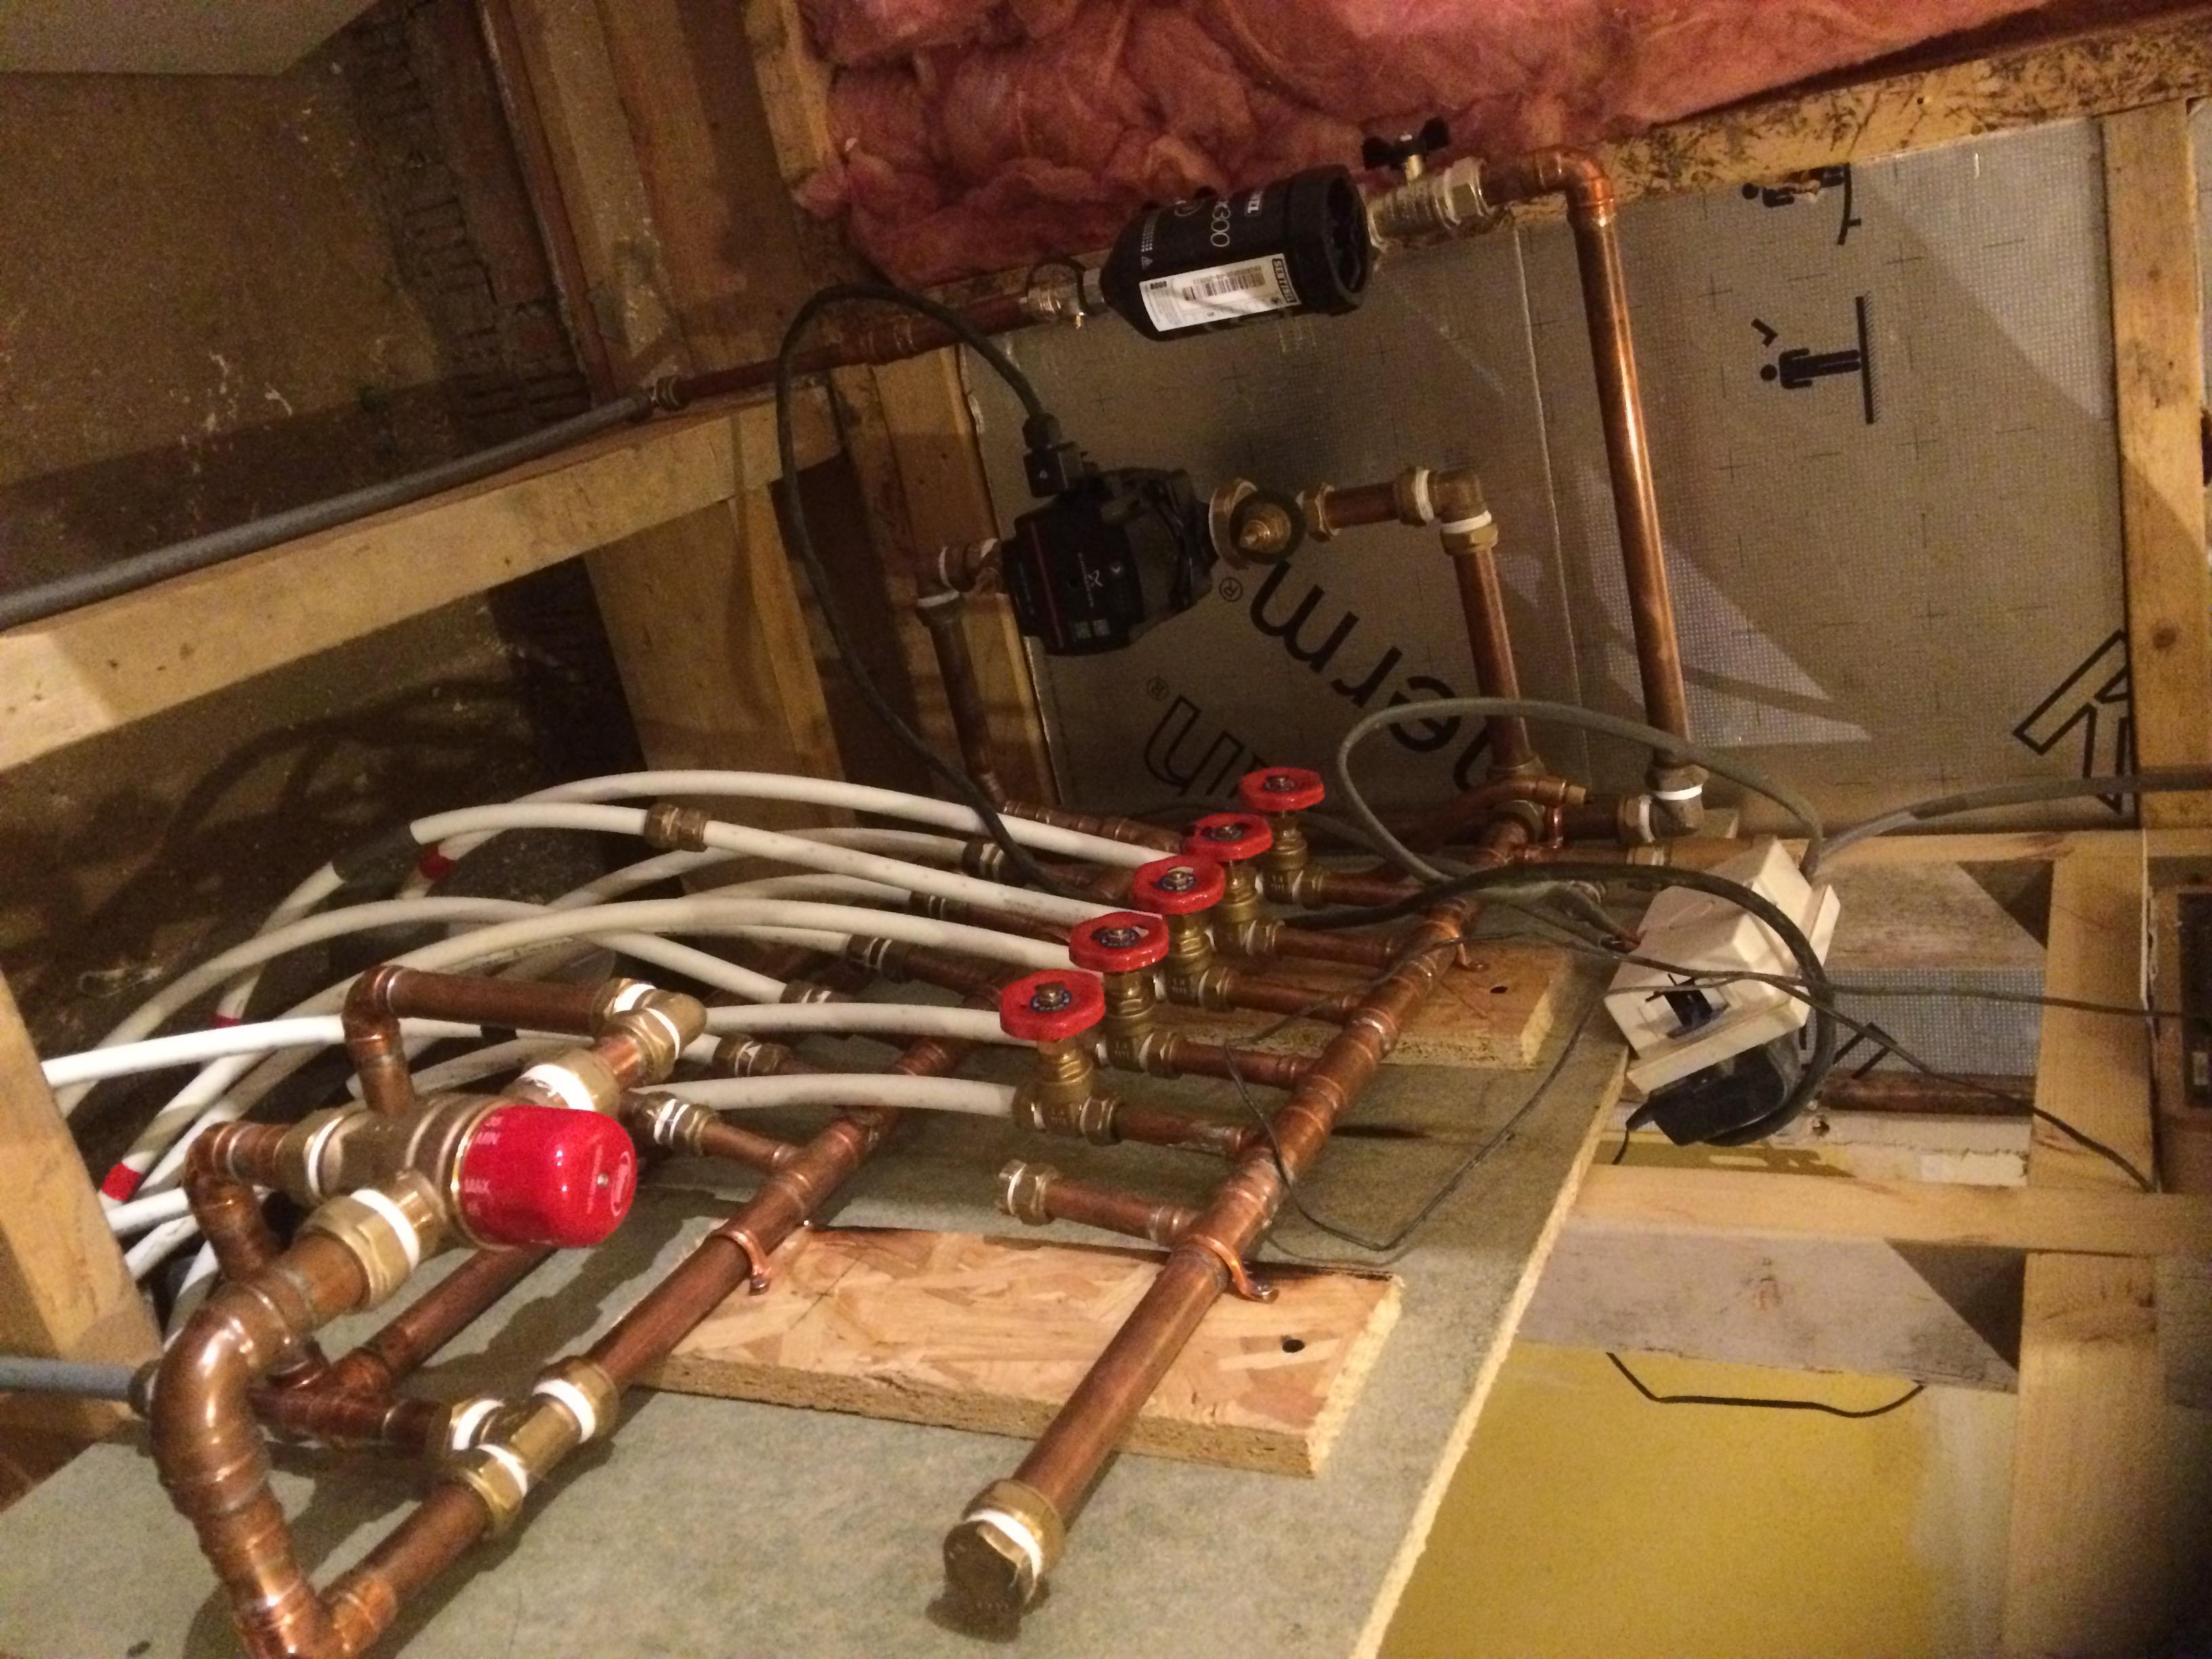
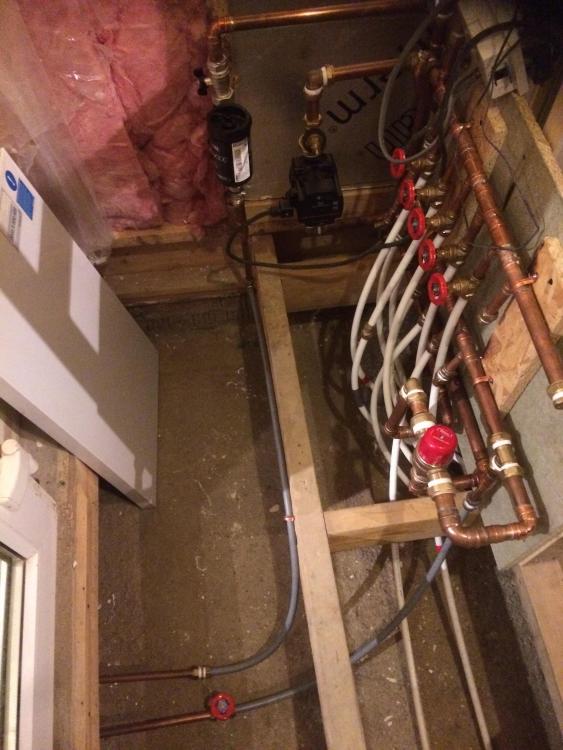
Hello all. Cheepish, chearful and it seems to work! This is my "Covid temporary manifold", looks like it will be the permenant one. Components: Filter, pump, 22mm manifold cut and soldered in a couple of hours, mixer valve - 28 mm reduced down to 22 mm to maintain a good flow, 15mm gate valves. Does it work? - yes better than expected. How did I calibrate it - flow ect - with my hand - too hot turn the valve down etc. Attractions, can get all the parts off the shelf. Connected to a standard heating system, combi boiler. Tapped into the flow side to the heating using close coupled tees. Still got the electrical controls to do etc, but great warm feet. Mistakes..cut one of the pipes too short, pride comes before the fall! Simple stupid.. yes, so pile on folks.

-
Hi Jamie. I'll have a stab at at some answers! Good points you make, there is always more than one solution! 1/ Different look.. yes my thoughts were that to get this within the budget of 10k it may be worth while conducting an appraisal of the concept design so far. Sometimes this can really help, although it seems at times you are going backwards. But that is part of the design process. 2/ Portalised structure - I spent time working with a few contractors a couple of years ago who were developing the "higher end man cave / garden room concepts. These were coming in at about 20k and the world was you oyster after that, well insulated with adequate founds. We were looking at both hot / cold rolled steel and also diaphragm structures - similar to SIPS. With these the labour cost initially was round about 1/2 to 1/3 of the overall cost, broadly extensions and so on tend to be closer to 1/2 the cost. The aim was to drive down the labour towards the 25% mark. I think the SIPS are another option, matter of preferance really, SIPS have less cold bridges perhaps, portalising things provides more of a "mechno" type frame that folk may more comfortable with? If you want a ball park figure for a cold formed steel shed go online and ask for just the frame only, you this may give you and idea. As a commercial venture the savings lay in deriving an acceptable ground / foundation solution that could be rolled out to the mass market, the cost of the superstructure had less of an influence in comparison. 3/ I would think carefully before you rely on the SIPS panel to straighten a plate, especially once its bolted to the timbers which themselves may not to true, these too will warp and move about. 4/ Yes a glulam would be quite chunky, heavy too as you say, but you can fix stuff to them easily, especially if you are more DIY orientated. 5/ Welding a top and bottom plate on? I think you can detail this so you get most of the insulation on the outer side of the web, thus more of the steel is on the warm side? .. apart from the edge of top and bottom plate.. food for thought? Yes, you are making a goal post but if you want to keep the top of the goal post as shallow as you can this is a way of doing it. The force distibution and connection design can be / is different around the goal post but the explanation is very lengthy so I'll leave it out as folk may loose the will to live. 6/ Origional plan for RSJ. You can site drill a 12mm dia hole fairly easily with a cobalt tipped drill bit on site provided the steel is on the ground before you need to resort to a mag drill. I use a 110v Bosch drill I've had for years. Don't be put off buy having to site drill a few holes, just a few mind, say ten or twenty in an accessible part of the beam or plate. In summary it looks like you are well on your way with the SIPS route and happy with the approximate costs. In this case, if it was me, I would cart on, get it built and start to enjoy it! You seem to have put a good amount of effort into finding something that suits you, that is important too! All the best.
-
Good points from the Punter.. but the developer has to win on all structural points as they have to at least to show that they have constructed a safe building, then you get to the serviceability issues. Historically, many buildings were often constructed with a good amount of redundancy and robustness built in. Now Engineers are pressed more than ever to come up with the most economic design. There is less fat left in the bank to cope with when say tolerances stray beyond those recommended in the codes. Once they move outwith the recommendations in say the Eurocodes and outwith the manufacturer's recommendations (the materials they are using that are not exlicitly covered by the Codes or a European Technical Standard say) then they are on their own and often on a "shoogly peg". While they may be able to justify one tolerance being out when you have several it can become very difficult to justify the safety of the structure as a whole.
-
Yes agree with Water, so long as you can deliver good value. At the top end that may swing more towards creativity (time spent) vs cost (your fee), at the self build end that may be driven by cost primarily with a bit of uplift for the flare / unique personal touch that an interior designer can bring. Really at the top end your work / reputation should speak for it's self and folk will seek you out anyway by way of personal recommendation. Is there any milage in having a look at what sort of uplift the kitchen / bathroom companies are putting on the base cost of the units say as many of them seem to be offering a "free design service" I don't know but maybe some parts of their model can be adapted to suit the interior design? At the self build end, if you are thinking about the business side of things then they (kitchen bathroom companies) have a pretty heavy software developement cost, but when you actually look a how functional the software it's not too flexible which leaves another door open for the interior designer?
-
Thorfun ..Thanks for posting, also great posts from all, so thank you. There may be space on Build hub for a section that explains the geotechnical side of things. I don't know? It's great to see folk delving into this stuff and trying to get a handle on it. There is a lot of information on build hub about this aspect, but from time to time there seems to be the "elephant" in the room. If you are a lay person how do you interperate the geotechnical info, what the Engineers are saying and how the other "water proofing" companies are digesting this, quoting and caveating. What is required in lay terms is clarity (often missing) regarding what the ground conditions are and so on, and more importantly a layman's guide to the implications of this. But the problem is that for the professional this carries a serious amount of liability, also some are not good at explaining / engaging with the self builder so sometimes it also a people thing. It looks like from the posts that you still have options but can't get the clarity on the actual ground. In other words you have the icing on the cake nearly sorted but have no idea what the base of the cake will be.. and if it's a different base this introduces lots of uncertainty.. and that is not comfortable. Anyway I'll have a stab at Thorfuns last post for members that may not be so familiar with the terms used. "No ground water encountered" Well that was at the time of the investigation. Thorfun... you may have to post more detail. One elephant / caveat is the mention of a "perched water table" One simple way you can look at this is to take the different glacial periods. During this time various layers of materials were laid down. You could have bed rock, a gravel / chalk layer over a large area but just below your house is a layer of clay (cohesive material). What happens here is that the main aquifer / water table is well down but locally you have a more "water proof" layer just below the surface and the water this traps (leaky drains or just rainfall) will run into your house. So when you read that last paragraph of Thorfun's post it's caveated such that it has less value. This will have a major impact on the design and associated cost.
-
How much is it off the level? Are you fairly sure that the difference in levels is just due to the age of the house rather than some on going "structural issue" Also, how does the daylight come into the room. If you have say a window in a bedroom and you run the flooring parallel to the window cill this can show up more the changes in level, but if you run the new flooring perpendicular to the window cill it can be a bit more forgiving. Lastly, do you think that once you put all the furniture back it will still be a thing that will annoy you?
-
Hello Harman. Firstly, thanks to all for the posts, great informative reading. I make my living in the construction industry but taking that hat off, difficult though. But to go through your questions in an informal way. 1/ Yes, because as you get older you find you don't know it all. 2/ Yes to benefit from professional expertise.. see above. Not all professionals charge Queen's Council rates. 3/ One facet is that you could get more for the same amount. If you want to spend a bit more then there is a lot of fun to be had. For me a lot of the stuff I do is often hidden, no one sees it. What clients do see, and live with is the the finishes and how they suit with their way of living. They will often attach a value to that, you maybe need to find a way of getting the message over and understand what matters to them and how they percieve value. 4/ I'll avoid this question, suffice to say, the fee could be offset by the savings they could bring. See Steamy Tea's post. 5/ Would not get one in at the "planning permission in principle stage" say, but once that is cleared then I would say that it does no harm just to start making tentative contact with an interior designer. 6/ Word of mouth. 7/ Non really, after all you can go to a shop and get a "personal shopper", go online if you want blinds for windows and get advice when they come to measure up and so on. This extra time has to be paid for at some point. The shops/ window blind people are trying to find a way of "adding value" to the basic garment / blind etc. 8a/ Using a different analogy. A lot of the kitchen / bathroom companies these days are providing an in house design service. These costs are built into the price you pay. Let's face it, if you go to many main stream suppliers and sit down with say a kitchen designer then the customer has to pay their wages at some point? This could be a model to use as a template for interior design? 8b/ Much will depend on your motive. Online as I understand is a very competetive market and to get established in the low end mass market often needs some heavy investment. Hope this helps.
-
On the next project have a look at using skirting blocks. More traditional but as a skirting block is a bit thicker you get a bit of play in the butt joint between the bottom of the door facing and the top of the block, also you get the same where the skirting meets the block. This cuts you the slack to get the mitres right. Glue them to death and let the shrinkage take place at the block where it is more easy to hide. While some of these traditional methods may seem like a lot of extra work they were not daft in these days and knew how to work with the materials they had at hand.
-
On a positive note to start.. the lead brazing looks acceptable on the left hand side, pity they didn't get the same angle of bevel on the right but... hey ho. As and aside I got pulled up years ago by a Clerk of Works who told me the hinges on a door were not fitted correctly. I had used slotted screws and not left the slots vertical, so this encourages drips when the painter comes along. Looking at the photos I'm curious as to: 1/ What is actually holding this moulding up, is it just relying on 50mm embedment into the block? If so, what is at the back of it to give the masonry above a full rest? If the masonry above is offset from that below then this can introduce another stability issue. 2/ There seems to be lead on top. Thus, how is this lead dressed in to stop water penetrating in rather than shedding outwards. Sometime these have a small boot on the back like a cill. It would be worth trying to see into the cavity just to see how it is build in, then work from there.
-
NHBC vs architect certificate vs any other
Gus Potter replied to WWilts's topic in New House & Structural Warranties
Sad to see (but not unexpected) the lack of satisfaction here with warranty providers. Historically the NHBC was set up to improve the housing stock in the UK and more recently other providers have come to the market as it has moved from more research and development to a more fiscal (insurance) set up / model. The system in my view is more than ready for an overhaul. In other European countries a lot of folk don't buy from large developers as they do in the UK, their model is different as many folk "build their own" Hopefully things will change, swing back to favour the self builder, small local builder while improving on the quality of the build. -
It's doable on you own.. but! You can build a house just on your own and do say 95% of the work yourself, you can't do gas, and sign off on electrics unless you have the registrations nowadays. I did this a while back and it took me three years to do a 1 and a 1/2 storey house of a similar size. Just on you own with a half bag Belle mixer, a good barrow, under cover, with not too many windows, tricky bits, and loading out the blocks each night for the next day, cleaning the mixer then with this amount of blocks I would go for 150 blocks a day (15m sq) if you are fit and tenatious. Expect this to drop off from time to time, well quite often, go for a hundered a day (10m sq) tops as you aslo need to order materials etc. I'm developing a formula for just for this. Variables so far are: T = time ..how much of a life do you want h = how old are you.. performance tends to drop with each decade (speaking very much from experience although this is not applicable to all) i = how much is it worth to you for the independance of choosing the pace of the works n = new.. will the work still look fresh and new when it's finished and .. will you too? k = Keen? will you go off the idea halfway through, rush it so as you can get onto something more interesting? [{(T * h * i * n * k) * (constant variables)] + (more variables) A constant variable is a value that can be changed if you don't like the answer, unlike gravity say. That said by building a house on my own I created a job for myself for a while and saved / made a good bit, tax free so don't be put off thinking about it, it may well suit some
-
Raw plug spec for wallplate strap fixing.
Gus Potter replied to epsilonGreedy's topic in Roofing, Tiling & Slating
Eplison. That's interesting about how a sail works in more detail, learn something new all the time. Your spot on about how the velocity of the wind leads to an exponential increase in the wind force. The wind acting on a house is pretty turbulant, it has small vortices that can act over a small area causing significant uplift and also larger areas of lower pressure / suction that can easily lift a whole roof off. In summary the key is to fix your tiles ect as per the manufacture's guidance, follow good practice in terms of fixing the timbers ect of the roof together and again follow good practice re truss clips, holding down straps etc. Sometimes you need to dig a bit deeper. If you build at the top of a cliff, or on a large hillside say the wind can be more severe so deploy common sense as Joe90 says. Ask the local folk. Some farmers may say in passing.. "that is a windy bit of the hill"..or " the stock avoid that bit in the winter", no barns built there as the last one blew down... Also, if you are in built up areas you can get a bit of wind funneling if you have tall buildings round about. There is lots of information about the wind etc available on the internet but there comes a point where once you have done your due dilligence then maybe as others have noted it's time to move on as you do want to finish the job at some point. -
Hi Oldkettle. It's a matter of preferance really as to whether an SE is local or not and at what stage you get one on board. For work that is below ground.. basements, retaining walls etc then a local SE will have a reasonable idea of what may work vs the risk the Client wants to take. At one end some don't want to spend any money on say site investigations or exploring the options of cut and fill, drainage etc. This increase the risk that you will encounter the unforseen. At the other you can spend more, too much, well not often, on investigation and this provides greater certainty. They (local SE) will probably be familiar with the area. Also, they may well have a good rapport with local BC and be sharing knowledge about what is encountered under the ground locally and so on. One thing that can be really useful though is just being able to have a chat with an SE, call it a brain picking excercise. There are some SE's who will come out to site in an informal manner with a pad of paper and pencil, walk you through the various principles of design, do the odd sketch to demonstrate the principles and "chew the fat" with you. At the same time they will give you pointers as to what you need to investigate and how you go about it, who to approach and how you ask (technical jargon) for your particular site. This can pay dividends later on. You can find SE's who take this approach. It can work well as you start to build a relationship, which you can if you wish formalise later on. Try asking some SE's if they will come out on this basis to give some informal advice. Some will be delighted to do so as for an SE it is often much more interesting to be involved all through a project, offer to pay for their time, say by the hour and you may well be pleasantly surprised at the outcome. All the best with the project.
-
What about getting and SE in right at the beginning even before you ask a builder, employ a QS, get an Architect. SE's know a lot more about this process than the common perception that they just just "provide calcs" A few rakes about on build hub say etc will get you on the ball re your budget. Work out if you have the money, can borrow it etc first . Much of the cost lies in the ground. Then spend £300 - 500 quid on getting an SE. Yes..you maybe don't want to put your money where you mouth is at the moment but it's a bit like site investigation.. if you skimp on this you end up paying for it later and often more. This is a known statistical fact in the industry and you are more vulnerable to this as a domestic client. Maybe it's worth getting and SE in early who will take you under their wing and guide you. A good one (SE) who has experience will do a desk stop study on the QT before they meet you and this can really go along way towards identifying real potential issues that need investigated/ designed around. This will also help you get provisional prices from builders by way say of an A4 spec on a page or two and you can access their contact list. They will also help you prepare a brief for the Architect. Also a lot of "SE's" are pretty good Arctitectural designers themselves so you may not need an Architect at all. You get two birds for one stone. You'll need an SE for a lot of basements so I think you could be missing trick and often wasting your money. It will do you no harm to just ask an SE right at the start?
-
Raw plug spec for wallplate strap fixing.
Gus Potter replied to epsilonGreedy's topic in Roofing, Tiling & Slating
Hello Epsilon and Peter and all. Here is a bit of an over view, my stab at things, no spell checking, for a bit of fun and so on. Say you have a sail on a yacht. On one side the wind blows against it (pressure) and the wind has to move around this blockage. On the other side of the sail there is a negative pressure before the air flow returns / stabalises to normal further down stream. This causes a suction force on the back of the sail. The two forces combine to create an overall wind force and as the sail is at an angle to the wind it drives the boat as you get a roughly perpendicular component to these forces. .. or you can capsize it... hence the lift jacket. The same happens to a house. I'll leave this for now but the wind forces on a roof (not just the walls) can move the house from side to side horizontally too and that is where we look at building stability. But for the sailors here, you'll notice that at the edge of the sail there are some really high forces, hence why often the sail rips. Here the wind vortices are significant, forces can be two possibly three and a bit times more. The same principles applies to a roof. However, unlike a boat a house is static, it has a roof and as the wind moves about in direction it can cause both a downward force and an uplift force on the windward side ( depending on the roof angle and obstructions like chimneys) and an uplift force on the leeward side. A roof is a bit like a tilted sail on it's side? To turn to the holding down straps. you need to start at the top surface of a roof. At the edges say and round chimneys you have high wind forces. That is why you often see tiles sucked off here, hence the tile fixing specification. Once you go through the depth of the roof you have battens / wind bracing / sarking and so on. These all spread / shead the localised loads. Now you have the roof timbers etc. these too load share / spread the load and this load ends up at the wall head where the roof rests. You also have an effect called " non simultaneous action.. wow! this means (good for you) that the whole of the worst wind does not act on the roof at the same time, and this depends on the size of the roof and orientation. Most roofs are designed to be stiff, like floors. They (roofs) act like deep beams and tie all the walls together. In other words the holding down straps take a more general load rather than a concentrated load that occurs over small areas of the roof. So there is an element of Engineering judgement applied. This needs a leap of faith here. We know roofs lift off so you need to hold them down. We need to connect the roof to something heavy, or to a timber frame that will be connected to something else that is heavy or stiff and we can use holding down straps to do this. Follow the load path. The first connection is between the straps and the roof timbers say. The next between the strap and the masonry, which is the point here. But.. before you get to the strap fixings, it's worth havng a look at some of the generally accepted norms for say 1960's standard housing. There were no holding down straps. The wall plate was just nailed essentially down into the brick. There are some quirky bits in the design codes that allow you to to take into to account a masonry height (for wind uplift) that can contribute to a counter weight to hold things down, although the mortar in in some respects acts in tension which is often not recommended when designing masonry for other purposes. But now we often have lighter roofs, lightweight blocks and timber frames. With timber frame life is fairly simple, you make the truss clips do the work and transfer the wind uplift down the studs and couple this with the sheeting and spread the load further into the structure. Previously for standard housing a brick cavity wall was common. The walls are often too cold nowadays. Here, you can calculate the weight of three courses of masonry / or more ~ 3 vertical feet and design for that. Actually, I don't think anyone bothered! they just knew it would be ok for standard housing. But for lightweight blocks the simplest way (if you have a concern) is to buy a twisted strap. The top of the twist connects to the truss say. You have two choices here and this is about the cost of procurement. You can site bend a 5mm thick the strap at the bottom, drill out a bit of mortar bed and turn the leg back into the light weight block buy 80mm , takes a couple of minutes. Fix this to the block with 5 x 80mm screws and plugs, 2 fixings per block vertically, these are to hold the strap to the wall so you don't need to calculate the shear capacity of these fixings. They also build in reduncancy / robustness. Or you can you do the full calc route.. which will require a lot of effort. Or you can just just nail / use any plugs you want and not turn them back into the lightweight block. Some inspectors just like to see the straps and don't look at the fixing type and compatibility with the masonry etc. For me I would do it the right way and turn the strap back into the masonry if light weight block. It's not that much work, a few quid. Lastly, well nearly, as a caveat.. what you want to look out for is things like canopy roofs and say wrap around bifolds on corners of buildings, anything that looks a bit out of the normal. Oz .. think your job is safe. Holding downstraps are hard to get your head around as the manufacture's only give you part of the data. Often it's easier to skin the cat in a different way and look forward to spending the time and money else where. Peter if you want some pointers on how to calculate wind loads then.. -
Raw plug spec for wallplate strap fixing.
Gus Potter replied to epsilonGreedy's topic in Roofing, Tiling & Slating
Hi Peter, pondering here on how to answer in the spirit of build hub! -
Just speculation but is that a bit of quarry tile that you would use on your hall floor say?
-
Hello Jamie. A few random thoughts, based on your budget of say 10k and doing a lot of the work yourself. Have you thought about going for a different look. What about a composite panel roof with steel purlins. Your wind and water tight pretty much right away. Also, you could spend a bit on the flashings to get a contemporary / but less industrial look that could compliment the existing house and the shading of the doors. This would /could then lead to either a couple of hot rolled steel portals at the gables with wind bracing along the back wall. Or you could explore cold formed steel portals as well. You could overclad parts of the composite with larch say or some other material. There is loads of stuff you can play with. You could over clad at you leisure as you look ahead to maybe linking in the house at a later date. I think you may be pushing your luck with flitch beams this size as deflection / bolting etc may trip you up when you come to the detailed analysis. Also, you would need a heavy flitch (thick too!) plate, may be hard to get one that long anyway that is straight and true. You could have a look at glulam. Here you could have a deeper one, still sit the bottom roughly flush with the ceiling but let the top side sit above the roof, thus creating a bit of a parapet. This may look ok as the vertical proportion of the beam over the door may fit well with the vertical height of the doors. You could maybe do something here to incorporate some subtle external lighting. I'm not sure but the likes of Carrara Hill has made some posts on how you can externally light a structure so folk can't see in at night. Also, if you have a bit of a parapet and there is some snow on the roof it may stop more of the water dripping as it thaws? Have a look about for Glulams that have been miss measured, it happens, you may get lucky and pick them up for a song. You could go back to the steel portal idea. Here, to keep the beam depth down you can weld a top / and or bottom plate onto a beam. One effect of this is to reduce the deflection and can provide a thinner accessible flange to drill and fix things too. Also, you can get more insulation in too. But also you could creat a good ledge to rest the sips panels on as you need some end distance for the fixings into the sips panels. If you transfer load to the beam this way it is not central and the beam will start to twist i.e. torsion. Have a word with the sips panel designer and see if they can put a good heavy end on the sips panel. This may allow you to bolt through the web / up through a bottom plate of the beam along with some brackets to transfer the torsion back into the roof. I'm not sure how far you will get with this as there will be a design for the sips manufacturer, and it's complex. It may be too small a job to make it worth while. Have fun!
-
Minimum gap between roof truss and 2-storey wall.
Gus Potter replied to epsilonGreedy's topic in Roofing, Tiling & Slating
Good photos Nod. You can see from Nod's photos how the metal straps & noggings (dwangs in Scotland) are installed so that when the wind sucks out the gable wall the load is resisted by the trusses, roof structure acting together. The roof acts like a deep beam and this holds the gable wall in place. There is easy to find guidance on this from say the NHBC details online. The same rules apply at ceiling level unless the wall has been designed on the basis of floor to ridge height. I think Epsilon has spotted this. Good example Nod of a job well done. You can see from Nod's photos how the diagonal wind bracing has been carefully cut where it meets the blockwork. By doing this Nod has ensured that the end distance for the nails has been maintained..in other words if a nail is too close to the end or edge of a timber it is no good. You can also see how Nod has placed the bracing close to the node points of the trusses as per good practice etc. -
finally got a response after 4 months
Gus Potter replied to scottishjohn's topic in Planning Permission
What are you building? Great part of the country, stunning in fact. -
Minimum gap between roof truss and 2-storey wall.
Gus Potter replied to epsilonGreedy's topic in Roofing, Tiling & Slating
I think epislon is having a look at how the wall is tied in at ceiling level so is asking a good question. Take, if you can a photo of the whole length of the ceiling where it meets the wall from both above and below. Take some close up ones of any steel straps, any fixings and some panoramic ones so the likes of epilon can see the whole roof structure. -
Hi Jamie. I would go back to basics before you open the wallet/ purse / gourd or raid the money tree in the garden. You have three walls and a roof with no openings. You do have quite a "stiff box" to work with. Most walls and roofs are pretty stiff. Think about them as deep beams, the roof, if it is detailed well it acts like a deep beam and thus able to transfer load down to the foundations quite adequately via the walls. If you have bottom supported bifolds, then yes they are heavy but when you work out the horizontal loads that appear at the head of the doors (when they are open) you may often find that they are no more onerours than the loads that occur when the doors are shut and the wind is sucking them outwards. It's just my view but bottom supported bifolds are more common now. Logically it's ok to float one part of a structure and connect it to another. You just need to design for the differential movement. Ask this. Say you have an 18 th centuary house, you add an extension, both will move differentially relative to the seasons, temperature and so on. Both the old house and the new extension often still float on the ground (unless maybe on similar rock), just they move up and down differently. All materials are elastic and some can also expand/ contract differently if the are sensetive to moisture. Before you go down the "steel route" and the associated foundations, deal with the cold bridging etc then it may be worth while going back to basics and avoiding all the extra interfaces and assosciated labour cost. This way you may be able to bring it all in budget and still have a competant structure / safe design that will still allow you to connect the house to it later. In summary you may get this within budget if you go for bottom hung doors, do away with all the steel, base plates and thickened founds and approach the design in a different way.
-
Tongue and Grove Chipboard, Caberdek, other?
Gus Potter replied to revelation's topic in Floor Structures
Good question Revelation. Just a thought.. make sure you buy flooring with a BBA and a CE certificate /mark, in other words make sure you buy structural chip board flooring. Once you get this stuff it's very much up to you. If you don't look after the materials on site then no matter how much you spend you are wasting your money. Have a look at the manufacture's data (fine print), they spell it out in terms of material handling and storage etc. If you are going for UFH then you want to get it as dry as you can. The plastic film is favoured by developers as they get a longer window before wind and water tight, also they need to spend less on the commerial clean after the tapers/ plasterers have been in. But generally the developers are not doing UFH. I would buy the unfilmed stuff, look after it and get it as dry as you can. Then once you are ready for the carpets, oak flooring, get down on you hands and knees and give it a good old fashioned scrub with a cloth and a brush!.. twice at least. Then enjoy the fruits, you can walk about in your bare feet..it's great! -
Tongue and Grove Chipboard, Caberdek, other?
Gus Potter replied to revelation's topic in Floor Structures
Hi Revelation. As an aside. It would be worth checking if the joists can take a sand/ cement concrete screed. Ask the Engineer if the floor can take a bit extra load, this is a simple option, but it works and it's easy to lay. The heat does not perhaps transmit as fast but at the end of the day heat rises and it will come out eventually. Look up Jeremy Harris on this site as there is some great info and lots of good contributions from the other site members. Take a basic sand cement infill between the first floor joists. You just need to set the timer to come on a bit earlier. Unless you want to try and make UF perform in response time like radiators? You could save a lot by not having the spreader plates. Your first floor will almost "tick" over as you'll get heat transfer from the ground floor. In other words (crudely) the ceiling below will also be heated by the ground floor UF and the heat gets up the stair well too. I'm not being too scientific here. The key here is that if you have not got some heat into the building and reduced the humidity then the last thing you need is chipboard with a plastic layer, it will just seal in the moisture. It's a pain but get the chipboard, stack it up with packers so that there is a gap between each board, let the wind into it and get it as dry as you can. Leave a gap at the edge of the floor for when you go on holiday and the heating is off .. it will swell. Screw it (chipboard) down with plenty glue , you can then go over it later and adjust / add more screws to stop most of the creaks / squeeks! It's hard to stop them all but that is part of underfloor heating life! But when you can walk about in your bare feet in luxury, you just learn to avoid the odd squeeky bit! And, when you get older and a bit deafer you don't hear the noise anyway. Before you lay the oak really be patient and condition it, it will pay dividends!