JFDIY
-
Posts
498 -
Joined
-
Last visited
-
Days Won
1
Everything posted by JFDIY
-
I've used JTM plumbing for some bits, based on price and they did long sweeping bends I was after
-
Its the postage that makes it expensive, since your prompt I did a bit of searching around and I have found a fairly main stream builders merchants who have it for the same price and they're only 15mins away from my route to work, so will go next week.
-
Off cuts of Ubbink 90/75 ducting
JFDIY replied to Adrian Walker's topic in Mechanical Ventilation with Heat Recovery (MVHR)
Is that the same as the blauberg stuff (bright green as well) if so I've got some. Let me know the minimum length and qty and I'll dig out what I have. -
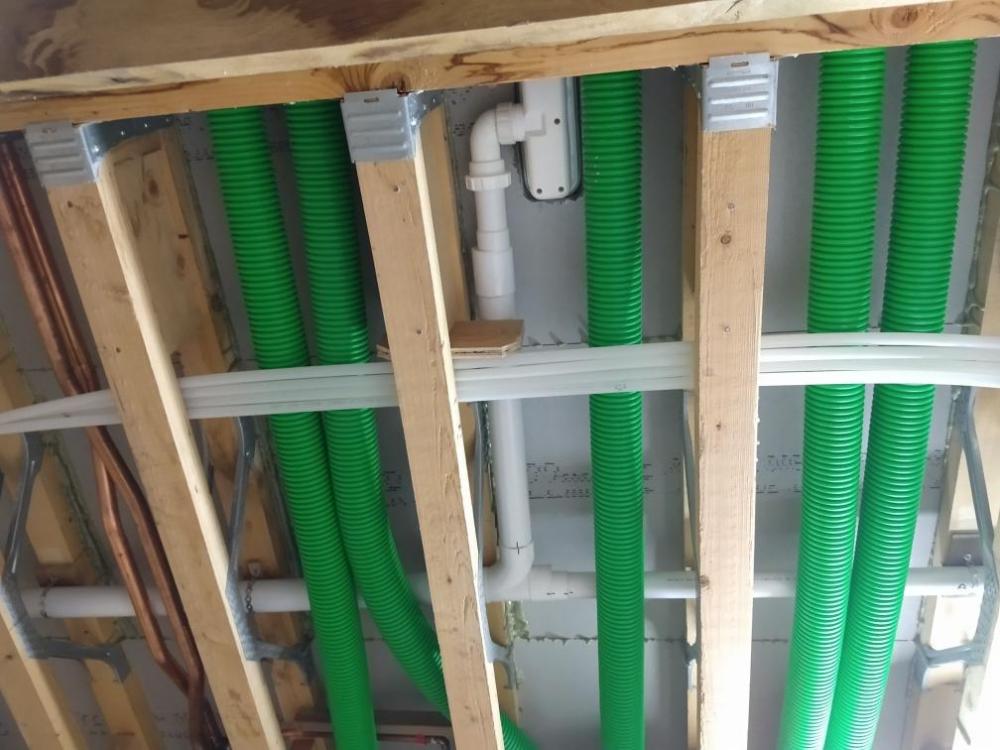
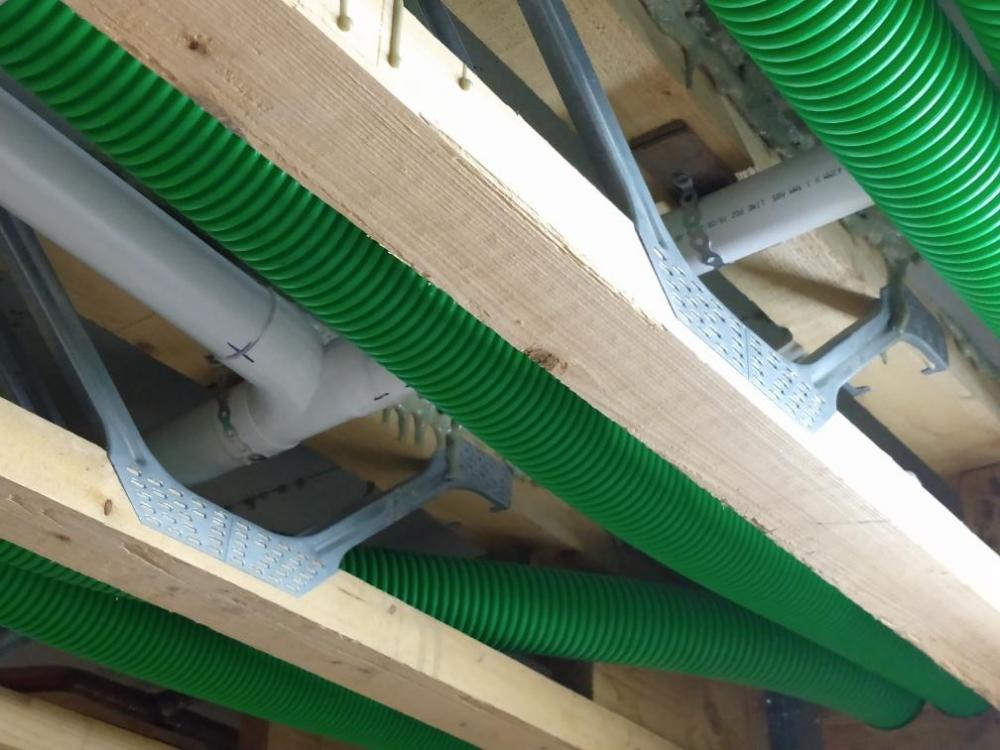
I've seen loads of waste pipes that sag between supports, so I've packed and strapped mine to all the joists at 400 ctrs. However I'm now wondering if I've over restrained them from thermal movement, it's all solvent weld, the run is 1.5m of 50mm then another 1.5m of 40mm to an AAV. Don't want it breaking the joints, but solvent weld is mega strong to I'm probably over thinking it.
-
Careful use of a heat gun will let you bend the overflow pipe to be square should you need to
-
Looks ok, I always try and rod them if in any doubt, that's all you need to be able to do, the effluent will flow through regardless. you could always, move the chamber closer to the last inlet, spin the chamber 45 degrees with a bend where is connects onto the main run so that the main run through chamber is at 45 degrees to your build, then you can have two rest/long sweeping bends straight from stacks into the chamber. Might need a couple of shallow bends but it'll keep BCO happy A normal 45 bend (single socket) bend straight into a chamber is easily rod-able Edit to add, leave as is, just on the last leg put the 45 close to the chamber then the swept 90 up the same as the other one, it'd be easier to rod.
-
Does anyone have an alternative sealant to the orcon F, which is amazingly good, but I can only buy at a kings ransom type price.
-
125mm bungs are available for about £15. I can find them on eBay and with builders merchants, if it were me I'd be getting rather than making do. You could always (space permitting) use a rubber band coupler to get to 100mm then fit a blank end in that.
-
MVHR commission template / cert
JFDIY replied to Oz07's topic in Mechanical Ventilation with Heat Recovery (MVHR)
I think you need something like a Testo 417 with hood kit (it's what I bought). Or a vane anemometer and road cone. -
Although shown diagrammatically as above is it possible that one contactor switches two phases for reverse. My lathe has reverse, but a separate mechanical switch to flip the windings. Run lathe backwards with rear toolpost or for parting off with upside down tool, stops it digging in.
-
Bugger - big chip in glass induction hob
JFDIY replied to jack's topic in Kitchen & Household Appliances
Depending on your worktop, if it's solid you can get the hole perimeter for the hob recessed, so a item slid sideways doesn't crash into the edge. But if you ever replace the hob in the future you might be stuck with that brand or have to go bigger. -
I can't tell how much of the above was tongue in cheek? I've read a few articles over the years and although counter intuitive, they all suggest the full nut on top. This makes a bit of interesting (though some might say boring) reading https://www.boltscience.com/pages/twonuts.htm
-
But which one goes on first?
-
Piece of cake with a rotary laser level and receiver
-
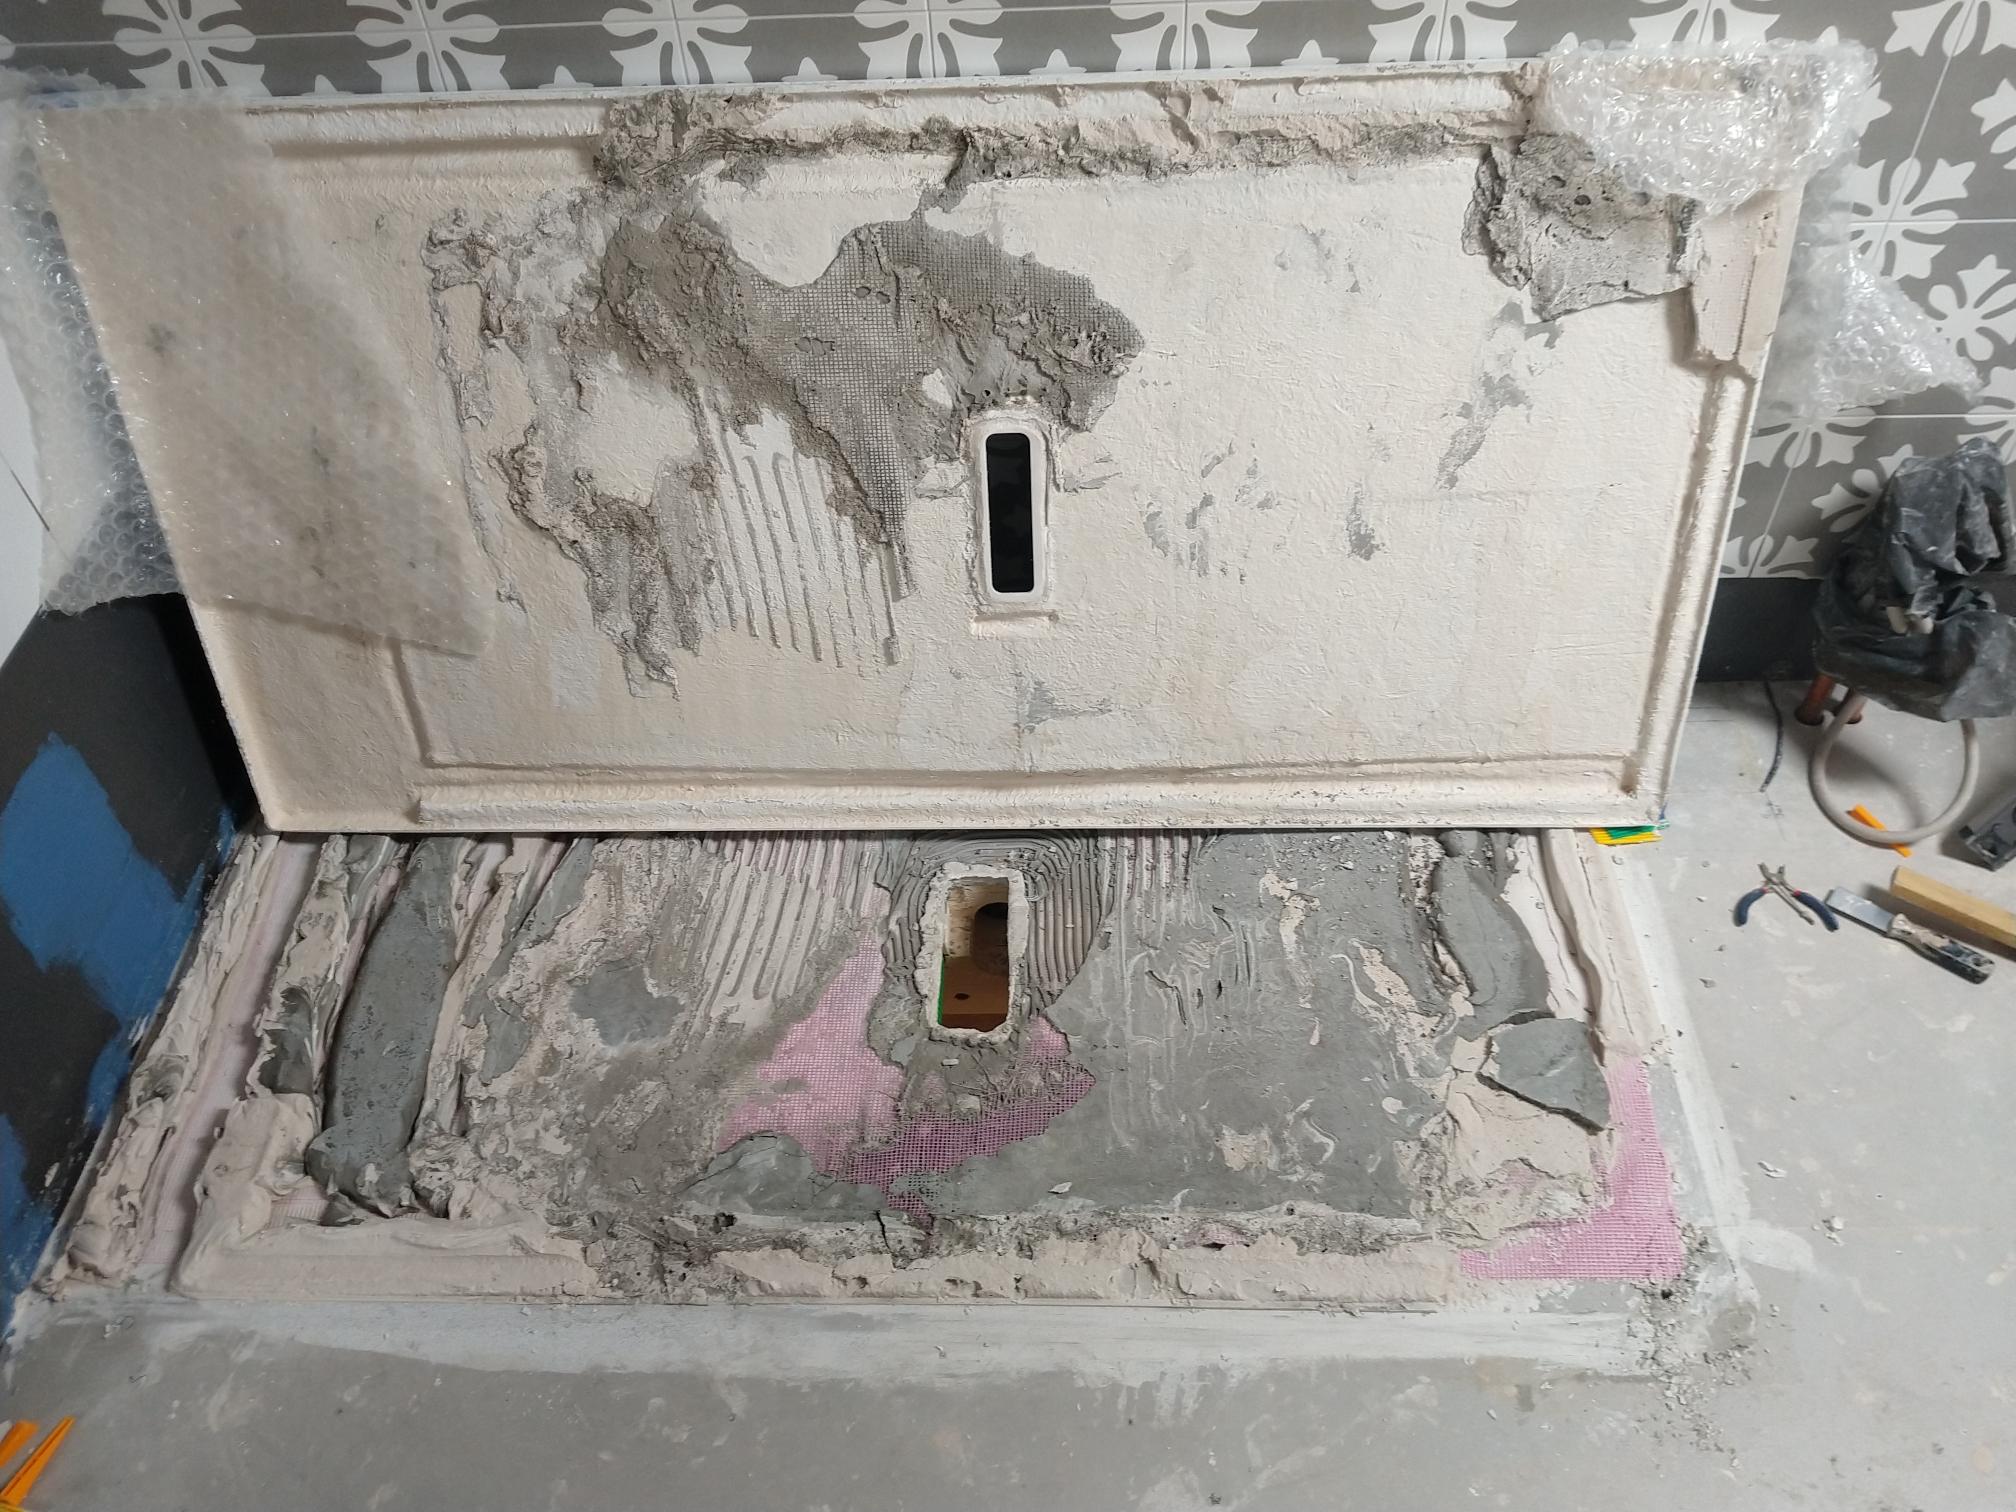
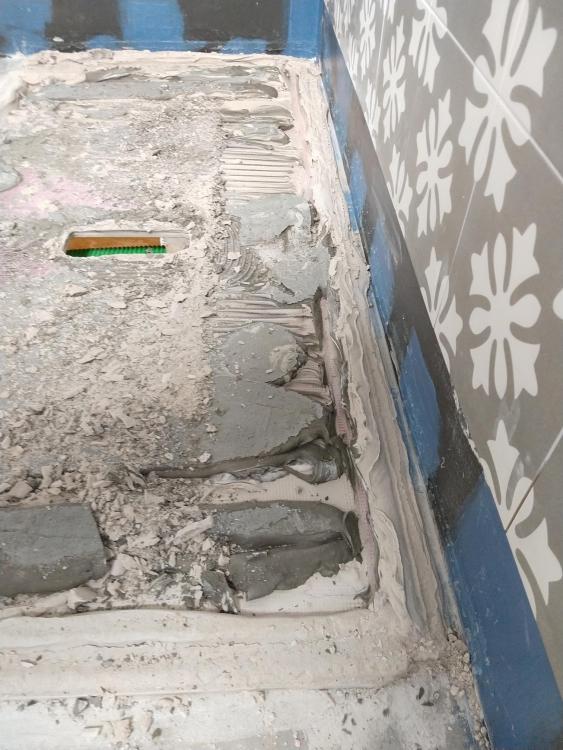
Thanks @nod, I'm not overly familiar with laying large format tiles to be honest. The underside of the tray is far from flat, around 30mm of slope, so wondering how you accommodate it in the bedding mix without using two bags of adhesive.
-
If the tiles are hard it will wear the diamonds down. Get a softish house brick and dress it across the spinning blade, this will pull the adhesive from the blade and expose fresh diamonds.
-
Yesterday I attempted to fit a large tray (1800x900). I decided to use tile adhesive as whenever I've used mortar, all be it in a smaller tray, I found it was difficult to bed down. Anyway the tile adhesive was better to work with, but I didn't put enough in the corner of the two walls, it was spongy and I left it overnight to see if it was just the adhesive being able to 'pant' before it hardened, anyway this morning it was no better, so I pulled it up. Question is what to do different, it needs nearly 40mm of something and I'm now thinking of putting some spare egger floor board down and gluing/screwing that in first to bulk it up and not need as much adhesive, then I can hopefully use a proper notched trowel. I'm guessing the likes of @Nickfromwales might have some words of wisdom, should I just make loads of dollops of adhesive or is there a better way?

-
Cutting a BSP thread in 1/2" iron pipe using
JFDIY replied to SillyBilly's topic in General Plumbing
Those dies aren't adjustable, they cut a tapered thread. I've a similar set, did a load of compressed air in my garage years back, anyway I guy I worked with borrowed it to thread a gas pipe for his plumber and managed it. I'd say access will be a bigger part of the puzzle, the die goes on the way you have photo'd it and the ratchet job beneath that, so having room to swing it might become a fair task. At the end of the day, unless you can get to the joint and undo the broken stub, what other choices have you got, it's already knackered....... -
The hole saw contraption is to enlarge an existing hole is guess, probably to let the ufh pipes pass.....
-
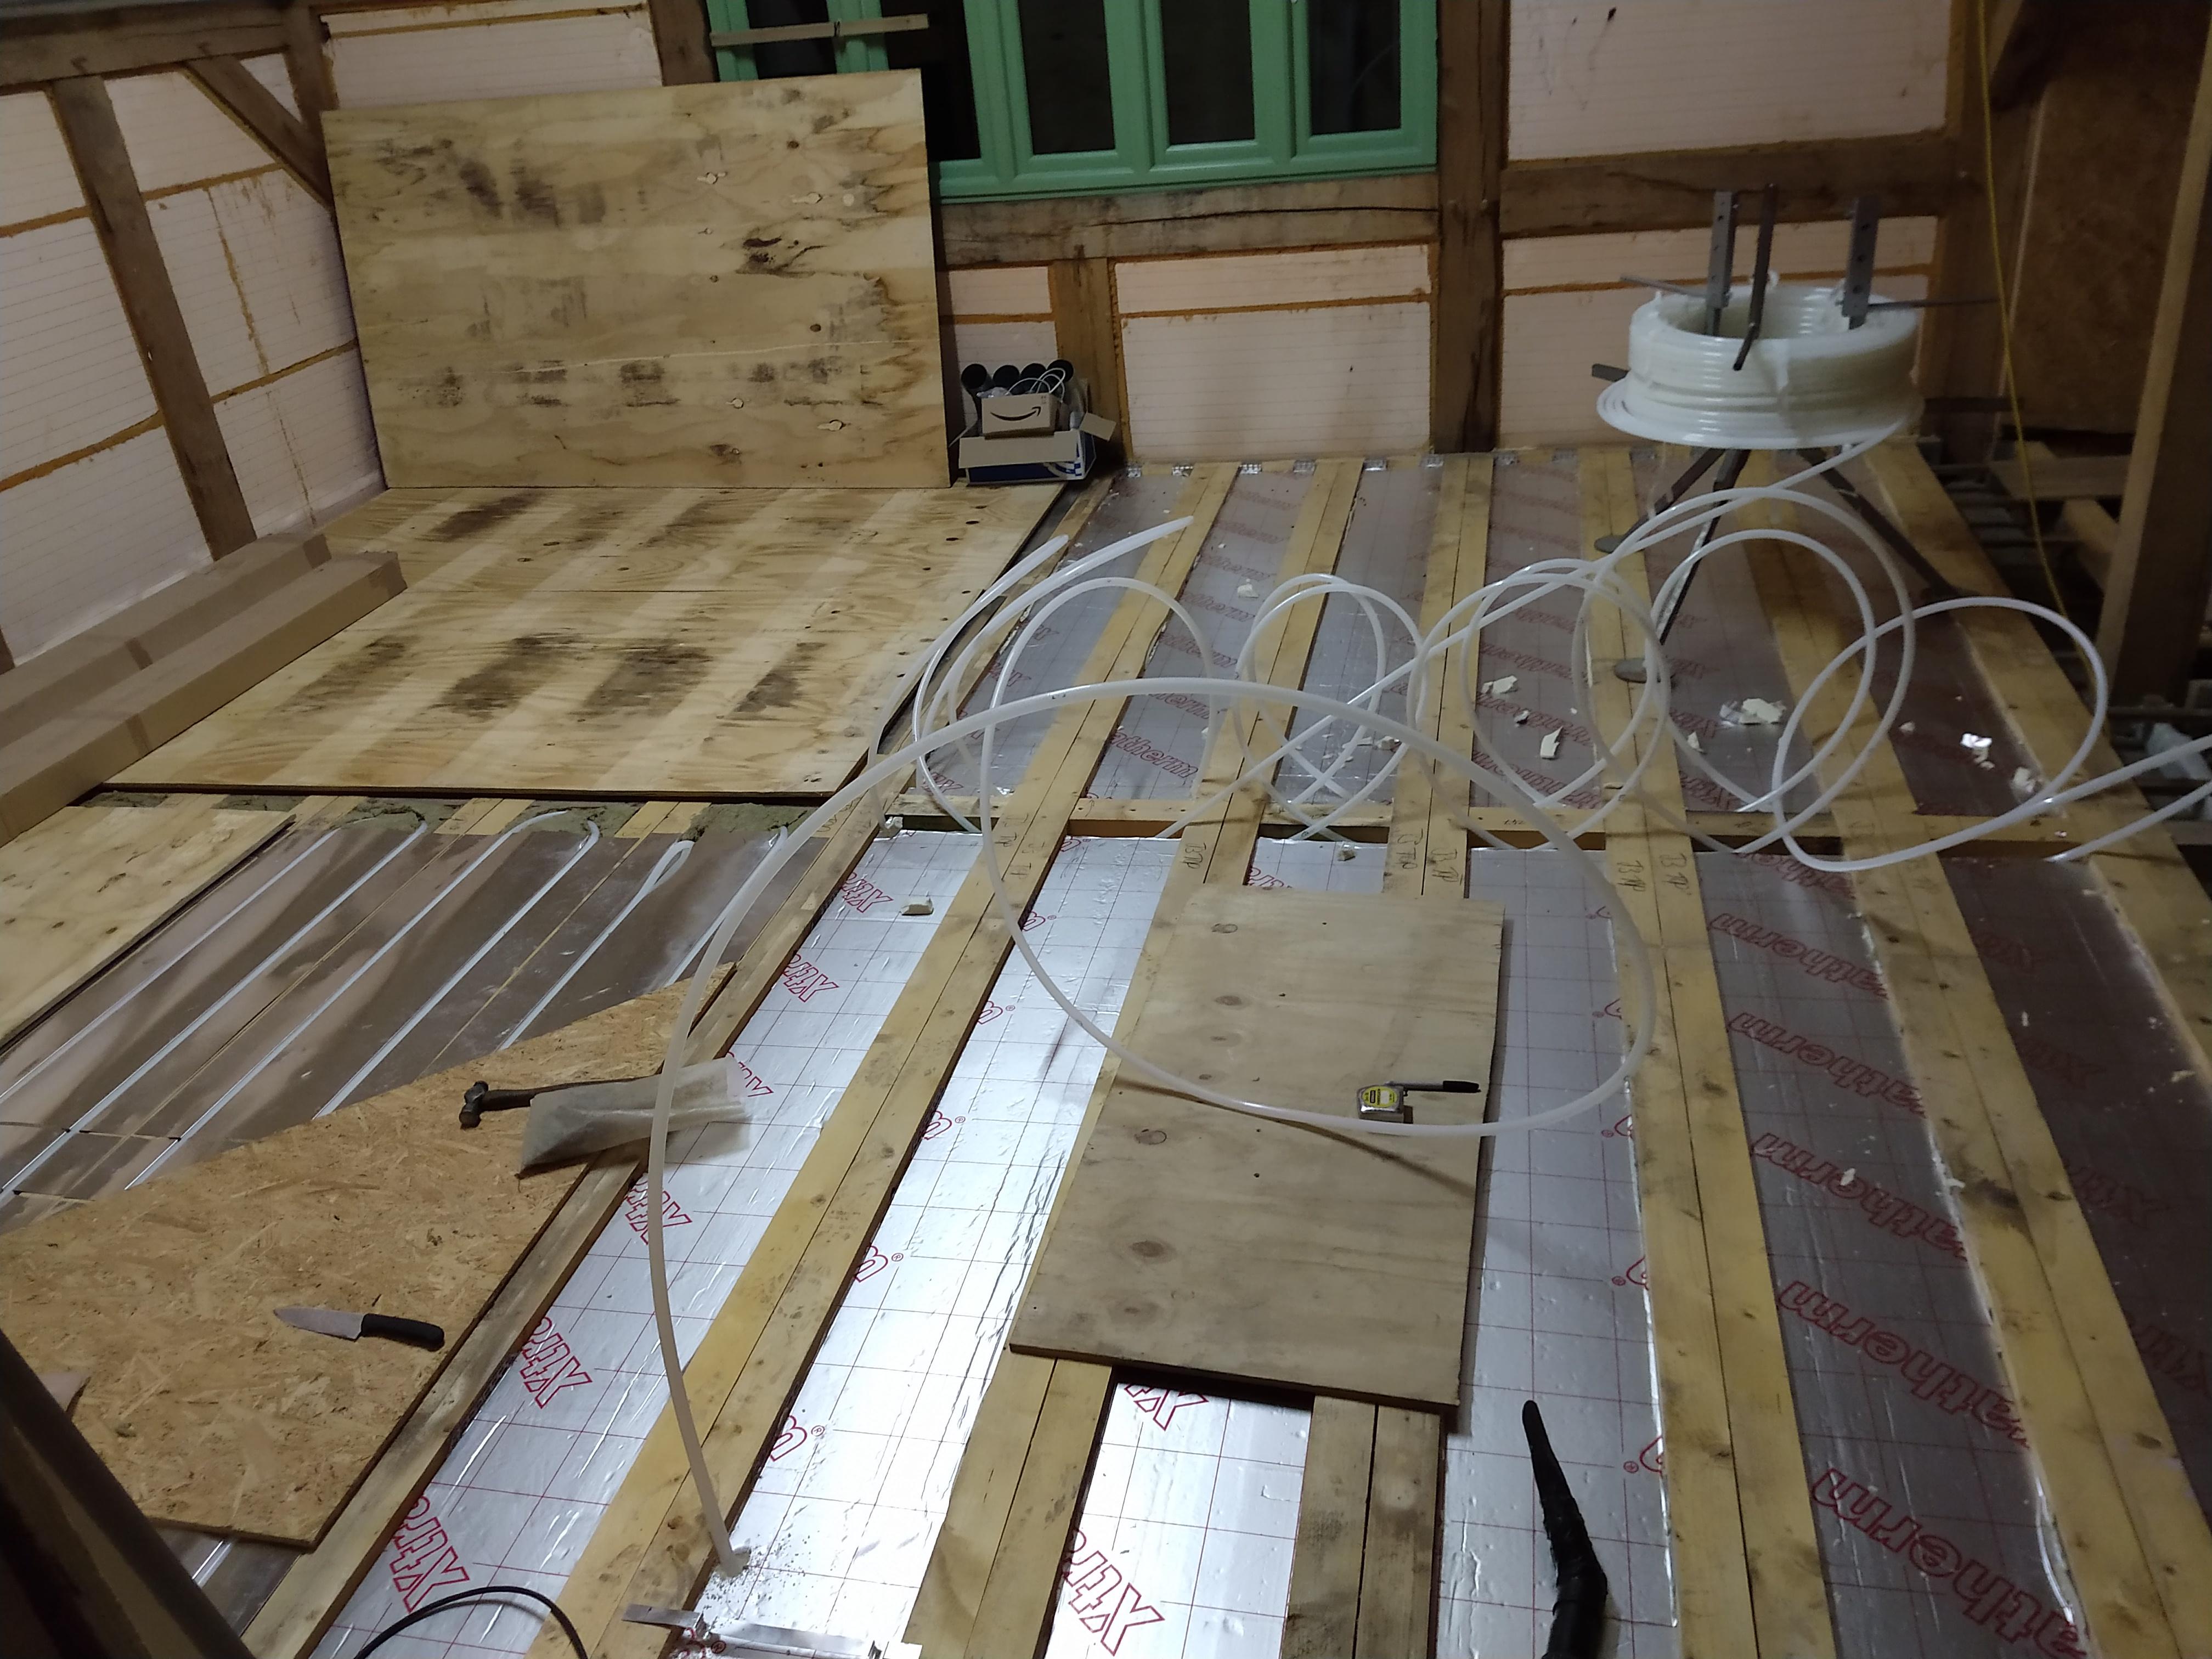
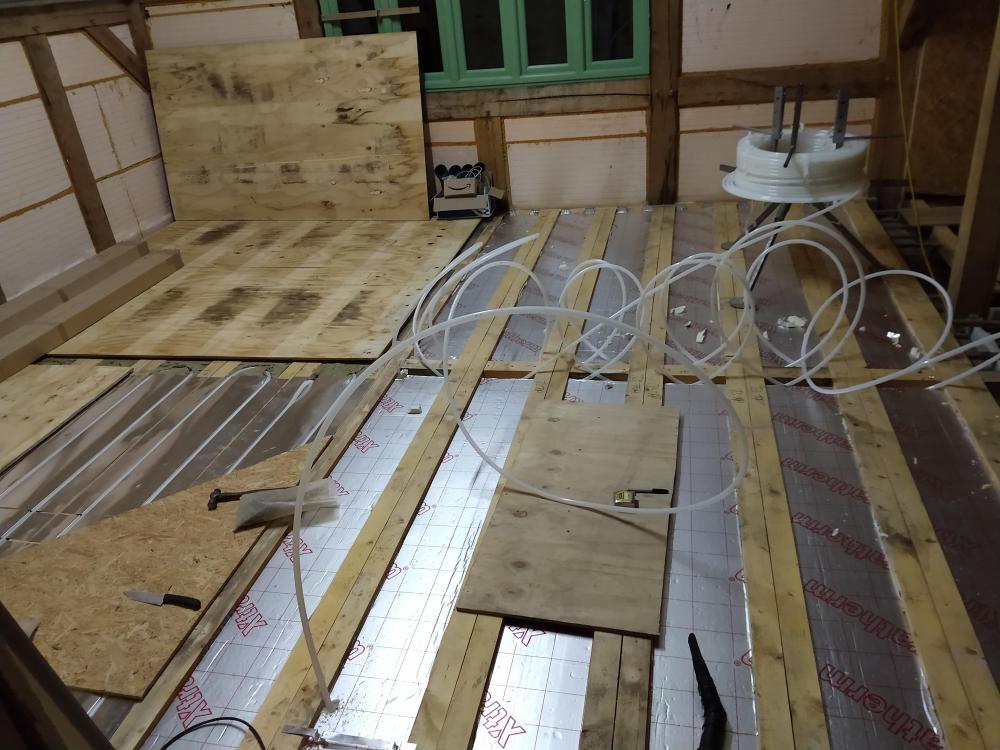
The other rooms I have will be done using similar layout, but using the fit from below spreader plates as is easier I think
-
If you use flexible pipe and plan your route, posi joist can be done with no loss in height. Here's mine half way through You just keep your loops within the joist at the ends and cross over/ under in the middle

-
Be warmer than that bathroom then.?
-
Demolish barn to add extension to main dwelling
JFDIY replied to freeze's topic in Planning Permission
I'd get some advise from local agents in the agricultural sector, find out what others have got through, there's one agent in our area who seems to know everything, because they do all the farm sales, insurance valuations and so on. Then put in for your big extension on its own, and as a last resort offer to reduce the other building. You may get lucky and get the extension without the forfeit of the other barn, they are so far apart that it probably won't factor as much as you think. -
No reason why not, if you use plasterboard adhesive you then need to mechanically fix through the dabs, as it doesn't stick to backer boards I guess tile adhesive would work. I think Delta board give fairly comprehensive instructions on all methods of fixing, search out the 7Mb version of their instructions.
-
Not problematic, just if you want the outside looking fresh it will need cleaning and re-sealing every couple of years, were letting ours steadily go silver for a bit. The big things for me are make sure you fully understand and are happy with the infill panel system, ours while on the face of it looks good, has suffered from poor detailing, as the oak shrinks (say >3mm across width) the panels need to allow this, ours has broken it's bond and leaves a gap around the panels, which reduces the airtightness. admittedly normally you'd have plastered it sooner (so wouldn't see it), and the plaster would help hold the panel from moving a bit. But I've had to cut out the panels upstairs and re-seat them in the proper place as they were bowing outwards by 5mm. A neighbor also has a similar frame (by the same supplier), but theirs is 10years older and I noticed their panels were also displaced and by a greater amount. If you fancy a look round, drop me a message, we're in the midlands