
BotusBuild
-
Posts
1379 -
Joined
-
Last visited
-
Days Won
10
Everything posted by BotusBuild
-
I bought one of these https://www.amazon.co.uk/gp/product/B07F8LFRCF/ref=ppx_yo_dt_b_asin_title_o01_s00?ie=UTF8&th=1 It was £89 when I purchased it in Oct 2023
-
A bit like the clip together flooring. Interesting product/business idea
-
Ready to order plasterboard and see claims you can decorate straight onto the plasterboard, implying no need to do a plaster skim. Am I reading this right? And if so, then the main question (a la Shakespeare) is whether to skim or not. Pros and cons?
-
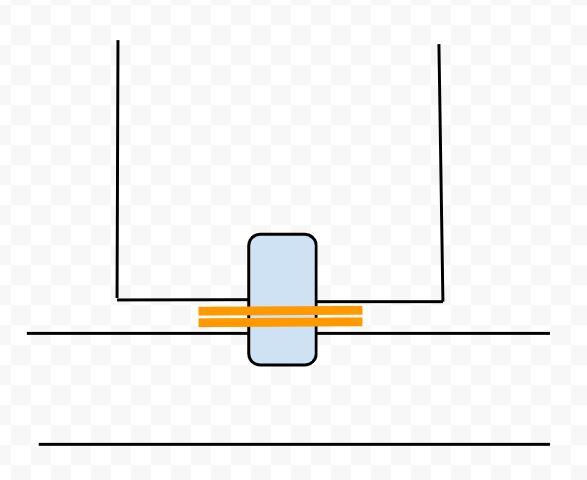
Which adapter should I get to connect the 20mm plastic conduit pipe to the socket metal back box? Male or Female? Logic says female. But logic has been wrong before.
-
Best electrical back box for ICF
BotusBuild replied to freshy's topic in Insulated Concrete Formwork (ICF)
For transparency - LZOH/LSZH is about 20-25% more expensive on a quick internet search -
Best electrical back box for ICF
BotusBuild replied to freshy's topic in Insulated Concrete Formwork (ICF)
Just about to do this myself. Using metal boxes with conduit running through the EPS (Nudura in my case) then an adapter to hold the conduit to the metal box. The key thing is the cable must NOT touch the EPS. -
Slab/Raft Foundation - Steel Reinforcement Question
BotusBuild replied to TonyE's topic in Foundations
Next time. NOOOOOOOOOOOOOOOOOOOOOOOOOOOOO - one house build has been enough 🙂 Hang on - I have a garage to build and an outer porch floor to pour -
At the top of the page click on your forum name - choose Manage Followed Content - click the appropriate button 🙂

-
A subtle (or crazy) feature of the forum - you have to "follow" you're own posts Admins - is there a way to setup "auto follow own posts"?
-
Glad it wasn't just me. They still insisted on sending too many bits that I have not used.
-
I didn't pay for the design. But I ended up with some extra ducting from what they reckoned I needed!!
-
I presume the same applies for plasterboard (guess what one of my next big purchases will be)
-
Best thing to do is to remove the show screen and refit the screen. Before refitting, clean the tile and bath surfaces really well and then use methylated spirit to clean away any greasy residue (including that from your fingers!!) Refit after having made sure that there is appropriate waterproof (bathroom) sealant between the bath and the hinge and the tiles and the hinge.
-
Slab/Raft Foundation - Steel Reinforcement Question
BotusBuild replied to TonyE's topic in Foundations
I had this problem, and there was a lot of "squashing" of high chairs and "fettling" of U bars. Alongside all of that I was fitting the UFH pipes to the mesh and trying to keep the whole lot with a 50mm coverage. It can be done!! Take time to think through the laying of the mesh. FYI - 2 layers of A393 is 30mm in thickness if you overlap them, not 20mm. If you get the overlapping at 90 degrees to each other that goes up to 40mm
-
Ooooh, we're nearly back on topic with mention of the BUS grant 🙂
-
Not of the final bracing, but it was follows: Scaffold boards laid sideways, then heavy concrete blocks every 2m or so, then some extra packing before driving 12mm rebar offcuts 600mm or more into the ground (so each piece of rebar was about 1200mm in length. Our pad is partial sub basement, so where we were in a hole (like most of the build time 🙂) I also braced between the side of the hole and the scaffold boards for extra security. Might be overkill, but worth the peace of mind, and not having to run around like a headless chicken at pour time if anything went wrong
-
Whatever you do, DO NOT rely on the upstand itself to withhold the pressure of the concrete. BRACE, BRACE, BRACE as they say when the plane is about to ditch. We used Jackon for our slab foundation, and it was very well braced come pour time.
-
Just spoke with someone who seems to be prepared to accept that I know what I'm doing and talking about, and will trust my heat loss calcs (based on Jeremy's ss). Will report back on what transpires
-
Context: asked for a quote for an ASHP + 300L cylinder and UFH buffer tank (for a zoned UFH system fitted by myself) Following MCS guidelines the heat loss calculations have resulted in a 6.0kW Mitsubishi Ecodan being specified along with a 300L UVC and a 30L buffer tank. From the quote: The total cost for the complete system detailed in the above specifications will be £6,764.62 + 0.00% VAT. A £7,500 Boiler Upgrade Scheme voucher has been deducted from the installation cost above. So a total of £14,264.62. A quick interweb search: Ecodan 6kW - £3,162.66 300L UVC for ASHP (I'm going high cost case with a pre-plumbed unit) - ~£1,800 30L buffer tank - ~£300 Ancilliary pipe, cable, switches etc - I'm going to allow for £1,000 which I think is fair give the pre-plumbed cylinder. Note there is no UFH related kit except for the 30L buffer tank. So I make that a total of £6,262.66 Leaving £8001.96 for labour !! Two people to get all the parts into place (2 hours each) One plumber to do their work (12 hours being generous) One electrician to do their work (4 hours being generous) TOTAL hours: 20 hours Hourly rate: £400 Even if we round it up to 3 full days (24 hours) that's £333/hour I will let you all choose the first optional word to the two word phrase "******* off"
-
They would likely work, but what about doing something like this ... Dowels top and bottom of each vertical slat, short at the bottom, with a shallow hole in the bottom horizontal rail. Put two metal washers over the dowel before locating in the hole. At the top, the dowel and hole would be longer. Insert the top first, drop the bottom into place. This assumes you are fitting the top and bottom rail first then adding the slats. Otherwise, no need to make the top dowel and hole longer.
-
Got any pictures of the current situation and the drains that are to be fitted?
-
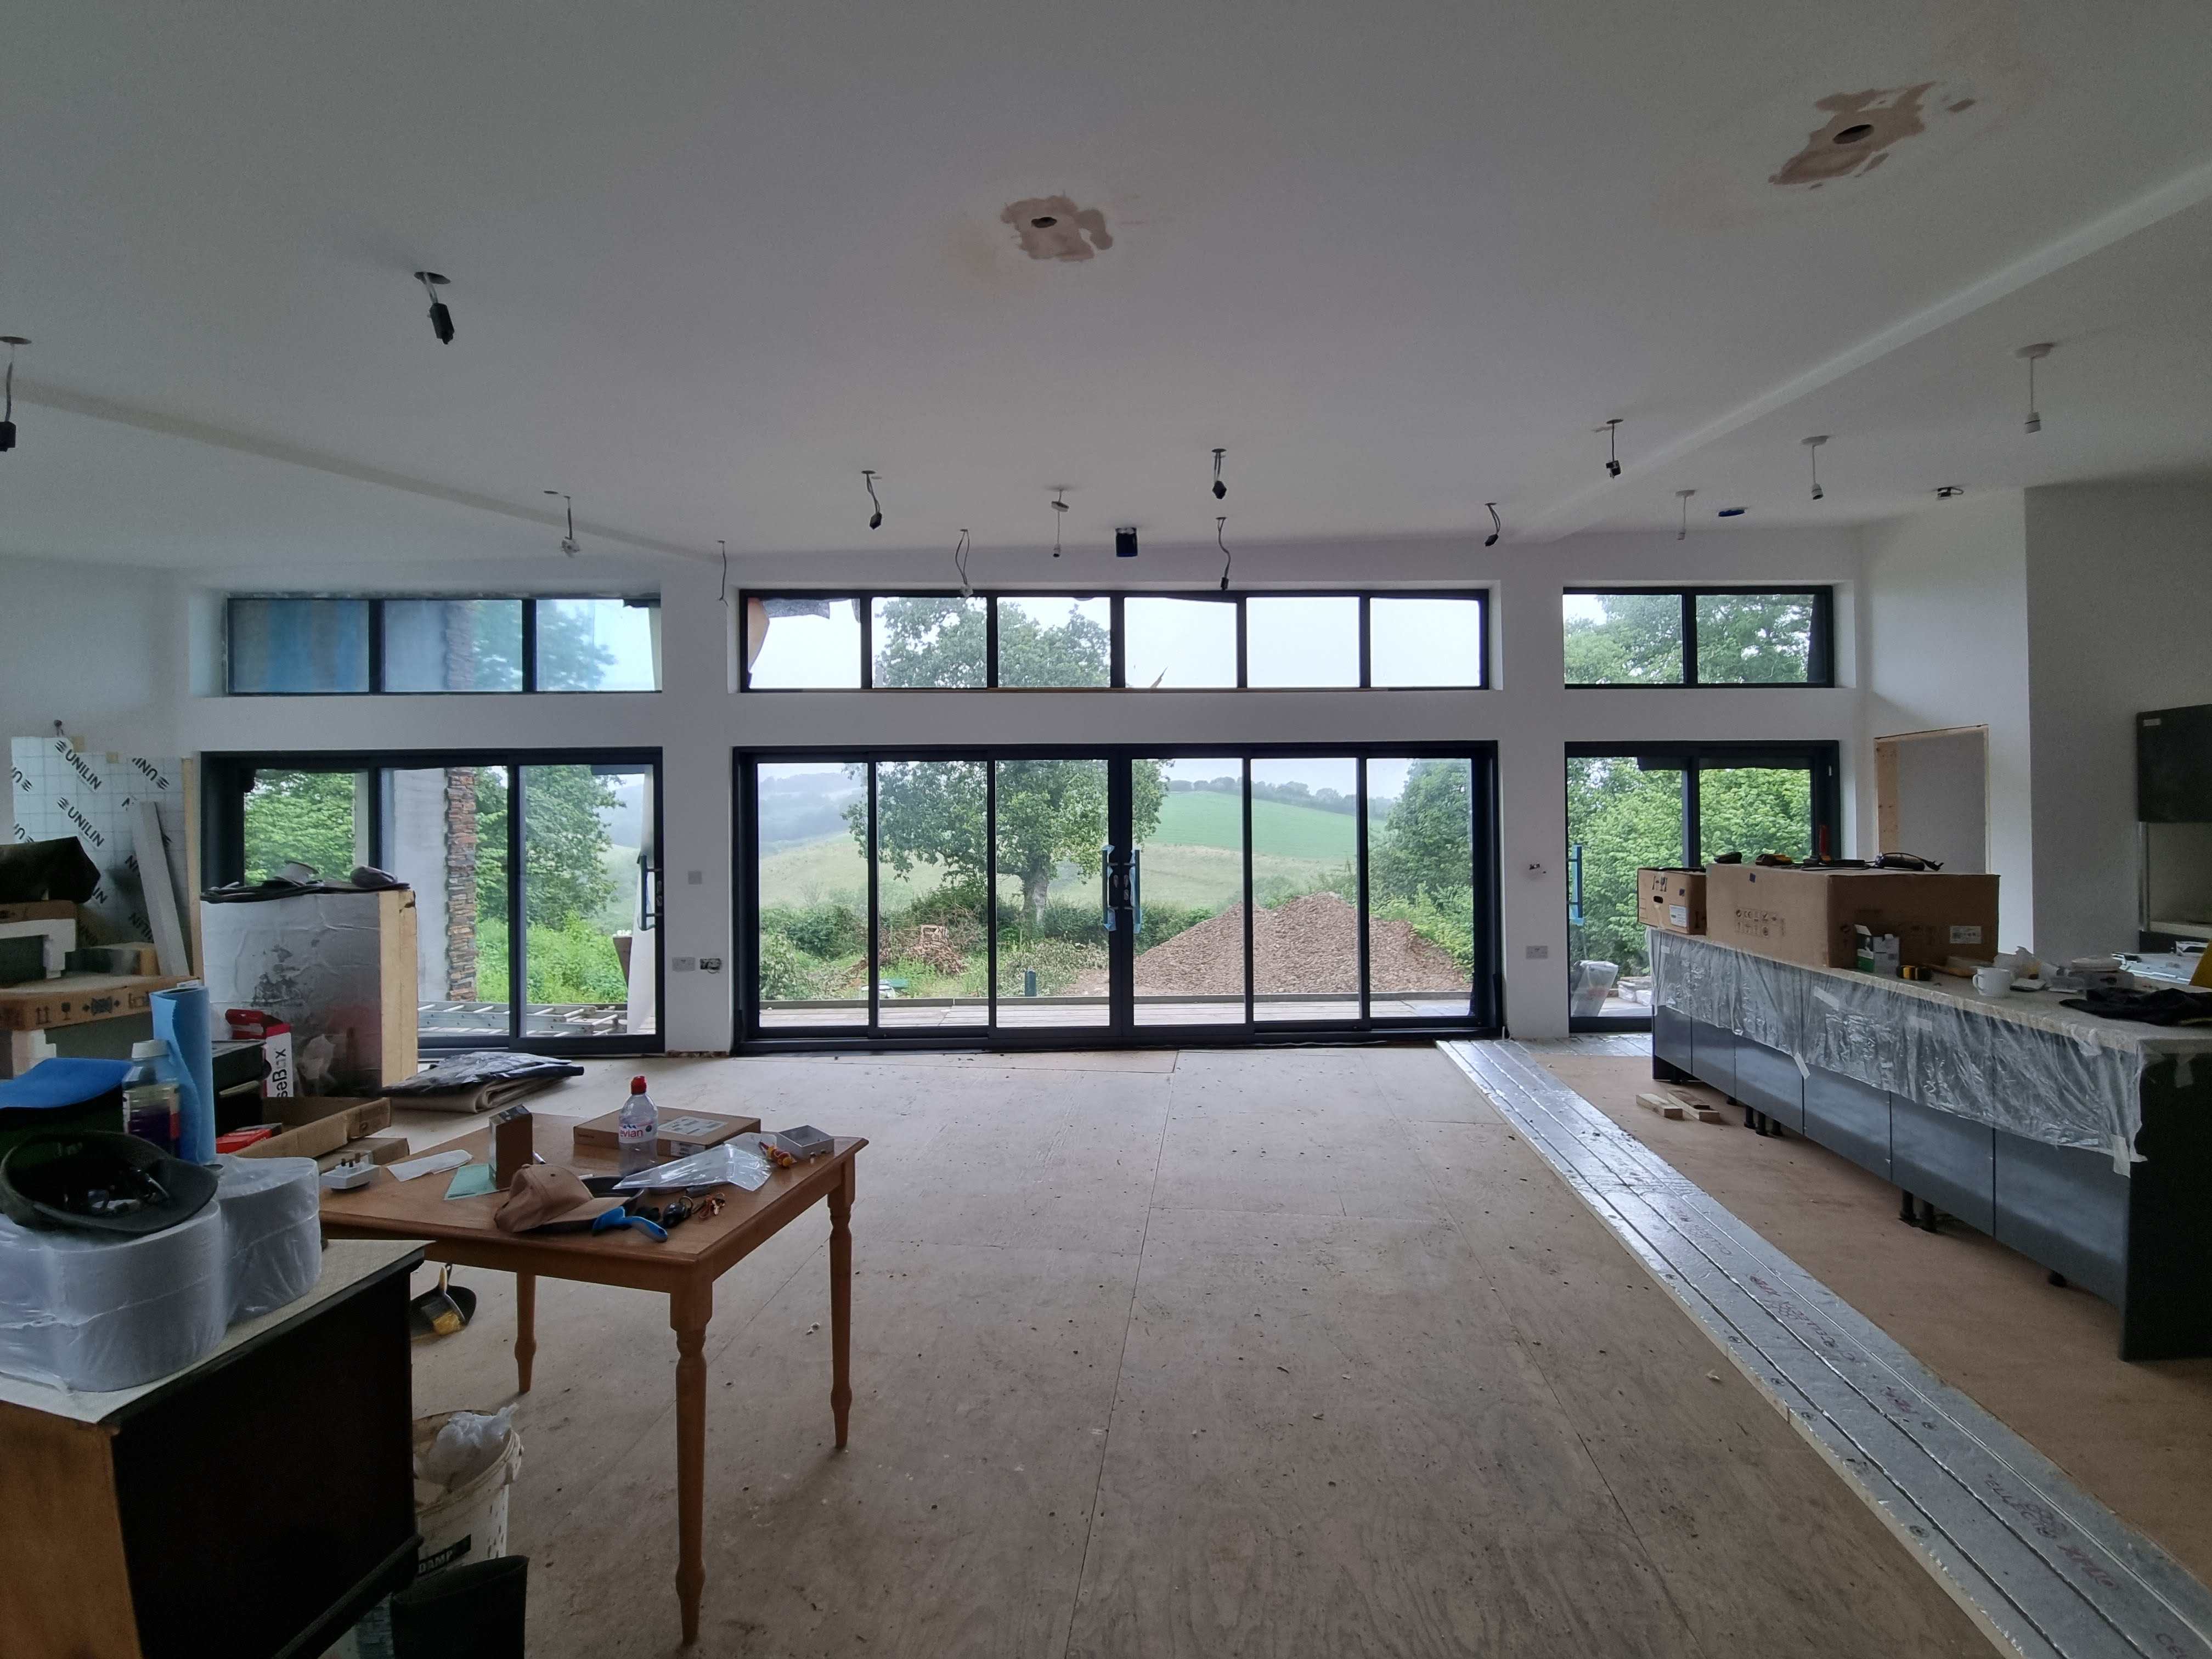
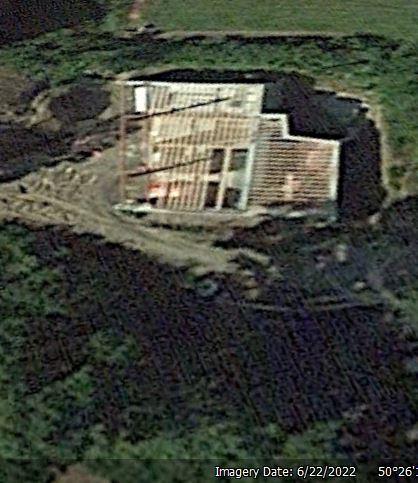
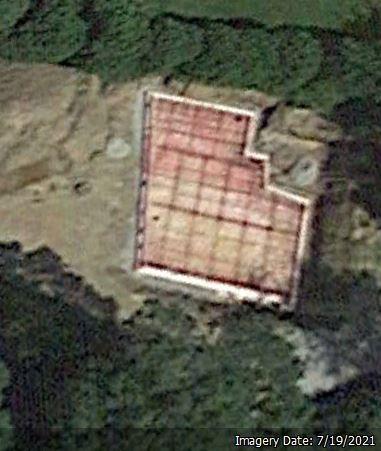
A time-lapse (of sorts)
BotusBuild commented on BotusBuild's blog entry in South East Cornwall Low Energy build
Might have to invest in a small drone to update the Chinese and Russians on a more regular basis 🙂 -
A time-lapse (of sorts)
BotusBuild commented on BotusBuild's blog entry in South East Cornwall Low Energy build
Got bored and was down another Internet rabbit hole ending up on Google Earth and the timeline feature, and came up with another version of the timelapse. Match the pictures to the satellite imagery 🙂


-
8.5kW Ecodan - expected cost for annual service?
BotusBuild replied to Happy Valley's topic in Air Source Heat Pumps (ASHP)
TBH you can do what is necessary yourself unless you think there is something not right with the unit. Check for any loose wires (carefully of course having isolated it), and remove any debris that may have built up at the rear of the unit e.g. leaves, feathers. Use a vacuum if necessary to remove any dust. That's about it. -
What do you do if you have 21 windows. Sell nine 1 inch brushes 🙂 (if my maths is correct)