Nickfromwales
-
Posts
30306 -
Joined
-
Last visited
-
Days Won
295
Everything posted by Nickfromwales
-
+1. "Where there's a will, there's a way"........the Buildhub way
-

Securing Bar Shower valves
Nickfromwales replied to JanetE's topic in Bathrooms, Ensuites & Wetrooms
Until one arrives, I'll try and fill the void. -
The adjustable bends Jeremy mentions usually have quite a large collar on each universal joint so can be quite wide, depending on manufacturer. Fwiw, I've done plenty of soil stacks and have always simply pulled the pipe square. Never had a leak or a comeback tbh. You could use a clip at the outer edges of the run, and then use patent band / similar to fix at the elbow I suppose. That would put the bend tight against the wall in the corner and remove 50% of the overshoot. Ive never had a problem using 92's for exact 90o bends, and, if it's 110mm pipe runs, I'm really struggling to see the issue if I'm completely honest. @ProDave Your issue will be worse as there's little to no 'give' in rainwater products I sell on all my exterior work tbh, so can't offer any help here, sorry.
-
+1. Always avoid protrusions and then the plasterer has a flat clear surface and you get a much better plaster job / finish. That's the reason I first fix all the downlights, with the cables coiled up loosely, and then drill through the plastered ceiling the day after and fish the cables out. Quite easy if you draw a reference 'map' and note the positions down .
-
Securing Bar Shower valves
Nickfromwales replied to JanetE's topic in Bathrooms, Ensuites & Wetrooms
He's already sacked ! Didn't fill the screw holes with silicone before putting the screws halfway in, and then another dab behind the screw head before fully tightening. . 8/10 I really don't like seeing compression going onto push fit and with those tails secured in the wall, if the plastic pipe got damaged prior to / during fitting, your buggered. I don't like those odds, especially when your tiled and grouted by that stage. He also didn't mention hand tightening one nut of the shower onto one fully tightened backplate, and then offering the other into a partially tightened backplate to allow some lateral movement. That way if your not dead on 150mm centres ( not the 1500mm he's says ! ) you can still get the second nut on, and then using a long reach pozidriver, you can tighten up the screws accordingly. Once tightened, remove the bar mixer, screw on the covers and refit the bar mixer, and then test. What he also doesn't say is that water can leak back down the pipe work from these kits, so you wouldn't know until a lot of water has gone behind the wall / void. Another reason why I insist on copper, as you can tighten the olive much more firmly. I did like the bit where he says "Lovely!" . Overall he gets a 6/10. Good, but no cigar sorry. -
Securing Bar Shower valves
Nickfromwales replied to JanetE's topic in Bathrooms, Ensuites & Wetrooms
No. Convert to copper prior to exposing the pipe so you can make the pipe off satisfactorily into the compression fittings of the kit I linked. I never terminate push fit of any breed into compression, always convert back to copper first. Have the push fit rising to a Hepworth straight coupler and then ( if you have the depth ) pull a bend mechanically, if not use a Hepworth bend, but you must have copper exposed for the final connection. In most situations, with stud walls, you not be able to bend the push fit pipe at 90o anyway, as the available depth wouldn't allow you to maintain the stated minimum bending radius . -
Securing Bar Shower valves
Nickfromwales replied to JanetE's topic in Bathrooms, Ensuites & Wetrooms
In my spare time of course -
Securing Bar Shower valves
Nickfromwales replied to JanetE's topic in Bathrooms, Ensuites & Wetrooms
I'll elaborate a bit more later, ( when this combis fitted ). ? -
Securing Bar Shower valves
Nickfromwales replied to JanetE's topic in Bathrooms, Ensuites & Wetrooms
Sorry I'm late to the party These are the ones I use. Just fit a couple of 18mm plywood squares where these are to be fixed ( drill the ply to take the pipe centrally ) and that's it. No need for any of the above complexity ( and I used to use the supplied cranked unions when I first started , never again ) and bobs your uncle. -
I'd be quite concerned if my architect was basing his preferred construction method on vehicular impact . I'd expect a slightly more 'relevant' argument.....wouldn't you?
-
Ok, daft question , but what's the appeal of these boilers to the extent that you've chosen to chase this up? They're not mega cheap so what gives?
-
That's pretty much the point where I'd ask him to shut the door on the way out
-
Soil stack to 110 drain -- the wrong way and right way
Nickfromwales replied to TerryE's topic in Waste & Sewerage
A new hand saw such as a Jacksaw is my weapon of choice. Nice wide blade to keep the cut straight and true. The multi tools tend to melt / cut through so be prepared to have to do some extra de-burring if you use that. I do use them for this task occasionally, but only in adverse situations. -
Bath Surround / Boxing In, and concealed pipework
Nickfromwales replied to Onoff's topic in Bathrooms, Ensuites & Wetrooms
2nd place is still a trophy mate -
Bath Surround / Boxing In, and concealed pipework
Nickfromwales replied to Onoff's topic in Bathrooms, Ensuites & Wetrooms
One of a few decent looking ones. http://m.ebay.co.uk/itm/Manthorpe-Tile-Access-Panel-GLTAP-500-/272270041907?nav=SEARCH -
Bath Surround / Boxing In, and concealed pipework
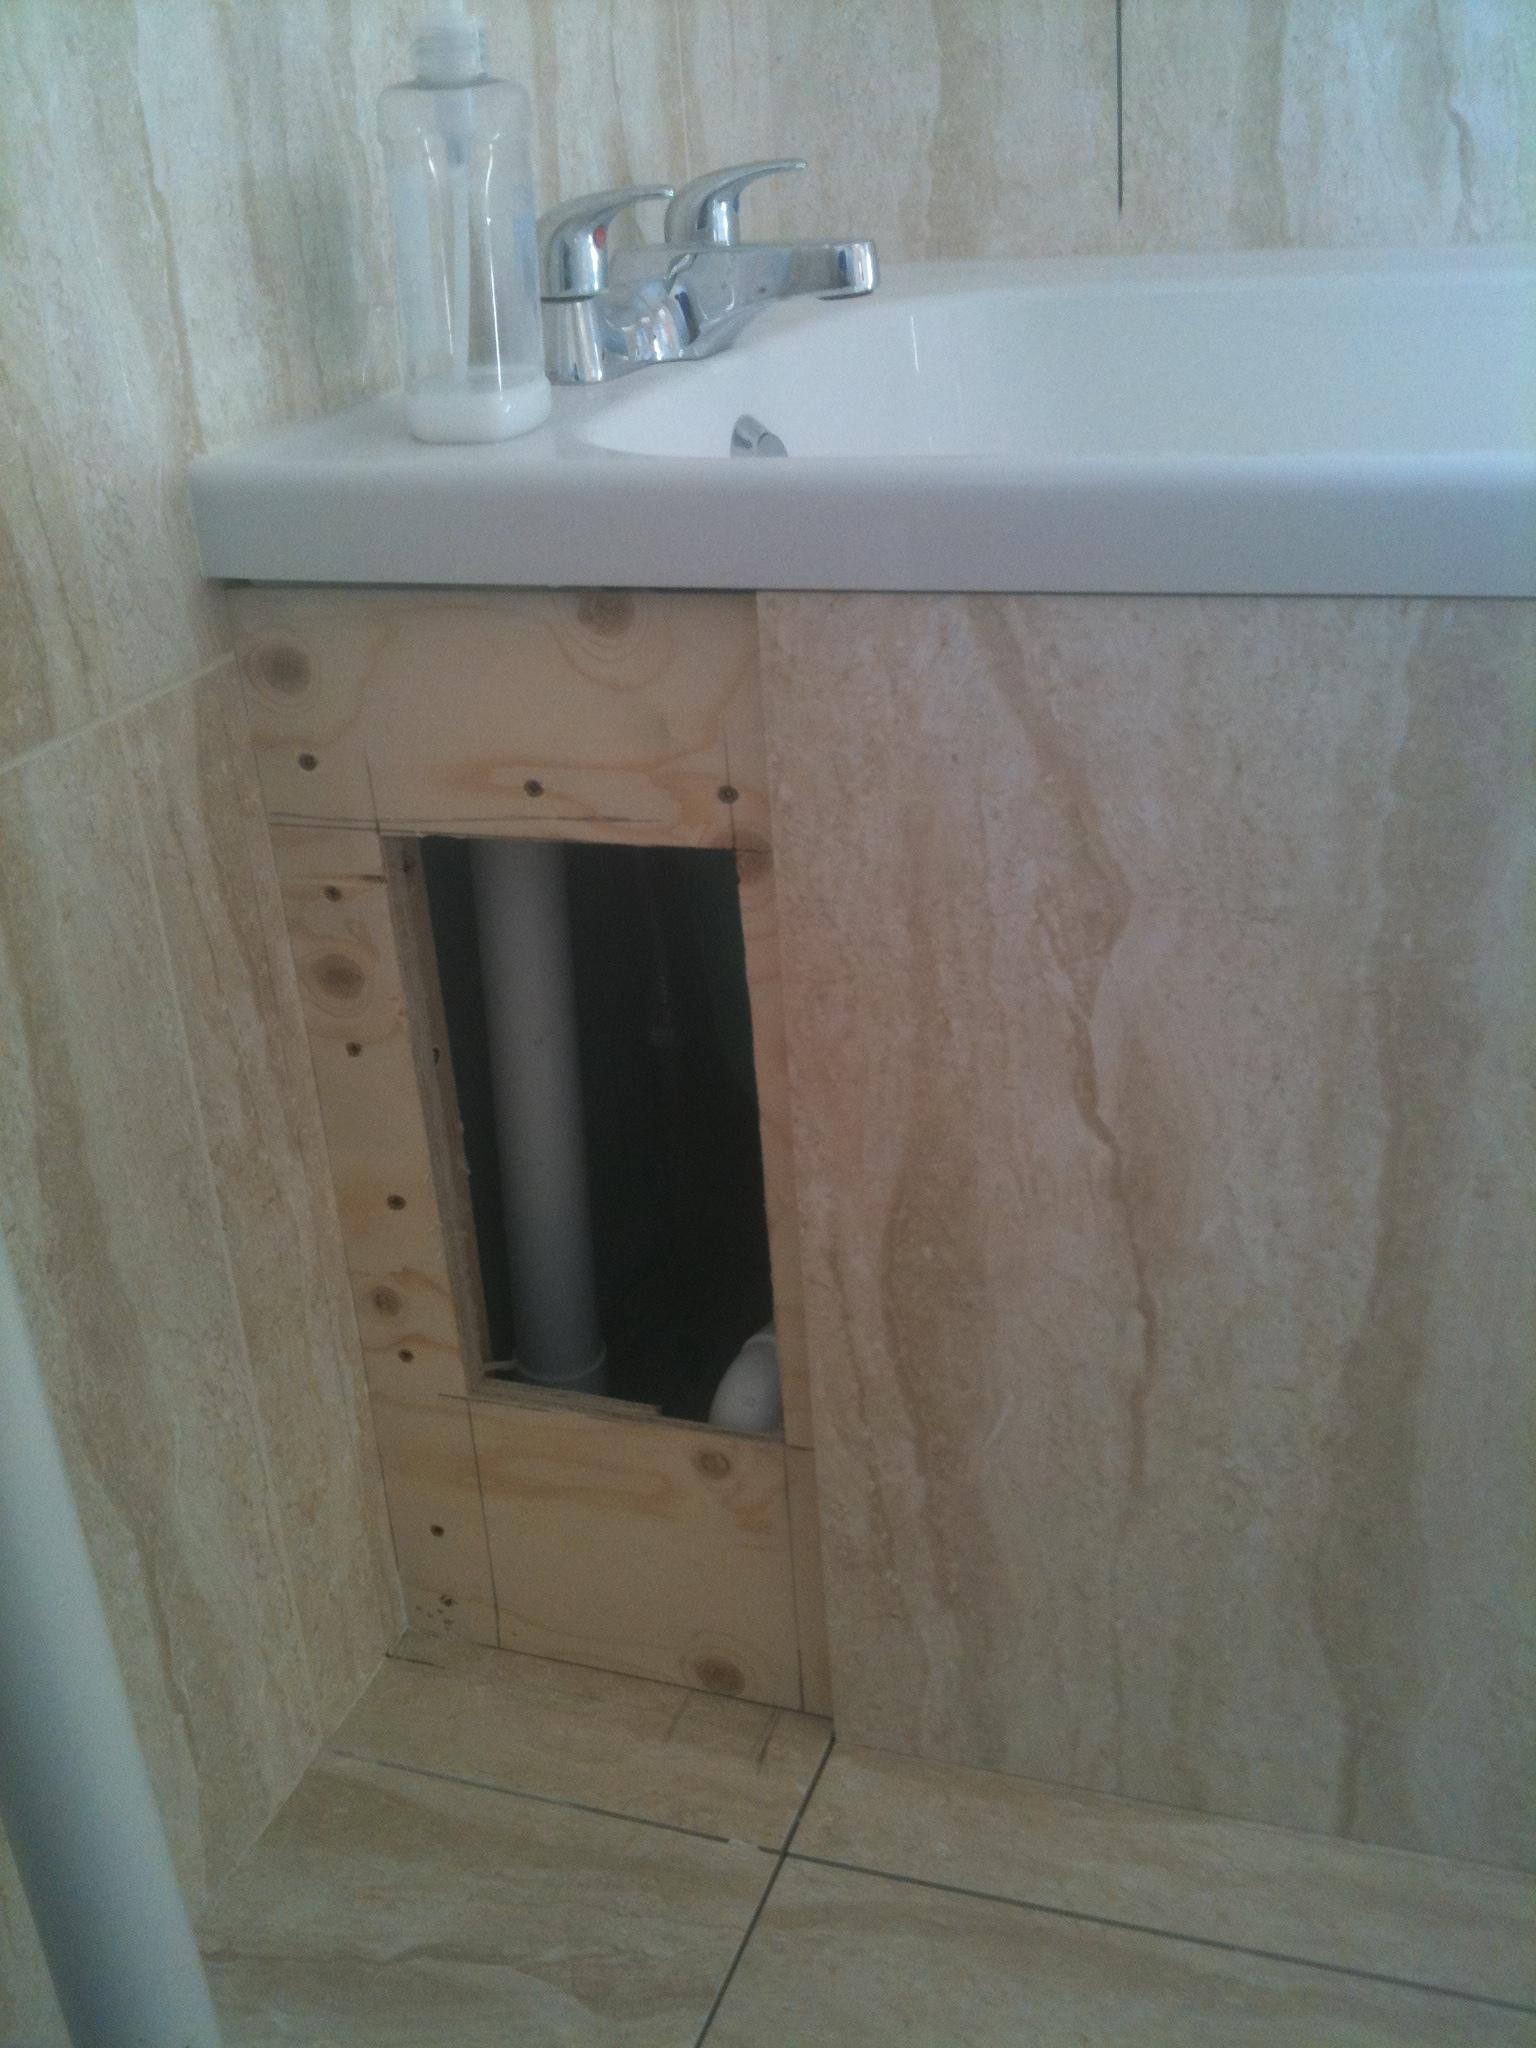
Nickfromwales replied to Onoff's topic in Bathrooms, Ensuites & Wetrooms
I usually cut a section of plywood out and fix a tile on with 4 or 5 50p size blobs of mastic. The tile the gets grouted as normal and looks flawless. I tell the customer to keep at least one full box of tiles, and the idea is if you need to get in ever, you just cover the tile in gaffa tape and whack it in the middle to break it. Remove it and clean up, change whatever and stick a fresh tile back. Fwiw most modern taps are all services from above . I only put an access option on these kind of jobs as there was also an air admittance valve ( on top of the white pipe shown ) so was more worried about that failing tbh.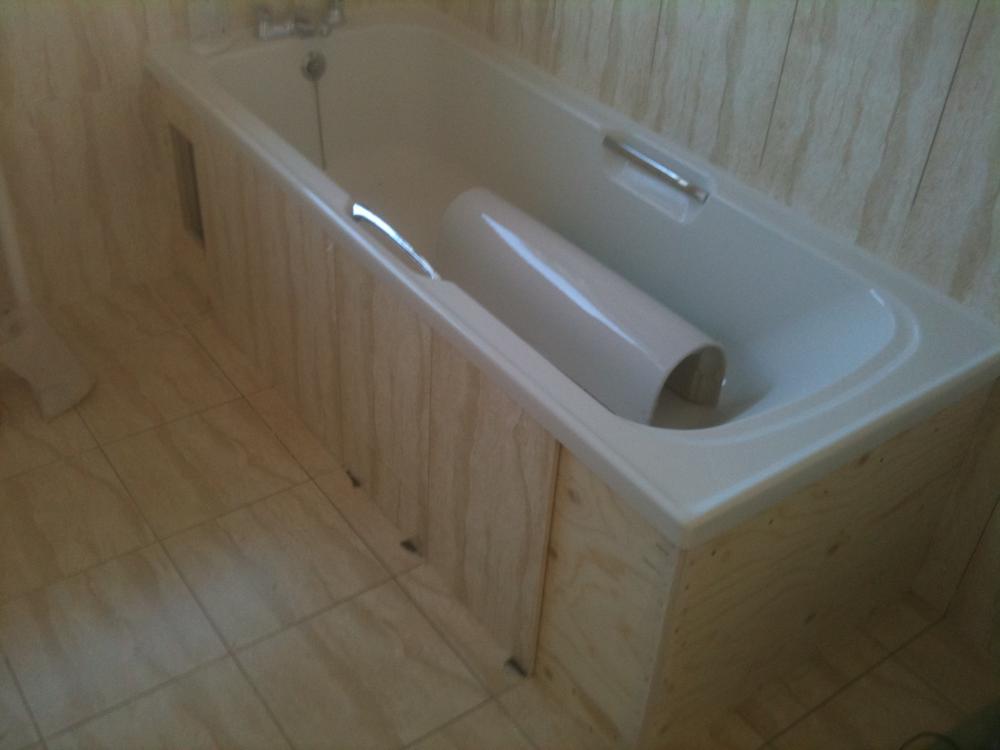

-
Wall or floor, ceramic / porcelain / natural......
Nickfromwales replied to Nickfromwales's topic in Wall Tiles & Tiling
FYI @sphannaby In addition to the above..,.. Remember that the 2- 3mm gap between the top of the batten / ply and the underside of the tray is to allow the bead of SF to create a cushion so the tray can flex slightly rather than sit on the timber directly. That's to allow for movement whilst your in the shower, singing and scrubbing. If your tray has a centre leg or more than one centre leg, leave these wound up and just set the tray by the outer ones. Leave the SF to cure ( 24 hours ) and THEN wind the other legs out to hand tight only. -
Wall or floor, ceramic / porcelain / natural......
Nickfromwales replied to Nickfromwales's topic in Wall Tiles & Tiling
Yup. Don't use the add-on upstands as they're useless without sealant anyway. Plus they come between the side of the tray and the wall, so stop you getting a good fix ( as your then relying on the double sided sticky tape to hold both bonded surfaces together where the upstand goes ). Dry fit the shower tray and set the height and level to suit. Draw around the upper edge with a pencil, and if you can reach do the same at the underside. Fit a batten around the 2 / 3 sides stopping 50mm short of each outer corner ( to allow fitting of the skirt / plinth ). A better option is to cut strips of 18mm ply and fit that like skirting board, so it sits on the floor and supports the underside of the tray in one solid section. Bond that to the walls with the Sikaflex ( SF ) and fix with a few screws going through into the studs, or rawlplug into the masonry. Set the battens 2-3mm shy of the pencil line and put a 12mm bead of SF atop for the tray to be offered down into / onto. Once you've got to that stage, draw the tray 15-20mm or so away, re-goop the top of the ply / batten, and then run two parallel lines of SF around the wall, one at half tray depth and another just shy of the top pencil line. Push the tray home against the SF and move it around a bit of possible to ensure the goop has taken well. DONT FORGET TO MAKE SURE THE PLASTIC FILM HAS BEEN REMOVED FIRST, ( if the tray has it fitted, some don't ). CHECK AND DOUBLE CHECK AS ITS SOMETIMES HARD TO SEE IT . Then follow the method described, in the thread I linked, re forming the SF upstand whilst the SF is all still wet / masking etc. Simples -
We have a site toilet... At last.
Nickfromwales replied to ProDave's topic in General Self Build & DIY Discussion
ugh. -
I somehow missed the part where I recommended the Hitachi gas nailer under my pseudonym. "Sparrow Fart" for the uninitiated. Thanks again, Ian .
-
We have a site toilet... At last.
Nickfromwales replied to ProDave's topic in General Self Build & DIY Discussion
Don't forget to whittle a loo roll holder -
Wall or floor, ceramic / porcelain / natural......
Nickfromwales replied to Nickfromwales's topic in Wall Tiles & Tiling
Have a read of this and see if that will suffice cone back with questions, no worries. -
We have a site toilet... At last.
Nickfromwales replied to ProDave's topic in General Self Build & DIY Discussion
Like his n hers? I bet you get whichever is coldest as your outnumbered ? -
We have a site toilet... At last.
Nickfromwales replied to ProDave's topic in General Self Build & DIY Discussion
Don't you mean bog? Happy days. -
If you don't hear from me ever again...............