Nickfromwales
-
Posts
31381 -
Joined
-
Last visited
-
Days Won
346
Everything posted by Nickfromwales
-
- 367 replies
-
- 1
-

-
- ireland
- timber frame
- (and 1 more)
-
Ah, the rustic look . A tin of yacht varnish over that should make it look a $million and make it waterproof.
-

Bath Surround / Boxing In, and concealed pipework
Nickfromwales replied to Onoff's topic in Bathrooms, Ensuites & Wetrooms
I tile to a 2mm grout line with the laser line and just have the laser lighting up the middle of the spacer. With ceramic I doubt that you'll be able to use plain spacers for every course from floor to ceiling without gaining / losing a bit. They're just not made to that good a tolerance so you'll end up using wedge spacers here and there anyhoo. Set the shortest piece of batten out and rest a tile on it, then put two spacers on it and another tile. Keep doing that until you reach the datum line and see how much you've lost / gained ( two man job if it's a few courses ) and adjust the batten height accordingly. You want to set it out so the first course of tiles sit on spacers THEN the batten which will allow you some wiggle room for when you get two ( wet ) courses high. You run a straight edge ( 1200mm level / other ), across every 3 tiles wide as your going, and if there are any peaks / troughs you just change the base spacer out to a wedge, pushing it in / out to suit, ( to push them in you'll have to chop the narrow end off a bit as it'll hit the PB ). Set the laser to the top of the second course, after you've stuck ( wet ) the first two tiles ( stacked one one the other ) and that'll then become your actual working datum. Go around the room those two courses high and allow them to set, first making double sure the gaps and top edge are perfect. Then you can lose the laser until you've gone another 2 courses high, at which point you reinstate the laser and go around the last row of spacers again changing out for wedges if / wherever necessary. Don't tile more than 3 courses high without checking / rectifying with the laser and wedges, but don't do it every course as that's just pointless. The laser is a guide but the straight edge is your friend, instantly ( and quickly ) pointing out any undulations. Note : "wet" means tile stuck on but the adhesive not yet set, so the tile can be adjusted. -
Maybe a lightly frosted one ? Sounds like a good idea to get some natural light, if there's enough available to make it worthwhile? Nice pic of some random wood and a bowl btw ?
-
Were ready when you are ? Its down to how confident you are that your plans will come to fruition, but building the shed first as storage and makeshift 'accommodation' / site office will be a good idea. If your site is even slightly remote I'd not fit the final windows, just the front garage door, and simply frame and double up on OSB ( screwed on from the inside ) for any other openings. Shell out on a good quality roller shutter and you'll then have some decent ( secure ) site storage, and add some security lighting and CCTV for good measure. You may have already said this, bit is there water and electricity there yet?
-
I read about how quickly nuclear radiation dissipates, so I'm sure we'll be fine if / when the two dodgiest haircuts in history 'have it out'.
-
Don't be disheartened. There's still world peace and perpetual motion to crack .
-
UFH with existing Radiators and system boiler
Nickfromwales replied to Silage's topic in Underfloor Heating
Unless you've got or intend to fit oversized rads then I'd stick with oil tbh. Ufh is a low temp system that's far better suited to an ashp's output, whilst still achieving a reasonable CoP. -
Usually you'll stud frame the entire wall, and also use that to hide the pipework etc.
-
Because they can . I went in there on a Sunday to buy some Ultra self leveller. Started off nearly £40, got it down to £20 after 5 mins of repeating "f@@@@g HOOOOOOOW MUCH?!?"
-
You said it
-
Change of a tenner a bag is a result .
-
-
I did think that tbh, but I am known for only opening my mouth to change feet
-
-
Yup. Guess which letter is on the hat
-
F The pipe between c and d is blocked
-
Other soft drinks are available.
-
Jesus. I go to get a can of sugar free Fanta, ( life on the razors edge ), and another question Any cementitious powder adhesive will do the job tbh, just take a small grinder to the underlying layer and scratch them up REAL good to get a key. ?
-
I think the list would be VERY big. . The only problem I see is updating it and maintaining the list so it stays current. Tbh, the information finds itself in each thread, relevant to the ongoing discussion, so probably best to keep to that IMO. We have a glossary of terms but as far as products go, that's a hell of a list .
-
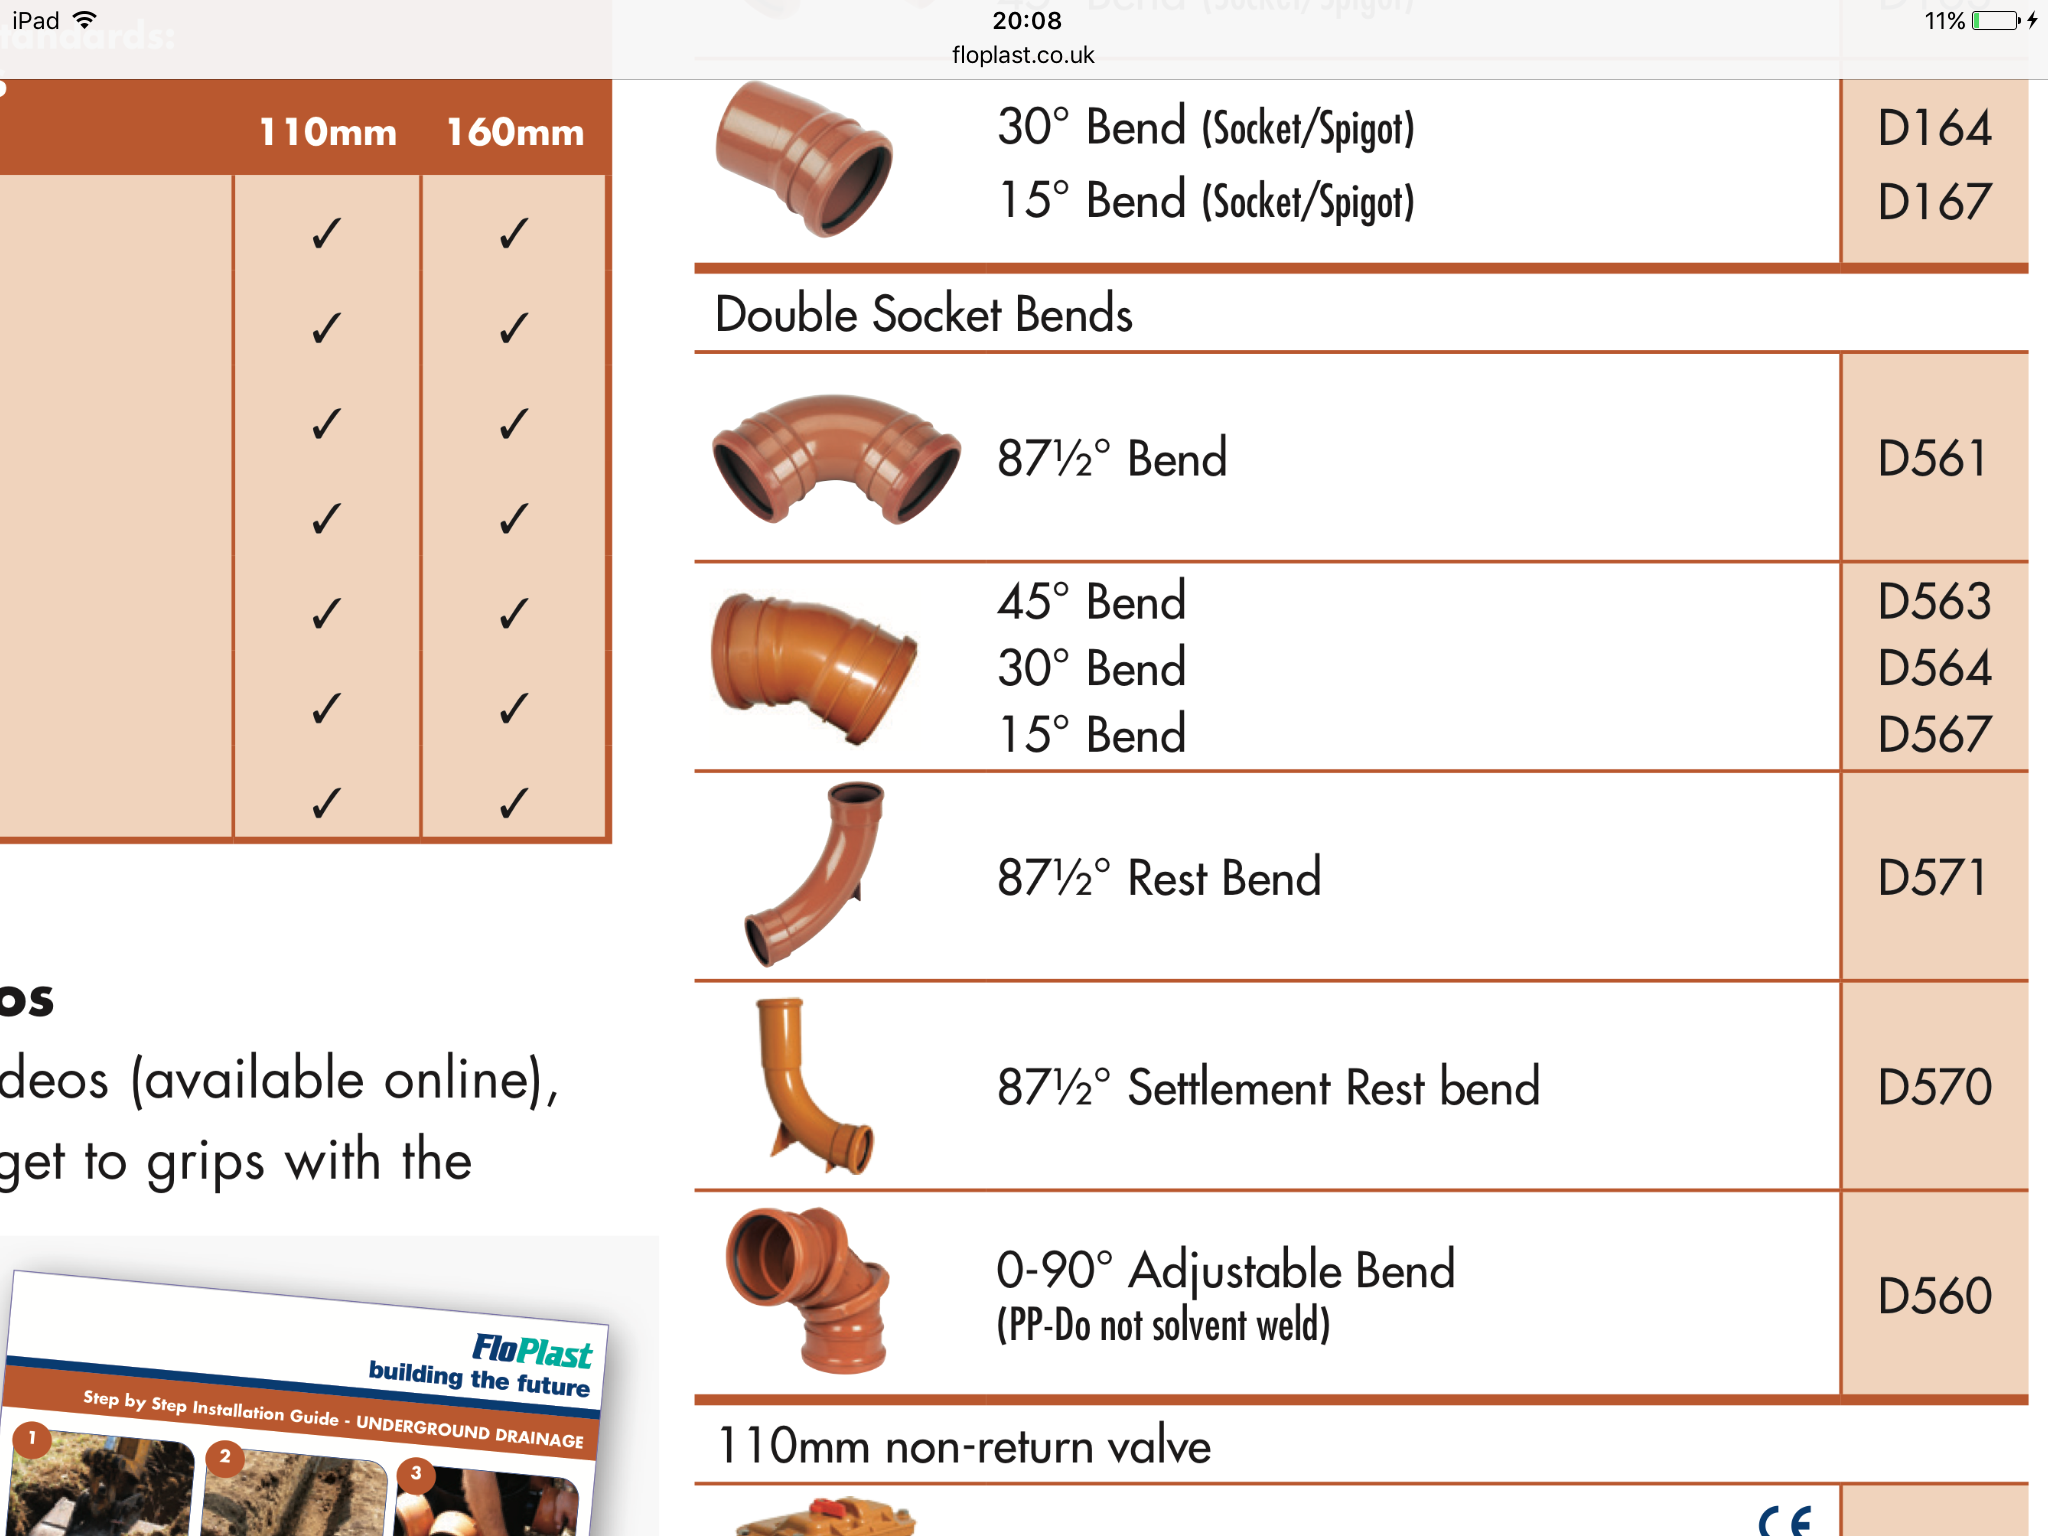
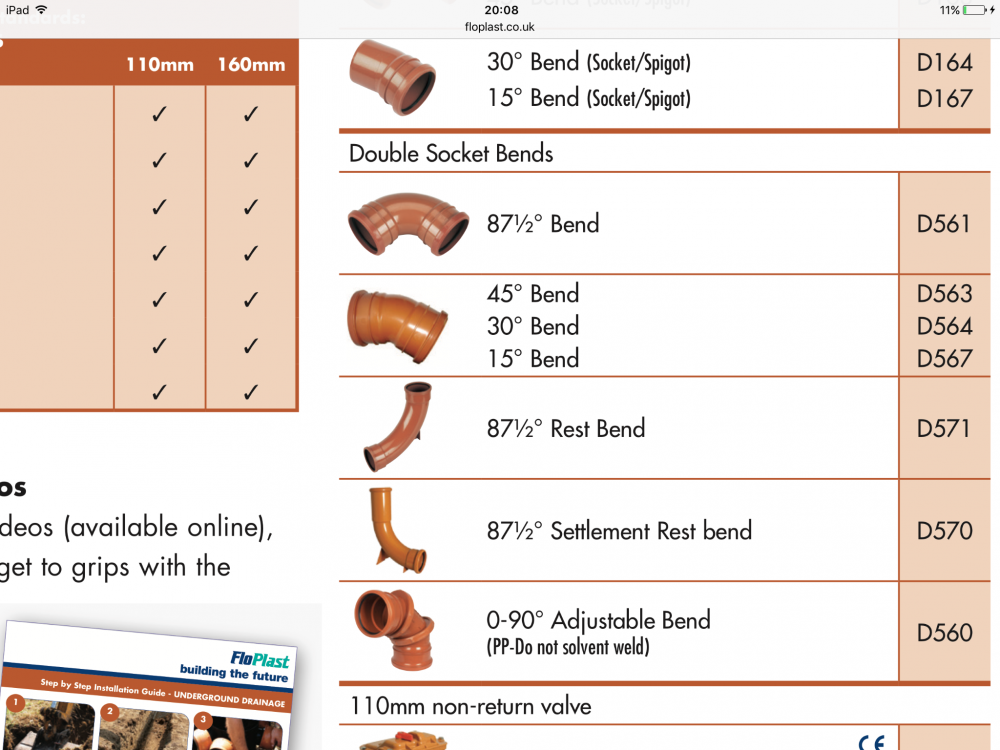
http://www.floplast.co.uk/uploads/downloads/110mm Pipe and Fittings.pdf The settlement bend seems to be for just that. A slip socket, telescopic bend that will move with ground heave. I just found this so we're both learning summat new
-
-
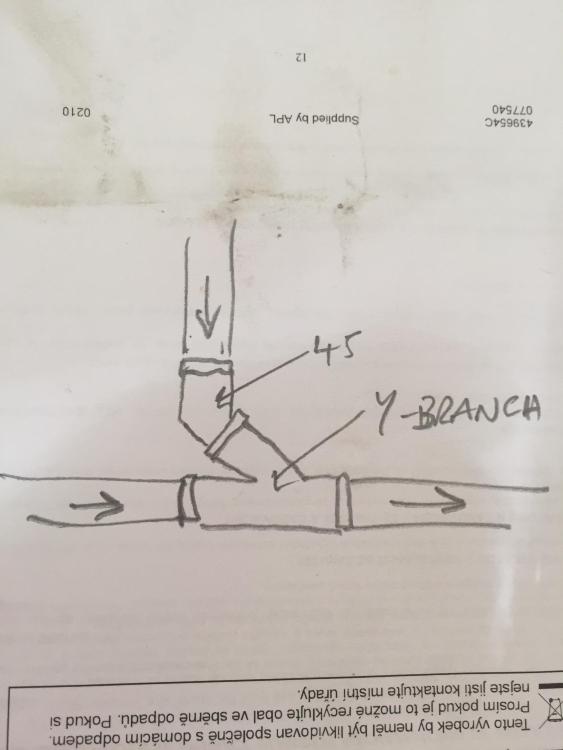
Never into an equal tee. You need to turn to horizontal first ideally, or, at the very least, have a Y branch set so the branch is at 12 o'clock and then a 45o bend into that to rectify back to vertical. The vertical drop then into that 45. The rest bend is the best option without a doubt.
-
Bath Surround / Boxing In, and concealed pipework
Nickfromwales replied to Onoff's topic in Bathrooms, Ensuites & Wetrooms
They're called standard set or extended set. Rapid is 30 mins or less pot time, can be more like 10-15 mins if it's a warm day. Extended will give you around 45 mins to 1 hour, possibly more, again dependant on ambient temp. Ice cold water is your friend. Don't use the slug of ambient temp water sitting in the pipe as even that'll shave a bit off the pot time. Same with the adhesive, store it cold and dry. -
Bath Surround / Boxing In, and concealed pipework
Nickfromwales replied to Onoff's topic in Bathrooms, Ensuites & Wetrooms
Cheers.