Jump to content

Nickfromwales

Members
  • Posts

    30995
  • Joined

  • Last visited

  • Days Won

    329

Everything posted by Nickfromwales

  1. The BCO will usually accept a demonstration of proper / reliable function TBH. The proof is in the pudding. If I doubt they'll be happy initially with one of my 'get out of jail card' solutions, I cobble it all together and call the BCO out. They cant say it wont work when they can see it working and they get the final say.
  2. To get 'splashback' out of an adjacent WC from another would be something I've never seen. I've fitted multiple WC's in nightclubs and hotels etc and they've been less than a metre apart in some instances. If the soils can fall vertically before any horizontal invert then the 'issue' is instantly removed. If you plan a T in between two rear exiting WCs which are DIRECTLY opposite each other then the worst you'd get is the water level in one being noticeably moved by flushing the other. 'Debris' would likely become apparent in the lesser used one over time, but I doubt anyone would ever T two together in such a way anyhoo as its not common practice. Offest the two WCs by 300mm or so and you'll be able to couple up to the same T using an 'intersection branch' and the issue is done with there and then. One of these or one of these for eg, with the two WCs existing horizontally left and right into the latter as the first choice.
  3. Well worded, misleading sack-o-crap ? Just another plain electric with some inventive write up. They shouldn't use the word 'Thermo' as it's not a thermostatic unit in any way ? This one is actually a thermostatic unit, and not a budget buster Don't go for the larger 9.5kw as they're far more cold supply hungry, whereas the 8.5kw will tootle along, managing fluctuations with a little less noticeable dip in temp / performance. The 8.5kw will still provide a plenty adequate shower too. Most 9.5kw showers in a busy home spend their life on the medium setting anyway, as the high setting just needs too much presume and flow to keep it going flat out.
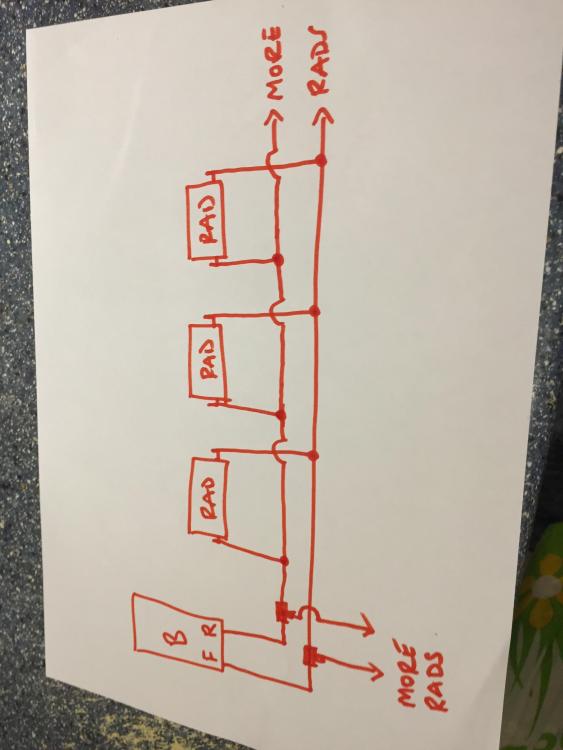
  4. Ok, an annex. Fyi do you both need to edit TRV to TMV ? Can you get an umbilical DHW supply from the house ? A hot return circuit governed by occupancy / demand would be a good solution and suffer no delay in getting hot water out of the outlets. Practicality needs to play a big part here but if this is a long term solution, with regular / daily usage in mind, I'd want a better lifelong solution if it were me. At the absolute minimum I'd go for a THERMOSTATIC electric shower and a small DHW storage heater ( 15 L ) to fit under counter to service hand wash. Kitchen / utility ? ?? @MikeSharp01, do you have room for a small uvc ?
  5. Ok. First off, never ever have a non anti-scald aka non-thermostatic shower from any instantaneous water heater........ever.......never ever. Ever. Second I wouldn't dream of not having a mixer tap on the basin. What I would do, as I have in my house, is fit a small TMV in the hot feed to cap the basin temp and it stabilises the water delivery wonderfully. The problem you have is asking a single water heating unit to deliver a temp range that is suitable for showering AND basin use. Typically the basin flow would be much hotter than the shower will ever need so you need to deal with the appliance which is most temp intolerant to the higher output temp, eg the shower, and design the hot water delivery around the outlet which needs the hotter water range eg the basin. What is feeding DHW to kitchen / utility? Fwiw, I would not be using an electric instant unless it had a decent cold uplift pre-heater, as I think this will struggle in the colder seasons where the incoming mains gets a lot colder. If your dead set on this I believe @joe90 may have a steibel that is surplus to requirements, if he hadn't already sold it. Fwiw #2, I'd choose a Sunamp for this job and nothing else, or a small uvc. I believe life with the electric instant would not carry much luxury. If it were for wash basins only I'd go for it. Why have you decided upon this route if I may ? Annex ?
  6. One I did a good while back was convection circulating over 17m of pipe away from the TS which went through an underground trench between the house and the garage ( new plant room ). No additinal pump needed afaic, unless it's the longest, most adverse run in history. Rememver you do need motorised 2-port zone valves ( ZV ) at the TS for each flow as otherwise you'll get them all draining heat from the TS 24/7 with convection circulation . Use the orange and grey wires of the 5-wire ZV to switch the respective manifold pump on, as that way you'll never have the pump pulling on a closed or partially open ZV.
  7. "He who pays the piper calls the tune" .
  8. @Temp If you highlight a particular section of text, then expand to encompass it, you'll be shown a 'quote' tag. Just press on that and the selected text will drop into the fresh editor page and be marked as quoted from said person . So it looks like that. I think you have to do it individually rather than encompass a few in one go, if I understood what you did correctly.
  9. Or you could go balls out and recess a pair of metal box sections from floor to ceiling and finish those flush to the existing PB.
  10. What stage are you at with the job? Are you fully refurbishing the room or just changing the sink ? If the wall panels are going onto the whole wall from left to right and the sink is in the middle then it's a relatively easy fix. Just channel out the PB and egg box from one vertical batten to the next, the ones that span the area the sink is to be fixed to, 1230 high and remove the cardboard lattice entirely. Brush the exposed PB ( rear of PB of the adjacent room ) with 75 / 25% PVA / water and then cut a piece of 22mm P5 Weyroc and lay horizontally, working from the floor up, so two pieces required if one 2400 cut in half won't do the width. Get some fast fix ( pink foam ) and apply horizontal and vertical beads of foam at 100mm centres to the PB going only as high as 550mm from the floor first ( 600mm P5 ) Push the P5 against it and gently push against it for 20 mins whilst it cures. It's important to dampen the face of the P5 with the same PVA solution to aid adhesion and speed the cure. Glue the tongue and do the same with the next piece. Then you have a section of 22mm thick P5 say 1200 wide and 1220 high embedded and bonded into the wall void. Measure the thickness you have remaining to the existing PB face, match with the nearest undersized product, 4mm / 6mm ply or better if you can get 9.5mm or 12.5mm PB but either will suffice. If it's ply, glue and screw it on, PB just needs screwing. Then apply your wall pannelling over the top and it'll be rock solid. Edit to add : To remove the original PB from the egg box lattice you'll need to cut it into multiple strips of 50mm and remove them one at a time so as not to damage the other room surface.
  11. Cut the bottom bevel off the tray tile and go from there up. See what that gives you at the ceiling. Take from the bottom tile until you get a nearly full tile at the ceiling. On the shower internal go 3/4 > 1/4 and when grouted you just run a bead of colour matched silicone down that line to blend it in, or go mega careful and then you'll get away with just grout and clear CT1. You need a credit card gap minimum to get some grout rammed into the corner so don't go crazy and but them against each other. Keep a margin on the right hand side of the window, turning vertically say half way between the glass and the window edge, distance to be decided so you end up 3/4 > 1/4 against the trim to nicely match the internals pair ( which will be matching ). The git will be getting a tile landing on the counter top, mark out and see how this all works out so far. Ifvit were me I'd tile right over to the sink side and do away with the paint down there. Oh, and 100x200 bevels ? Have you argued and that's a punishment? ??
  12. Oh, and the flow temp was unregulated when I got there with the TRV sensor double sided taped to the backer board you see the manifold mounted on. Wtf. The temp dial was showing a bit under 70oC.
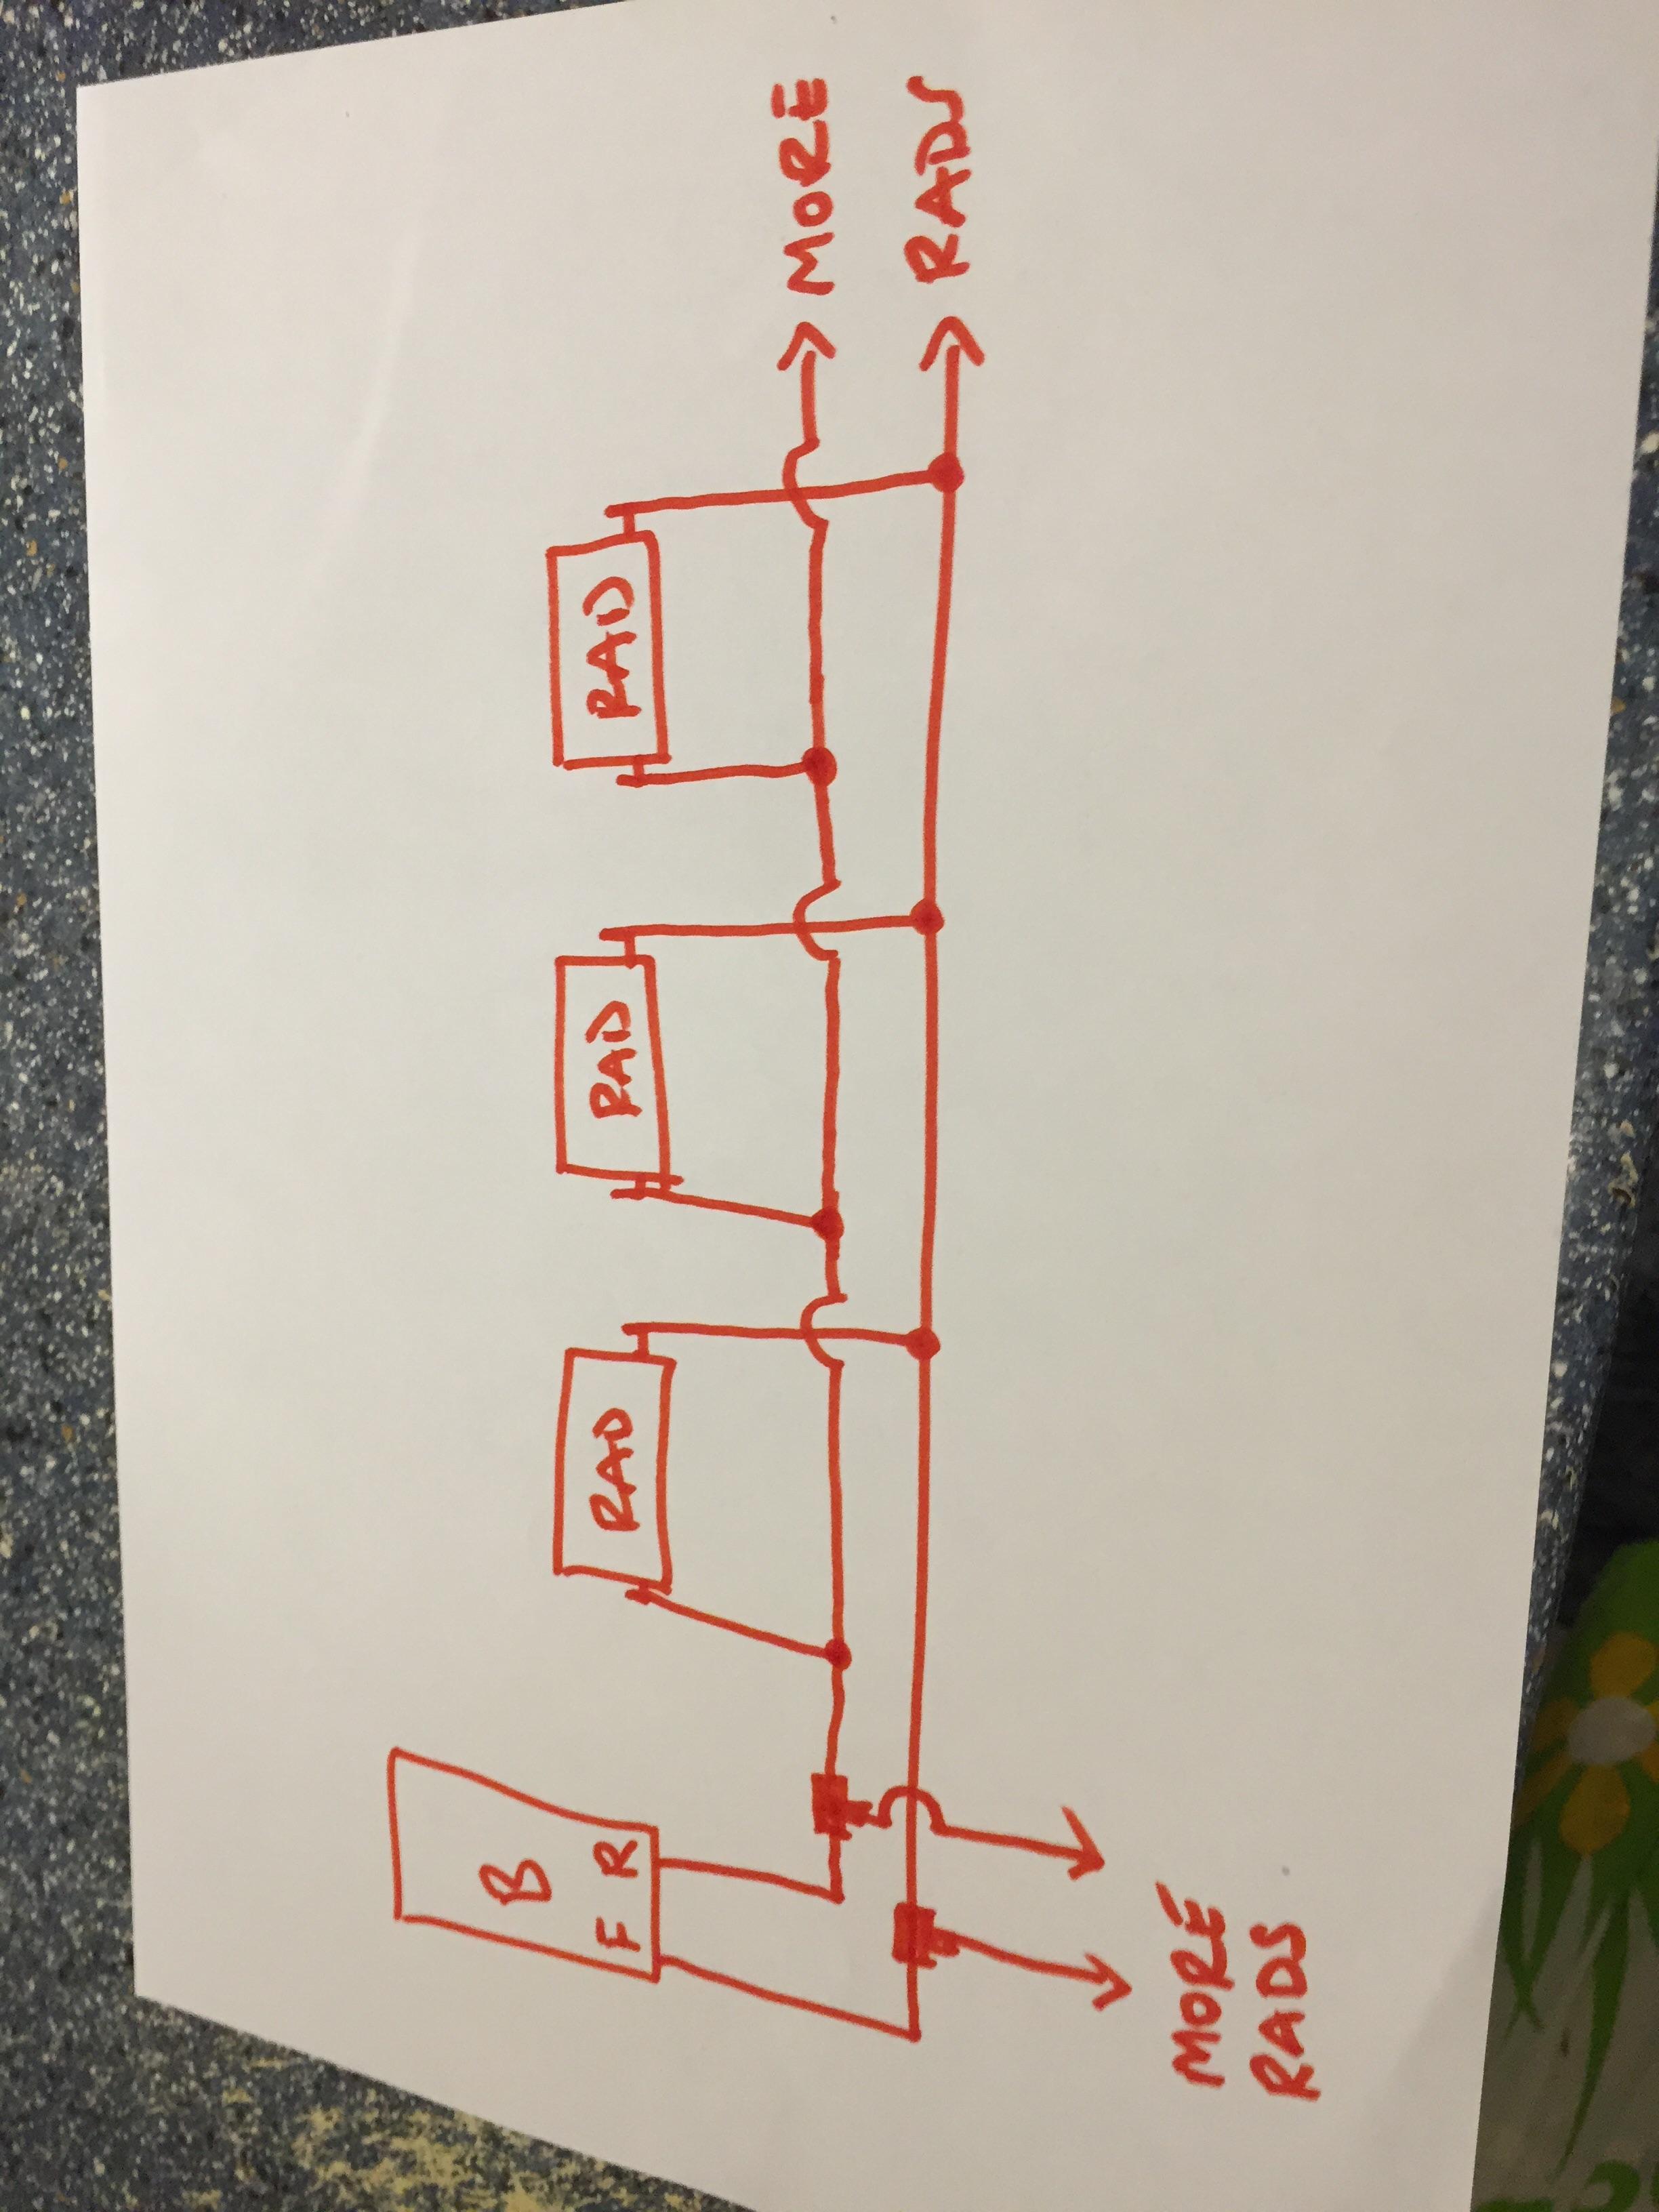
  13. To be honest, I never knew about these until the other week when I priced to sort out my customers Ufh, which had never worked since they moved in around 2007 . Previous plumber had the boiler flow going across the return manifold, entering in the end which should have been capped off with the thermo aviator head / TRV there, then being sucked up through the pump and forced through the flow manifold, through it, and out the other end, going back to the boiler return ( so basically a conriuous recirculating loop which completely Here you can see flow entering the bottom rail, and return leaving the top rail bypassed all the Ufh loops,if there was no differential pressure greater than the resistance of any one loop ). Here you can see boiler flow entering the bottom rail via the TRV and boiler return leaving via the top rail It then gets pulled through the pump What a shambles. This is a development of 12 like properties in a gated complex, and one neigbour has already asked to be booked in for the same overhaul. I wonder if the same tool fitted them all ? If he did, I may be busy until Xmas.
  14. Get a hozelock spray bottle and fill it 50/50 with PVA and water. Spray it a few times until saturated and leave to dry. Then do it again a bit later. That seals the surface and locks any loose material in place. ?
  15. You can do 600 in kitchens and bathrooms etc but you'll have to ply or OSB them as tiling over plasterboard at 600 centres holds very little weight. Even worse when the moisture from the adhesive softens the PB.
  16. 400mm for bathrooms and kitchens for cabinets etc and tile weight per m2 Don't forget that over a certain kg/m2 you need to ply then PB then tile. 400mm centres if it were me, 600mm is ok for living spaces and bedrooms, hallways etc but utility / kitchen / bathrooms etc should be 400mm.
  17. Who needs 'Plenty more fish" eh? Get your coat lad, you've pulled !
  18. Yup. The theme seems to be a small requirement for space heating, dealt with very easily by a small heat pump for eg, and then to have an UVC for DHW, heated up to around 45-50oC by the HP and boosted by either grid or solar electricity. Size the UVC according to your needs, simples. A few here have chosen to preheat the DHW cold incomer via a buffer tank with a coil in it, making full use of the fact that the HP can provide 40oC temp water all day long at very good CoP which is all you need for daily bathing with only the bath or the kitchen sink really needing much higher temps, say ~50oc max, for which you use the HP running in DHW mode so the UVC stays at a min of 50oC, and the buffer sits around 40oC, with the UVC getting boosted at least once a week for legionella purge, but if you get solar Pv this will likely happen almost daily plus you'll get the DHW sitting much hotter. Again size the UVC according to Pv so you harvest and retain as much of the here taped energy as possible as hot water. As overspill you can also put an immersion into the buffer. For more info please pick up on one of the existing threads or start your own so the chat doesn't get lost here in the 'introduce yourself' section. .
  19. Do you mind me asking how much you paid ?
  20. Most MI's state it's use, but the success is solely down to not over tightening the fitting. On copper the olive has to press firmly onto the pipe and only deforms slightly, but when you tighten an olive onto soft plastic it is free to continue to bite into the plastic, deform the olive excessively, and also allow the compression nut to travel to its last thread therefore losing any opposing force from the olive. If the pipe ever gets pulled / moved then the olive is free to further 'chew' into the plastic which has memory, so the seal between the olive and the pipe o/s diameter gets compromised. Ive done this many a time on site for a temporary feed for plasterers etc, but I'd never bury a joint like this in my, or a customers home, it just isn't necessary. Hepworth fittings are bombproof so why stray away from an excellent solution to save one more fitting. ? Compression fitting > section of copper pipe > Hepworth fitting > Hepworth pipe > Sleep peacefully. ?
  21. Lets assume it's a slab and there'd be no give and no severe cracking . I expect the grout to develop a hairline crack at the skirting, but if the grout is sponged back so it's concave at the joint then the CT1 will bridge that, fill the crack line and remain flexible enough to keep it covered whilst also allowing the grout colour to still be partially seen. Just pumping the void full of clear will make it look black as it'll form a clear window into the dark shadow / gap.
  22. I would grout it, keeping it as minimal as possible, then let it dry, then go over it with a bead of clear CT1. Silicone won't put up with mopping / abrasion etc anywhere near as well plus you really don't want silicone next to a painted surface as it can't be over-painted like CT1 can.
  23. Probably what I would have said before I joined EB and BH.
×
×
  • Create New...