
Leaderboard


Popular Content
Showing content with the highest reputation on 05/10/19 in all areas
-
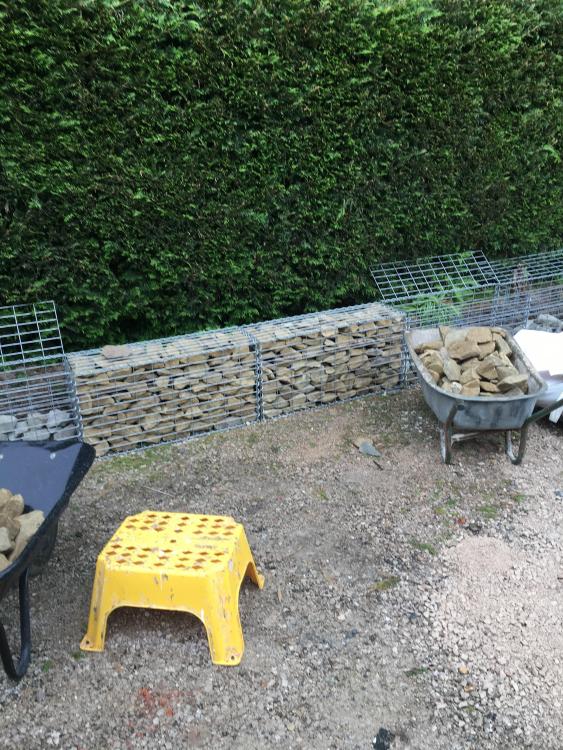
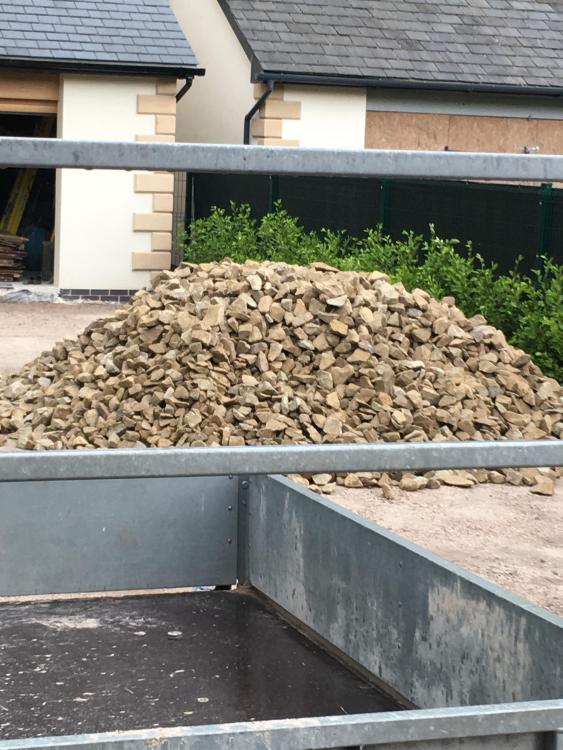
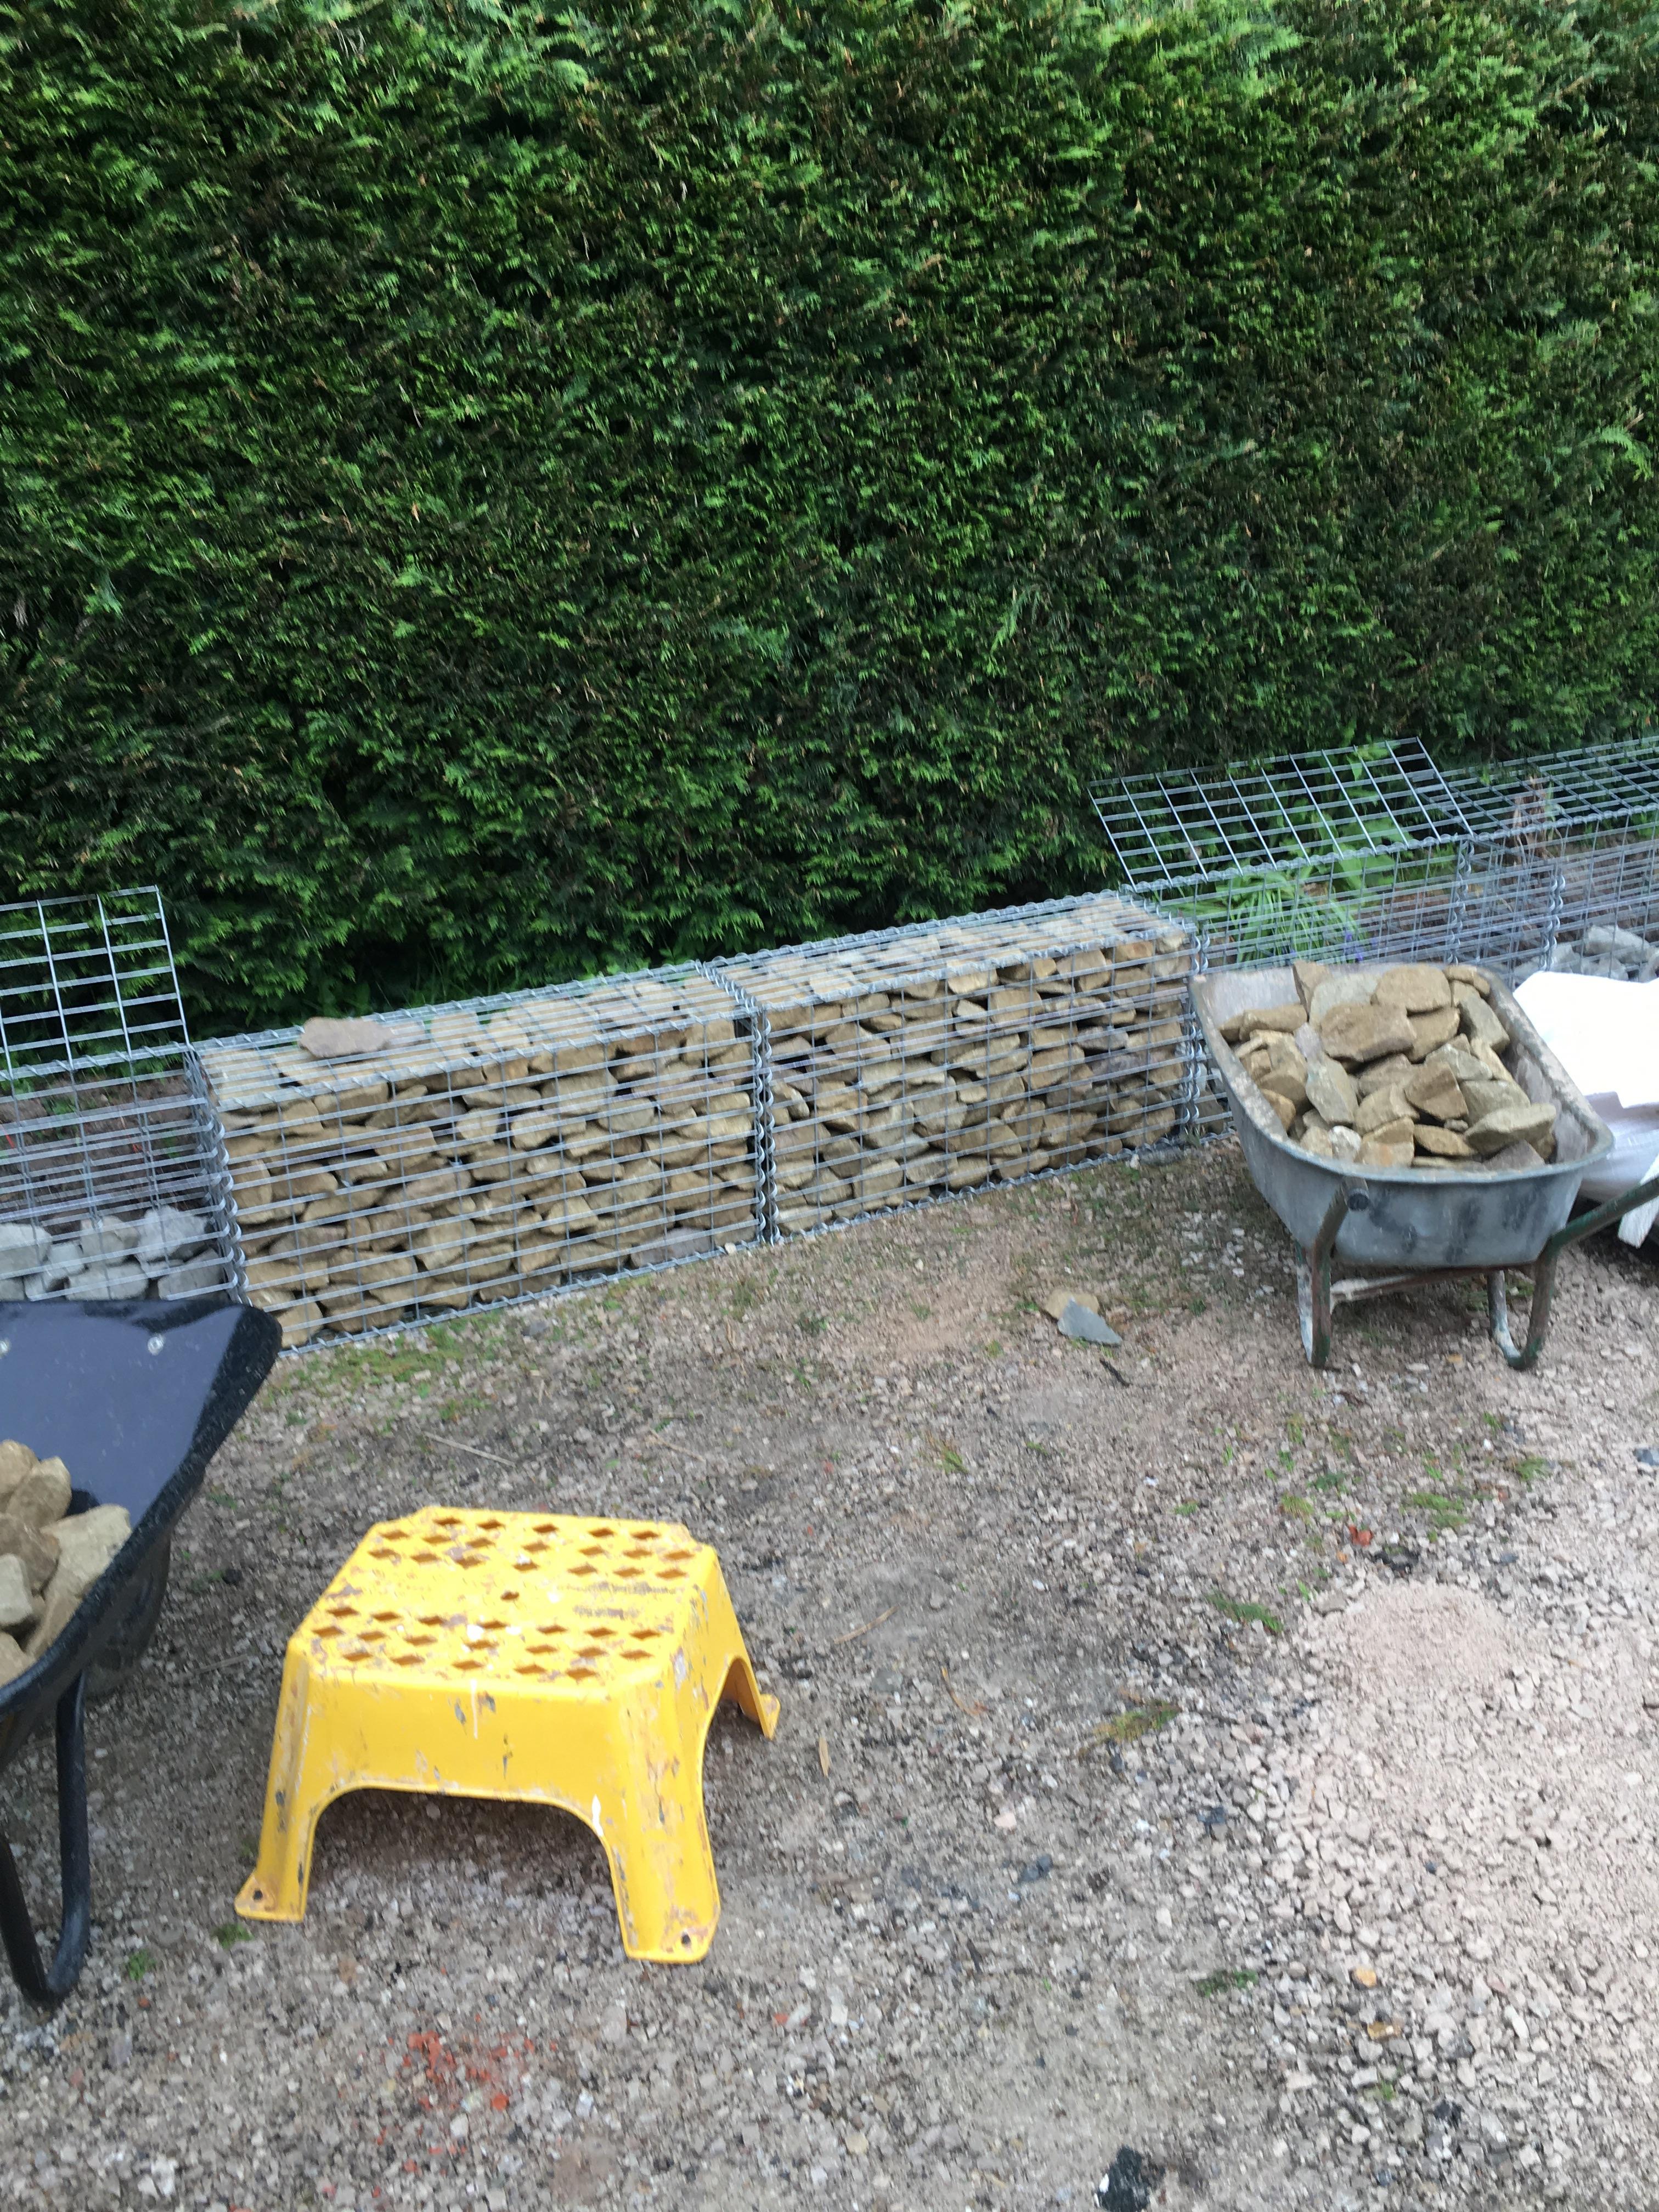
My wife s little project She has put twenty Gabion baskets together and taken delivery of some stone How the hell to you gauge how much stone you need
 2 points
 -
FFS give me your email address and I’ll send you the £3 for the leftover bag ..!2 points
-
Good luck with the sign off. Can you not post a skateboard video before you rip it out? ?2 points
-
But we have not all tried to cut a live cable and ended up with a notch in our side cutters ??????.2 points
-
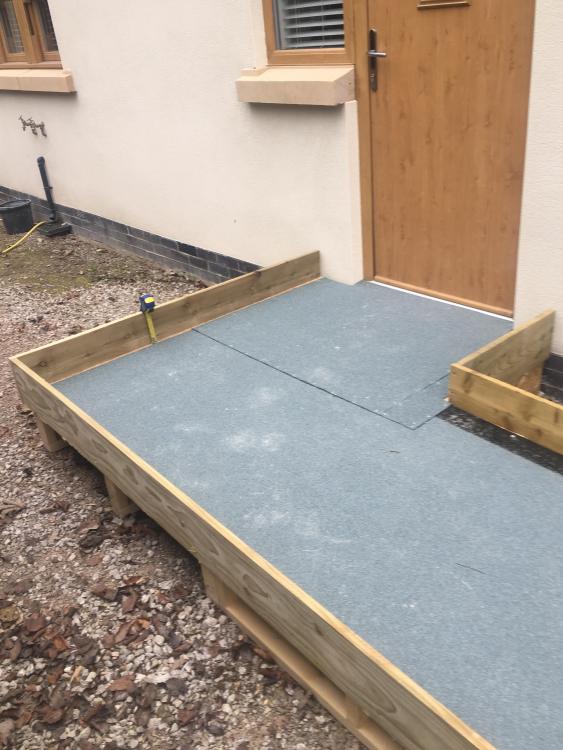
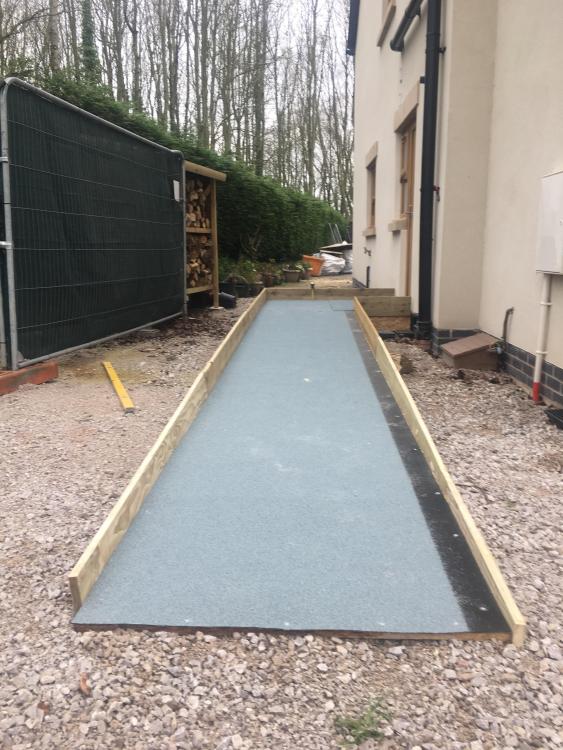
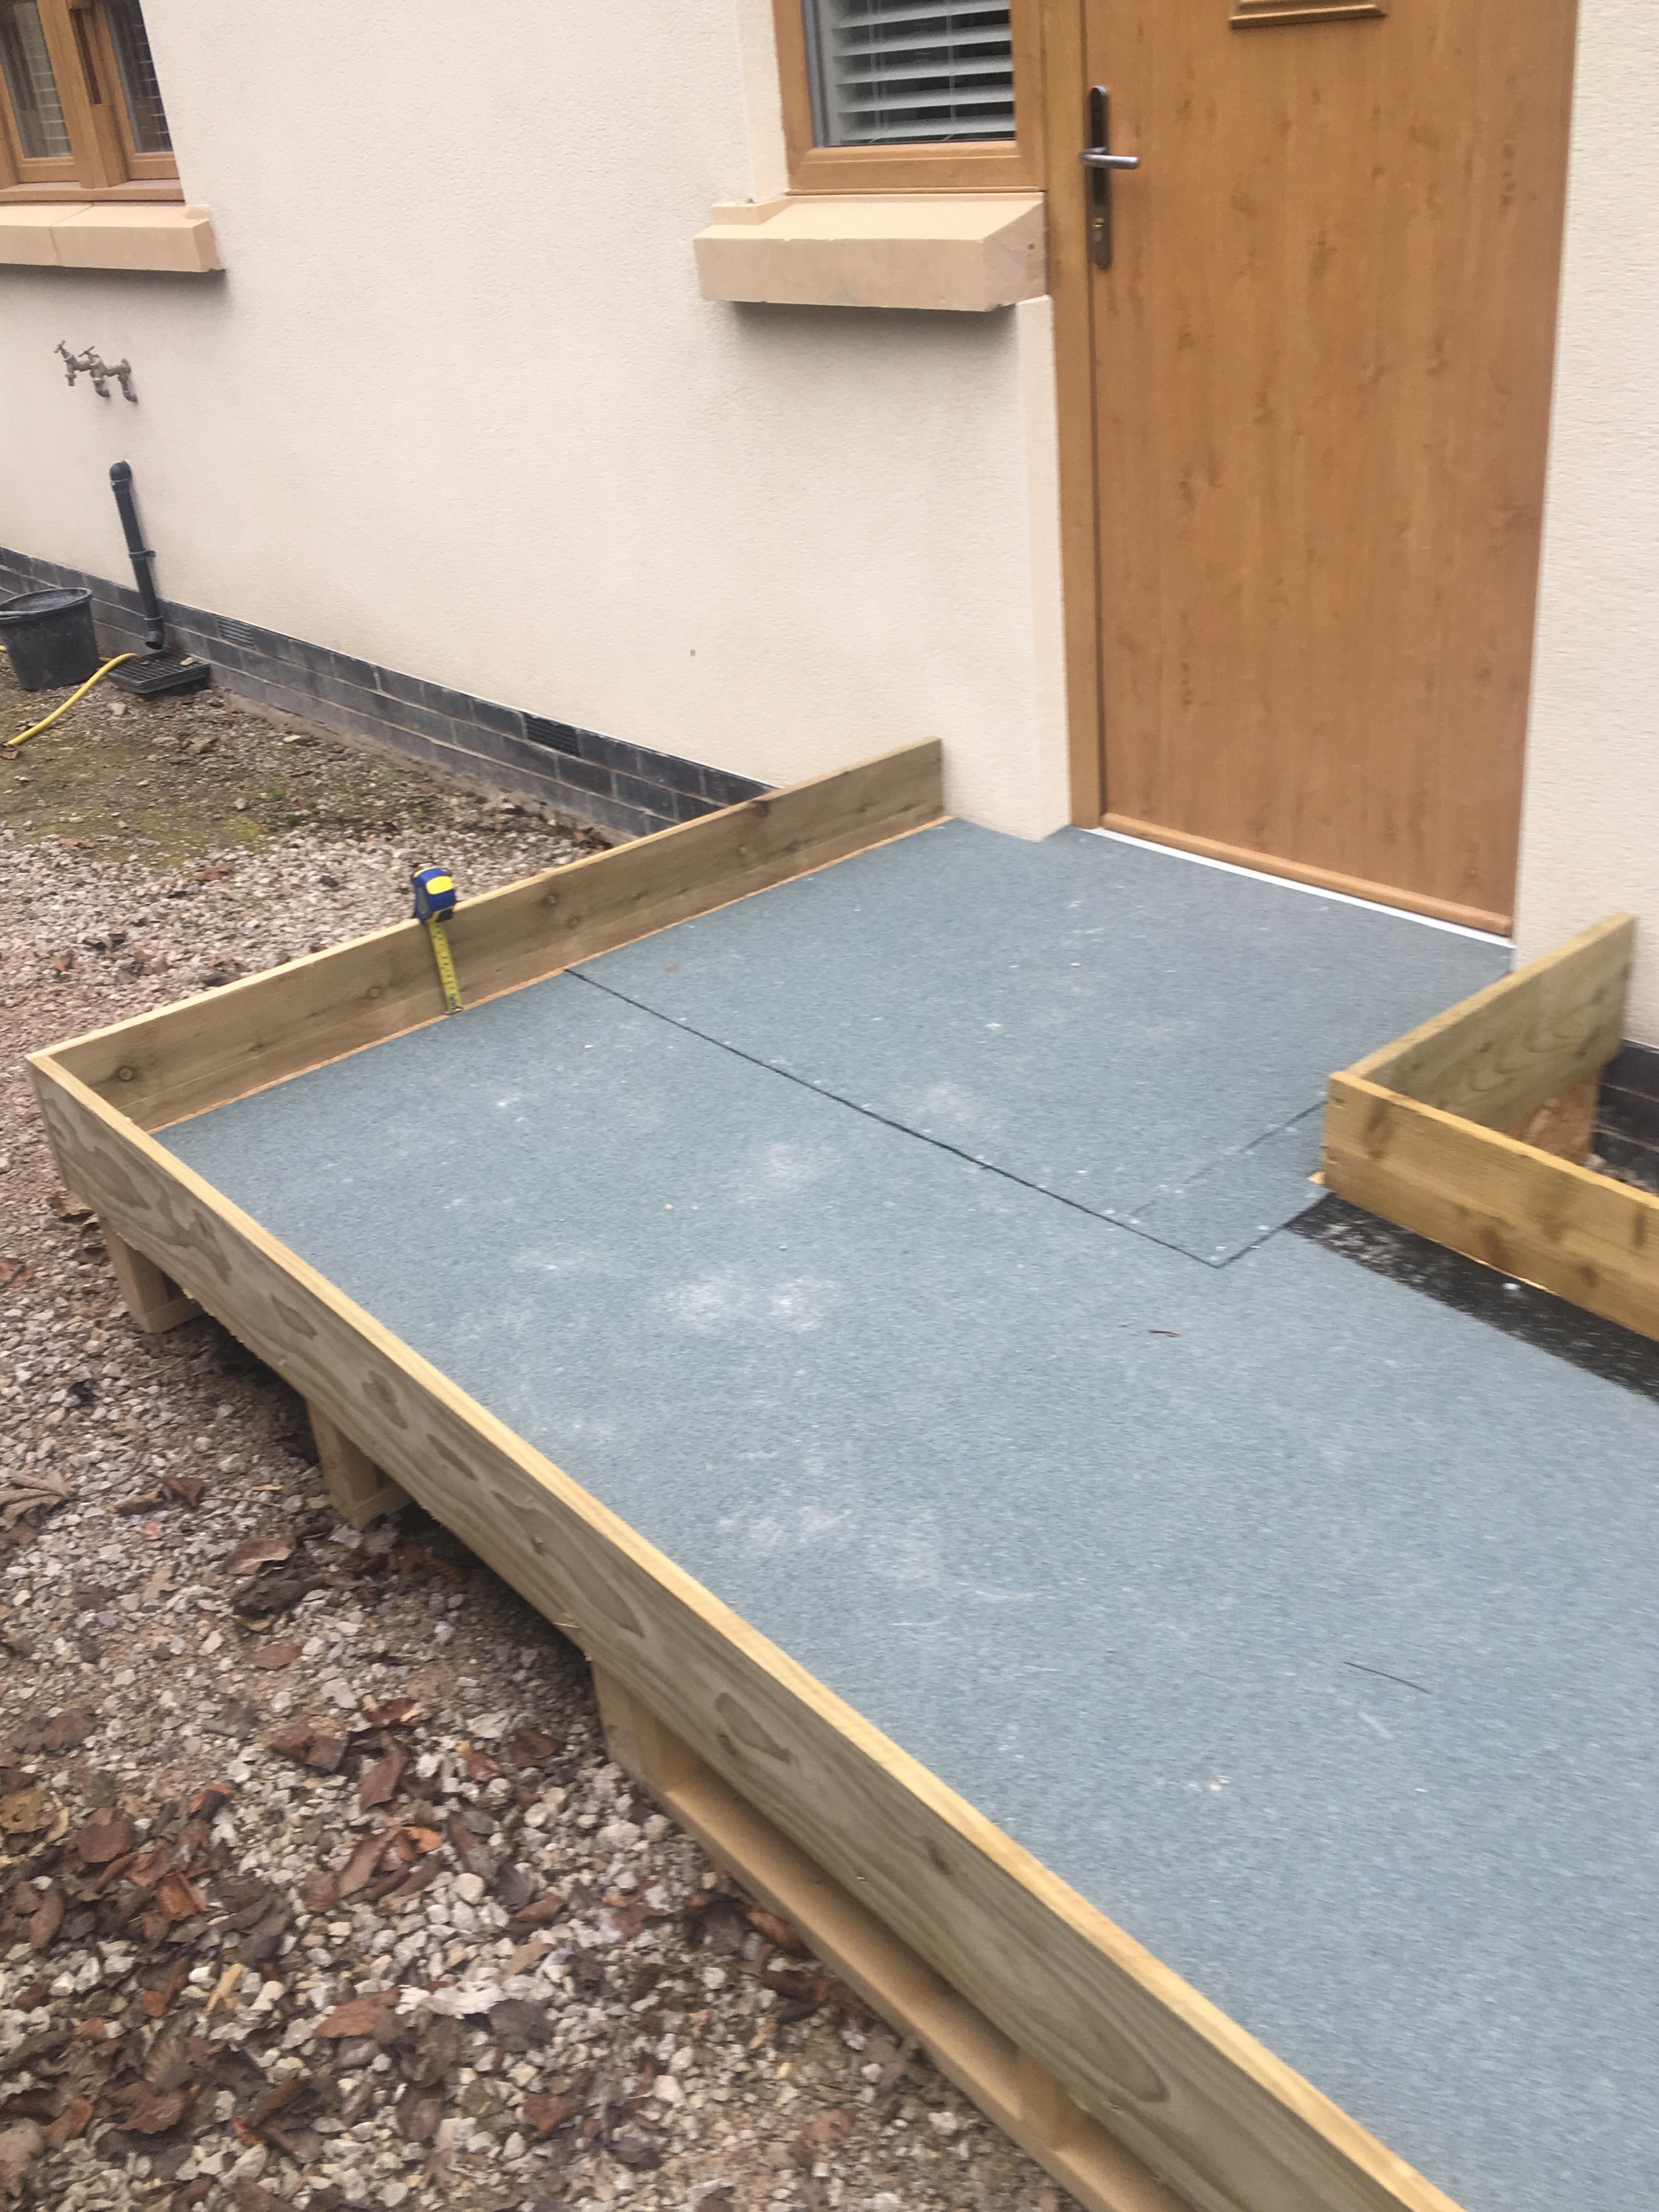
Finally got my Hetas Cert through today So BC can sign us off this afternoon Our infumous disabled ramp can now go No more jokes about skateboarding
 1 point
 -
Oh ok I think I’m confusing it with the insulation you put down and push the pipes into the grooves i think you wanted it for drainage issues didn’t you.1 point
-
What @Onoff picture is showing is a crimped and heat shrinked joint between an old red & black cabe and a new brown & blue cable. The heatshrink is covering one of the colours of each cable making it look a bit odd.1 point
-
Not related to your question, but the F.75 error is fairly common and can be prevented, but Vaillant are a PITA over the cause of this. We battled with repeated F.75 errors on the boiler at our old house, and eventually found a 100% solution for them (after more than 20 call outs under warranty). The fault has two known causes, both stemming from the same pressure sensor inside the boiler. The sensor tries to detect the pump pressure "kick" as it starts, but this "kick" is tiny, especially on a big system that has a fairly low flow resistance. The most common cause for this fault is the pressure sensor being blocked by debris. This was the "go to" approach taken by everyone that came to see our boiler - debris must be blocking the sensor, so they replaced the sensor each time, only for the fault to recur a week or two later. For us, it turned out that debris wasn't the problem, as we'd fitted a Magnaclean filter on the return right next to the boiler, and examination of the tiny hole in the sensors that had been removed showed they were clean as a whistle, but it's very easy to see how just a small amount of debris could block this sensor port. So, making sure there is a good filter on the boiler return, and making sure that it's regularly cleaned, is important to reduce the risk that the sensor will get clogged. The other cause is if the system is large and has a very low flow resistance. The problem is that the margin between the static pressure in the system and the tiny pressure "kick" from the pump can be low, especially when all the TRVs are wide open, so making operation a bit unreliable. The boiler will try to fire three times before throwing an F.75 fault and locking out, so this problem can go undetected for a time, as the chances are that one start out of the three will be OK, so no fault will be flagged. The fix for this is a modification kit available from Vaillant to reposition the pressure sensor to a location higher up inside the boiler. Once fitted, this modification kit completely removes the F.75 fault problem. The kit is called an "F.75 modification kit" by Vaillant, believe it or not, although it seems that Vaillant installers may not be aware of it (those that installed our boiler knew nothing about it - I only found out about it from making enquiries on the web).1 point
-
Have a look at our Ed's sums on this: https://edavies.me.uk/2012/11/pv-dhw/ The prices may need updating, but the physics is good. Insulation is an odd one down here, we have relatively stable temperatures. The one to look at is airtightness and heat recovery. Start designing it in from the start. One of the big issues is solar gain. When the sun does come out, even in winter, it can quite quickly warm a place up. That extra input is hard to hold onto as the wind soon takes the energy away again.1 point
-
I would look at putting the HW circulation system on timers, or room occupancy sensors, so it only circulates when the rooms with taps are in use.1 point
-
Given that the dependency on the immersion heaters is a rare occurance, is it not sufficient to leave the switches on all day when required with the thermostats preventing power being continuously drawn? If you're not using hot water heat loss will be minimum, and if you are then the stats will just top things up as required. I can't imagine there's much energy to be saved by having greater manual control in such rare circumstances.1 point
-
But plugs let moisture and crap in, and they were designed for portable equipment and not fixed installations which you could say this is ...1 point
-
You may not want or need one, but the fact that there are tens of models of this type of stripping tool available suggests that this sort of automation is considered necessary by the market. Sure, saving a few seconds per connection if you're only wiring up a few sockets doesn't make the cost of a tool like this worth paying. I don't know how many double sockets we have throughout our house and garage. 50+, for sure. Every one of those is a double socket, then you have a huge number of lighting circuits, and all the other connections at the other end. Saving a few seconds and the cumulative impact on your wrists and fingers for each of hundreds of connections is worth it for my money.1 point
-
LOL -- 240v just wakes you up a bit 415v is the one you DON'T mess with not even sure you would get a belt with the modern auto breakers in the consumer unit . when still in manchester my best mate was sparkie and he rewired an old house i had,and of course bonded to the bath etc . long story short --we had a bet he would stand in bath and drop a live cable in while he was standing in it . which he did and won a fiver from me - never got a shock cos his earth bonding was good + electronic circuit breakers kicked in on consumer unit he did recheck it before hand though !!1 point
-
I used to use side cutters but due to old age my grip is less than it was, I bought one of these cheapies for my build and wish I had done so years ago https://www.ebay.co.uk/itm/Self-Adjustable-Automatic-Cable-Wire-Crimper-Crimping-Tool-Stripper-Plier-Cutter/401457846747?epid=16031184053&hash=item5d78c099db:g:TSMAAOSwXCVcgmxi1 point
-
Get plastered!1 point
-
That'll do, beer o'clock:1 point
-
Most "upgrading" you are likely to need will be in relation to tv's and media. Nobody can predict what the next "thing" will be. I have tried to cover this by making a short section of floorboard at each end of the bedrooms as a trap door that can be lifted. This should give asccess to feed new cables down the service void to the tv's at one end and down to the AV cupboard at the other end. so I should be able to pull the next thing in cabes through when I need to. Several spare CAT6 cabes may enable you to use some king of converter, e.g 2 cat6 cables can convey an hdmi signal with an adaptor at each end.1 point
-
I've already had about 40 years worth out of them! I'm not a fan of insulated tools at all, with the exception of screwdrivers where it might be useful to tighten a live terminal (very rarely). The reason is that my view is that they encourage unsafe working practices. No one, no matter how qualified or experienced they are should be working on a live installation. Isolate the power and check it's really dead before working on it is the golden rule.1 point
-
Pay a professional to design one? Everyone seems happy to pay an architect to design a house but when it comes to the garden they tend to do it themselves. My perspective is that the garden is very important in not only being a space that works for you as your outdoor living space it it adds to the all important kerb appeal of your property. I paid about £2500 to get a design done for a half acre plot and i feel it was worth every penny. It is something i wouldnt have come up with....ever.....and is simply an excellant design. I am now left with multiple drawings showing planting schemes, drainage, retaining walls, water feature construction, schedule of plants to purchase etc etc. I now have a idiots guide set of plans to work to which suits me. The chap I used offers services starting at about £100 for a 2hr consultation up to £1000 for detailed designs (mine was the price it was due to size). I would say engaging a profesdional who does this for a living would be a worthwhile investment and pay for itself in terms of value added.1 point
-
Buy a digger.1 point
-
We are just commencing our second self-build (started onsite last week). In both cases we have used Architects and in both cases have been very happy with the results. We have outlined how in both case we selected and worked with our architect which we hope will assist other people starting out on their self build journey. 1) Start thinking about which architect you are going to use when you start looking for land and not when you have found land. 2) Draw out a requirements list. My approach is to provide a brief / framework for the architect to interpret rather than prescriptively dictating to the last detail. Requirements should be no more than 2 pages. By making the requirements generic, you can apply them to most plots of land. Include in the requirements why you are building as well (develop and sell, house for life etc) 3) Checkout your architects previous designs. There is likely to be a common design pattern and if that is way off what you want then maybe the architect isn't for you. Also go and see a couple of houses - just viewing from the outside can tell you a lot. 4) If you see a plot that is a potential candidate, email architects on your shortlist for feedback. Most architects will provide feedback for free within reason and the reply will help you to decide if the architect is thinking along the same lines as you. Also, meet with your architect before you engage formally to check that they are a person that you can work with. 5) Be completely upfront with the architect about your budget, put it in your requirements list and be very clear what that budget includes and doesn't include. 6) Be completely upfront with your architect about their fees. Fees based on a %age of the build cost are OK as long as the build cost used is your budget for the build at the outset (fixed) rather than the actual build cost (variable). 7) Good architects are in high demand and don't need to advertise so you will need to research (a lot) and do your legwork. Be prepared for the fact that you might need to wait for the architect you want to become available. 8. Check whether the architect has any experience in the build method you want to adopt and the energy standards that you want to achieve. Find out what the build costs have been on recent build projects and how these compared to budgeted costs . 9) Check with the relevant boards that any claimed registrations are correct. 10) Fees may seem expensive, but for the amount of work that goes into a design I have always felt I got good value for money. In the context of the cost of the project it is a small percentage much of which can be quite easily recouped with a little restraint on the fixtures and fittings. 11) If you use an architect local to the build, it is more likely that he will be able to advise on securing good contractors based on experience of previous builds. My architect has more than recouped his fee by drawing up an attractive house that is straightforward to build. Insulation is what we need to get to passivhaus but no more and the size of the house is what we can build to meet our budget (based on his previous build costs) and requirements. Listed below are the requirements we drew up which may assist others going through a similar exercise: Build Budget: £325K (House, Garage) excludes landscaping, external works and professional fees. The Plot There were a large number of objections to the development from residents but planning permission was granted on appeal. Plot width is around 16.7m. Plot length is 44m. Electricity, Water and mains sewerage (but not gas) available at the plot boundary. Functions of the Building Home for ourselves and the dog. Enough room for friends, grown-up children to stay and family get-togethers. Building a house for life as we can’t get what we like on the open market. We love cooking and the outdoors, so it should support that. Combine open plan living combined with a segregated quiet room downstairs Provide a comfortable and healthy interior environment with a stable temperature and no drafts. Design Direction and Requirements Good natural light to rooms is really important with dual aspect windows in as many rooms as possible but not too keen on huge oversized windows that require complex and expensive shading solutions Designed to Passivhaus standards in a cost-effective manner but don’t over-rely on technology that has high cost to install and maintain. Downstairs Open plan kitchen, dining room and seating area Utility room (able to dry clothes in using pulley) Lounge Small Study if possible WC / Washbasin Good Storage – larder cupboard, cloakroom and cupboard for cleaning utensils Somewhere to sort out a muddy dog and muddy boots (A covered porch with a stone floor and bench maybe). Sliding doors or similar out to the garden from the sitting area. Bottom of kitchen window to be level with the kitchen worktop. Back door into the utility room No large step into front or back door WC away from front door if possible Upstairs 3 to 4 double bedrooms. Small study if not room downstairs (or 4th bedroom) Built in wardrobes Cathedral ceiling. Master bedroom should be able to comfortably take a king size be. En-suite in master. Separate shower in bathroom. General Heating / DHW – no mains gas. Solar PV with a diverter? ASHP (noise?) Consideration given to some acoustic insulation between rooms and between downstairs / upstairs. Doesn’t need to be completely soundproof however. LED lighting throughout and up the staircase Point for charging electric car. Ability to use battery storage in the future should it become more cost-effective. No requirement for chimney or wood burning stove. Agnostic about whether the garage is attached or detached, but should have storage for bikes and a little workshop area. Could be modified for easy access upstairs in the future (Straight staircase maybe). Point for charging electric car. Low maintenance exterior for windows and wall facings. House to have a more contemporary feel inside. Outside to tie in with planning / design code. Window frames recessed into the openings. Other Stuff Recess in shower wall for soap etc. Built in bookcases Lots of sockets Sockets in cupboards for charging hoover etc. Room in utility room for dog crate Built in water filter Water softener Lighting on dimmers with switches that gradually turn LED lights on so they don’t blow. Good outdoor lighting (pathways) Outdoor power point / tap Phone point in every room1 point


.jpg.c21f3ac78c9b7efd90cbdcb312744dc5.thumb.jpg.7adcad4c0e384f5ecd7d56b0618df6e5.jpg)


This leaderboard is set to London/GMT+01:00