Leaderboard
Popular Content
Showing content with the highest reputation on 10/26/24 in all areas
-
The problem is, we need to sequester the excess atmospheric CO2 levels (from about 422ppm today down to about 300ppm) as well as deal with the excess ocean/lakes and rivers acidification. The UK uses about 130 MTOE (1,511,900,000 MWh) each year (2020 numbers for total UK energy). That is a mean power requirement of 1,725,913 MW, or 1,729 GW. As an example, a large nuclear reactor can deliver 1.5 GW, so we would need 1,200 of them. As demand fluctuates between by a factor of 3 during the year, we would need storage of approximately 15,768,000 MWh, or 16,000 GWh to smooth of those fluctuations. Taking a best case of 50 kg CO2/kWh for a battery manufacture, and 10,000 charge cycles, that is 5 gCO2/kWH or 5 tonneCO2/GWh. 80,000 extra tonnes of CO2 added to the environment. Now my car has emissions of 185 gCO2/mile (ish). So that 80,000 kg extra tonnes of CO2 is equivalent to 432 million miles. About 1% of the mileage of my last two cars over 12 years. So I don't think we have to worry about the CO2 from batteries even of we have to replace them every 10,000 charges.2 points
-
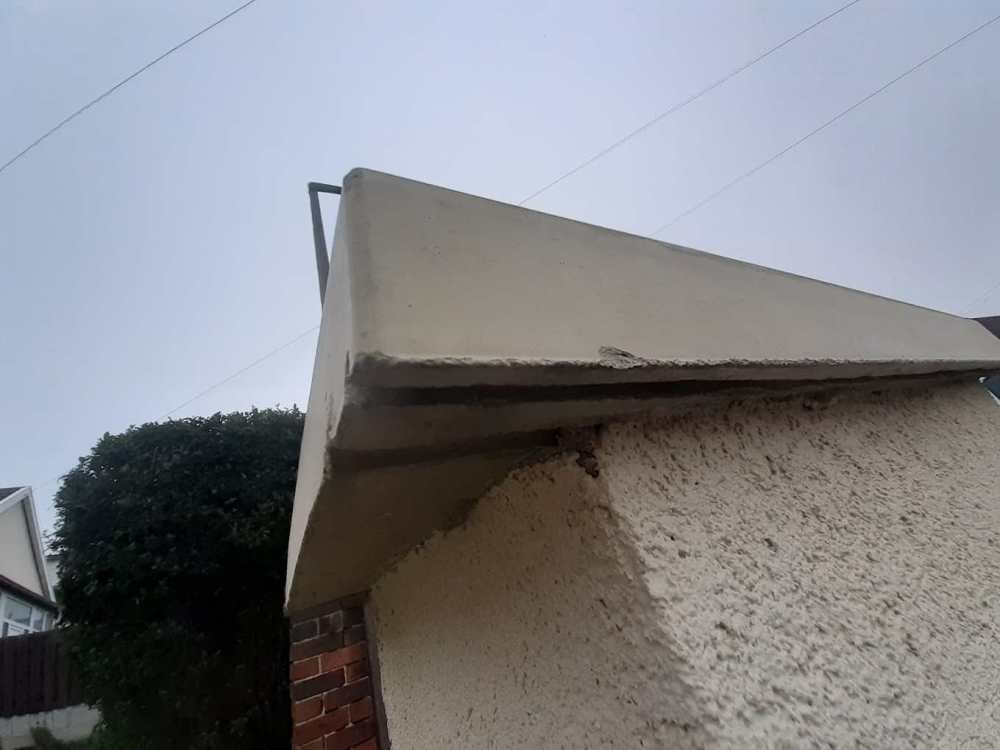
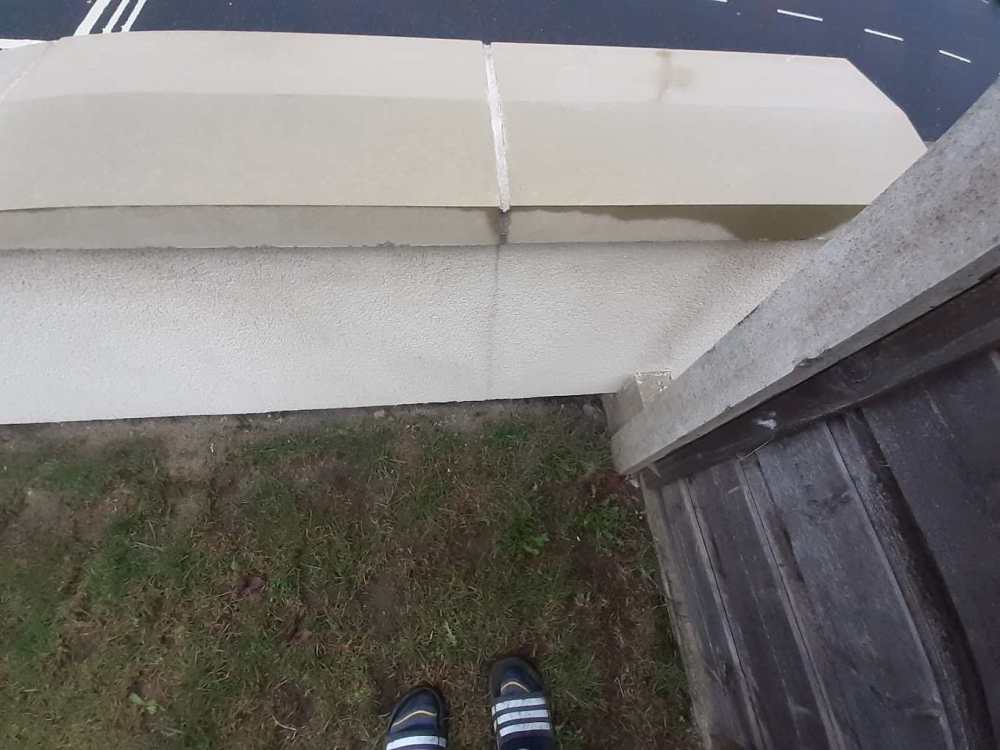
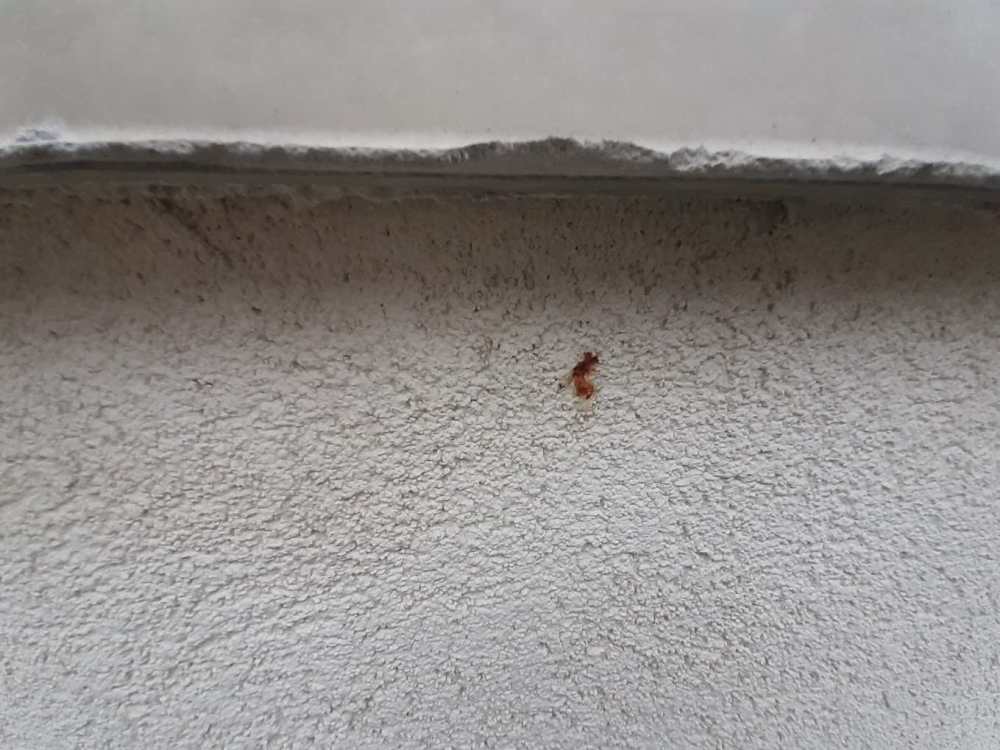
I’ve now done the job! I’ve cut a new groove in the underside of the coping stones, alongside the existing groove that was in the wrong place. As Scottish John said, it wasn’t a very easy job and I haven’t done it very neatly, but I’ve done it well enough to make it work. I’ve already seen water being caught by the new groove and dripping from the edge of the coping stones to the ground - so, my work seems to have produced some effect! As for appearance, I’m not worried about it because the grooves are not visible. The first photo shows one of the new grooves I have cut – one of my neatest and straightest ones – alongside the groove that was already there. Now, my next job is going to be to clean the rendering. Do people here have any advice about that? This rendering has localised water stain marks as you can see from the second photo, and there are also a couple of small red marks on it, that I haven’t been able to wash off – the third photo shows one. It has also lost its shine more generally because of diffuse water staining and diffuse dust. So, what is the best way to clean this rendering and give it its shine back? RE the photos - the first one shows the underside of a coping stone, the second one shows the top and side of my wall and the third one shows the side.2 points
-
Now you know their motivation for the inspection. Expect a follow up letter. I’d get all your ducks in a row now to establish whose responsibility the wall is. It might also be worth having your inspection done to get an ‘expert’ opinion on why the wall is failing rather than just your opinion it’s the roots of their bushes.1 point
-
Ratchet handle "closed". Have the slot which the strap goes through in the position you can see through it (may need to ratchet it round before closing the ratchet.) Feed the fly end, or the loose end, of the strap from the bottom of the slot up towards you - you should be able to see it coming through if the slot is lined up nicely as above. Pull the loose end through as much as you can to take up the slack. Holing the loose end hand tight, now start ratcheting. Tie off any spare strap1 point
-
In that case the wall is built on your neighbours land surely? And as such it is theirs to retain their land 🤷♂️1 point
-
Back to bathrooms and the like, which is better Acetoxy (stinky vinegar) or Neutral cure? I'm considering these two: Dow 785+ Bacteria-Resistant Sanitary Silicone White 310ml (58308) Dow 785N Sanitary Sealant White 310ml (800FG) Both have fungicide,1 point
-
>>> self weight of the stairs - is that just the total weight of the stairs or something else? Yes, including balustrades etc. Your SE will then allow for suitable 'live' loads (e.g. all your guests at a party standing and admiring your build) - actually the number is probably specced in the regs somewhere. Then they'll calc the loads to be supported at the top and bottom.1 point
-
>>> Sign off what’s the prize ? Presumably you'll get a BuildHub gold watch at the self build completers ceremony.1 point
-
I know a friendly building control officer. So I may just give him a call & get regs as I build , probably be cheaper in the long run too. Yes, footings on the clay round these parts is normally 1m deep. The slab has gone, a foot thick in places! glad I had a man with machine + breaker. Still been here next spring otherwise!1 point
-
Was the retaining wall built originally to allow your garden be lowered artificially below the normal grade? In which case I would say it is your responsibility. The neighbours are entitled not to have their garden fall away because of your failing retaining wall. If the wall was built as a normal dividing wall, and the neighbours built up their garden above the normal grade I would say you were perfectly entitled to do whatever you wanted with your wall. Including removing it entirely or let it fall down and their garden to collapse too.1 point
-
Think the important bit is to drop down, that kills any thermal gradient which leach away heat from the cylinder. If it's pipes at the bottom of the cylinder I wouldn't bother, as that area takes in cold water when you open the tap so is cold quite quickly anyway.1 point
-
Quarry dust (0-5mm typically.) compacts and holds together better than paving sand.1 point
-
I also used Ob1 to temp seal around our sika roof to the MVHR ducts that went up through the roof, before they sleeved it. Worked fine for the weeks I saw it before it was sleeved over.1 point
-
Here are a few of my thoughts for you to mull over... I'll do my best to explain. In my day job I often take on these kinds of projects, an old house that needs a bit of an upgrade. I've got one on my books at the moment, circa 1915 house with solid wall, little insulation. Out the back is essentially an out house that I'm turning into a utilty area / shower room and internally knocking out some walls to make it open plan. Now that needs BC approval as I'm extending the floor area, carrying out structural alterations and increasing the insulation envelope. To make this work it's not possible to get enough insulation into the out house to meet the U values so to compensate I'm upgrading parts of the old house. But you are not doing this! The last bit of text was to hopefully let you see how we compensate elsewhere. I'm based in Scotland but the English regs are similar ( know the Scottish regs but don't do bedtime reading of the English regs / nuances.. but I do projects in England if they are of interest to me ) if they were not then we would be totally stuck when we refurbish / upgrade old buildings. It is often impossible to upgrade an old building to make each wall / floor / roof element for example comply with the latest regs. This excercise is about doing what we can (in so far as reasonably practicable) and all the UK regs allow for this in some form or another. For you it seems that you are not extending the insulation envelope or floor area. Thus my starting point would be to go back to the regs and see what needs BC approval. I think you'll find that a lot of the things you are doing (if any) don't require formal approval.. but in the regs there is a bit that says even if you don't need formal approval they still need to be compliant with the regs in terms of say workmanship, durability and safety ( the bit that worries you about the law? ). In terms of upgrading they don't say that anything you do must meet modern U value regs for example. Look for the phrase "in so far as reasonably practicable". This means that you can carry out upgrading work even if you don't meet the target U values. But in doing so you still need to comply with the regs.. for example.. you don't compromise the structural integrity of the house.. introduce a condensation risk, a fire hazzard and so on. If you want you can possibly regularise it by way of BC permission.. but they may turn round and say to you.. nothing to do with us so long as what you are doing is still compliant with the regs, British Standards and so on. I would go back and read the regs carefully and you may well find that you can upgrade your house the way you want if you apply common sense and do a bit of research. Hope this helps a bit.1 point
-
Yes, it's a cheap win. Heat is typically lost through insulation over the course of days, but is lost through air leakage within minutes or hours.1 point
-
I've stopped doing room by room, you just end up chasing your M&E tail tbh. Most rooms achieve an ambient, regardless, and rooms with lower temps attract heat from adjoining spaces, so seems a more pragmatic approach in most instances to just copy/paste/calculate.1 point
-
On Monday the internal structural walls are up to the top of the ICF walls and are tied in to the ICF walls. The windows and doorways have extra bracing ready for the pour. Nobody on site on Tuesday it rains all day and no more prep is needed before the pour. Wednesday starts with the last minute checks ready for the pour. The concrete pump arrives on site at 12pm it takes 30 minutes to set up before the first concrete pours out. We have 4 builders onsite plus the concrete pump operator. The concrete is poured into the ICF on all four walls in stages twice round and its up-to window cill height, the ICF cills are pushed into the wet concrete and the wood boards replaced so that the pour can continue higher. A poker is used to vibrate the concrete to ensure the concrete fills the ICF without any voids. At 4pm the pour is finished and the cleanup can start. The pump driver tests out our hammer head turn which was required by BC as we are so far from the road and Fire Engines are not allowed to reverse more than 20m. I think this proves our access works and it’s all down to the driver of the vehicles, the pump driver is great if only all delivery drivers are like this. The gables will be completed later so the concrete has rebar inserted, the other two walls are trowelled level. By the end of the week one gable is braced and poured. Total man days of labour week 6 is 17 days.1 point
-
And there is no way I would want someone plastering the celing above my newly fitted kitchen...1 point
-
I don’t use CT1 for final / cosmetic sealing because IT IS AN ABSOLUTE FECKING PIG to work with. It really is horrible. Great for purpose, but just SO much hard work getting anything less than a small bead. Silicone is great for cosmetic stuff, and is easily removed when tired so can be redone with ease. Try that with CT1 at your peril. Anything with microban in it for ‘no black crap’ is a winner. Silicone cleans up easily too and is quite a bit cheaper.1 point
-
Written by liberal arts grad trying to explain to ‘the man in the street’? (ducks and hides behind wall)0 points


