Leaderboard
Popular Content
Showing content with the highest reputation on 04/20/20 in all areas
-
Following on from the plastering work we did a quick stock take. Our plan was to be back on our narrow boat for the summer but with the current problems that was out of the question. We didn’t have materials to start flooring or fit bathrooms or kitchen and there was little hope of getting them. After a bit of head scratching and phoning around we found we could get fencing material and paint. We also had a few other jobs on the list that we could tackle, commissioning the water harvesting system, second fix electrics. We decided that the fence should be at the top of the list. Our plot has been behind Heras site fencing for a year now and although we’ve kept the site tidy it still was not that pleasant an outlook for the neighbours. We’re not far from the coast and strong winds are the norm so over engineering the fence makes sense so we don’t get a long term maintenance problem. Some while back we erected a green oak fence with the expectation that it would last a good thirty years. That proved a false expectation with the post rotting out after 15 years. We replaced the post with galvanized steel, but it was a lesson hard learnt and a problem we would avoid this time round. Initial thoughts were to use galvanized post and larch stringers, my Larch is expensive! After a bit of searching around Pat found a fencing product by an English company Marano who make aluminium fencing and had a nice contemporary product called Breeze. It’s an aluminium product and didn’t cost a fortune, and as it’s name suggest is designed for windy locations. The only down side was that it is not the best from a privacy point of view. On the subject of wind we also had a pane of glass broken. It happened overnight and we think it must have been broken by flying debris as it’s on the first floor with no access. Annoying but no big deal we thought. The glass that got broken is in a door supplied by Velfac. Contacted Velfac to ask about re-glazing only to be told it was not an option and the door would need to be replaced. Unlikely we thought and contacted the Velfac specialist fitting company who has fitted our windows, they agreed and said they would come back with an estimate for re-glazing the door. After a week they got back to me and rather apologetically confirmed re-glazing was not an option...so repair was an eye watering £1200. I’ll add a thread in the glazing section of the forum with more information so at least others will be forewarned. Back to fencing, at the front of the property we needed something cheap and cheerful to smarten the site up pending some art work fencing courtesy of one of our daughters who is an artist blacksmith. We decided to go with park fencing really low cost but looks surprisingly contemporary. I guess it’s cheap because it normally gets put in by the mile. Fencing complete, attention was turned to commissioning the Kinspan water harvesting system. Pretty strait forward, wire in sensors, pump, and connect water pipes. Half a days work, year right! All went really well, followed the initialisation instructions, tank set up OK, gauge reading set, pump pressure test...RCD trips. Meter across pump, sure enough earth and live not separate. The tank is just over a year old and the pump is a Grundfos SB3, quick look on their site confirmed a two year warranty. Contacted Kingspan to ask for new pump only to be told their warranty is one year from delivery, never mind installation. We’ll send out and engineer to look at the problem, OK how much is that £350 and how much is a pump £350...OK I’ll take care of it myself. The pump it turns out is not the simplest thing to dismantle, the parts PDF line drawing is not the best so It’s been put on the back burner. After a bit of searching and some good technical assistance from Anglian pumps, a new Divertron 1200x pump ordered £235. Still painful as it was not on the budget and had not done a single days work. With the plastering done we also wanted to get a mist coat applied and now we had more time get a finish coat as well. With a lot of area to cover, spraying looked a good option as I already had a HVLP setup. It turned out not to develop enough pressure for the emulsion, time to get an airless sprayer. Being a single use project I decided to see what was on Ebay and found a Wagner 418 sprayer being sold after use on another single project, looked clean and genuine, result I thought. Sprayer arrived and setup with paint to experiment and get to know how to use it. Not easily as it turned out, the spray was tailing badly, this is a solid central strip with a gap either side then a thin line, not what you need. Read the manual, googled it and it looked like it was down to low pressure. The 418 has no pressure adjustment, and the manual said it was down to cleaning out the inlet valve and paint filter. Lots of cleaning, no result, more research, cleaned outlet valve. Tried new nozzle, tried another gun and so on. Several frustrating days later opted to return it and buy a new one. Thank goodness this worked brilliantly and we were soon painting. Allowing for a 50/50 mist coat mixture we should have had plenty of paint. Half a day later, half the rooms done and all the paint gone. Fortunately the local Toolstation had stock. Another half day and it was done. All I can say is airless sprayers are brilliant, but boy do they have a drink problem. For the top coat we are using a really tough mat latex paint that you can scrub. This of course was special order and ordered before we knew about the sprayers drink problem. Needless to say the 45lt disappeared in half a day. It did cover the majority of the house, and we just have two bedrooms left to finish. The finish is very pleasing.4 points
-
The immersion heaters thermostat opens when it gets to max temperature. Some of the more clever units can then dump the power somewhere else.2 points
-
Sorry, I was referring to the mechanics, not BR requirements. All I know is that my ashp installer got a bit twitchy when I told him that he didn't need to worry about a legionella cycle...1 point
-
3/8” sounds really small - is that the internal diameter ..? If the 3/8” is already connected I wouldn’t disturb it but just cut the 20mm and get a 20-25mm connnector - short restriction won’t harm it.1 point
-
Correct. Although if you've no PV immersion controller, you'd probably use the ashp's legionella control programme. I've got the Apollo Gem, and the immersion heater is wired directly in to it, independent of the ashp. It has it's own programable legionella cycle and boost facility if you need it.1 point
-
Solid State Relay. The device that pulses the power to the immersion heater.1 point
-
The Makita battery to Einhell/Ozito continuation: Einhell it seems bought Ozito. From that came the Power X Change system. Seems the same batteries fit both makes. Off of Thingiverse we downloaded a ready made adapter by a chap named Seibar. That itself was his take on a model developed by a chap, sportsedan. Seibar's was a little loose for my liking so we increased widths/thicknesses here and there and made it a bit tighter. The visible face on his, you would see, where the Makita battery clips on looked dog rough imo: So our 1st print was done with the layer orientation at 90deg to Seibars: It fits nice and tight, Face you see not too bad: But.....it was printed with this end sitting on the bed, where the supports came off, it's horrible: The clip broke as well. Pretty sure the layer orientation didn't help: Printing another with the end squared off and more "meat" on the clip: 0.2mm layers, black Steadytech PLA. Watch this space about 8pm tonight!1 point
-
1 point
-
1 point
-
1 point
-
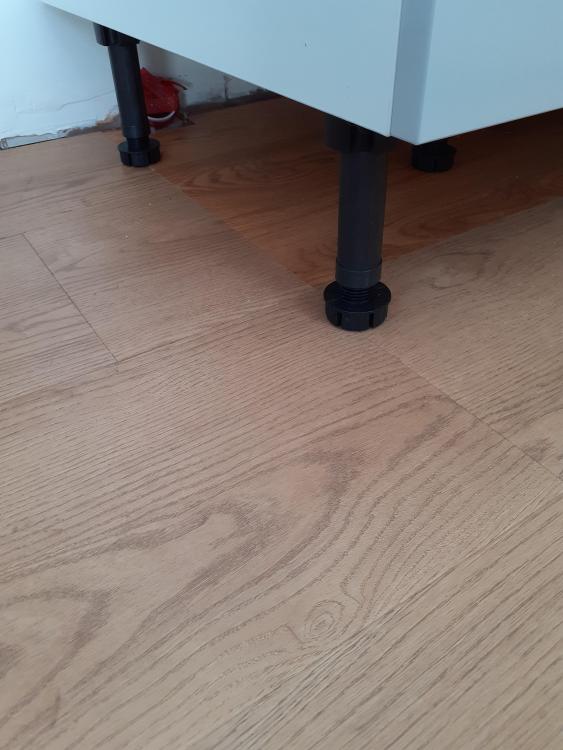
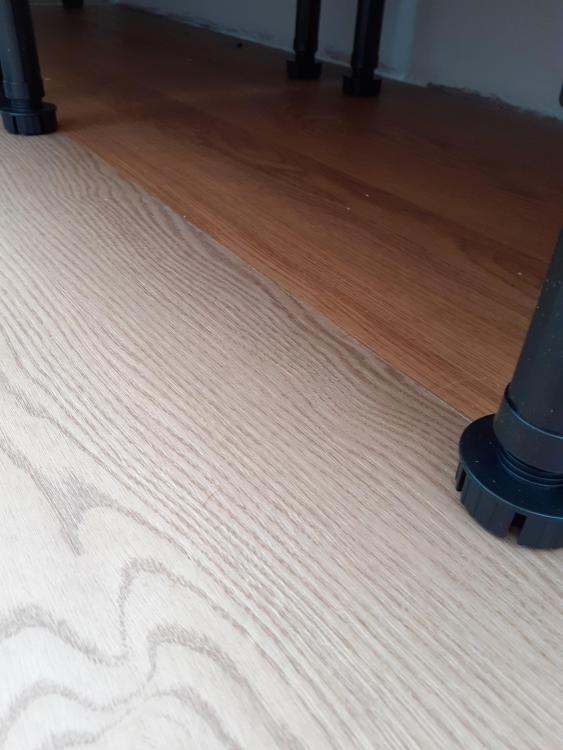
I'd say for me as it going into a kitchen it was going to be Amtico or tiles, I went for Amtico as I felt confident, after research, DIYing it, I also have experience of living with Amtico flooring and thought it would be a good option as it is never as cold as tile and dropped glasses and plates stand a chance of survival, being able to do it DIY was a big factor too. Of course I know you can DIY tiles but I couldn't really be bothered with the hassle. I choose tradesmen very carefully and when it comes to letting them into my house the bar is raised even higher - I don't have any flooring contractors on my speed dial and the monkey I did phone for a quote put me off so badly that I didn't even try a second. My mind was made up right then and there that I was doing it myself. I opted for a fairly expensive Amtico product on the basis labour was free so I think in the end I got a better floor. Amtico installation difficultly is one of these myths spread by the installers themselves. If you really think about it, it is gluing bits of plastic to the floor! After 2 attempts I was even able to cut and bevel the edges for that clean lines you will see at the transition from Amtico to Vusta on the plank ends, this is the same skill required where doing Amtico with borders etc.1 point
-
If it is blue MPDE then it is likely to be 25mm, it could be 20mm but surprising if it is as it tends to be used less for mains supplies. Pipestock hold all you need - is this an external standpipe as it will need insulating and preferably have its own isolator.1 point
-
1 point
-
1 point
-
1 point
-
I have to face facts: my mobility is reducing a good deal more quickly than I'd like. And sometimes the mobility I do have is accompanied by a reasonable amount of pain. My memory isn't what it once was either. I regard this new phase in life as just another challenge to be faced and - if not beaten - then dealt with crisply. By accident I bumped into IFTTT. Also by accident we renewed our Amazon Fire Stick recently, and that comes with Alexa built in. Curious as ever, mucked about with it. Didn't take long to make the link between the two..... Yeah, I get it: ya don't get owt for nowt. There are - for some - security or privacy concerns which outweigh any perceived advantage. I accept that. But when you need to work out how to get back up again before bending down to pick up the hen's eggs: when, before descending into a trench, you work out which ladder will be the least painful to use: when you for the first time realise that you can't be sure who rang you when and on what date ... its time to harness a bit of creative thinking. Voice activation has to be part of my future because it will help reduce the number of sources of pain. Please can we discuss on this thread POSITIVE reasons for opting in to either IFTT and Alexa or IFTT and Google Assistant? Maybe there's another voice activated technology which you know about that might help control simple parts of our lives?1 point
-
1 point
-
Interesting. When I spoke to Marley technical they were of the opinion that uPVC pipe should only be concrete encased where unavoidable. They said it could cause more problems than it solved as the concrete was less tolerant to ground movement etc than the pipe so could crack and put pressure points on the plastic. If it was possible to use one of their standard details e.g. gravel and slab, they reckoned that was a much better option. I'm not an expert in any way, just reporting what they said...1 point
-
1 point
-
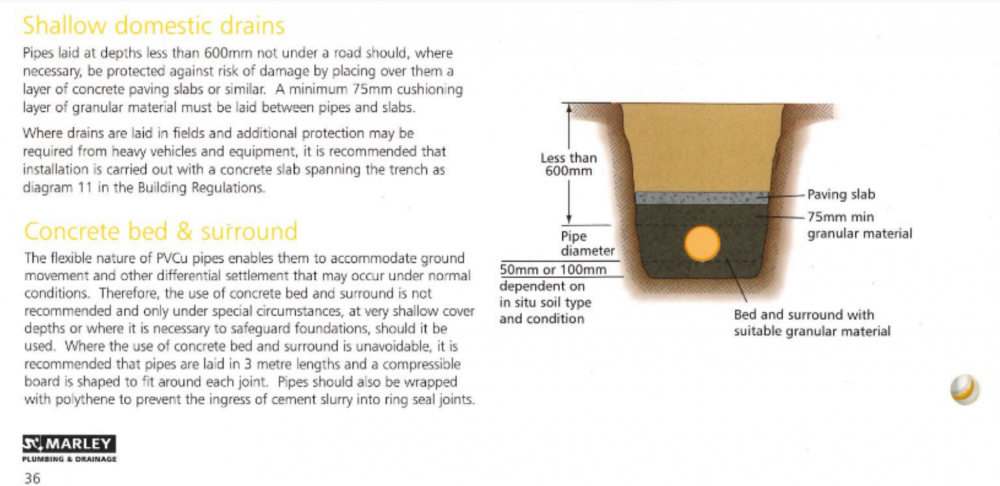
Marley say it can be shallower in non-trafficed areas so long as covered by at least 75mm gravel then paving slabs as per their installation document: I emailed to confirm what the "where necessary" meant in case there were exceptions to this, they said it meant where necessary to put it shallower than 600mm. They also said the paving slabs can be replaced with 50mm poured concrete if easier (I had spare concrete materials on site so did this, scored at regular intervals to encourage any cracks to span the width of the trench rather than randomly fracturing over the pipe. Yours seem very shallow though. A 100mm invert (assuming 110mm pipe?) means the pipe is only partly buried.... NB although the drawing shows the paving slab buried when I spoke to them they confirmed it doesn't have to be e.g. if very tight for depth you could have them under a paved path so long as 75mm gravel between the pipe and the path bedding.1 point
-
This RPi based CO2 logger claims to come ready to log.. https://www.co2-logger.com/product/co2-logger-development-kit/1 point
-
Here you go. Page 1 is the buffer, page 2 is the DHW cylinder. DHW cylinders.pdf1 point
-
We use only Miele washing machines and dishwashers and have done for a very long time. Never had a problem and the ten year warranty is worth it.1 point
-
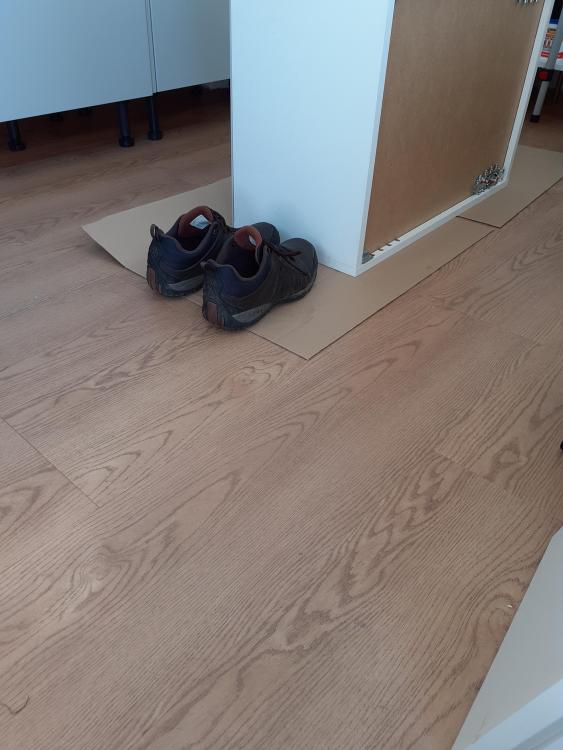
Well that is the Amtico part of the floor down, it looks great, I am very happy with it and considering it is my first DIY Amtico adventure I am quite pleased with myself. I now need to do the cheaper stuff around the perimeter which will be under the cabinets. I do have some photos but don't have the time to email them over and what not, I will soon. So in summary, Amtico is very much a DIY job unless you are going for a complex floor with motifs etc, where maybe I'd not want to risk it, although, if I had plenty spare lengths I might risk it... I would be happy to lay a border with what I now know. So, if you are thinking about it - go for it! I used Ardex Universal adhesive spread with an A2 notched trowel, I used a Marshaltown 4 inch jointing knife to scoop it out the tub and generally spread about the place before hitting the whole area with the notched trowel until I had 100% coverage but notched sized lines so there was room for it to squeeze out into the troughs and not so much adhesive the flooring just starts to slide about. I'd do it again in another room tomorrow, as with most jobs, the time is in the prep, the flooring actually goes down very fast and cuts very easily - if I was doing it again I'd setup a workbench with a "cutting station" on it.1 point
-
0 points


