Leaderboard


Popular Content
Showing content with the highest reputation on 01/19/18 in all areas
-
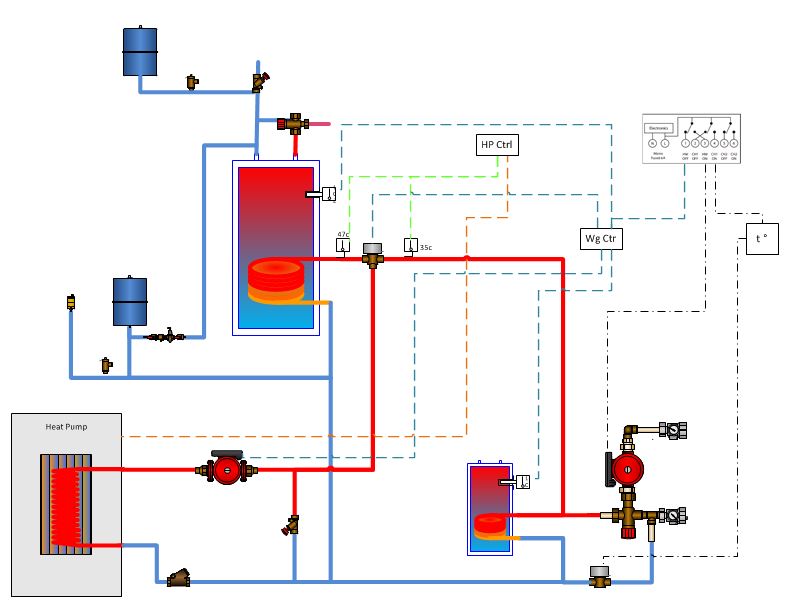
Visio has a massive library of M&E /HVAC symbol libraries if you know where they are - they are installed but not visible usually. This is my ASHP done in Visio
 2 points
 -
Hi, Tom here. New to the site. I am a passive-house enthusiast, already planning designs for a new build but I have not even found a plot yet, so I am probably letting my enthusiasm get ahead of me. I aim to build a small home in the South East of England, probably around Hertfordshire or Buckinghamshire. I have no experience in building but have been reading intensively for a few months now and have learnt a lot from this site and many other blogs, including Jeremy Harris' and podcasts, including Ben Adam Smith's House Planning Help podcasts and by visiting houses on the Passive House open days. I am fully convinced that Passive House is the best way. And have been persuaded that SIPs above a floating concrete slab might be a good construction approach. For DHW and heating, my latest best guess for internal services is an ASHP, UFH, SunAmp with E7 and PV. Best regards, Tom1 point
-
Just about to puncture in earnest my lovely plasterboard ceiling for 5(6) downlights and in particular the continuous vcl that sits above the moisture resistant plasterboard. I've had it planned to do like this for a while but will my idea to maintain the airtight layer work? So, between the joists its fully filled with 100 + 50mm of foil faced PIR. I'm using TH140 Thermahood downlight covers that measure 185 x 185. A rigid plastic type they are. They have no bottom flange really as per the sketch (the circular ones do but I like squares). So I drill up from below my 60mm dia hole that goes through the plasterboard, vcl and into the foil faced PIR a bit. Then with a long series pop a hole up through the PIR. Into the loft with my 200x200 wooden jig, centre over the hole and neatly cut out the PIR. At this point I have the opportunity to LEAVE the bottom layer of foil intact as the PIR just peels away. That is above the vcl. Ideally though I want the vcl outside the 185x185. So I cut back an exact 185x185 section of foil and vcl and centre the Thermahood over the cut out. I figure just a bead of intumescent sealant around all 4 sides should do the trick or should I invest in some airtight tape? To maintain the insulation I'll be adding a 150mm deep slab over the hole area above the downlight. Plenty of height to do so in what is dead space. There's a good 300mm between the tops of these ceiling joists and the underside of the dormer extension floor joists. Do I need to fill the void outside the tapered sides of the Thermahood? Low expansion foam maybe? Or can I leave this void unfilled? Thinking condensation maybe? Cheers.1 point
-
Well I have got deep window reveals ( angled to let more light in, and it works really well) deep door reveals also angled, but 100 mm block inner walls, this enabled me to have 200mm cavity which is full of insulation. My build is very solid and i don’t understand why you would want 200 mm inner walls as the 100mm I have is rock solid.1 point
-
If the only reason for a 215mm inner leaf is because " The architect likes to build houses that are substantial in look and feel" then I would get rid of him sharpish1 point
-
There is a possible online solution that would let you access from iPad/Mac/any device - Smartdraw. It does cost though - $9.95/month. There are a number of templates in there - look under "Engineering" https://www.smartdraw.com/templates/1 point
-
That's the sort of thing I want to do @PeterW seems like I need to go and dig around Visio a bit more.1 point
-
I do work with computers all day so can access both PowerPoint and Visio easily. I use Visio alot for network diagrams but when I looked I didn't think it was great for depicting valves/manifolds etc. Visio and office products were available at a very competitive price on Amazon for along time.1 point
-
I have often found window manufacturers and fitters to be very slopey shouldered.1 point
-
I just did mine on powerpoint. Put the appropriate cut out of the plans as a background (you need to be able to scale) and went from there. Some companies do have them but you then have to utilise all their parts which can be a pain of you are doing it non bog standard (as a lot on here are).1 point
-
I think you would struggle to get airtight tape down into that narrow gap. I would stick the vcl down and stick the hood in place with something like "sticks like...." then foam around the hood with expanding foam, leaving the top of the hood exposed. Assuming LED lamps no heat problems. Make sure you seal the cable entry into the hood.1 point
-
Off the top of my head I think I would say yes because you want to keep air circulation / convection, even in a small space, to a minimum. Not sure I would use foam, might go for glass wool - easier to manage.1 point
-
It's not wholly true to say the FIT has reduced to 4p per kWH. The current rate for sub 10 kWp systems is 3.93 per kWh generated, plus an export payment of 5.03p per kWh for half the generated energy, unless you have an export meter fitted. With an export meter you still receive 3.93p per kWh for every kWh generated, plus 5.03 kWh for every kWh exported to the grid. This can alter the dynamics of the payback significantly if you export a high proportion of your generated energy. It's also worth noting that FIT payments are indexed linked to the RPI, not the CPI, for the guaranteed period. This means that the 3.93p rate will increase by 4.1% in April.1 point
-
Our BC inspector said it was quite normal for self builders to move on prior to sign off. Not sure about the legality, was a case of JDI, though I did tell various parties like self build mortgage, build insurance, council.1 point
-
We have a lot of oak outside and initially treated it with Danish oil. Would never do that again as it has to be recoated every year at least. Currently trying "Osmo UV Protection Oil Extra" which claims longer life. Jury still out. +1 to what Ox07 said... Our front door is oak and is treated with "Sadolins light oak Classic" and "Sadolins Extra Clear". Note: Most of Sadolins products are made in two versions the "Classic" and the "Extra". The Classic is thinner than the Extra. If you were to use the extra version for both it would obscure the oak grain too much. Use one or two thin coats of the classic brushed out well and then the Extra Clear to give it protection. When it needs redoing you just need the Extra Clear only.1 point
-
You mean this Lisa Rogers, chatting to us just before I drive the boat in the race - ('tis me with the grey beard, lifejacket and helmet....):


 1 point
 -
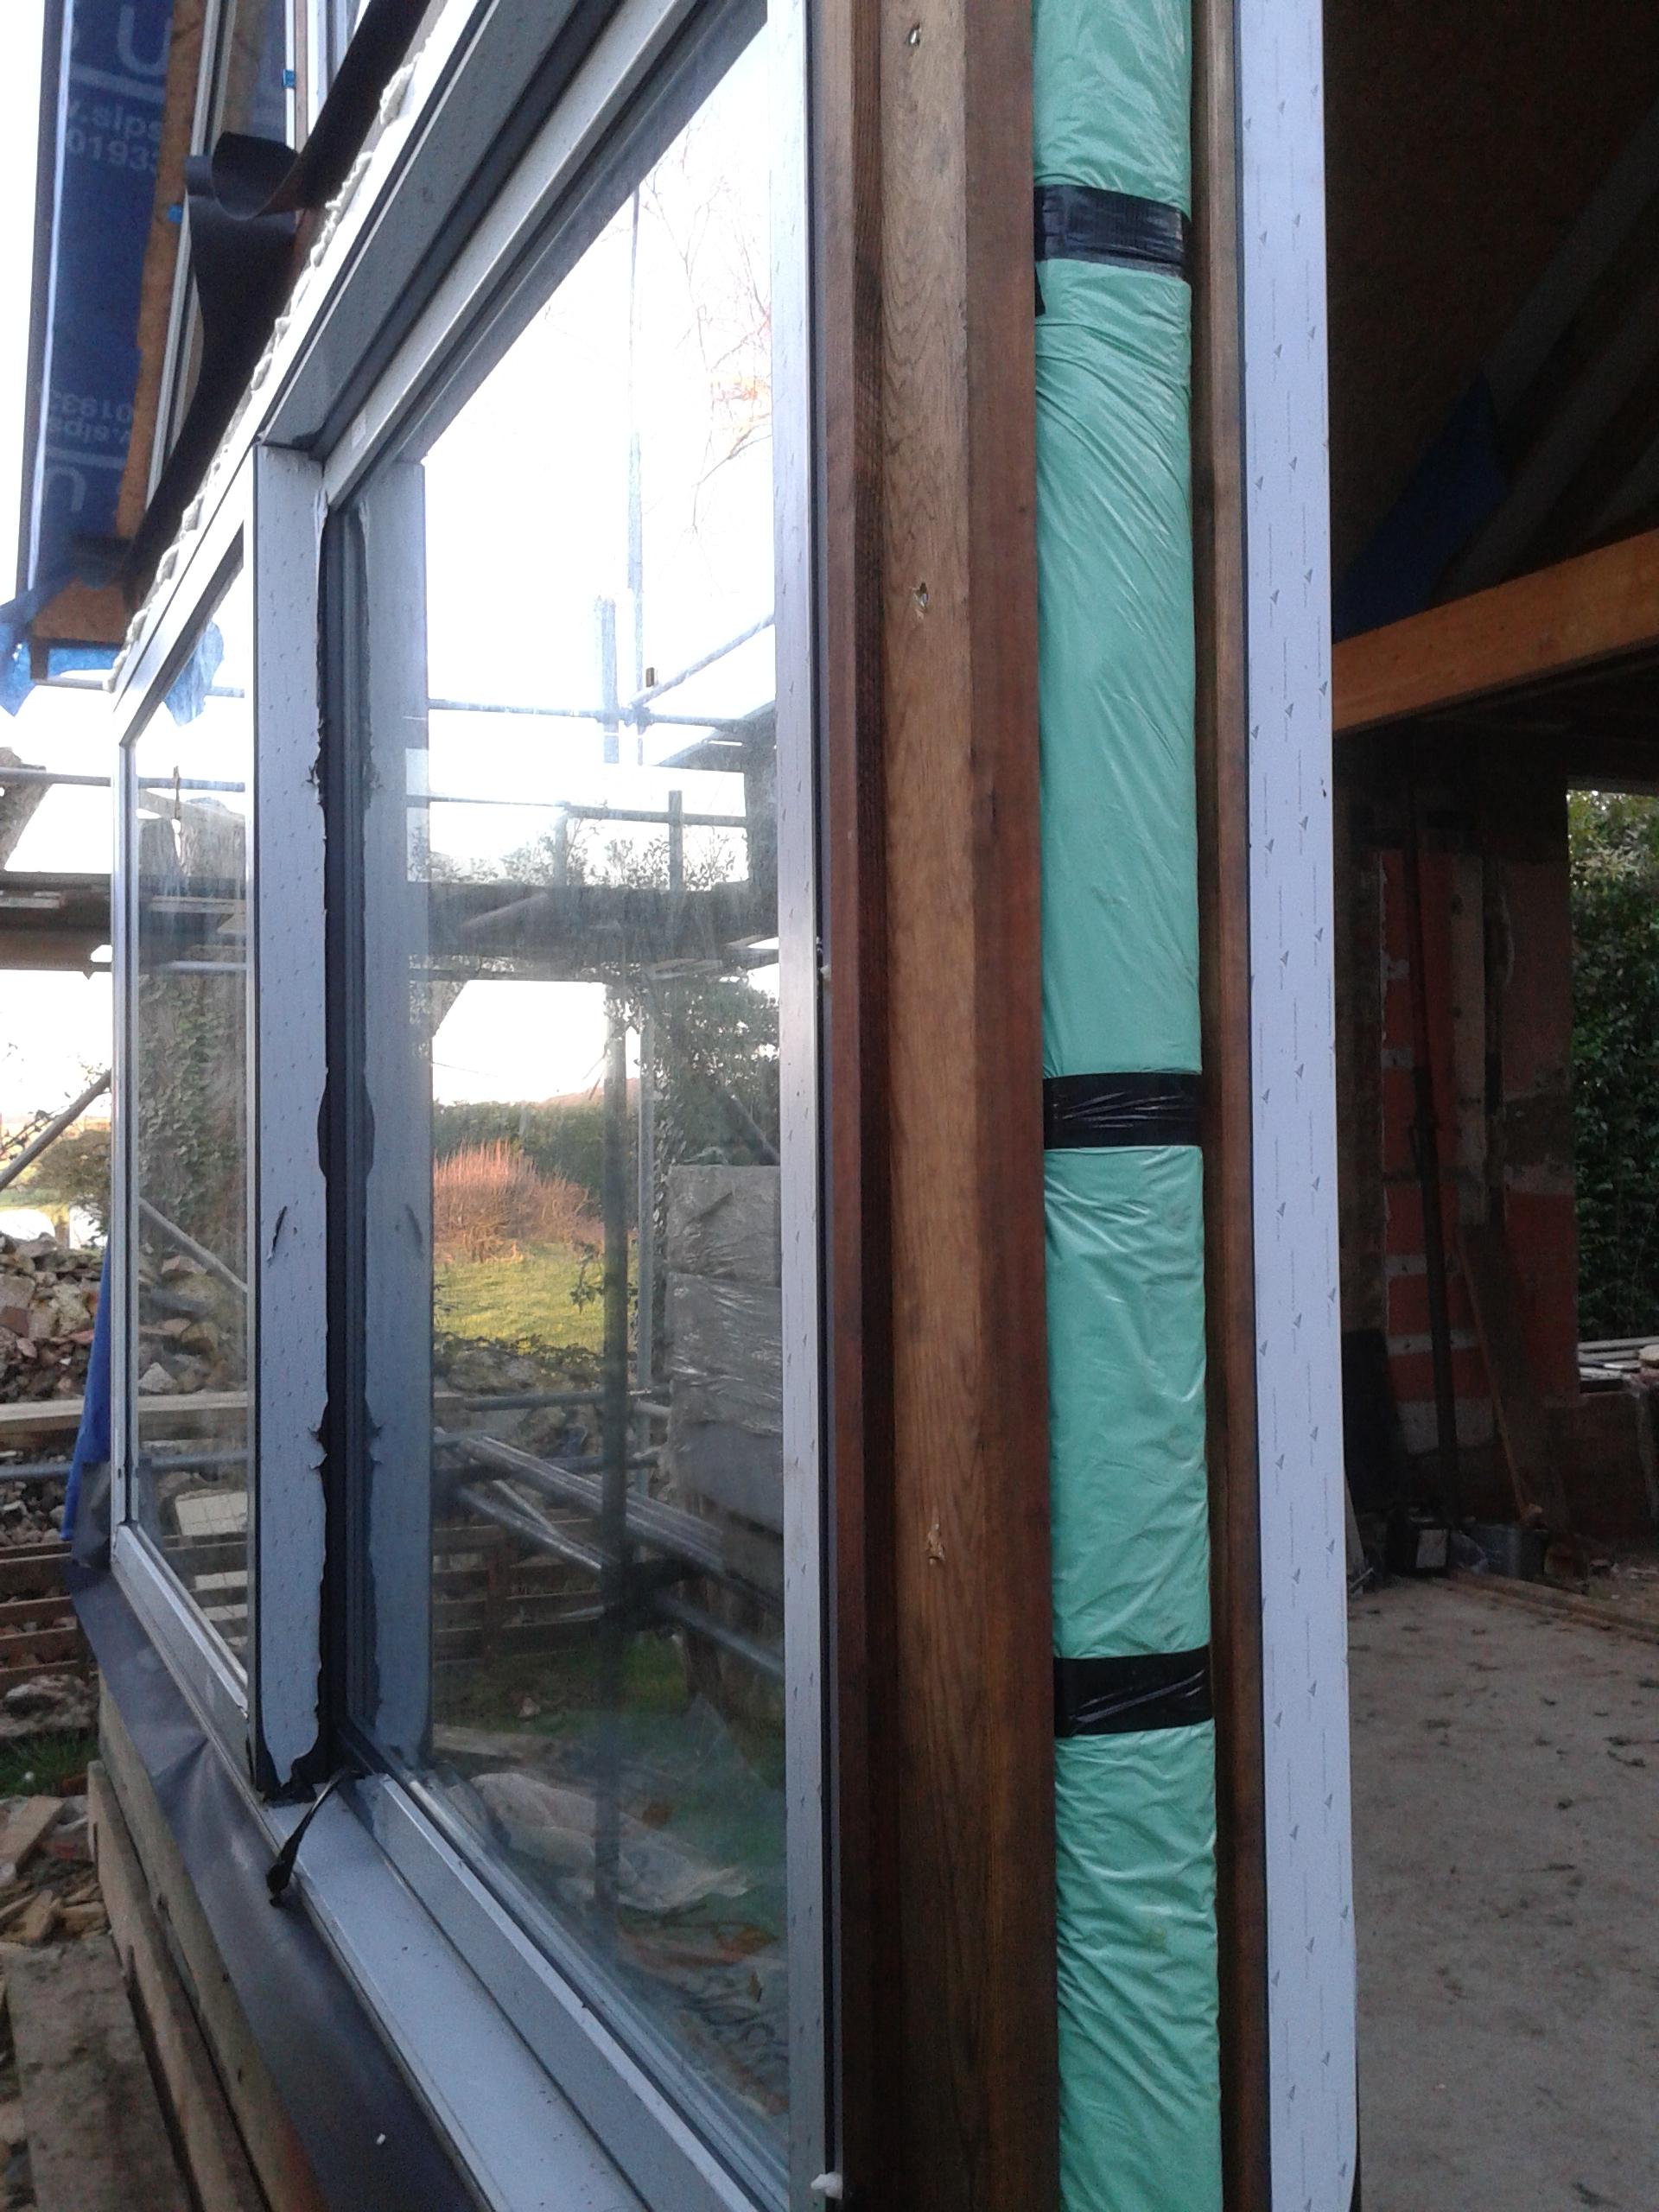
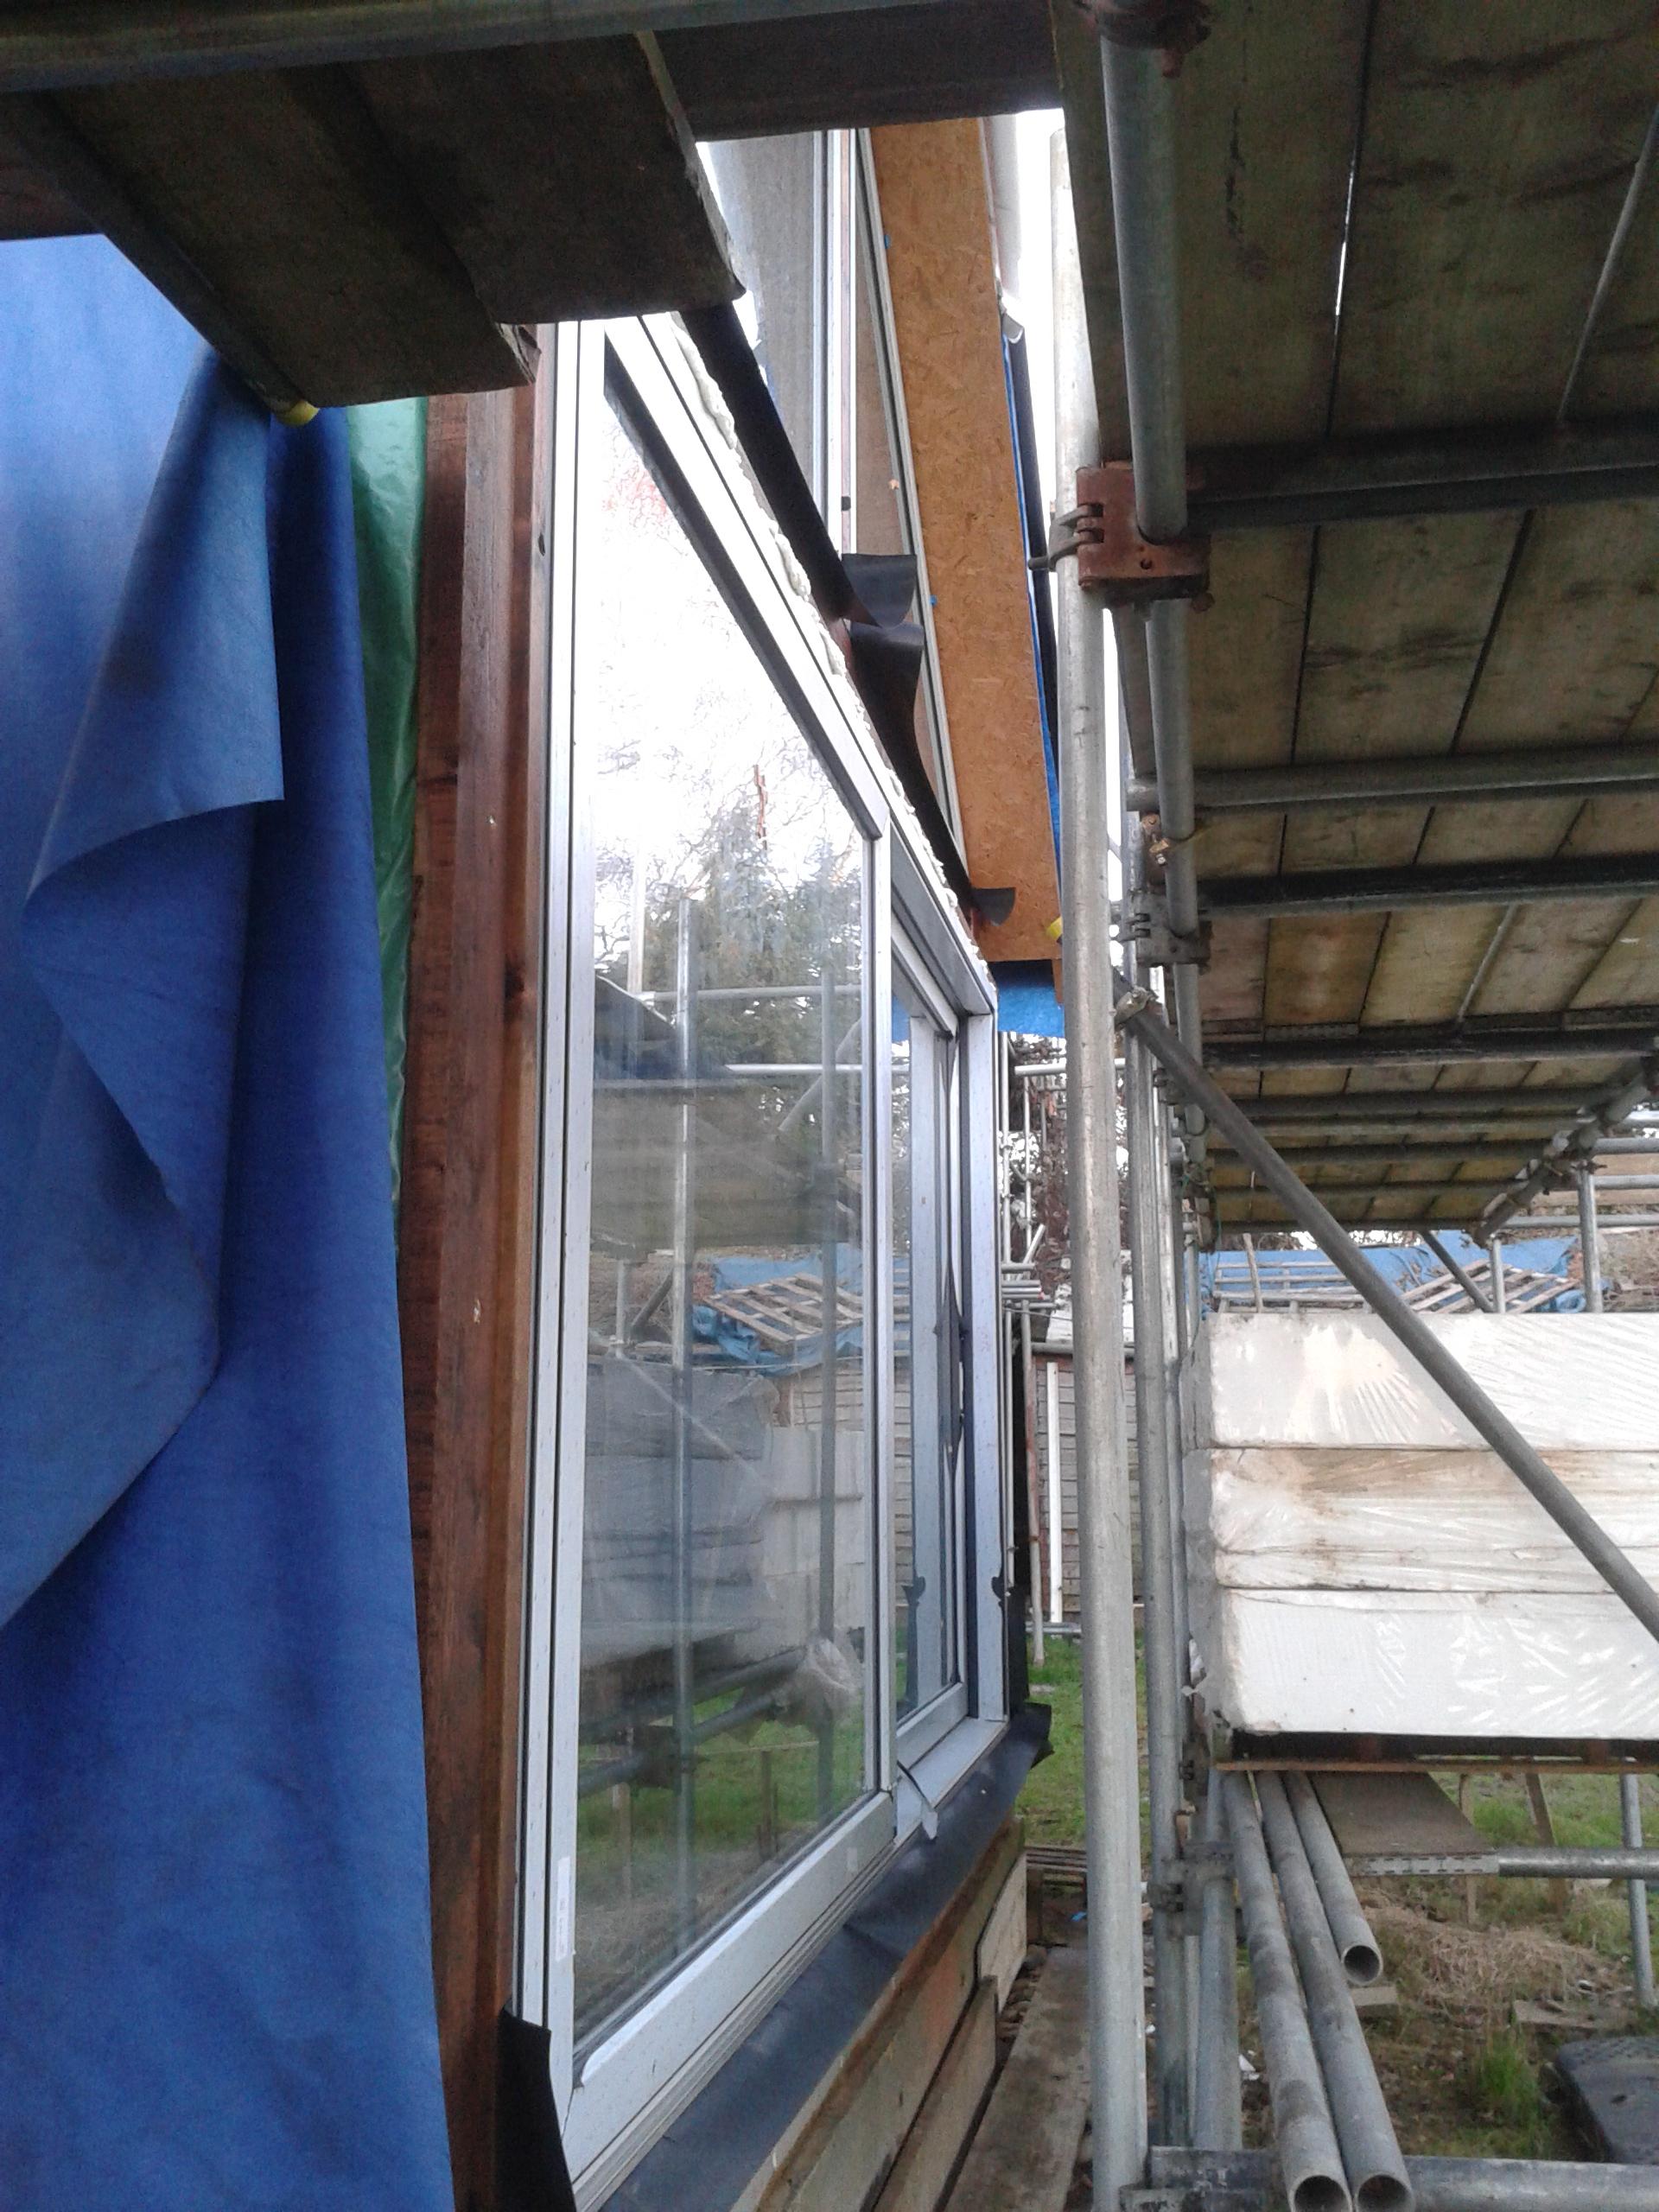
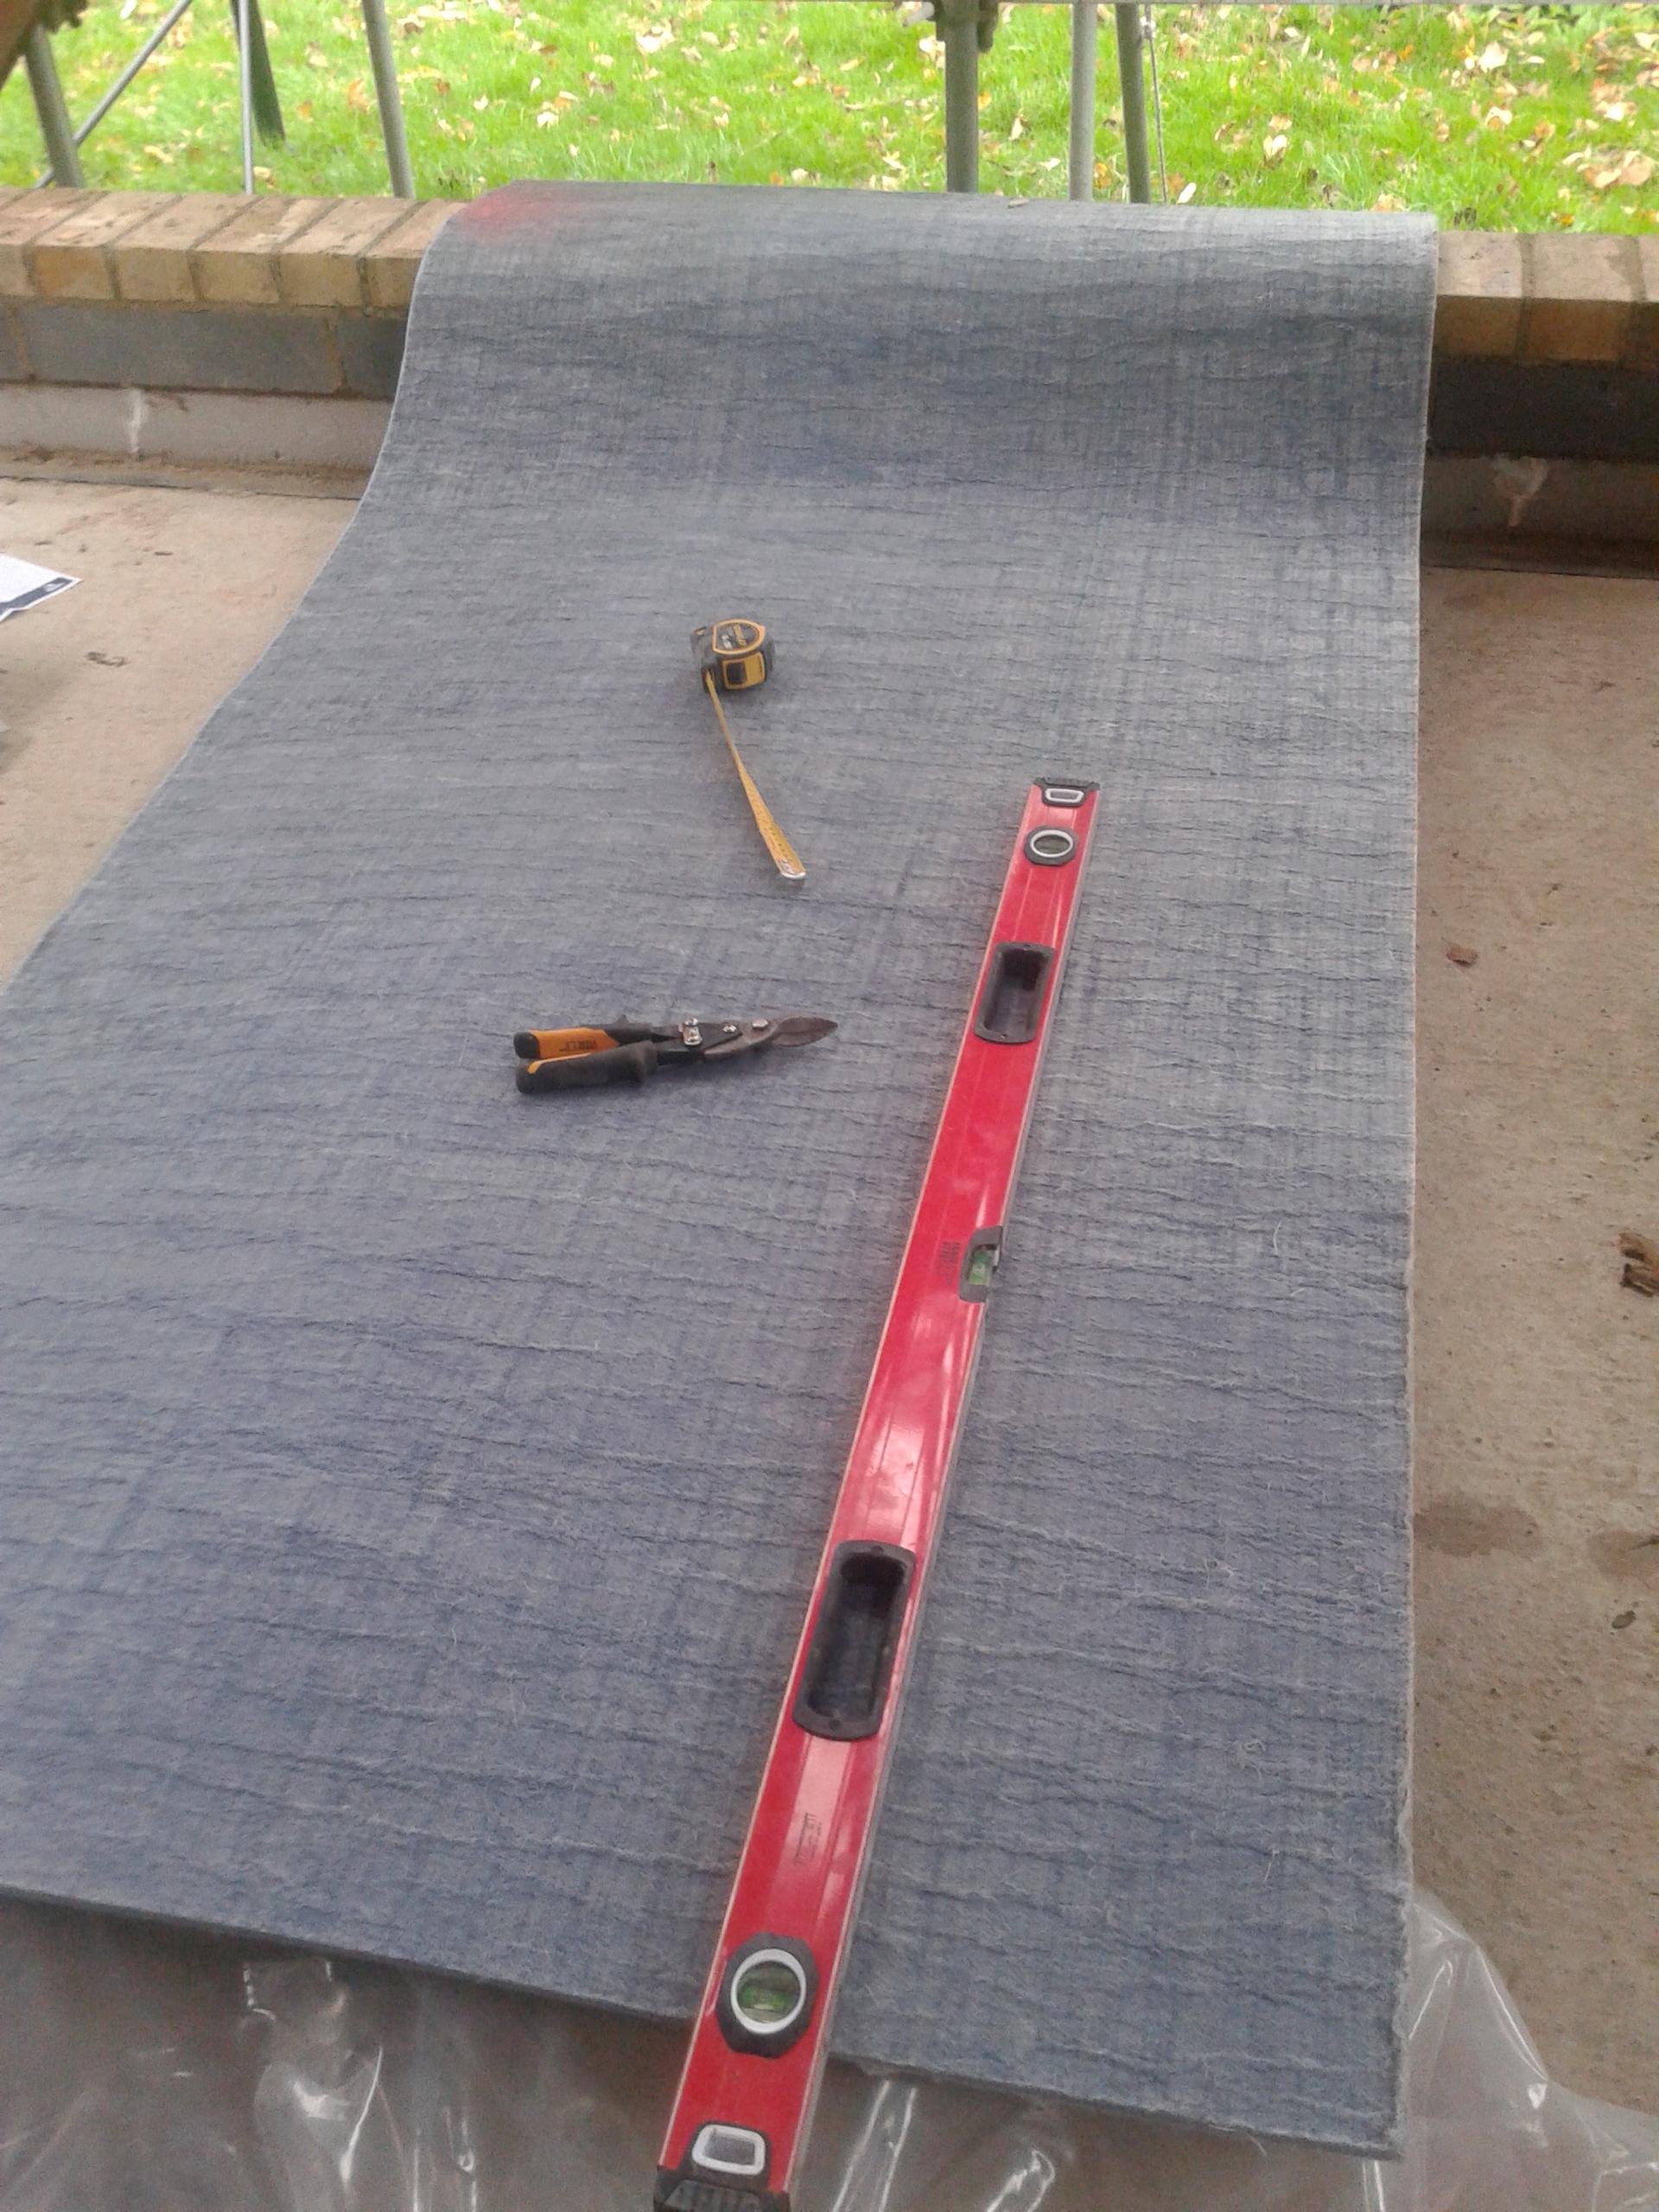
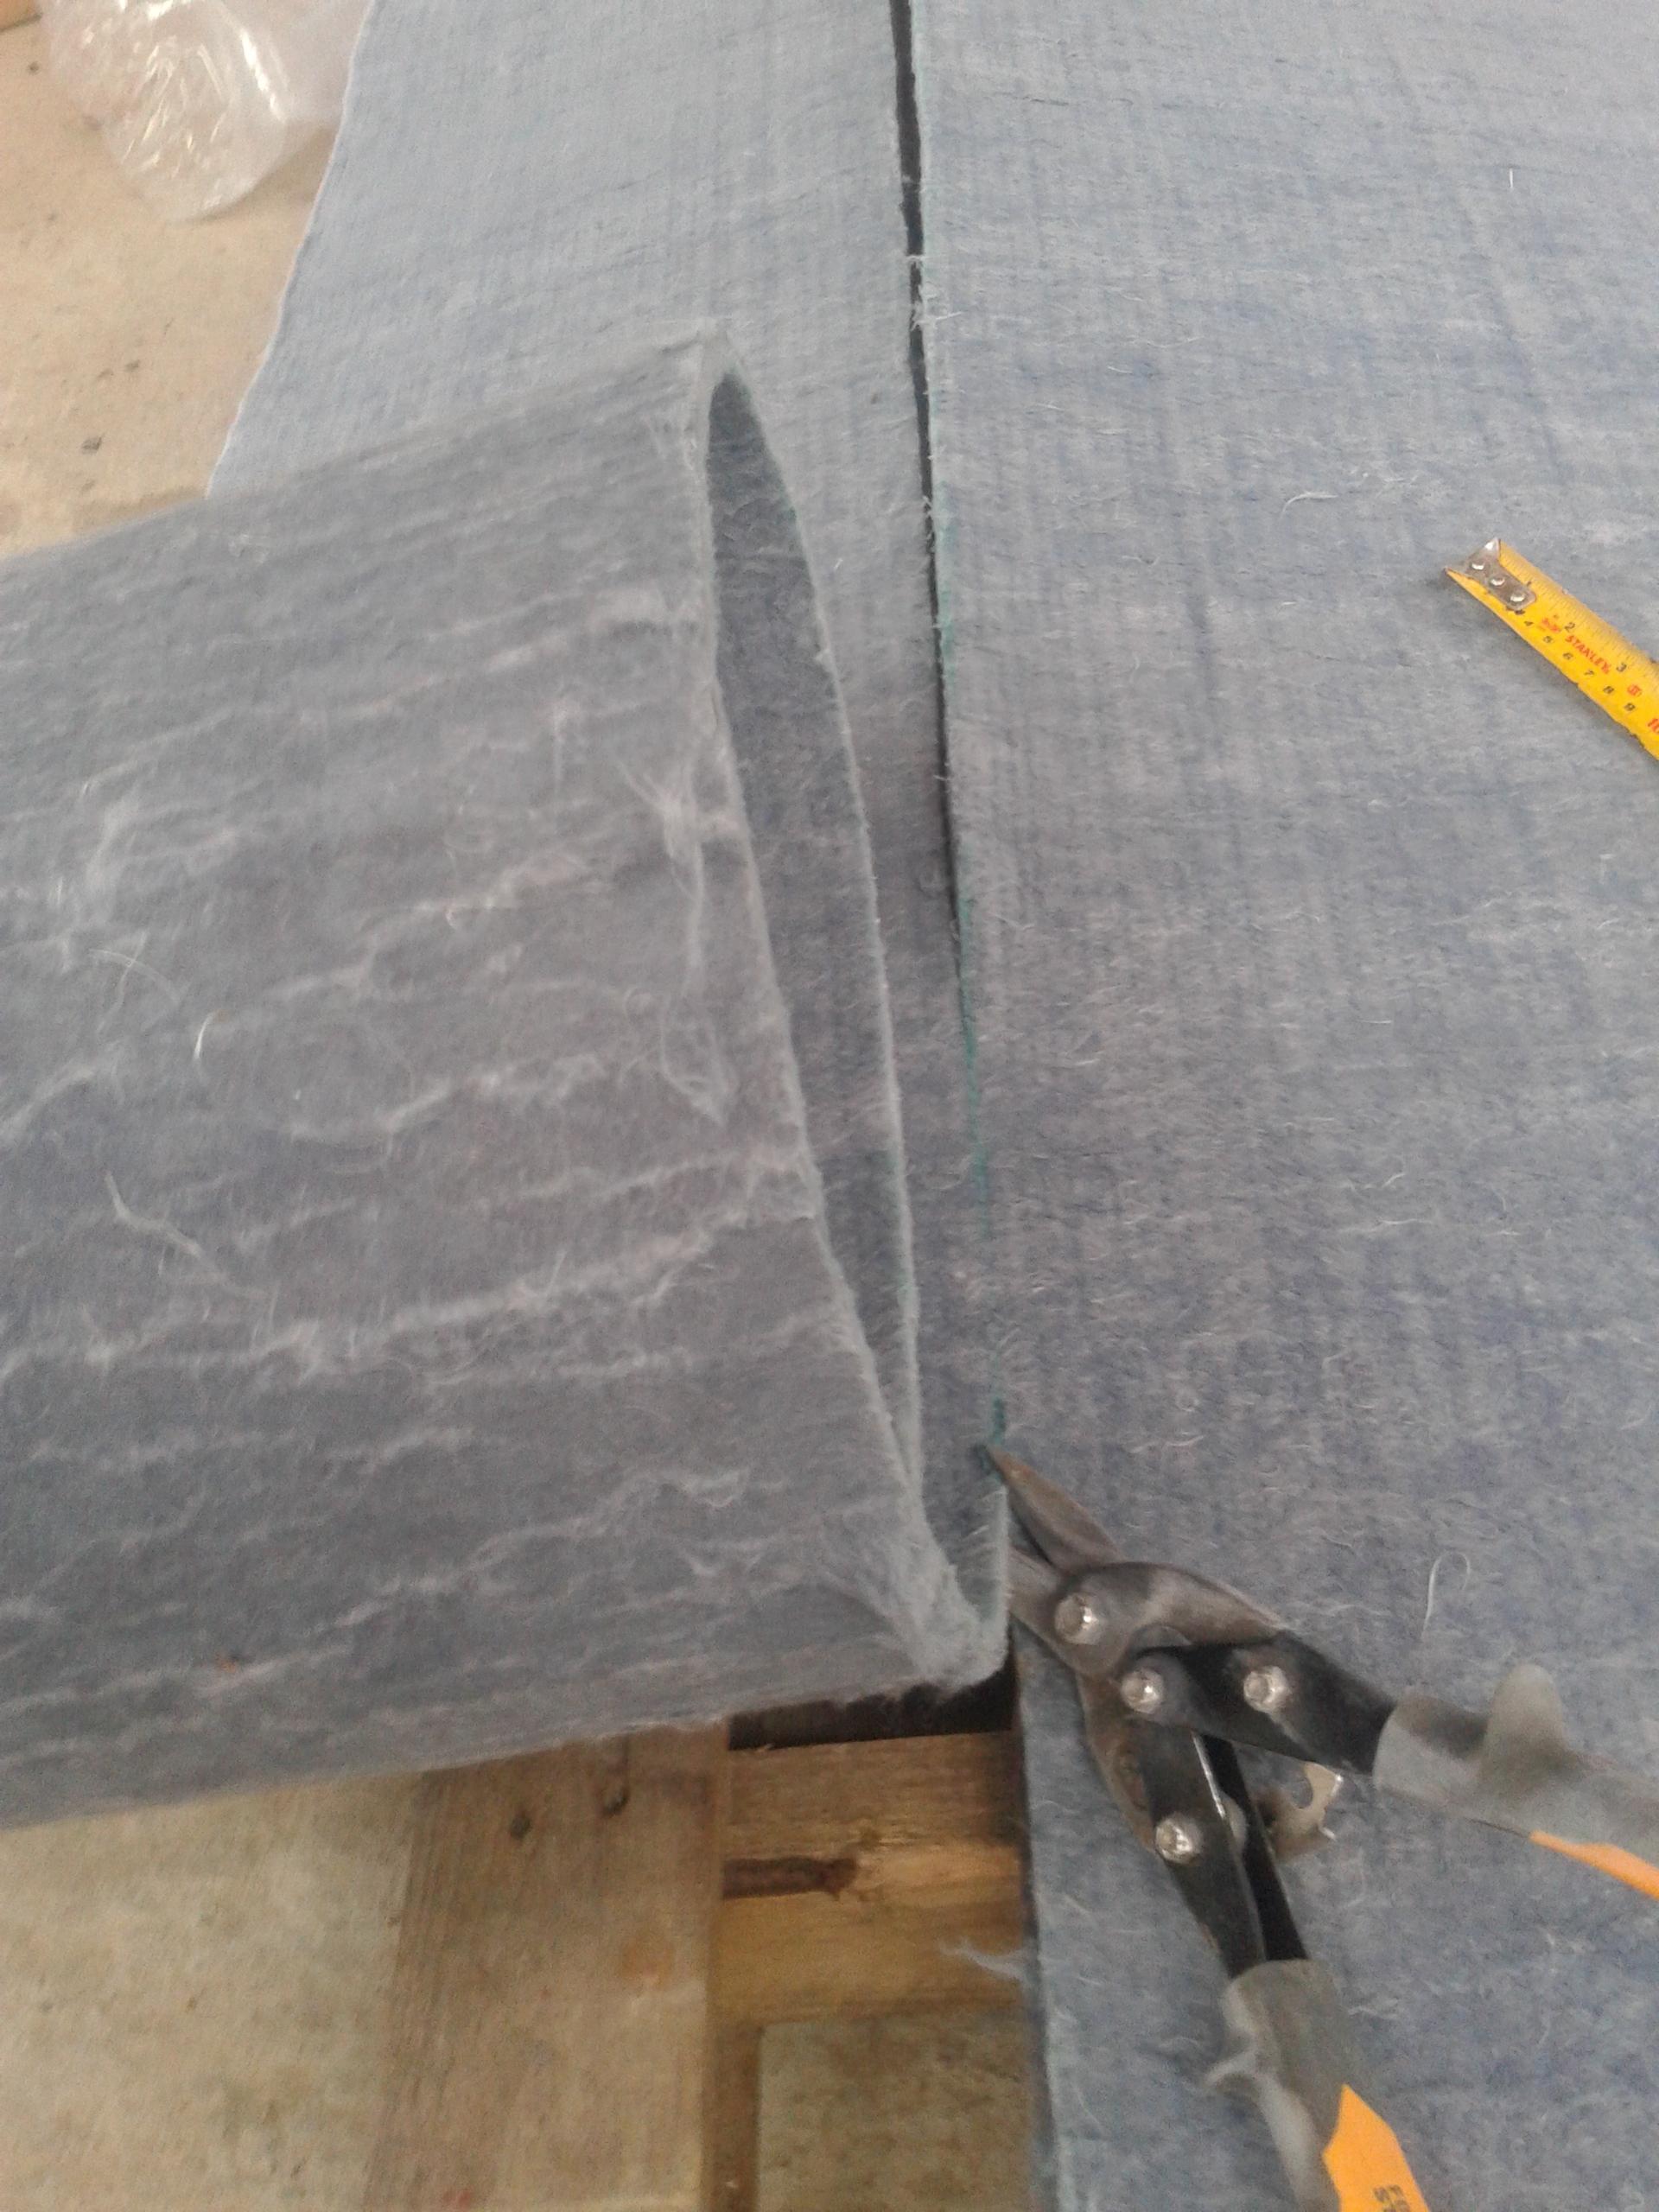
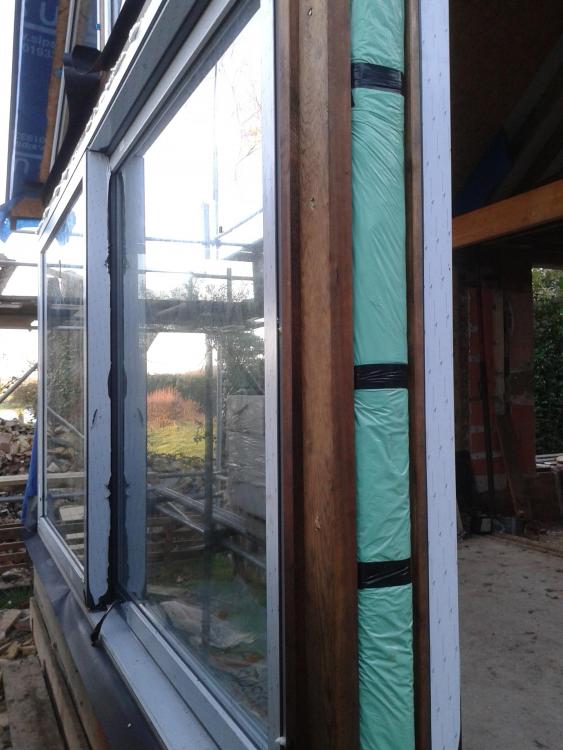
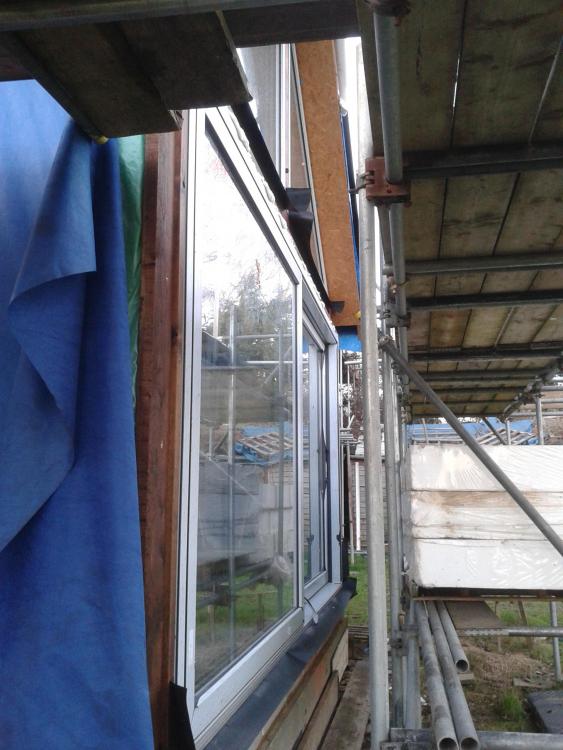
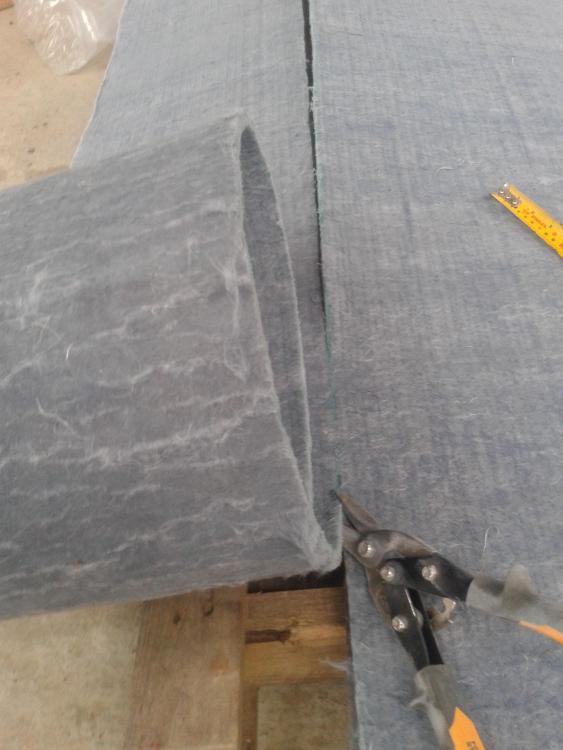
I had a similar dilemna and didn't want to bulk out the post too much with thick insulation (PIR or anything similar). In the end I went and dug into the account and went for aerogel sheets. Stuck that onto the steel post on all four sides, covered with a VCL and then covered that with some timber. Better u-values than PIR, slimmer view and will protect from condensation and reduce thermal bridging. Aerogel: use a mask to cut the stuff! wrap onto posts (had to tape them as I was doing this on my own), otherwise could maybe use a spray glue. VCL Timbers drillied into steel post (bit of bridging): (glazing to be fitted in above pic). Aluminium capping still to go over the timbers now, but need to source that. Timbers were pretty thick, but managed to get away with that here as the door frame was almost 200mm iirc.

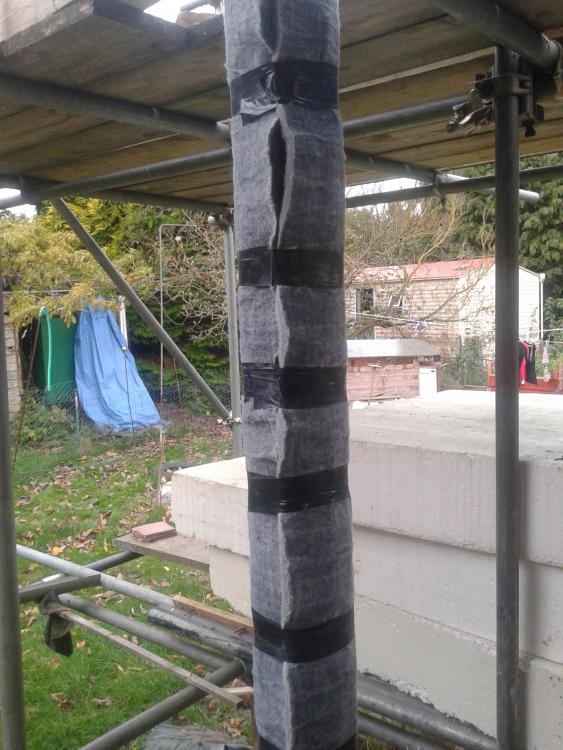
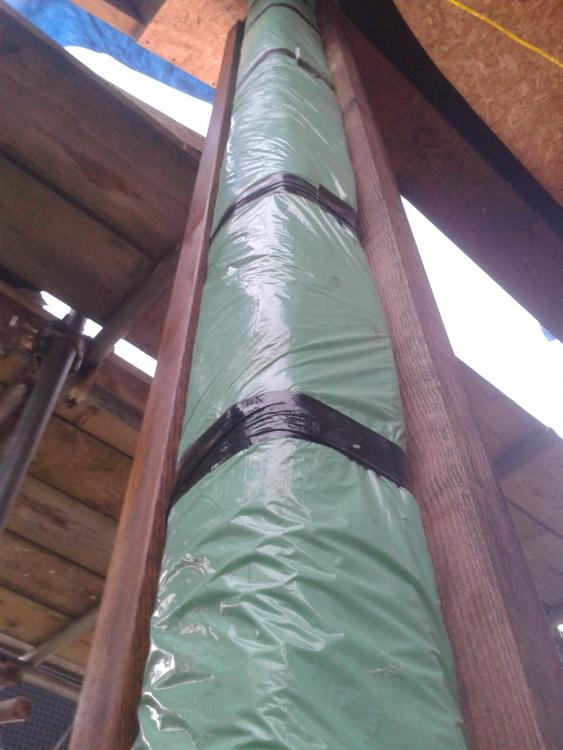 1 point