Leaderboard
Popular Content
Showing content with the highest reputation on 11/20/17 in all areas
-
6 points
-
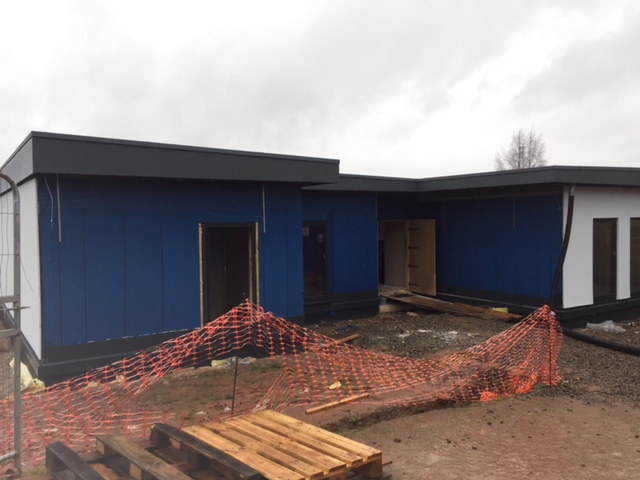
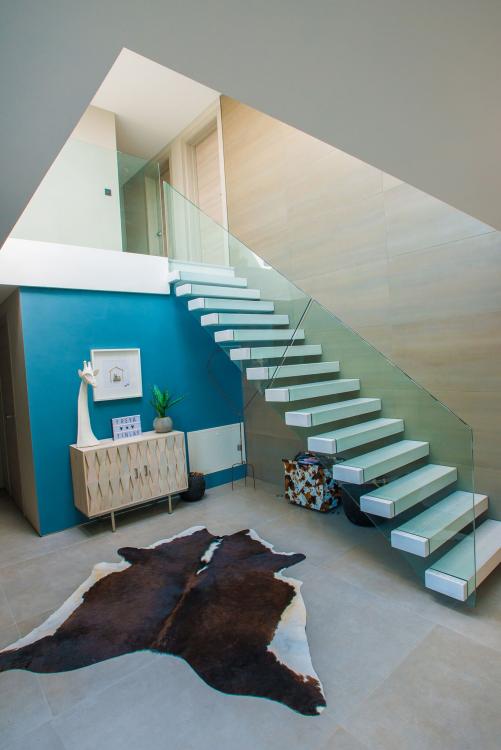
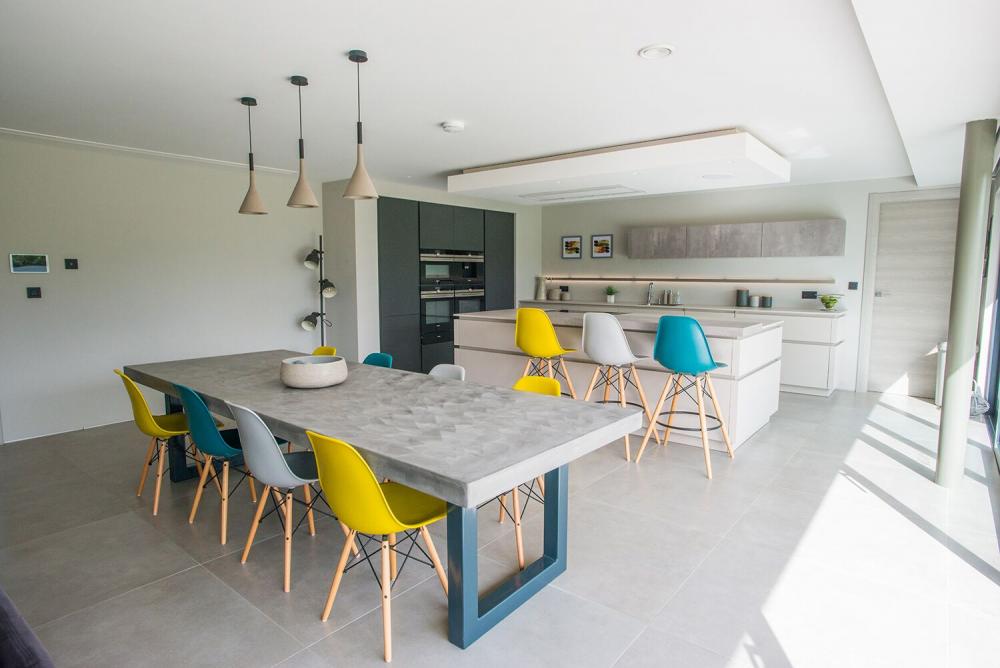
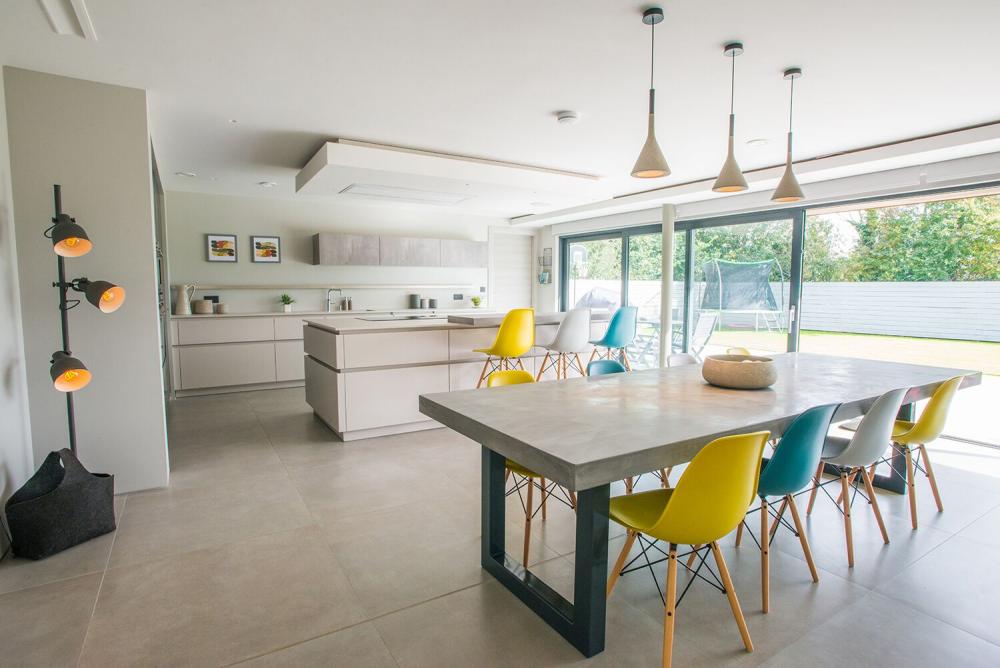
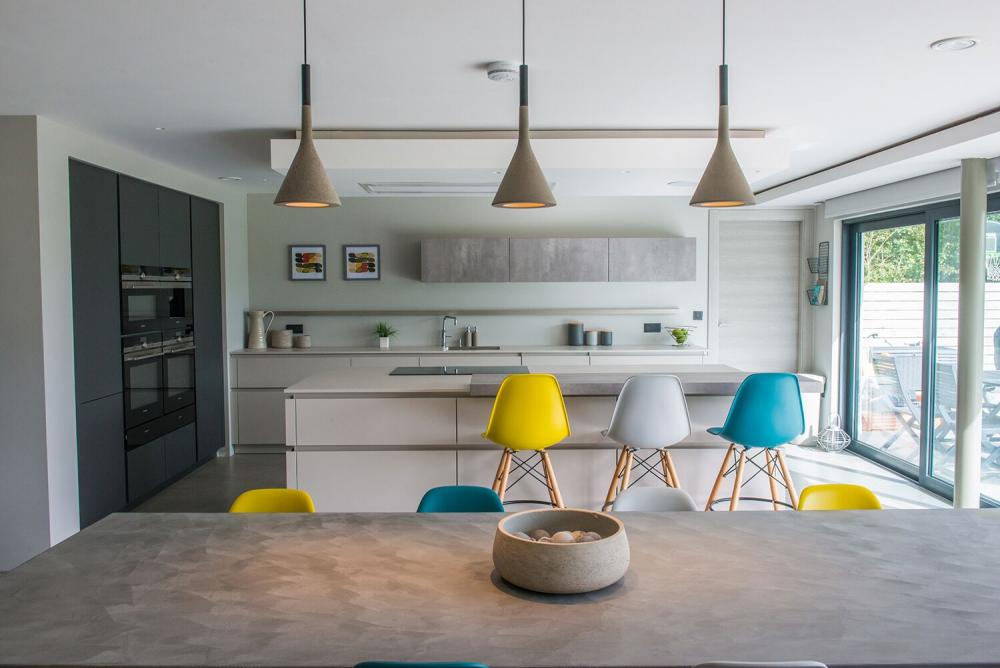
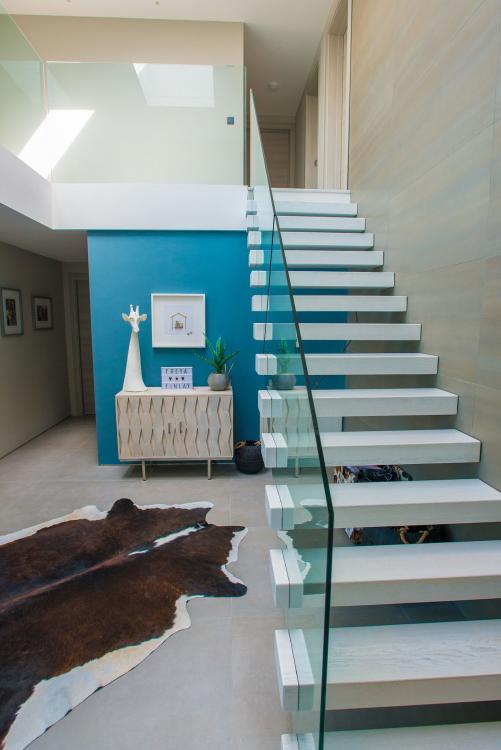
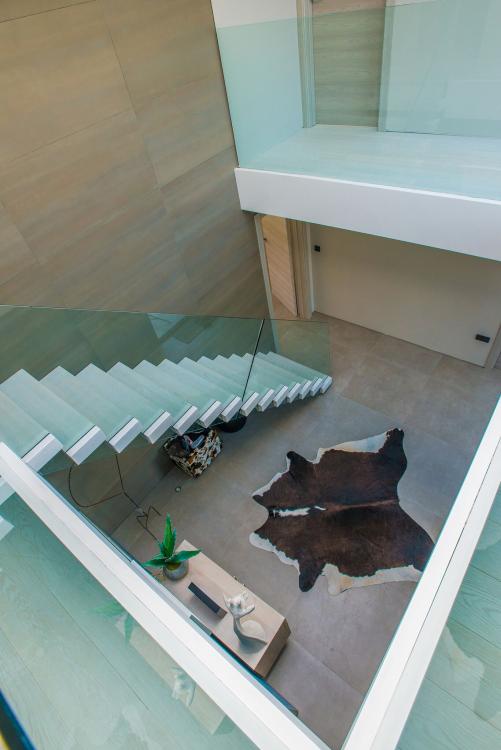
Its been a while since I added anything to this blog, but we ve just had some professional pics back (our timber frame supplier wanted to do a case study).... so I thought I may as well add them here... Its also a nice reminder for me to see what the house would look like if I did nt have a 4 and 6 year old.4 points
-
We built a great one at Penwyllt, as the septic tank kept getting blocked up with "fat bergs " (a consequence of a few dozen cavers having fry ups for breakfast every weekend). In essence it was a deep brick built chamber (only built of bricks as it was right next to the old Penwyllt brickworks, so there were thousands just lying around) that had an inlet pipe around half way up it's depth and an outlet right at the very bottom, that led to the septic tank. Midway across the chamber was a weir, designed to deflect the incoming flow upwards. Above this was a suspended galvanised steel milk crate, resting on ledges just above the top of the weir. The low level outlet pipe went via an inverted U bend, made from 110mm waste pipe fittings, so that it worked as an auto-syphon. The way it worked was pretty simple. The chamber would fill with the kitchen waste water run off (the toilets and showers went directly to the septic tank) and the fat would float up to the top, and clog in the milk crate. The relatively fat free effluent would flow over the weir and when the level on the outlet side exceeded the auto-syphon height it would drain away to the septic tank. Part of the Duty Officer's job each weekend was to lift the lid and check the fat trap. We kept spare milk crates, so if it was looking clogged with a fat berg, it would be lifted out and put on the bonfire to burn off, and a fresh crate dropped in. Before adding this system we used to have to dig the septic tank out at least once a year, as the fat made it impossible for the truck to suck out the sludge. The indication that this was needed was from complaints from those camping in the field in front of the club house (below the septic tank) as it used to over flow across the campsite. Digging the tank out was a thoroughly miserable job. It was a long, rectangular, tank, with the lid made up from a lot of concrete railway sleepers. All these had to be lifted off, the digging party had to don wetsuits, boots and goggles, and climb in to break up the contents, whilst keeping the tank flooded with water so that the tanker could suck up the stuff that was liquid enough. As an aside, shortly after I got my explosives permit, I was Duty Officer one weekend when the tank had to be dug out. I definitely did not want to climb into it, so I made up a handful of small charges (around an ounce of plastic blasting gel in a small screw top aluminium pill can) poked an electric det into each one, wrapped them in electrical tape and pushed them deep into the solid mass at intervals, using a long stick. All the wires were connected up to the exploder, we all stood back, and the handle was wound and the button was pressed. All the charges went off, but they blew the contents of the tank immediately above them vertically, for a considerable height, smattering all the cars in the car park with some of the contents. We were hoping that we'd have fractured the solid mass (the inspiration was the "hot rocks" project in Cornwall), allowing it to be liquefied with water and sucked up. Sadly we had to climb in and dig it out as usual, and then clean up the mess in the car park.........2 points
-
Internorm but not from ecohaus we used Rangemoor who are in Solihull near Birmingham. They gave us a better deal than ecohas. They are 3g aluclad with laminated glass.2 points
-
They are starting our rendering tomorrow. I really hope the weather holds out. Cedar cladding & stonework in a couple of weeks. We are in a conservation area so had to conform to the vernacular. We would have loved something really sharp & contemporary like yours.1 point
-
1 point
-
Thank you everyone for your kindness & good wishes. I am overwhelmed by your support & comments. Nick, I had the welsh mafia here last week fitting the windows. My timber frame supplier is PYC from Welshpool. They are great lads & always lift my spirits. Lizzie, keep smiling & dreaming of your fantastic kitchen. It will soon be a reality. xx1 point
-
1 point
-
I am not familliar with that manifold controller. But in general they all work in much the same way. Each zone has a room thermostat. When any of the zones gets a call for heat from it's thermostat, it will tuen on the manifold pump., open the appropriate zone valves, and send a call for heat TO the boiler. You have not mentioned room thermostats. With none connected, it won't do anything.1 point
-
Regarding containers, I used to buy and sell a few each year as and when I needed them on a job. Look at a 20 footer 40 footers are a pain, they are hard to find things in them,just to long and skinny, they are also hard to re,sell you will find every man and his dog will want your 20 but not many people have room for a 40.1 point
-
Brown and blue are L an N to the motor to activate the valve. Green / yellow is earth. Orange and grey is the contacts of a microswitch that closes when the valve is open. Used for feedback or to turn a pump on in a typical heating set up. If you have no use for them, ignore them.1 point
-
Dove, the groundwork contractor detailed by @jack was also used by me for my groundworks and all hard landscaping and they do work in Woking. Great, reliable, efficient and very experienced groundworks contractor but not sure they are interested in demolition. Give them a ring - Mick Peffer is the MD, Mob No 07774 786755. Other very experienced demolition contractors in the area are Shorts of Ascot and Woolridge in Bagshot. I used Precision Groundworks for my demolition but not sure they work in Woking and they now tend to specialise in basement construction.1 point
-
1 point
-
It's one of those 'unlikely to happen but severe consequences if it does' situations. What if the demo does not go to plan and you have to pull more of / the whole house down? What if you're injured while living on site? What if HSE comes along and throws a wobbly? BCO are only there to monitor that the build is to regs, but they could possibly notify other agencies (HSE) if they see something very dodgy. I'm pretty sure your existing buildings insurance will be null and void as soon as you start major works (unless otherwise agreed) so that will have additional implications on your mortgage as it's normally a condition of lending. Assume you're putting your personal stuff into insured storage. You should also have site insurance that covers you and your on site visitors plus the value of the existing and new building materials on site etc. Not 100% sure but I believe that if you handed the site over to a contractor for the duration of the works you would not need it. The old phrase 'hope for the best but plan for the worst' springs to mind!1 point
-
Thanks for the heads up - was just turning onto the M4 to help the search. Somehow my six sky/tv remotes have all migrated to my bedsite cabinet but I think I m culpable of that one.1 point
-
We used (and were happy with) http://www.dovecsl.co.uk/ They're based in Camberley so pretty sure they'd cover Woking. I don't know whether they'd do this sort of demolition, but you could ask.1 point
-
In my experience ground workers tend to stay fairly local as there is cost in mobilising the plant and carting muck away etc. You're not far from @jack and @HerbJ who I believe used the same groundworker so maybe they can recommend. Your demolition requirements are pretty specific (mine was to tear down an entire house) so a standard GW may not be comfortable with that - you'd need to check. Have you done an asbestos survey? Also, why do you need to retain parts of the old building - did you consider a full demo and rebuild (saving 20% VAT and a lot of headaches on tying new into old)?1 point
-
1 point
-
I built our founds as per the Golcar site above, no thermal bridging, the only thing we did differently was put two DPC,S, the one on the Golcar site gives a slip plane on the inner skin above the skirting board and my builder had done this once and the customer ended up with cracks in the plaster at this line which needed constant repair. We lowered the DPC to ground floor level ( inside) but this meant the DPC was below ground level outside, so he installed a second DPC in the brick outer skin level level with the internal floor level, 6inches above ground outside. Because we have a French drain around the outside the weep vents from the lower DPC empties into the French drain. My builder did this on another house in the area several years ago and it works very well.1 point
-
I would add that I always send an email outlining my requirements and what we have agreed - however when things don't go to plan I am realistic and reasonable enough to know when it's their issue to fix, mine or just for us to work on a solution together.1 point
-
Thanks for the warm welcome JS! Sounds like CDM has been done to death, and as you say, it is not required from a Self Builders point of view. Looking forward to spending some time perusing the chat forums in more detail in due course. Best regards Kenny1 point
-
There are people yet to find plots who will finish before I do...1 point
-
Your architect is very good at drawing pretty pictures. But I don't think he was overly worried about your wallet. - it is drawn with firing pieces (tapered bits of wood fixed to the top of level joists) - the tapering of the insulation was just to create the gutters. E.g you would cut out a 6" wide channel at the low end starting at 0" deep in the Center of the roof and ending up 2.5" deep at either end where your hoppers are. - he mentions useing marine ply. Our bco has always been happy with 18mm osb 3 which is possible 1/3 of the price. - he also mentions no mechanical fixings or second layer of ply above the insulation. Just suggests "sticking" the VCL to the marine ply then "sticking" the insulation to that and then "sticking" the roofing material to that. The last part I can understand and should be fine with the correct insulation board but the the other bits I would be a little sceptical about. - also for your wall plates fix them down about every 500mm with concrete screws and then every 1500 with plate straps. ( the plate straps at least should be in your spec.) also yes to the half laps.1 point
-
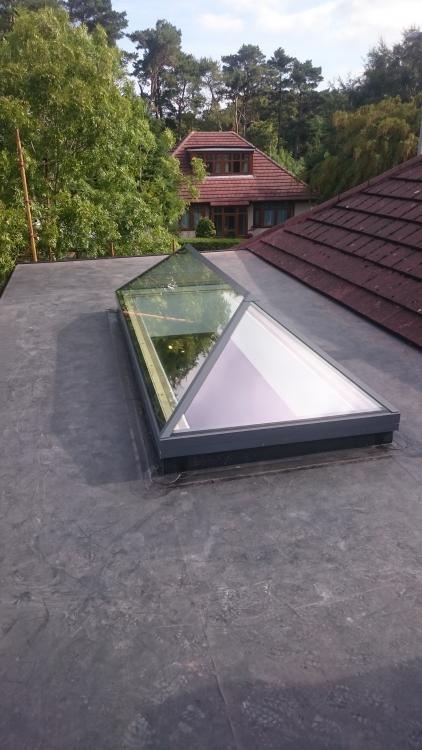
Why not use tilt firrings? Most timber merchants do them - they will give you the fall you are looking for without the need to install your posi's at an angle. Water will run no problem at a gradient shallower than 1:40. There doesn't seem to be a large span there so you could achieve this without great difficulty. Alternatively, ask the posijoist manufacturer what angle you can go to (that's if you have already had them made) - they are engineered joists and the webs are calculated according to the stresses based on their proposed installation. As such, if they are installed at an angle, they could cause stresses not factored and the webs could potentially fail. Not saying that *will* happen - but the potential worst case scenario. For the roof covering, I would recommend using Firestone Rubbercover - I have used it several times now and never had any issues with it. It is a single ply membrane and is flexible enough to accommodate expansion and contraction without compromising the integrity of the membrane. I have attached a photograph of one I did some years ago for my brother. Hope this helps.1 point






.jpg.c21f3ac78c9b7efd90cbdcb312744dc5.thumb.jpg.7adcad4c0e384f5ecd7d56b0618df6e5.jpg)


