Leaderboard


Popular Content
Showing content with the highest reputation on 08/14/17 in all areas
-
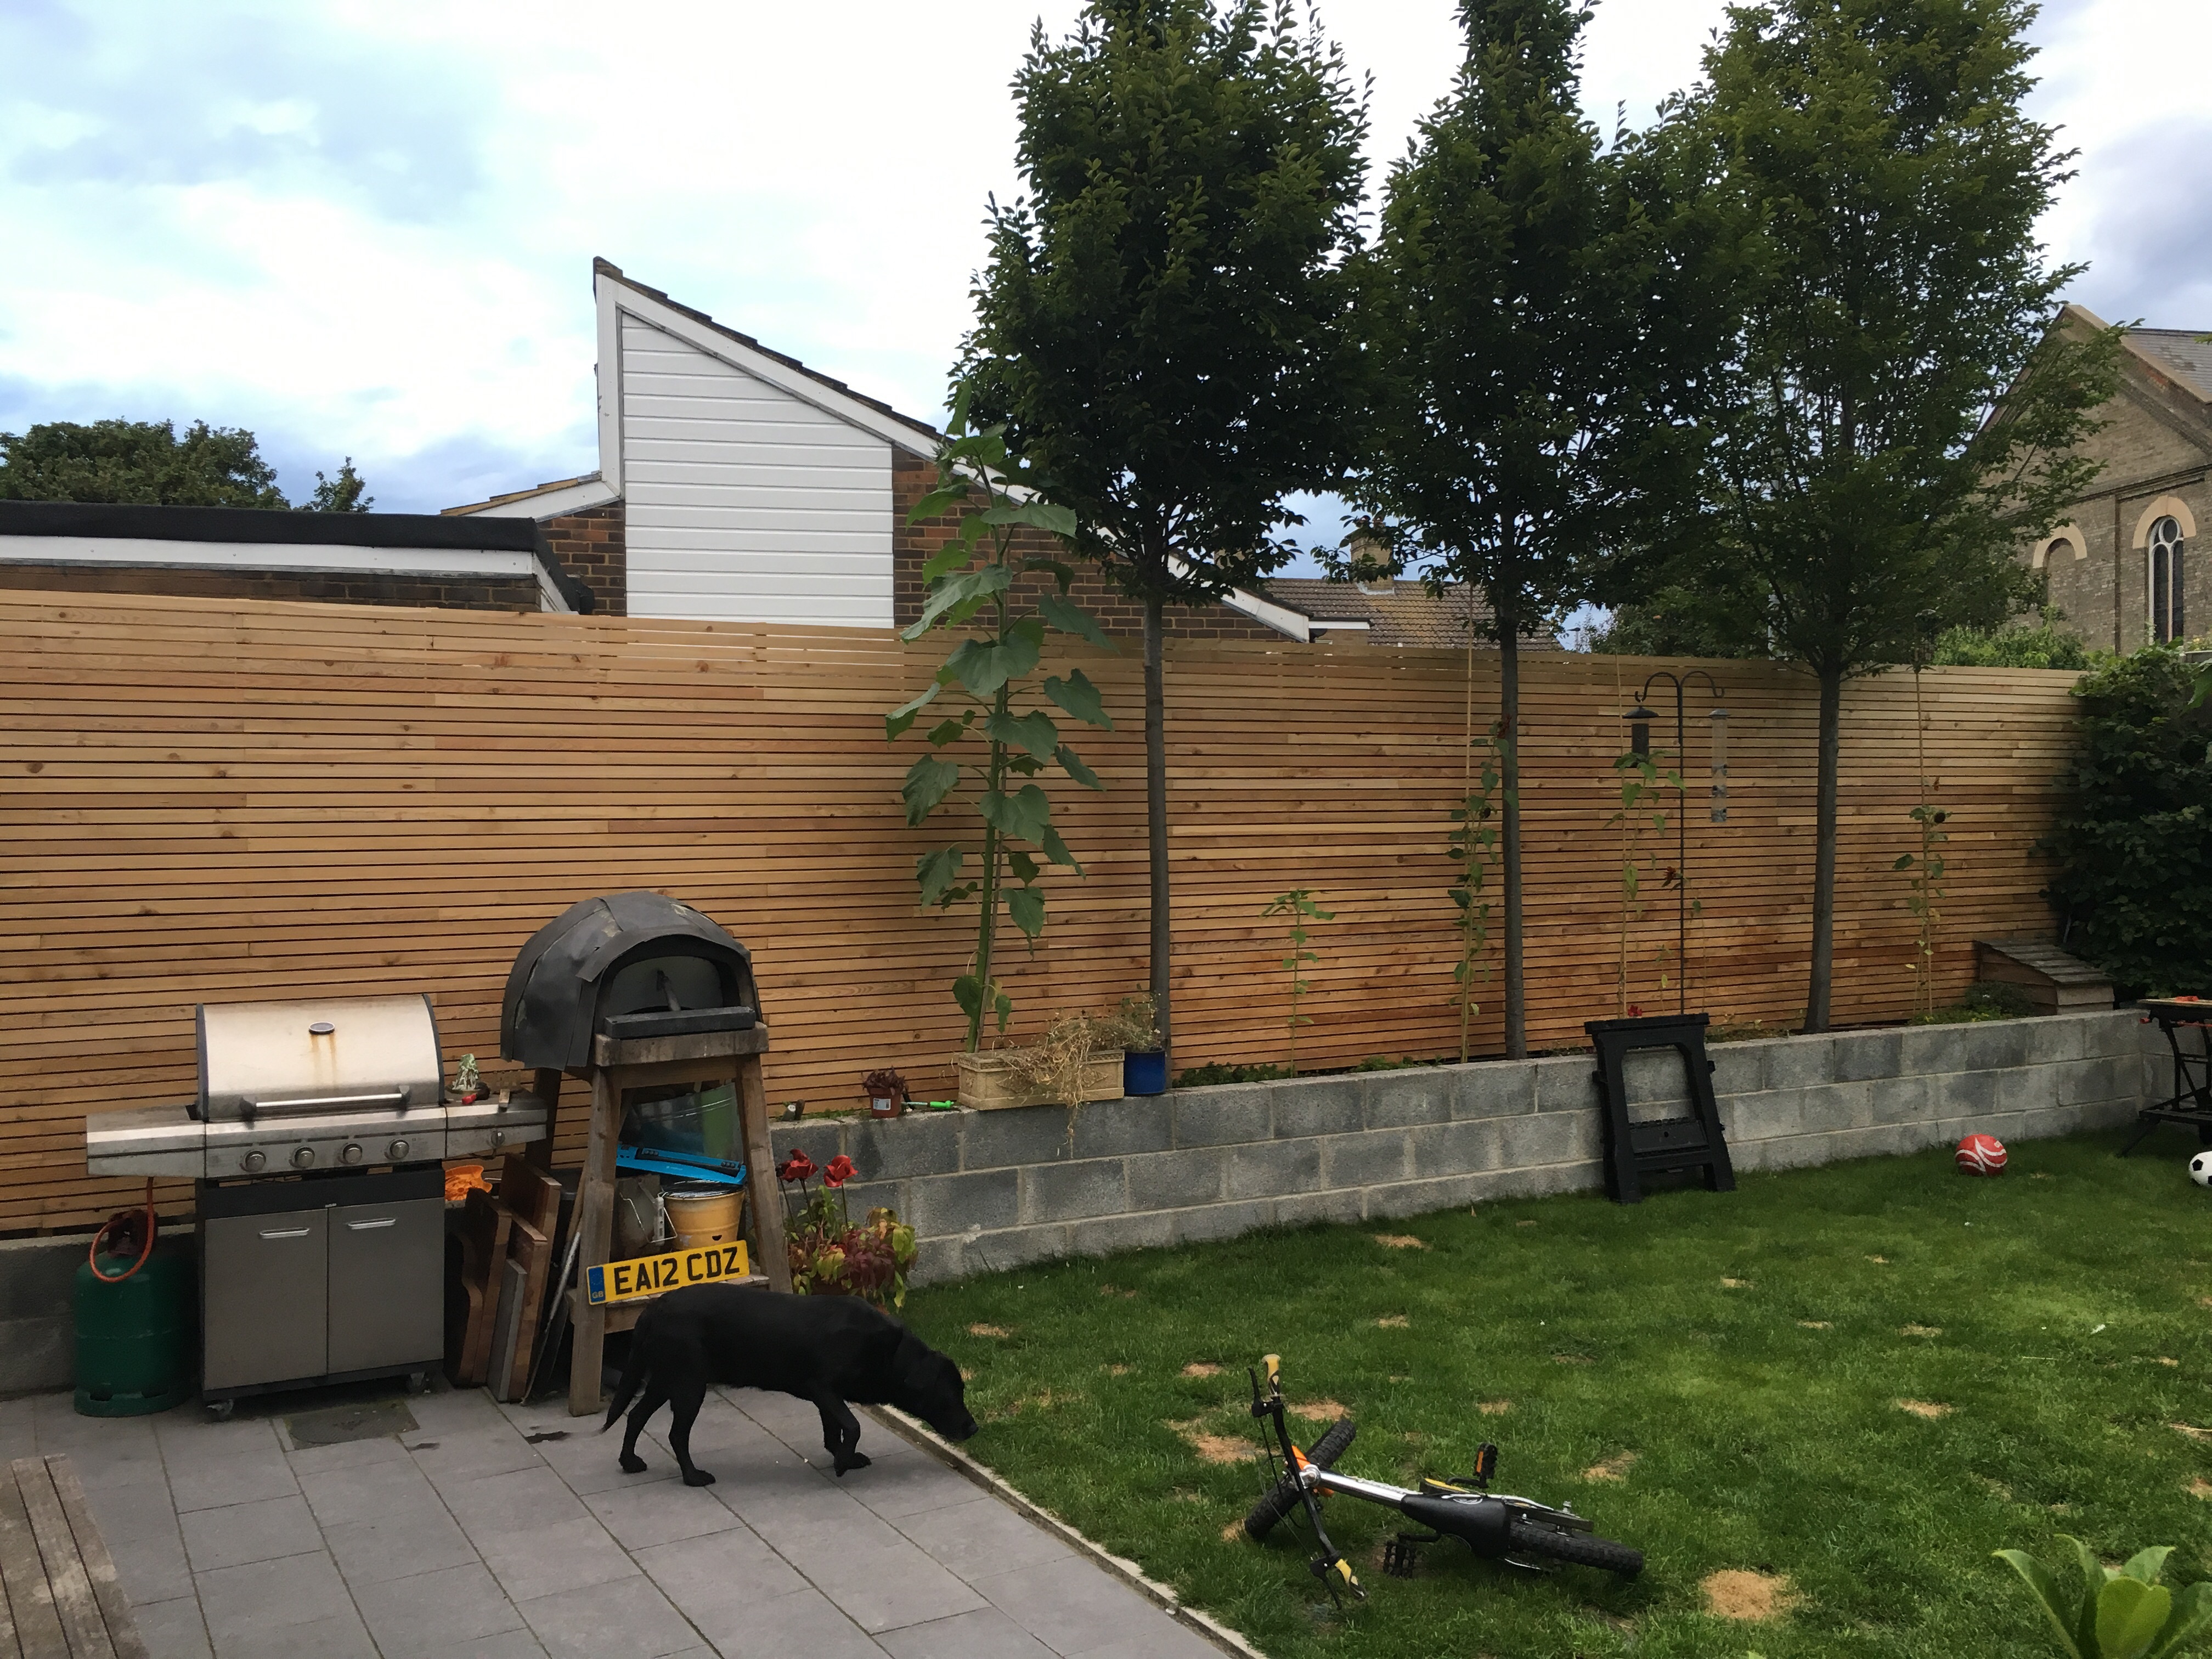
Just to round things out, here is a picture of the finished fence, well one side, got another 12m of fence to go
 2 points
 -
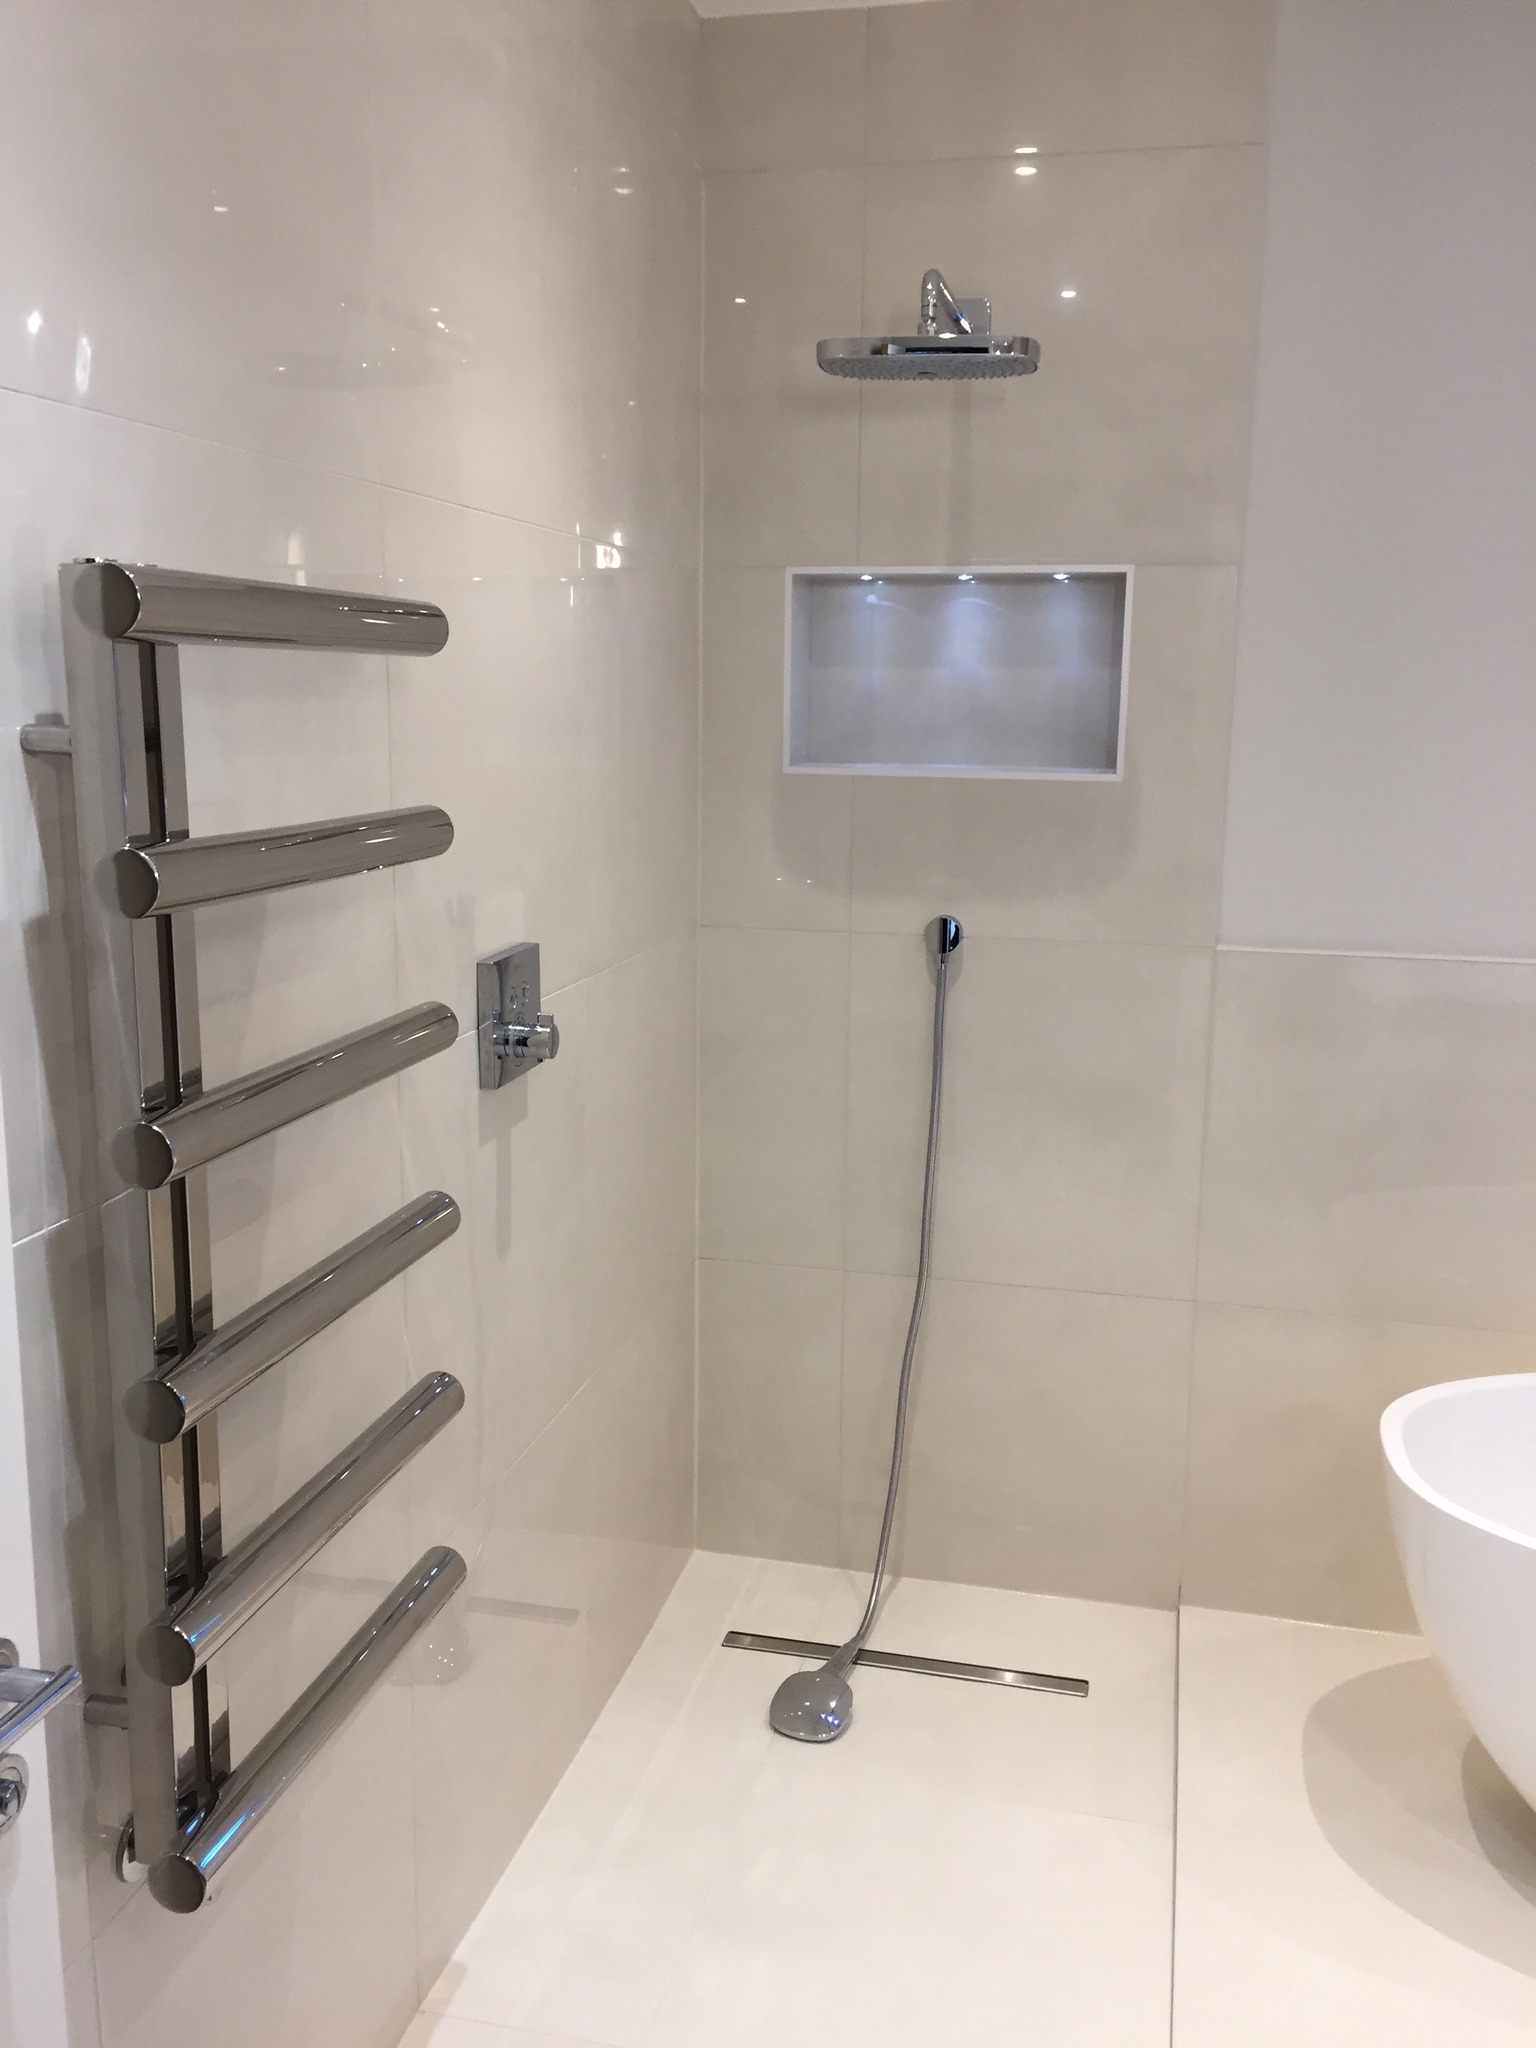
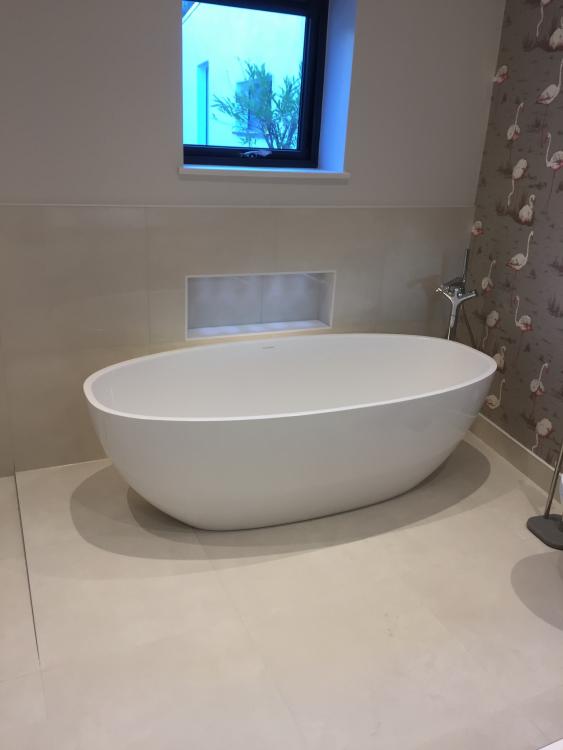
I've just finished this bathroom.... As its rectified edge porcelain, I used 2mm spacers. Was really peeved when I found every other floor tile had a 1-2mm 'hump' in the middle of each 600mm edge . Had to sit tiles alongside each other, dry, to ascertain which 'complimented' each other best prior to sticking them down, numbering them accordingly for reference. What an absolute bastard of a floor to lay. Grade 5 porcelain and a brand new £68 Rubi blade in my radial wet saw didn't last the job out. Not a single tile in that room would cut on my £360 Rubi scribe and snap cutter. Every cut, wet and slow. ??

 2 points
 -
Well, went to visit Cumbrian Nicks build yesterday. Straight out of Beatrix Potter, site to die for, so secluded I couldn't find it when I was a few hundred yards away, innovative design, more cabling than a Google Data Centre, and within walking distance of a hidden gem of a village. The kind of place where every winter you'd fervently wish to get snowed in. It was a real treat. Thanks Nick. ===================================================== The deed is done, we parted company with the builder on Friday on good if not cordial terms. I went straight out and bought £300 worth of safety gear: harnesses , strops, carabiners. I feel so much better for having done that. Watching the builders waltzing nonchalantly waltzing around on the scaffolding with an unprotected 30 foot drop on one side made my fingertips sizzle. I did point it out several times, but got laughed at. I'm mulling over getting a safety net or two. Durisol Rep is coming on Tuesday, plus one of his mates, and we are pouring at 11. O'Reilly's pump is arriving at 10. I'm busy today making a 'Flush-Pond' for the excess concrete from the next two pours. At least then, we'll have a nice hard temporary working surface for the rest of the build. Builder's mate today? Debbie . Prettier than all the others.2 points
-
In this entry I'm going to discuss in more detail how I came to choose our heating and hot water system, and how it has performed to date. As other forum members have found, deciding which fuel source and type of technology to use in a low energy house, is a challenge given the different requirements each of us has. We had three stipulations – low running costs, hot water available on tap 24/7 and maintenance of the whole house at an even and constant temperature 24/7. Having calculated our heating demand, taking the impact of solar gain, incidental household gain, human occupancy and wind speed into account, I was confident that I had a good indication of the amount of heating I would need. I was also confident, based on historical use, of the amount of hot water we as a family use. Living in an area without mains gas, my options were somewhat limited to using either oil or electricity as my fuel source. LPG was initially considered but discounted due to the lack of availability in my location. As part of the decision making process, I spent a fair amount of time carrying out a cost comparison of both oil and electricity based heating and hot water systems, using 500kWh increments from 2500kWh to 5000kWh. I considered direct electric of various type, oil and air source heat pumps, both air to water and air to air. Solar PV was also considered and costed in terms of each method of heat and hot water delivery. In line with previous cost comparisons that I had carried out, I found direct electric to be the most cost effective in terms of capital outlay and running costs when both heating and hot water demand were less than 2500 kilowatt hours each year. As heating requirement and hot water requirement increases so the balance began to tip in favour of other technologies. Oil was quickly dropped from the list as it became apparent that any rise in fuel prices over then then low point, would significantly increase running costs. Having conducted significant investigation in respect of the viability of Sunamp units, although attractive in many ways, I found that the capital outlay and running cost was simply too high to be able to justify, given that the main benefit (low heat losses) were not as critical for me as they have been for others. Part of that decision was also driven by the cost of fitting Solar PV, which in our remote location was extortionate. I looked into a non MCS DIY install, but couldn’t make the figures stack up, the break-even point being around 17 years. Much as I wanted to install PV, it didn't make any sense financially. In time, I hope to revisit PV, if and when battery storage reduces the break-even point to a more realistic timescale. A wind turbine, given our location and the virtually constant presence of wind, would have been an ideal energy source and paired with Sunamp technology, probably unbeatable. The proximity of nearby houses ruled out that option in terms of planning permission. Air to Air heat pumps were ruled out based on my own experience of them and a road test at a friends house. Neither myself or my good lady found them particularly pleasant as a heat source. Having gone through the list of options, an air to water air source heat pump, paired with a large UVC and UFH for the distribution of heat, represented the best balance in terms of capital outlay, running costs and crucially, comfort and convenience. We opted for a package from Mitsubishi Ecodan, an 8.5kW heat pump and 300 litre pre-plumbed cylinder fitted with the Mitsubishi FTC5 control panel. Given our location, we opted for the coastal model, which is treated with acrylic resin for enhanced corrosion resistance. Whilst a pre-plumbed cylinder is more expensive than a bare cylinder and associated parts, after taking labour (plumber and electrician) into account, I found there was very little difference in cost. I sourced the package from a trade supplier, Secon Solar. I found their price list while searching online and having phoned the company, and perhaps fortuitously speaking to the managing director of the firm, found they were quite happy to sell me package at trade / installer price, the bonus being that delivery to my location was free. The package is configured for the UK market, the only difference to the system as sold in the rest of Europe (AFAIK) being that the cooling function of the heat pump is disabled so that the product complies with MCS approval for claiming RHI. It is however a simple task to activate the cooling function, by flipping a dip switch in the control module on the cylinder. Cooling can then be controlled from the master controller. As stated in an earlier blog entry, the heat pump and cylinder were fitted very quickly with simple connections on the plumbing side – flow and return from the ASHP, cold water, hot water and flow and return to the underfloor heating manifold. Electrical connections consisted of power to the ASHP, a cable from the ASHP to the control module and a plug-in controller. I had initially planned to have the cylinder in the utility room close to the ASHP Monobloc, but changed the location to a service cupboard in the middle of the house, to reduce internal DHW pipe runs. This does mean a 15 metre pipe run for flow and return to the ASHP, but as virtually all is within the insulated envelope, it doesn’t represent much of an issue, and does not appear to be having an adverse effect on performance. The ASHP Monobloc itself is located beside our back door, open to the elements. It seems happy enough where it is, despite the wind that traverses the space between house and garage walls. Locating the ASHP within the garage itself was an option but one I decided against simply on the grounds that I didn’t want to give up floor space within the garage. A timber housing for the ASHP is something we may look at in the future. We opted to fit individual room thermostats to all 3 bedrooms, to give us the option of being able to reduce the bedroom temperatures if we so wished. We have not used these and keep the whole house at one temperature 24/7, treating the underfloor heating as a single zone. At present I only have limited data as to how the heat pump has performed since moving in. On board energy metering (energy consumed and energy produced) shows the CoP for heating has ranged between 3.5 and 4. DHW is maintained at 47C-50C in the cylinder, boosted every fortnight to 60 degrees by the immersion on an anti-legionella cycle. To date the CoP for DHW is 2.4 As members know, heat pumps are best suited to the production of low temperature heat as opposed to the higher temperatures required for domestic hot water. Whilst the CoP for DHW is lower than that for heating, the cost per kWh of our DHW, based on a CoP of 2.4, is 5p, which is significantly better than an E7 electricity tariff. We may be taking a hit on efficiency, but in reality all of the other options would have cost us more. The 300 litre capacity of the cylinder means that we have plenty of hot water on tap and can comfortably run a full bath and still have sufficient left over for another person to shower. The ASHP is currently operating on a 24/7 basis, providing heat input to the UFH and topping off the DHW as and when it determines it needs to, at whatever flow temperature it determines. Whilst that does sound like a recipe for high bills and high flow temperatures, in practice, the heat pump delivers the lowest flow temp it can get away with to maintain our set temperature. If I so choose, the controller lets me set various parameters such as heating curves or set flow temperatures, or indeed a timed schedule for heating and DHW. However,as the system is operating efficiently on its auto setting, and providing the level of comfort we want, I see very little reason to mess around and create my own settings. If say electricity tariffs were to change from a single tariff to a dynamic tariff, then I would have the option of timing the heat pump operation to coincide with lower rate tariffs. After much thought, and indeed discussion on this forum, I opted for an 8.5 kWh ASHP over a 5 kWh ASHP, as I felt happier running a larger unit more gently than pushing a smaller capacity unit harder. A 5 kWh unit would probably have sufficed, and in time, may be what the current unit is replaced with when it reaches the end of its life. We haven’t yet had to activate the cooling function as any overheating (defined as internal temperatures over 23C) caused by solar gain, can, as modeled, be managed by natural cross ventilation. Neither have we found it necessary to constantly circulate the UFH to even out the house temperature / redistribute solar gain from one part of the house to the other. In the heating season, we found that there was sufficient circulation of the UFH during the heating cycle to maintain the house at an even temperature. Outwith the heating season, when solar gain is at its peak, the house zones itself, the bedroom section remaining slightly cooler than the public areas, very useful on a warm summers day. Overall I’m very happy and impressed with our system. It has, so far, delivered everything we have asked of it in terms of comfort and convenience, and the running costs are low. I have the capability to cool the house (via slab cooling) if I so wish, and the option to bolt on a second zone pack onto the pre-plumb cylinder if I ever found it necessary to install a second heating / cooling function – i.e. fan coil or duct heater / cooler. The one criticism that I have is about the controller thermostat function and its hysteresis - 1C increments only. A finer degree of control would have been preferable. Our installation was recently inspected by an MCS accreditor (our plumber is going through the accreditation process). In due course that will give us the option to apply for RHI, although that will be very much dependant on whether the figures stack up.1 point
-
If he's getting them free or at a reduced price, he should be saying so. Otherwise, he's violating an ASA code.1 point
-
It arrived plastic shrink wrapped and number plate sized, easily fitted through my letter box.1 point
-
I'm no expert but I used roadform once and I found it heavy and difficult to adjust accurately. The love of timber is its light and reasonably easy to adjust. Screws are your friend so you adjust levels as you go. The one exception is ref ground conditions. If they are really hard (and you can't drive a wooden stake into our ground) then timber becomes more challenging. there's a great write up of the two types here a long with loads of other helpful info on concrete: http://pavingexpert.com/formwk01.htm1 point
-
Yes, their proactive nature has come as a relief - I've given them space to deal with it and stayed calm.1 point
-
Hi Everyone, Been absent for a bit working on something else so build has been a bit slow - back on the case now though so we are off again! However, we have had to go to 225mm floor beams due to spans / springing etc which apart from cost brings a couple more headaches. One of those is setting the DPC levels. Weve run some brick around the outside which is OK but to keep the DPC at 150mm above outside level we either: Option 1 - have to cut 100's of thermal block down to 150mm for the internal skin and internal walls... what a waste of time or Option2 - set the DPC at 225mm - ie one whole thermal block - no cutting just get on with it. Insulation and screed are 140mm +60mm +15mm tiles - so should be ok Anybody see a problem with this - I'm sure the DPC above path is a minimum of 150mm to prevent rain splashing only Thanks guys1 point
-
I'd go with 9mm ply over 18mm chipboard, glued and screwed every 100-120mm centres. Ceramic is nowhere near as hard as porcelain.1 point
-
Google trim tex buttboard1 point
-
Just had director of render firm plus local Parex rep round. Board rep couldn't make it today but is planned to visit at some point. There is a definite 3-4mm dip between boards now when putting a straightedge over the top. Boards do not seem to have any give and the system is intact, no cracks. If they're all confident that the boards have settled into their final position then they will apply a top coat of maite, mesh and DPR (top coat) all round. We have generous reveals and drip gaps on the cills and other fascia so no issue there. May get away with using a scissor lift vs scaff. If they think the boards are subject to more movement then something more radical will be required.1 point
-
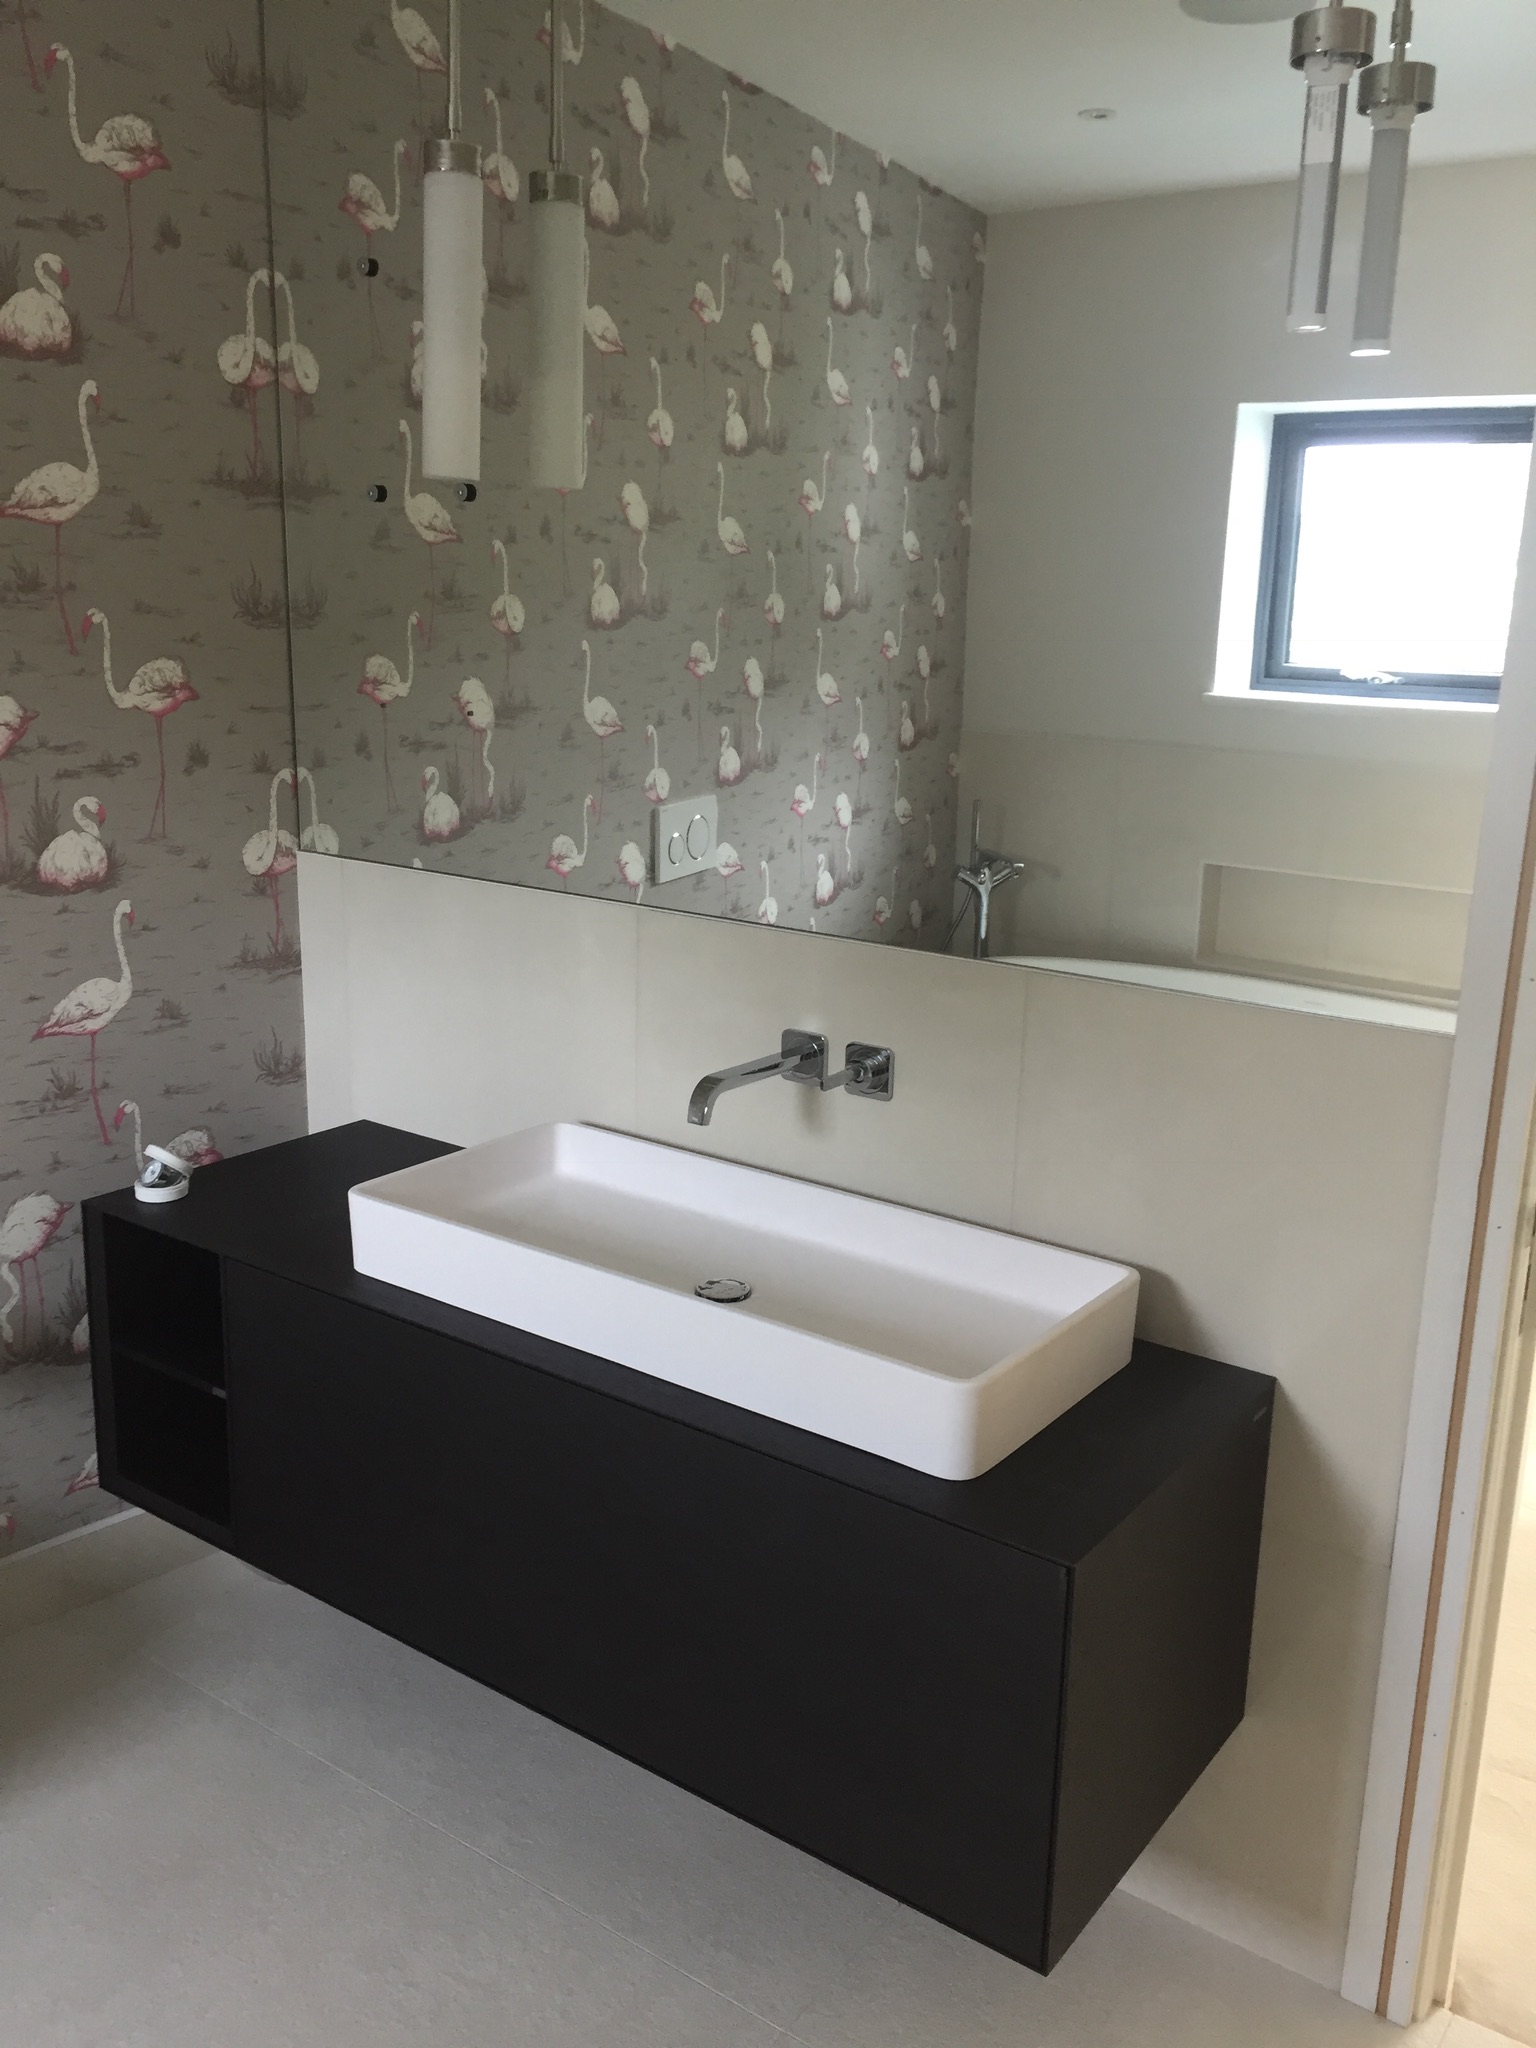
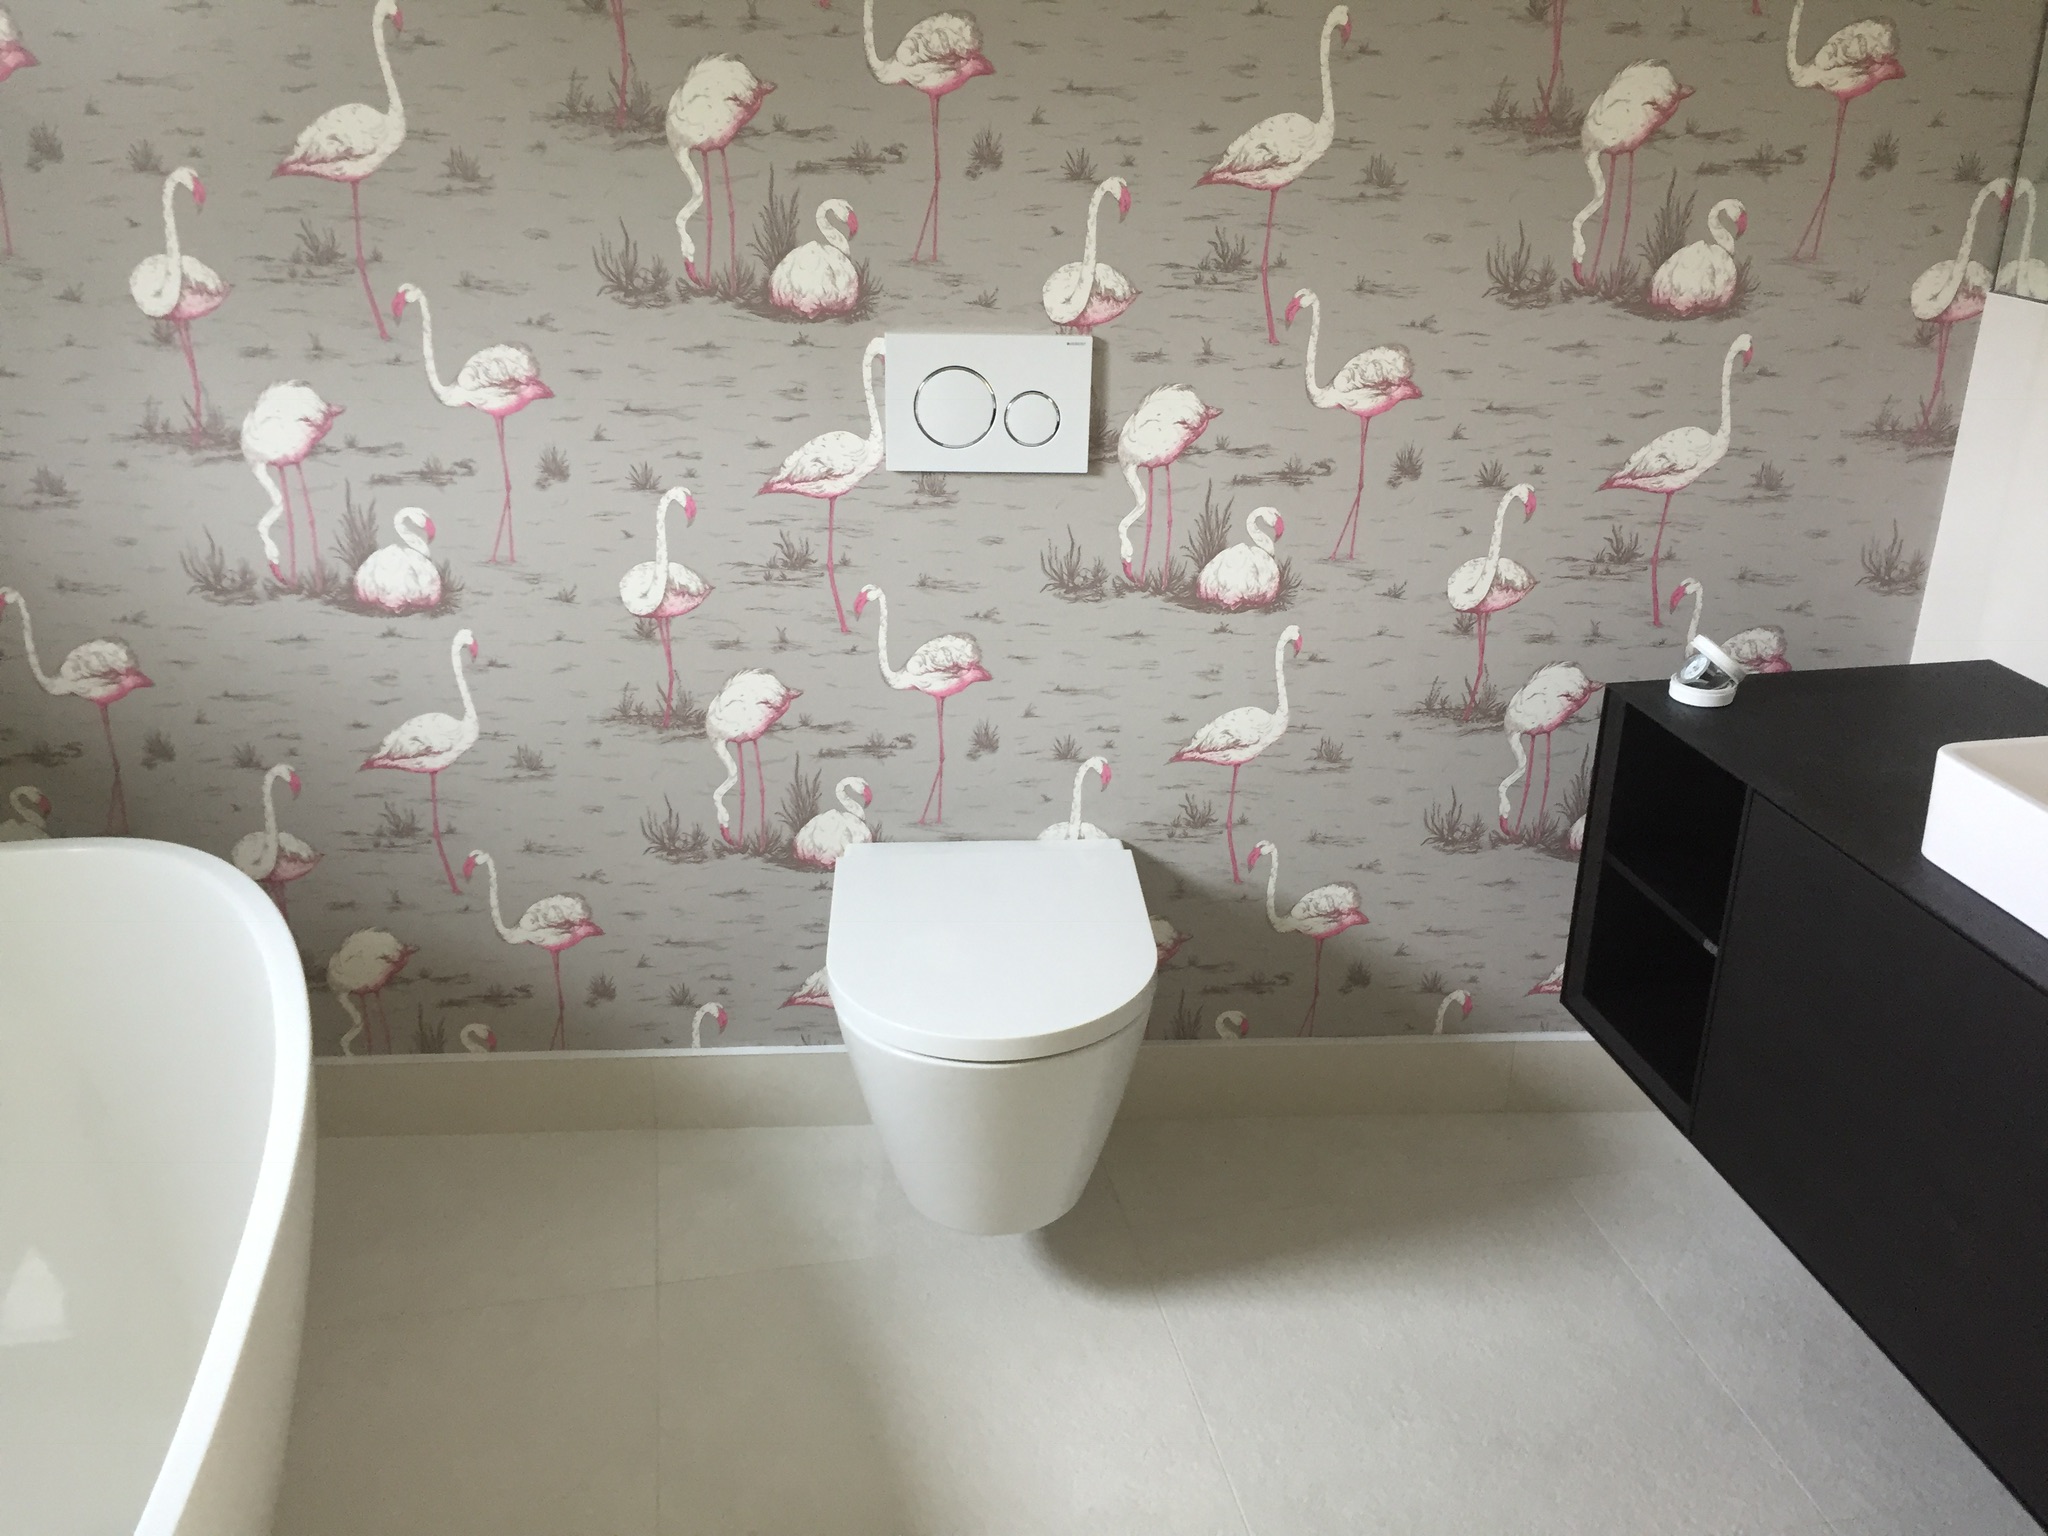
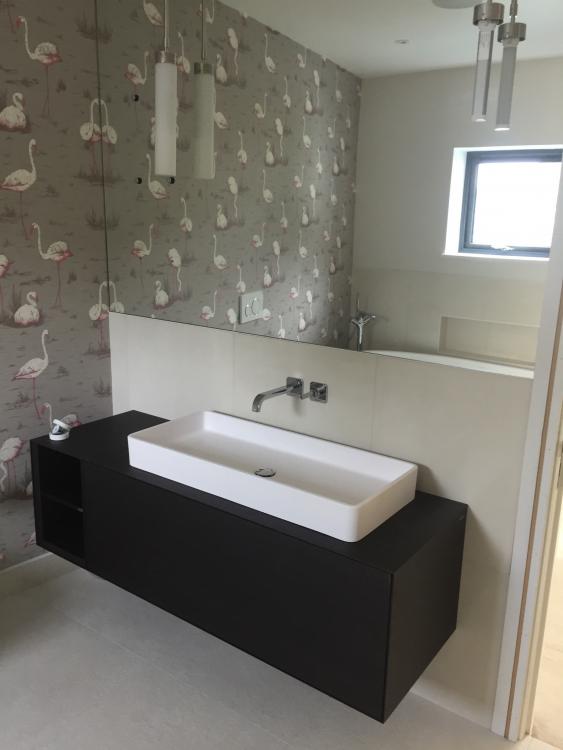
That's an Impey linear 2. Handset is going into a holster, not a riser rail. I haven't drilled the tile for it yet as the glass screen is still in Bristol being toughened. . Customer wants to see the screen in position before deciding the final location of the handset. I was shitting bricks fitting the 1780x1410mm mirror, with 3 pairs of holes in the left hand side for floating shelves It has two large demister pads on the back too so gluing it, holding it in position, connecting and feeding the cable into the wall as we went was a nerve-wracking event to say the least. My sparky mate and I breathed a sigh of relief when that was up and supported ( by the temporary screws, washers and open 20mm grommets you can see ). Used 5 tubes of mirror goop so it's nearly completely covered behind, less where the demister pads are. In the reflection you can see the Lithe Audio ceiling mounted speaker. Fantastic sound, loads of bass, and change of £170. Beofre anyone asks, the right hand pendant diffuser sadly didn't make it. RIP.
 1 point
 -
The one I'm redoing at the moment has had a rewire in the past and the wires are horizontal between the sockets. No issue apart from they didn't chase the walls so these are 2.5mm ring circuits just in plaster and in the internal corners the wires come out from the corner by 20mm.... Behind the sink base unit was a spur for the boiler that was fed from a double socket which then went back to another single socket on a different spur .... all of it in T&E and not clipped..! Took the sparks longer to take the crap out than it did to do it properly ....!1 point
-
I always use a meter, and check right at the CU first, checking the live side, then flicking the switch and checking the load side is dead. Finally, I check the end of the cable I'm working on is dead. Whilst I'd agree that some DIY work can be grim, it is worth remembering that DIY work by someone competent, but who no longer happens to hold a ticket, may well be fine. I'll hold my hand up to having done loads of DIY electrical work, from complete rewire jobs (before Part P came in) to allowable DIY work since the regs changed (and DIY electrical work is still permitted for some aspects of domestic electrical installations). It all comes down to competence and knowledge, and I think we have reduced the level of knowledge in recent years by changes in legislation. An example, when I was a small boy my mother (who was the practical person in our house) showed me how to wire a plug. To this day I still remember her drumming into me the "red on the right" rule, and why the green earth wire should always be left with slightly more slack inside the plug (so it would be the last wire to pull out under strain). This was long before the harmonisation of cable colours, and before we had BS1363 13A plugs, and still used the old round pin plugs. Even now, every time I wire a plug the old "red on the right" thing pops into my head. How many people today learn even the basics of something as simple as wiring a plug? Very few, I suspect, since the law changed to require every appliance in the UK to be sold with an approved plug already fitted. I'm not saying that this new law wasn't a good idea, it was, but an unintended consequence has been to dumb down the level of understanding of electricity and basic electrical safety knowledge by the population as a whole. Finally, just because I know full well that the above will raise a red flag about my personal views with one or two, I'm not advocating that everyone should DIY electrical work at all. Having a fear of undertaking electrical work, unless you are confident that you have the knowledge to do it safely is life preserving, and no one should think about even something as straightforward as fitting a plug, or changing a fuse, unless they fully understand what they are doing, and the consequences of them getting it wrong, let alone more complex work. There are a stack of semi-hidden gotchas waiting to cause a potential risk in even the simplest looking electrical installations, unless you understand everything about the job in hand.1 point
-
Yes, we have numerous projects with non certified windows. You'll find a lot of suppliers will use the non certified product. For Instance, Internorm tend not to use the certified product because the certified product costs about 25% more (at least that used to be the case, I would need to double check if they have had any of the standard systems certified). Certification is a marketing tool, it does also make the certification process a little easier but only just. You don't need and are not required to use any certified product on a Passive build. You just need to prove the product you are using, does what is claimed. You do this by 3rd party certifications, which the supplier should be able to supply. They will generally be supplied with thermal calcs as well. Its important that these values are available at a very early stage, so that these can be entered into the PHPP. If not available, the certifier will generally use standard values advised by the supplier/manufacturer and apply a penalty until the values/certificates are available. I would also say that the shell of any build is not one to skimp on, the shell is what brings the savings. The bells and whistles are things which can be added/tweaked further down the years if need be. Difficult/costly to alter the shell later - I personally wouldn't advise skimping on windows but I'm biased in that view.1 point
-
I have been amazed at the complexity of the shuttering process. I'd be sure this task is placed in the hands of properly experienced contractors. A lot can go wrong...with massive consequences.1 point
-
There are companies that specialise in it ..! Otherwise the whole of the van interior has to come out to repair it. Probably find it was given a coat of wood hardener too so will be rock solid.1 point
-
[pedant mode] Nice to hear that you weren't electrocuted (killed by an electric shock), but just got a survivable electric shock.[/pedant mode] MCBs can stick on, as can RCBOs I've found (I had a DP RCBO fail like this), and I suspect any device like this can fail, given the pressure on manufacturers to reduce cost. Personally, I never trust any switch or circuit breaker, and routinely test to make sure a circuit really is dead. Having said that, I've taken risks from time to time, by just relying on a single pole switch/breaker to "isolate" a circuit, but, to be frank, I still tend to treat any single pole switched circuit as if it were live, unless I've tested it to be sure it's not. Maybe I'm just a bit paranoid, but over the years I've developed a healthy respect for electricity, having had a few near misses.1 point
-
Can't get into a mucky trench either.1 point
-
My experience has been that cash flow can be a real problem for small traders, especially if they get one or two late paying customers. A couple of the guys we had working on our build gave us a slightly better price because we purchased all the materials, saying that they would rather make a few pounds a day less on their labour price than have to bear the cost of a load of expensive materials up front. I made a point of paying them all at the end of each week, too, provided the work was OK.1 point
-
If the builder is stretched on one job he's stretched on all the jobs he has going. There would be a strong temptation for him to order materials for another job on this account. You can try telling the BM to only deliver to your site but that might not be enough to prevent problems. I'd look to close the account as soon as all the big items have been ordered?1 point
-
I bonded all our oak skirtings and architraves, with no screws of nails anywhere. I used mitre bond for the architrave frames, as suggested above, then bonded them all in place using the water based grip adhesive from Screwfix. Far, far better than the solvent based stuff, as it doesn't skin over and dry anywhere near as quickly. I've not had a problem with any of the 13 doors or any of the skirting - once it's bonded on it stays there. This is the grip adhesive I used: http://www.screwfix.com/p/no-nonsense-11663102-solvent-free-grab-adhesive-white-310ml-12-pack/614281 point