Carrerahill
-
Posts
2132 -
Joined
-
Last visited
-
Days Won
10
Everything posted by Carrerahill
-
PM me your details and I will give you details of a top guy.
-
When it comes to pressure washers I want fierce, the fiercer the better!
-
It has to be Nilfisk - Karcher have a great advertising program, shame they don't spend the money on their products! I have a Nilfisk P180 - very pleased with it - it had a man washing a tractor on the box so figured it must be good and was aimed at the heavier use market! It does do a nice job of excavators! The key to look at with pressure washers is volume of water, people, like me in the past get hung up on pressure, but loads of pressure with hee-haw water isn't going to do much. The plant hire place also commented this was the only electric pressure washer they hire out as it cuts the mustard. Mine has a detachable stainless lance with a vario-head on it with 4 settings, 20°, 60°, rotating whizz-blast and soap. You can buy things like HP drain cleaning heads for it and all sorts. For it's size and punch it is pretty quiet too, doesn't drone on like the £80 Karcher's Asda like to do deals on. It is also very robust with full brass construction pump and all brass fittings - you can also feed it hot water.
-
So many options. We have a mono-pitched ceiling in our kitchen, totally uplit it. Not a thing on the ceiling, worked well as I lit from the cabinets, I have 2 colour temps, I can light in 4000K or 2700K or mix them, works really well and is nice light to work in as it's indiscriminate and baths everything in light. Our original plan was a single indirect light source suspended centrally along the room, it would have worked really well (a little better than the chosen actually but never mind) but we discovered we could have this big white empty ceiling and it would look really clean. I appreciate neither of these options are maybe the right thing for a living room but there are so many variations of light. Flos do some really nice little wall/ceiling mounted fittings which look like little white pipes which can be focused where you want them, those combined with suitable other sources such as table and floor lamps can light a space very well. Incorporate light into custom book cases or plasterboard shelf details if you have anything like that, maybe some wall lighting - what stage are you at? Could you create a detail around the perimeter to push light up?
-
How does your garden grow?
Carrerahill replied to recoveringbuilder's topic in Landscaping, Decking & Patios
I believe coffee grounds are meant to deter them and also act as a soil filler. I open my kitchen window and chuck the grounds from our machine onto a flower bed in the planning stage - no cat poop or interference yet - yet they do poop on other areas of turned over soil. I had only prepped an area for turf 12 hours and there was cat poo on it! -
How does your garden grow?
Carrerahill replied to recoveringbuilder's topic in Landscaping, Decking & Patios
This is what I want next year - I note you are in Scotland too - good, I have a chance of success! Where about in Scotland - not being noisy, just roughly for climate reasons. -
How does your garden grow?
Carrerahill replied to recoveringbuilder's topic in Landscaping, Decking & Patios
A local farmer may have a trommel. Does your JCB have a PTO? -
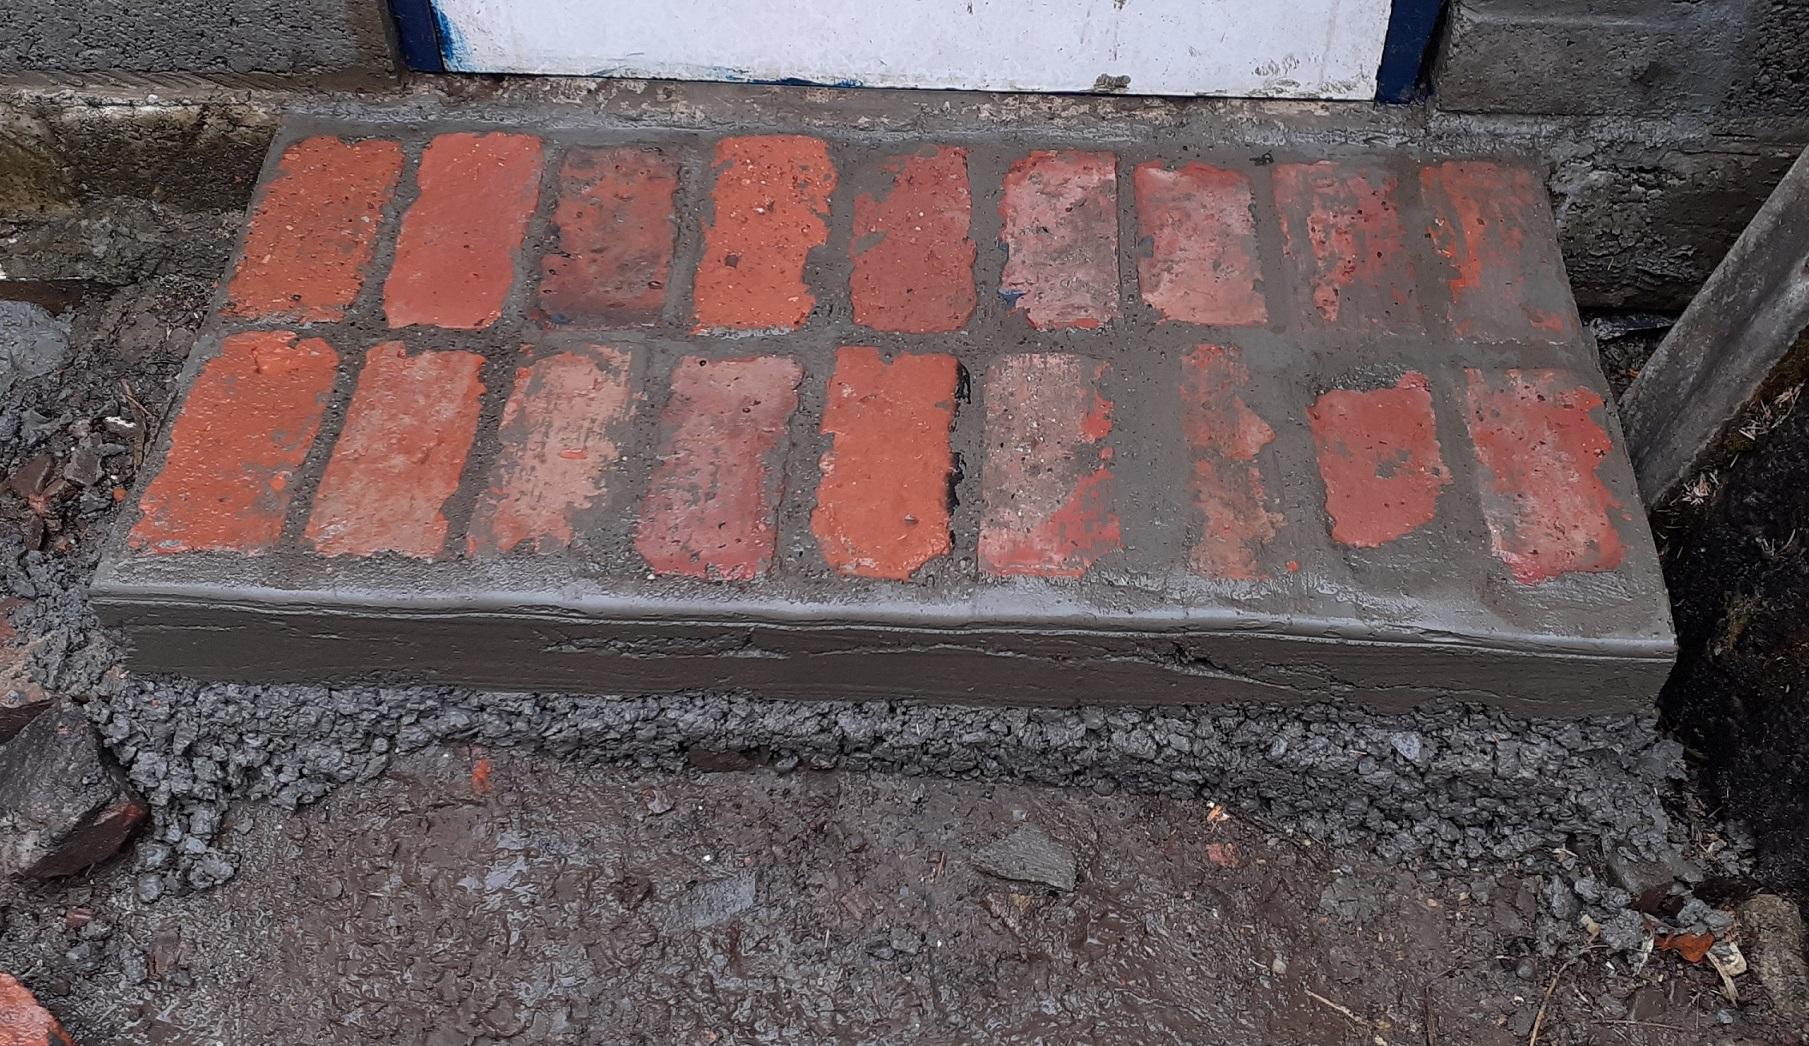
I have quite a few old bricks, found them under the old garage slab, looks like they scraped all the top soil off to the clay then dumped a lorry load of bricks to make up the ground then covered it in whin dust which sort of filled the top layer gaps. Interestingly if any of us suggested this method today we would all baulk at the idea, yet this garage did pretty well for 60 odd years on a 2-3 inch slab with edges built up on cobbles 3/4 layers deep. The bricks are quite nice, big 9" red bricks in pretty good condition, so I have been scratching my head after I had to lift a couple of 100 to run a soil pipe through the old garage site wondering what to do with them, so I looked about, I have always liked the reclaimed brick walls and paths and things so decided to give the new garage a new side entrance as test bed for bigger things. (The dark area to the left of the 4th from the right bottom brick isn't a gap, it is heavily fired clay.) I am quite pleased with the results, I used a wet grout technique, this will not be a step so the rough sides will be unseen - the ground level around is coming back up. So the plan is now a much larger area that leads to this entrance to create a theme.

-
Just for fun - build a house for £100k
Carrerahill replied to Gav_P's topic in General Self Build & DIY Discussion
So what I may be looking for is another woman? -
Puzzled by what my architect's drawing means
Carrerahill replied to dnb's topic in Roofing, Tiling & Slating
Post the real drawing so we can see where the lines representing things actually go. -
Not on a perp joint - mortar isn't giving any real strength when in shear like it is in a perp joint. Mortar is basically a filler, it obviously binds the bricks and blocks together but it isn't actually strong in it's own right, basically it is "filler/bedding" material which in compression has excellent strength. If you look at blockwork after a year or two you can often see hairline cracks around a lot of mortar joints, this is normal, the mortar may not actually be chemically "stuck" to the brick/block but it still conforms to the surface of the brick/block and will stay in place well as it's locked into place. That wall isn't now weak because of these little cracks. Look at sleeper walls in solums and what not, they leave a whopping great gap between the bricks for ventilation, these walls are often structural too supporting brick walls directly above, they are fine. Walls also gain strength from their own weight and the compression on all the joints. If you have ever tried to remove a single brick from low down in a wall you will know what I mean. Also consider that walls sit on a piece of DPC - basically a piece of plastic which the mortar it laid, that first brick or block on a DPC is not actually bonded to the bricks under the DPC.
-
You are going to end up with a substantial house here, so although you are appealing to bankers who don't really get this building with SIPs deal you are also getting to my mind the best of both worlds. So what is your planned make-up? Sip panel wrapped in a membrane then a cavity then block skin? In terms of how you end up cladding the block I would be thinking of the following: Whatever I cover the block in will not be easily repaired or replaced - full cladding off job, so it needs to last. If I paint it, it may flake and bubble in 5-10 years, where does that leave me? If I fix treated battens or possibly galvanised metal etc. to the block with good quality fixings then membrane over that, as long as I use one of these exposed membranes that you often see behind cladding like this then the inner structure is going to be protected and the "consumable" aspect is just the larch and membrane (it will need to be designed for full life exposure, i.e. UV stable) which can be changed out every 30-50 years. I would also be thinking about alternatives, possibly longer lives alternatives. I would also consider having the membrane in direct contact with the block, then stained black battens over the top (like a roof make-up) as this would also mean the membrane didn't get as much moisture coming into contact with it, which could then sit directly behind the cladding and would let the cladding dry out quicker. I have seen this done so many ways from log cabins we have stayed in to modern architectural wonders in the city centre with cladding and I am always that guy poking about looking to see how it was done and have so far never seen "the way" as there seems to be many. Use black bricks!
-
This is really just one idea out of many possibles but may shed some light, when the first and second part of the building were built foundations as we know them today didn't really exist, they used corbelled brick foundations which are basically wide brick walls laid directly into a prepared trench. Many many 100,000 of buildings and structures, millions in fact stand across the UK like this, have done for a century an will do for another with basic maintenance and care. Sometimes due to lack of a unified foundation individual areas of the building can settle and move, it is possible that at some point someone even removed these lower bricks not understanding what they were - "oh there is a row of bricks, they are in my way" they are removed and all seems fine, fast forward a few decades and another course of two drops and gives you this "floating" column. It could also just have slipped - the fact is the bricks went somewhere, it was not built like that, it only stands because it is tied into the other walls. If it was me I think I would dig a local pit around this column, investigate the makeup and then place a proper foundation around it all and make up to the underside of the column. What I would want to achieve by exposing more down below is how the column and the wall behind it all ties in together and make certain that it is going to stand for another 100 years without any issues.
-
https://tradefixdirect.com/hilti-type-cartridge-nails
-
Things have changed but this was always Hilti-gun territory but as I say, things have changed and some manufacturers make air and gas powered concrete nailers so have a look but I suspect these will be pricey and probably not the sort of tool you will use much of after the build so maybe hiring? It might be worth hiring a Hilti-gun and the correct cartridge for your use - I used a hilti-gun years ago to fix battens to a concrete ceiling and steel flanges directly onto the ceiling too - I must say it was the business but they are pretty dangerous so take care.
-
Honestly, I think you are worrying about nothing, and I think through and over engineering everything! I paint the cut ends of treated wood and all the cut ends of my roof structure etc so I am hearing you, but I think too much worry. Get it up there! Damp transmission is from damp, is this ply damp? When you say lying in his entry what do you mean? Inside his house? Does he have a termite infestation or woodworm? As I say, use that nasty, Carbopadox stuff or whatever it is (I have used it on all out important timbers in potentially damp areas) and it claims to stop more or less everything that attacks wood.
-
If the sheets are new why would you suspect rot? Ply is not likely to have the same issues that normal timber will see, but that is not the rule, ply is mostly damaged, with enough exposure, from water damage and starts to peel/flake. So unless there are these signs I would not worry. If you are very concerned I would treat the original timbers with some of that Dulux Trade wood preservative which also stops little beasties, wood worm etc. However, in all honesty, I'd just inspect it and check it all seems fine. Construction timber often gets wet and isn't usually a cause for concern, up here I see OSB and ply decks on builds sitting with what can only be described as swimming pools on them for months on end and are all OK.
-
I assume you mean £14.00 for the whole job? In which case for £14.00 go up a size - from my supplier the cost difference between 16mm and 25mm is £10.92 on a 13m run.
-
Depends on load and distance. Confirm those and the rest is easy - however, word of advice, always over engineer here. So if it calcs as 6mm go 10 for 20p a meter more!
-
Maximum fence post centres/ arris rail length?
Carrerahill replied to Randomusername's topic in Landscaping, Decking & Patios
3m is not good, it depends certainly on the size of the rail 75x45mm or something? and height of the fence. I did ours with 4x4 posts, 75x45mm rails and that was on about 2m spacing, fence was 1800mm tall so wanted strength, if a lower fence you can open that up a bit. By your guys logic all our rooms should be exact multiples of 1200mm for plasterboard sizes! -
Polished Indian Sandstone
Carrerahill replied to Carrerahill's topic in Landscaping, Decking & Patios
Thanks for the responses all. I think as with most things, it's all in the prep, I am fairly sure my usual approach to slab laying will work here. I am going to lay them out on the lawn to find the pattern and number them with chalk and make a plan once I know what I want. I think that is the simplest way, I was going to measure them and count the bits and CAD it up to see how it looks but I think it would be better to actually lay it out. -
Consumer unit mounting
Carrerahill replied to Russell griffiths's topic in Consumer Units, RCDs, MCBOs
Technically it can go onto anything! Most new builds mount it on a piece of OSB. There is no direct reg in BS7671 18th - which states the mounting material must be non-combustible. There are a couple of regs, 421.1.? which states that materials used to form enclosures for electrical equipment must be non-combustible or the enclosure must be non-combustible, and it even gives the example of a ferrous metal, in other words, make it in steel and you are exempt from making things out of non-combustible materials. Now just because the regs say something, doesn't mean they are infallible! So as the consumer unit itself is metal and is supposed to be fully sealed to stop the spread of fire, if the CU's integrity has been maintained, then fire should not be able to escape, so worry more about ensuring the unit is using appropriate glands and intumescent seals etc. I personally think that it should be on a non-combustible material, I made a board for my unit out of 11mm OSB covered with 12.5mm plasterboard. -
Changing from 10mm to 15mm pipes
Carrerahill replied to Stmc93's topic in Central Heating (Radiators)
How old are the radiators? Cold spots are probably not flow issues to be honest. Our house, as we bought it, was all plumbed in 22mm primary flow and return lines for ground and first then down to 15mm as things split off and finally 8mm out from manifolds and T 15mm Tee's with 8mm reducers, we have never had an issue and some of the 8mm runs are probably as long as 5/6m. Must say, on the rater occasion we run the boiler the radiators get blinking hot blinking quick! It may be worth analysing your system and doing a schematic then post it here. I have seen some frankly odd odd plumbing, I once saw an entire ground floor circuit of radiators plumbed in series - if the first room got too hot or the stat was off none of the other radiators got hot! I also once worked in an office where they ran about 20 radiators around the perimeter walls of the open plan office in series. They told me when I started it was broken and didn't work correctly. I explained the issue and we learnt how to balance all the stats to keep some sort of flow going. As for the change in pipe size, if you are going to upgrade to 15mm then you really want to upgrade as much of it as possible. -
Hello All. I picked up a pack of polished Indian Sandstone today, I've always wanted one of these patios as I think they look very smart, so I am now the proud owner of 1/4 of a ton of polished sandstone in a random assortment of sizes. I have laid plenty of patios over the years and always do them properly so I am not unfamiliar with laying slabs, but these guys are a different kettle of fish I feel. To be honest they are more like really thick tiles. So I am looking for someone with experience of laying this stuff - any tips or tricks - does the method change much from ordinary, more robust slabs? Usual sharp and cement mix? Thanks.
-
Can you not use PIR insulation and do away with the OSB - this sounds like you are creating a cassette floor which will be prone to moisture issues and the OSB crushing will be the least of your worries in a few years. Another option would be to use breathable membrane or mesh, sling it over the joists, insulation sits in the "hammock" and then fix it to the top of the next and so on and so forth, I'd not let it touch the ground though. If it was me I would be knocking in PIR between them, if I was not confident in my cutting skills I would be fixing 25mm treated battens to the bottom of the faces of the joists then knocking PIR down onto them to seat.