Dave Jones
-
Posts
3597 -
Joined
-
Last visited
-
Days Won
11
Everything posted by Dave Jones
-
the only true cost is every penny, from legals, stamp duty and every £1 spent no matter on what it all counts. then you can see if you have made or lost money when you get it valued. The only real cost reducer for a diy/self builder is free labour. Trading dragging out the build time over paying for professionals/trades.
-
you really need 150mm below DPC unless you have a tray.
-
save the cost and hassle, brick and block over timber with the maintaince issues etc Save the 10k on a heat pump and go for a combi if you can get mains gas, 10 year warranty on worcester bosche.
-
warm roof as you say much easier but on a pitched roof can not look good due to the build height. How did you seal it to stop air/moisture from entering externally as tiles wouldnt be sufficient ?
-
Wrapping a SIPs Garden Room 1.2w roll or 2.7w ?
Dave Jones replied to Tooled up's topic in Structural Insulated Panels (SIPs)
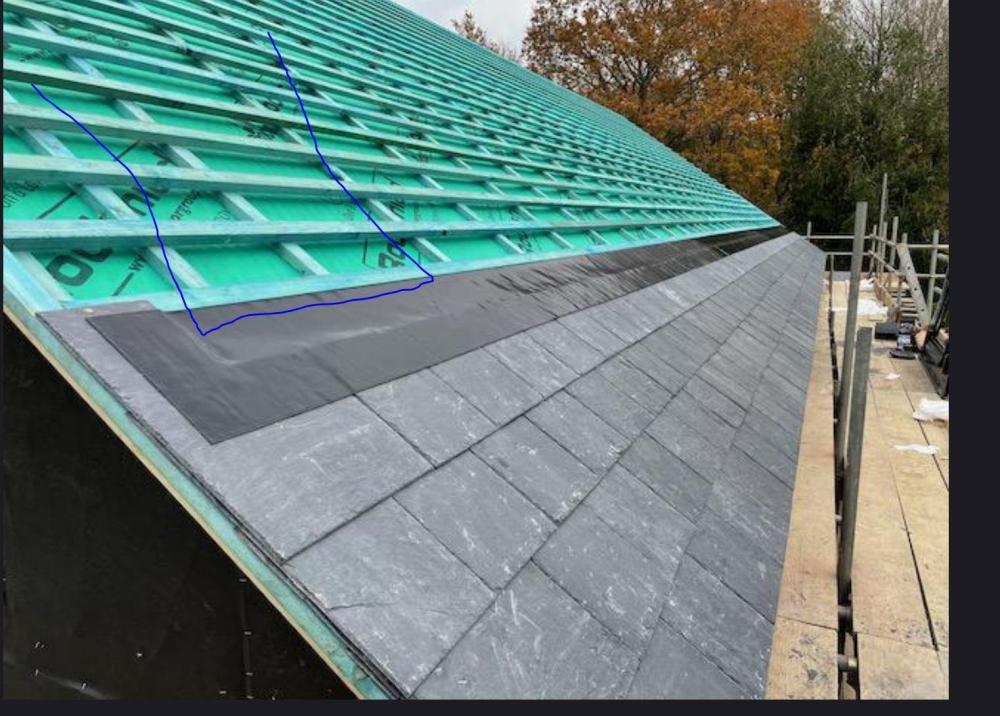
really doesn't matter overlap by 150 (its marked on the rolls) and its fine. -
slightly incorrect you show a gap to the underlay, as you can see from the photo there is none. the counter batten is on the other side of it.
-
Alternative sliding doors to be used with ikea wardrobes
Dave Jones replied to Adsibob's topic in General Joinery
https://www.cutwrights.com/new/home https://www.online-bedrooms.co.uk/ -
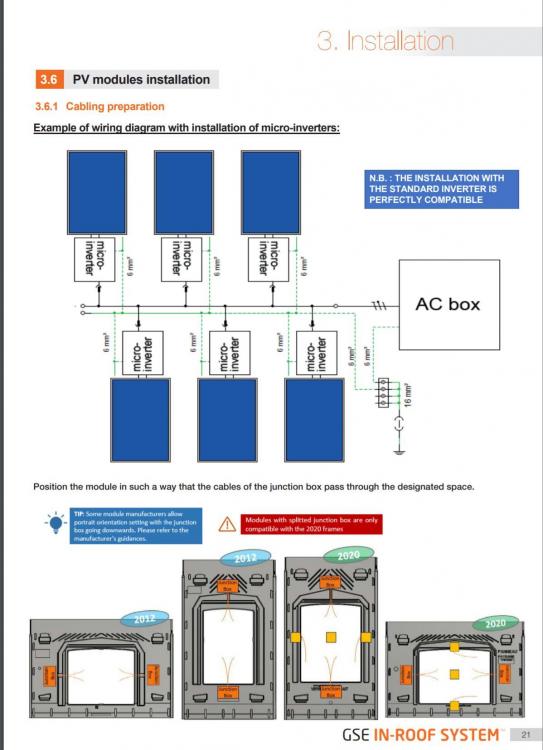
i really dont know, i used those small micro inverters and the sparky said it needed earth but your could be different. fingers crossed.
-
you will have more air flow if anything as the GSE trays have a massive open area in the middle!
-
https://www.carvers.co.uk/building-materials/chemicals-sealants-adhesives/liquid-damp-proof-membrane-25l-everproof-blackjack-543032
-
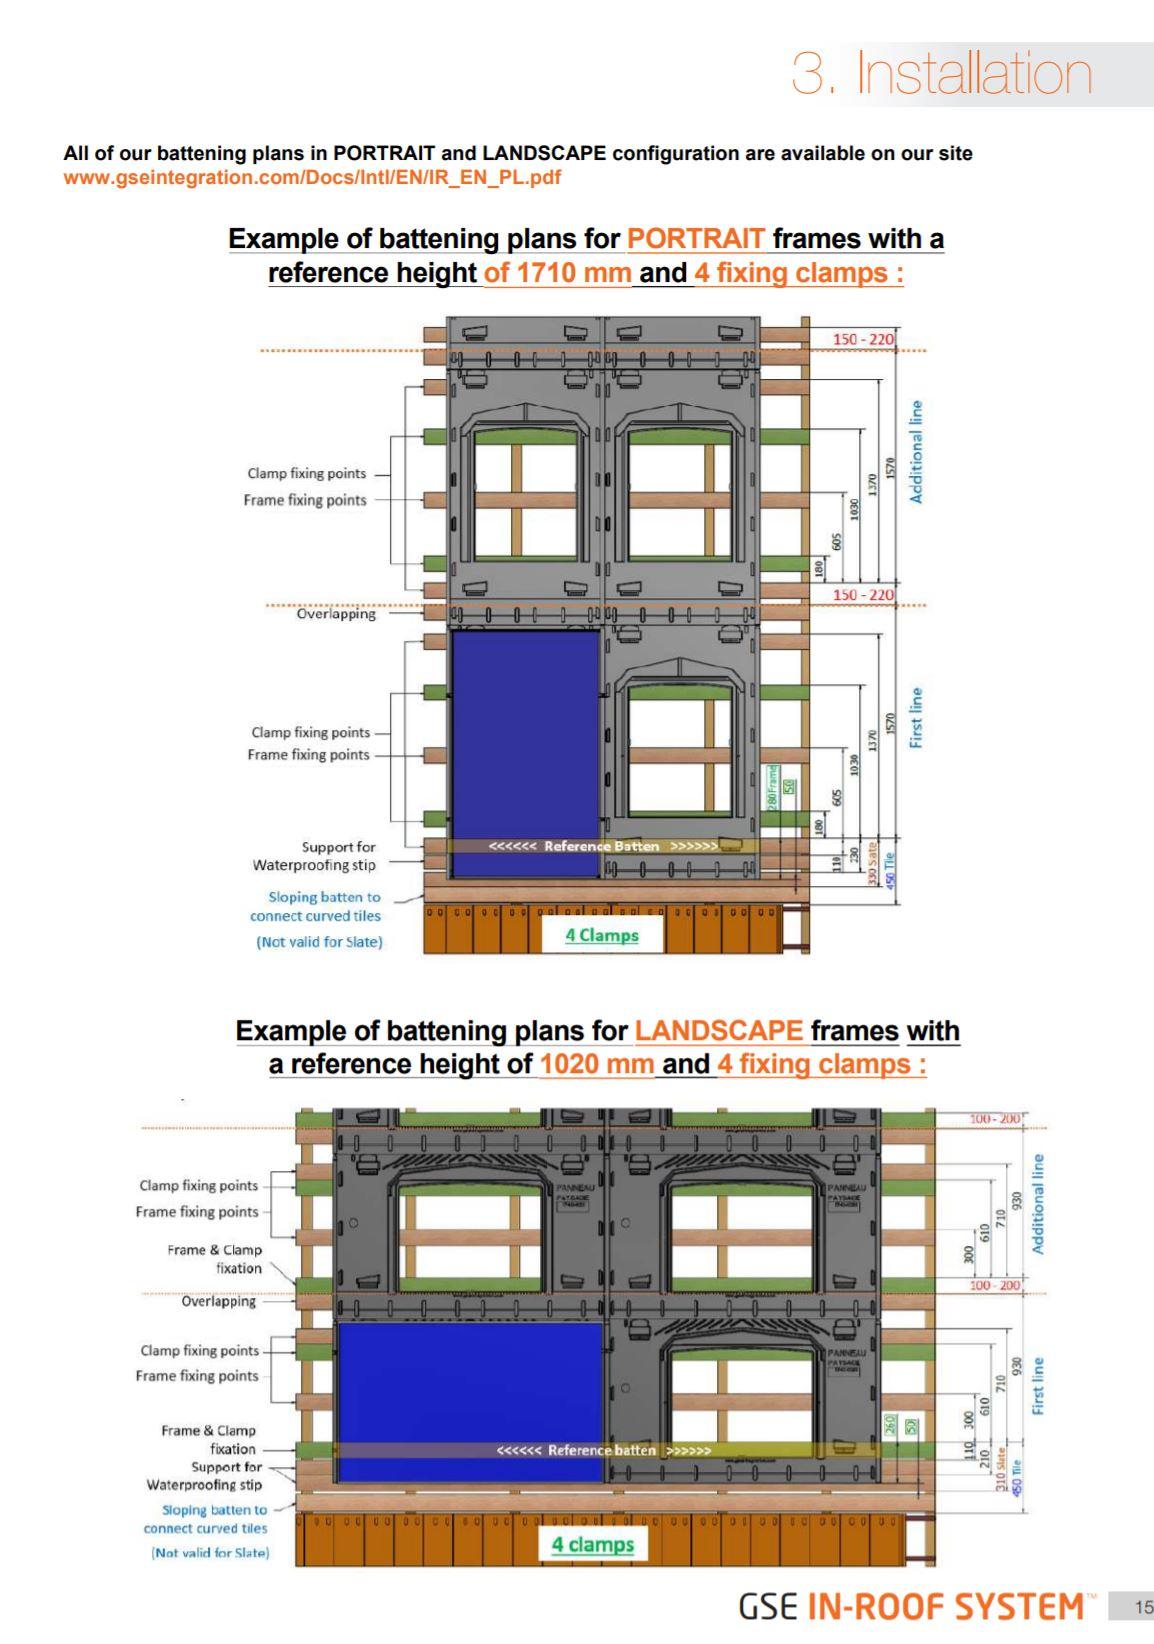
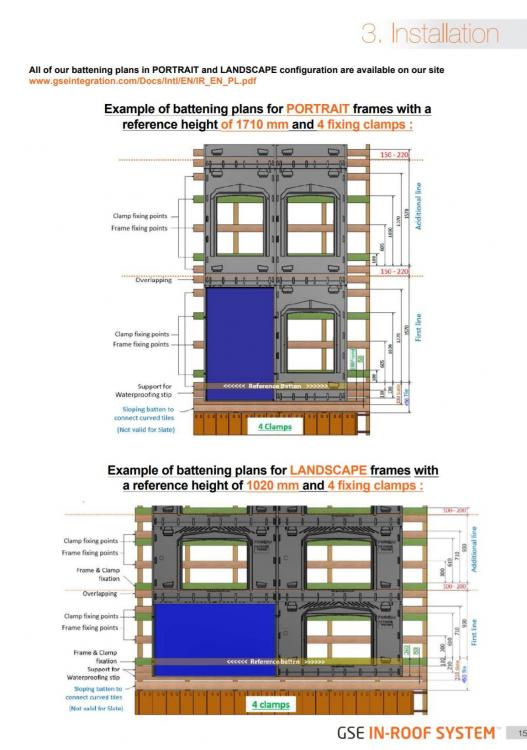
the batten support spacing is in the manual, basically run your normal battens then add more to match the GSE fixing locations.
-
page 21, check with whoever will be signing off the electrics..
-
you don't have to remove the trays, just take off the locking clips on the bottom row panels so you can prop up the end of the panels, you can leave the existing flashing if you like just pull out the tiles from underneath it and relocate them below the panels and redo the flashing. Its a couple hours work to get it right and avoid bodging with packers etc. If its any consolation when I did ours the panels had to come off completely as the sparky didnt tell me about the earth wire that has to be clamped to every panel so i feel your frustration!
-
not all the trays just the bottom ones are wrong. You have almost a whole slate under the bottom this has to go and be replaced with the flashing/lead so it sits down. The sides are fine as you cut them into the metal flashing try same as the top. Just take out that whole bottom row sitting underneath the panels and replace with a flashing kit per the manual and it will be fine. Lead looks so much better than the crinkled stuff that comes in the kit.
-
Neighbour 'pressuring' me to not object to application
Dave Jones replied to JKami84's topic in Planning Permission
your objections unless on planning grounds would't matter a jot anyway. -
i would think they have 100% as it wouldnt be watertight otherwise. just need to get the row of tiles at the bottom cut shorter so the panels doesn't sit on them. Strange the trays are so short it looks a good 150mm as if the panels were not the right size for the trays. Oh and every panel should be earthed as well as cant see any earth wires in the pics.
-
thats where the pressure is when they are tightened down.
-
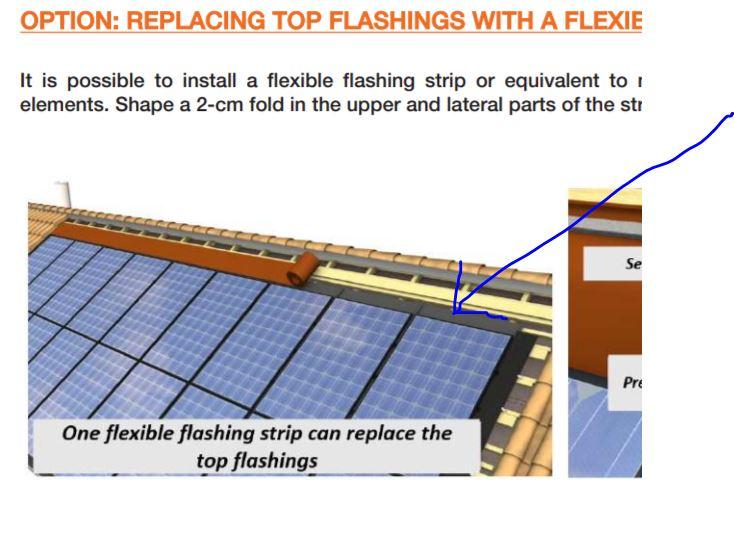
The bottom of the panels should not be in contact with the tiles as it will push them up when the panels are tightened down. it does show this clearly in the manual. strange they have given you the correct side flashing but not the top, if you look at page 29 there is a metal flash at the top onto which the sticky crap goes otherwise you would have to stick it directly onto the panels!
-
The top shouldnt have sticky flashing. They come with a metal tray that sits on the top edge of the panels, the slates/tiles are then cut into to it flush.
-
they have fitted the panels too low and the weight of them is kicking up the tiles. You should see the bottom flashing. Out of interest can you show a picture of the top as well. We had the same panels and tray, i really didnt like the sticky flashing and used lead instead. Page 17 of the manual shows the correct installation method. https://www.gseintegration.com/wp-content/uploads/2021/07/IR_EN_MI-v11.3-4.pdf
-
leaded flat roof can look nice, much extra cost and faff though....
-
do some more research. your rads will need to double in size, if they are fed by microbore pipe this needs to be replaced. You WILL be paying a heck of a lot more money on your heating bill compared to gas, maybe close to treble depending on how insulated the house is. Also take into account the racket the outside unit makes if your neighbours are close to you. Not many pro's and a lot of cons unfortunately. You will be pushed to get unbiased facts here as you will no doubt read ....
-
Help Needed Brick and Block Quantities
Dave Jones replied to Natasha's topic in Bricklaying, Blockwork & Mortar
ask the brickie to tell you. -
F*ckWit neighbours strike again
Dave Jones replied to Pocster's topic in General Self Build & DIY Discussion
pole to pole is covered by wayleave or have I got the wrong end of the stick ? -
anna, send your drawings to get priced you have been given the links. No point any of us giving you an example quote as it wouldnt be of any use. to give you an example, your looking for a new ford mondeo. We give you a quote for a Bently. See its silly. Get your build priced, then get builders to quote based on it.