Bitpipe
-
Posts
4118 -
Joined
-
Last visited
-
Days Won
53
Everything posted by Bitpipe
-

What to do with BT connection?
Bitpipe replied to Weebles's topic in General Self Build & DIY Discussion
+1 on all of this. We did it the official way and it was a major PITA. Had to register as a house move to the site office - BT were hopeless, OR were fine when they finally came to site. Did this for two lines one business (voice & DSL) and one domestic voice. Was charged £120 I recall. I spliced some left over drop wire to create another run to the caravan at the back for a voice circuit - worked fine. For the reverse I just requested a new line to the house and had the old one disconnected - that was free -
Mvhr install - makita drill casualties
Bitpipe replied to Jimbouk's topic in Mechanical Ventilation with Heat Recovery (MVHR)
Well done, running MVHR duct seems to be a self build badge of honour I used an old hitachi 240v corded drill to go through our 22mm OSB floor deck - surprisingly tough material. I used to drill 2/3 from above and 1/3 from below to get a neat hole. Where I had a lot of pipes coming together, I used a jigsaw to do a square cut, can't say it was much easier though - got through quite a few blades. -
Planning permission for a caravan on site?
Bitpipe replied to Weebles's topic in Planning Permission
Ok, I'll confess to never having explicitly approached the LA for 'permission' but my planning consultant said that it wasn't necessary, he was ex LA and seemed to know his onions (got us planning after a refusal). So I just plonked it on site - ours was to the rear so not visible from street (until we demolished the house). I see plenty of vans outside local builds and don't think each has sought PP - I'm guessing if it's still hanging around after completion then LA will want it shifted. I did receive a letter from planning enforcement a few weeks ago regarding our site container that's still out front (a neighbour had complained). It referenced that it did not have planning and I was 'encouraged' to remove it in 21 days as they believed it was no longer required. I wrote back saying that it was required until landscaping was complete and they agreed that this was fine. Have just agreed a private sale so will probably shift it in a few weeks but it will be when I want, not them -
Planning permission for a caravan on site?
Bitpipe replied to Weebles's topic in Planning Permission
Our LA (RBWM, Berks) did not require PP for a temp caravan, like you we stuck it in the garden prior to the works - was there for a year before we moved in, we used it for 18 months and then it was empty for another 6 after we moved in (took a while to sell it). Have had a few friends do similar during major refurb and no PP was required. LA will want you to pay council tax on it though (usually A band), you will need to notify them when you demolish existing to get the old property de-listed and they will then start to charge you for the van - technically they can charge you for it as soon as its habitable. We were stuck paying for ours after the new house was re-listed (50% of the A band) until we proved it had left site (pics of it being removed sufficed). -
Balancing MVHR system
Bitpipe replied to Stones's topic in Mechanical Ventilation with Heat Recovery (MVHR)
You screw the terminals in each vent to increase / decrease air flow. That said, I've not got round to doing mine and been in the house since September. Will probably need to do this to get BC sign off.. -
General Election Predictions 2017
Bitpipe replied to Ferdinand's topic in General Self Build & DIY Discussion
Reminds me of elections back home in NI... -
That's what we're considering for the rear of the house where we have two 4.5m sliders that are west facing. Still quite expensive though - £3-4k for a 5mx3m pergola. Look at what these guys can do (for inspiration if nothing else). www.gardentrellis.co.uk I bought a £10 5m tensioned wire system from Ikea and the other half made up some dark voile panels that we've suspended from it and already the difference is noticeable.
- 32 replies
-
- 1
-

-
- privacy
- brise soleil
- (and 3 more)
-
I wonder if the kick comes from having to hold your breath for an extended period of time.
-
General Election Predictions 2017
Bitpipe replied to Ferdinand's topic in General Self Build & DIY Discussion
I have given it serious thought. He has some good policies, return of Ceefax being my favourite.. Seriously tempted by this guy... https://www.buckethead4maidenhead.com/ -
Cooker hood to mvhr extract plenums
Bitpipe replied to CC45's topic in Mechanical Ventilation with Heat Recovery (MVHR)
https://xkcd.com/386/ -
Cooker hood to mvhr extract plenums
Bitpipe replied to CC45's topic in Mechanical Ventilation with Heat Recovery (MVHR)
Not a massive amount of slack but enough to be able to move each plenum 500mm or so if needed. Duct should not be super taut, if you keep your bends fairly lazy then you'll have some wriggle room if you have a problem. -
Cooker hood to mvhr extract plenums
Bitpipe replied to CC45's topic in Mechanical Ventilation with Heat Recovery (MVHR)
Extract similar distance for me. Depending on your joist type (we had metal web) you may be restricted in how neatly the duct arrives at the plenum and you'll then have to position the plenum to best receive the duct and allow a snug connection (buy WD 40 silicone spray, a must for getting the duct with rubber washer snug into the plenum). It's easiest to have the duct arrive straight at the plenum (at least 1m) to give you the room to position and insert it home, avoid very tight bends immediately before the plenum as you'll find it tricky to get the duct in. I used 50mm batten offcuts to create two noggins across the underside of the top web of the joist and screwed the plenum into this. There was initially quite a bit of fiddling about to get them where I wanted and consistency spaced from walls, webs always seemed to get in the way but you get the hang of it after the first few. I then ran the duct from the manifold location (leaving plenty of slack) to the plenum and secured it (rubber washer and clips). Be prepared to reposition duct a few times, especially if you have a few coming together through a penetration in wall or floor - can take a few tries to get the flattest arrangement. Two people are better than one when running duct as it can sometimes need a pull and a push to get round bends - usually gets caught on metal webs (I used bits of cardboard to minimise this). Making a lasso from poly rope can help pull it along from ground level and avoids hopping on and off a ladder. Keep your duct loosely coiled - I used a batten across a door way as a cable spool, if it totally unwinds then it will knot. Last thing I did was connect duct to the manifolds, be cautious when trimming to get a neat fit, suggest you get them roughly connected first and then trim each to get rid of excess, if you over trim, you may struggle to get any additional length in the duct to get a tight fit to the manifold. I zip tied these when final as my manifold only had two spring clips per duct. If you have the ceiling mounted type of manifold that has ducts on either end and the main duct to the base, you need to ensure it's flat otherwise the duct down to the unit will be crooked. Can take a bit of trimming of duct either side to achieve. After I was done, Sparky moved a few plenums to line up more neatly with downlights and other roof furniture, provided you have a bit of slack in the duct, this is not an issue. I left my plenums untrimmed and had the tackers cut board to fit - they were pretty neat, only a few mm of gap. Left them untrimmed for plastering too, probably should have trimmed with a multitool to get a neater finish, however the cowl extends an inch or so past the plenum edge so ceiling looks fine. -
Cooker hood to mvhr extract plenums
Bitpipe replied to CC45's topic in Mechanical Ventilation with Heat Recovery (MVHR)
I have a similar arrangement - I put an additional extract duct midway between the ovens and the cooker hood (on opposite walls). Works fine and if I burn the toast I just open the window a little to increase ventilation. -
Does anyone utilise their top hung roof lights?
Bitpipe replied to Construction Channel's topic in Skylights & Roof Windows
We have a two Velux integra (wired version) over our stairs and two in the utility vaulted ceiling where we can't reach them - work great at ventilating the house in the evenings and we have them programmed to open and close automatically (blinds also to minimise solar gain). The matt white painted finish is quite smart. We went for manual velux in the attic rooms and do use the top swing more than the pivot. -
Bungalow Demolition Costs
Bitpipe replied to Triassic's topic in General Self Build & DIY Discussion
Our groundworks contractor charged £5k do demolish and cart away our old 180sqm 3 bed, 2 storey house - this was in 2015, SE England. Did it as part of the bigger basement contract so there was obviously some discounting in there. We had quotes of £10-15k from specialist demo contractors. We didn't allow burning of timbers on site and we also had no asbestos (paid for a survey) - this can substantially increase the cost. I recall Herb J found it in his render and it added substantially to his costs. -
When a five minute job runs to the whole weekend...
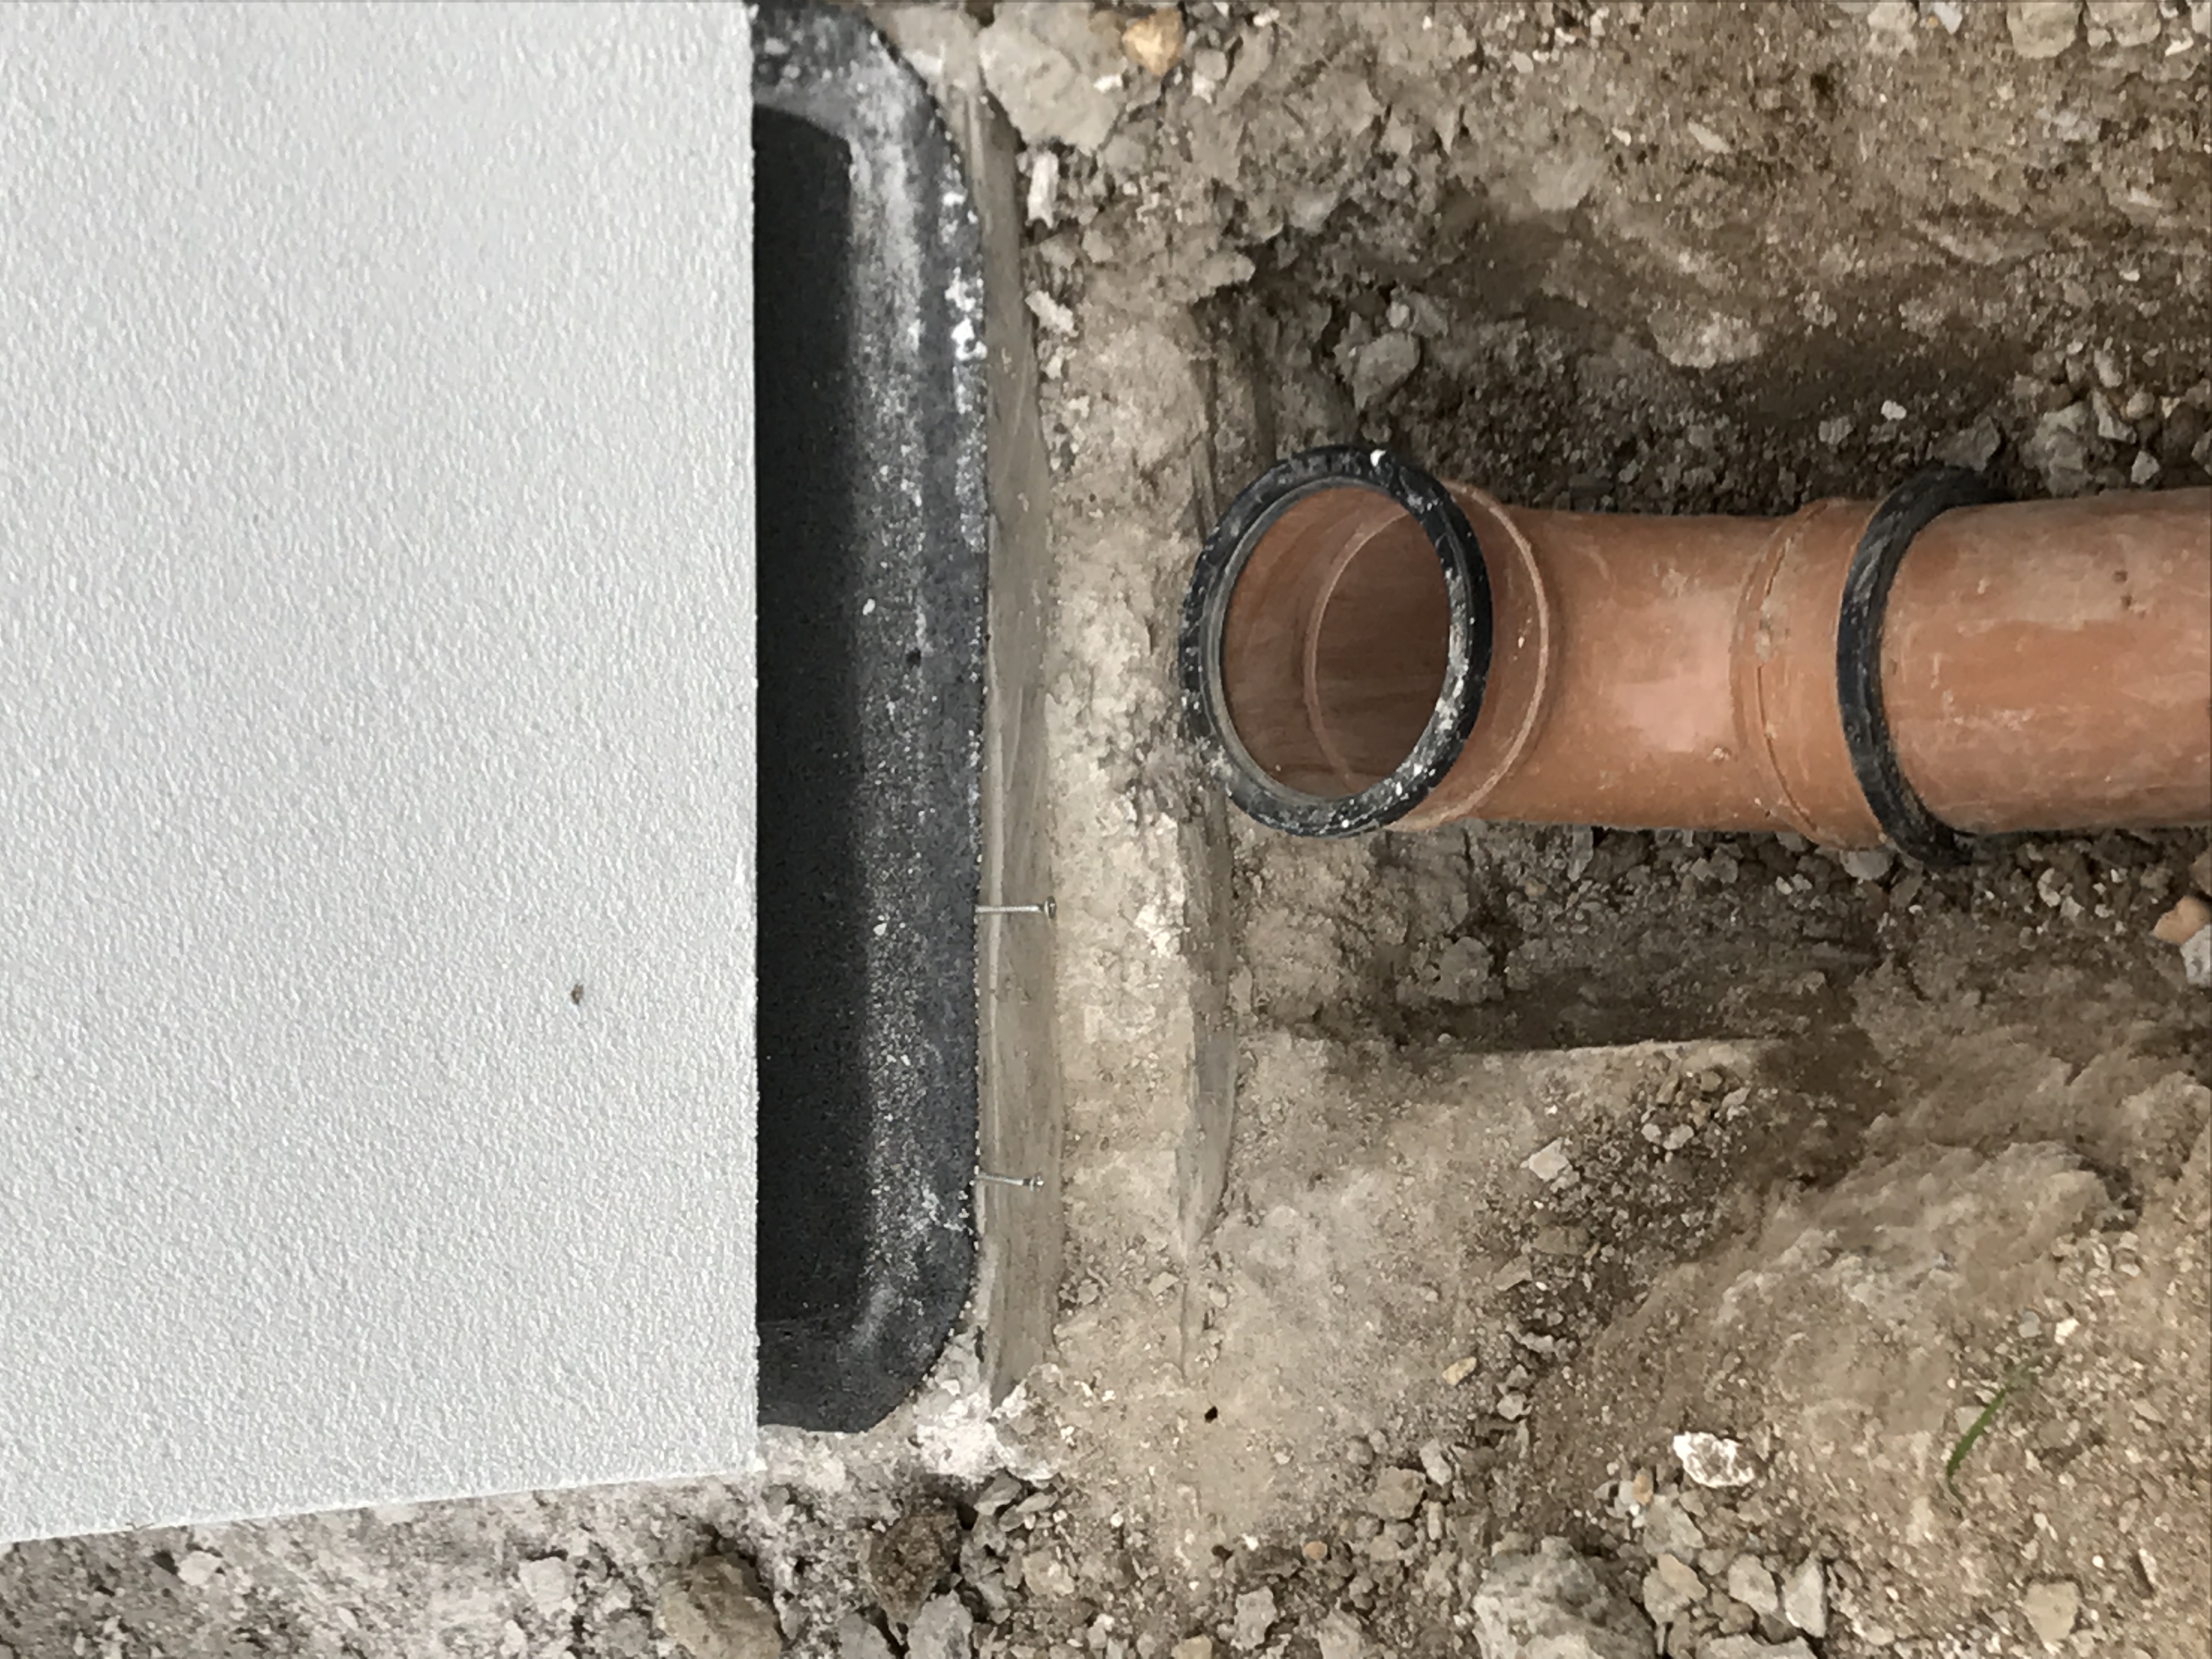
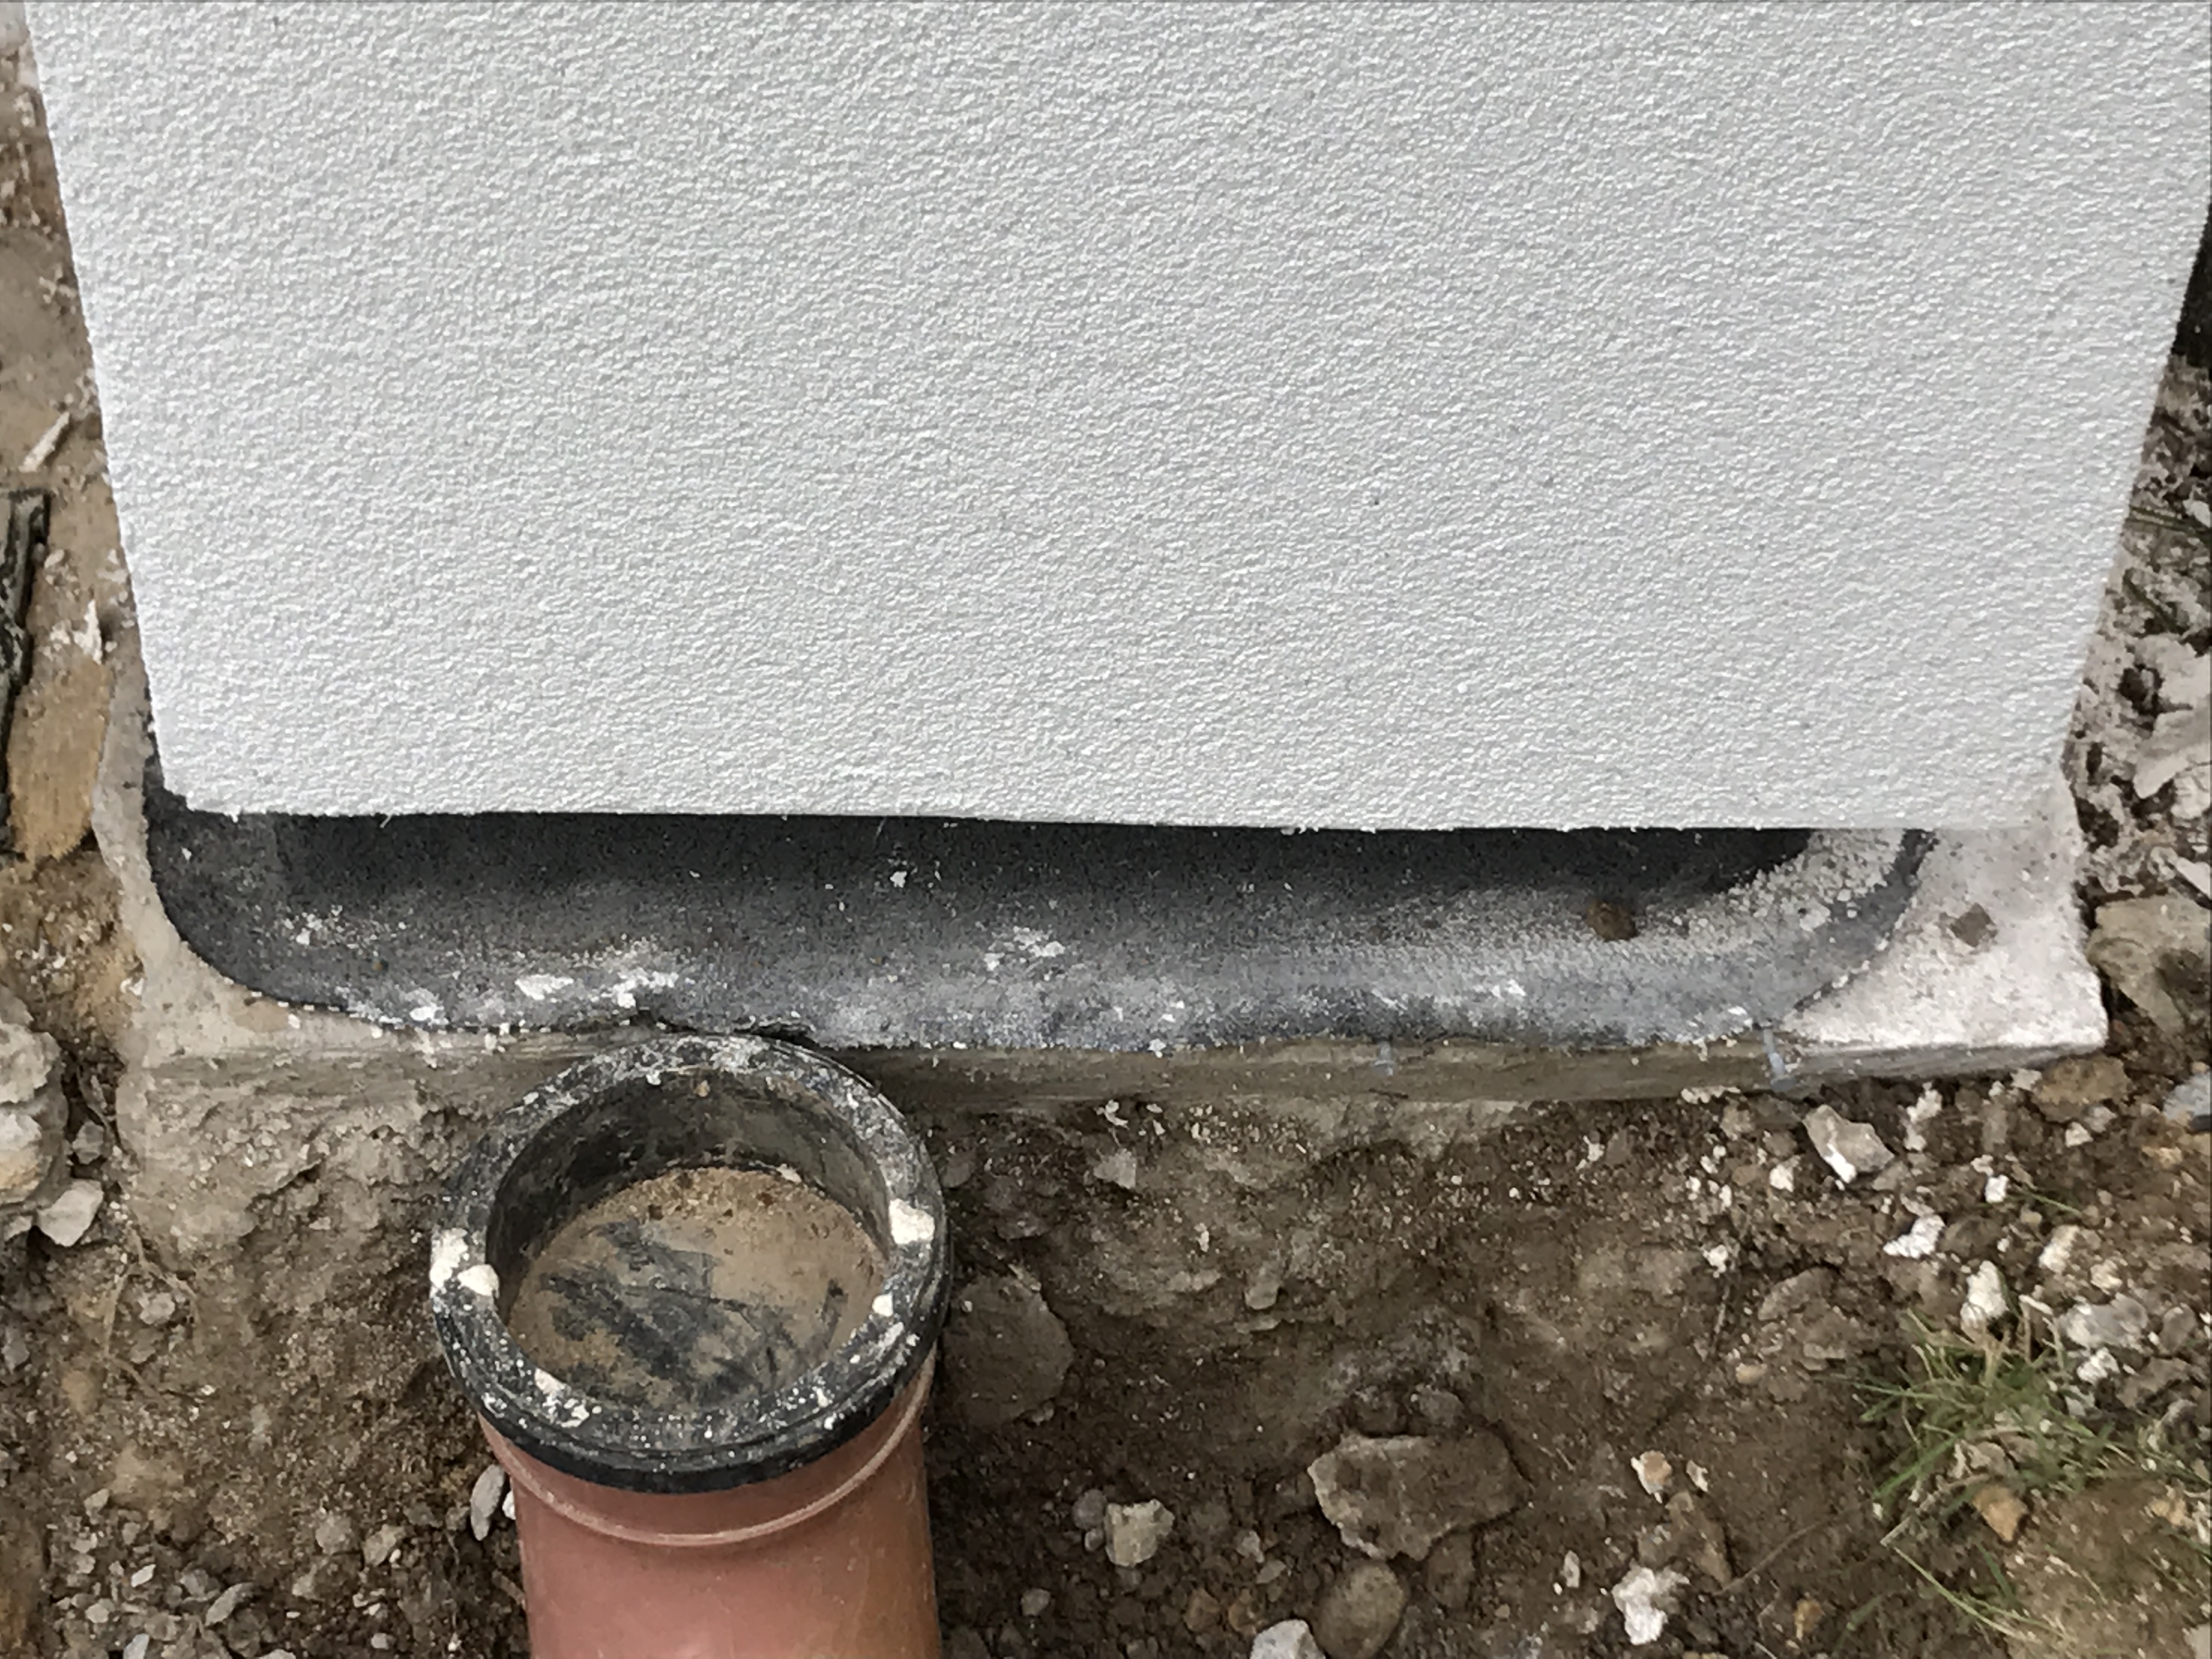
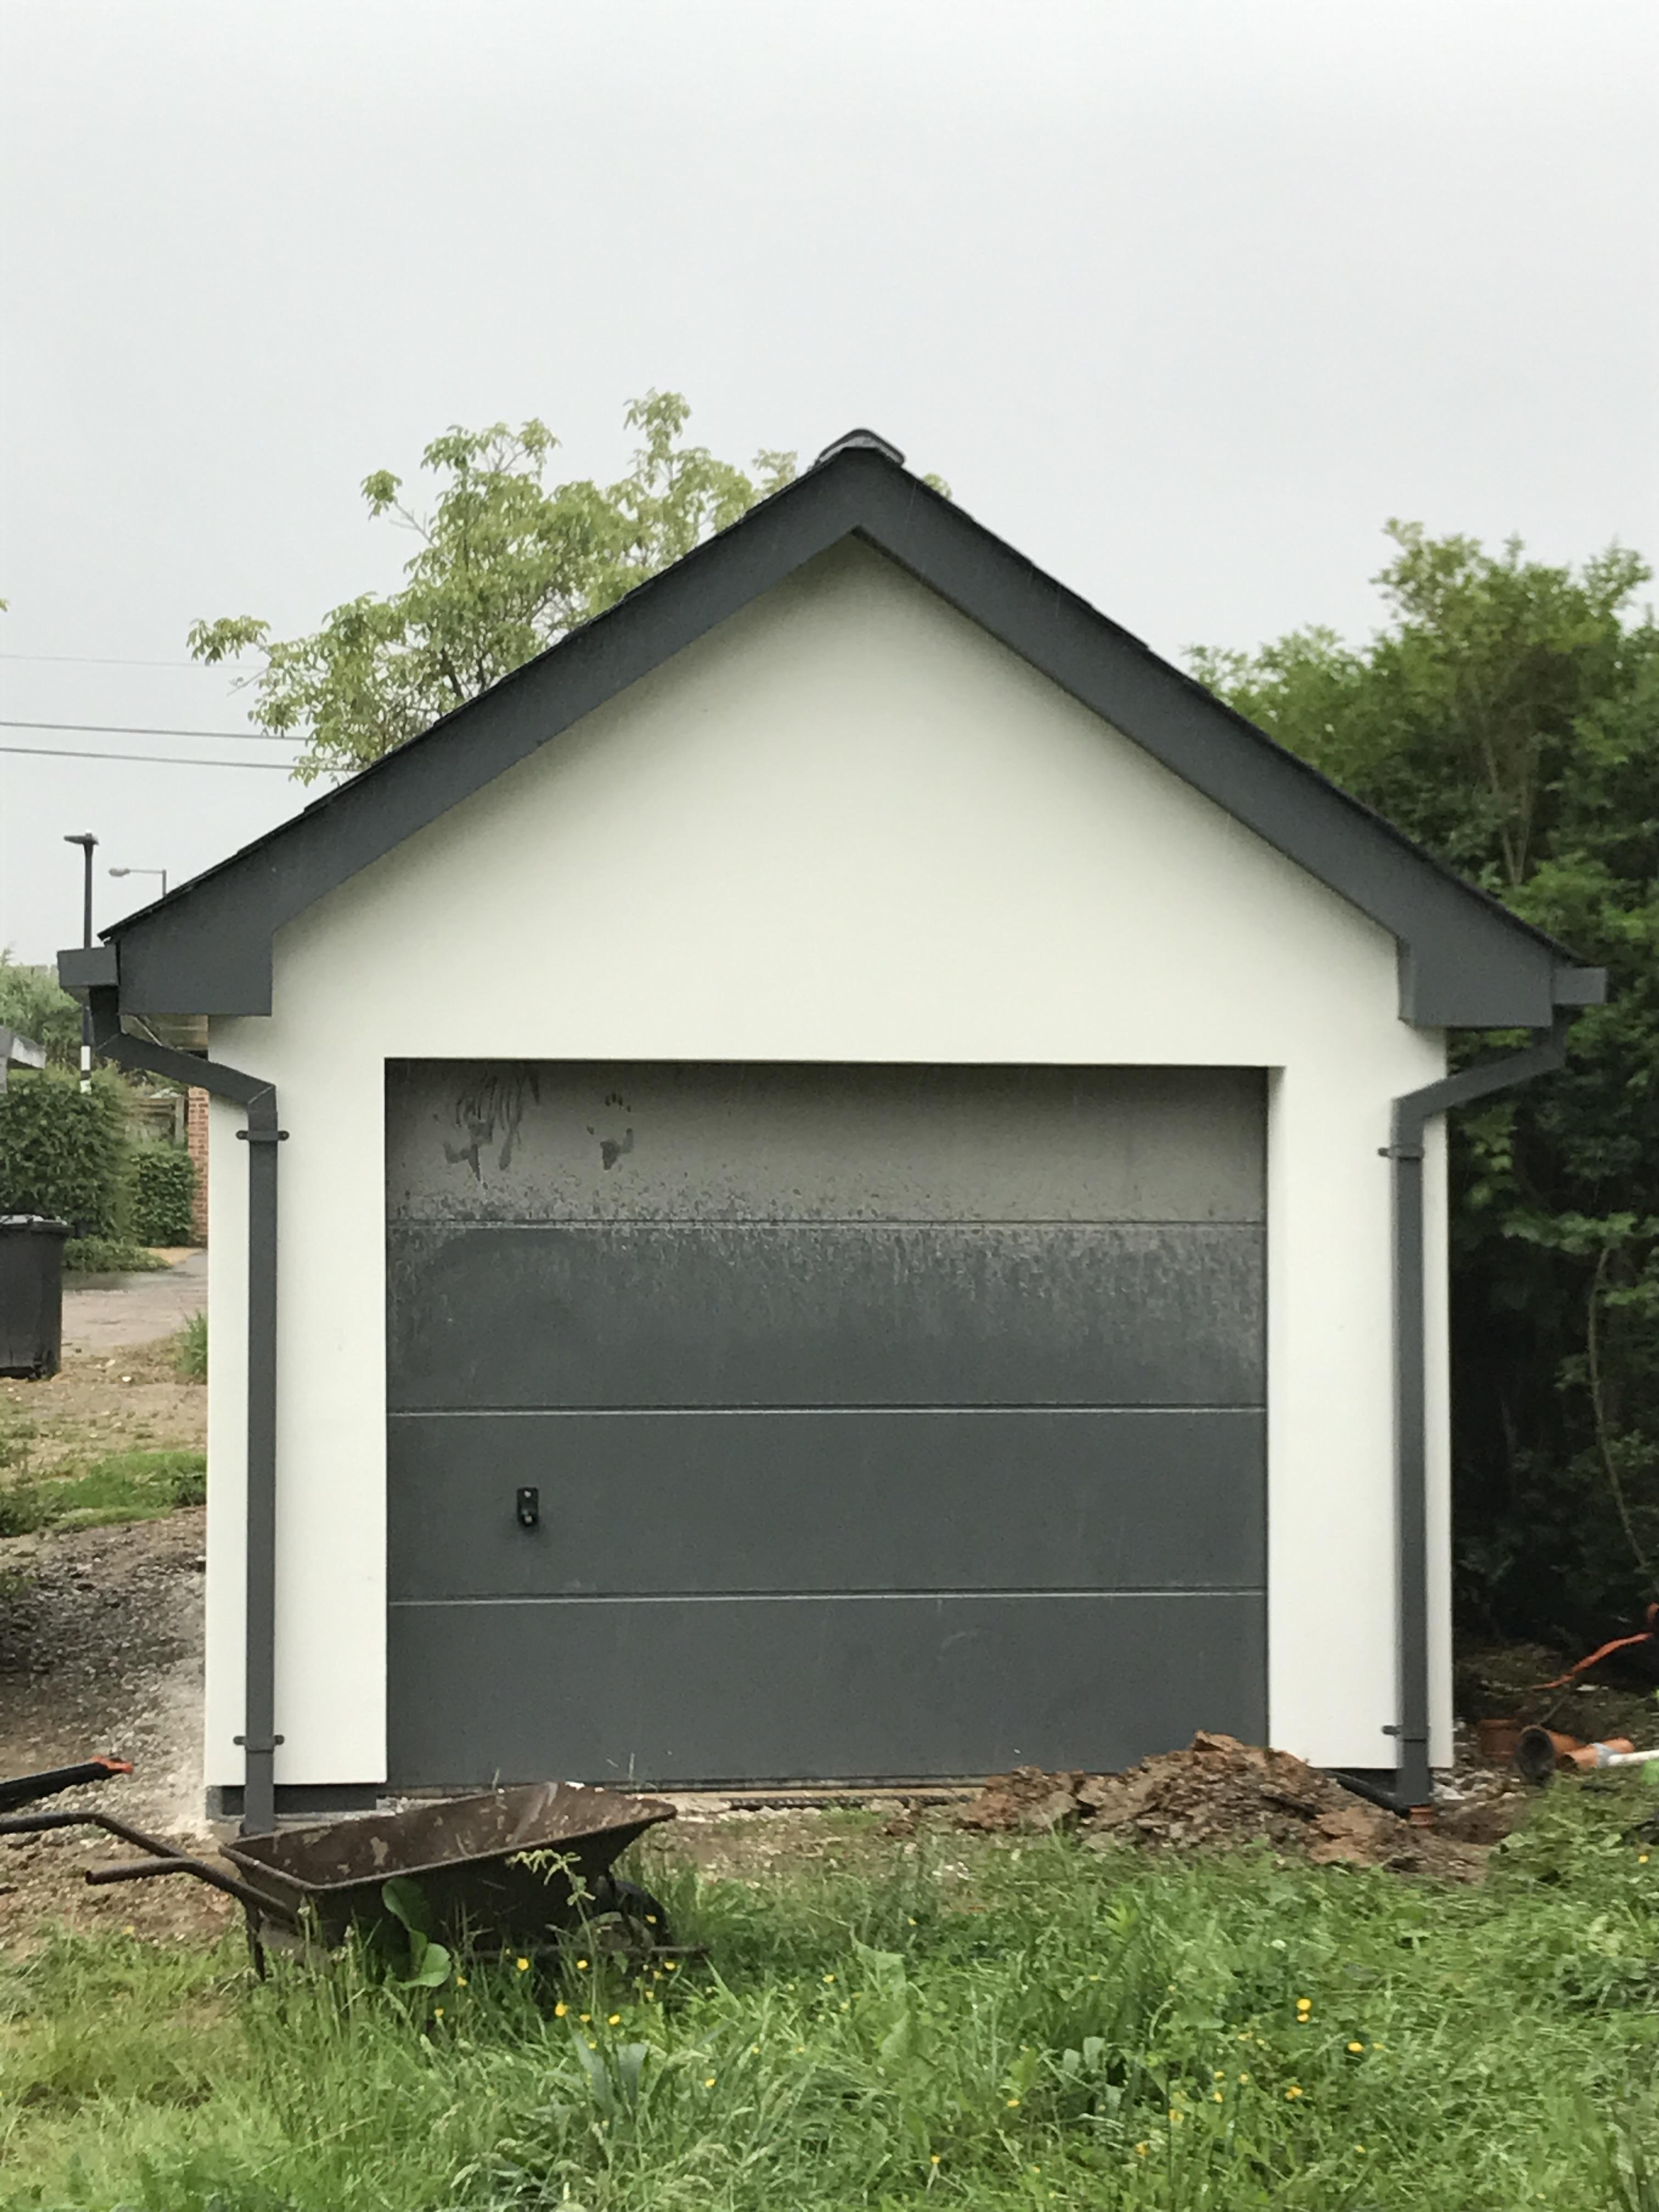
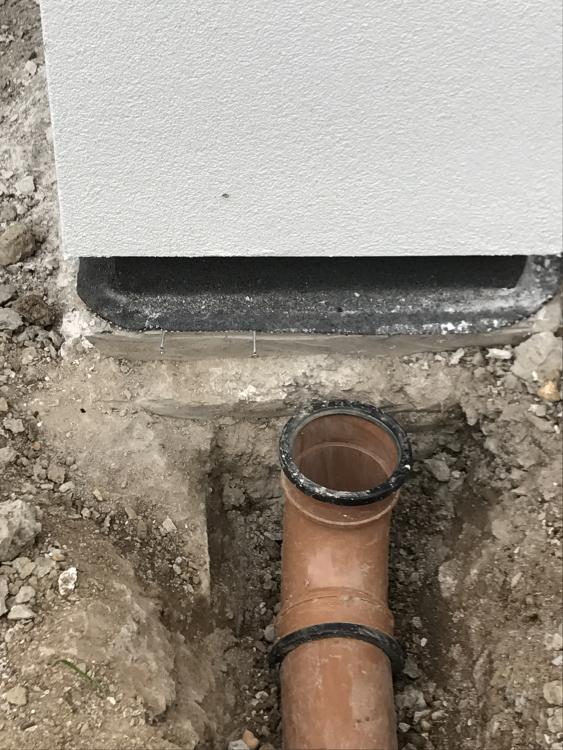
Bitpipe replied to Bitpipe's topic in Rainwater, Guttering & SuDS
Job #724 - power wash garage doors -
When a five minute job runs to the whole weekend...
Bitpipe replied to Bitpipe's topic in Rainwater, Guttering & SuDS
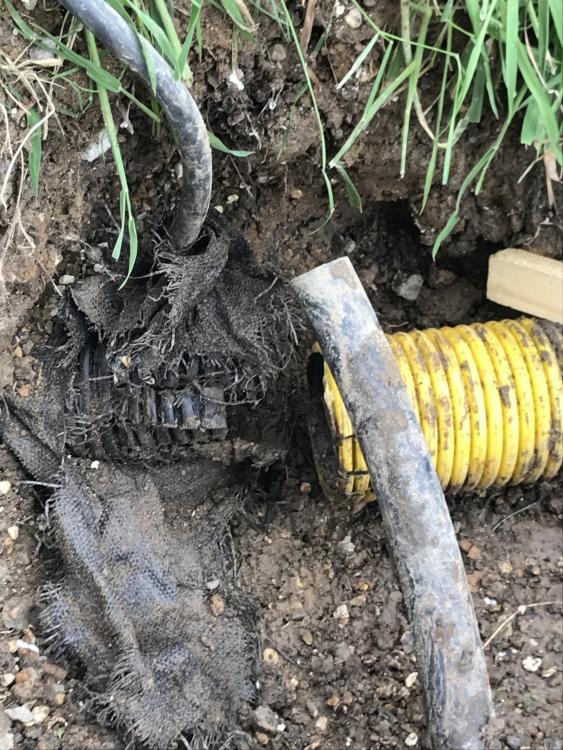
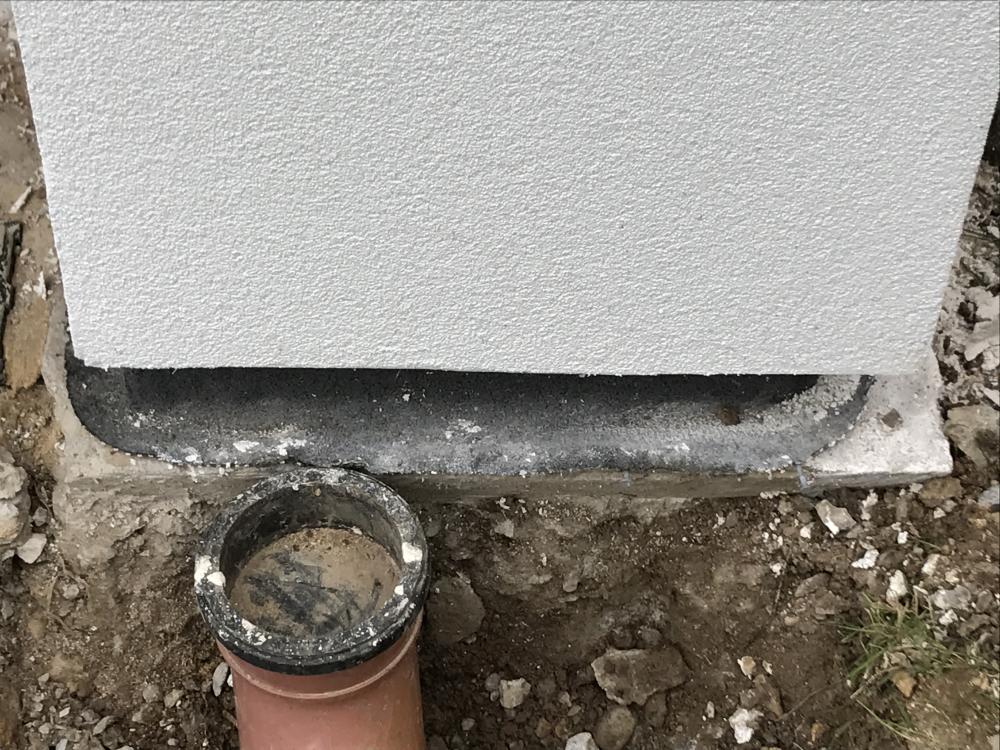
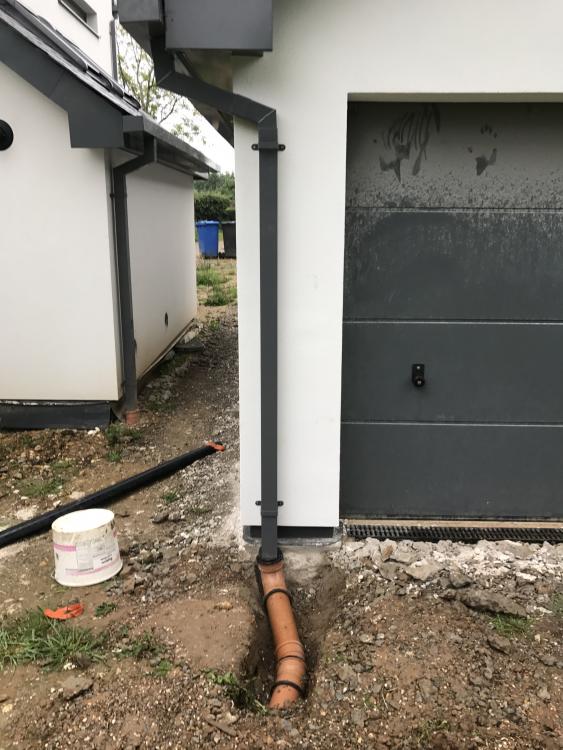
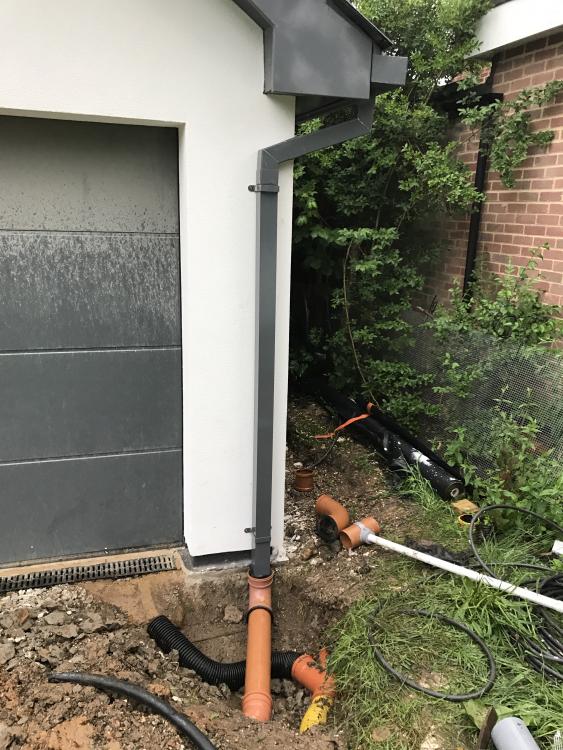
Same groundwork firm who did the demo, basement and services - that work was pretty high quality and I kept a very close eye on it - this was the last thing they did for me at xmas (took ages to get them back for a week of minor finishing jobs) . We oversized the slab initially so when the garage was erected the slab needed trimmed back and the ACOs and gullies fitted (hence the dust on the door). Was only able to put the downpipes on when the render team came back to do garage and a few other bits. What with one thing and another, I wasn't able to supervise that work closely. Not the end of the world, but should have offered up the down pipes and marked it out more clearly for them. Less happy on the joining of ground level drains - will leave the pits open and let my new groundwork / landscaper take a look next week when he comes to start work finishing the site, he might relay the run to the nearby soakaway to ensure the fall is adequate while he has a machine on site. One thing I've learned - it's very time consuming getting any 'big' trade back on site once the majority of the work is done. Smaller guys (sparks, joiners etc..) are easier as they tend to come out multiple times during the build so are used to having a spare morning or afternoon for snagging. Now trying to get the roofer back to fix some GRP topcoat that's peeled off - roof is not compromised, just an aesthetic thing... -
Finally had garage rendered so decided to fix the alu downpipes. Then noticed that the gullies were not quite where they should have been. Did a bit of digging... Then noticed that the French drain at the rear of garage didn't quite meet up with the run to the soakaway, also the pipe connection from the garage aco was very optimistic. Managed to reuse a few unused fittings and then had to cold chisel out the new gully location in the concrete slab. Just finished it in time for the rain...

-
Fixed it. Can't lose our resident Captain Flange to the beast, can we...
-
How noticeable is the film Jeremy? Was it expensive and how easy to apply? Our two west sliders are the main source of solar gain in the afternoon - have put up some voile which is doing a good job of shading the room but obviously won't stop the glass from heating up. Planning on erecting a pergola / bris soleil for outside on the patio (once built) to create external shading but interested in film also.
-
Similar situation for us - we keep the east facing window shutters down (inc. velux) and the house stays cool, our problem starts when the sun passes over the house and streams through the two 4.5m sliders that face west - this warms the room up quite a bit. I popped out to Ikea today and purchased two of their £10 tensioned curtain wire systems and some linen voile - rigged it up this afternoon and it cuts out most of the solar gain so happy with that. Plan is to erect a pergola / bris soleil outside on the patio (when built) which should give additional shade. Evening purging via the roof velux and tilting east windows is very effective at cooling. Still to figure if the MVHR is helping at all, summer bypass is activated but doesn't feel like its making much of a difference.
-
Understanding how to get the money needed
Bitpipe replied to Kuro507's topic in Self Build Mortgages
This was our build finance story. We owned a nice newish 4 bed and had paid down the mortgage substantially, also had some savings. When we stumbled across our new house (tired 1950's detached on 1/2 acre garden) we re-mortgaged the original property to the hilt and used the equity to help buy the new (old) house. Then rented out the original house to cover that mortgage and started planning our build. A few years later, we eventually sold the original house and had the capital (our build fund) in the bank. No need for a self build mortgage we thought. However when we informed our lender that we were planning 'substantial' works on the house (i.e. demolishing and rebuilding) they got cold feet and after much faffing, released us from the mortgage penalty free - however that ate much of the build fund. We then got a self build from Ecology, who were very easy to deal with but have strict criteria on lending to passive or SAP A projects. They were happy to give us the whole chunk upfront or release it as we needed it, there were no inspections or surveys to release funds. On our self build team, Mrs B is the visionary and I am the one who figures out how to do it. Works quite well and irritatingly she's almost always right with her decisions.... (even after I've said about six times - thats impossible, we cant afford that, that will look stupid etc...) -
I grew up in NI on a large catholic housing estate in the 70s and 80s and then studied in Belfast in the 90s. Living with terrorism and general disruption to life was not something I or my friends gave much though to, life had to go on on both sides. Bad things happened across the board, aside from the bigger events that made the news on the 'mainland', there was a drip, drip, drip of weekly murders, beatings, shootings, intimidation etc. Sensible precautions were taken (i.e. avoiding a given area, etc) where possible but that was about it. There was a certain fatalism that if you were unlucky then that was it. To me, this is the ideal response to terrorism. The whole point of it is to use asymmetrical methods to terrorise a broader population and to actually encourage the alienation of the community that you're hiding within, as that will drive more people to your point of view. Obviously we came out of that situation and things have somewhat normalised - who knows, maybe in 20 years there will be a new threat from another, currently benign, section of society and we'll view todays horror the same way we look at the bombings of the 70s and 80s. Obviously, it is practically incomprehensible to understand the grief and pain that the affected families will go through, but the reality remains that the chances of being caught up in an attack are vanishingly small and statistically we keep doing the things that are most likely to kill us (lifestyle choices, driving, sports, power tools) but fear things that are highly, highly unlikely. It was interesting to hear the scant 30 seconds given to six people killed in a single car on the M6 today vs the understandable hours of coverage on Manchester. So while somewhat trite, for me the keep calm and carry on mantra is pretty effective.
-
We avoided burning and the demo contractor just hauled away the timbers in one of those mega skips. Our LA recycling site takes all kinds of timber for free, no restrictions.
-
So, what would you do differently next time?
Bitpipe replied to Kuro507's topic in General Self Build & DIY Discussion
I'd have specced more external blinds, there are a few windows that I mistakenly assumed would not need them but the sun does find its way in during the day. I'd have gone for fully hung door sets vs putting in the linings first and then getting the joiner to hang the doors after. He did a good job and I saved a few quid on the door furniture but it took way longer than expected so the labour cost racked up. Included architrave and skirting in the budget. Budgeted a lot more for general joinery - really underestimated the post 1st fix work needed to box in pipes etc and get ship shape for plastering plus lots of other small jobs On the other hand, things I'm really glad I did are Joining e-build (Buildhub predecessor) and never being afraid of asking a stupid question. Infact I almost relish it sometimes Meeting quite a few other self builders, mostly from this forum. Talking to others on the phone. Helped keep ourselves sane, shared good trades, learned a few tricks and was happy to pass on advice to the next generation Living on site in a caravan (even with wife, two kids and a cat). The basement - was a bit of a leap of faith but worked out really well External concealed blinds on east windows and on east and south Velux Splurging on really nice stairs and doors. Resin floor downstairs Choosing alu soffit & fascia instead of uPVC Squeezing in electric UFH in the bathrooms at the very last minute. Taking the time to be amazed that I managed to big a big old house with zero past experience, stay married and not be bankrupt at the end. I also learned to chill out a lot during the build and (try) not to get too stressed out. As they say, two types of problems - things you can change and things you can't, no point loosing sleep over the latter...- 25 replies
-
- 1
-
-
- lessons learnt
- self-build lessons
- (and 4 more)