

Jeremy Harris
-
Posts
26430 -
Joined
-
Last visited
-
Days Won
360
Everything posted by Jeremy Harris
-
Down about 6.9% at our old house, but down 18% where our new house is, and neither of those figures really even vaguely accurate. Demand where we are seems high, and when our old house was valued recently, for a quick sale, it was just under twice what we paid for it in 2000. That matches the increase shown on Zoopla for a detached house in our area pretty well. I have a feeling that it's looking at the whole ward, not your actual post code. There are clearly some pockets where house prices haven't risen much, and other pockets where they have, so depending on where your house is within the ward could make a pretty big difference to the figures that calculator is spitting out. For example, for the past ten years, according to Zoopla, prices for the exact post code for our old house are up by 14.9%, not down by 6.9%. Similarly, for the post code for our new house area, prices are up 15.8%, not down 18%. Zoopla seems to given a more localised result, I think, based on actual sale price data from the Land Registry, I believe.
-
Page 14 seems to have the control group, and it's all external. The snag is that there is no expansion vessel shown, and it doesn't look like there is an internal one, either. It may be that, given the high max working pressure (10 bar), plus the high PRV pressure (6 bar) that this unit is designed to work in the same way as our boiling water tap boiler, where the PRV blows off every time the tank heats up, as a means of controlling expansion. That was made in Belgium, so it it could be that this is just the way things are done in other countries, and that would tally with the check valve arrangement, where they seem to have gone overboard to make sure that there can be no expansion flow back to the supply. Here we tend to use an expansion vessel and not let the PRV blow off. So, it looks to me that if a suitably sized expansion vessel was fitted next to the point where the PRV (Item 7 on the diagram of the control group) connects then it should be compliant, subject to the points that @Nickfromwales has made about G3, tundishes etc.
-
Looks like there's room to cut the copper pipe off to get a nice clean end, use a strip of emery cloth to get all the paint off to well below where the joint is, then you have two choices. Try and get a longer flexi, or solder on a short length of new pipe with an end feed connector. That will give you a pretty neat job, with a short flexi up to the cistern. I'd also be inclined to bin the flexi with the built in isolating ball valve, and fit a separate isolating valve to the copper pipe. That way you can replace the flexi in future by just turning off the supply locally. If you choose this option, then you could cut back and clean the existing copper pipe, fit an isolating valve, then add a short length of new copper above that to connect to a short flexi to the cistern. The key to getting this to work is cleanliness. I find that a strip of fine emery cloth, wrapped half around the pipe and pulled to and fro will get all the old paint off and clean the pipe back to a good finish. This works well where you cant get to the rear face of the pipe. For getting a good seal on any compression fitting the pipe needs to be clean, cut off square at the end so it seats fully in the fitting, have no burrs on the cut end and have a reasonably good surface finish. A thin smear of one of the proprietary compression joint sealants/lubricants makes all the difference, too. I tend to use a thin smear of liquid PTFE where the olive will go on the pipe.
-

MVHR pipework camera?
Jeremy Harris replied to readiescards's topic in Mechanical Ventilation with Heat Recovery (MVHR)
Probably, as ducts are pretty smooth inside. One snag with mine is that I made the camera housing from a bit of solid brass bar, as I wanted it to be heavy, so it would sink. For pushing along a duct the camera needs to be kept really light in weight, I think, so that it doesn't tend to kink the cable. I do have another bullet camera, with LED lights, that is just on the end of a length of very thin cable (not sure how long, probably only around 4m). I fitted this to the end of a length of 20mm conduit and used it to probe through the space between the ceiling and floor when I needed to run an extra data cable that I'd forgotten about at first fix. The camera has a female thread on the end (whatever the thread used on camera tripods is - something odd and imperial I think) and could be adapted to fit to something like a 6mm Cobra, perhaps. I may be able to fit a much longer cable to this, as I have a feeling that I have around 40m or so of the same thin (around 3 to 4mm diameter) cable around somewhere. -
As an additional reason for using Cat 6 over Cat 5e, the cable is a fair bit stiffer and less liable to kink when being installed. The cable is cheap, so put loads in, anywhere that you can possibly imagine you might want connectivity, like TV/entertainment points, places where any fixed bit of kit like a printer, router, desktop etc, anywhere you might want to fit a security camera, anywhere you might possibly ever want a phone point (you can run phones over network cable). Also have a think about whether you may want WiFi repeaters around the house - we have two WiFi networks, both run from cabled points. When it comes to where all these network cables meet, then decide where you are going to have your incoming line, be it phone/ADSL/VDSL or fibre/cable, and try to locate the main network patch panel in the same place. That way you can have one area where your incoming data is routed/switched to each of the network sockets from one out of view area. I have a cupboard in my study that has all this stuff in, along with some power over Ethernet (PoE) stuff so that some of the remote network sockets can power the equipment that's plugged into them (handy for things like CCTV and remote WiFi access points). PoE is a really good way to get rid of all the small plug in power supplies that seem to accumulate and make things untidy. I didn't plan where our incoming phone line was located well - I just brought it in via a duct through the slab where everything else was coming in, in the corner of the utility room. This meant that the master socket is on the wall there. This then created a problem, as the modem (or modem/router in some cases) needs to be as close as possible to the master socket. This meant fitting it to the wall in the utility wall, which also meant having another untidy small power supply plugged in there. I got around this by sending power to the modem via the network, using PoE, so the modem is powered by the network cable:
-
My wife was drinking a Kir Royale, rather than a Belle de Nuit, but I had a Burgh Bramble that evening, you're right. Yes, it's a bit expensive, but it is a pretty amazing place. It is like being in another country, as well as stepping back in time to the early 1930s. Everyone still dresses for dinner, with the house rule being that "it's simply impossible to be over-dressed for dinner at Burgh Island". As a consequence, the cocktail bar and dining room are just like something from one of the more upmarket Agatha Christie novels (without the inevitable murder.........). I would guess there were around 30 or so guests last weekend, and there was probably between £1M and £2M worth of diamonds, pearls etc being worn at dinner. The place really is well worth a visit, as it's staggeringly well-preserved, with just about every item in the place being from the Art Deco period, where possible. Architecturally it's interesting, too, as it was built in 1929 entirely from reinforced concrete. Even the balustrades around the terraces of each room or suite are reinforced concrete. It's Achilles heel are all the Crittal windows, although they've all had very slim double glazing fitted. Not sure how they managed to get permission to do that to a GII listed building, but you need to look closely to notice it. There is still a slight air of "naughtiness" about the place. Guests are transported from the well-hidden shore-side covered car park across the beach to the hotel via black Range Rovers with dark tinted windows (assuming the tide is out). No one who isn't a hotel guest gets through the electric gates and the place still has the sort of discreet atmosphere that must have made it an attractive place for people like Edward and Mrs Simpson to go and stay, or Eisenhower and Churchill, who held a secret meeting there. We spent Christmas there a few years ago, and it was brilliant. For us it is a great place to escape from the unwanted side of family pressure..........
-
MVHR pipework camera?
Jeremy Harris replied to readiescards's topic in Mechanical Ventilation with Heat Recovery (MVHR)
My new borehole camera uses professional studio/stage mic cable, the very tough stuff that is around 7mm diameter, with a screen, two cores, plus internal cords to add strength. I bought an "offcut" of around 62m left over from a 300m reel, from a professional stage sound system company. They were selling offcuts and end of rolls on ebay. It takes video just fine, so I use one core for power, one for composite video and the screen. -
The panel is ready do I need to protect the tails?
Jeremy Harris replied to MikeSharp01's topic in Electrics - Other
I added another earth block right by the switch. That allowed the 25mm2 earth in the SWA to be converted to 16mm2 down to the main earth block at the bottom. Handy, as most earth blocks only have one or two large cable holes. -
Worth looking at decrement delay, not just the U value. PIR can given a good U value in a thin frame, but has a very short decrement delay, so may be less comfortable to live in. Decrement delay is important to comfort, in my view perhaps more important that just the U value of the structure. It's worth reading this article to get an idea as to how decrement delay impacts on comfort: http://www.greenspec.co.uk/building-design/decrement-delay/
-
Fitting an undermount sink to granite
Jeremy Harris replied to Lesgrandepotato's topic in Kitchen Units & Worktops
Our sink is fitted underneath the stone worktop. The advice I was given was to rout out space for the sink flanges (it was a stainless 1 1/2 sink) in the edges of the underlying cabinets, so the top face of the flanges were dead flush with the upper surface of the cabinet edges at the top. The sink was left with a bit of wiggle room, so it could be aligned with the cut out in the stone. When fitting the stone, as well as using neutral silicone on all the cabinet upper edges where they were going to contact the stone, clear neutral silicone was also run around the sink flange. The stone was then lifted into place, with the sink position adjusted very slightly to get it dead centre in the cut out. The stone overhangs the sink by a few mm, so there is also a thin bead of sealant underneath the overhang. The sink and the stone are only held in place by silicone, there are no mechanical fixings at all. -
MVHR pipework camera?
Jeremy Harris replied to readiescards's topic in Mechanical Ventilation with Heat Recovery (MVHR)
I have a small camera on about 60m or so of cable that i made up to check our borehole. It has a small monitor and the ability to record reasonable video. The camera is about 25mm diameter, with a ring of white LEDS to provide enough light. It runs from it's own 12V rechargeable battery. The only slight snag might be that postage could be costly, as the camera and cable is on a steel cable drum and the monitor, video recorder and battery pack is in a small alloy case. -
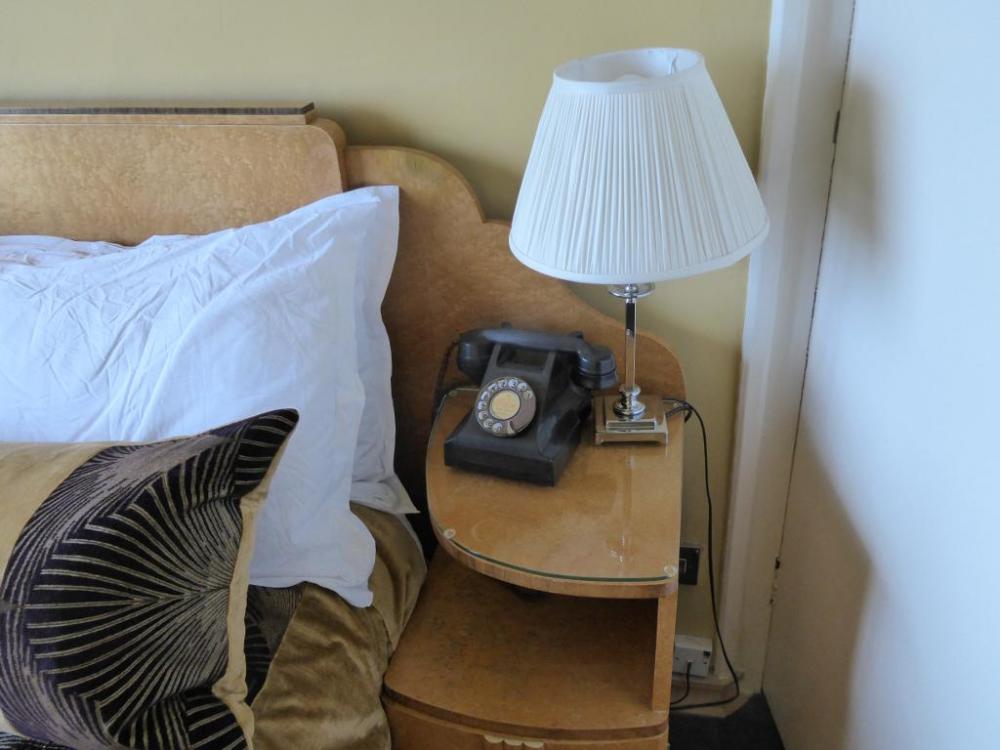
We've just come back from a weekend of "cocktail indulgence", and an escape from modernity, so who can guess what the cocktail in the foreground here might be: The room key is a slight give away, perhaps, as we spent the weekend staying in a suite at a rather infamous hotel built by my wife's great uncle (it was the suite named after great uncle Archie we stayed in). Sometimes it's nice to get away from TV, the internet etc. This was the most modern form of communication in our suite:

-
Coax is pretty cheap now, so go for the best double screened "satellite" cable you can find. Also, forget the grim old "UHF" connectors used on old TVs, and use F type connectors - they are easier to fit, more reliable and have lower losses. Boosters/splitters low down in the cable are a pain, as they introduce noise. Best bet is to fit a higher gain antenna and then use low-loss splitters. If you can avoid amplification in the line then the signal quality qill be better, as a general rule. If you really do need to increase the signal strength, in order to over come the losses at each split, then fit a decent head amplifier at the antenna. Adding gain right at the antenna is far better, if gain is needed, than adding gain lower down the cable, because it doesn't increase the noise floor as much.
-
The panel is ready do I need to protect the tails?
Jeremy Harris replied to MikeSharp01's topic in Electrics - Other
I only ran the main insulated SWA core up inside the box to avoid having to fit long lengths of heat shrink over the cores. The central core of the SWA acts as the double insulation layer right up to the point where you strip it back to get the cores out. -
The panel is ready do I need to protect the tails?
Jeremy Harris replied to MikeSharp01's topic in Electrics - Other
Sorry for the late reply, been away for the weekend with no internet access. Yes, I used grey heat shrink sleeving over the line and neutral SWA cores, where they were exposed at the point where the three cores came out of the main cable sheath. I also used a larger adhesive lined heat shrink sleeve over all three cables and the SWA core, then used a pair of needle nose pliers to form a three-way branch and seal the end of the SWA core, whilst the heat shrink adhesive was still tacky. This formed a neat termination and maintained double insulation right into the fused isolator switch. -
A critical point that is often ignored! I keep harping on about the lack of dynamic modelling in "standard" interstitial condensation risk models, but I do so because it's important. Once water vapour has condensed in a region inside the structure that can be prone to damage induced by organisms that thrive on damp, then it takes a LOT of heat energy to cause that water to undergo a phase change back to vapour and be able to escape from the structure. In effect, you can have a sort of "one-way valve", where vapour enters under a certain combination of short duration conditions and condenses inside the structure. Insufficient heat energy ever reaches the area where the water vapour has condensed, so it stay there, and build up every time a dynamic condition exists that allows more vapour to condense. Some of these dynamic conditions can be of short duration - for example a cold, still, wet, night, followed by a hot and sunny windless morning, where the air immediately around the external structure and in any cavity could easily reach high water vapour concentration levels, and some parts of the internal structure may well be just below the local dew point for a time. The fact they get above the local dew point later in the day may not be enough, as there may still not be enough heat energy available to convert the condensate back to vapour.
-
The panel is ready do I need to protect the tails?
Jeremy Harris replied to MikeSharp01's topic in Electrics - Other
If you have a labelling machine, it's acceptable to just print labels and wrap them around the tails, clearly showing L and N. This seems to be the preferred technique of quite a lot of the meter monkeys now, whereas for years just a bit of coloured electrical tape around the tails has been the most common method. I'd already prepped ours using brown and blue tape around, but the meter monkey fitted printed labels as well. -
The panel is ready do I need to protect the tails?
Jeremy Harris replied to MikeSharp01's topic in Electrics - Other
The general rule of thumb is that any line or neutral cable within an easily accessible location must be double insulated, with the guidance being that the inner layer of insulation should not be able to be touched on the outside of the switch/henly/meter enclosure by a finger or conductive tool. -
The panel is ready do I need to protect the tails?
Jeremy Harris replied to MikeSharp01's topic in Electrics - Other
Double decker Henlys are legal but a bloody nightmare waiting to happen, IMHO. Do NOT leave exposed single insulated cable at all, it MUST be double insulated into the enclosure. Use tape or sleeves around the outer sheath to denote whether the cable is line or neutral, either brown and blue (preferable) but red and black is still generally accepted. Labels wrapped around the tails, with the lettering "L" and "N" is also acceptable. This is most definitely Part P work in England and Wales, and cannot be done as a DIY task, unless under the direct supervision of a suitably qualified person. Yes, some of it is nonsense, but there are gotcha's in the regs and it's the electrician who signs off the work that will get it in the neck if things aren't done correctly. Yes, the tails between the cabinets need physical protection, too, the outer sheath is not specified for exposure, so needs protecting. Worth getting a copy of the current edition of BS7671, and, far more useful, a copy of the OSGs, that translate BS7671 into plain English. -
Vacuum cleaner recommendations?
Jeremy Harris replied to Jeremy Harris's topic in Kitchen & Household Appliances
The filters in the ancient Vax 121 seem pretty good. There is a bag that acts as a primary filter, then a large diameter (~300mm) fine fabric filter, then there is a fairly standard looking HEPA type washable filter. Not sure what filters the Henry has, but the old Vax 121 seems to have filters that are at least as good, most probably better, than the two very thin filters that our old Dyson had. I've not had a chance to do a side by side comparison between the ancient Vax 121 and the new Vax multi cyclone one. First impressions are that the new Vax is pretty good, and very light and easy to use. -
Yes, their number is 01227 773067, website is www.gsi-insurance.com
-
It was GSI we used to get the policy we needed as an interim, I'm sure. They shopped around and came up with a "customised" policy for a very reasonable premium.
-
MBC build- a year later
Jeremy Harris replied to dogman's topic in General Self Build & DIY Discussion
I love the brick slip "lintel" detail, looks really neat. How are they going to deal with the small area under the brick slips and above the windows? -
I think you're right, as I remember the old chap at the sawmill telling me they didn't much like milling larch, because it wore the blades out pretty quickly.
-
No, none at all. I used ordinary galvanised gun nails and none have left any marks. The cladding has been on for three years now, and been exposed to a fair bit of wet weather on the West gable.


