
Leaderboard


Popular Content
Showing content with the highest reputation on 01/05/19 in Posts
-
Assuming a 8m x4m floor slab it currently has a U-value = 0.89. Vertical edge insulation (EPS lambda 0.036 W/m.K), down the inside or outside of a foundation wall gives depth/U=values 0.5m/0.62, 0.75m/0.55 and 1.0m/0.50. thicker/deeper insulation has relatively little additional effect. A 100mm of PIR with no edge insulation would give a U-value = 0.18 At the the moment the cold floor effect can only be mitigated by using a floor covering with a low thermal conductivity as you have a massive thermal cold store in the floor..3 points
-
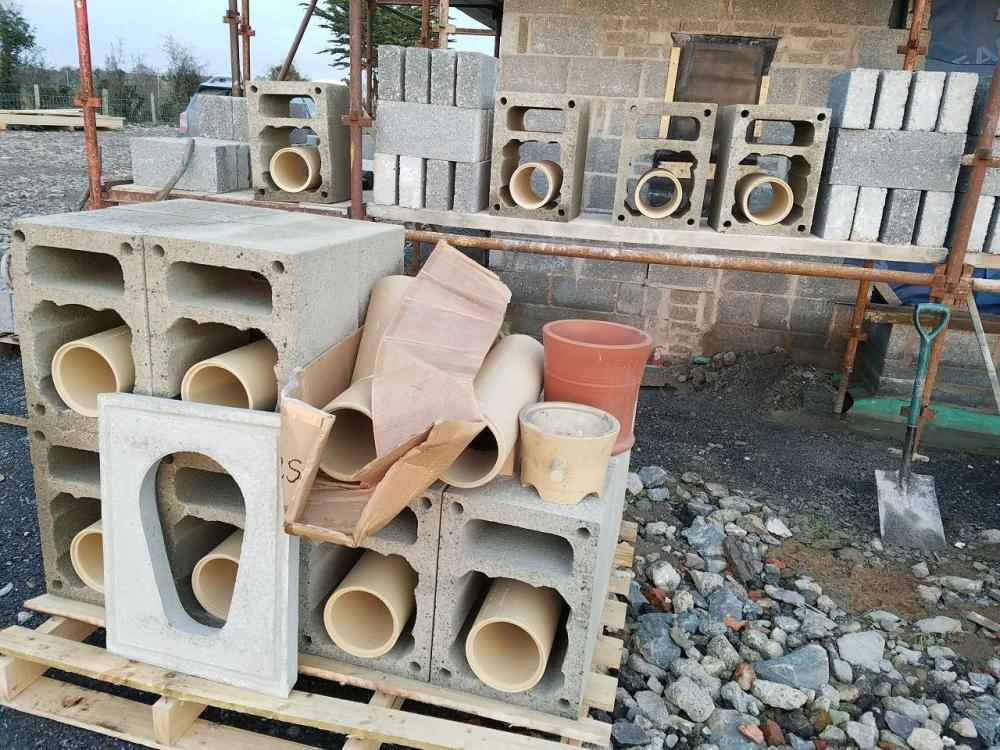
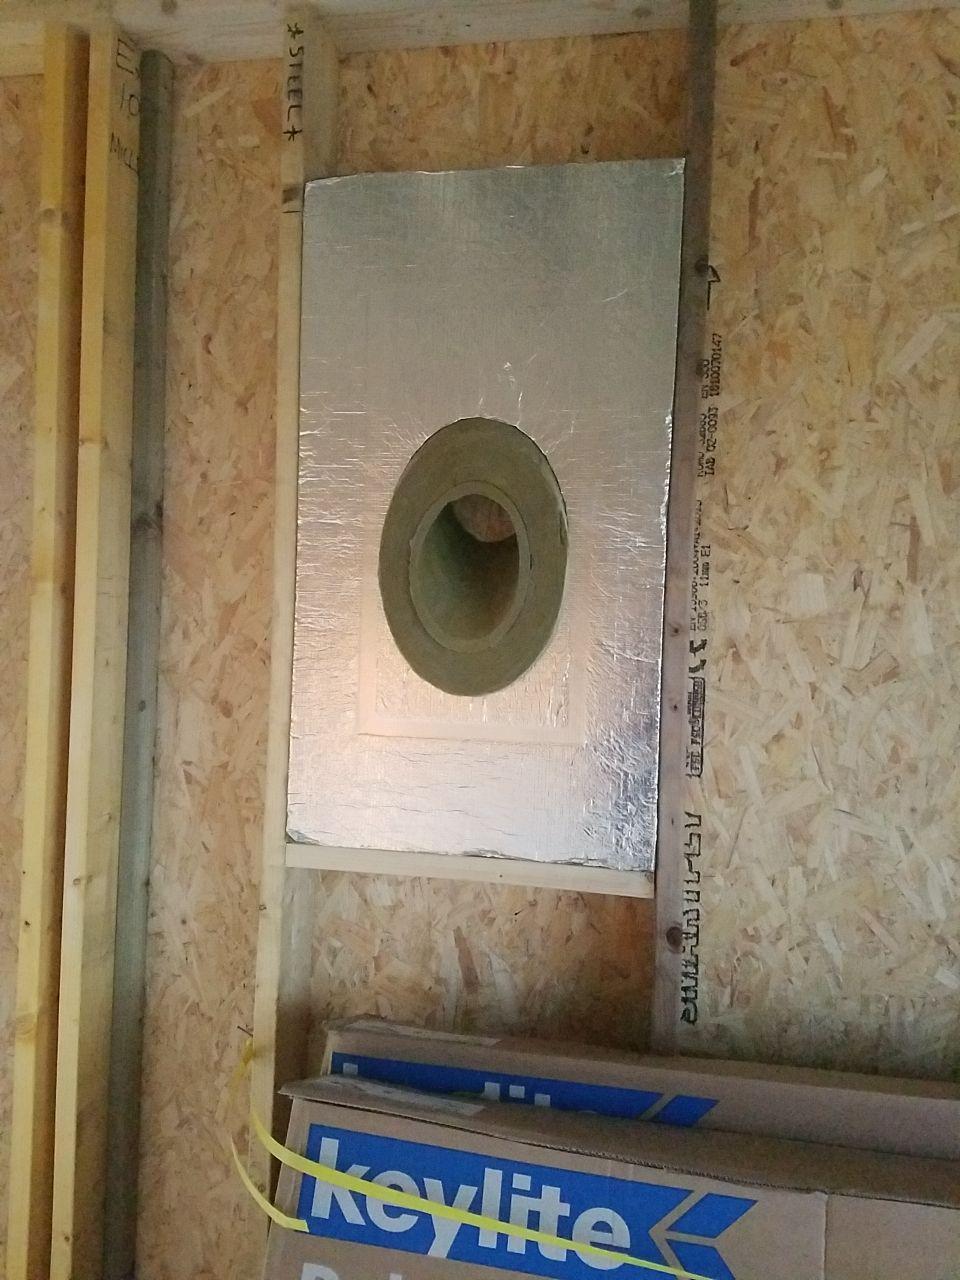
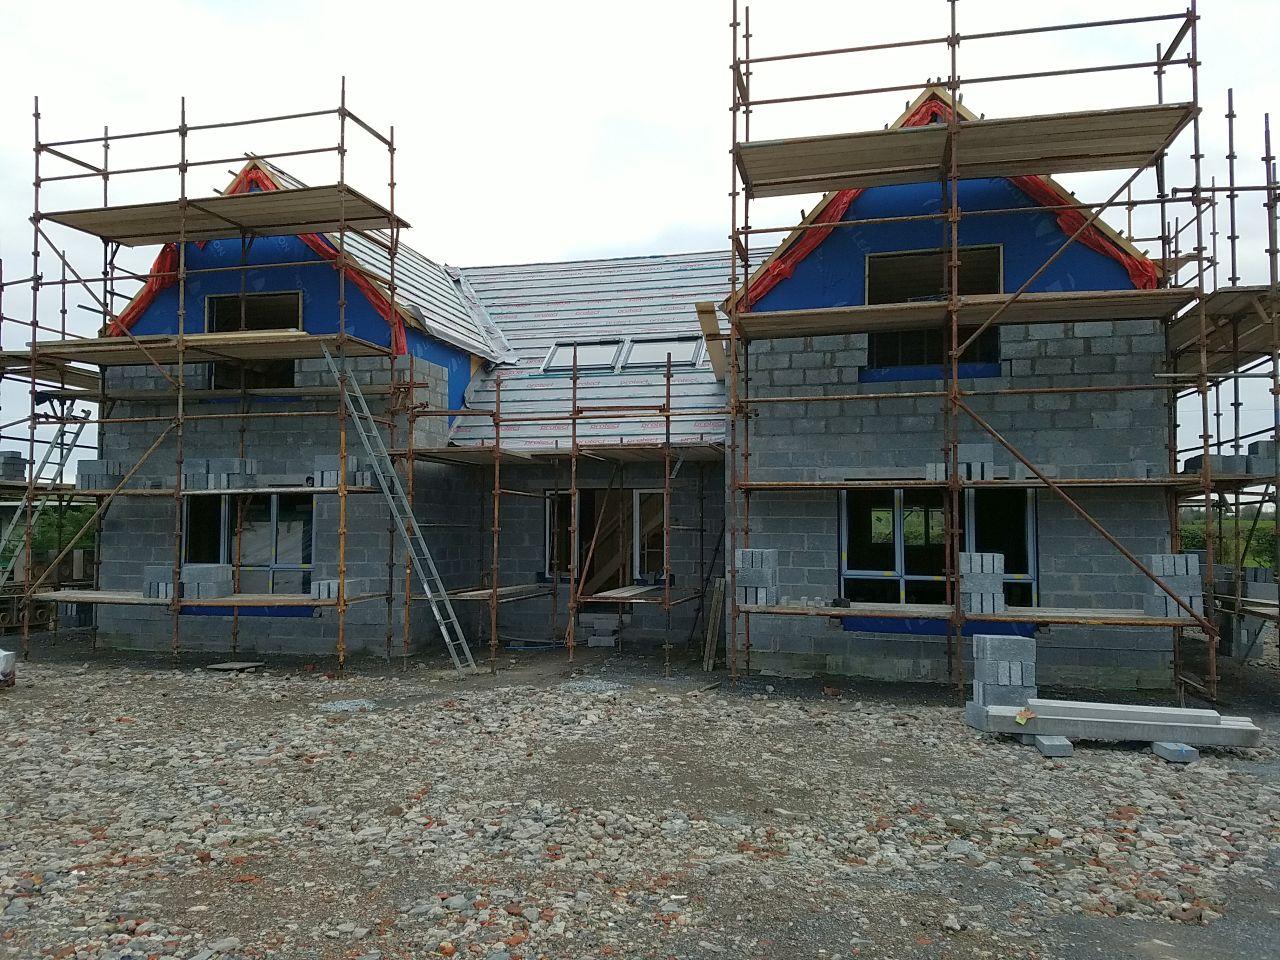
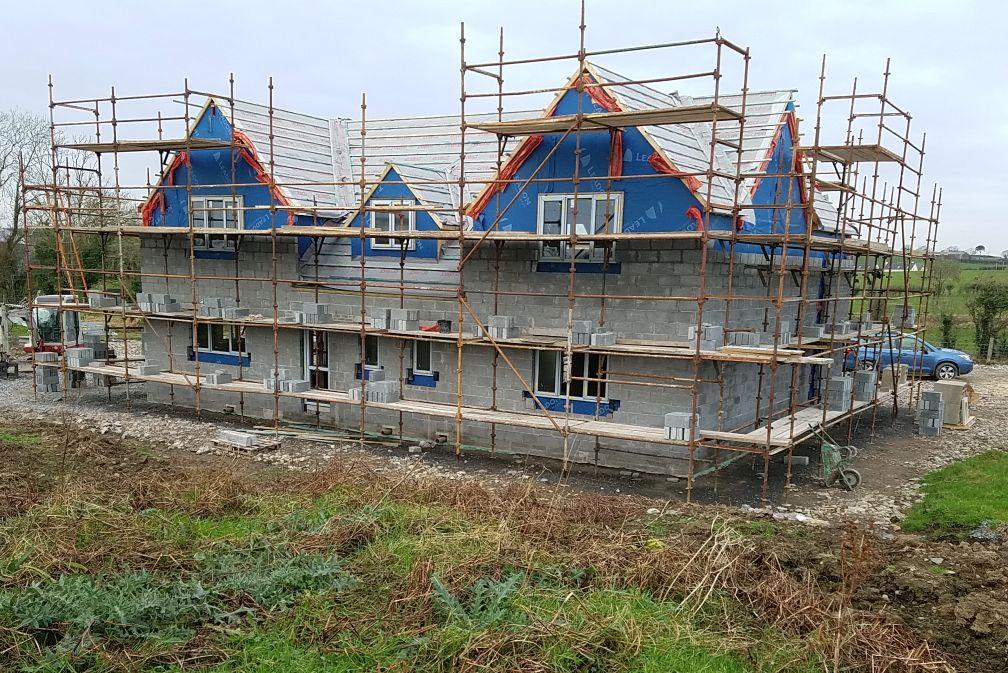
Another busy week approaches. The roof tiles and accessories are to arrive on Monday as is my bargain MVHR unit. Final glazing visit on Wednesday (hopefully!). Blockwork is finished in the porch so we repositioned the scaffold out from under it today. Just waiting for a couple of picking issues to be resolved with the chimney system and they'll be going up too. Not so much blue membrane on show now! These are the Swift Air chimney blocks. Precut rockwool fills the space around the ceramic inner pipe. And this is the Ignis Protect in pretty much final position. The stove pipe comes through the centre, and another steel outer sleeve gives an airgap through the cavity and masonry.

.thumb.JPG.98e388a4e7348c66f8083dead2ec7510.JPG)

 2 points
 -
Hey you lot - don't jump the gun! I'm sure @Onoff can drag this out for a good while longer .2 points
-
Just found this. I love technical solutions to simple problems:2 points
-
Fill the bath with water and grout. Leave it full until the grout has cured then empty it. Wipe all the grout dust off, and give the lot a good polish. Get your silicone gun out and do all the internal angles until your happy. Bingo chuffing Bango. ??2 points
-
Is he happy, grumpy etc?2 points
-
That's them all nailed down. Couple of oversize joints but hey ho! "Proper" tiling can recommence!2 points
-
Can be done & cheaper than gym membership! 1) The bathroom had a concrete floor some 60mm higher than the adjacent rooms. It was in fact pretty much dead level with the DPC (damp proof course). That was slate on the two original solid brick walls and some sort of bitumen felt on the two cavity walls: 2) Not the only room in the house with level issues. So out with the BiL's vintage Kango: 3) I bagged it and hand balled it out the front door. About 80 bags from memory: 4) Got down to top soil: 5) And started to DIG! Someone worked out the tonnage that I shifted, again by hand. 7 tonnes? Can't remember though I did lose weight! 6) Hit our wonderful clay not too far down: 7) So then to build it back up. I didn't now how but knew I wanted UFH. Started the questions on eBuild! So I banged a load of level pegs into the clay allowing 2 - 4". Tbh nearer to 2" in most areas. Sprayed the pegs so I could see them: ? First off I graded a load of the hard core that came out of the floor thru a 40mm mesh sieve. Basically I'm too tight to buy Type 2 etc. Laid it roughly level: 9) Somewhere around this point I shuttered off and squared up, with concrete, the ragged tops of the footings: 10) Any old bags of cement, plaster etc got thrown in to help get rid of it and fill voids in the hard core: 11) I then bought a second hand electric wacker plate and compacted it all down. (Did take a slight diversion and started making an electric wacker plate. THAT story is to be continued! ) It WILL live one day! 12) Anyway.....back on thread. Wacking: 13) Sharp sand went down next to fill all the voids. Me being me it was all levelled off: 14) At this point I was feeling pretty happy, I mean it just looks FINISHED! 15) 25mm of EPS went down next. EPS doesn't suck up water like PIR can so can be in direct contact with damp "ground". It's why so many here put 300mm of EPS under their concrete slab under the whole house. The combo of the sharp sand and EPS is to ensure no sharp bits of hardcore poke up thru the DPM (damp proof membrane). Think the sand and deffo the 25mm EPS was @Nickfromwales idea. 16) I'll openly admit I went full @pocster and had a sneaky, naked lie down on it at this point. It felt SO WARM! 17) I continued the EPS over the squared off footings and up the walls a little as a nod to cold bridging. Glued on with Soudal Low Expansion Foam, thanks to @JSHarris for that tip. You can see where the damp is coming thru: 18) Probably OTT but I applied a liquid DPM up to the level of the DPC. 19) Whilst the second coat was wet I blinded it with sand to give something for the Soudal foam to key to and when dry foamed the EPS in place. 20) Thick, blue DPM next. From Screwfix, on a roll: 21) Bit of a pig folding it into the corners: 22) Next 150mm of PIR as a 50 and 100 layer. Better to put the 50 down first the the 100 - wish I had! I'd suggest 150mm as a minimum. With hindsight I'd have dug a bit deeper and gone 200mm: 23) The DPM carries on up the wall with the intent of sticking to / overlapping the vcl on the stud walls to come. It's why the room is so draught free. 24) Now at this point I could have laid a plastic membrane over the foil faced PIR and stapled my UFH pipes down.....I didn't. Instead I used Polypanels as I think suggested by @PeterW. They serve 2 purposes; to act as a separating membrane between foil face and screed or concrete (you can get a reaction) and also to aid laying the UFH pipe. They also save a bitbon concrete: 25) I used a self adhesive edging strip, basically a corrugated cardboard/EPS sandwich. This takes up any expansion of the slab as it heats up.....or it can push against your walls! Probably overkill as I've already the ESP upstand: 26) With my homemade pipe decoiler it makes laying it a breeze as the video shows: 27) A142 reinforcing mesh was laid next as per @JSHarris's build / suggestion. Probably the only thing the houses share in common! I attached screeding rails (Unistrut) to the stud walls which were only affixed at this point to the walls and ceiling. A drag board went between. It's the reason my slab is so level: 27) A strong., wet concrete mix went down to give me a 100mm slab. Pockets left for the wet room tray which I cast later and one to "sink" the bath a bit: Et voila: From top of the original concrete I dug down a minimum of 385mm. Final, conservative floor build up was: - 50mm compacted Type 2 on clay - Sharp sand blind - 25mm EPS - 1200 gauge DPM - 150mm PIR (100 + 50) - Polypipe panels - A142 mesh - 100mm concrete (though I forgot to add the fibres ). - Ceramic tiles @oranjeboom has done similar to his WHOLE HOUSE. Tbh that's my plan eventually.2 points
-
35mm would probably have been enough to use non-mutilated back boxes. And of course it opens up the option of using metal boxes behind the plasterboard. My wall buildup is 150mm glass wool between the studs, and 50mm PIR on the inside of that. Roof was the same but 100mm PIR instead.1 point
-
He might put up photos of every grout joint ... ??1 point
-
Fire rated is only applicable if there is a 'deemed habitable' room above. You're 100% off the hook there.1 point
-
Not necessarily in the living room, but as an alternative for areas you'd consider fitting a 'regular spotlight'.1 point
-
Yes the blown insulation...blower machine is just a van probably size of a transit....its self contained and portable, all runs from the van. The insulation is delivered separately and for me it was a massive pile of bags. They feed the bags into a chute and it pumps the insulation up through holes they cut at various points in the vapour barrier they then tape the holes when finished.1 point
-
Different types of downlights can have much shallower depths I personally prefer the led flat panel ( 180mm round ) LED types nowadays, and the light is just spectacularly better than a single small spot. There are instances where I will still fit a 'regular spotlight' but they need to be a nice looking fitting with no horrible visible clip / other to retain the lamp. EDIT : You are single storey too, so no need for fire rated fittings so much more choice1 point
-
Our ceiling battens for the service void are 50mm, like the external wall service void battens, so plenty of room to fit slim panel lights. When our house was built 50mm x 50mm service void battens were the standard, so I doubt there would be any real hassle in changing to these.1 point
-
My roof is 0.10 with the 400mm insulation although a completely different structure......beware the 25mm service cavity batten if you are going to put in downlights, mine was not deep enough caused chaos we had to double batten to increase the space which meant I lost a few cm of ceiling height, it was too late to do anything about it.1 point
-
@Dreadnaught I used the sister product for the membrane on the OSB exterior, it held up reasonably well. Had to do some patching but this was mostly due to wear and tear rather than the quality of membrane. This one and the VCL layer are marketed as having thermal properties but do they actually offer much here? ? Does this form part of the thermal wall calculation? And I sometimes sit on my 'Quintherm sofa' and I don't hear any baa baa coming from the croft, so I'm glad I increased the spec and went for triple glazed windows.1 point
-
My house is very quiet and well soundproofed, we hear no external noise.....I do have very good triple glazed windows.1 point
-
Sounds like a reasonable compromise. I can wholeheartedly echo @Nickfromwales comment about soundproofing. We are still amazed at how quiet our house is. It's spooky, in that we cannot hear anyone driving up the drive, even noisy diesel delivery vans, and have to rely on the CCTV motion sensor alarm to let us know someone has driven up. Nice during the night, though, as the house is completely silent - we don't even hear the noisy ducks/swans/pheasants outside in the morning.1 point
-
Perimeter insulation goes downwards round the outside of the house, maybe a metre or more into the ground. The idea is that heat doesn't escape from under the floor sideways. So long as water isn't flowing, even very slowly, through the soil under the house it should give you a warmer ground reducing your heat losses downwards a lot - once that soil has warmed up. Sometimes it's done vertically down the outside of the foundations. On older houses without foundations it probably needs to slope outwards so was not to undermine the walls. A question with your extension would be whether you go the whole way round the house or what?1 point
-
Should read MASSIVELY improved sound proofing. It really makes a huge difference in my direct experience. PIR is pretty ‘transparent’ as a wrap for a home. @Dreadnaught I’d stick to your guns and see if the 300mm sections can simply be fabricated in smaller sections as a couple of days of extra man handling is nothing for the MBC team imo. The best thing to do is tell the MBC guys that they CANNOT do it, and watch them then prove you wrong ?. ???1 point
-
@Dreadnaught 1. You would have to decide how important decrement delay would be at your site. 2. Not sure about that, we have foam insulation and good sound proofing. 3. I doubt that as the studs are covered with insulating board. 4. I think the recycled newspaper goes through several processes before becoming insulation so I don't know about carbon embodiment. I can't think of anything else but I'm sure someone will.1 point
-
At a project I know they grade bark and have a number of drums made up in different grades or sizes think of a hamster wheel only bigger and made of grid like mesh one bloke shovels it in another turns the wheel and the graded stuff gets bagged and sold this is a project for adults with learning disabilities1 point
-
This sort of thing but motorised: Using an actual recip saw: I rather like this one:1 point
-
Only got this bit. Nominal 1 1/4" x 1 1/4" so about 35x35 through the hole - too small I assume. Not taken a vernier to it but looks about 4mm dia rod. Guessing about 6'x4'. Red oxide painted. Will happily dig it out.
 1 point
 -
I wasn't for a moment suggesting otherwise. The confusion comes from seeing what to all intents and purposes in a photo appeared to be LV wiring that wasn't double insulated, that's all. Without being able to read what was on the boxes (assuming that they are labelled to indicate that the voltage on those wires is really ELV/SELV) then the only safe assumption anyone could make would be to assume they were LV; i.e. at mains potential. FWIW, I used to teach electrician apprentices years ago, and the golden rule was never, ever assume that anything is safe until you have positively identified and tested it to be so, and to always assume the worst case until you have proven beyond doubt otherwise.1 point
-
I'll look in the garage in a bit. Might have a piece. If not P & W Nash at Hoo ask for Stuart. He'll be able to supply mesh in various sizes, cut to size, galvanised if required. Tell him I put you onto him The BiL made a reciprocating sieve that sits atop his dumper. Slide rails, motor with a cam. Will try and get a pic tomorrow. Rotating drum types good for soil mainly. Get on Pinterest and have a look there for ideas.1 point
-
My understanding of ELV wiring colours: Brown - polarity not connected to earth (usually positive). Blue - other polarity which is connected to earth (so ELV but not SELV). Grey - other polarity also not connected to earth (so SELV). Any corrections to that? So if they earthed those blue cables elsewhere (making it PELV or FELV rather than SELV) that'd be OK, but I suspect they don't. But this is all getting pretty picky, frankly. Power over Ethernet would, I imagine, typically be SELV but uses blue and brown (and blue/white and brown/white) - I doubt building control is ever going to tell people to rip that out as non-compliant. Edit to add: in summary, my understanding is that ELV colours are the same as LV, first power voltage not referenced to earth is brown (like line or phase 1) then the next is grey and presumably black if there's a third one, but they'd need labelling by that point, whereas a power voltage referenced to earth (like neutral) is blue.1 point
-
Found it......I recall we ended up with slightly different insulation on site as supply issues for MBC but overall u value the same mbc wall spec.pdf1 point
-
Just realised I've been guilty of the over-use of acronyms... LV = Low Voltage, which in this specific context means 230 VAC nominal, i.e. normal mains voltage, where the line conductor is identified by being brown and the neutral conductor by being blue. The full LV voltage range is over 50 VAC up to 1000 VAC, over 120 VDC up to 1500 VDC. ELV = Extra Low Voltage, not greater than 50 VAC or 120 VDC, although the EU LV Directive applies to anything over 75 VDC SELV = Separated (or Safety) Extra Low Voltage, as for ELV but with isolation from any Protective Earth (PE).1 point
-
A 13t digger with an extension in the boom will lift whatever you need esp if it's only a single storey. You can get diggers with no tail swing that will be not much more than 2m wide.1 point
-
That's the one that had me concerned, as it shows LV colour coded single insulated cable, with no second insulation layer, as required for any LV cabling. From what's been written above this isn't LV wiring, but is either ELV or SELV, with the wrong colours. As such, if it's really ELV/SELV then it doesn't need double insulation. However, it shouldn't really be using LV colour coding, as the chances are others will look at it and jump to the same conclusion I did.1 point
-
@lizzie Looks neat, thanks for sharing the pics. Will be different to mine as two different systems (Dynalite vs ZWave/Fibaro) plus mine normally has a lid on it - not much fun just looking at a grey box ?. Similar 'star' wired setup, all control elements in a central location for easier swap out of failed components / switching systems if needed. @PeteTheSwede For CCTV I use Hikvision, cameras + NVR, it 'just works'. For the AV side of things I agree with your thought process - I went through a similar plan to centralise all AV kit in a shiney rack but in the end it seemed to cost more and was more hassle than having a stack under each TV. For me each TV gets the same Freesat box + Roku combo. Add on a soundbar if it's in the lounge.1 point
-
Doordeals have what you want. I’ve used them before and the service was good: https://www.doordeals.co.uk/products/door-frames-and-mouldings/internal-door-frames/internal-softwood-door-lining.aspx1 point
-
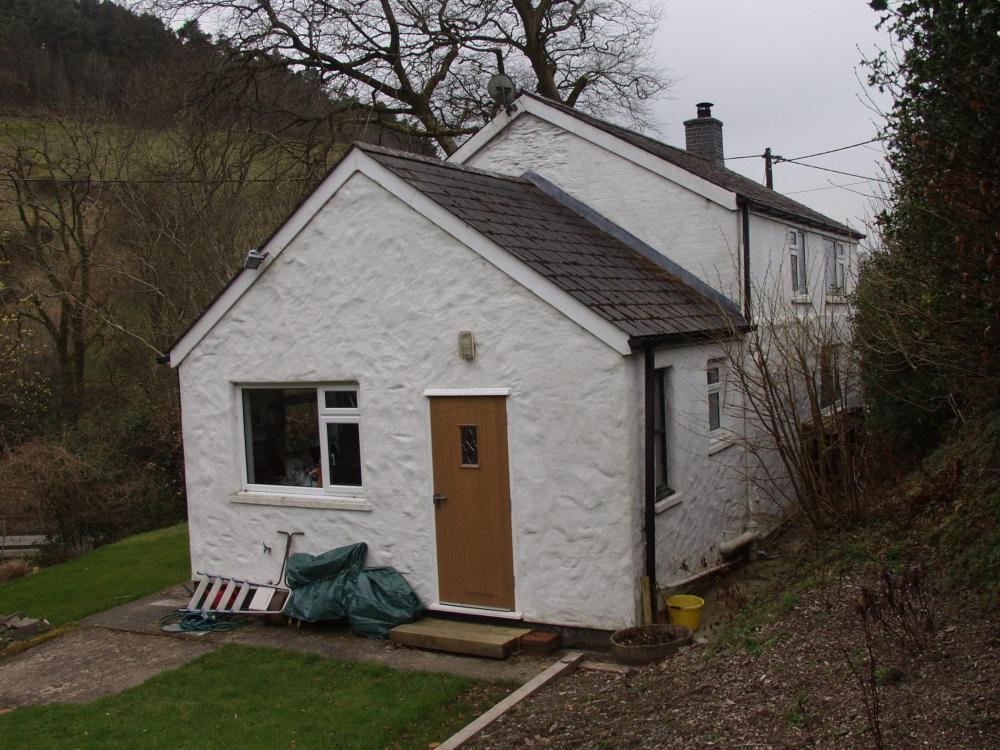
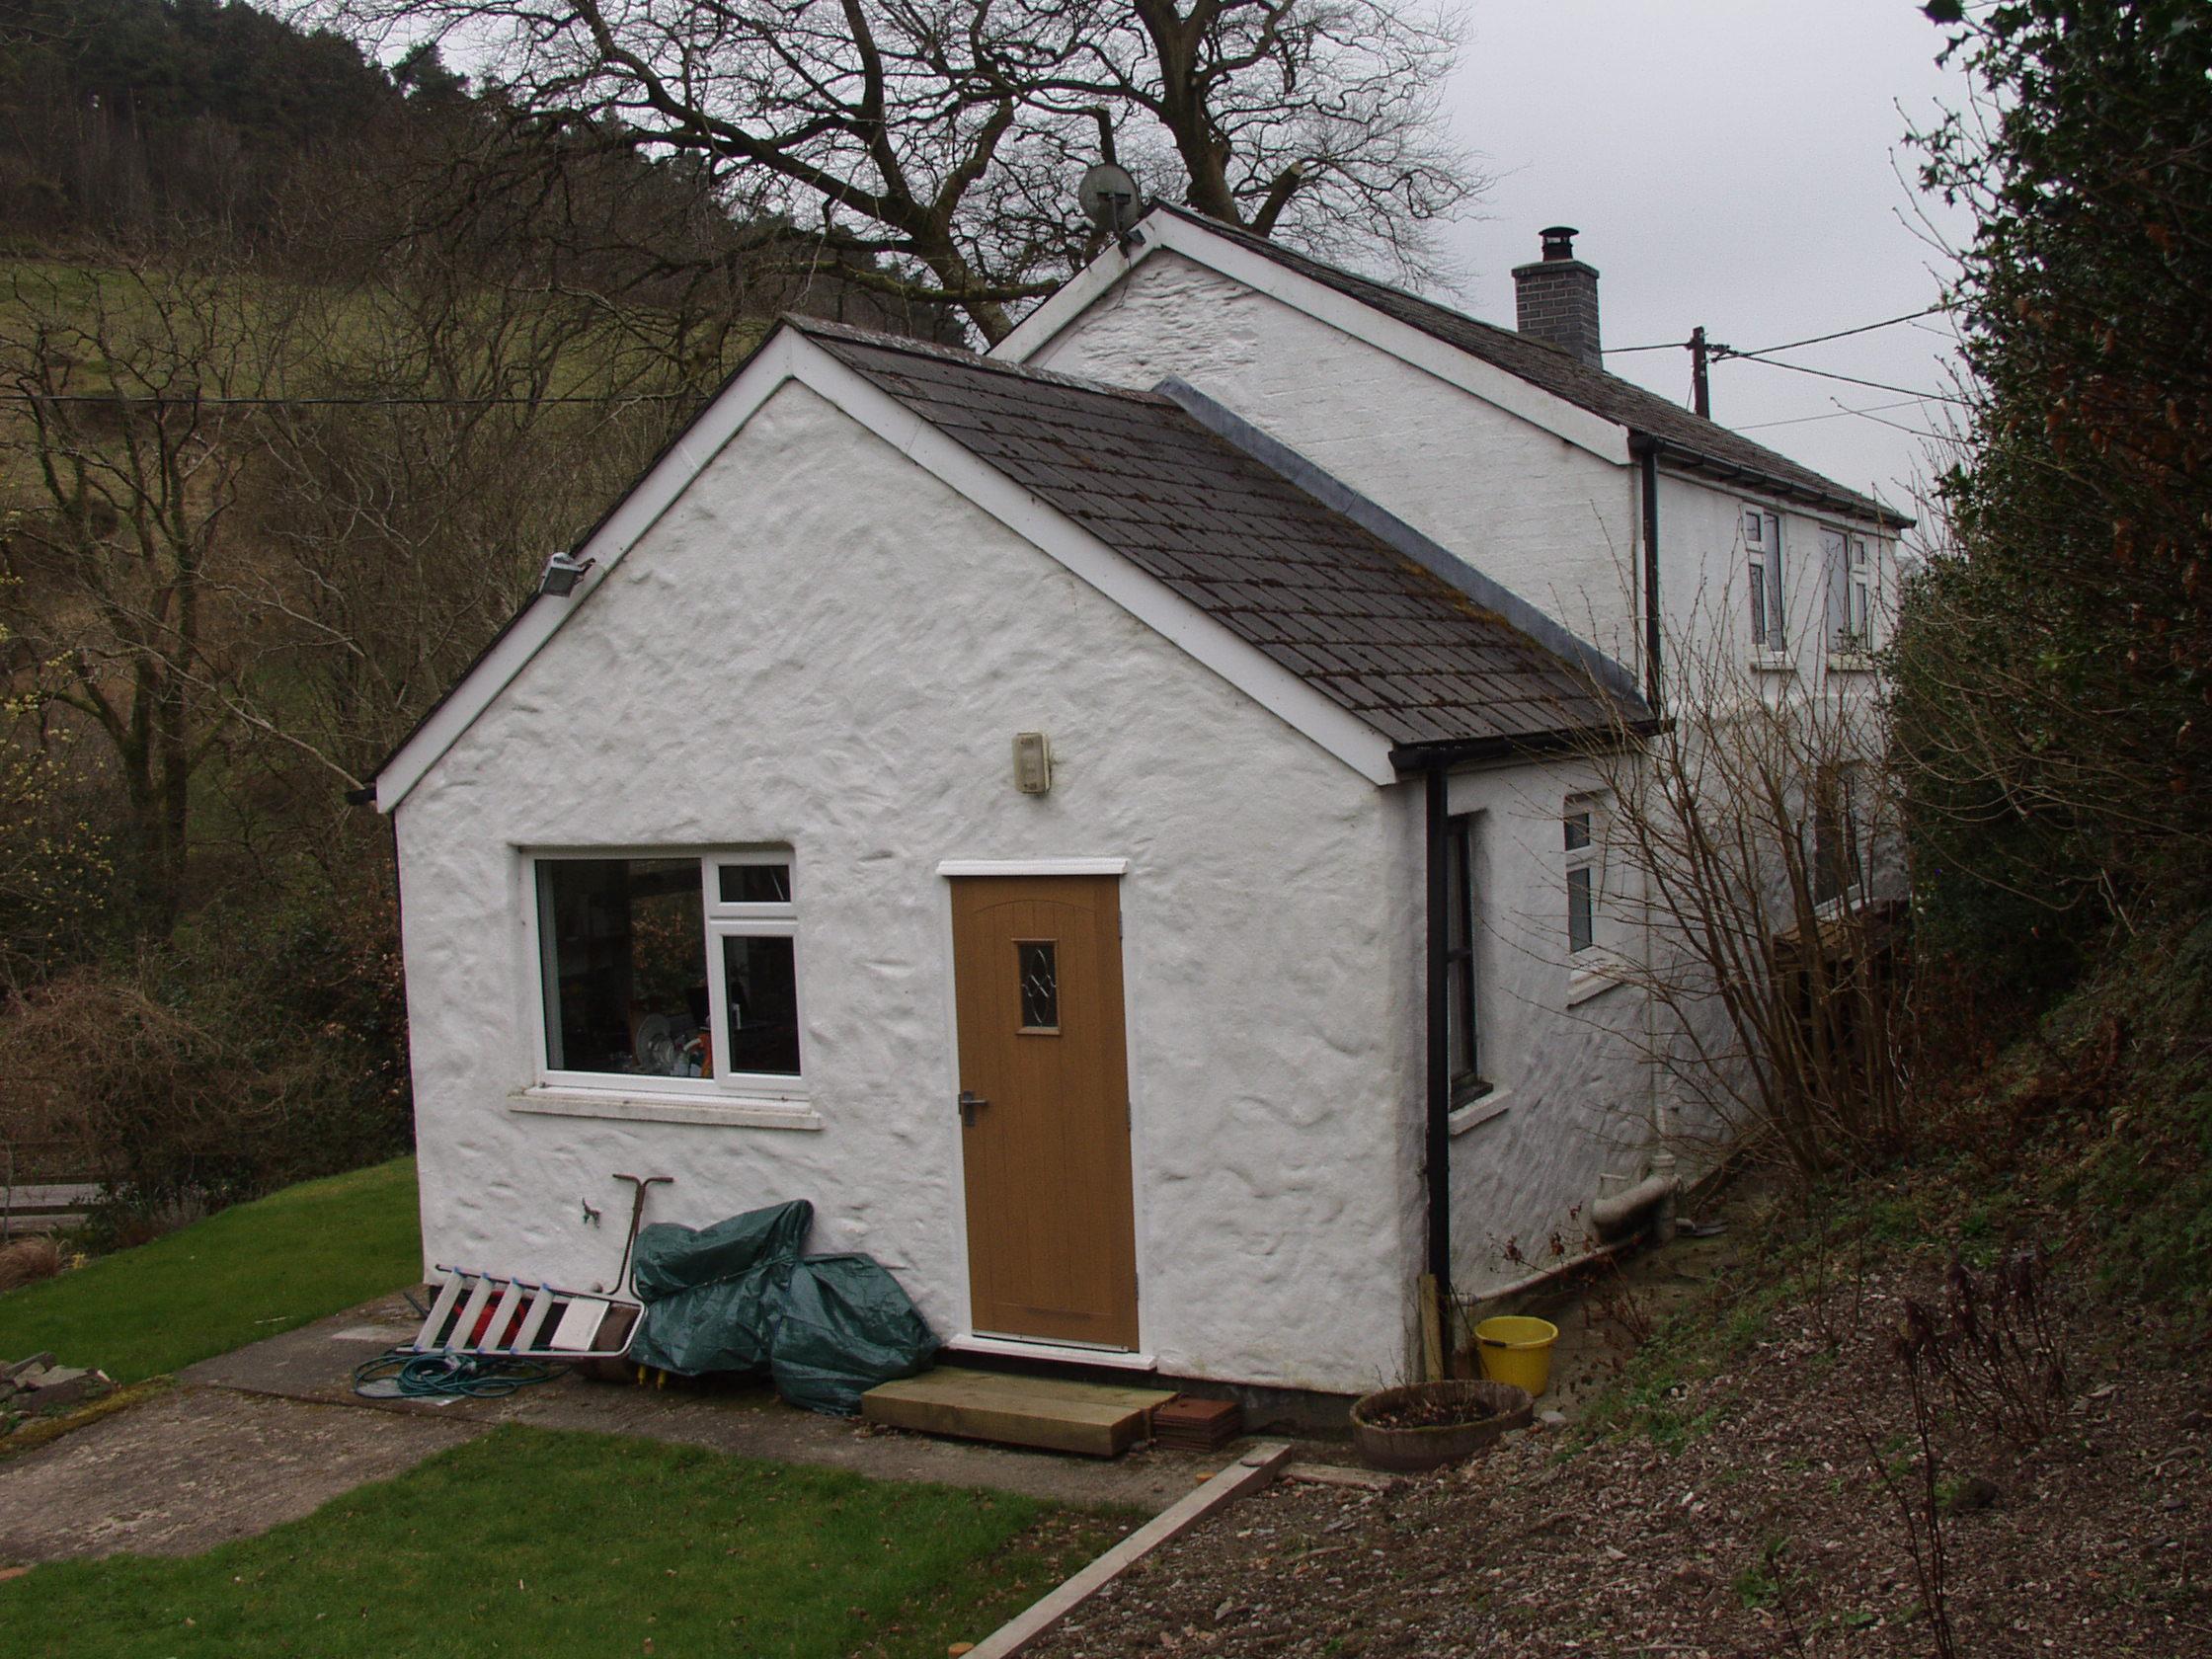
This is the basic house, foreground the 80's dreadful kitchen, behind the 4-thick-walled 'shell' main room (ontop the 80's disaster 1st floor addition).
 1 point
 -
History in the making!1 point
-
Probably should have done the other way around... Second time lucky!1 point
-
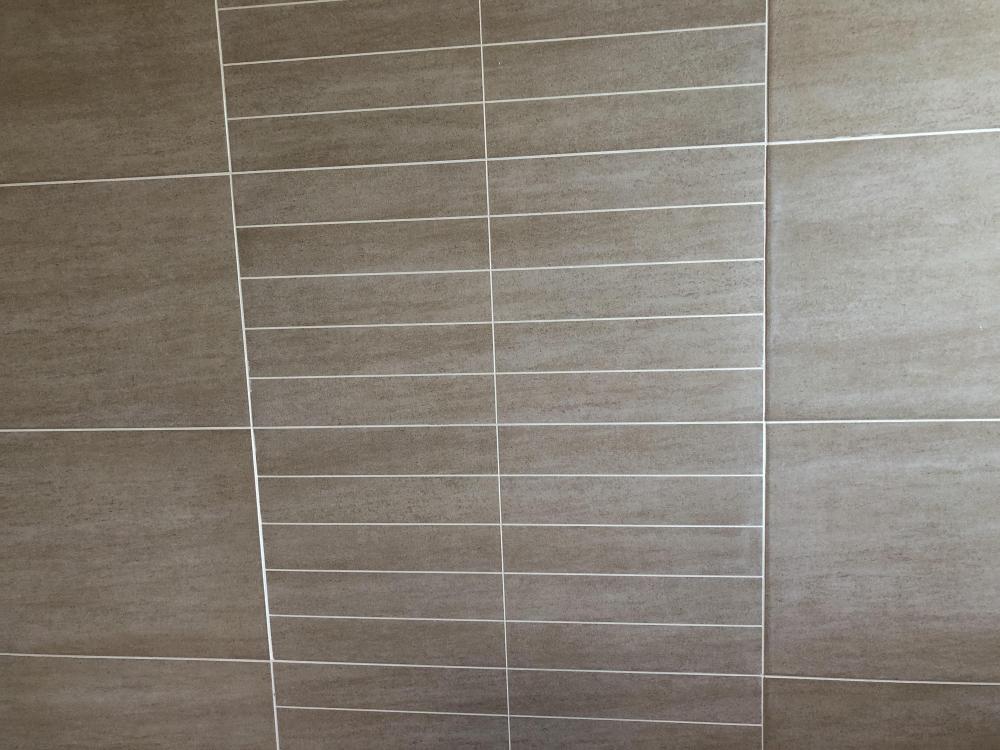
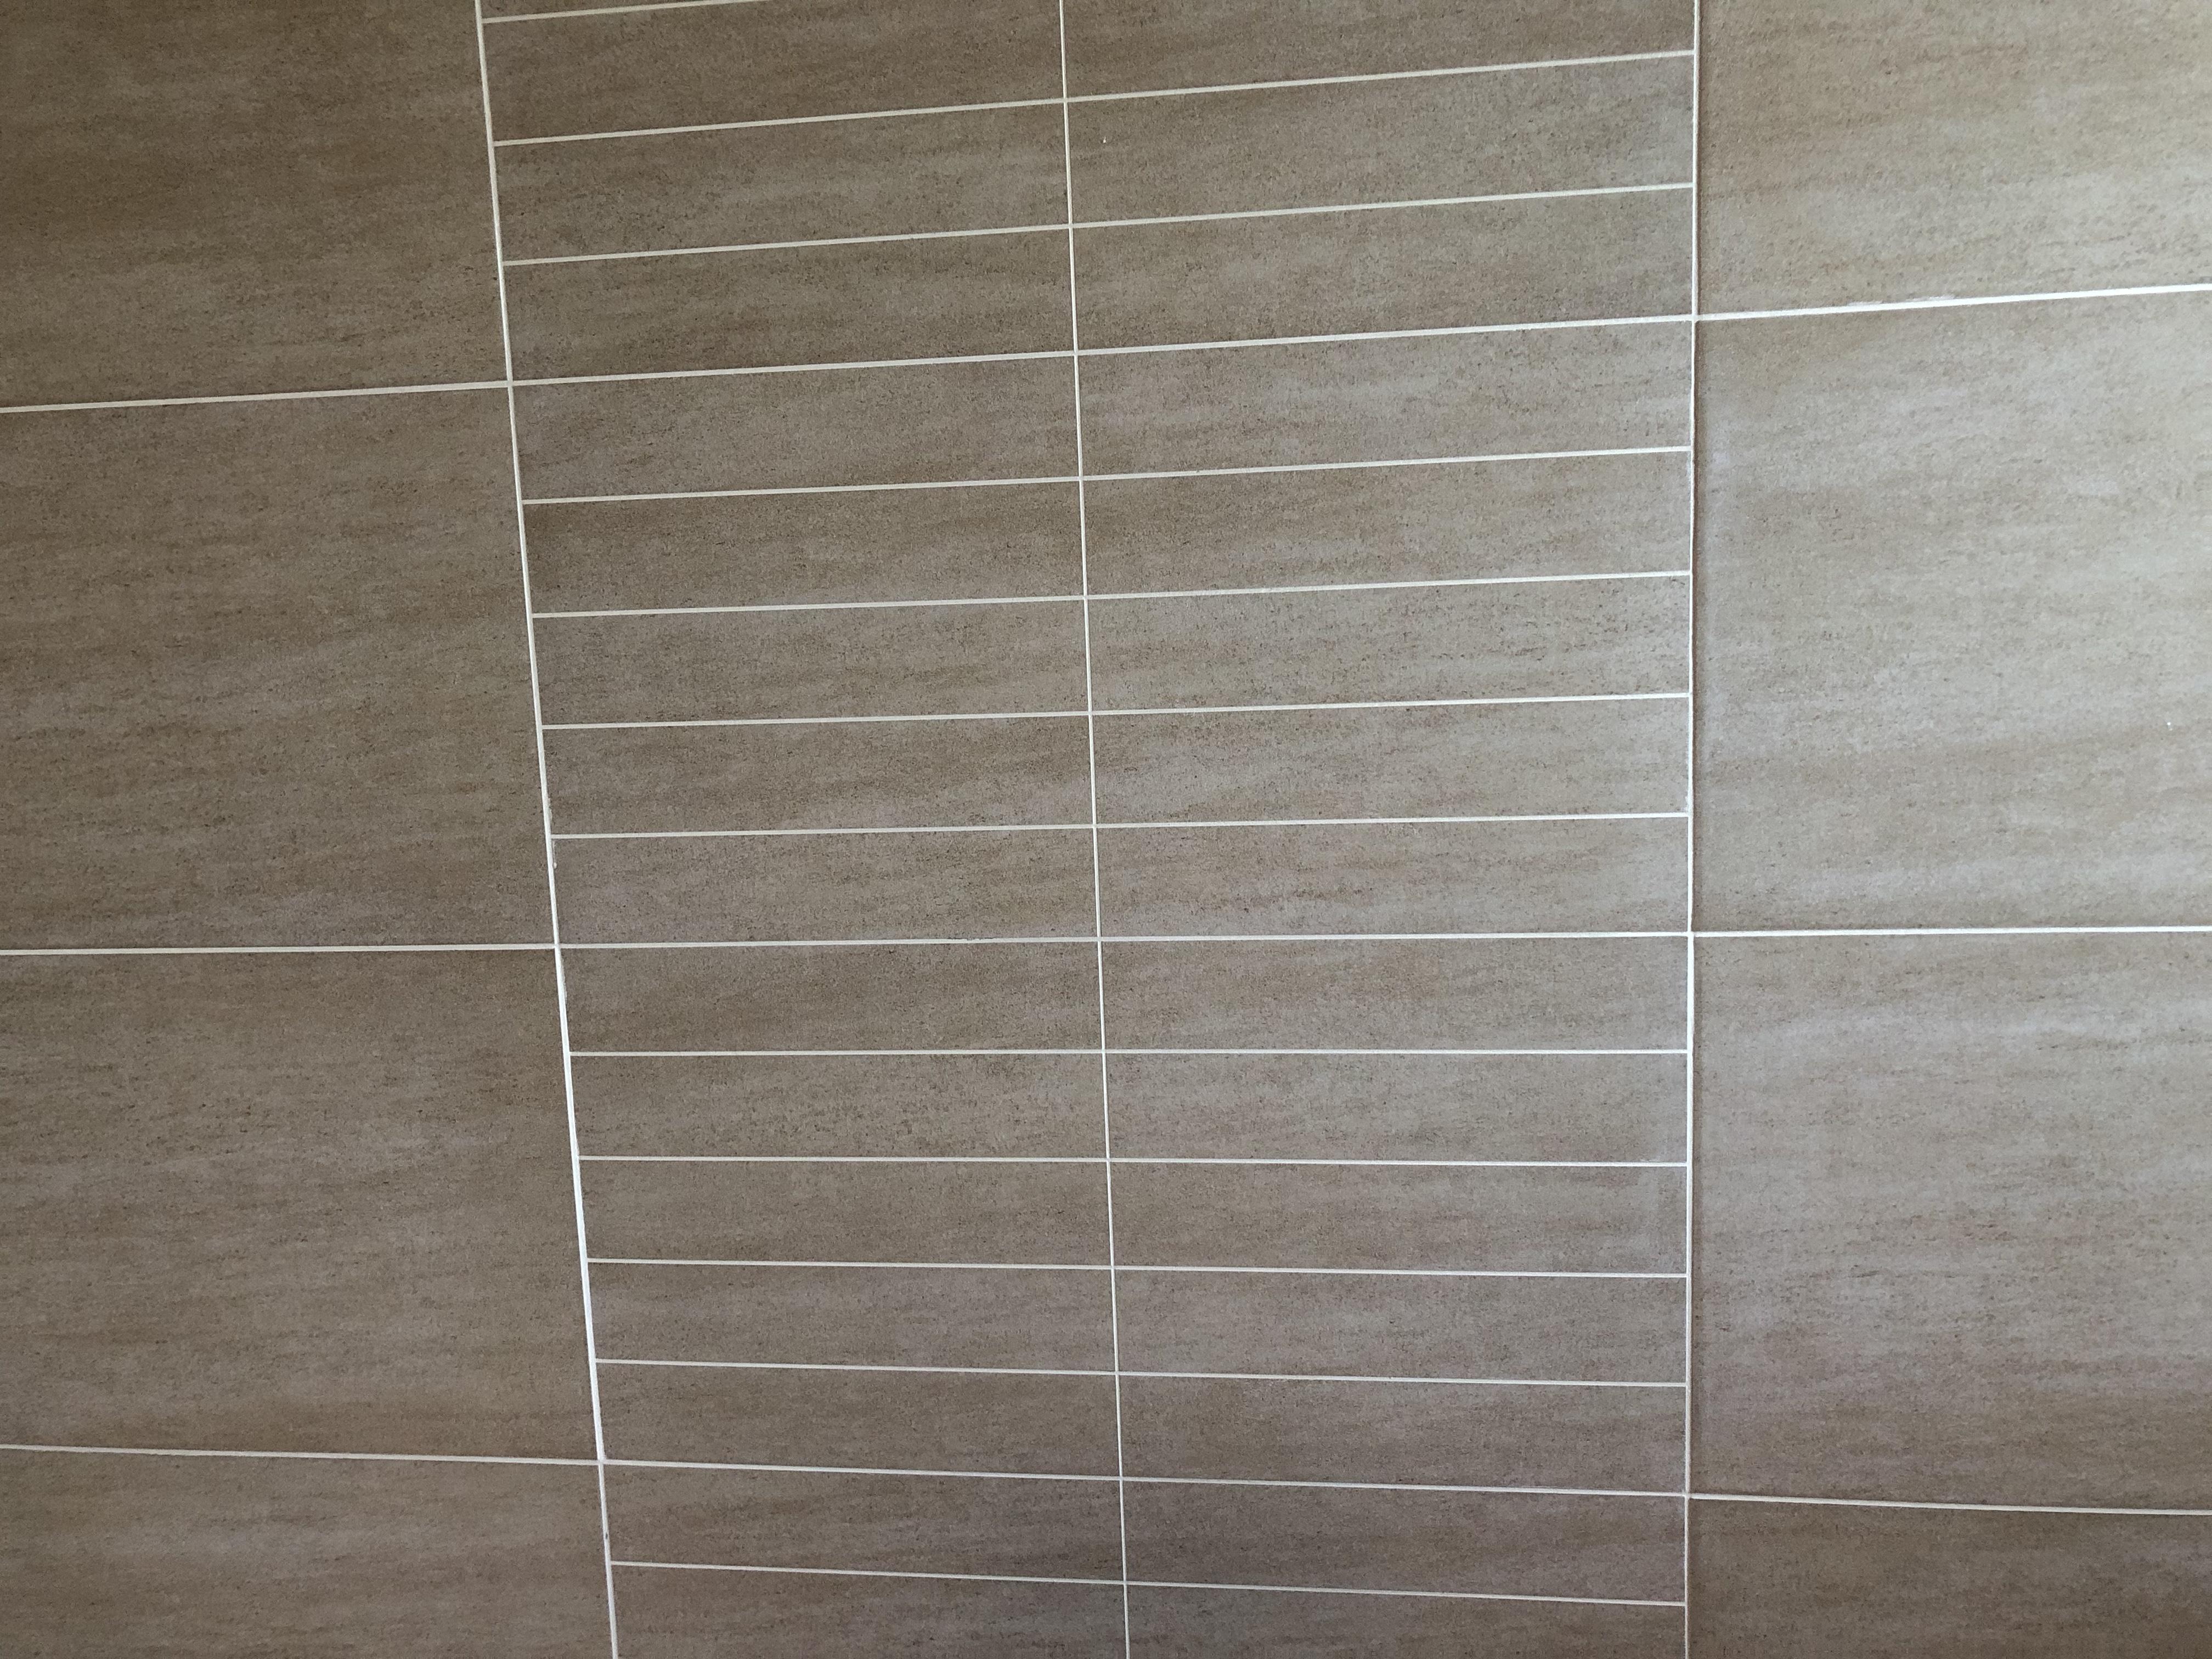
Not mosaics but faux and real grout lines
 1 point
 -
Remember that you don't have to use the gap under the doors as transfer ducts, you can fit ducts in the walls to do this. If these ducts are arranged like periscope ducts they will tend to reduce noise transmission, plus you can add acoustic lining to any transfer duct to further reduce noise transmission.1 point
-
Mine are tiny little led and needed more depth than MBC service void ...no-one notice the service void spec was so small for the ceiling. I am single storey too. If you know before hand you can get MBC to increase it but we did not so we were stuck with it and had to rectify as best we could. Lighting was already specced and everyone had had the drawings well in advance.....0 points


.JPG.4a9f1302cd34579bac3d496e69beb4c5.JPG)


This leaderboard is set to London/GMT+01:00