Leaderboard


Popular Content
Showing content with the highest reputation on 04/02/17 in all areas
-
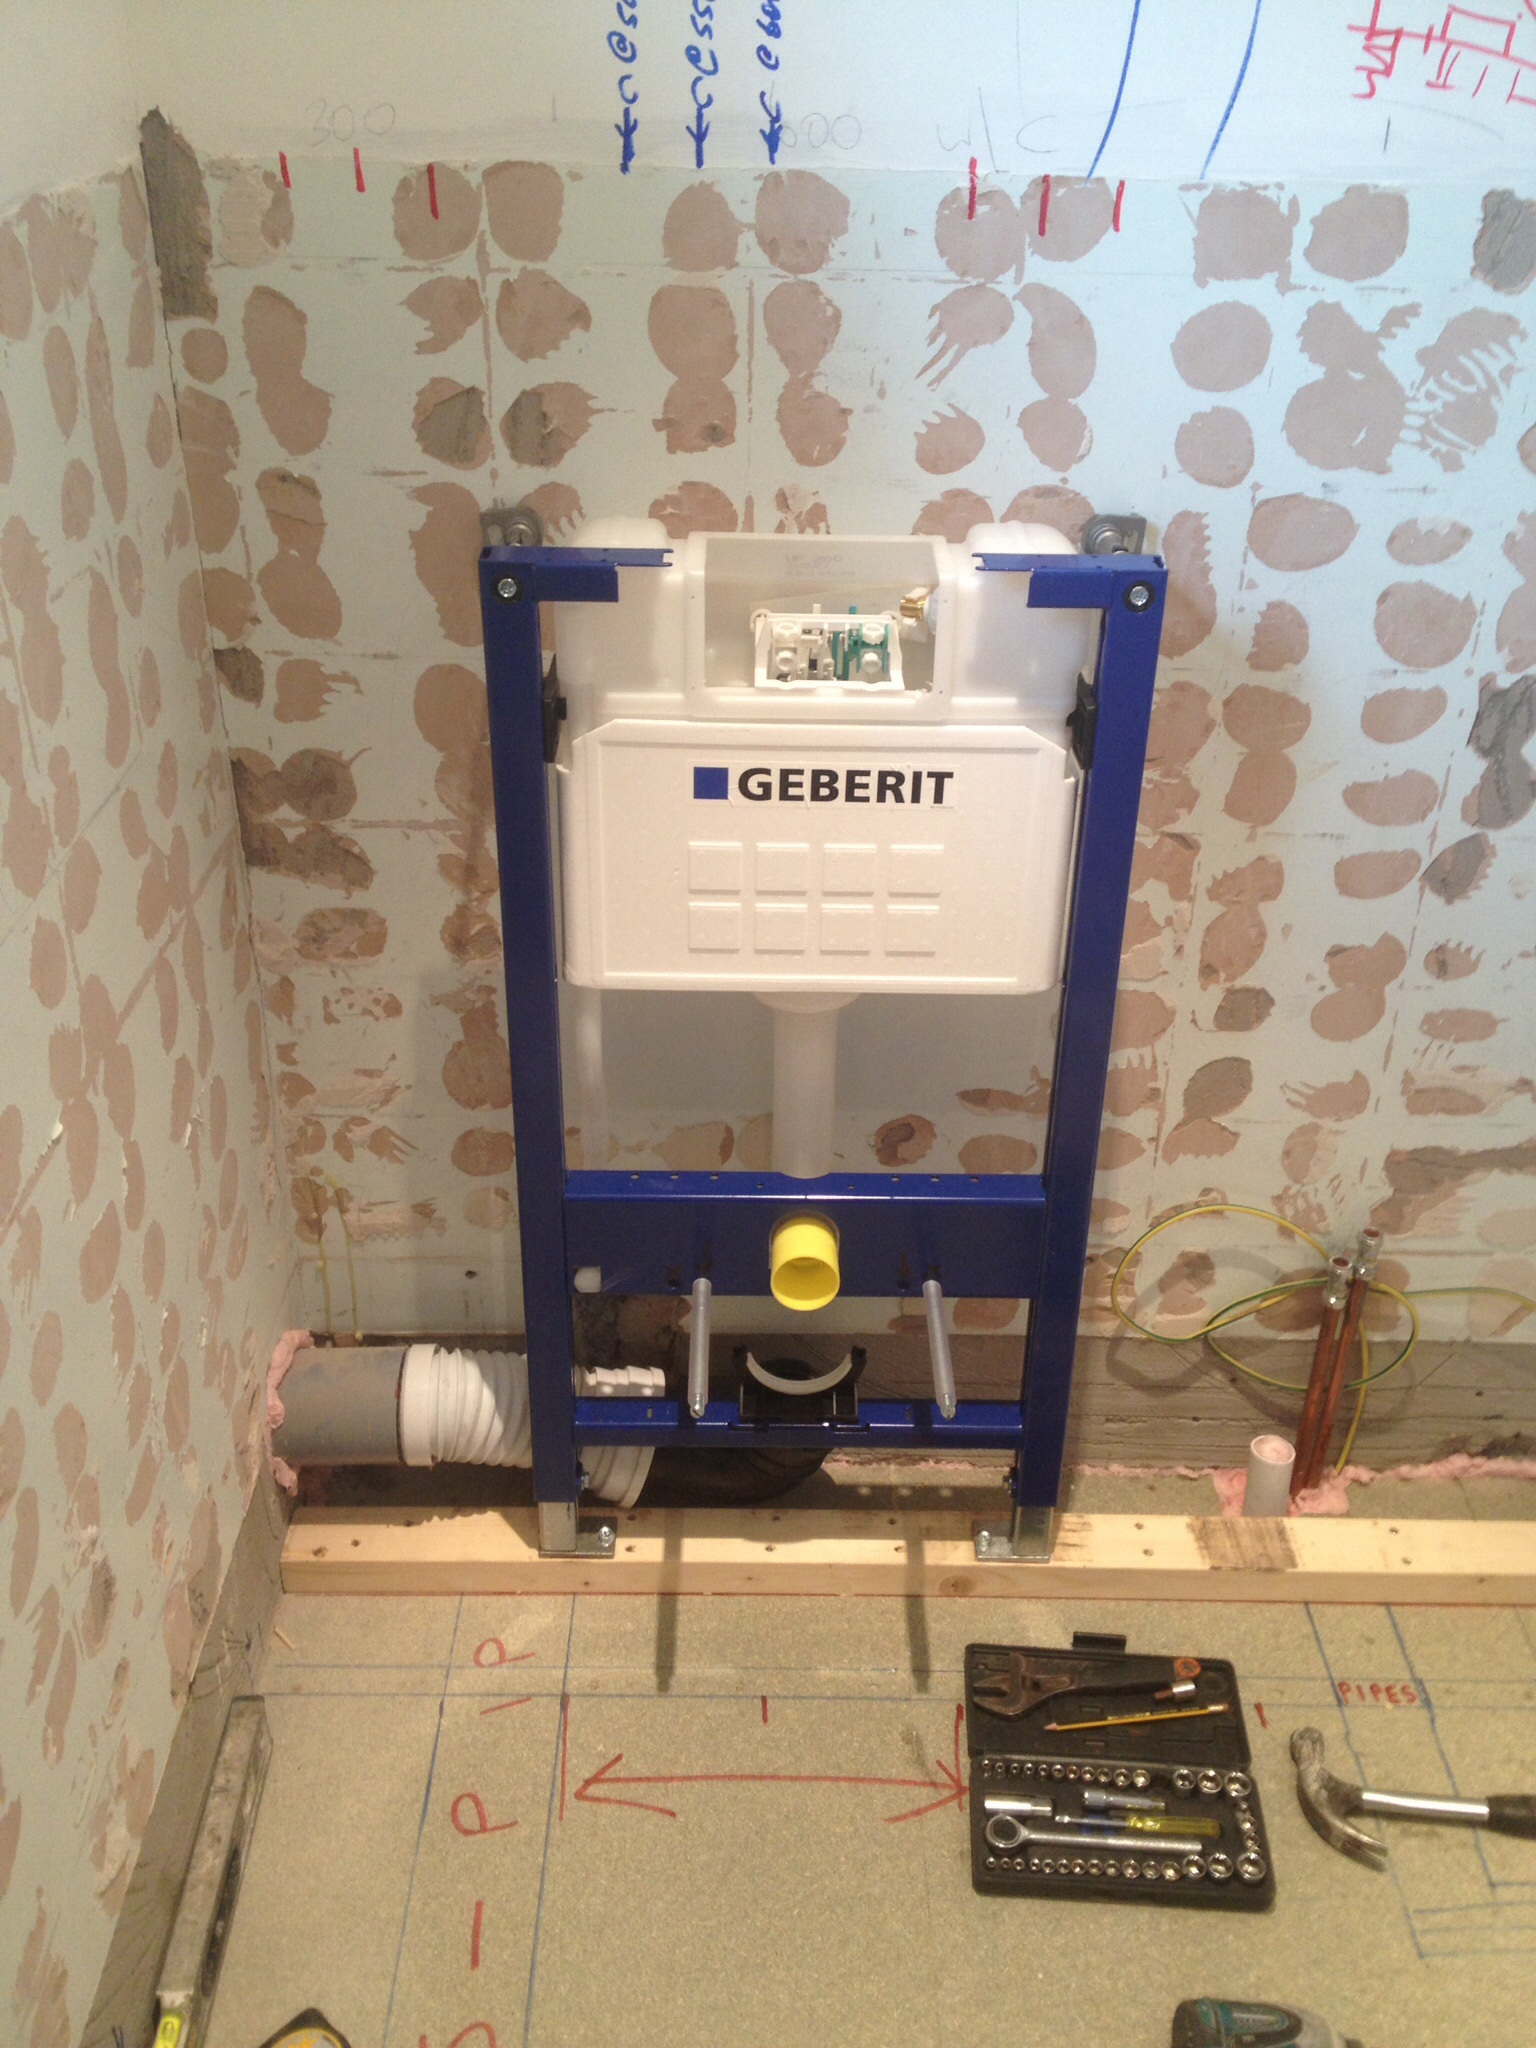
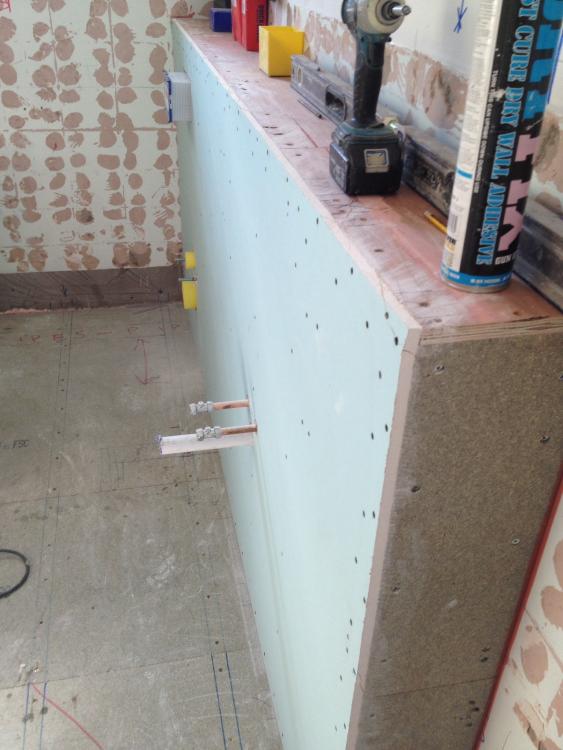
Slow but sure and ready to start tiling tomorrow.
 2 points
 -
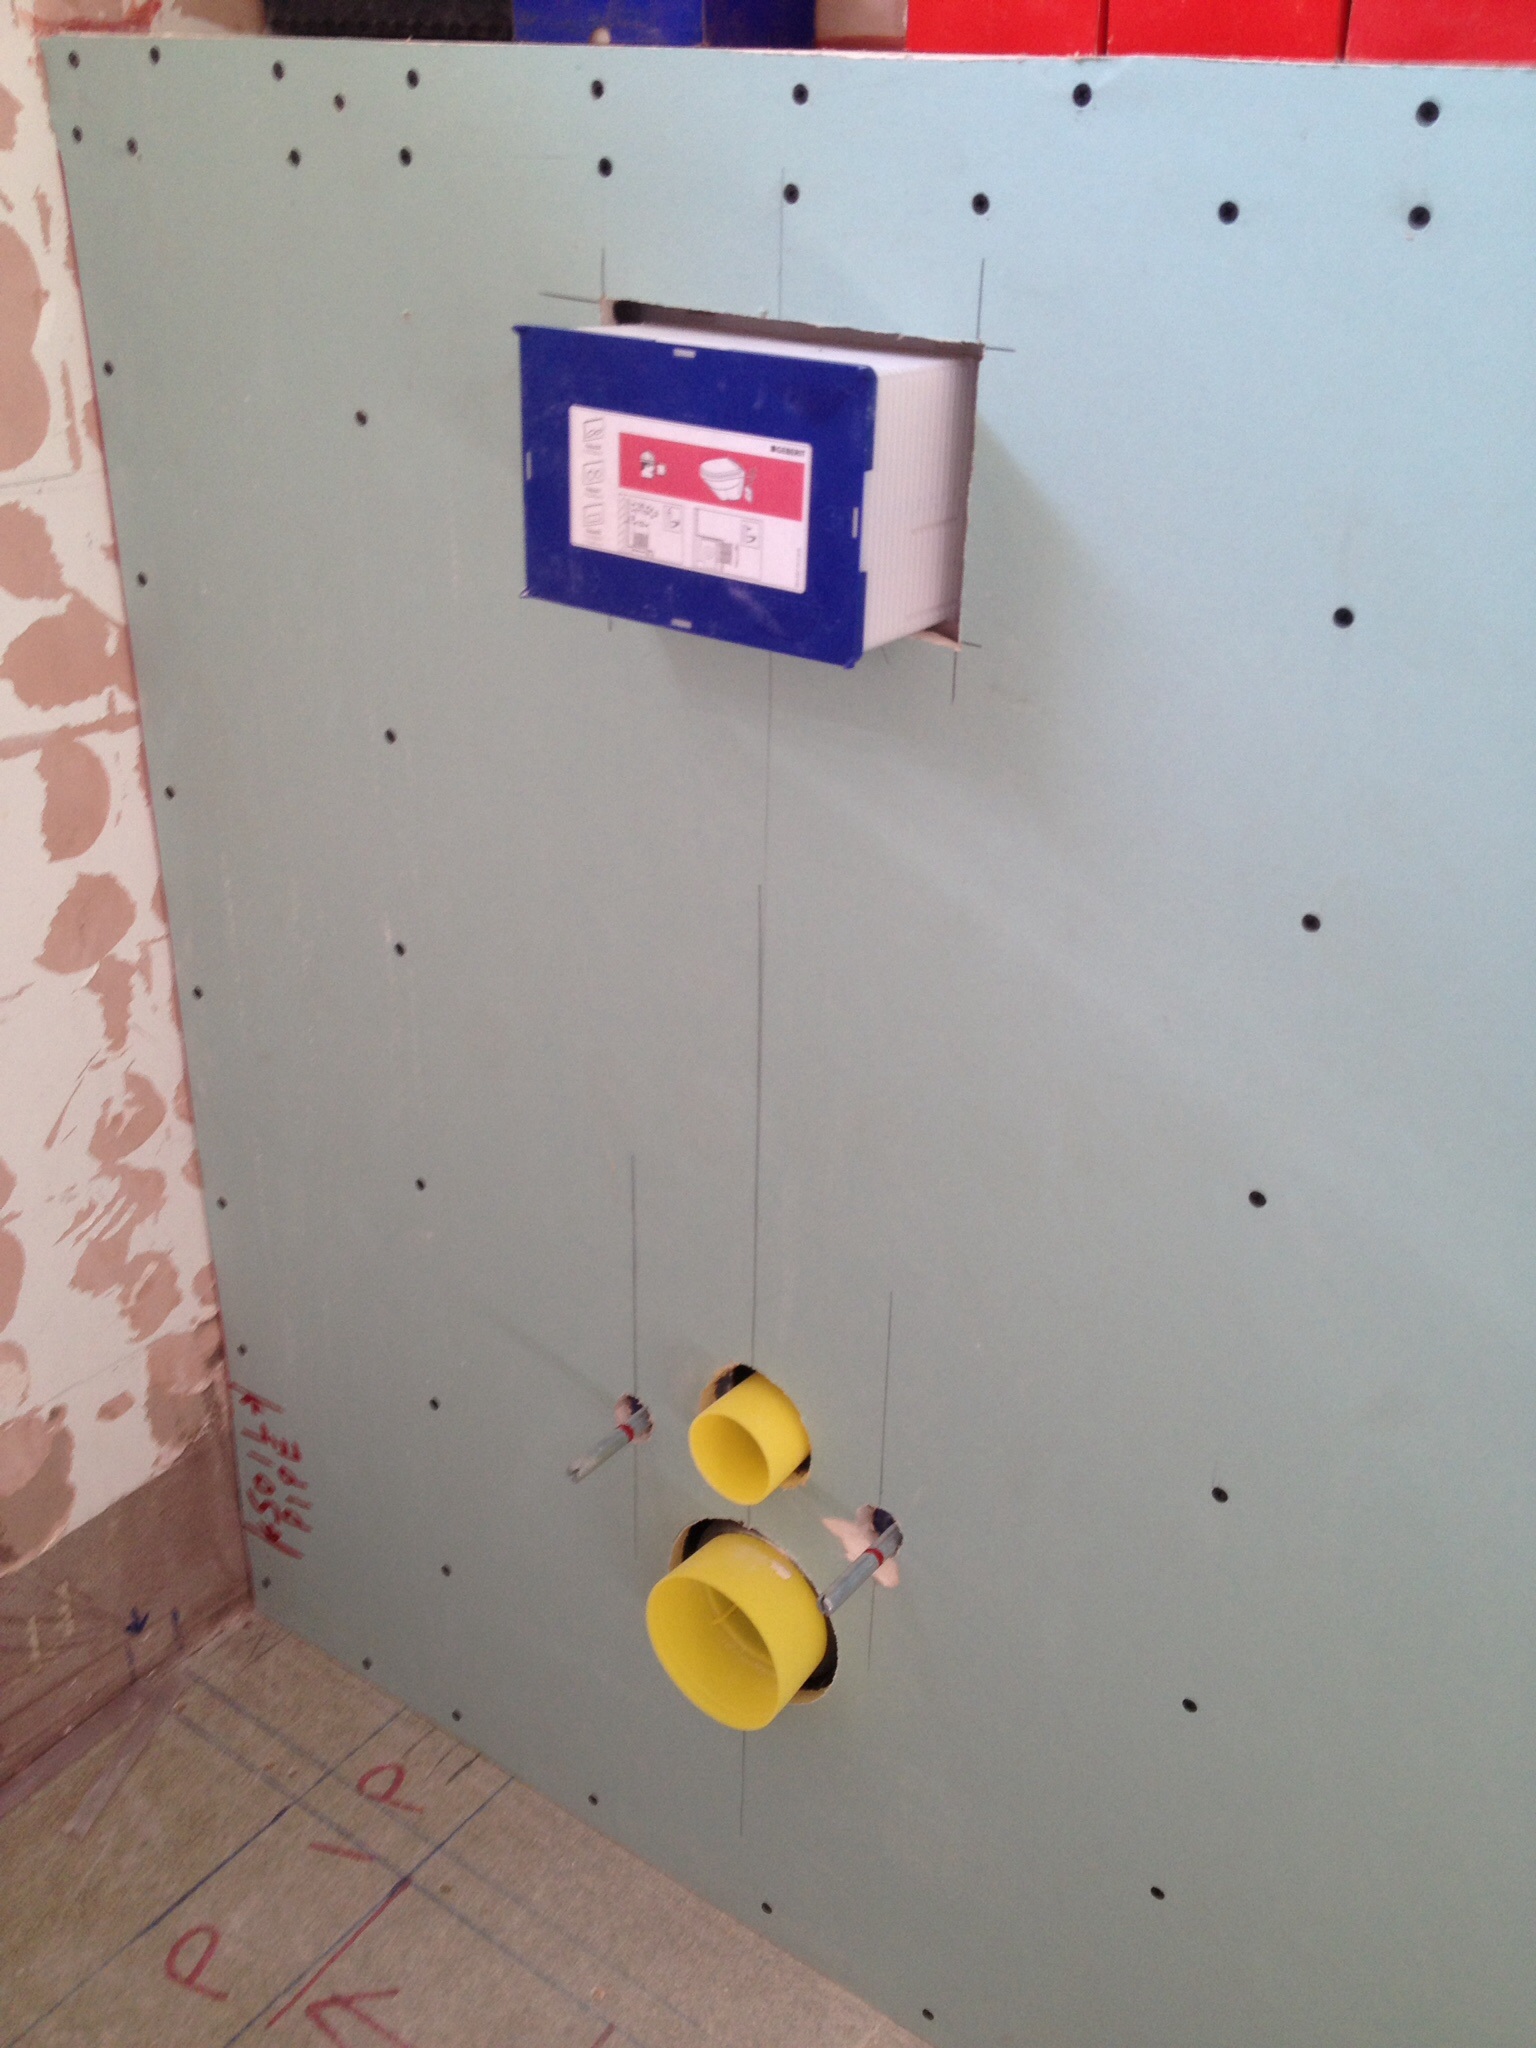
I got these, very easy... http://www.screwfix.com/p/erbauer-countersink-12-7-x-70mm/86157?bvrrp=5873-en_gb/reviews/product/2/86157.htm1 point
-
Don't use self drillers. Pilot with a drill bit ( sacrificial one ) and countersink as per @PeterStarck's comment. S/S fixings. Dont cause any distress to the board by forcing fixings through it as that will compromise each attempt at securing the board and make fitting it pointless. I'm still a PB fan, and not lost a patient yet.1 point
-
I can fully appreciate the challenges of finding people that you can trust to do a job that meets your own standards; we had a couple of people that were bloody awful, and I did find it difficult to just tell them that I wanted them off site and didn't want them back. From talking to others locally, I think we were just very, very lucky. After having been let down by three brickies, in desperation I rang around everyone local I could find and came across one guy who was a real perfectionist. So much so that he carefully pointed up a block wall that we were going to render, and when I said that he didn't really need to bother with how that wall looked, his reply was that he couldn't go home, knowing that the wall didn't look spot on, out of pride in his own workmanship. He recommended a chap to do the rendering, saying he was the only person he would trust to do a good job, and he was spot on, so not only did we get that chap to render the big walls around the house but we also got him to board and plaster skim the whole house, and he was damned good. In turn, the plasterer recommended a tiler and decorator, and he was another perfectionist (I reckon he would probably be a good match for Nick, in terms of his attention to detail). The tiler, in turn recommended the landscaping guy, who was so good that we've had him back about three times now to do more work around the place. So, for all of the "finish-critical" stuff that I wasn't doing myself we used people that had, indirectly, been found as a result of employing that first-class brickie. I'm near-certain that this is the best way to find good people, as anyone who is good and takes pride in their work will not recommend anyone that has lower standards than their own. The challenge is getting into that network of good people!1 point
-
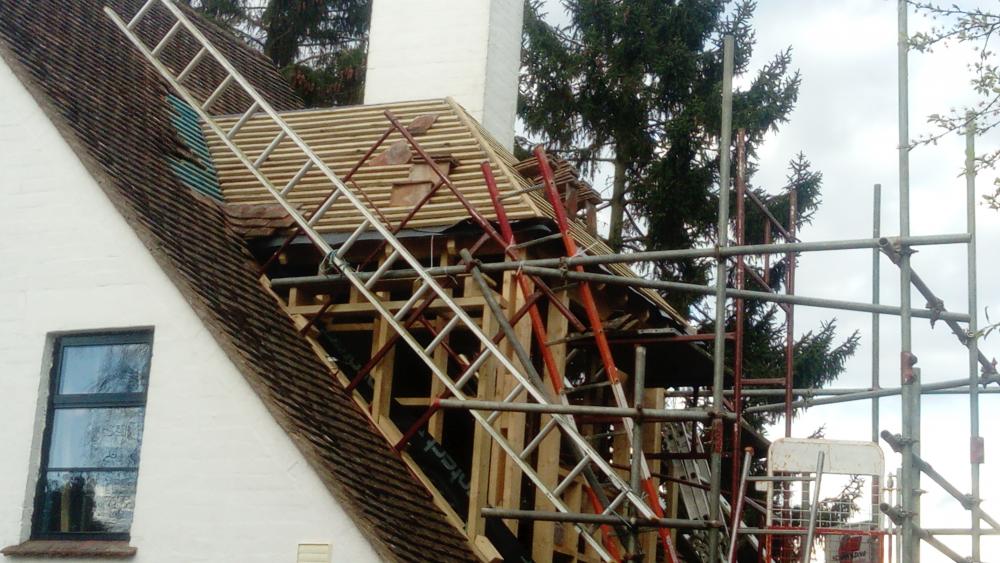
@Dee have a read of this Lots of detail and diagrams and pretty easy to follow too https://www.marleyeternit.co.uk/~/media/Files/Product-Files/Roofing/Brochure-Request/Marley-Eternit-Sitework-Guide.pdf1 point
-
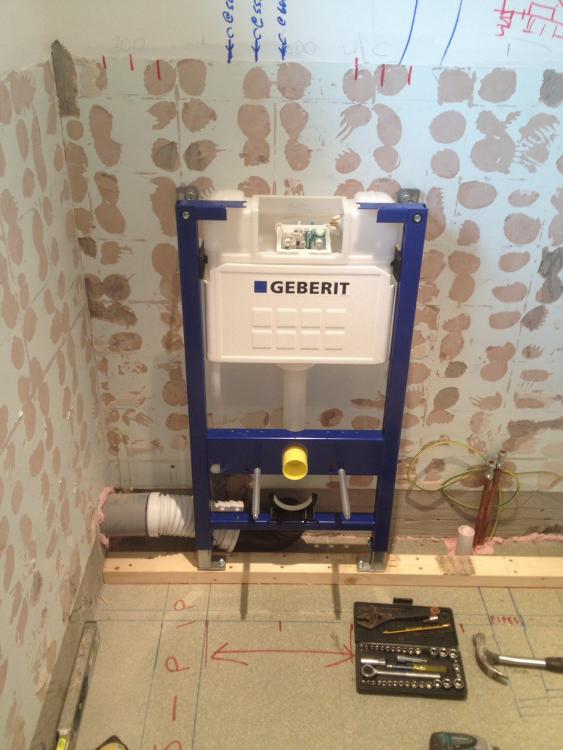
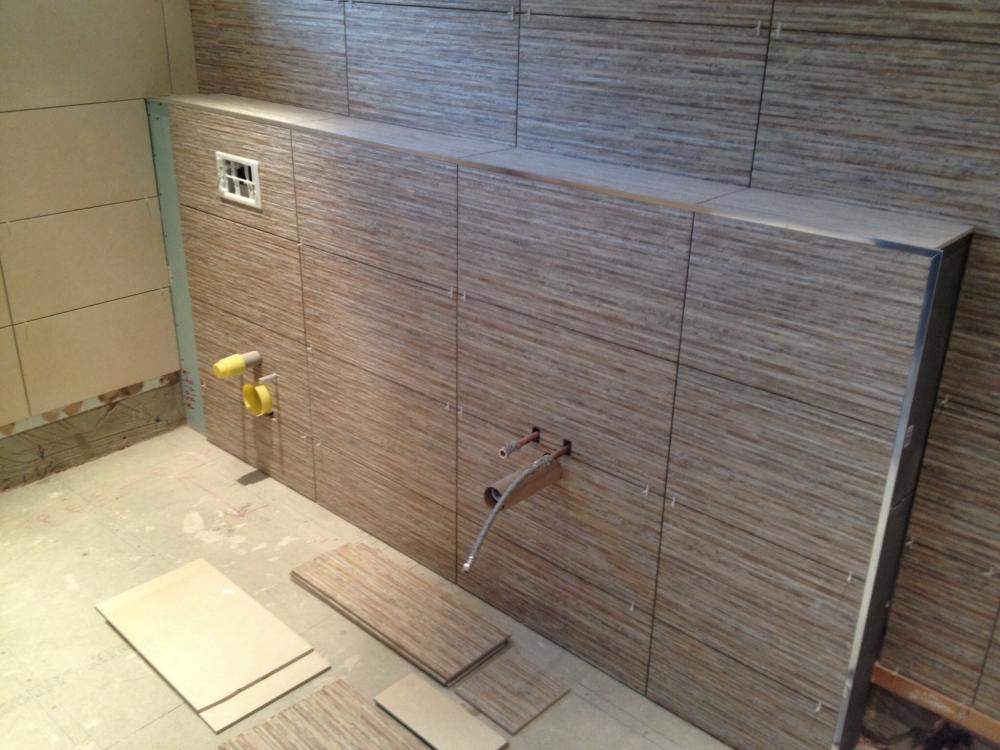
Get one elevation stripped of tiles and adhesive. Then simply push against the backer boards to check for movement / fixings etc. Let's find out how many screws and where before we speculate any further. Fwiw, I've blobbed tiles on many a time, but only in instances where they've been on horrendously uneven walls and I've had to pull the wall plumb and straight ( large shower cubicle etc ) so it can be done. I always use cementitious adhesive in theses cases, NOT ready made acrylic stuff, as the latter can only be applied 5mm thick at most as it just doesn't set, literally for weeks, otherwise. If you have a non-porous background like cement board then you should not be using acrylic full stop, and the same goes if it's a porcelain tile as the moisture just doesn't have anywhere to go. Same applies again if the area has been tanked, regardless of tile type. @jack, do you know what type was used? Tub or bags of powder. ?1 point
-
That's exactly how ours was done. Our roofers also fitted the fascias, so got the overhang right on the slates. The only slight problem we have is that our in-roof PV panels are fitted with the lower edges flush with the edges of the slates, but are about 20 to 30mm higher. In very heavy rain this causes water to overshoot the gutter in two places. I'm thinking about fitting wider gutters to try and alleviate the problem.1 point
-
Not sure if it's just the angle of the photo or not, but that tile adhesive dob looks pretty thick, almost as thick as the tiles. I'm no expert at tiling, but I've always used a toothed spreader to lay a complete covering of adhesive, to a fairly constant thickness, with the grooves allowing the tiles to be pushed down to the right depth to be flush with each other. Not sure of the right way to work, but I've tended to cover enough for a row and a bit of tiles at a time, rather than just dob stuff on for each tile.1 point
-
There are good pics on Google Images if you search for lead flashing on dormer windows. Several ways of doing it...according to the pics?1 point
-
Just make sure that if water falls on anything it flows down and off the roof!1 point
-
I use 18mm plastics but would never just use them to support tiles - I nail / screw 25mm board on first (4x1 or 6x1). Roof can be tiled then, leave the board 25mm proud of the roof timbers to give the necessary kick. Nail fascia on at your leasure, remember to tell the roofers the plan so they leave adequate tile overhang for the gutters.1 point
-
I'm still struggling to understand how this has happened in so many places. the bends in the wall may have been to do with the tiles on the odd occurrence but it makes no sense on this scale, the fact they don't have a full bed for the tiles worries me even more. I dislike people "dobbing" patios let alone bathrooms! how did you go about the contract? was there a snagging list? if they have used plasterboard screws they won't have pulled through like i suggested in my last comment as they will all be proud. (backer board is a bastard to get into without a cutter head) This is not my field so probably best to let Nick to sink his teeth into this one But if the company you used has any kind of reputation to uphold. call them back in to see what has actually happened and see what excuses they try to come up with. someone has f*ked up somewhere and if you paid for a professional job there is no reason you should end up bleeding for it1 point
-
If that is a join in the boards should there not be more screws visible. At least one in the corner and some along the top plus maybe another along the join.1 point
-
Is that flooring grade chip board ?1 point
-
That's looking great. I'm loving the "handrail" up the roof.1 point
-
I thought all fascias had to go on first when tiling to support the bottom row of tiles..? if you're using capping boards they go on afterwards but if it's the full 18mm ones then it goes on first. Try this for size http://www.swishbp.co.uk/installation/1 point
-
NOTHING pi$$es my missus off more than when I repair a domestic appliance and she was hoping for a new one! Bosch dishwasher is coming up 20 years old.1 point
-
In the last pic I can see some sort of straight strip / joint. What is it? Also, how the hell can we see a drywall screw head, and even worse it looks proud of the adhesive? The tile adhesive has been blobbed on too, rather than solid bed. . None of the affixed area should be void of adhesive. Take the tiles off jack, as otherwise this is just guess work tbh. Seeing that regular plasterboard screws have been used is not good.1 point
-
You need another number as above: http://www.partmaster.co.uk/washing-machine/l75480wd-91460560000/bearing/catalogue.pl?shop=aeg&path=108434&model_ref=2549563&refine=bearing I've tended to use espares myself, others favour Ransom Spares: http://www.espares.co.uk/search/ma143pt1553/washing-machines/bearings/aeg1 point
-
I hear you mate but it's a £600 machine (washer/drier) so I can't let it go without a fight :))1 point
-
Another vote for it being a problem caused by fixings. I think there is a very good reason that our resident expert plumber/bathroom fitter/heating engineer gets a bit focussed on using lots and lots of fixings! My experience with slight movement in our house has been that there is a small (perhaps 0.5mm) shrinkage of the skim plaster away from most of the windows, and a dozen or so pops in the skim where screws are, plus a very fine crack that appeared in a joint between two bits of plasterboard high up in the entrance gable (since filled and repainted and now seems fine). The main area where there was shrinkage was the additional MDF covered thin "stud" wall I added to build our walk-in wardrobe. That stayed in one ~4m long, ~2.2m high piece, but shrank away from the ceiling and wall joints on either side by around 1mm. My guess is that it's because I didn't leave enough time for the timber to stabilise inside the house before I built the wall. Since filling and re-painting it it's not moved at all. It's hard to see how shrinkage in the structure could force the board to bow out that much if it was secured well to the walls.1 point
-
Check for straightness vertically. Have the studs warped?1 point
-
how soon after the walls were built did it get boarded and tiled? My only thought would be that maybe the studs have shrunk and pulled the screws through the board?? it is a bit worrying that it has happened so often though. I think you have got to take at least the broken tiles off and do some investigation. + one to a strong magnet just to see how many fixings are behind the in tact tiles1 point
-
Was the Hardiebacker fitted tight when very cold and could it be due to expansion when it warmed up?1 point
-
@jackI think it is a different thing, but I have floor tiles cracked in my bathroom on 8"x4" lines. I think the cause is the use of the wrong type of chipboard to cut a corner (ie the same chipboard as the other upstairs rooms), which has swelled. I can post photos if you like. Ferdinand1 point
-
A strong magnet will also detect any screws as well.1 point
-
I suspect they didn't screw the Hardi to the middle/all the studs. Got a metal detector/stud finder (eg to look for the screws)?1 point
-
That's pretty strange. Our bathroom was clad in travertine over Hardi backer board with no issues. I'm wondering if your joints weren't done on studs? Is it the centre of a sheet bowing out or the edge bowing in? Edit: Looking at that last picture it looks like the centre of sheets bowing outwards. Were they screwed to all the studs or just along joints?1 point
-
Good news about it being better with cheap emulsion, as I've just bought loads of cheap trade white, as it's only a garage! I can't quite understand why the hire price is so high, as a reasonably good unit can be bought new for around £300. It may be because they have to factor in the cost of nozzles and servicing the pump. The pump not only needs cleaning out, but also needs lubricating every time it's used, with a special (and expensive) lubricant. Nozzles are reported to last for somewhere between 100 to 400 litres of paint, depending on the type of paint (exterior stuff apparently wears the nozzle faster then something like emulsion). The lubricant is around £15 to £20 for a small bottle, nozzles are around £6 each, and the hire people may just replace nozzles before each hire, so with the labour cost of servicing between hires I can see that it could cost them £20 to £30 or so, perhaps more. I'll give some feedback on how I get on with this unit, probably later next week (if I get the garage cleared out so I can paint it.........).1 point
-
You're sure total waste of time and effort. There is nothing serviceable OUTSIDE of the cistern. Anything INSIDE the cistern gets taken apart / serviced / replaced as per the demo vid. Bob's your uncle.

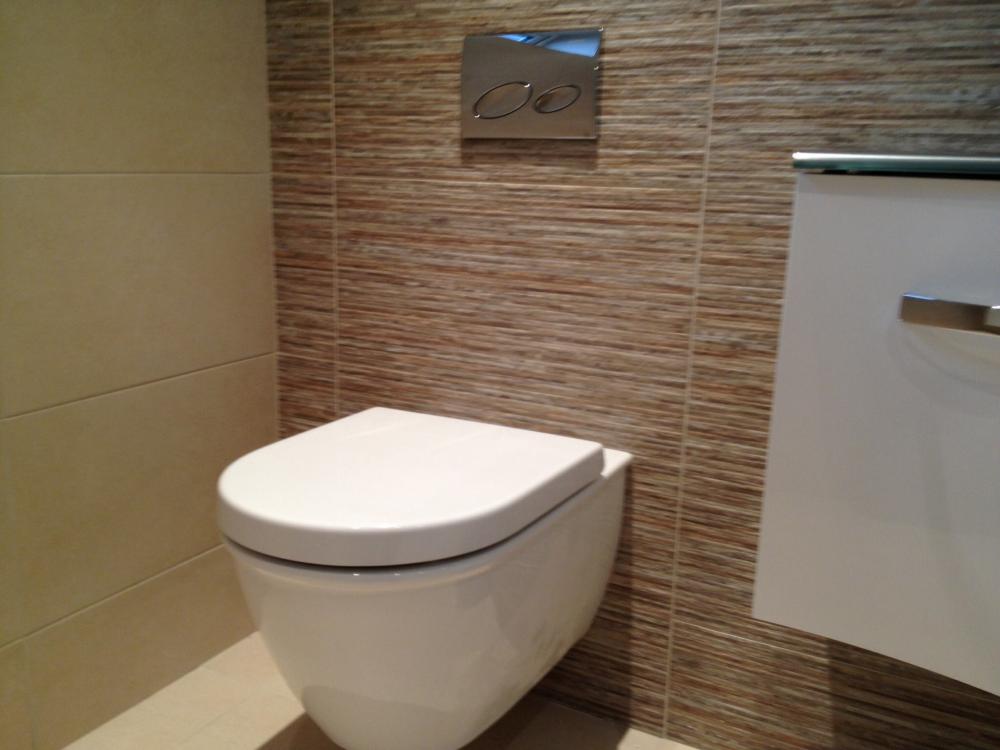 1 point