Search the Community
Showing results for tags 'ewi'.
Found 10 results
-
Hi everyone, We're adding ~300mm external wall insulation and render to our 70s terraced house (looking to achieve EnerPHit, hence the especially thick EWI), and we're trying to find some information on cavity trays and weepholes. What we know: In at least one instance, we have a sloped lintel which acts as our cavity tray. There are no noticeable existing weepholes above any of the openings. Based on the "Weepholes" section of https://nhbc-standards.co.uk/6-superstructure-excluding-roofs/6-11-render/6-11-7-detailing/, we think that we don't need weepholes since we are in a moderate exposure zone (Stockport). Our questions are: If we have interpreted the above guidance correctly, would that mean it doesn't matter if our cavity tray doesn't have stop ends (we believe these may be missing)? Similarly, considering the questionable build quality, we're not certain if the meter boxes or if all the other openings in the external wall are fitted with cavity trays. Would cavity trays even be needed if we are installing EWI and render? Would appreciate some advice on the above, or if anyone has done similar work please tell us how you did it! Thanks all
-
Is this a choice of material issue if it was the external wall insulation that caused the fire to spread?
-

Fitting of new windows in EWI layer using EWI brackets
oranjeboom posted a blog entry in Kentish RenoExtension
Original house contained cheap UPVC windows that were ill fitted and would not match the new windows in the two extensions. So the decision was made to fit new windows throughout with the original plan to go for alu-clad wooden, nut resorted to UPVC due to cost and worries on how some of the alu-clad windows were constructed. Surprising how difficult it was to get quotes that were in an affordable category. Some companies needed numerous follow-up calls which was very frustrating in view of the fact that I would be spending approx £20k on their product. In the end, although I would have preferred to buy local, I ended up sourcing windows from abroad which ended up costing a lot less than anything UK-sourced and also meant they were passivhaus certified! Pity how many sectors in the UK shoot themselves in the foot by atrocious service which is partly down to them not wanting to deal with end clients/self-builders. There was a lot of email ping-pong, but I think that would have been the case with UK windows too, but they were at least keen to do business which didn't seem to be the case with many of the UK ones. The only area I was hesitant about was measuring the window openings which was further complicated by the fact that I was using special EWI brackets which would position the windows outside of the window opening itself. So I had to take into account the bracket measurements in addition to the window openings. I must have measured each opening at least 15 times before submitting my final order. Glad to say everything seems to fit (just 3 doors to fit now). Unloading some of the units was a bit precarious especially the 800kg 4.6x 2.3m slider using a standard forklift and then travelling 200m down the road! I got a local window company to help me fit the windows and of course they had no clue how to fit them with the EWI brackets. It took a while for them to admit that the client knew best in this case as he'd actually read the bloody instructions. Means I'll have to rectify their first window later on. External view: Next stage on the exterior, is to EWI all walls with circa 100mm insulation. Note the brackets above (this is the first window and the bottom bracket aren't fitted correctly, so will need to be fixed before EWI). The brackets will cause minimal thermal bridging at least and certainly be better than having a timber frame constructed all round the window frame. The external aluminium cills (sourced from Germany, cheaper and thicker than UK suppliers) will fix onto that bottom mini (grey) cill at the bottom. EWI will tuck in under frame (well all sides of frame of course): and will marry up with the insulation I plan to add under the internal cill also: My next job is to get started with the internal plastering, so I'm looking at how to detail the internal reveals and cills. My plan is to insulate under the cill also. Cavity wall will most likely be filled with PIR where I can force it down or EPS beads (with a bit of PVA). I'll then fix 60mm PIR board to the now insulated cavity wall using PU adhesive. I'll have to channel out a bit of the PIR to accommodate the window brackets so the board sits flat: I should have enough clearance then to fit a wooden cill on top of the PIR. Not sure how best to affix that to PIR. Maybe the plasterboard reveals will sit on top of the cill and help pin it down. Probably overkill with the EWI, but my intention was to also insulate the reveals (see grey EPS example above) with 20-25mm PIR board and then plasterboard over the top. Just need to leave sufficient space to get at the internal beading in case the glass ever needs replacing (sons and footballs....). The other consideration is to decide where to stick the air tightness tape. Initial thought was to stick that on face of window frame and onto brickwork before I stick down the PIR board. But how well does the stuff stick to clean brickwork? I could add a further layer of tape from window frame and stick to top of PIR board before the final cill goes down. I'll try and post some drawings up here later on. Not great, but some of the intended detail: -
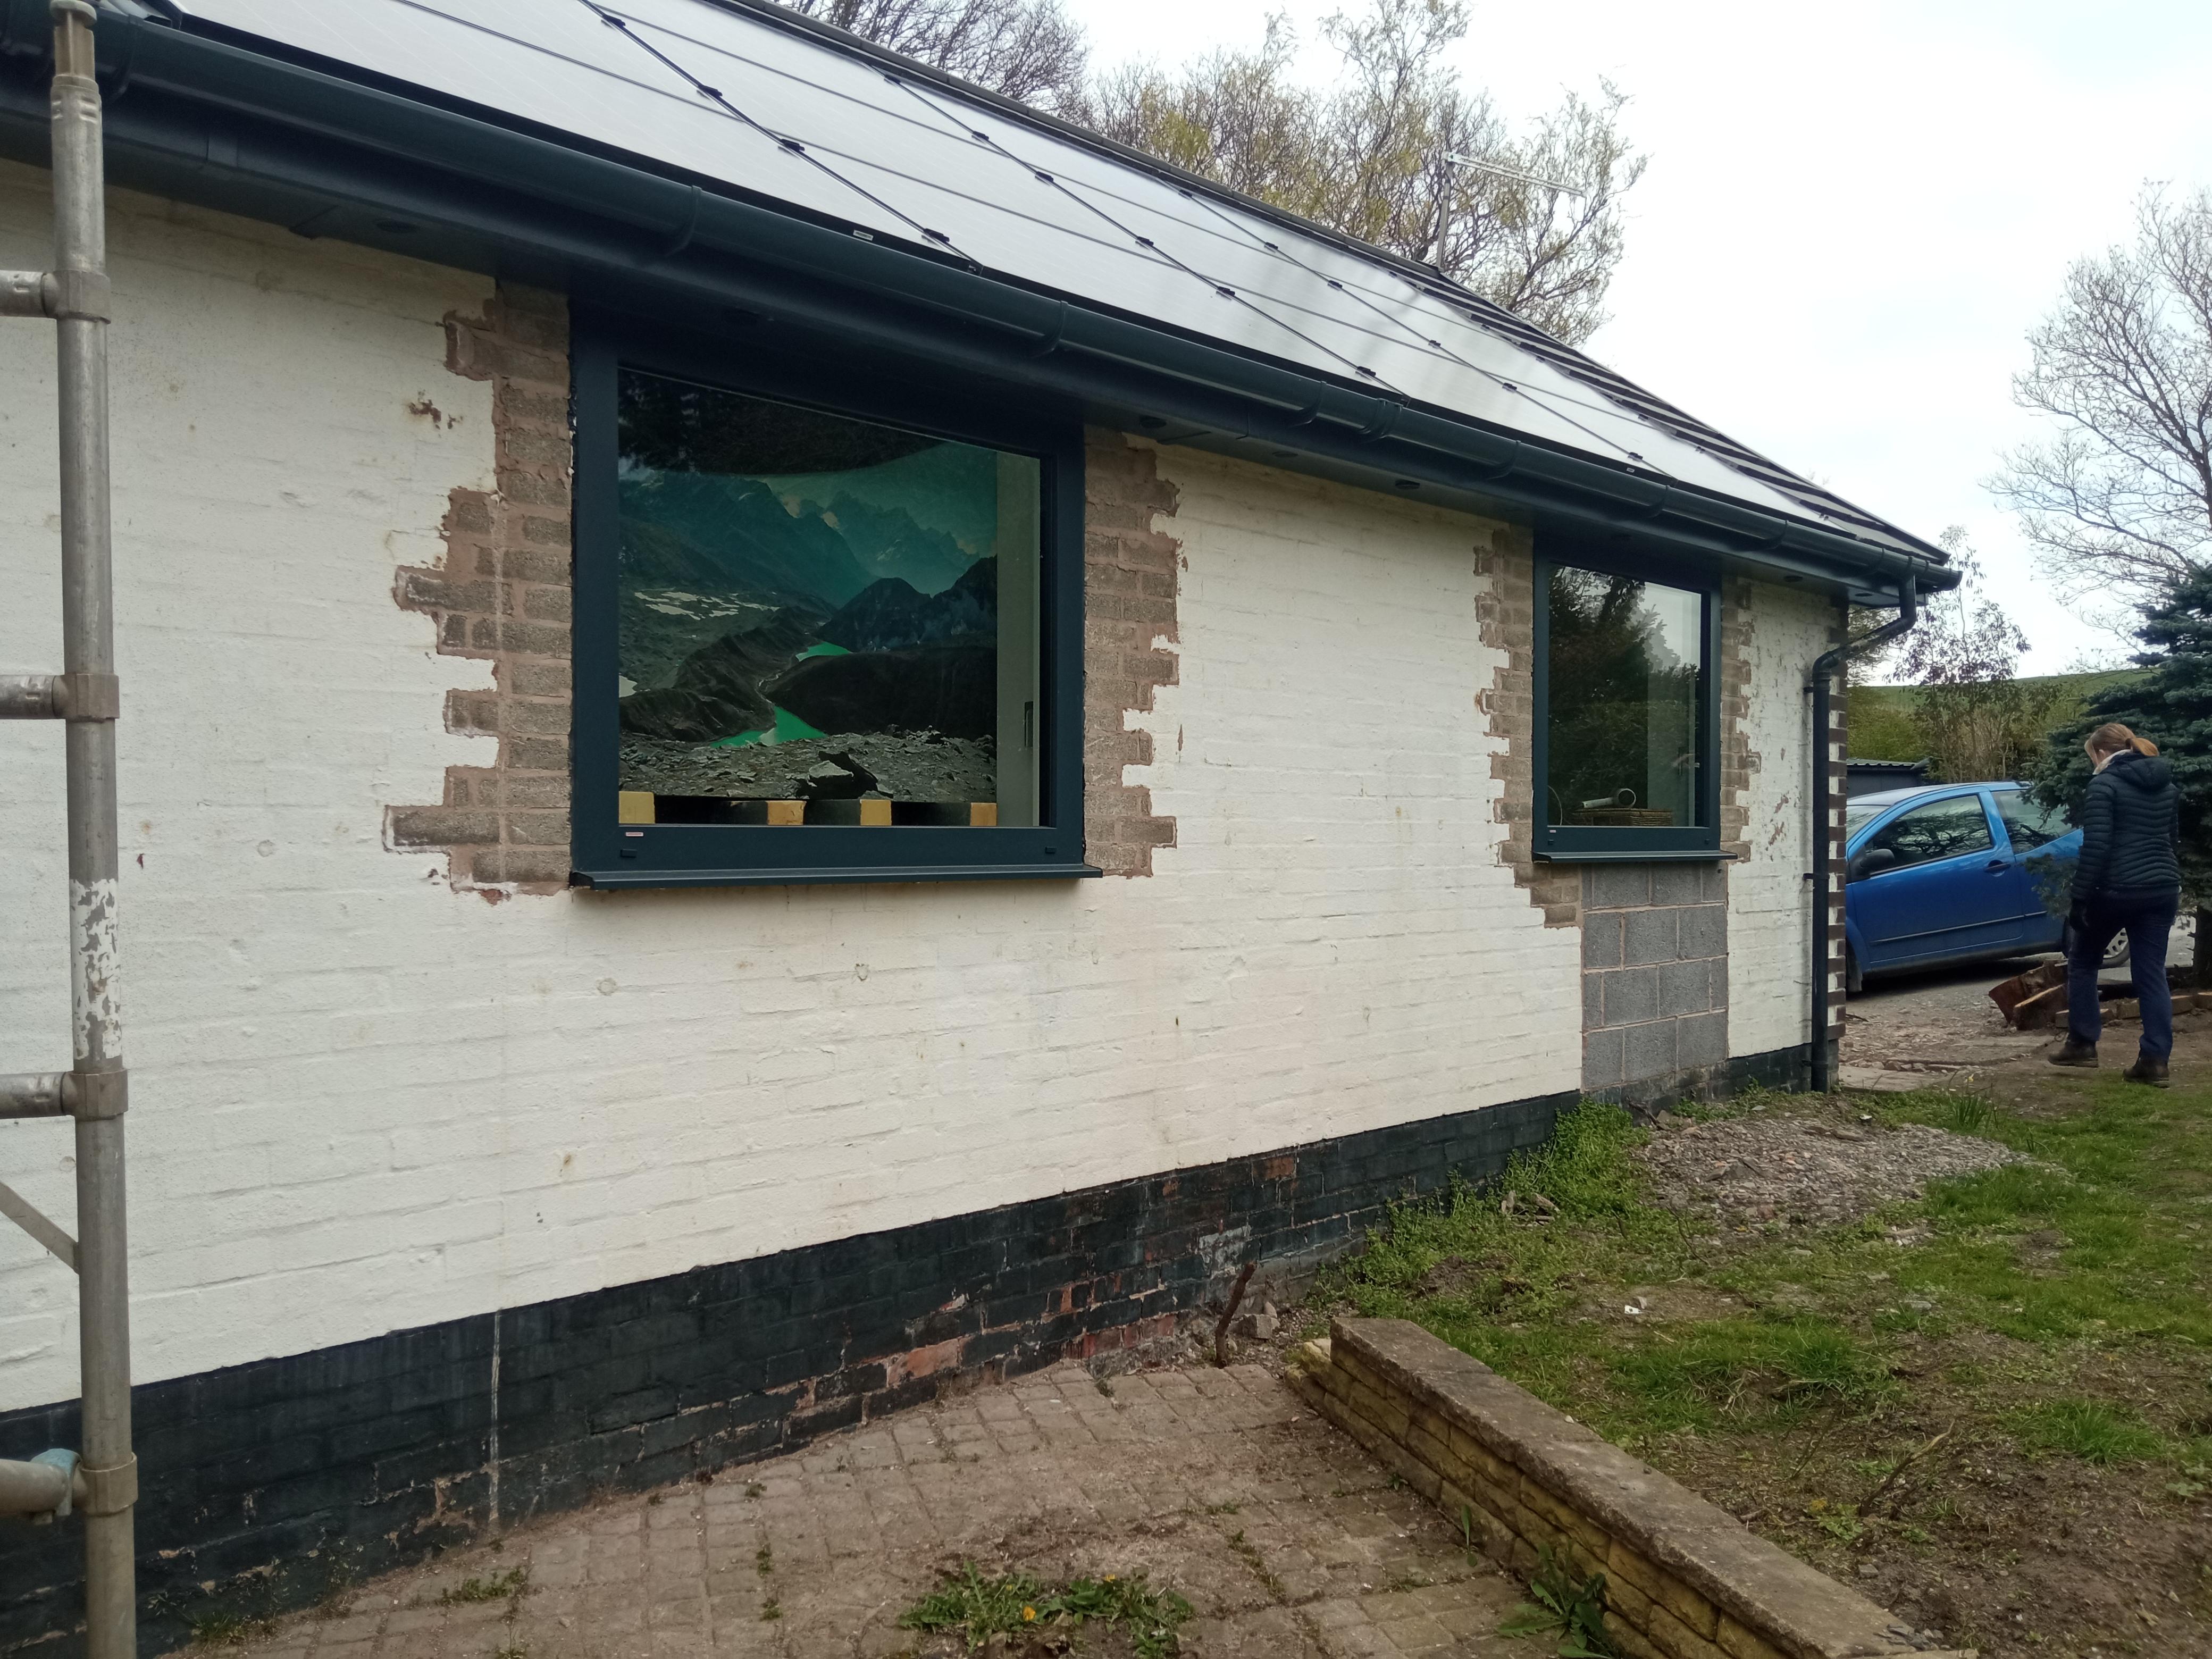
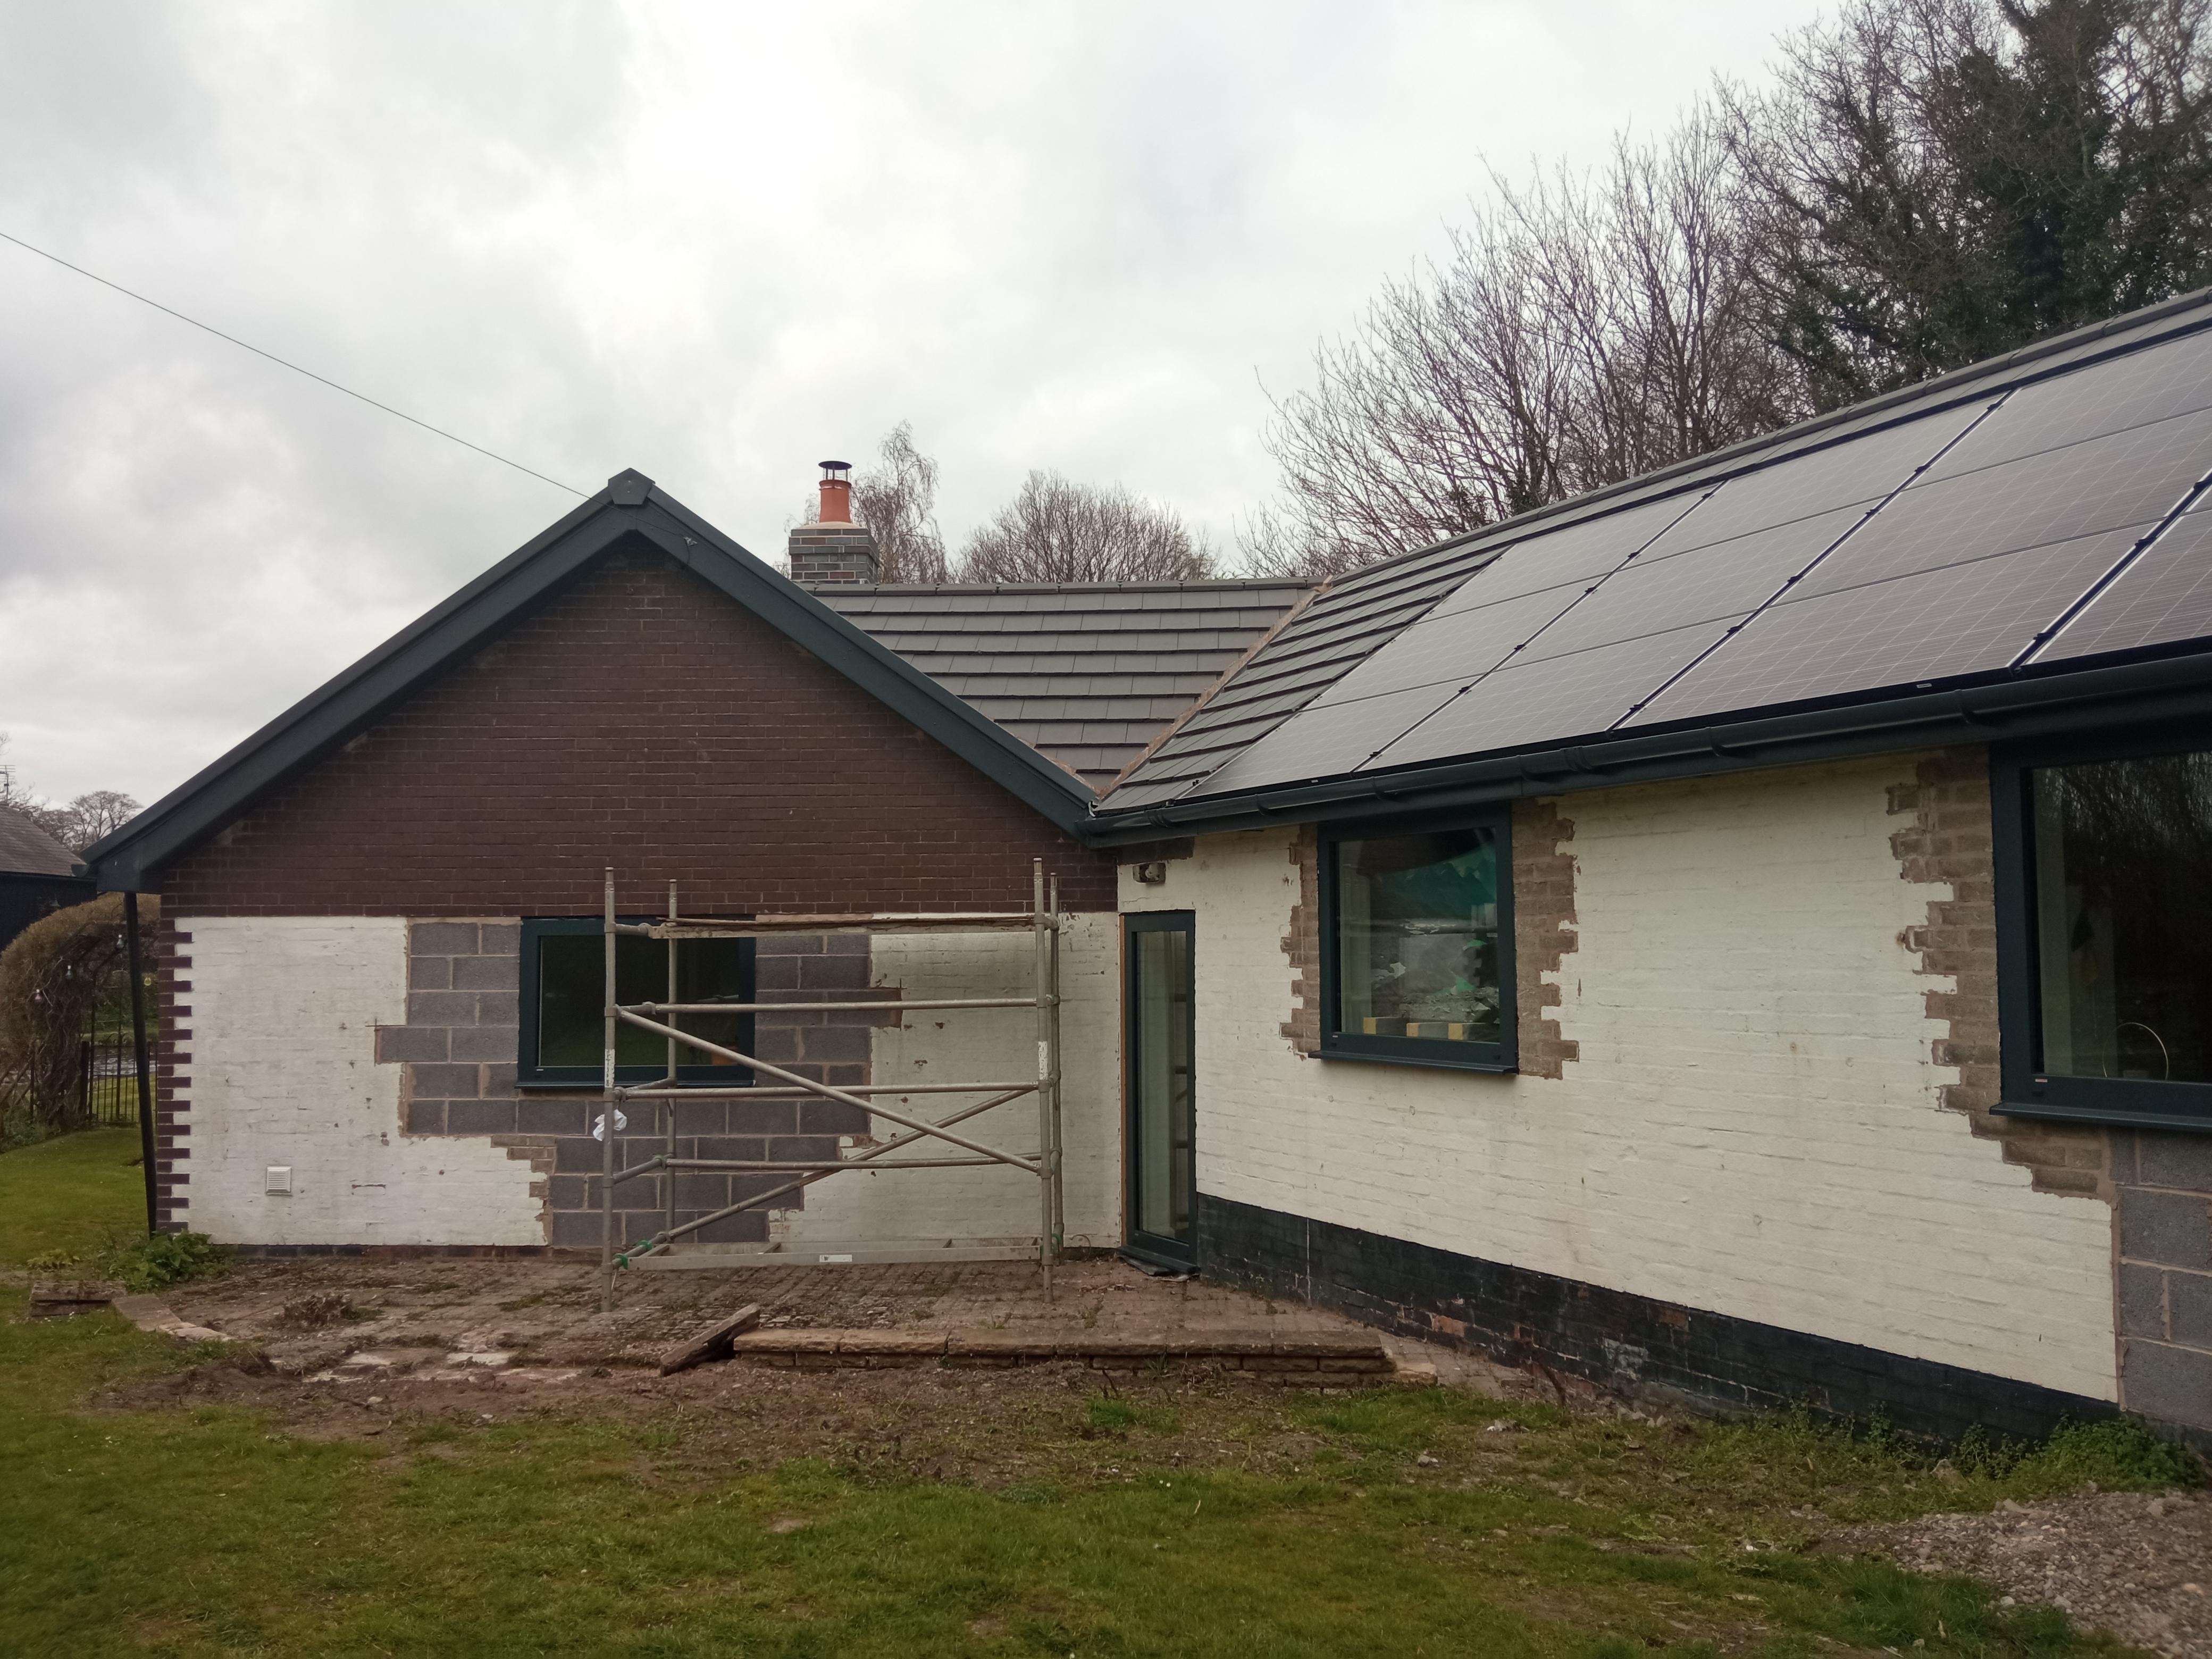
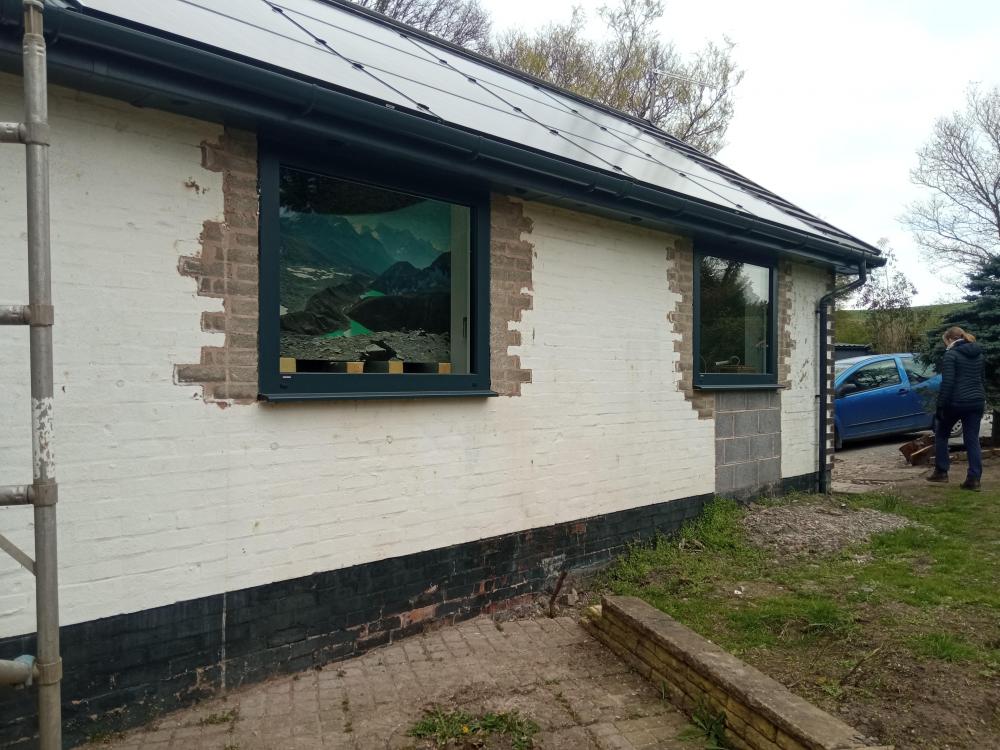
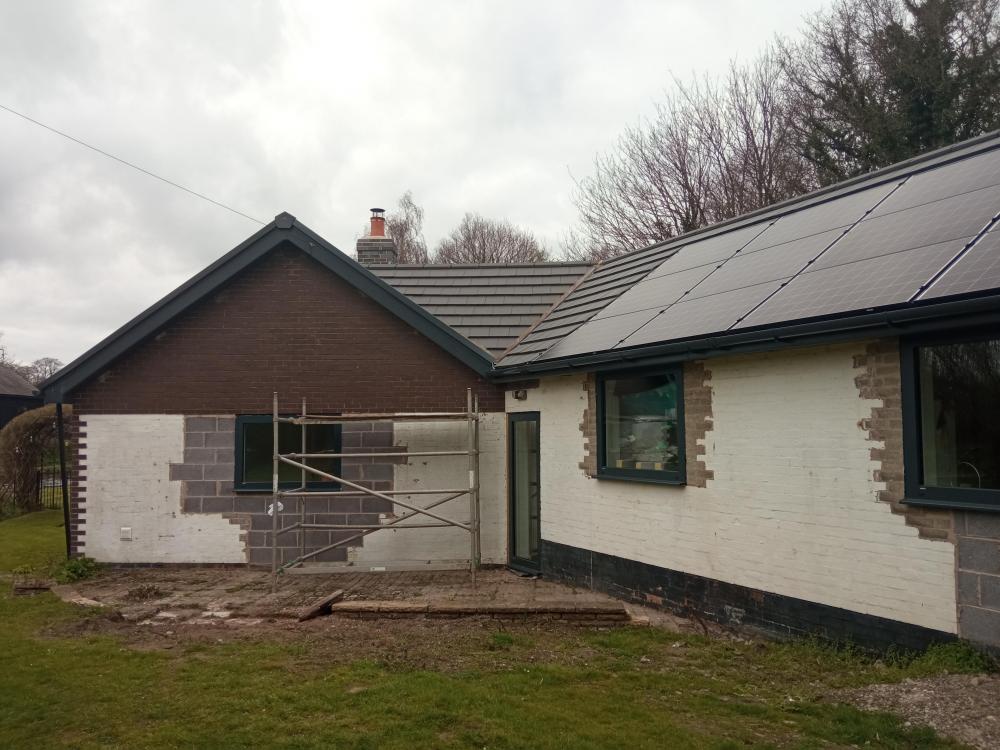
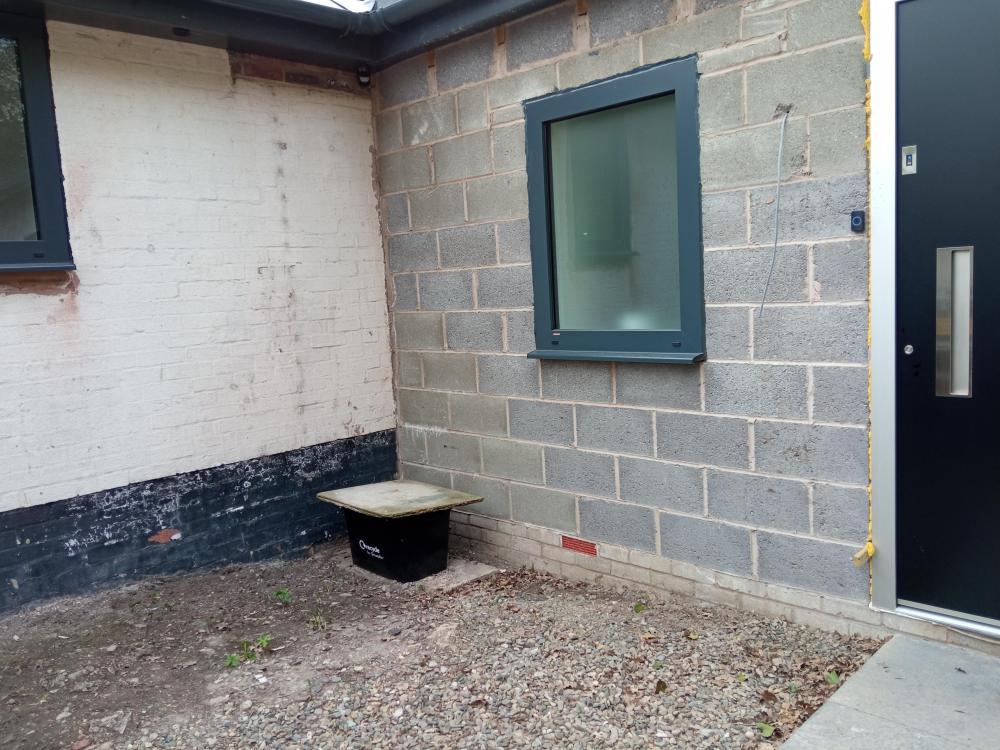
We should hopefully getting our EWI and render in the next couple of weeks thank the bl00dy heating gods because we are hoping this will improve the bills! You'll know from the original layout of our bungalow that part of the bungalow is stepped inside (to the bedroom/dressing room) as it is higher. This means the DPC is at a different level. This is going to look really odd as we have our DPC at different levels. The builder was speaking to the different reps about the render and if there was any solution because it's going to look a bit messy with the render coming lower on some parts and higher on others. It's days like today when I wish we would have knocked the whole thing down...... Pic below is our bedroom and dressing room and the bungalow is higher here as we step up two steps to access this part of the bungalow. This pic below probably demonstrates it better and you can see how it steps up. The scaffolding is in front of the living room/snug and the wall window is the middle hall. Ignore the garden walls and any paving etc... And then this is close to our front door where we have the existing part on the left which is pretty much where it is stepped inside and then our extension. We had picked Krend pure white but I've just had an email from the builder with the spec for the EWl and render and it's something called Ecorend and Jablite. Is Ecorend similar to Krend? And Jablite - is this a suitable EWI? Feeling slightly overwhelmed again! EcoRend_Spec.pdf Jablite Spec.pdf
-
Not sure if it’s ridiculous to consider solid walls for a new build. I have done a lot of googling on the subject, it seems you can get a decent U value without the wall being too thick, some suggesting even thinner than would be required with cavity walls! Im considering it because there is a flood risk, and I believe solid walls are preferable in this situation, water in the cavity wouldn’t be pleasant even if I chose closed cell insulation. Other positives could be, depending on route chosen, dense block work could be a great sound barrier, or it opens up the possibility of more interesting brick bonds. Have double the bricks would be pretty expensive though. I can’t work out if condensation is a risk, some people say it is a risk with solid walls, others think cavity wall insulation will be the next ppi for its damp risks.. That brings me on to the next thing internal or external wall insulation, it seems external is preferable, however internal offers the chance to have more interesting brick work. In my mind I think external would be more effective, however with external surely you will lose a lot of energy heating the dense blocks? You wouldn’t have this with internal insulation. Hmmm. Going around in circles with this one!
-
Hi all i am really keen to get great sound and heat insulation, searching on here if I see many have timber frame or other construction methods. I was wondering what the best way if achieving good results with a brick and block construction? I dont really have extra space for thicker floors or walls to pad it out with extra insulation, maybe there is higher spec material I can use etc? any way tips are massively appreciated
-
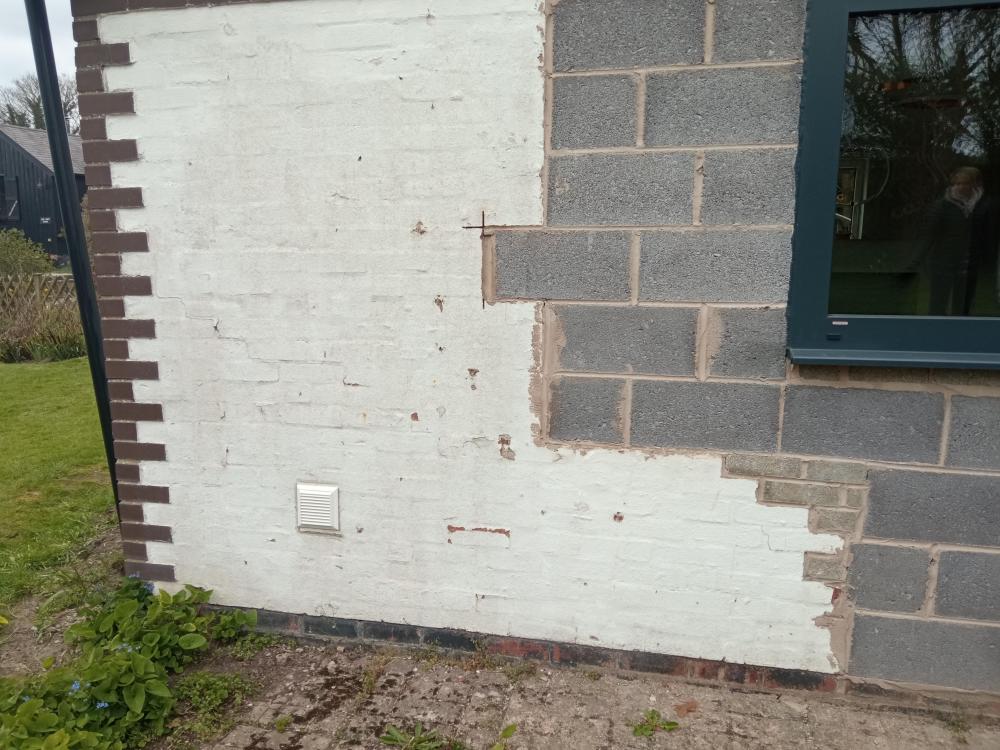
TL;DR: scroll down to "So my questions are about the render" or if you fancy a read about the context... We have a fully rendered house. The render is about 15 years old in its newest spots, maybe 20-25 years old elsewhere. The render is sand and cement. The problems with this are: It has popped (taps hollow) in the more exposed locations Rusted corner beads There are cracks everywhere Signs of water ingress in some of the worst places Numerous bits crumbling away around the bead at DPC level My original plan was to install EWI at the same time as also replacing the windows (which are also in a bad state of repair). The trouble with this is the cost. Not only in terms of the EWI, but in terms of what the EWI has a knock-on effect on. For example: Making sure EWI meets loft insulation Digging, parging, insulating below DPC Moving drains Bricking up windows that are overlapped by insulation Converting lean-to roofs to warm roofs. Moving the electricity meter Changing other services running in and out Probably replacing rainwater goods Probably replacing soffits/fascias I definitely intend to install EWI in the future. The reality for most people though is that this is extremely expensive. So I wondered what my other options were, and if I can make this project much financially tolerable for my family. Here's what I know I can do to plan for the future: Follow details to allow new windows to be moved into the insulation layer later Get the cavities fully filled (currently crap partial fill - will source some sort of foam... or something) If I have a lower initial project cost, I can spend a little more on quality for what I am actually buying, e.g. window quality If I were to not install EWI and just fix the render, I would want at least a decade, I would hope, to save for EWI with ideally NO maintenance in that time period. So my questions are about the render: Is there much point in "patching up" S&C render? What should I fill the removed sections of render with? Won't other areas go, or crack at the join between the two? Is it better to rip the lot off and start over with a modern render, e.g. silicone? Could we render over the top of the existing render? (This would reduce the space for insulation later if we also don't convert the roof to a warm roof at the same time). Would really appreciate people's knowledge on this one...
-
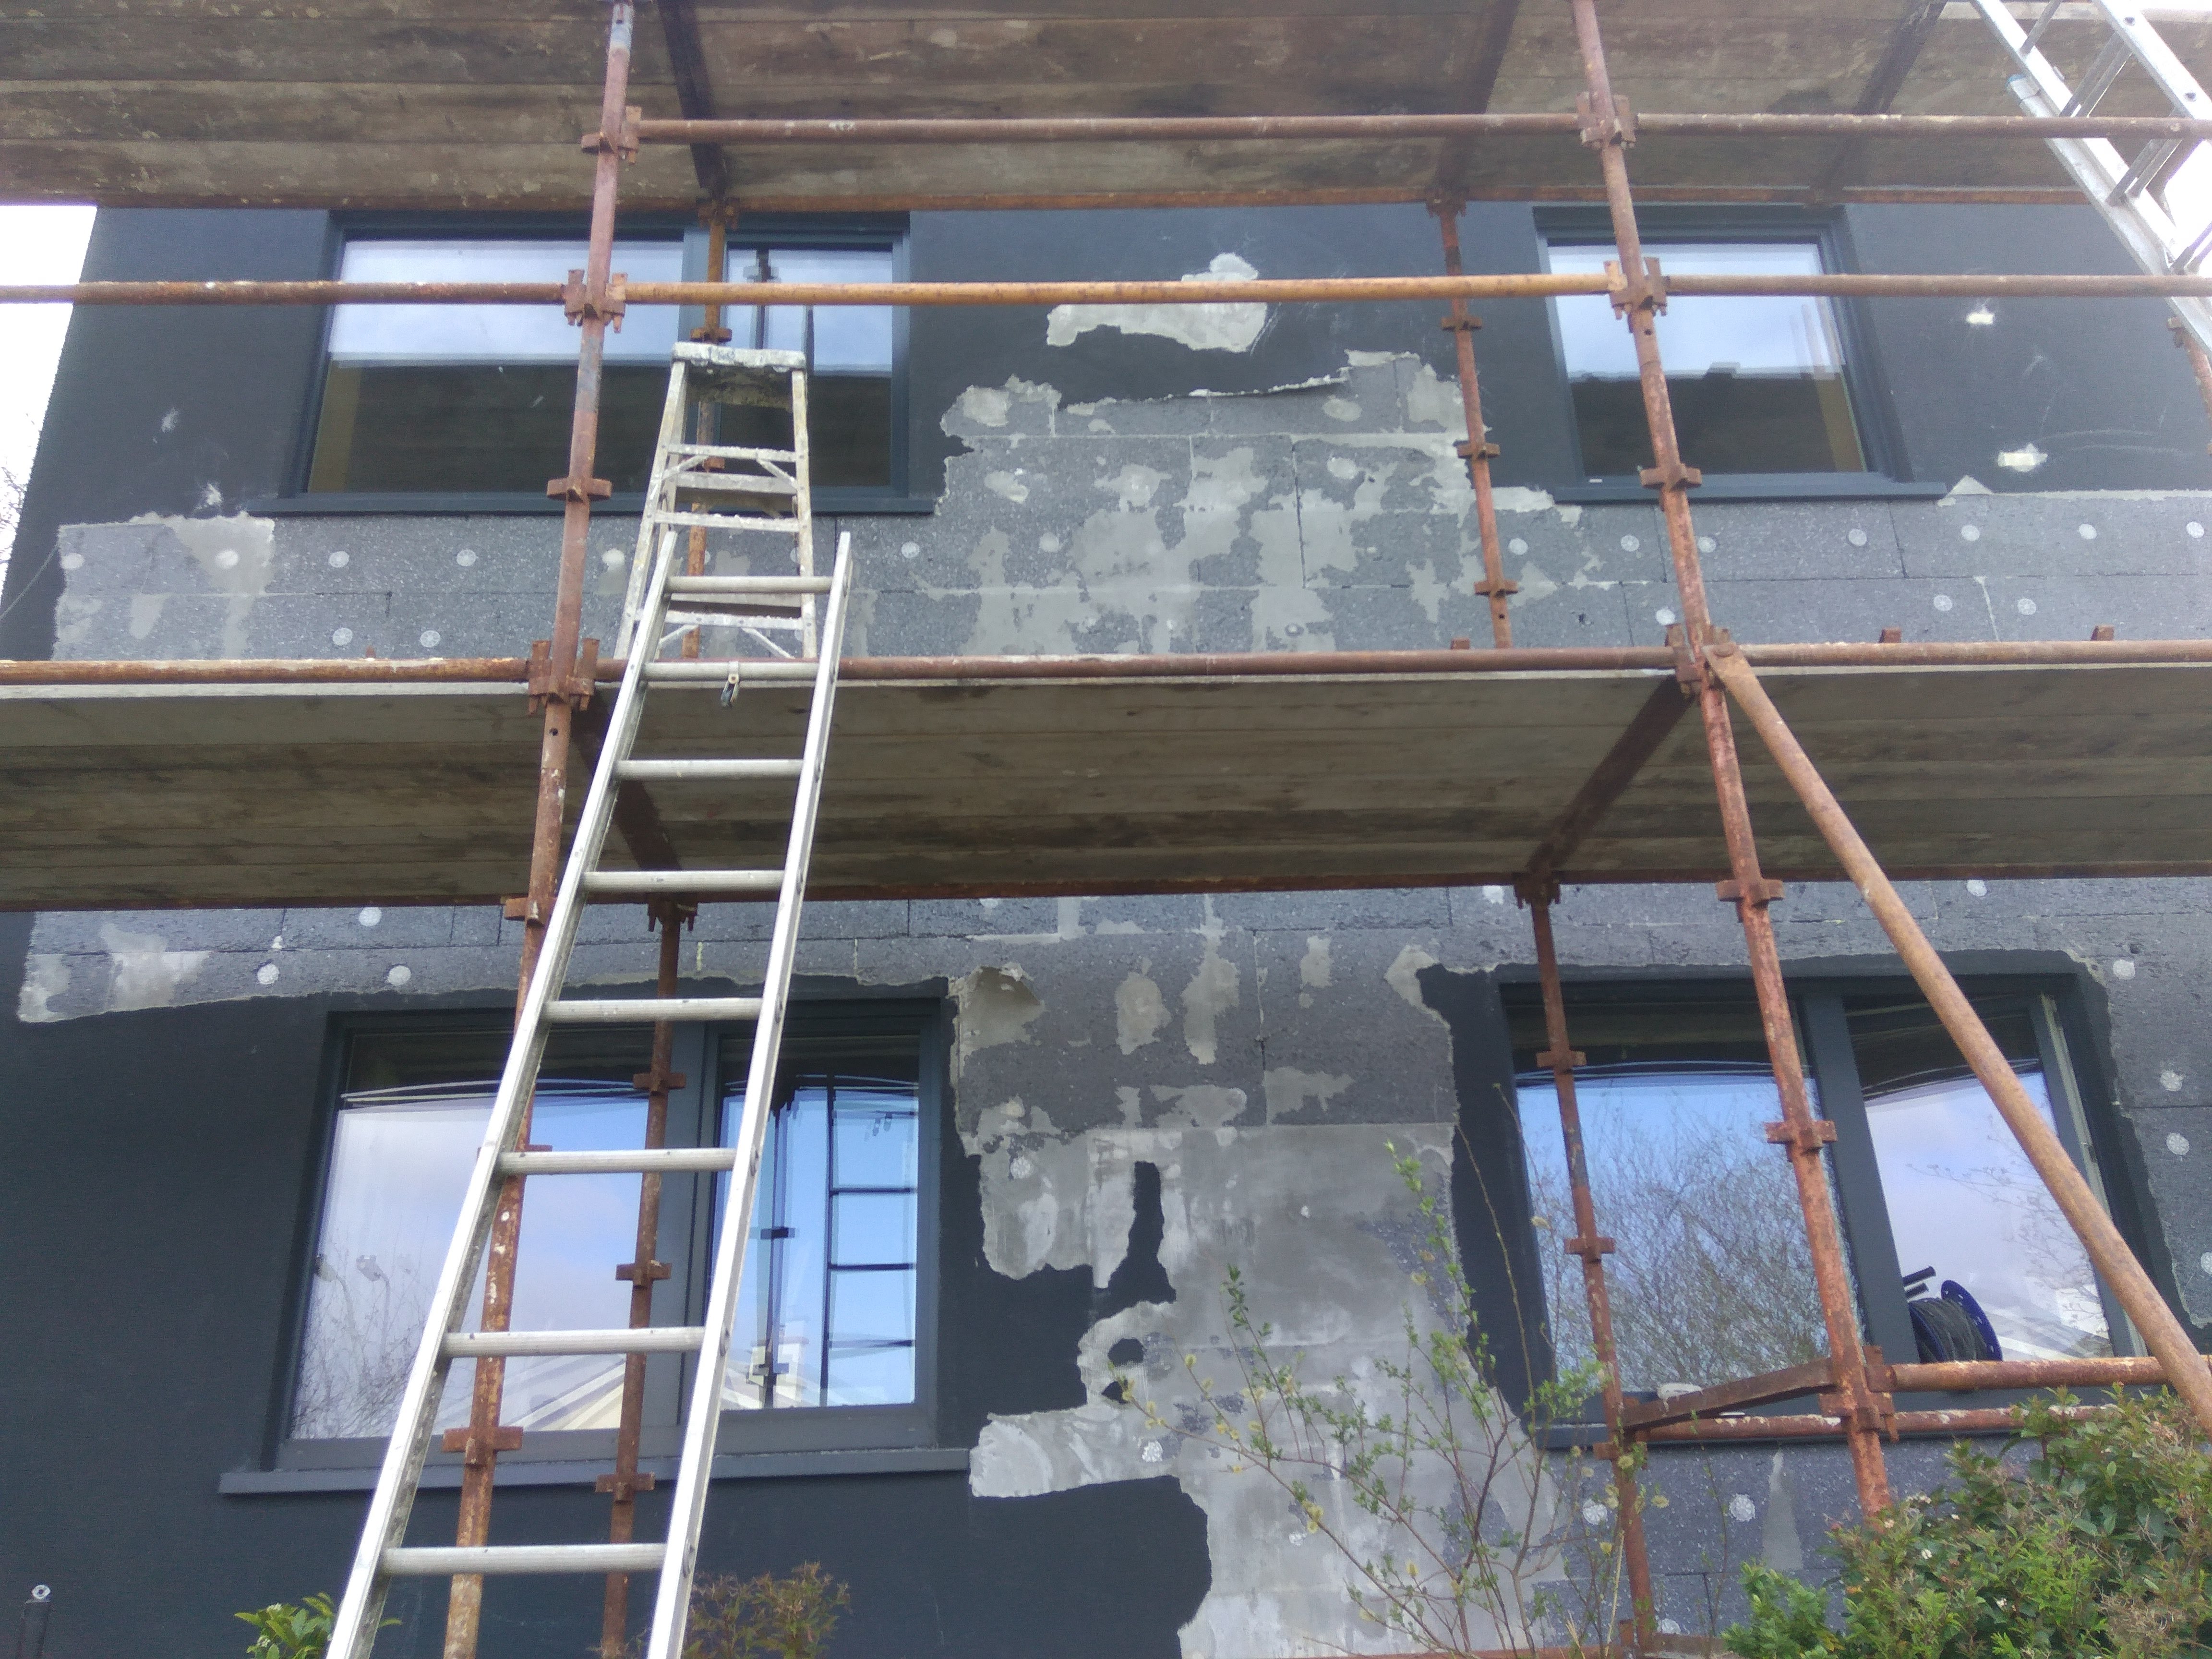
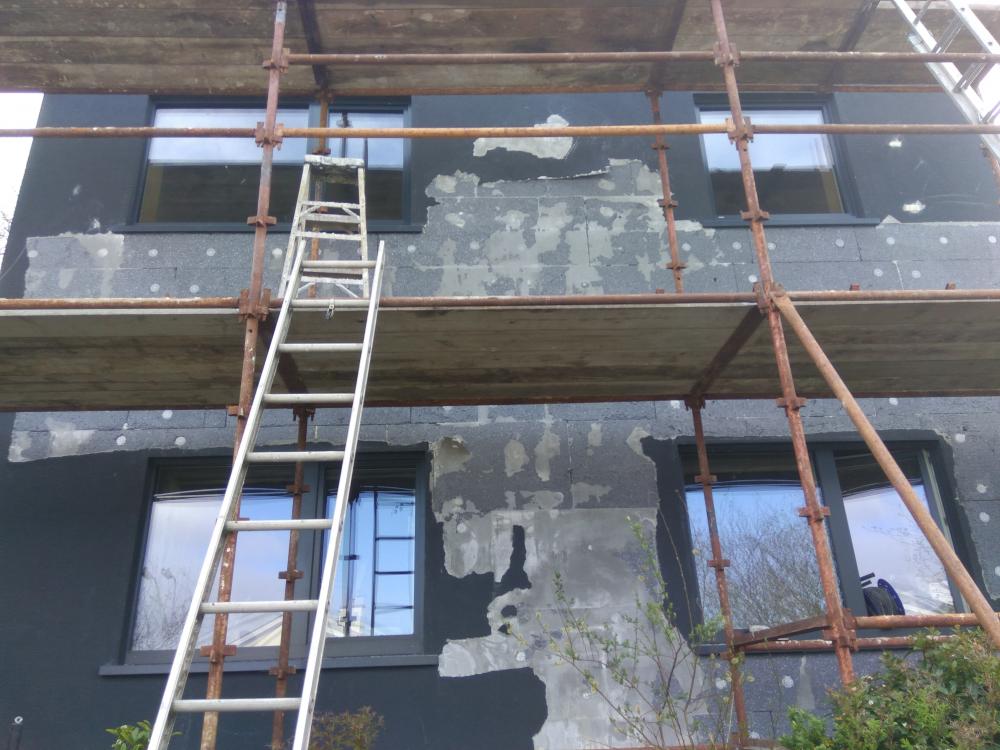
My external insulation has failed. It’s under guarantee so getting replaced at no cost. It was finished 15 months ago. The external render and mesh didn’t bond properly to the EPS and is coming away surprisingly easy. We’re still not fully sure of the cause. It’s an exposed south west facing gable so originally we though water was penetrating in someplace and causing it to bubble in an area. It was only when they started removing the bubble they noticed it was widespread and therefore not a localised water issue. If it was water at the top the render would bond fully under the window cills. We now think it’s most likely frost damage. When the base coat was applied it was very cold and think it froze before it had a chance to dry out. Lesson is don’t apply external insulation in winter or cold weather.
-
The perils of lunchtime daytime tv. Looking at the build method of a bungalow shown partly completed on TV. Newbuild solid single skin blockwork structure due to be externally insulated and rendered - but it didn't look like passive slab base. From visible details it looked like strip foundation with a conventional screeded floor ( might have been slab or beam and block under). By the look of it there are a couple of courses of a different blockwork at the ground transition - some sort of thermal blockwork maybe to offset heat loss at foundation. Standard thermalite? or is there some wonder-product block with better characteristics?
-
Branching off from my Little Brown Bungalow thread, I am doing EWI which will probably be 90-120 EPS and a thin film render, to give me a U-Value for the wall of between 0.19 and 0.23. Good so far. But I have a number of questions about "how to do" to make sure I get the detail right, and I thought it would be a good separate thread so others can pile in their Qs in future. Over at the Green Building Forum (GBF) there is an extensive literature of scores of threads about this, but digging there is like excavating Troy with a toothpick. Hence this focused thread. These are my current queries: 1 - How to Mount things on the outside of the EWI There are three categories - a) - light things (say less than 5kg), b) heavy things (5kg+), (c) really heavy things (eg porch canopy). (a) might be something like an outside light, while (b) might be something like a satellite dish. What are the current suggested best practice for this? (a) used to be "drill a 25mm hole with a shovel bit, insert a piece of pipe, fill with a stronger gun-foam, and plug/screw into that". Or alternatively to "insert and glue a plug of stronger insulation, such as a different grade EPS or Extruded Polystyrene, and mount into that". I note that there are now "EWI Spiral Insulation Anchor" fittings, like large versions of plastic plaster spirals and claim 5kg capability. (b) used to be "accept the cold spot and drill into the wall with a long fixing", but I have also seen "insert a batten or sheet of plywood under the insulation when doing it". My preference is for an alternative - eg provide a 6" diameter 6" post elsewhere for a satellite disk and a precreated cable route inside. (c) has usually been "use lighter anchors and a post against the wall that passes the load into the ground" or "freestanding post" Clearly the more complex it is made at the beginning the more cost that will be added to the install up front, but that is probably worthwhile to avoid complications later. This is the best thread I have seen over at GBF: External fittings on EWI. 2 - Gas and Electric Meters Separate thread here.: Shallower Gas Meter Boxes. 3 - Ventilation via Ceiling rather than Fans On the "minimise holes in EWI" principle, I plan to take these out through the roof. Are there any difficulties or limitations on taking bathroom and kitchen extract fans (probably not the Hob Extractor Hood) out through the ceiling and a ventilation tile, other than length of duct run etc? I need a model of heat recovery fan that will do this (usually I use through the wall Vent-Axia Lo Carbon Tempra models). 4 - Gas flues I know nothing about this wrt EWI. My small bungalow does have an old flue which goes up to a chimney. Can I use this for my boiler exhaust etc? I suspect that it will not meet the modern inspection requires for Gas Flues (ie hatches everywhere). I think I can find a way around this reasonably easily. 5 - Controlling mad men with drills (Hello Virgin) This is tricky since my property will be rented. I need to stop the visiting driller killers from putting holes in my nicely warm and airtight walls. I can do things such as a clause in the rental contract, tenant education etc - that will work with longer term tenants. I suspect the best way will be that plus a pre-determined duct with a drawstring coming (eg) into an airtight, insulated built in cabinet in the appropriate location. Another option is to have the cable runs in place first. I would be most interested to here comments or variations on any of the above. Thanks Ferdinand