PeterW
-
Posts
18480 -
Joined
-
Days Won
207
Everything posted by PeterW
-

I need to order some footing blocks, what types?
PeterW replied to epsilonGreedy's topic in Foundations
Never seen that - got any details ..?? This has the potential to affect your blockwork / build up so I’d try and get it resolved sooner rather than later. As @Declan52 says, bear in mind that commercial builders test 1 in 4/5 so you’re building 1, so your test needs to be the thing you aim for. £250 on tape is a good investment. -
I usually drill a 6mm hole and put a 4mm stainless pan head in to hold it down so it can move sideways but not upwards
-
I need to order some footing blocks, what types?
PeterW replied to epsilonGreedy's topic in Foundations
I currently have a build that is “standard” construction but has a target top B rating (not putting solar on to get an A) that is traditional build. Total cost to date - including £8k kitchen - is coming in at £775/sqm. It’s not deluxe, it’s standard construction, but it’s about attention to detail. Floor is 150mm PIR, walls are 150mm blown bead with some areas 25mm overboard, roof is 200mm Earthwool with 25mm or 50mm overboarding. All glazing is triple glaze uPVC. Airtightness is plastic membrane, foil taped joints on all PIR internally. MVHR is a commercial Mitsubishi unit, heating is UFH and ASHP. My - and the clients - notion of spending close to £1m is to get something that actually meets specification. It’s not to do with practices, it’s to do with getting what you paid for..! The reason I don’t like B&B is that unless it’s for specific ground conditions, it is more expensive and labour intensive than a ground bearing slab. The reason a lot of house builders use it is that they also don’t need to remove as much top surface generally with B&B so their muck away costs are less. On individual builds, a single slab of concrete with the UFH built in is cheaper and more effective as it is also dry enough to finish long before the end of the build unlike screeds that can need force drying. Most mainstream builders see UFH as the plumbers job and they aren’t on site until the shell is up and watertight as all underground services are completed by the groundwork teams. Having a plumber into a site for 1-2 days to fit UFH at ground works level would not be easy or cheap to schedule - hence why B&B at groundwork level followed by insulation pipe and screed at first fix is the norm. As you're building a single build you don’t need to follow this and tbh you can get a better finish for the same money the big boys play at per plot if you work hard however you need to save on the fabric where possible and work out the best way to maximize spend. Cost vs Time is the only equation a self builder really needs to focus on, quality should never be compromised. -
I need to order some footing blocks, what types?
PeterW replied to epsilonGreedy's topic in Foundations
Where is your DER/DFEE that was submitted as part of your building regs submission ..?? That is your starting point. And I stick by what I said - high end UFH and 100mm PIR do not equal quality build. On Saturday I did a pre-plaster inspection for a house that is circa £825k when complete - it has UFH too - and I’ve done a list of about 40 items to be rectified before it’s closed up. I will need to go back and check them before it’s finished however I’ve got a good relationship with the site manager now who understands I’m picking up on detail that their client expects on a major project such as this. The house has been inspected by a major warranty provider and BRegs supplier and has been passed however none of what I have picked up would be classed as not meeting the Approved Documents. Getting a decent air test result with 2 blocks missing in a wall into an integral garage could be fun though ... devil is in the detail ..! -
Brick from sloping roof upwards is single skin brickwork. Nothing else needed
-
I need to order some footing blocks, what types?
PeterW replied to epsilonGreedy's topic in Foundations
Does your local builder add 55mm of additional internal PIR wall insulation to his “top end” builds too to make sure his 100mm floor insulation is sufficient to meet the overall DER/TER..? Happy to have the debate. I’d suggest a light read of SAP 2012 (Appendix R may be useful) and then run your build through with 0.30 as the floor numbers and see where the DER comes out. What you will quickly realise is the floor and roof losses in SAP will dwarf any of your other losses so unless you get to below 0.13 and preferably 0.11 for floor, your chances of hitting the DER will be nil without 480mm of conventional insulation in the attic, or 200mm rigid with 40mm overlay at roof level. (The next largest loss in a building fabic exc windows.) Given the massive cost and complexity of this, adding an additional 40mm below the floor seems a no brainier to me...?? -
Resolving untraceable, uncapped water supply pipe
PeterW replied to Ferdinand's topic in General Plumbing
Doubt that STW will be bothered as a water pipe within a property boundary is deemed to be the owners responsibility. You could always get a Cat and genny and see what direction it heads. -
Top section doesnt need block and you need to lose the 50mm cavity around the fire back as before.
-
I need to order some footing blocks, what types?
PeterW replied to epsilonGreedy's topic in Foundations
That doesn’t meet Building Regulations so if he is, he’s a cowboy. To meet the 0.11 elemental value you then you need 140mm of PIR. I suggest a bedtime reading of the Building Regulations may enlighten on a few points. -
Designing for blown beads at the cavity bottom.
PeterW replied to epsilonGreedy's topic in Heat Insulation
Unless you’re planning on moving your entire house to a severe rated zone, why are you even bothering to debate this ..? The building industry has been full filling with bead for over 25 years and I’ve not heard of an issue - it’s also very common in Ireland (as @Declan52 was referring) and they get a lot more rain than the rest of the UK. If you’ve already submitted - and have had accepted - your BRegs plans then what’s the issue building to these ..?? Be careful making amendments as you may be made to change the work at a later date -
I would fit the front boards and add the mesh from behind then fit the rear boards with screws so you can remove for maintenance in the future. 1/2” fine S/S Mesh is available in big rolls.
-
@willbish are you having UFH in that too as it’s going to be a serious heat sink if you are ! As @JSHarris has said, 250mm is thick and even if the SE is looking at uneven stress loading, putting 2 or 3 beams at 250mm with the remainder at 100mm would be ample - unless you’re building a car park ..??!
-
Got a table saw ...?? run some tantalized 4x2 through the saw with a 22 degree bevel so it sheds water to make horizontal rails. Then it’s as per your design with just the vertical boards and gaps. Have a look at any new cow shed for inspiration....
-
I need to order some footing blocks, what types?
PeterW replied to epsilonGreedy's topic in Foundations
10.4N rather than 7N then ..? -
I need to order some footing blocks, what types?
PeterW replied to epsilonGreedy's topic in Foundations
Is that lights or heavys..? -
Designing for blown beads at the cavity bottom.
PeterW replied to epsilonGreedy's topic in Heat Insulation
I’ve never seen it in nearly 30 years. To soak through 4” of brick at any rate to cause water in the cavity would need some serious hydraulic pressure. If it was an issue then full fill cavity insulation wouldn’t be allowed. -
I need to order some footing blocks, what types?
PeterW replied to epsilonGreedy's topic in Foundations
Door thresholds, ceiling heights, outside doors, the list goes on... -
Both FIT AND export payments to be cancelled next year
PeterW replied to Jeremy Harris's topic in Photovoltaics (PV)
Probably ... a 1% addressable market would make it attractive but if google is the source of a definitive data set then I would be worried. DC lighting on a boat is a very different beast to a house - just look at the sheer volume of wiring to begin with. DC lighting in boats is also limited in the UK due to archaic regulations on inshore boats, and legacy design in yachts as inverters are seen as inefficient and a heavy piece of equipment that is not essential. Most modern larger boats use 120 or 230v depending on where they are built so DC lighting isn’t a major player and is essentially niche market. It’s based around the 12/24v battery technology that has not changed in decades. -
Yes - all in Part M.
-
Dig about 2” of the EPS out and fill it with rapid cement if you’re worried.
-
There are millions of Siamp ones in use - unless you’re up for buying Geberit and doing some sort of Frankenstein’s inlet on it, as the main nut where the pipe is I would expect is pretty non standard ...
-
Designing for blown beads at the cavity bottom.
PeterW replied to epsilonGreedy's topic in Heat Insulation
Unlikely - how do you plan to get moisture into the cavity other then when it’s being built...?? -
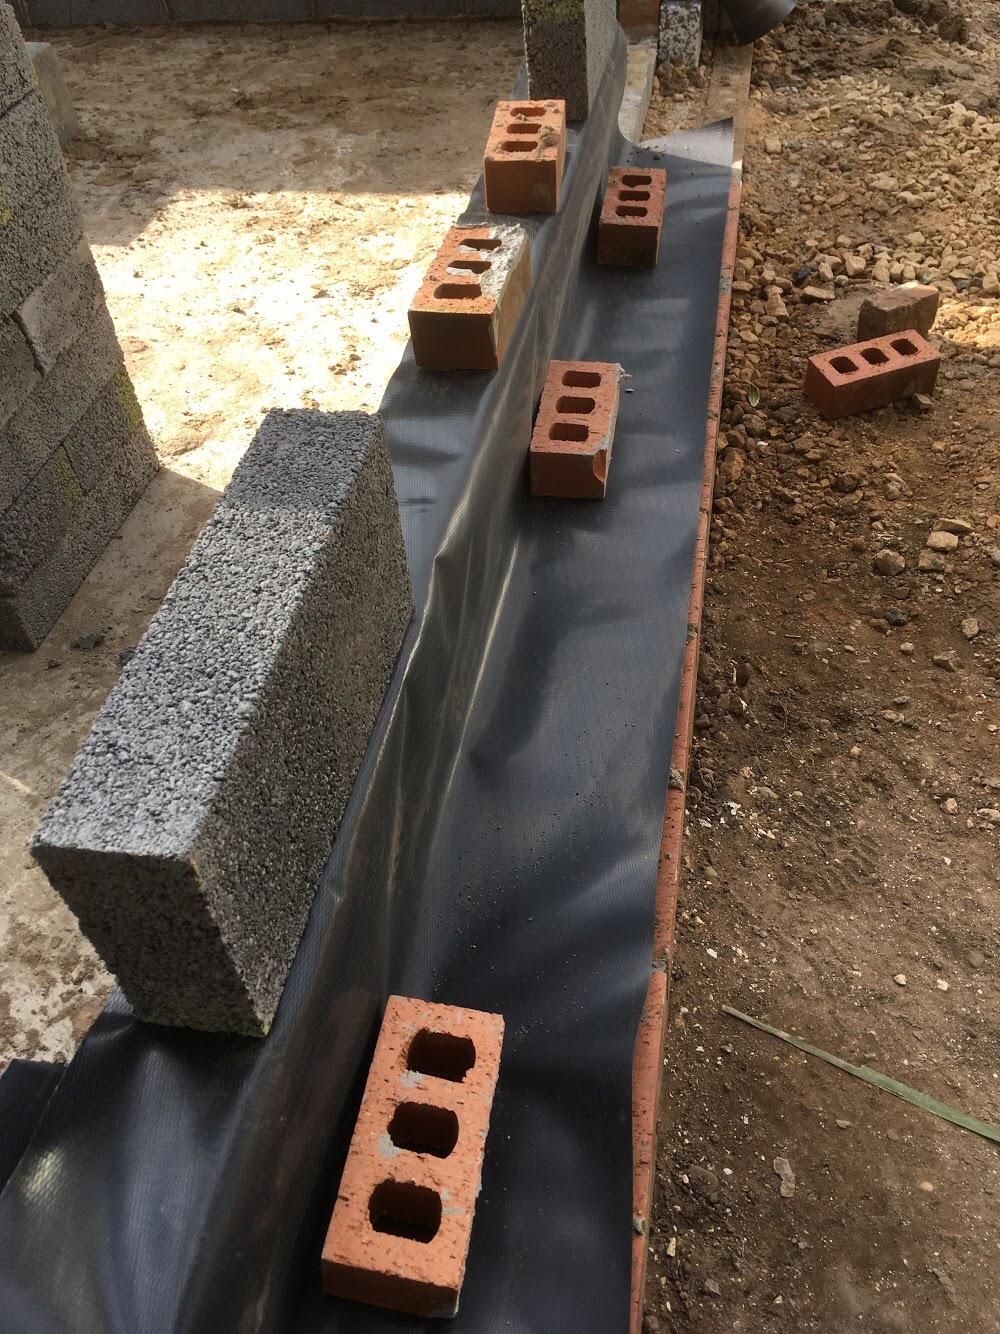
Designing for blown beads at the cavity bottom.
PeterW replied to epsilonGreedy's topic in Heat Insulation
I did just this fill however : - below ground is 100mm EPS with a 25-45mm 6:1 sand cement fill in the remaining cavity. - there is a second DPM cavity tray up the inside of the first block lapped down and across to the outer DPM - all cavities were cleaned (and hoovered....) before the closers installed and beads blown in.
-
Lever it up and it will unclip from that and that is a 17mm nut...
-
Yes but only when you’ve got it out.... water valve off and then grab the top of the fill valve near the middle and lift it up and back - it should come loose. Bring it out through the front then undo the nut.