PeterW
-
Posts
18480 -
Joined
-
Days Won
207
Everything posted by PeterW
-
Fill valve is fecked then. Can be replaced fairly easy - silver valve turned off and the plastic bit before the threaded hose clips into the white retainer. All comes out and the hose detaches. Should have a manufacturer on the valve as they need the slim plastic section to clip in.
-
Ok the float is too far up - turn it anti clockwise so the float moves downward. Flush it and see if the water level stops below the top of the white tube.
-
It will lift up when the float hits the top and then the lever lifts and the valve stops.
-
Right need you to try and unclip the rod and move it down slightly to move the lever up and down.


-
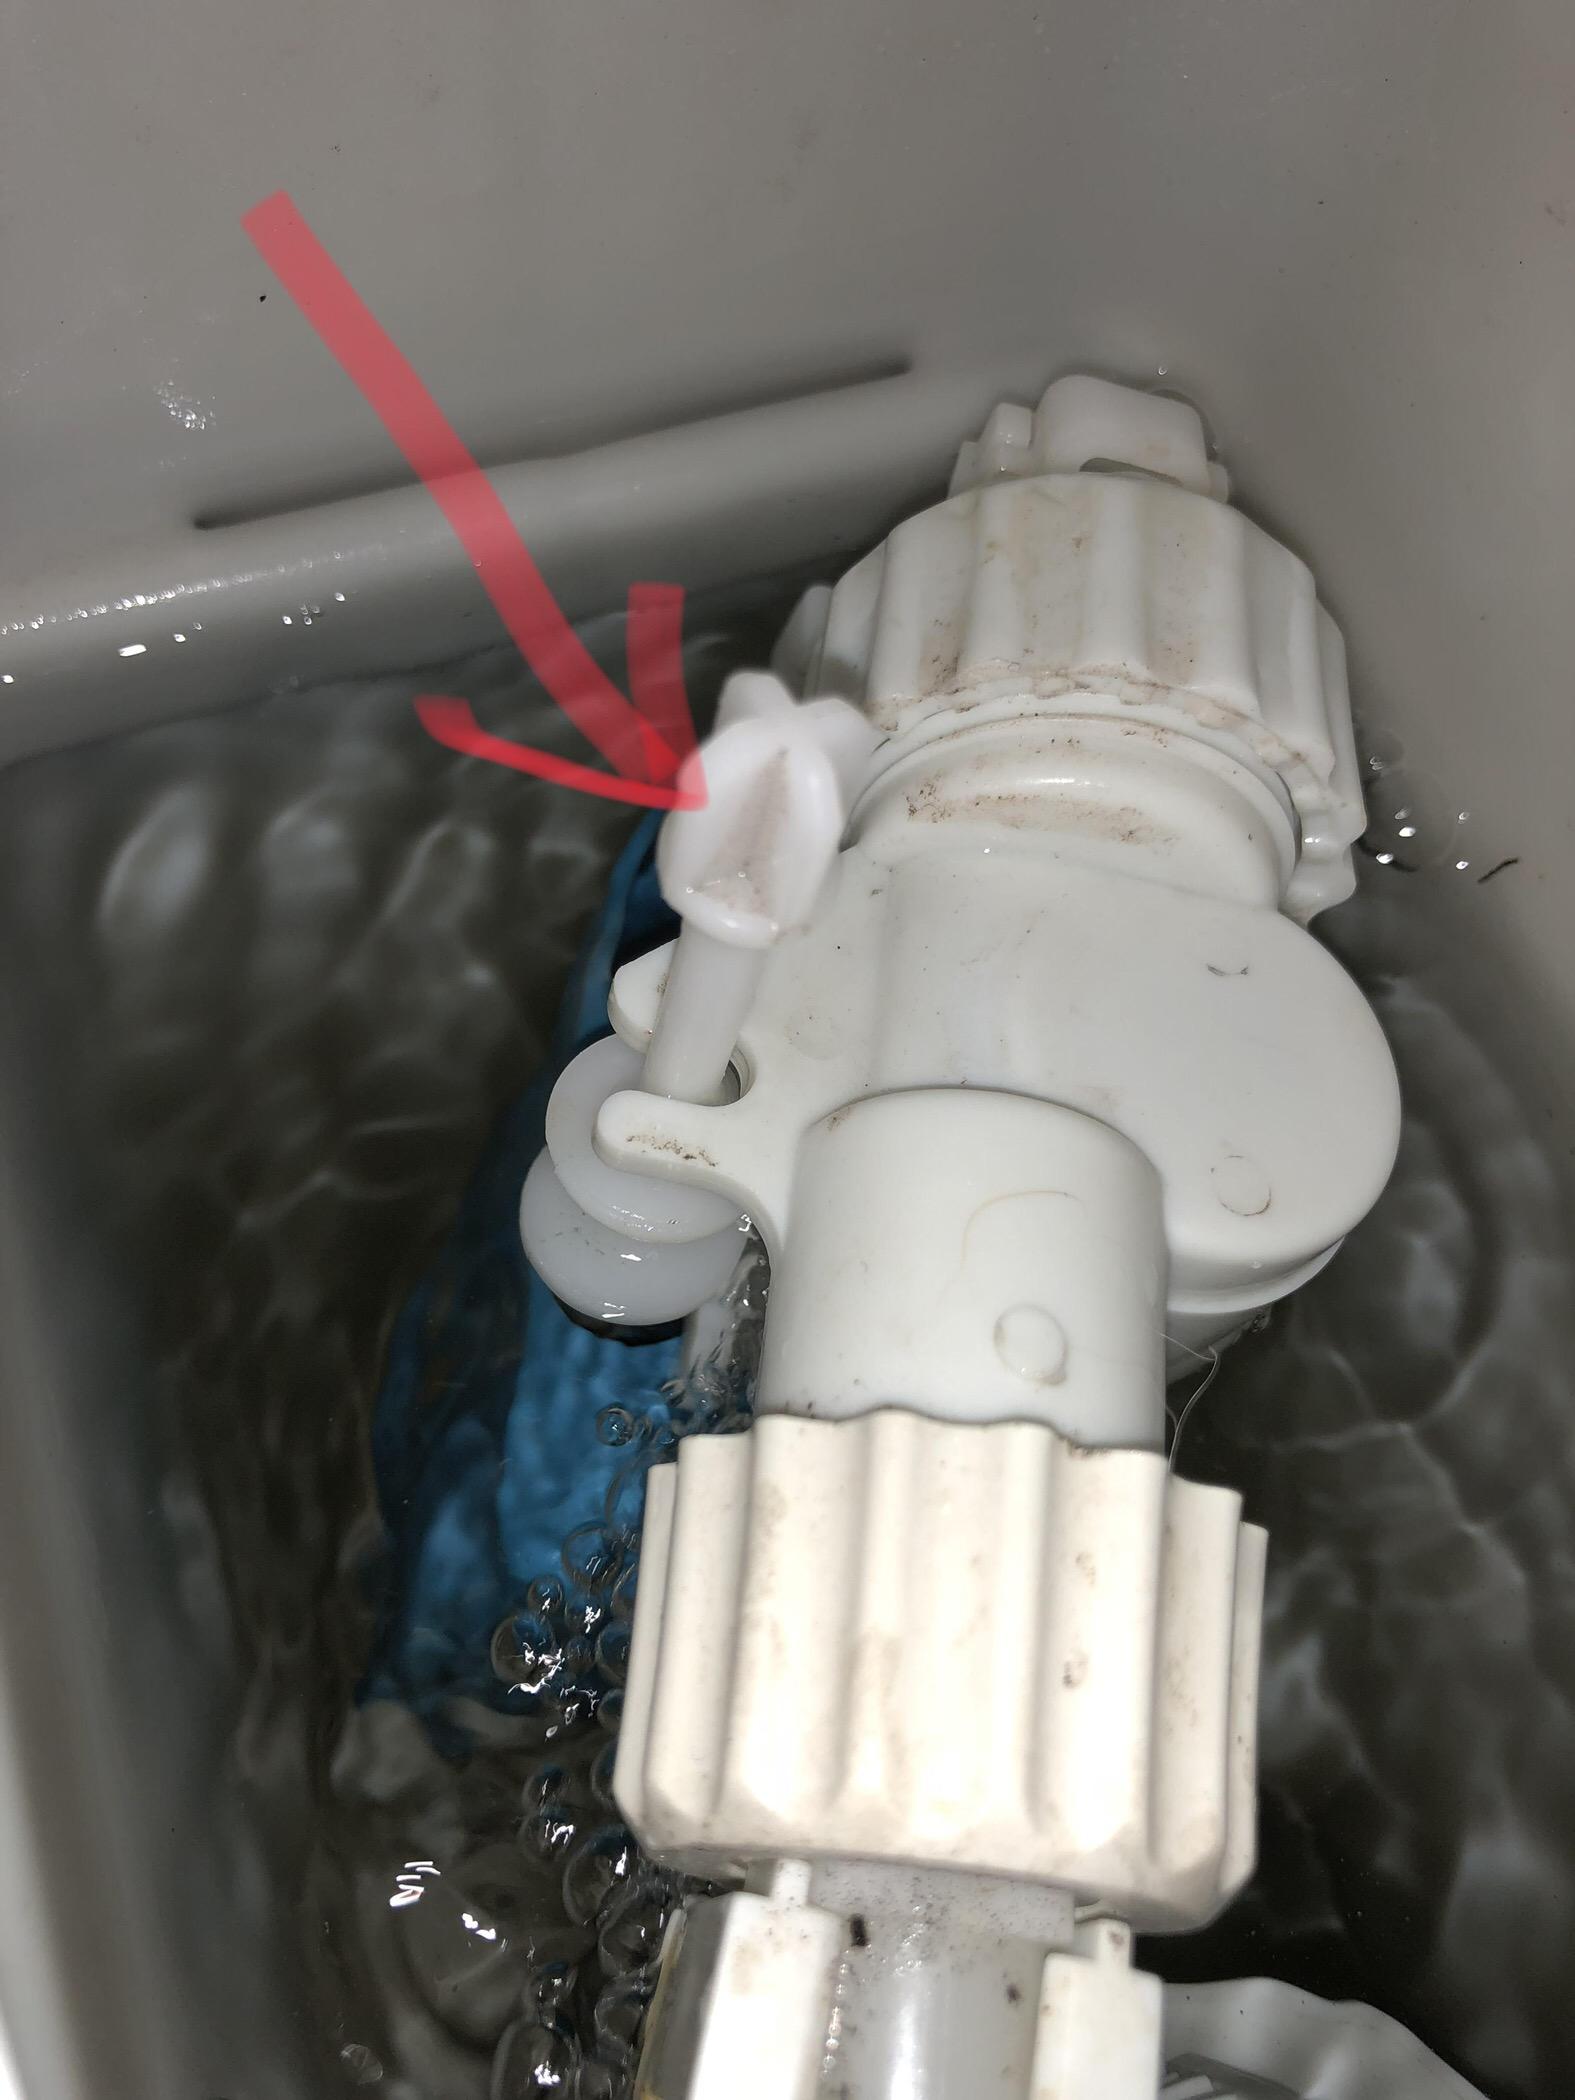
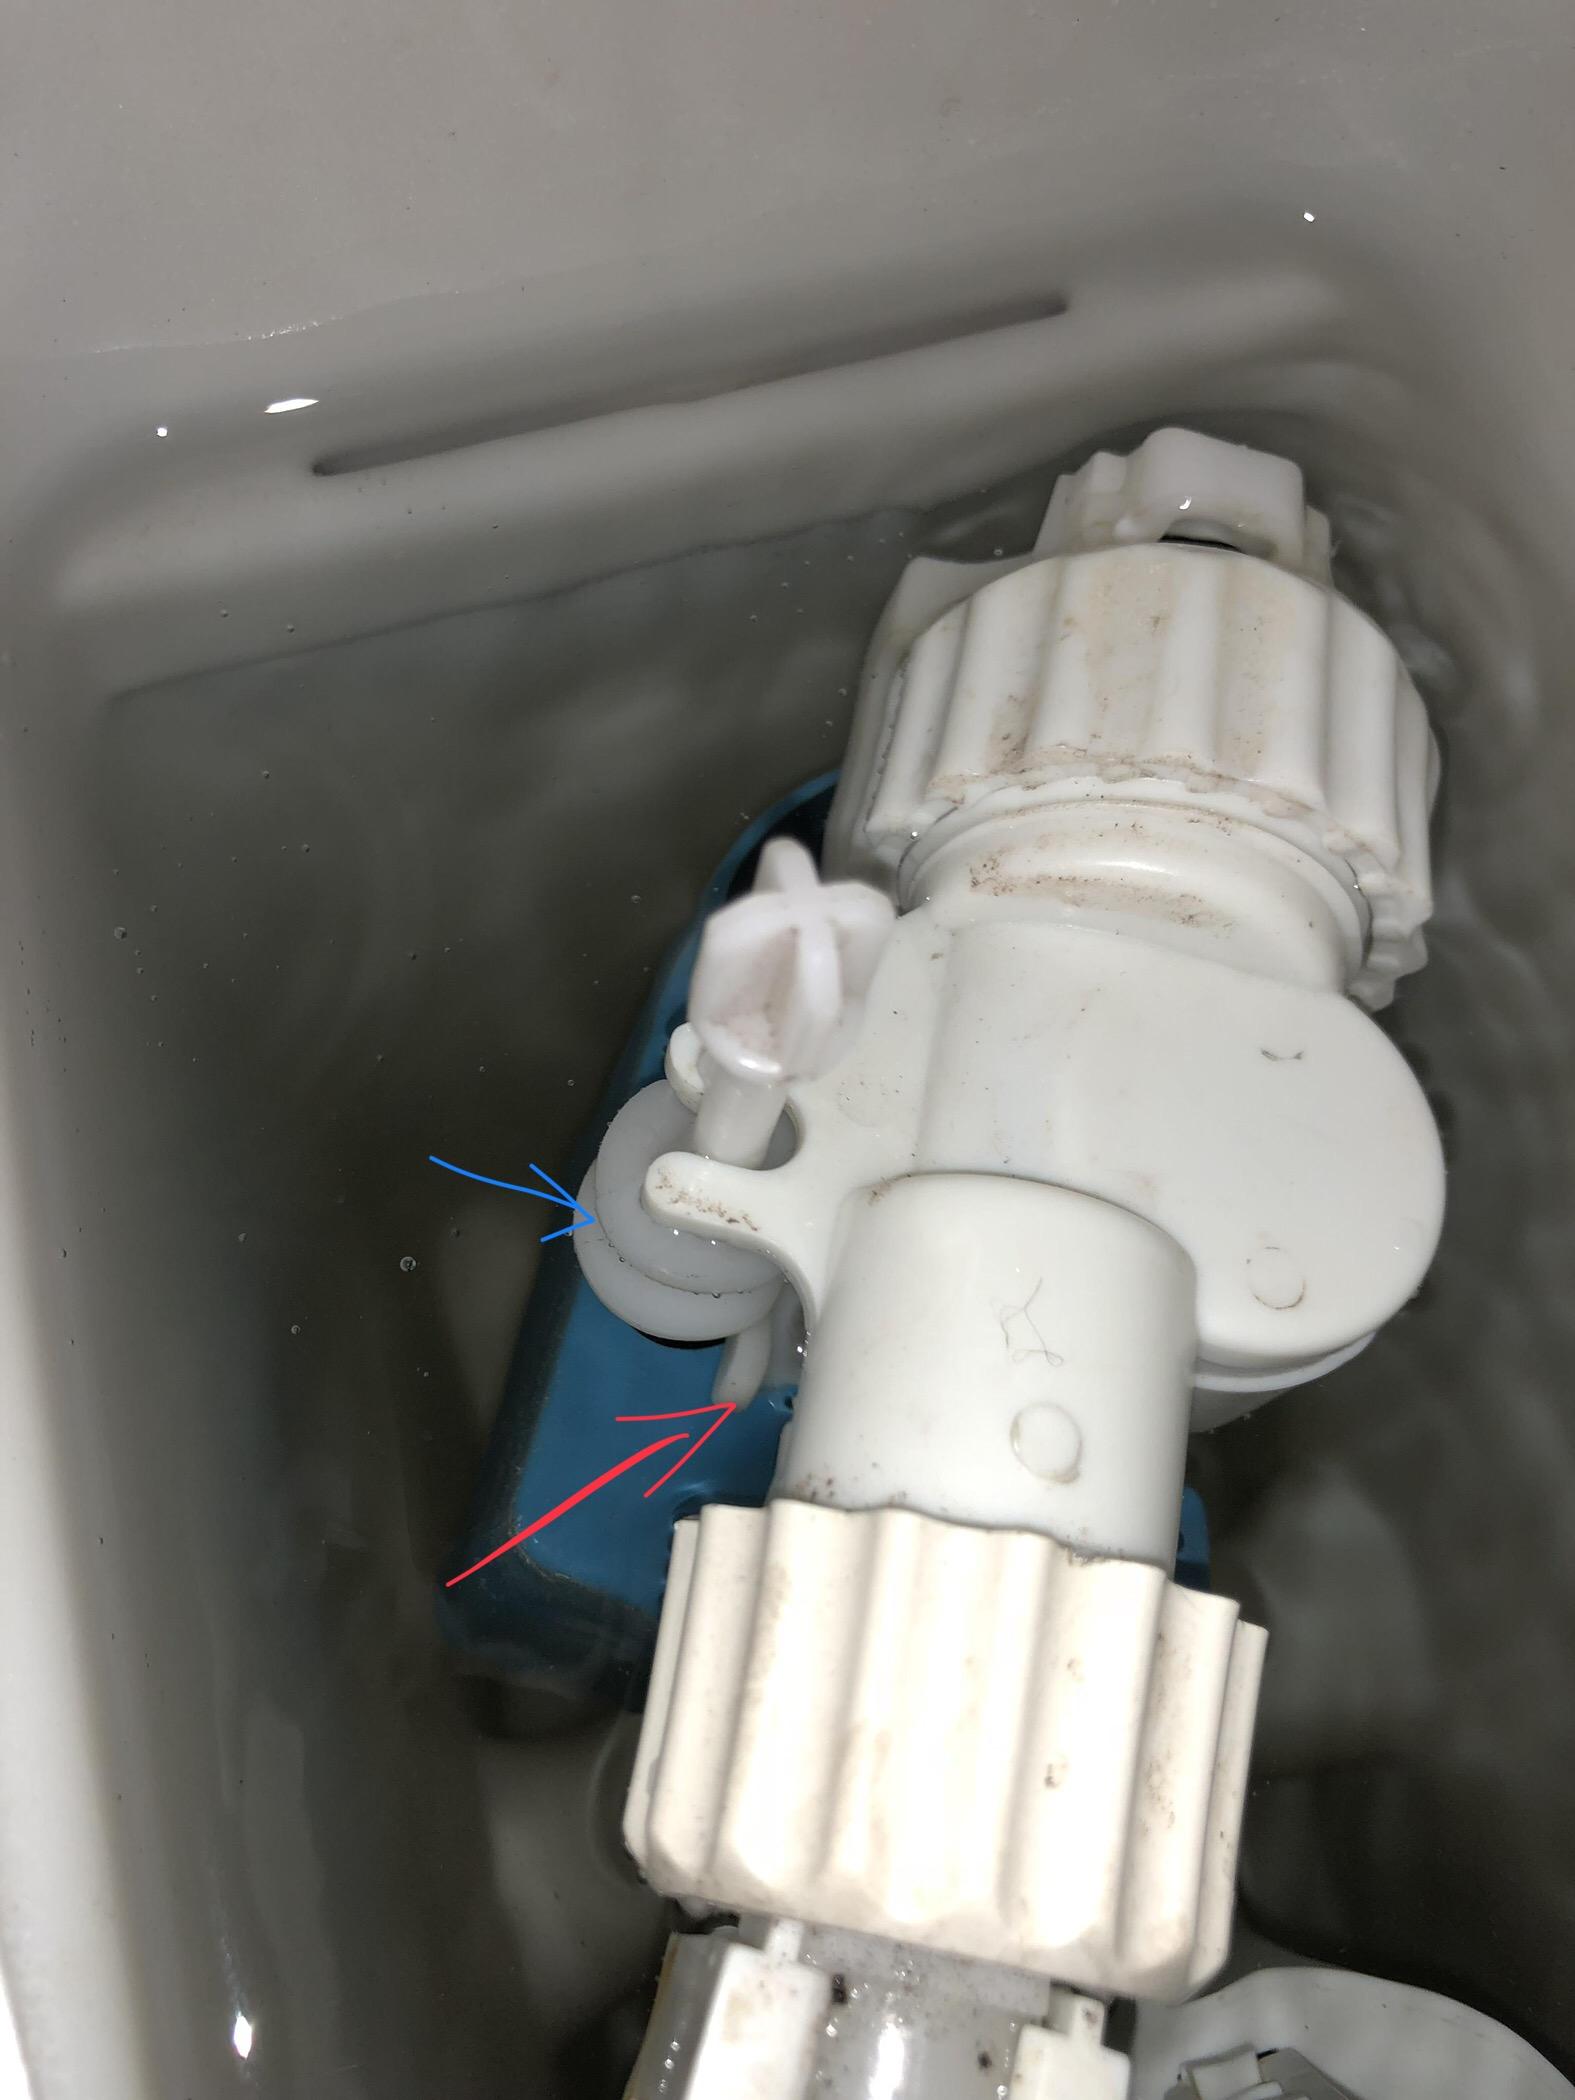
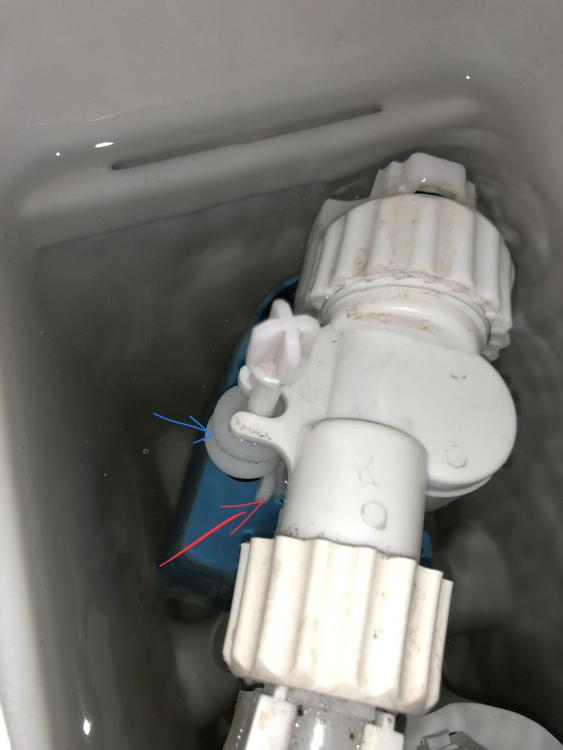
Think I’ve spotted the issue. The float should lift the lever marked with a red arrow. It should be between the two flanges arrowed in blue. That’s why when you lift the rod it shuts the valve. You may be able to push the rod sideward a little to get the lever back in.
-
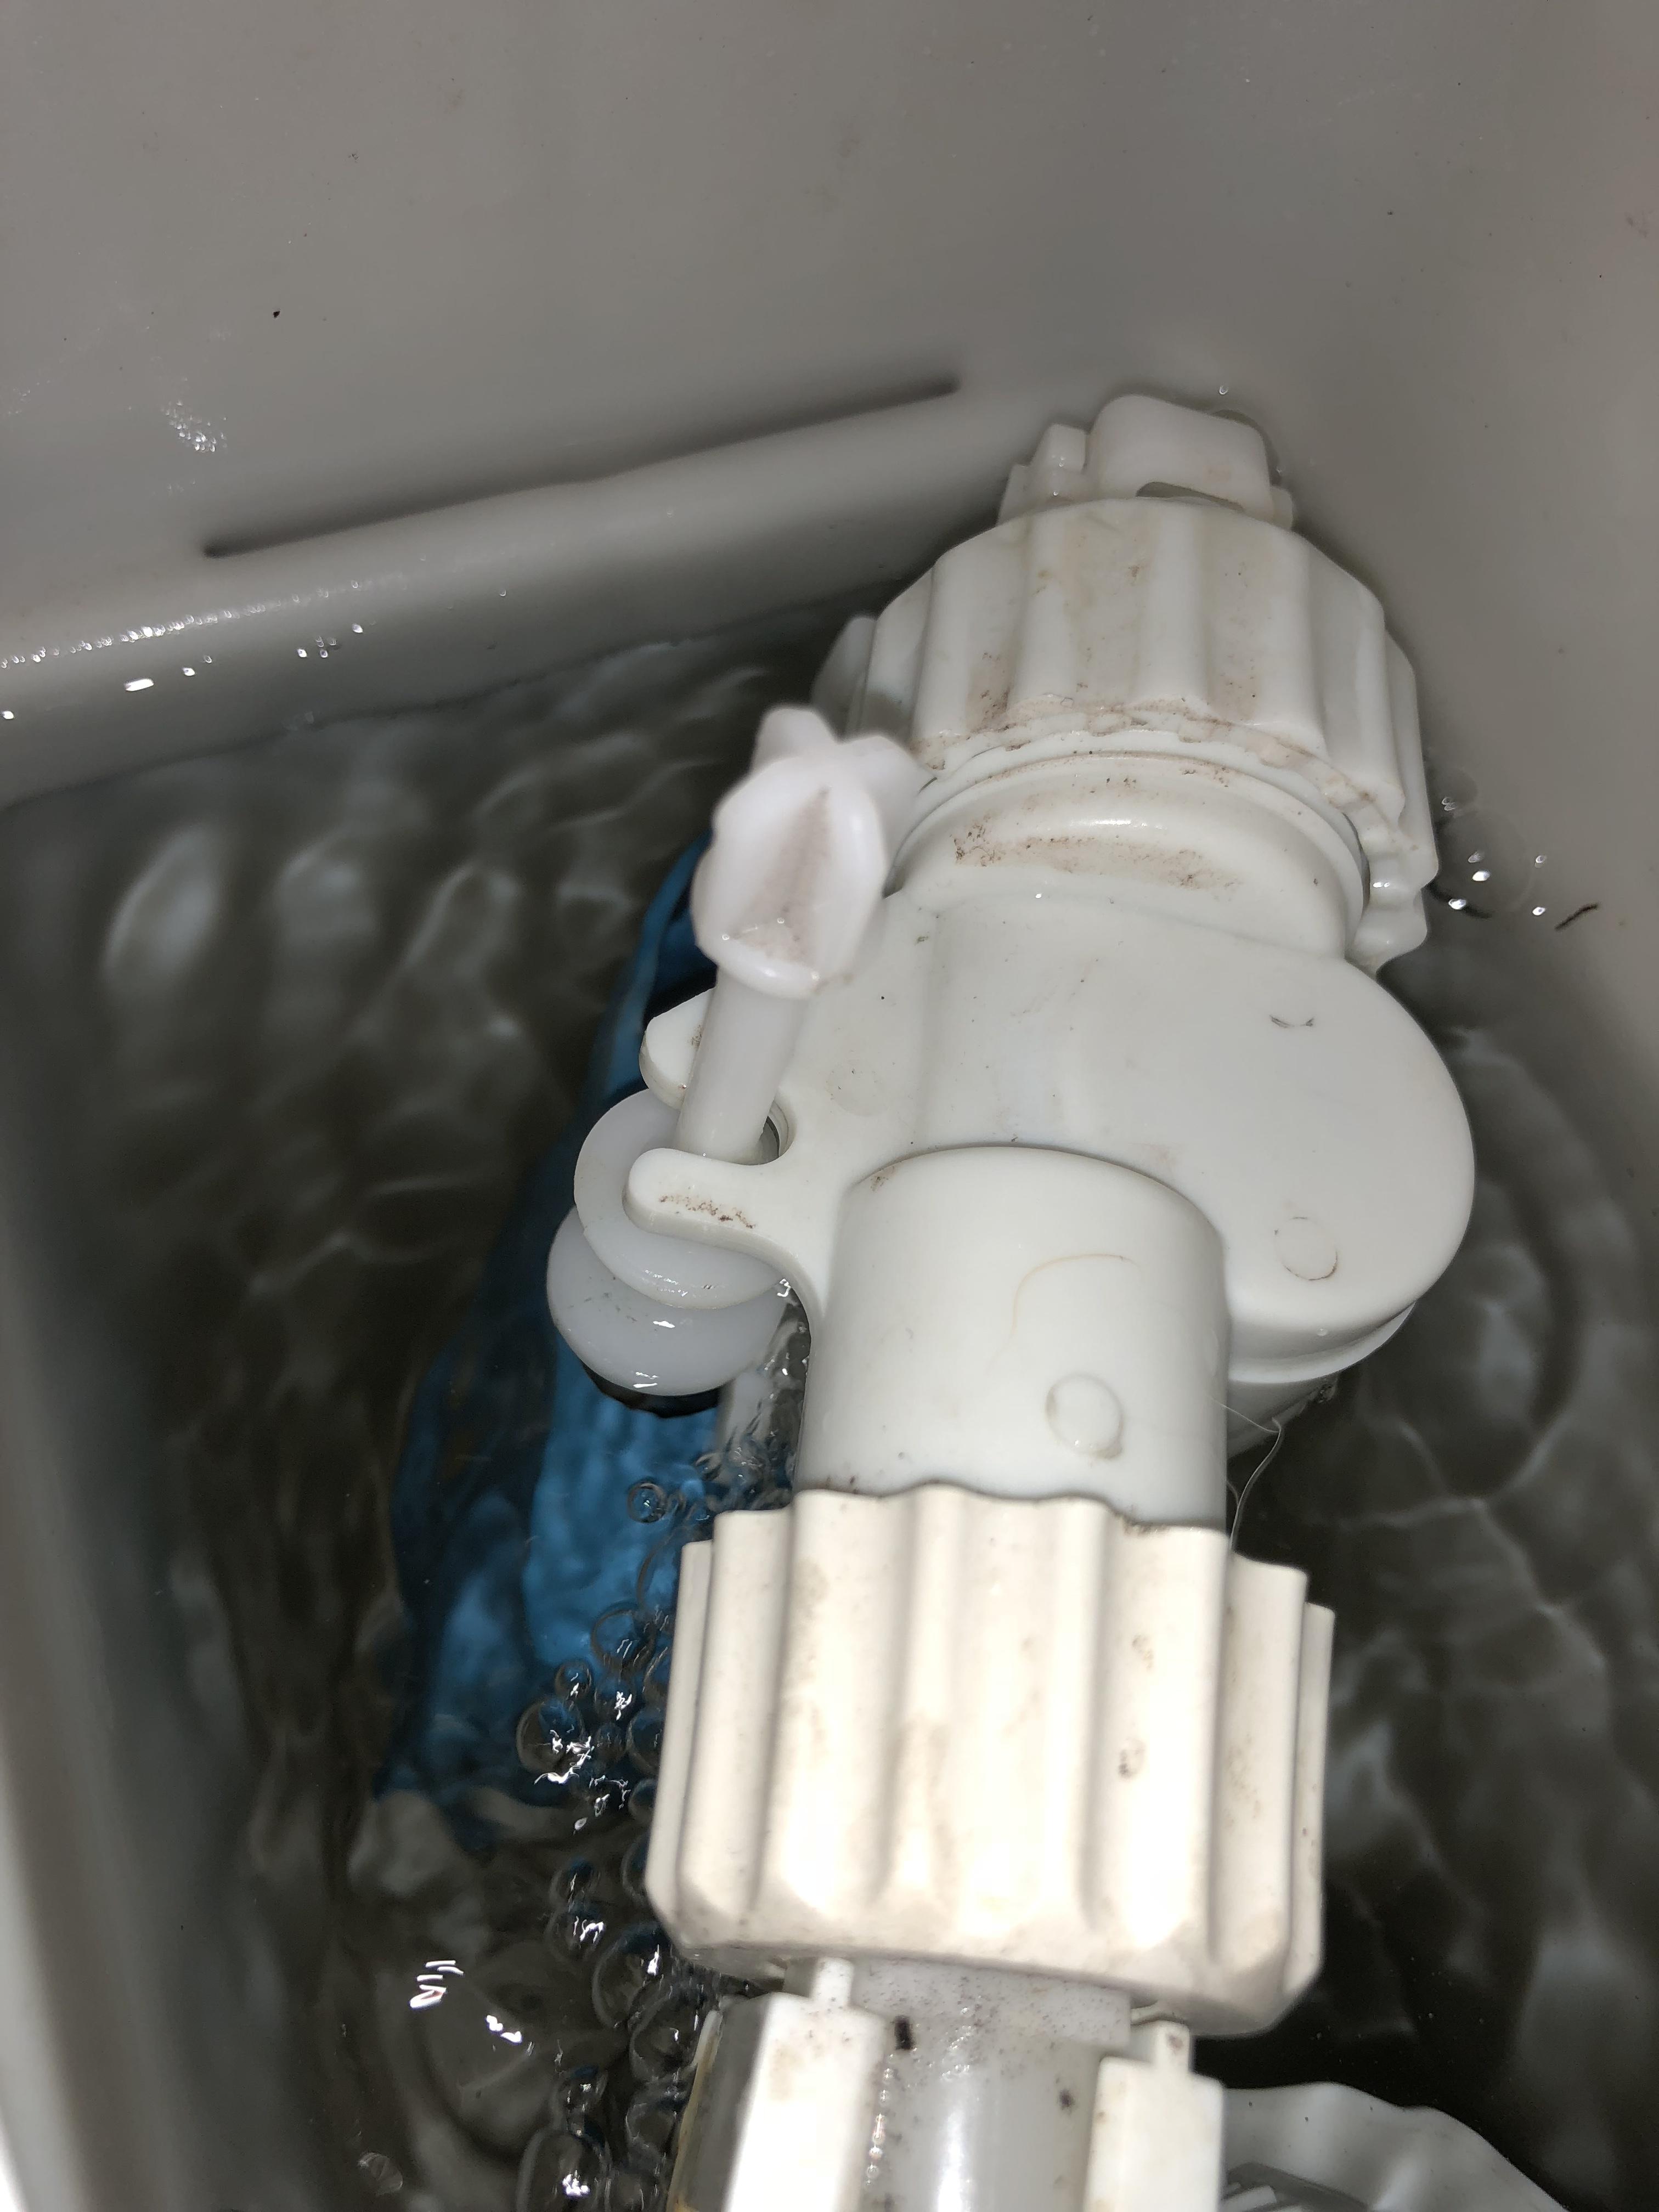
Yep water is going over the weir in the middle. Where is the blue float thing
-
Screw the big valve back in... turn the arrowed thing so the blue float goes down. And no, won’t come off
-
I think the water level is too high and it’s going though the hole at the front. Can you drop the blue float down a bit more ..?
-
Can you let it fill and take that photo again..? Just don’t drop the phone in the cistern.....
-
The larger tube is a complete assembly - should come out in one go
-
Its not the inlet valve you need - start with the flush valve.. Turn the silver valve off and then take hold of the thing with the two plastic rectangles by the tube, and turn it clockwise a quarter turn and it should pull up and out. Check the seal carefully for nicks or lumps
-
Yes. The white bit is the screw that controls the float that sets the water level. Could be a cistern flush seal that’s gone. I think they are a Siamp flush unit ...
-
All entry level doors that go from the front door to the WC on that floor have a minimum 838mm width requirement to meet Part M TBH I think 838 vs 762 doors look much nicer and aren't any more expensive.
-
The two rectangular levers - pull the right hand one up and let it flush and see if it settles the fill down again
-
Ok so the isolator works, turn the silver knob 45 degrees til water starts flowing. Now give the circled bit 2 full turns anti-clockwise.
-
Right circled bit is the float on the fill valve so that “shouldn’t” have anything to do with water leaving the cistern. The silver knob coming from the back - try turning it clockwise towards you and see if the water stops.
-
Standard HX lintel will be fine but let him come back. Should be no more than £50
-
The two white threaded bits turn 90 degrees and they should pull out, then the plastic plate will follow
-
Need to draw the sections - doesn’t work like that...
-
You can lose the 50mm cavity around the outside of the chimney and add it to the insulation layer and job done.
-
Standard lintels are available for wider cavities. I used Condells who ordered them direct from catnic. This is the 150 cavity catnic that would fit your doors. Just remember they need a minimum blockwork above the lintel on the skins to be deemed properly loaded.
-

I need to order some footing blocks, what types?
PeterW replied to epsilonGreedy's topic in Foundations
195mm is pretty much the minimum but working from your comment about the buff bricks, you have 5 courses to DPC which is 375mm. Given the threshold on doors is usually set at DPC then you have a significant step down inside of nearly 180mm with your current build up. This needs drawing out properly - what’s on your AT plans..? -
Cut a series of fingers and snap them out to a scribed line.
-
Both FIT AND export payments to be cancelled next year
PeterW replied to Jeremy Harris's topic in Photovoltaics (PV)
Info here Ofgem FIT closure -
Get on with laying them then ..!!