Onoff
-
Posts
21126 -
Joined
-
Last visited
-
Days Won
206
Everything posted by Onoff
-
@Sensus, there are some big egos on here and some right tenacious sorts too but isn't that's what's needed often to firstly self build and similarly to have the energy and drive to keep a forum like this going? It's not a democracy here and there is an "elite" club, live with it like most of the rank and file (like me) are happy to. No different to the real world. It is what it is. Got to be honest I skim your posts as they come across as aloof. Seems to be a bit of a "I could go into the detail but am too busy" air that's devisive at the end of the day.
-
Very unlike me but I've just BOUGHT a set of copper boppers.
-
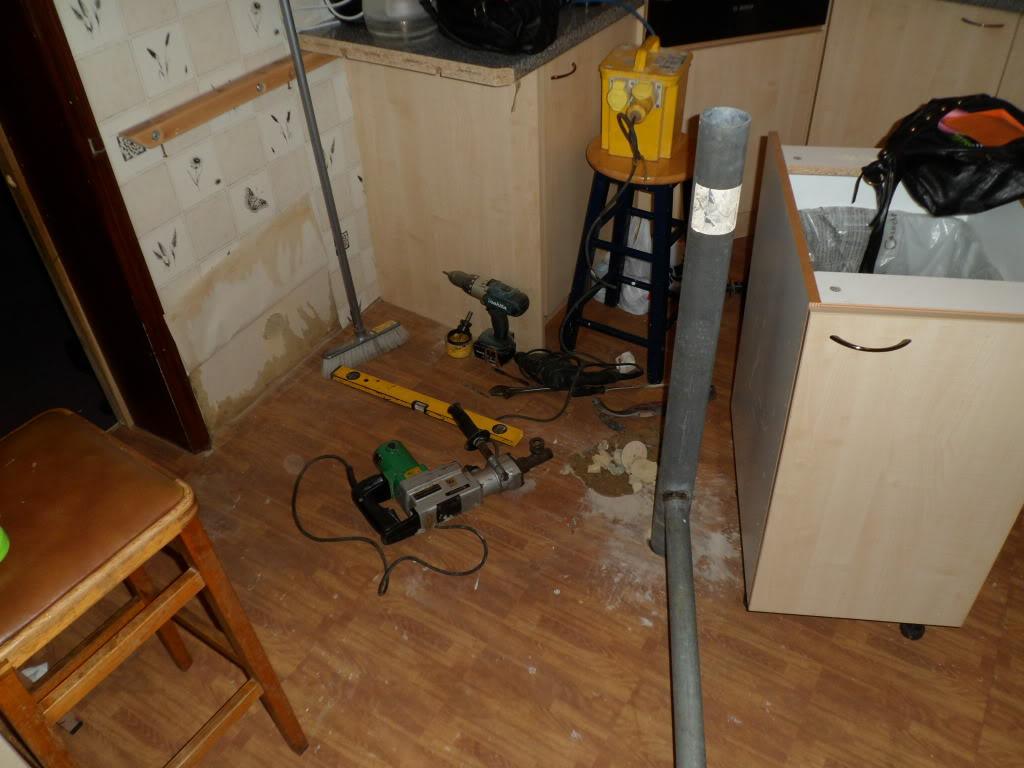
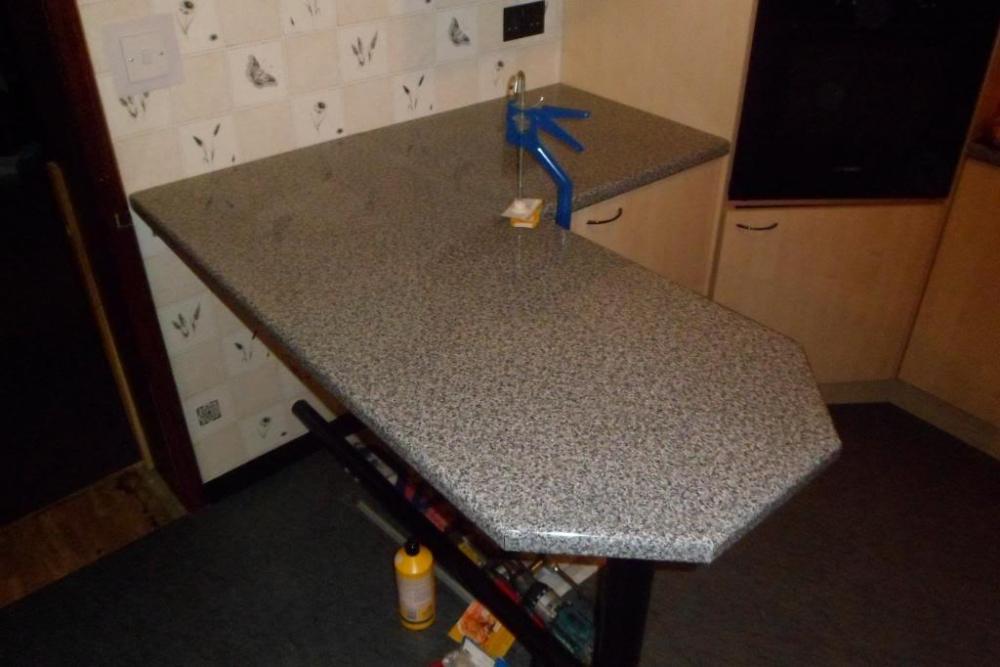
I cored a hole in the floor slab for my breakfast bar / island leg: One day this'll all go. Bloody kitchen floor is about 5" higher than it should be.

-
I think that'll be more forgiving and enable a neater job tbh. Finding it tricky to squeeze the gap closed over the bubble bend especially.
-
It's this. On EVERY other compression joint I've done it's fine:
-
Aluminium tape it is then. It'll drive me nuts if it creases! ?
-
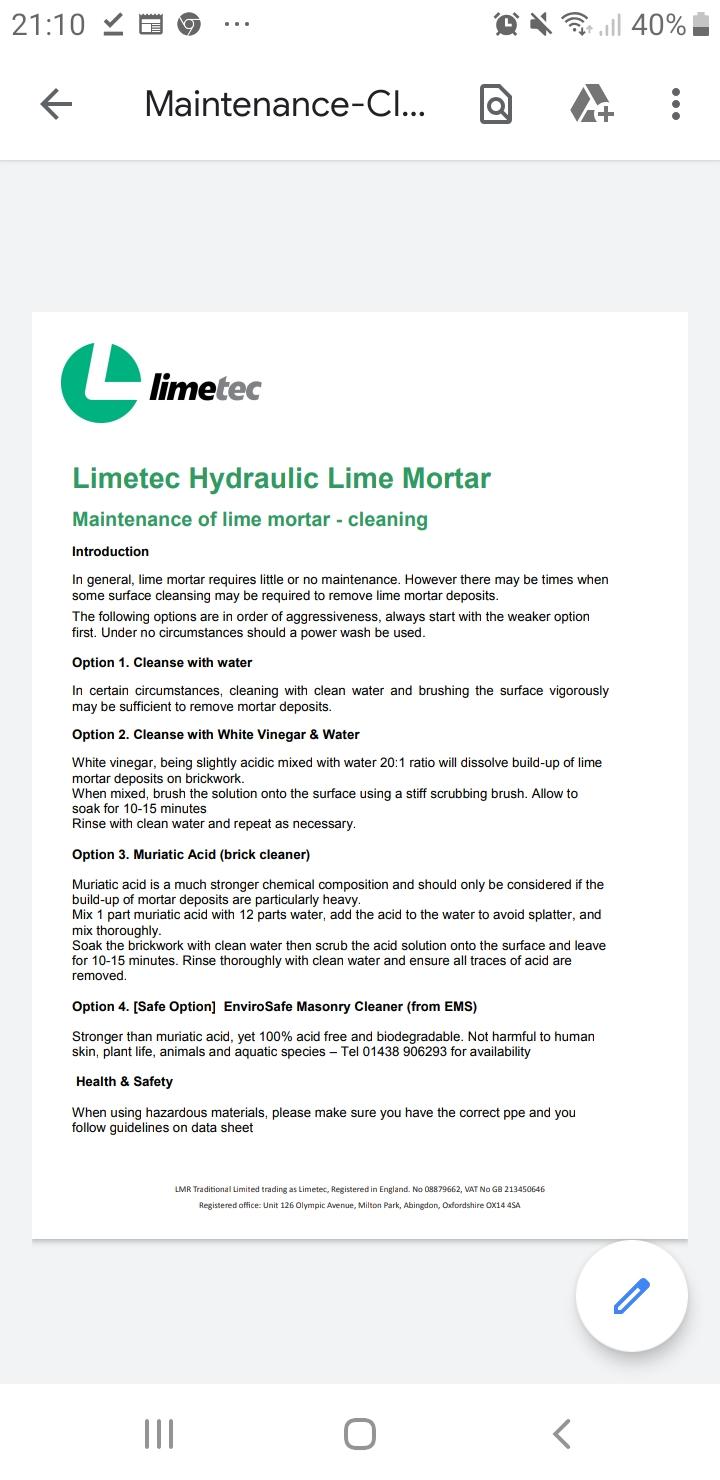
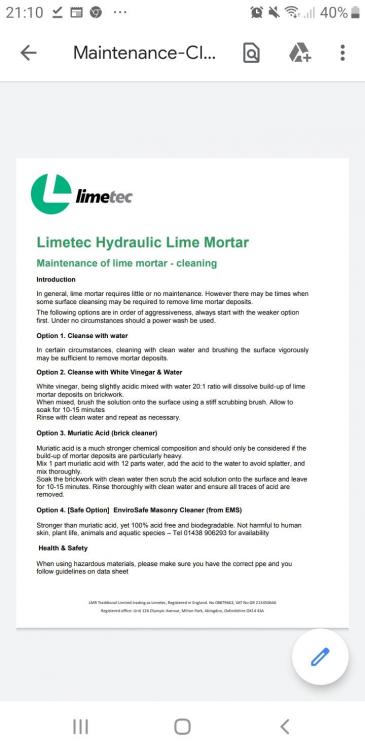
Looks like white vinegar and water is the first thing to try before Disvlean which is muriatic aka hydrochloric acid:
-
What's the norm for keeping pipe insulation in place, duct tape silver tape etc? I can't see cable ties being any use as they would cut in over time. Thanks.
-
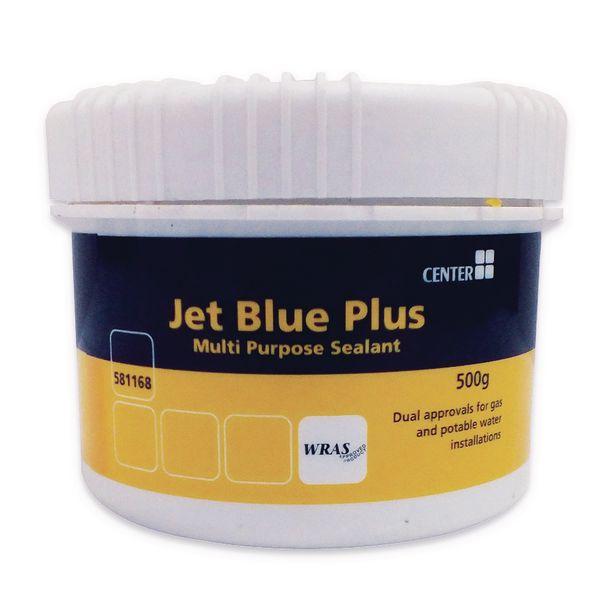
Any ideas what this sticky gunk is on my 3 port valve - in less than a year? It was nutted up with Jet Blue Plus which is what the green tinged stuff is:
-
Bits look alright to me. I wonder if you could Disclean the stones and not affect the lime mortar?
-
Got any photos (even of your screw ups ? ). I'm on the brink of doing some flint panels using lime mortar.
-
I thought they pulled in air. Seem to remember a Victorian fountain in some stately home using the system to great effect...
-
Do the claims for venturi type shower heads / valves stack up or is it snake oil?
-

Just what would building control do if they found out?
Onoff replied to ProDave's topic in Building Regulations
My lounge is still like that. Original house was built in the 30s. It has 1" battens with hardboard on top. I had the cheapest survey done. Never picked up on it. There's only two mains sockets in there and wall "swells'" where they are. -
You get them in 2 and 3 way form. This is a (knackered) 3 way: This is the guts of a 2 way: I've two 2 ways and one 3 way. Not long replaced them all: How many do you have and what make? On the better (more modern?) ones you can swap out the motorised bit without affecting the plumbing. If the valve itself is all crudded up and stiff then you'll likely need to change that anyway. A picture of your valve(s) and the surrounding pipework might help.
-
Ground floor for bungalow: joists better than a slab?
Onoff replied to Dreadnaught's topic in Timber Frame
Like at Chennai airport? -
Scaffolding tent for temporary roofing
Onoff replied to andyscotland's topic in General Self Build & DIY Discussion
Isn't RH an issue with doing GRP? -
I watch a video of knapping, pick up a flint and think wtf? It's a proper art. I really must make a set of boppers.
-
Very basic tap wrench. Must have been made pretty early on, like straight after the perfect 2" cube / drill drift. Still looking for one knurled screw and a handle! I still use it's bigger brother to this day, will dig it out. (A bit more complicated to make that one). A bit later on I made this: This little clamp. Always liked it but never used it since I made it tbh: I've even got my tray work somewhere and the bending tool I made for that though I did that years after the mechanical stuff above.
-
I remember one of the other apprentices got his measurements wrong by 100mm when doing his tool box. Of course he had to make the lids longer in turn. He had the last laugh as only he could fit a full size hacksaw in. On another note the knurling tool is looking salvageable: Hoping to clean up the old leather working tools and flog to some yuppie with more money than sense to compliment their AGA! ?
-
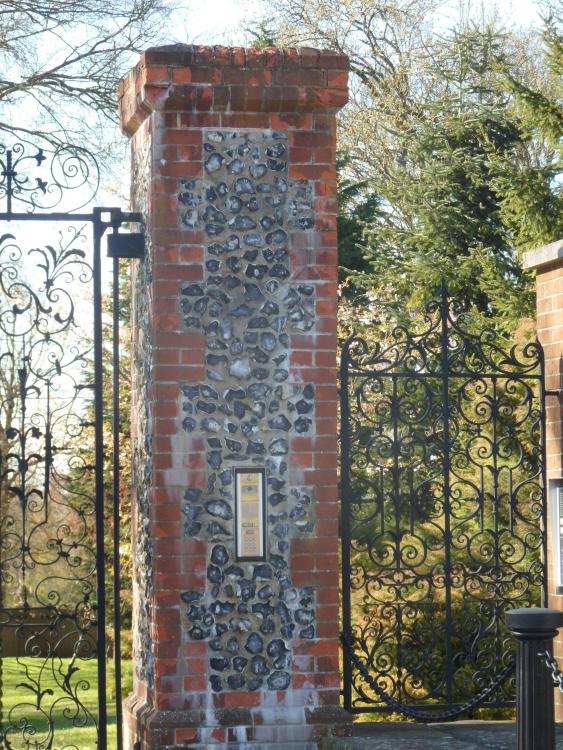
Nice. Interesting how it's not just the "black" faces pointing outward (which is what we're wanting). Took this of a pillar I passed somewhere en route to Hever Castle from memory, as I say just the black faces pointing out. I'll stop tomorrow at out church and have a look at theirs:
-
Thanks. Interestingly those green trays the flints are sitting in are full of water. They've been in there for a couple of years I guess. The water has got into a couple and frozen, splitting them along I guess what are natural fault lines.
-
Thanks. No it won't be removable panels.What's a fist size 80x80mm maybe? And now more questions! ? Can the lime mortar be hand mixed on a board? Selecting the flints, do you avoid ones that although flat look as though the face has imperfections in? I've yet to try knapping. Do you dress them or just use whatever fits?
-
Small ones look better d'you think?
-
My fist is then about as big or a bit bigger than what I'm calling the "big" flints. Just about to watch some YouTube vids on lime mortar. Someone did say to me the way to lay them was to do in 9" high courses and strap a scaffold board to the pillar front whilst it goes off?