TheMitchells
-
Posts
908 -
Joined
-
Last visited
-
Days Won
2
Everything posted by TheMitchells
-
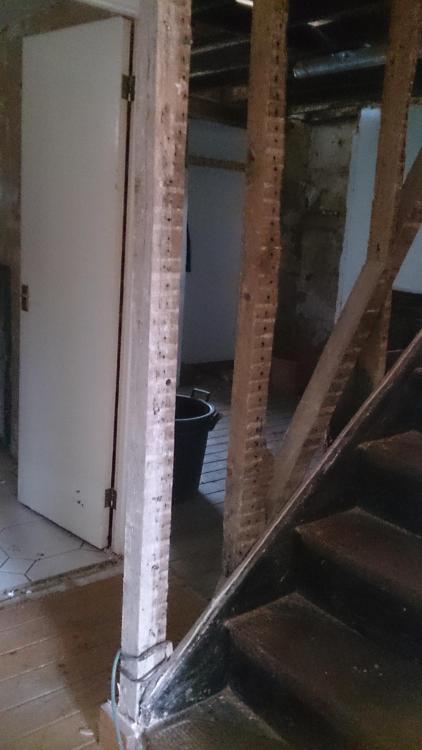
that diagonal will have to go and yes, we have added a couple of posts to hold up the beam while we get the proper posts. these ones are only things we had around and neither are structural. Hope that helps.
-
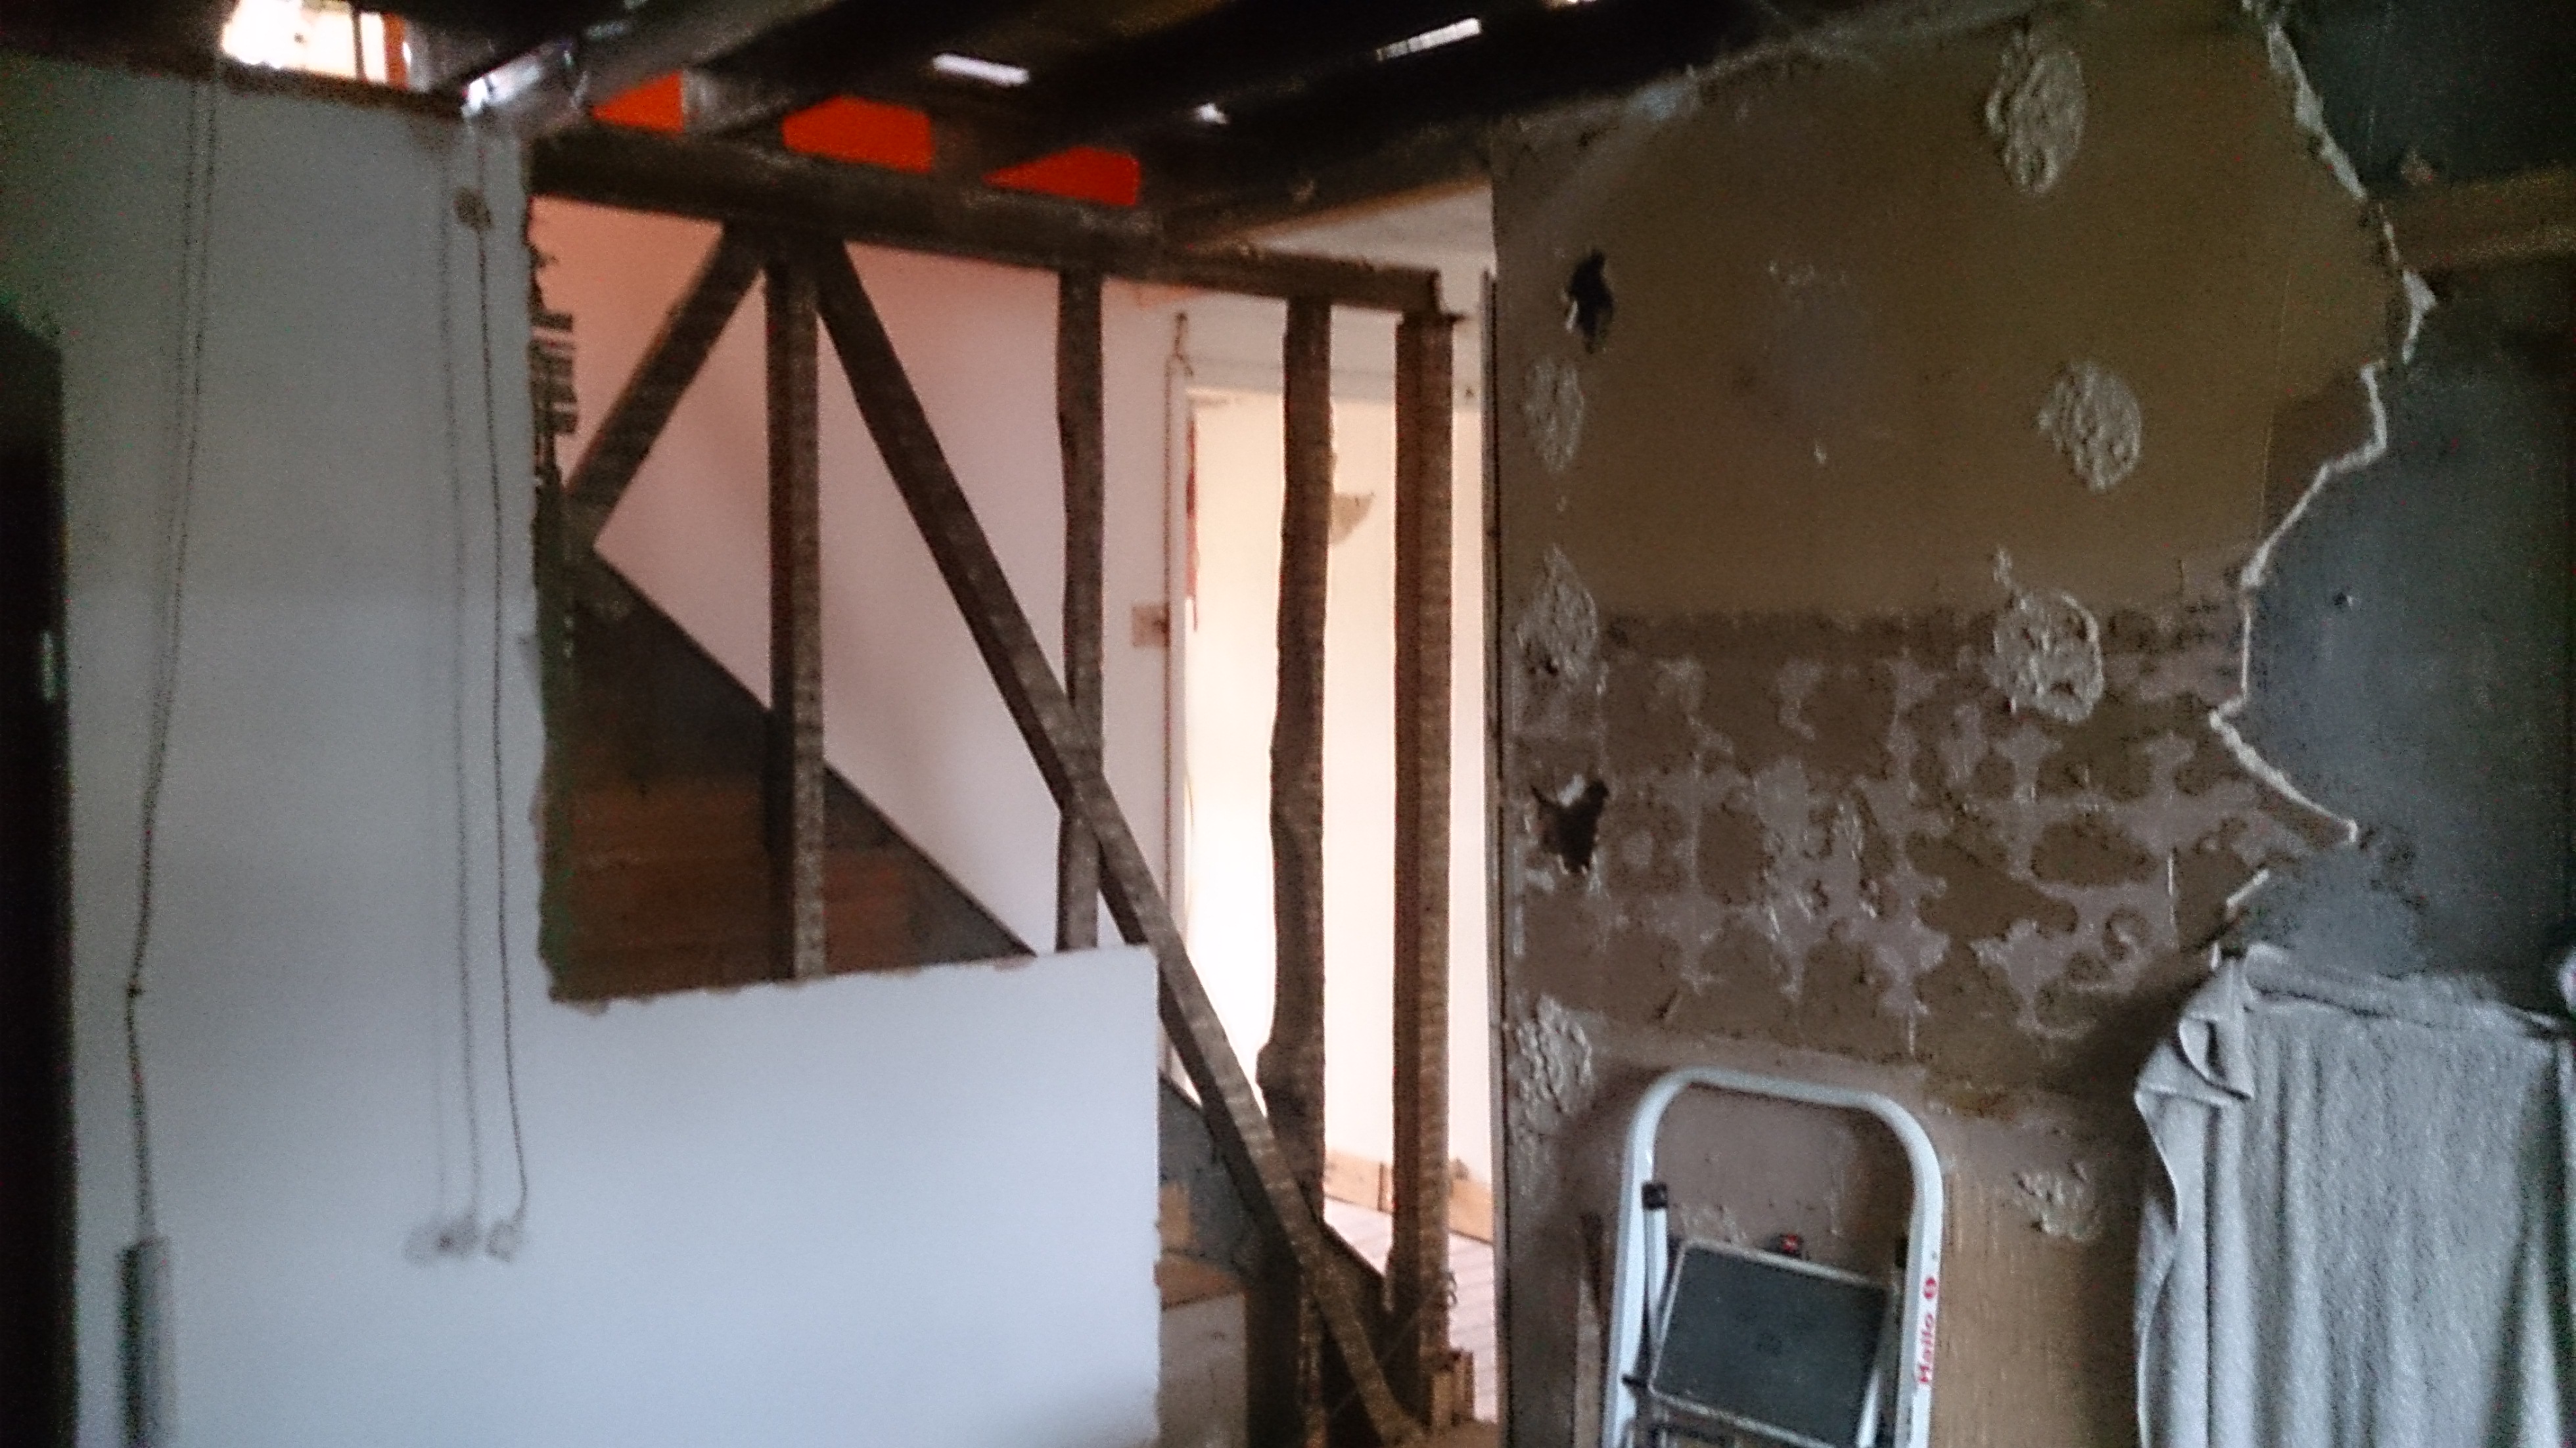
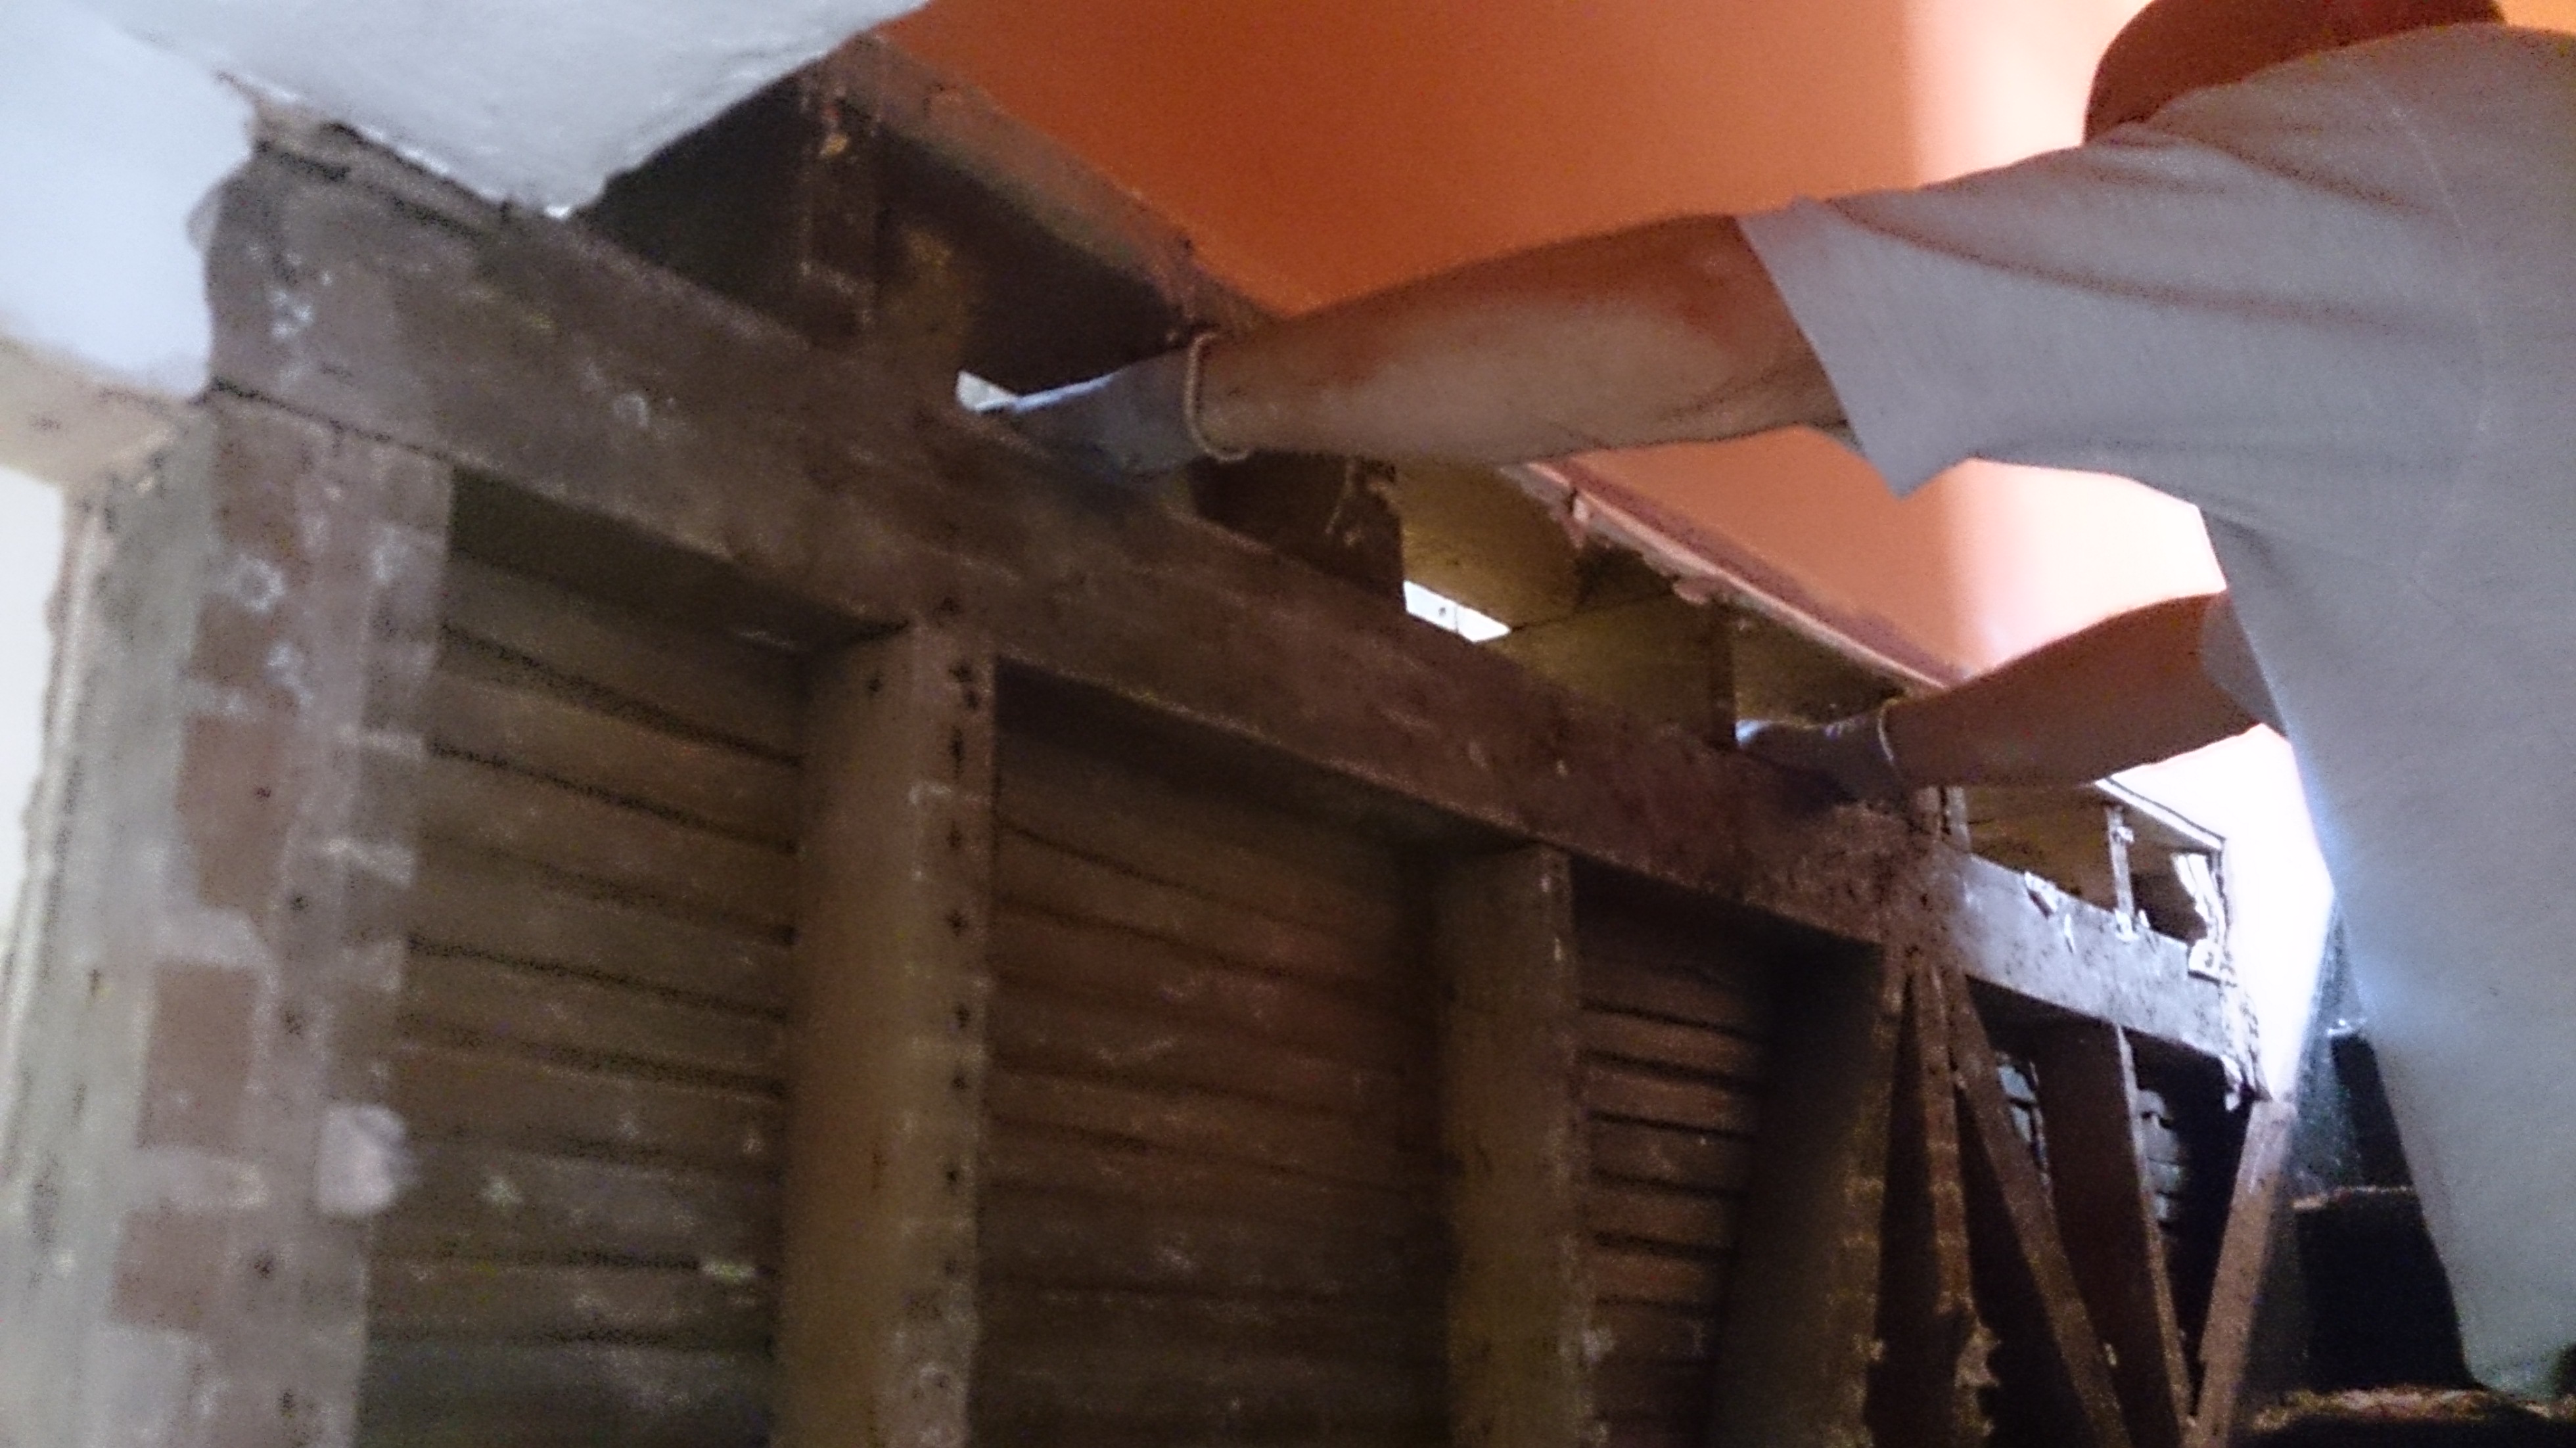
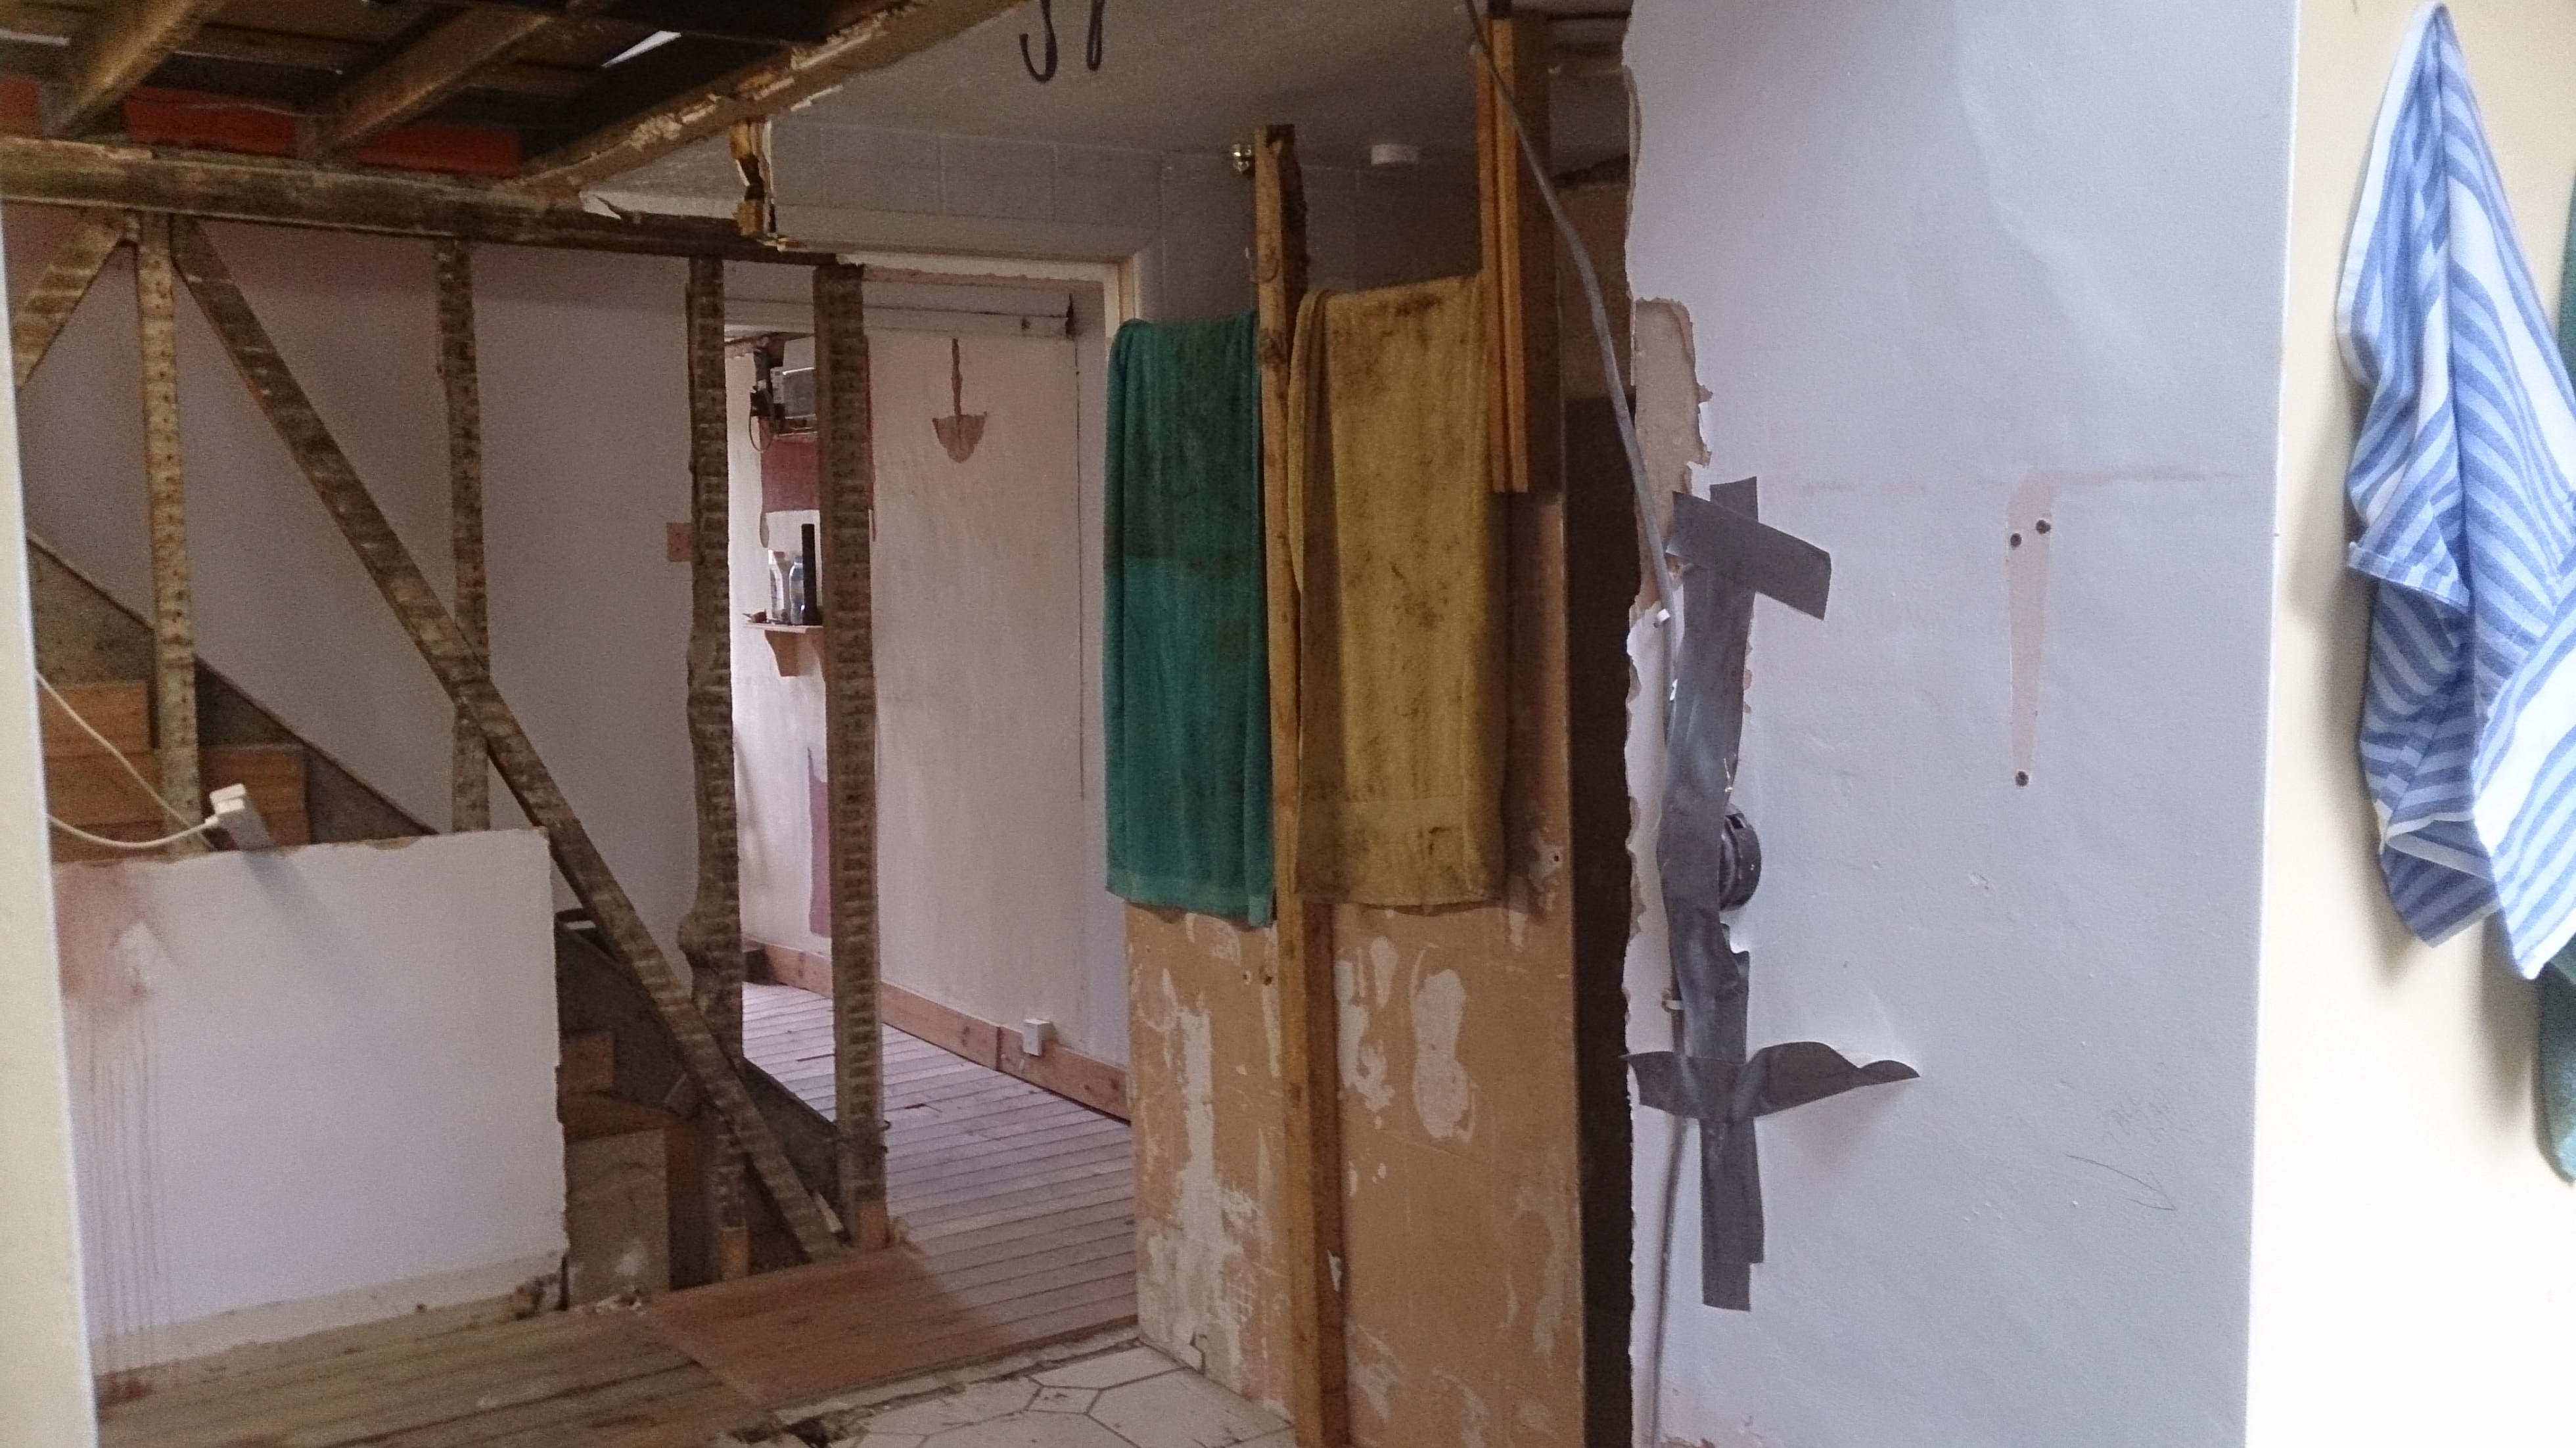
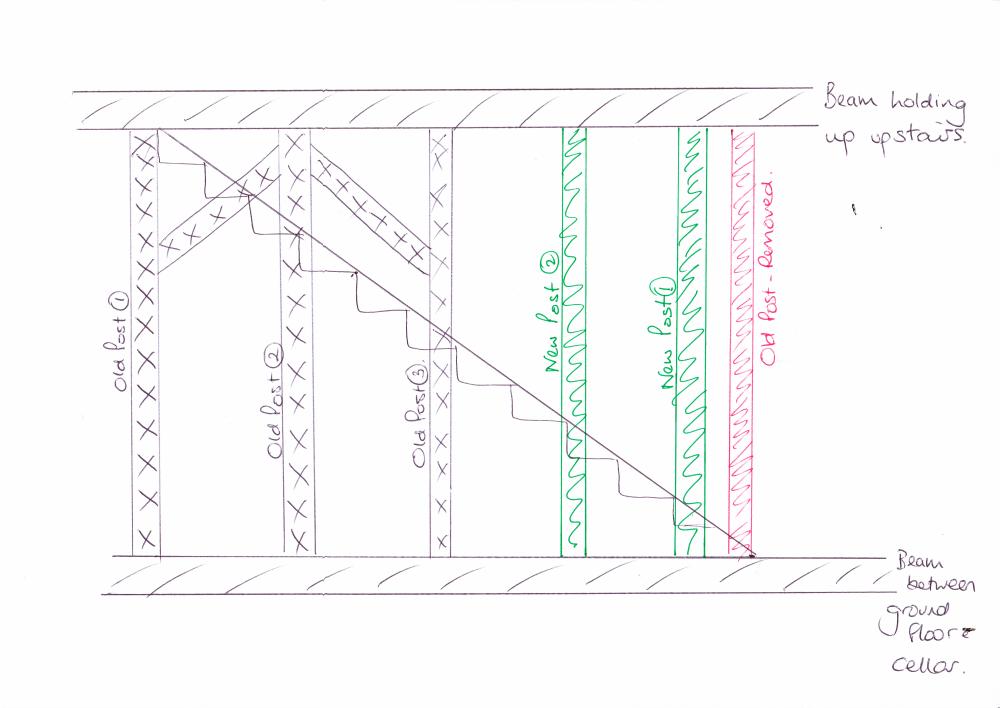
In our renovation, the middle room was always very dark as it has no natural light. We have removed the wall between that room and the kitchen which helps and on the other side, we have removed the plasterboard and exposed the staircase posts with the aim to leave some of it exposed, while plasterboarding the left hand half of it. the idea is to get some of the light from upstairs, down into that room. Also, as the space from the lounge into that room is rather tight, I want to remove completely the bottom-most post and instal new structural posts slightly further back to hold up the beam above. As this is structural, I did ask an engineer to check it was okay while he did the calculations for the kitchen rsj's. However, I cannot understand his report at all. This is the stairs as it was when we took off the platerboard. You'll notice that the 'posts' and cross pieces are all just tree branches, with the bark still attached. I guess there were no building regs in those days! Picture above is from the stair side and you can see the beam at the top which supports the upstairs. Here is a plan which I hope explains what we plan to do. The new plasterboard will cover the three old posts and the bottom triange between old post 3 and the bottom of the stairs. Between 'old post3, new post 1 and new post2, we plan to get glass from the balustrade companies if possible to allow light through and also, when entering the room from the front, it will open up the middle room in a much nicer way than previously. if the glass is too expensive, then good old fashioned spindles will have to do with a handrail. I am hoping someone can interpret the engineers report and confirm what I think he is saying, which is using C24 timber, using a 75 x 112 mm post, it must be within 1.2m of the wall. But I have been to a timber merchants and TPerkins and neither have C24 timber. I shall try another timber place tomorrow but it would be useful if I knew exactly what the report says we should do. Any advice will be gratefully received. ignore the first 10 pages as that relates to the rsj's for the kitchen which have all been done. And any suggestions of where to get the right timber posts. they need to be reasonably nice as I want them to be seen, maybe painted. AB2782-01 for pillar.pdf ab2782 calcualtions for pillar.pdf Picture of stairs as they are now.


-

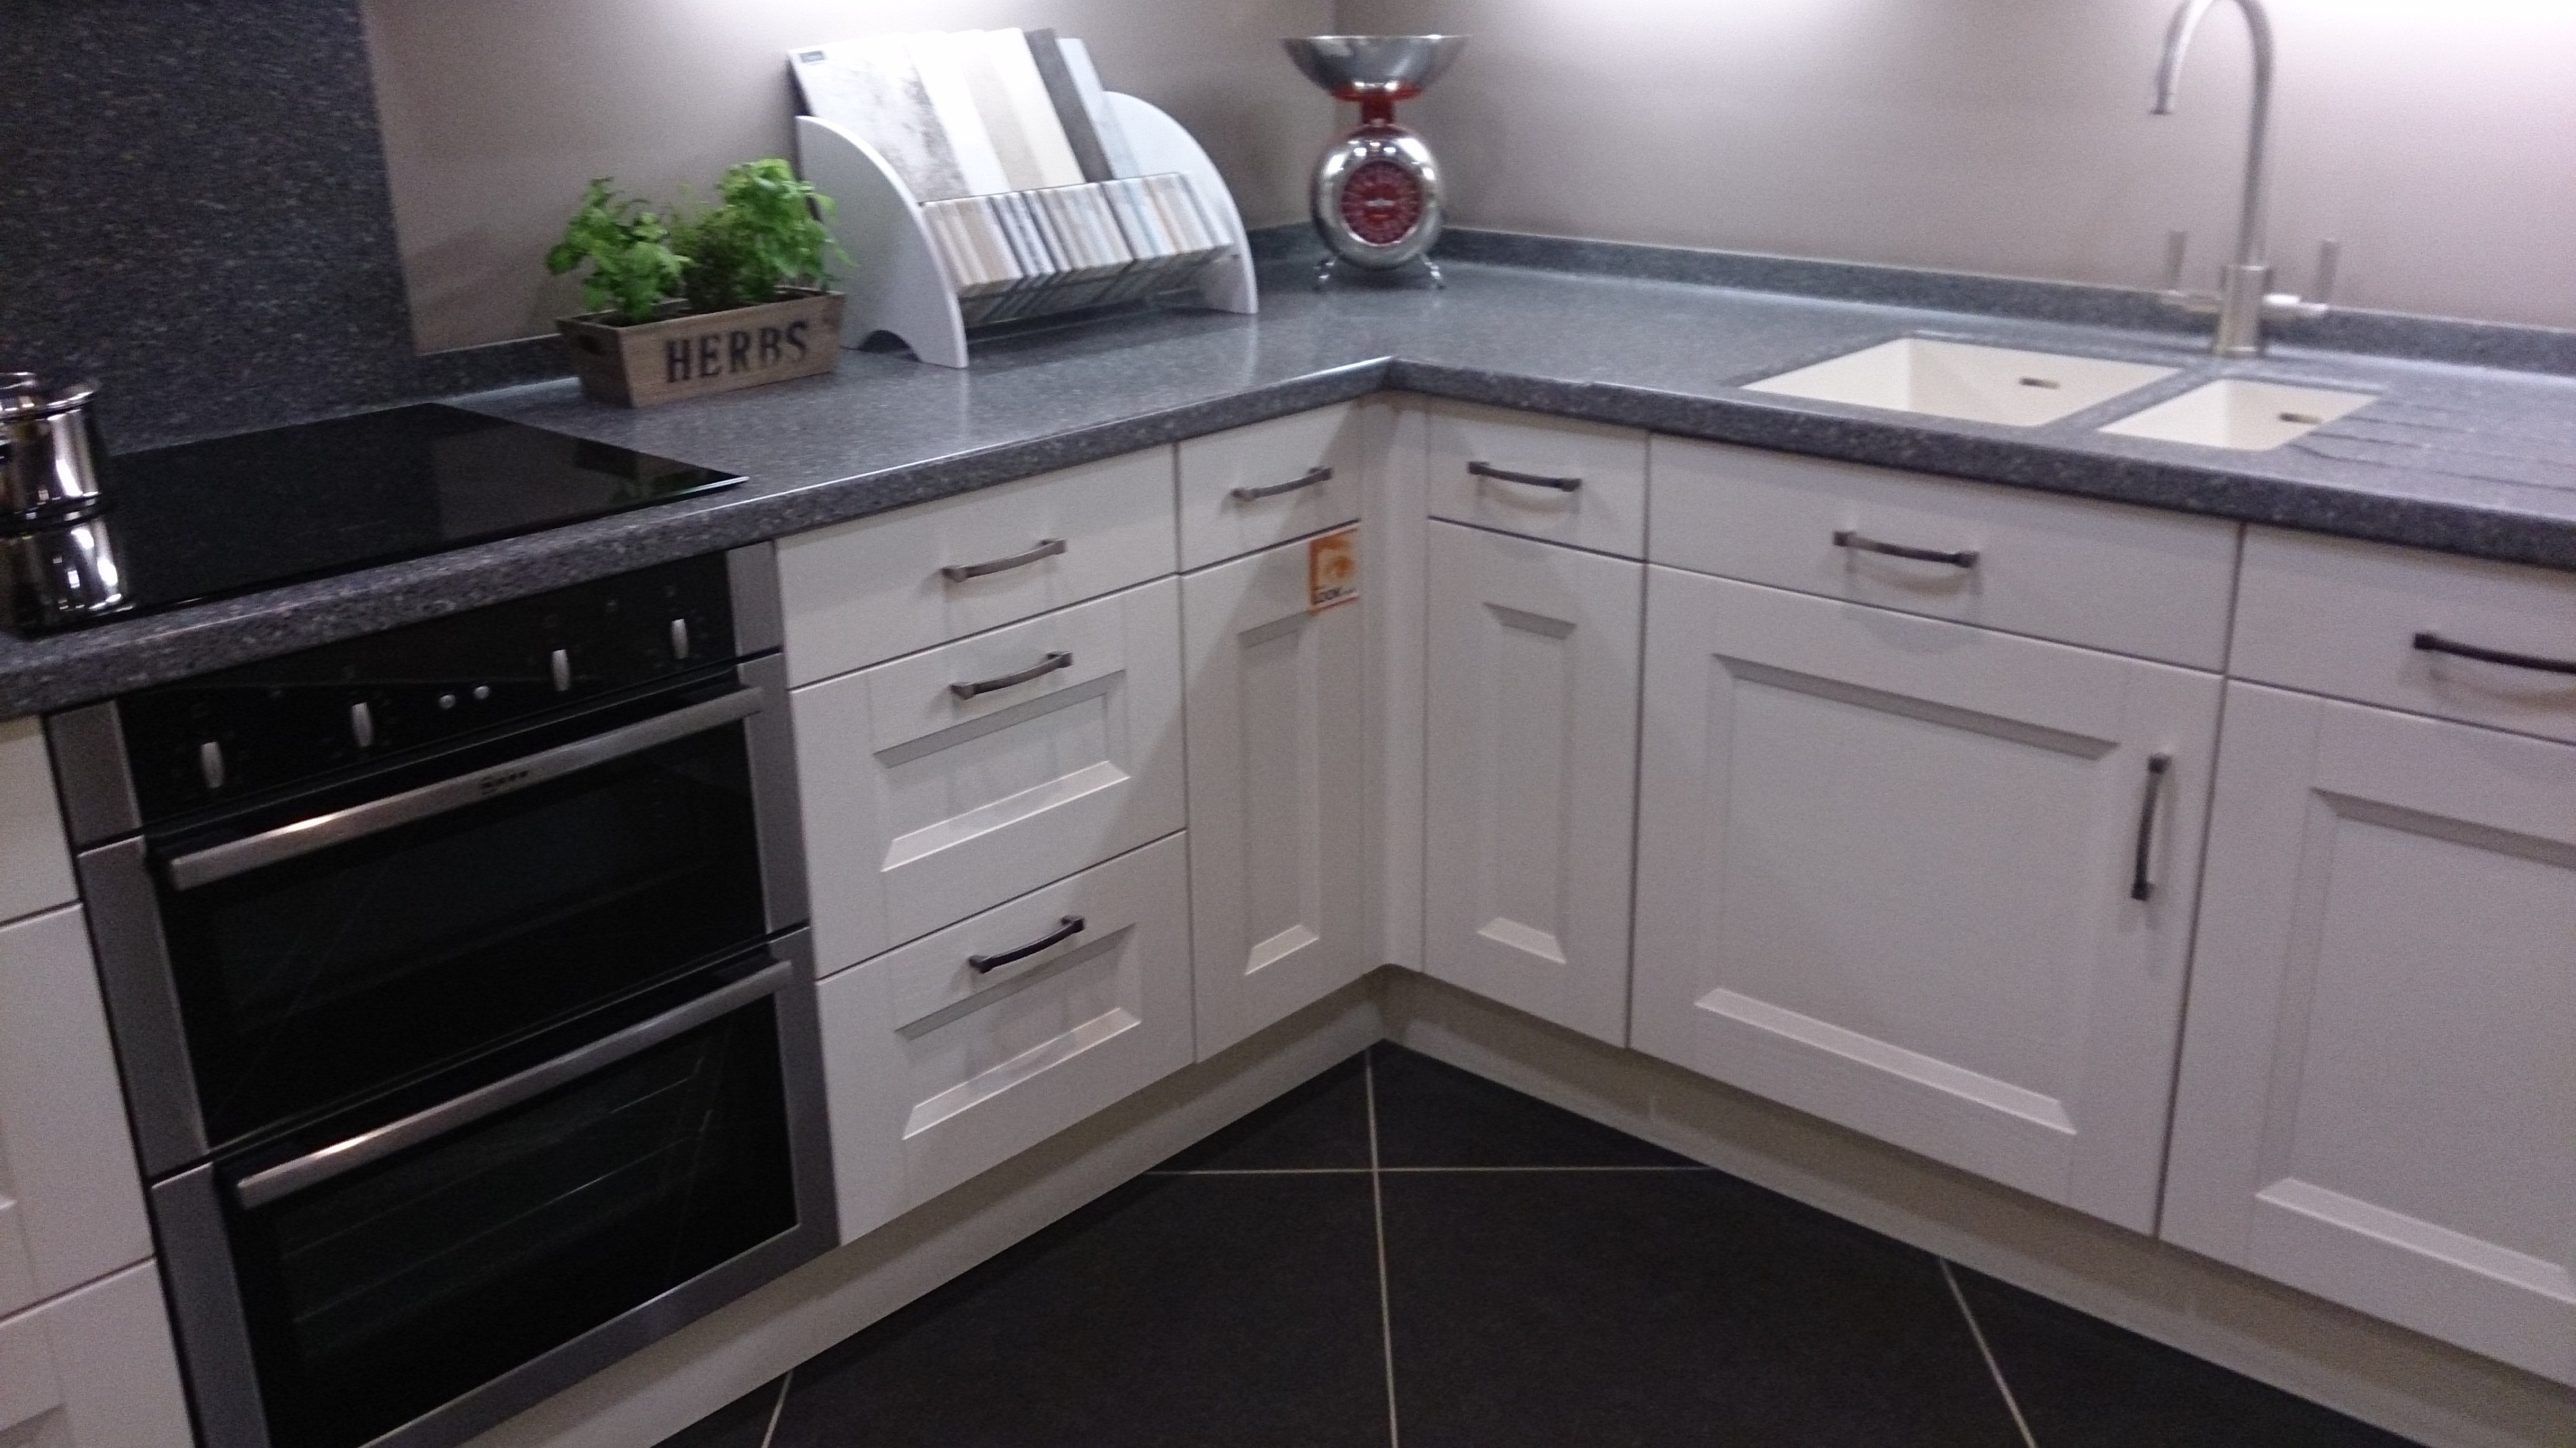
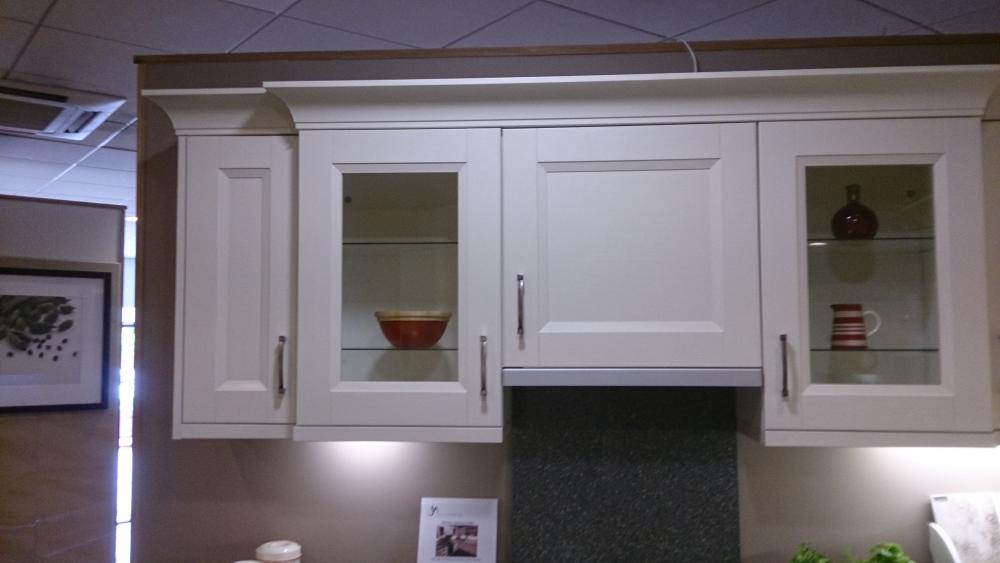
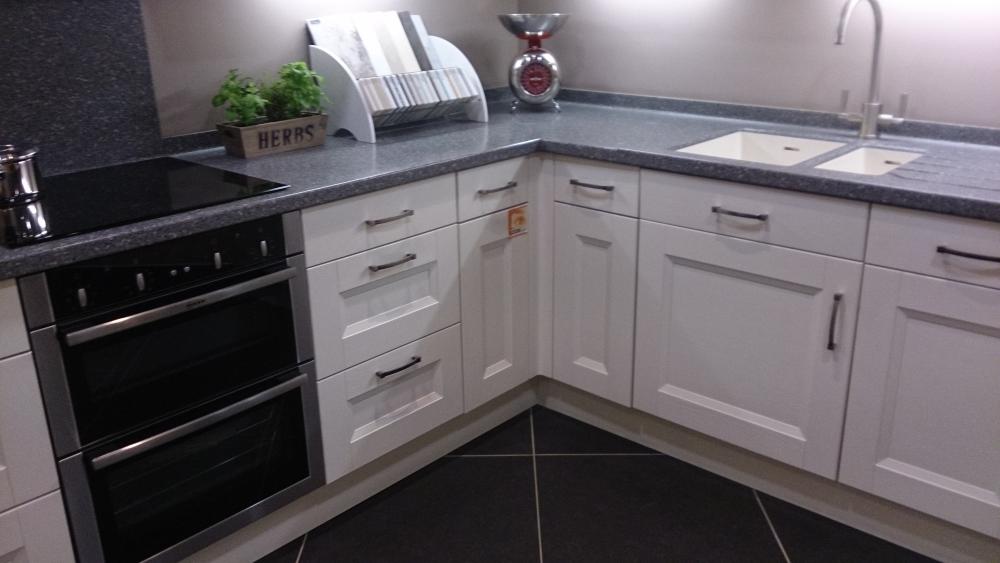
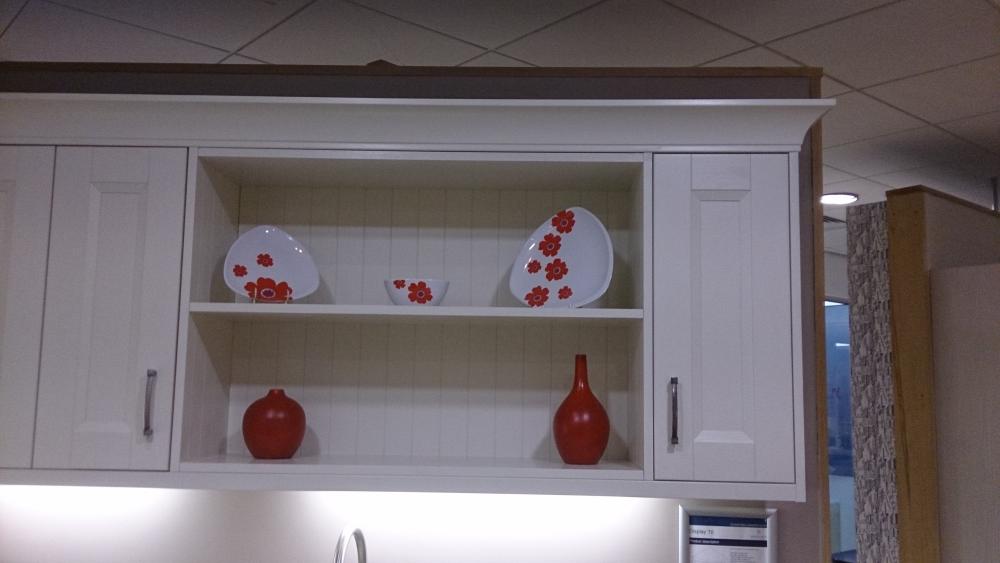
Altering Corian worktops?? Easy or not??
TheMitchells replied to TheMitchells's topic in Kitchen Units & Worktops
Its been very interesting reading all the comments and I shall not be using Corian in my kitchen! In the end, we decided to not buy the show kitchen. after buying the units, we would still have £2k to buy the rest of the stuff and I know we will make it look lovely. I was also quite worried about how carefully the units would be dismantled and what damage stuff would have after being fixed/glued together for several years. And really, we are not quite ready for the kitchen yet so we'd have had to store it all somewhere and work around it. maybe another time..... -
The house arrives & I get a real life Tonka toy!
TheMitchells commented on curlewhouse's blog entry in Sips and stones may break my bones...
Am really happy for you and must be great to watch it all taking shape! keep the pictures coming. -
Altering Corian worktops?? Easy or not??
TheMitchells replied to TheMitchells's topic in Kitchen Units & Worktops
that sounds like good advice and I dont think its something we'd want to do ourselves. I have played around with the units and our kitchen plan and I do think it would work without having to buy any extra units. I shall go and ask about fitters tomorrow. And to be honest, we were planning on a wooden worktop so if it didnt fit, its not the end of the world. I think the value of the extra's and hopefully the quality of the units (better than Howdens?) make it worth going for, even without the worktop. Im thinking of all the handles, sink, tap, hob, oven, dishwasher and extractor. They have to worth a couple of thousand?? I didnt really take in the models but Neff arent cheap. I also will need to see what sort of guarentee they come with. -
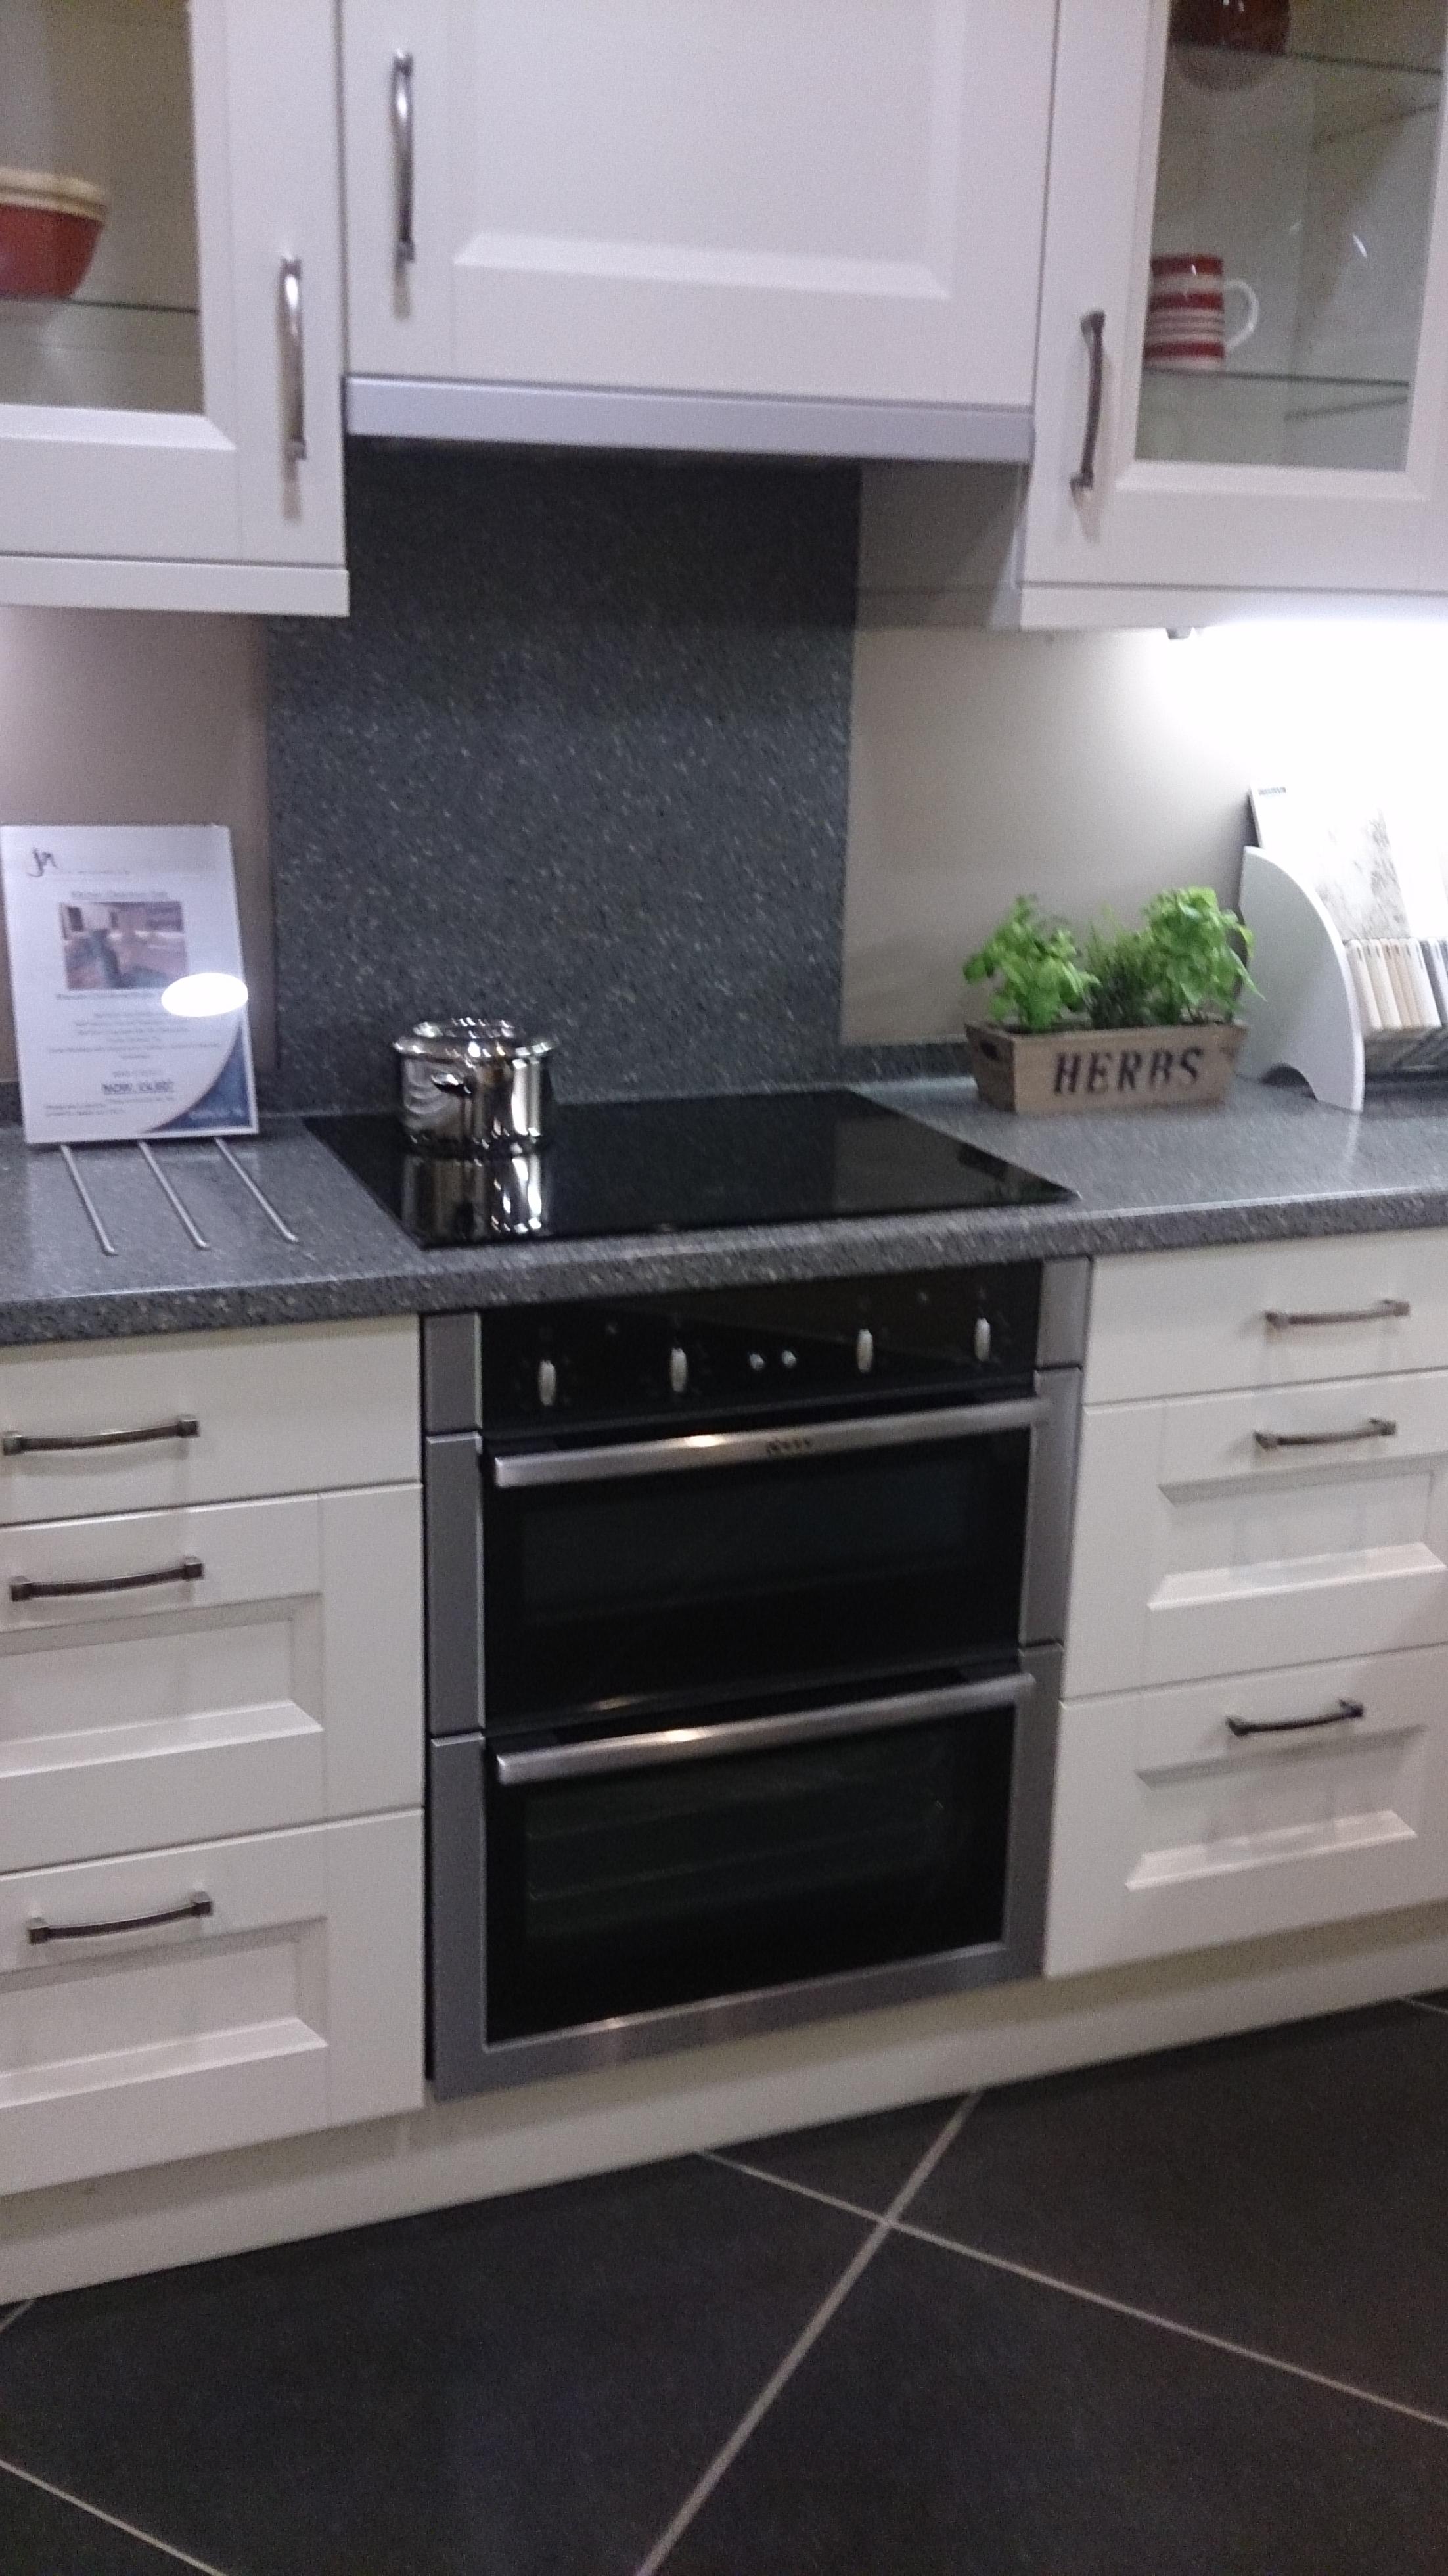
I have my eye on a redundant showroom kitchen at nicholls which I think will provide a large part of our renovation kitchen at quite a good price - it includes a Neff induction hob and double oven, dishwasher, and all the extra's which would probably add quite a lot to our quote of £2k for the basic units from Howdens. It has a lovely Corian worktop which would need altering so my question is:- How easy is it to alter the worktop fit our use. I think most of it could be cut to fit two of the sides of our u shaped kitchen and we would need to buy the third side which would be a breakfast bar. But is it possible to join separate bits and still look good?


-
Floors, plastering and time to recover!
TheMitchells commented on TheMitchells's blog entry in Scooby Cottage renovation.
Thanks for all the best wishes and yes, he's recovering well - has a couple of scars which just add to his handsome good looks - he'd give Daniel Craig a run for his money now! Re the plastering - no - I did the prep and plasterboarded the rooms then we had a local firm in. I think they did a smashing job so will call them in for the next stage when we're ready. Its back to work tomorrow - painting the fence while I prep the bedrooms. He's working mornings only this week to ease him back slowly. Then its full on for next couple of months - we are over a year into this renovation and while initially we said ready to sell by spring17, we are now just hoping to get it sold before Christmas!- 7 comments
-
- 2
-

-
- plastering
- flooring
- (and 1 more)
-
Floors, plastering and time to recover!
TheMitchells posted a blog entry in Scooby Cottage renovation.
Its been a while since the last blog and lots has happened. We'd been busy with other things and planned to crack on with the house but while on the way to our house a couple of weeks ago, the OH was hit by a car which failed to give way at a junction. He was riding his cycle, got thrown up and across the road, landing on his head. Luckily, nothing was coming the other way, and he was wearing a helmet which took a lot of the impact and somehow, apart from lots of scrapes, his main limbs were fine, it was just his head that was badly hurt. He suffered a fractured cheek and eye socket but luckily, his eye appears okay. There were no fractures of the head or neck so after a night at the hospital he was sent home. A week later he had an op to fix the cheek and is now recovering from that. His good looks have returned with only a small scar around the eye. Another week and I'll be sending him back to work - he can do the painting at least! And in case you are wondering; the car driver was reported for careless driving and has admitted liability. Back to the house and a few pictures of the plastered bedrooms. What a transformation from their origonal state. The old windows had plasterboard added right up to the glass so I did take it all off and redid the reveals. It looks so much better now. The new cupboard on the landing and door to the front bedroom. and the back bedroom; This is the wall in the last blog which was my first plasterboarding attempt - it looks much better now. We are looking to start on the bathroom downstairs next. I have been busy sourcing everything and once the OH is back to normal, it should leap forward. The stud wall is in place, the bath is sitting in the bedroom and I am waiting for Nicholls to give me a good price on the rest of the furniture. More to follow...............- 7 comments
-
- 3
-
-
- plastering
- flooring
- (and 1 more)
-
Iam planning to use bamboo in our renovation and I think it would look so much better right through the ground floor, into the kitchen too. If we were to seal it well with that Sikaflex that you recommend, do you think that would be sufficient protection from flooding/water damage. I too was looking at the 10mm strand woven t&g from Simply Bamboo. I dont really want to use tiles but neither do i want to leave the new owners with a possible problem should they ever have a water leak/flood.
-
'Nother newbie thinking of developing garden plot
TheMitchells replied to Dinosaur's topic in Introduce Yourself
Dont forget to start a blog as we can follow the process. -
Cheers - I'll get it ordered! thought as much but its nice to have it confirmed. The OH is out of action for a while as he was knocked off his bike during the week so i didnt want to bother him. he's really pi**ed off as the weather is gorgous and he's not getting to enjoy any of it. I shall show him your photo's and make sure we do the same.
-
Hi - advice please. we are on the point of ordering a trojan bath (as recommended on this site) and I need to know whether to order one with two holes for taps or none. is there a set distance between the tap holes as we are getting the taps from a different supplier? I dont want to get the bath and taps and find they dont fit the holes....... Also has anyone had dealings with QS Supplies as their price for the bath looks very competitive. Thanks in advance.
-
Jeremy, Any chance of photo of the bottom edge with the pvc moulding. My parents want a shower installed in place of their current bath and they like the look of these panels. am I right in thinking to fit the shower base first then the wall panels so any water is flowing into the tray, rather than the wall panels and then the tray with the issue of water possibly seeping beind the tray if the seal goes?
-
Plasterboarding newbie and the lounge loses its floor.
TheMitchells commented on TheMitchells's blog entry in Scooby Cottage renovation.
I think I prefer this one https://www.todd-doors.co.uk/cottage-6-light-oak-door As there are no windows on the landing, I was hoping to borrow some light from the bedrooms so wanted a glazed door for the bedrooms. And actually the only other door needed is the bathroom. only three internal doors in the whole house Yous could be the bathroom one and this for the bedrooms. sorted. I think a trip to St Albans is in order! -
Plasterboarding newbie and the lounge loses its floor.
TheMitchells commented on TheMitchells's blog entry in Scooby Cottage renovation.
Oh and we had a plasterer in this week to quote for skimming the bedrooms. I was a bit worried that he would tell me I had done all the plastering worng but he was quite complimentary - phew! He did point out a few things I could have done differently but I am happy to learn. Apart from how to plaster! -
Plasterboarding newbie and the lounge loses its floor.
TheMitchells commented on TheMitchells's blog entry in Scooby Cottage renovation.
They look nice - thanks for the heads up. -
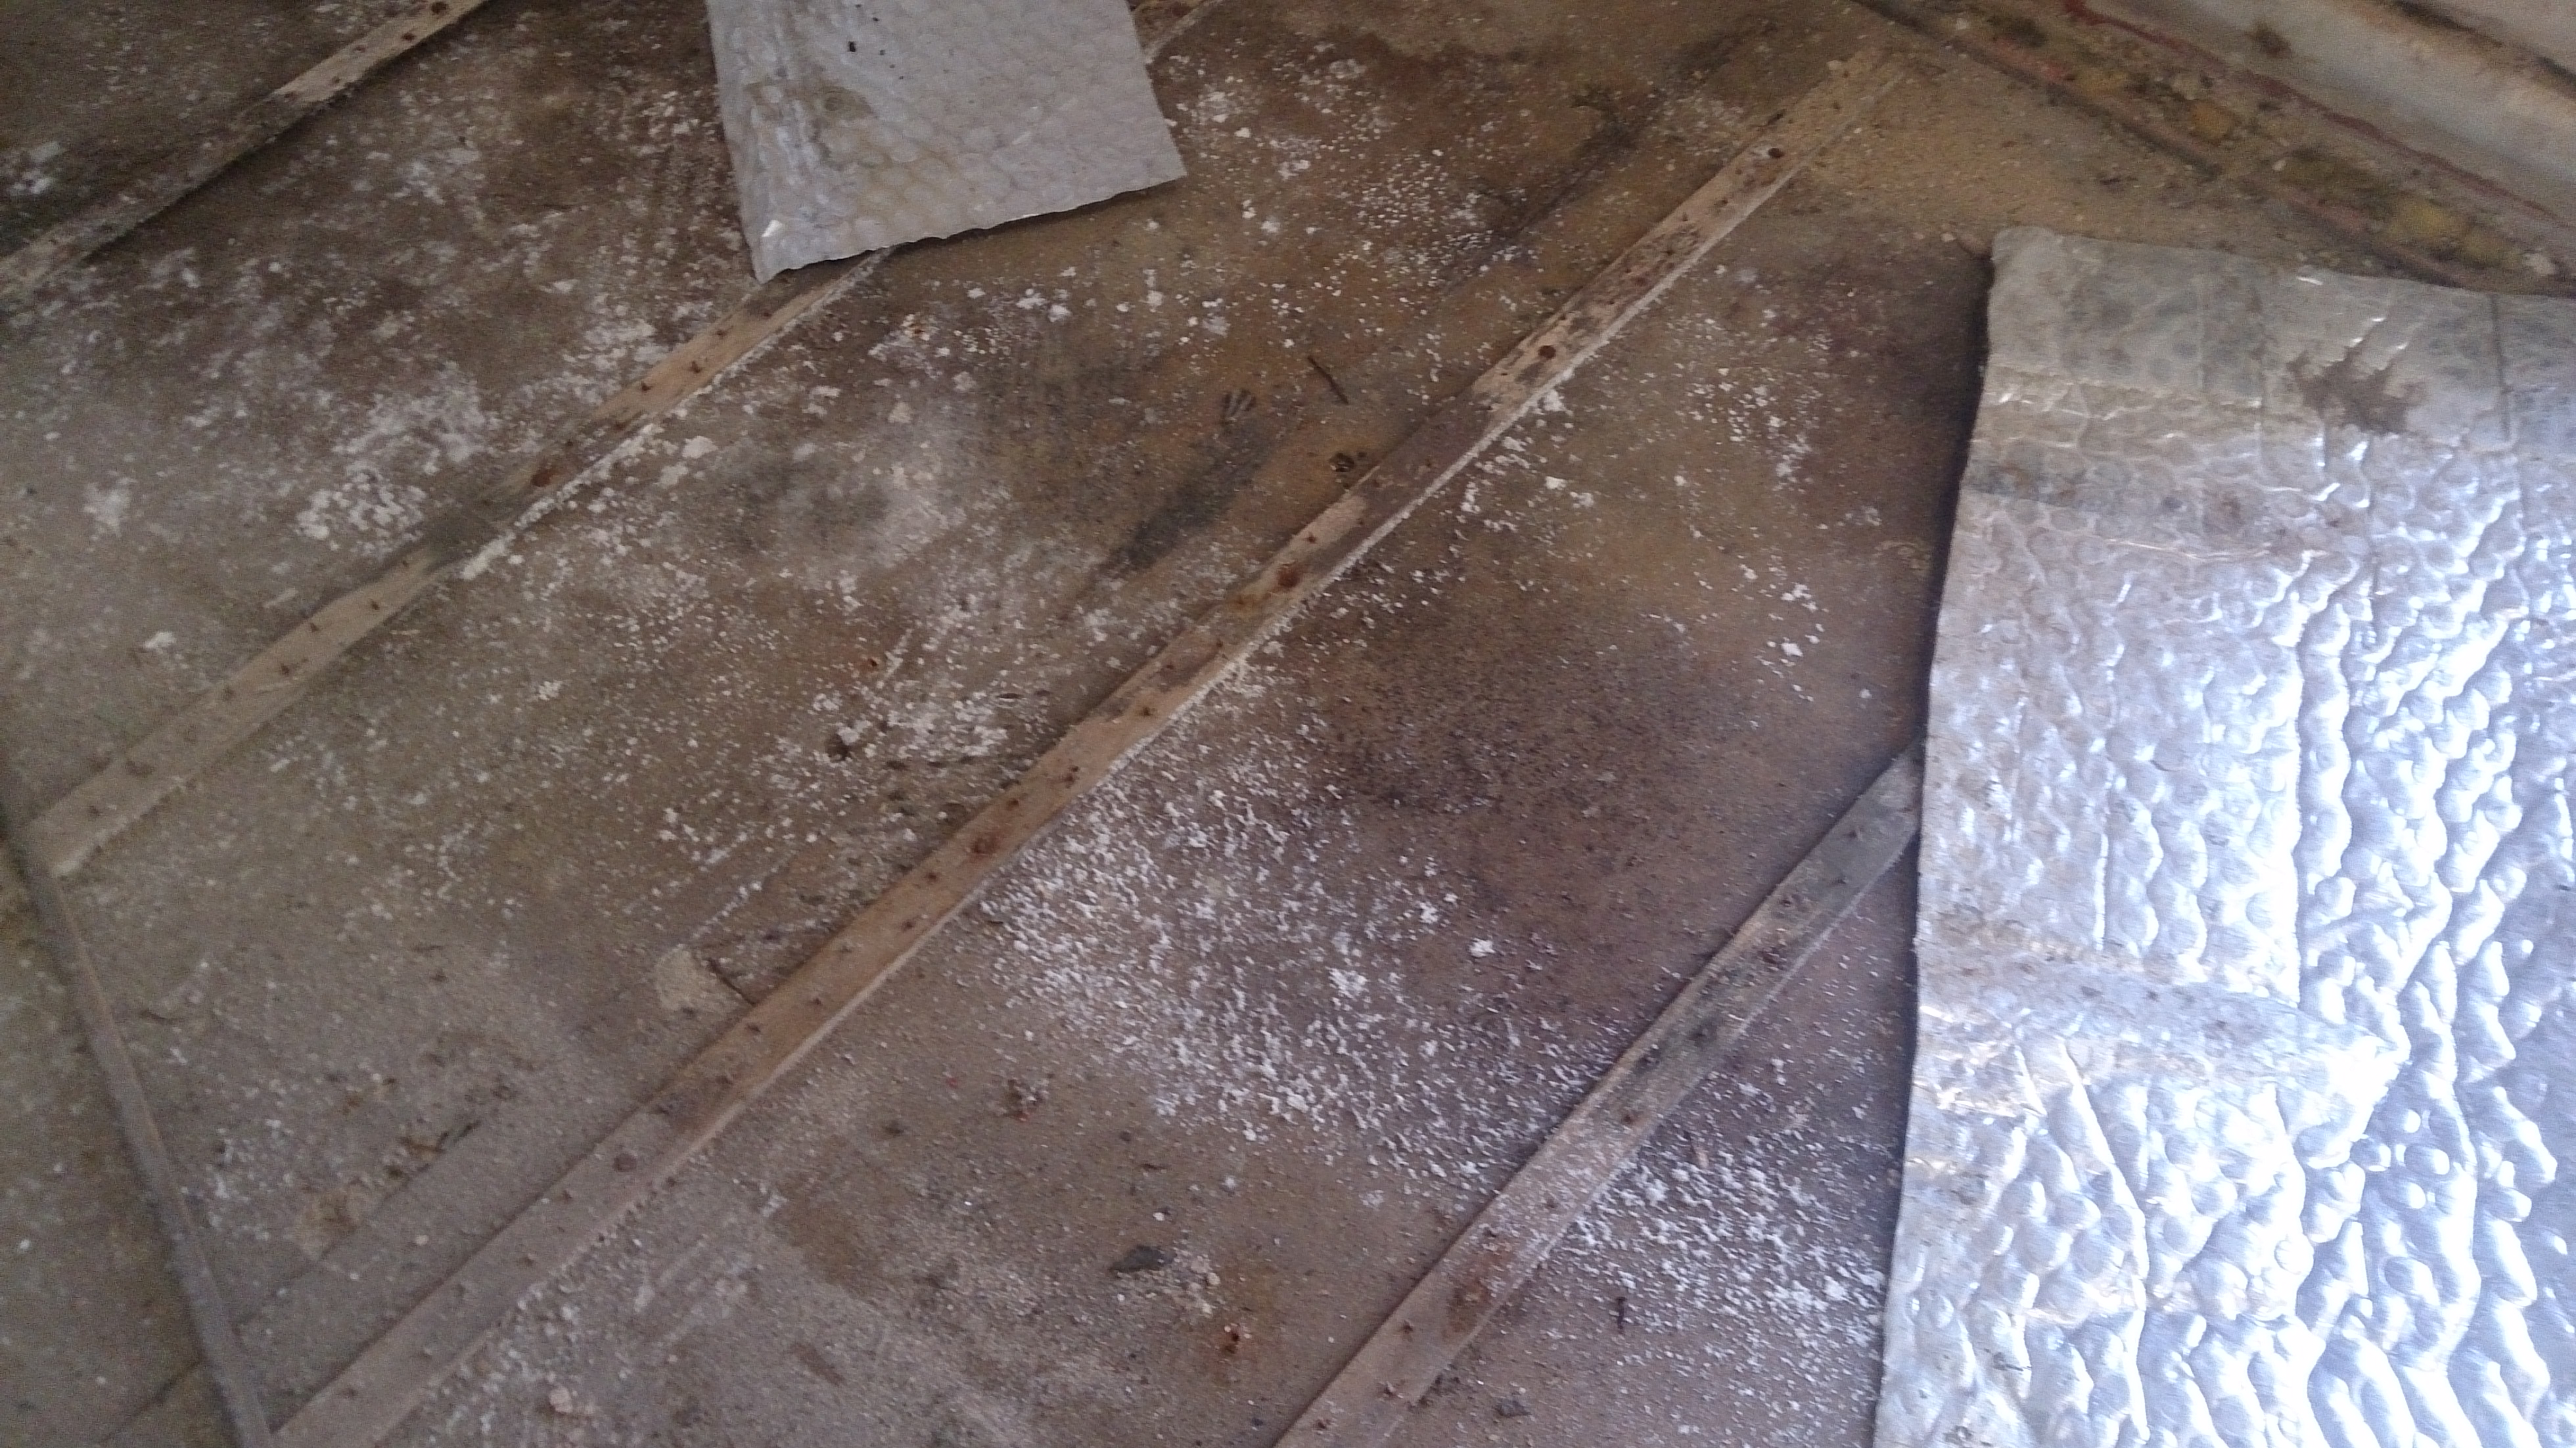
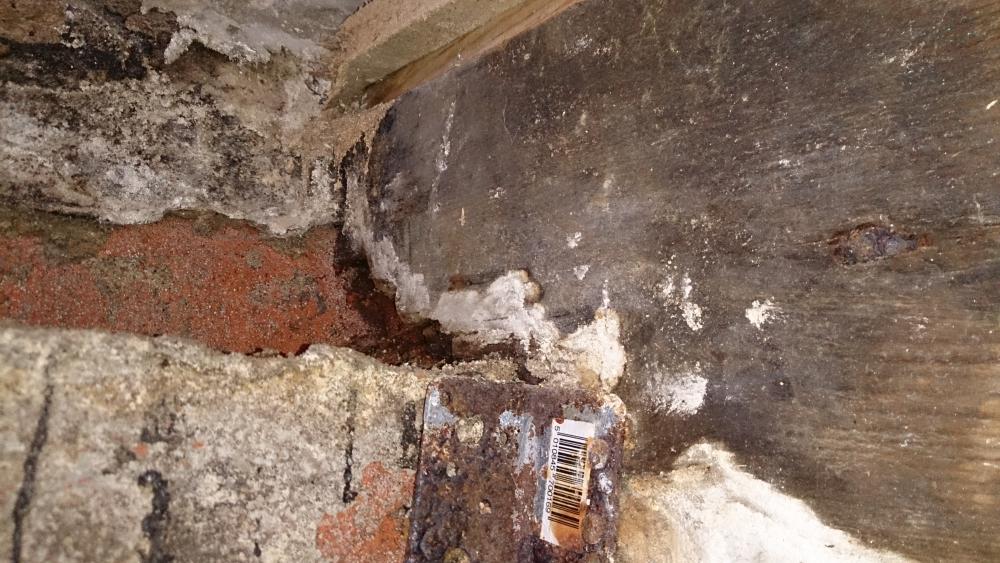
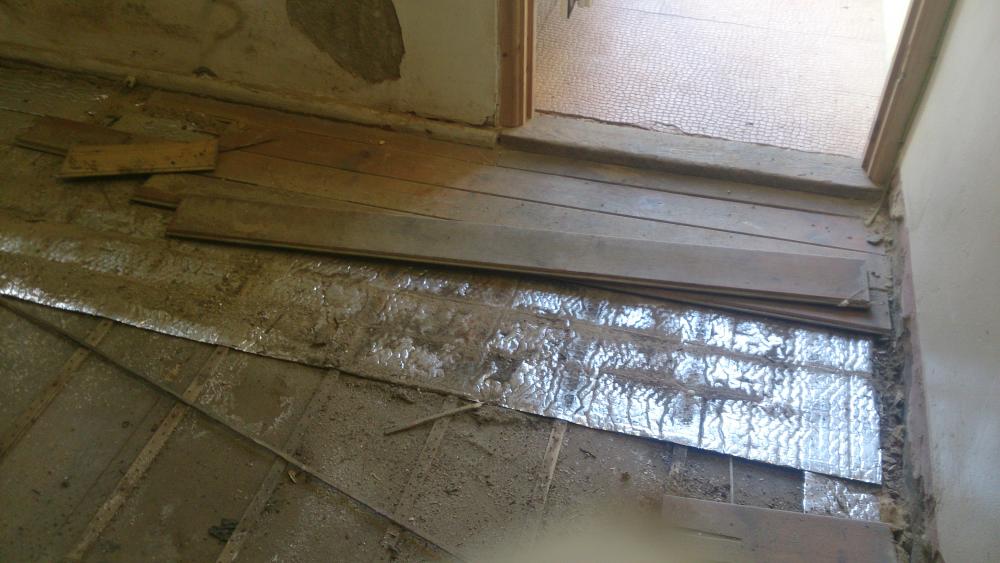
In our renovation of a Victorian end terrace, we have been replacing the lounge floor beams as they had been rotting where they sat on the cellar wall, which is reasonably damp most of the time. In most cases there was no dpc. as can also be seen, as we removed the flooring, the chipboard was quite damp too with mould. The make up of the floor was as follows: beams, with rockwool insulation squashed between and in some areas, around the front door and alley wall, the rockwool was wet. tongue and groove chipboard - some of which was damp. upside down gripper rods - to hold the insulation in place. foil backed insulation sheets. pine tonge and groove. In two areas, the chipboard was quite rotten and could be pulled away with fingers. So we have removed all the flooring and the old beams, fitted a new extra thick beam across the whole floor and then put in new joists. We have sat them on dpc, with engineering bricks, slate and strong cement used to level them to the correct height. Then we have laid new 18mm T&G chipboard across the whole floor. My question is how to insulate the floor to provide a comfortable lounge without any draughts while avoiding any future damp issues? This house is to sell so we do not want to spend too much yet still want to do a reason job. We want to lay bamboo flooring above the chipboard. but do we need any membranes? and how best to insulate? The cellar could always have damp issues, particularly in that corner, although we have added an airbrick to the front so there is now a cross flow of air to the other airbrick under the bathroom. so if we just add Earthwool between the new joists, will that get damp and eventually rot the new joists and chipboard? Or would a thin insulation go on top of the chipboard before the bamboo? We dont have much head room, only 2.1m in the lounge, so do not want anything that will reduce the height further. Any suggestions/advice.


-
Decking - concealed fixings
TheMitchells replied to Jimbouk's topic in Landscaping, Decking & Patios
love the look of that deck - nice job. -
Plasterboarding newbie and the lounge loses its floor.
TheMitchells commented on TheMitchells's blog entry in Scooby Cottage renovation.
point taken and will be considered. It is something we could add. Thanks. -
Plasterboarding newbie and the lounge loses its floor.
TheMitchells commented on TheMitchells's blog entry in Scooby Cottage renovation.
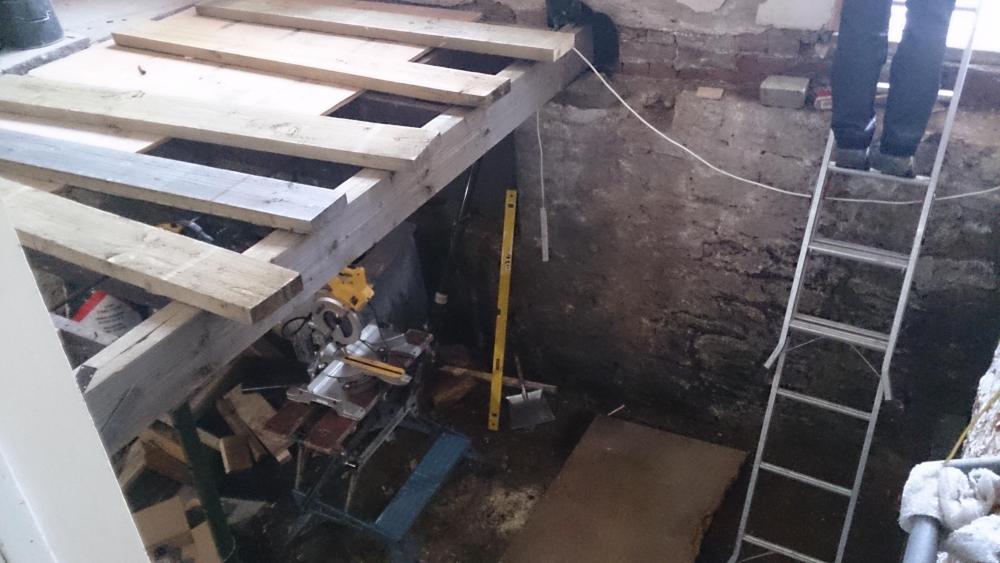
No we havent involved BC for the flooring. I used tables and then went closer together for all of them. so its well supported. here are the new beams. supported by hangers on the cross beam and sitting on dpc on bed of cement on the house wall. The cross beam is sitting on the front house wall on engineering brick and dpc and at the inner side, its on hangers off the main beam across the house which supports the stairs but additionally we have added a significant prop, sat on a cement bed with the base protected from damp with thick dpm. So overall, we dont think this part of the house is going anyway for a good few years yet. chipboard flooring should be going down in the next day or two. then its deciding what to do next; bathroom, walls, electrics downstairs or middle room floor..... decisions, decisions! -
Plasterboarding newbie and the lounge loses its floor.
TheMitchells posted a blog entry in Scooby Cottage renovation.
Some of the plaster of the bedrooms was very loose and severl months ago, I stripped these areas, leaving any sound plaster. However, this has left me with very uneven walls. The plasterer suggested that we apply plasterboard to the walls and then he'd come in and skim over, making it all look nice (hopefully). But before we could apply the plasterboard, I had to get the walls to the same depth or the dots/dabs would be huge in some areas. So I decided to use the pieces of plasterboard I had and stuck them onto the wall, before using Hardwall plaster to fill the gaps. It may look a little strange but it seemed to have worked. Okay - it might not look pretty and I am sure there was probably another method I should have used, But it was all I could think of. and all I had to do then was fill in the gaps ready for the PB. We got a stack of 1800x900 delivered as these were not too heavy to carry and we didnt think the larger ones would actually fit up the stairs. so after manhandling them into the house, (down the alley and along the path, one at a time!) and I had watched several HooTube clips of how to fix PB, I was ready to have a go. I even had bought a hawk to go with the rest of the tools. But as I am sure you all know, its not as easy as it looks. Mixing the adhesive was okay but getting it from the hawk, onto the trowel adn then onto the wall was impossible. It all ended up on the floor! So I swopped for smaller tools - the trowel for holding the adhesive and my faithful wallpaper scrapper for applying it to the wall. Worked a treat. The only thing was that the dots and dabs were a bit smaller and so there were lots of them. Dont laugh! This was my first wall and It worked; the boards stuck like glue and once dry, it was all completely solid. I did get a bit better and even started making sure all the edges were sealed by the adhesive, particularly around the sockets and ceiling join. The same wall once finished We even have made a lovely cupboard on the landing - ideal for hoovers and stuff. We are now waiting for a plasterer to come and give a quote to come and skim all the walls and ceilings, hopefully making it all look pretty. So after many months we have pretty much finished upstairs, apart from the painting and fixing the radiators after its been plastered. the next job is the big one which we've sort of been dreading! The lounge floor! When we had the survey done (nearly a year ago now), it was highlighted that some of the ends of the floor joists, where they sat on the exterior alley wall, were rotting and needed replacing. we just were not sure how much would need doing or how we would do it. But we'd give it a go. First job was to take up the floor. It started with pine tongue and groove, follwed by silver thermal bubblewrap sheets, help down with upside down gripper rods ontop of the chipboard. As we lifted it, we were surprised by the amount of mould on the boards, under the insulation. But I guess we should have expected it. that corner of the cellar below was always damp and they had fitted rockwool between the joists which were sodden. So I guess the chipbaords and the joists were always going to have issues with damp. We could pull up the chipboard with our hands around the front door, it was so damp. As we lifted the floor, we could check the conditions of the other joists and luckily the ones on the firepace side were all okay. There was a very large cross beam on which all the joists were supported which was supported in turn by two accro props and a very large lump of wood, which was stood on the damp floor, so had a very rotten base. We could see where many bits of wood had been added to the ends, underneath, alongside the joists, anywhere extra support was needed. it was a real mishmash! We decided to add a new joist, across the middle of the floor which would allow us to get rid of the accro props. And replace all the beams at the alley side of the room, which had the most rot. I popped to the shop for milk and when I got back, the whole front floor had gone. access was now via a ladder! After cutting our new cross beam, the OH used joist hangers to attach all the cut beams. The far end was to sit on the wall, where that loose brick is, sitting on a damp proof membrane with the other end attached to another structural beam, next to the stairs. However, that wasnt looking great so we plan to add a wooden prop once i have created a brick plinth for it to sit on. Okay, it isnt attached on the photo - I'll get one of that on Monday But it is done and looks so much better. all the rubbish beneath is gone and the accro props are only supporting the new beam till the new prop is fixed in place. The end on the wall is fixed on an engineering brick with dpm around it. so hopefully this beam will not rot in the next few decades. Next job is to attach the rest of the new beams and hope the floor is level. It wasnt to start with so any improvement will be a good thing. More photo's next week after we fit the new periscope airbrick thingy to give additional ventilation to the cellar, and fit the new joists so we can actually walk in from the front door without falling into the cellar. -
New floors and a new stud wall - shame about the ceiling....
TheMitchells commented on TheMitchells's blog entry in Scooby Cottage renovation.
they are LED downlighters and we kept the insulation away from then. They are dimmable and also have a switch to change from warm white to mid to cool white. so if the new owners want to change the look of the room, they can. we've left them on the mid white and it looks fine but once all sorted and decorated, we may want to change them. And it wasnt the bathroom floor, just the wooden cill above the loo. and now its dried, it has lost most of the warp - its only water marked now. whereas the ceiling still has a large hole in it........ -
Quality of Wickes 60% off Laminate Floor?
TheMitchells replied to Ferdinand's topic in Wood & Laminate Flooring
sorry - dont have any advice to offer but interested in any comments on this deal. -
New floors and a new stud wall - shame about the ceiling....
TheMitchells posted a blog entry in Scooby Cottage renovation.
We seem to have made huge strides in the last two weeks with both of us spending a good amount of time at the house. The pipes have been laid ready for the radiator as well as the lights for the downstairs lights. To try to get the rooms ready for skimming, we needed to sort out the bedroom floors. they were a mish mash of old boards, some damaged where we'd lifted them (tongue and groove is hard to lift without lifting them all). So we took the decision to replace them all - 20 sheets of chipboard at £150 for both bedrooms from a local builders merchants which I have started to use. It was £50 cheaper than the others I got quotes from and they delivered the following day. I had already bought Earthwool from Wickes while on offer a few months ago and we filled up the floor to help damp down the noise passing into the rooms below and also I wanted to minimise draughts between floors. That went fine. Then we started to lay the boards with the OH marking the locations of all the pipes and wiring. It was all going well when someone got a bit cocky and forgot to watch where he was going - and you can guess the rest! Luckily, he fell backwards and landed on the previously laid boards but we now had a new hole into the lounge ceiling which was the only nice ceiling in the whole house and wouldnt have needed anything doing to it. I was just happy he didnt fall though and he was happy he didnt land between two beams! I was also glad it wasnt me or I wouldnt have heard the end of it..... But it was great when we later went home and discovered some plants I had on the bathroom window cill had leaked water onto the wood beneath, warping the wood - he didnt dare say too much as I'd been so understanding about the hole in the bedroom floor!! We managed to stick some pieces of PB ontop of the hole so we can, later, repair the ceiling and hopefully our plasterer can make it look nice. At least then we could carry on and get the job finished and I have to admit, it looks much better than the piecemeal effect earlier. The pipes for the two bedroom radiators were installed with the board above left loose so it can be lifted when we get round to installing the radiators, which is after the walls are skimmed. As we took out the wall between the two front bedrooms and created the large bedroom as seen above,we also had lost the landing bedroom wallAs was. As is now. seen from inside the bedroom. You can see where the old wall was on the ceiling. so with some of the Wickes timbers which were bought when on offer (£2.15 each less our 10%discount), we created a new bedroom wall and also a cupboard for the landing. Its always useful to have somewhere for the hoover/ladder for the loft etc. And should the new owners want to reinstall the third bedroom, they can do it easily enough by going through the cupboard. We put a strip of wood on the back of the cupboard and OH will wire in an aerial cable and socket as that top corner will be the ideal place for a TV on a bracket. Perfect for watching tv while in bed, if thats their thing. The OH will get that PB'ed next week. Hopefully we'll be ready for the plasterer upstairs in a week or two. And it will be fantastic to see upstairs almost finished - even though there is a huge amount to do downstairs, it will be a nice milestone completed. Next blog - my plastering attempts and all change in the garden. -
sedums and sempervirens are both good as they can cope with dryness. A lot depends on whether you want a roof that stays green or one that changes with the seasons. I think there are quite a few companies that provide advice. But I havent done one myself. I like the idea though.