TheMitchells
-
Posts
908 -
Joined
-
Last visited
-
Days Won
2
Everything posted by TheMitchells
-

Passing inspection.
TheMitchells commented on curlewhouse's blog entry in Sips and stones may break my bones...
When we contacted the local council BC regarding the new electrics planned for our renovation house, we were told they dont have anyone qualified to check electrics!. We'd have to find an electrician prepared to inspect it for us. Instead the OH joined a certifying Company. He had not bothered while he didnt need it but it cheaper to join up for a year then pay a local electrician. Lets hope you get somewhere with the senior staff at the company. -
Discount Offers of the Week
TheMitchells replied to Ferdinand's topic in General Self Build & DIY Discussion
@PeterStarckWe were thinking of visiting the shop in Leicester as family live near there so we are often in that area. Let me know how much you need and I'll see if they'll do a deal on a larger order? we need to get it ordered sometime next month, I think. -
Discount Offers of the Week
TheMitchells replied to Ferdinand's topic in General Self Build & DIY Discussion
If anyone sees any good offers for Bamboo flooring, I'd be glad to have the heads up. We'll be ordering in the next month or so. will need 24 sq metres of Natural strand woven and plan to get the Uniclic system as it does not need glueing down. Keep checking with Simply Bamboo and The Bamboo Flooring Co but neither have much off. -
Welcome Amanda! Sounds like a very exciting project - we'll be with you all the way.
-
Have orderd the jenolite. sounds like just the right thing. thanks.
-
We have a bathroom!
TheMitchells commented on TheMitchells's blog entry in Scooby Cottage renovation.
And yes, sleepless nights but not sure why. Just wake up in middle of night and brain will not let me go back to sleep so get up and do something for an hour. Usually works. Unfortunatly it also means I make mistakes - I'm not sure where a couple of those pictures come from at the end. I should have left it to check in the morning instead of posting straight away. -
We have a bathroom!
TheMitchells commented on TheMitchells's blog entry in Scooby Cottage renovation.
B&Q for the ceiling light. Not expensive at all but the OH said it was quite good quality and it does look nice. They have quite a good range of similar and as the ceiling height is only about 2.1m, we needed something that did not hang down much. Will see if I can find the box for the name. Unusually, we actually went into the store so dont have a link -
thats not good news. its on about 4 corners. some worse than others. as we plan to sell it soon, i dont fancy the thought of having to get it all off and re-done.
-
Wow, I cannot believe its 4 months since the last blog entry. Life has just been busy, busy, busy and for a while, there didnt seem to be much to report, even though we have been busy. The bedrooms have been plastered and painted, skirting fixed and the bedrooms doors have been bought and are awaiting fixing. The best thing was finally gettitng the bathroom fitted. Its been a while since we had a working loo and while the 'portaloo' in the cellar was adequate, the new one is fab! Fist we had to rebuild the walls which was a shame as the middle room has looked great with all that space. Then we addede 9mmply (I think) which covered all the chipboard joins and gave it rigidity. Sealed with pva and screwed down. Although there are joins on the left hand side, these are going to be under the units and bath so we arent worried about them. The main part is all one for the lino to cover. The bath was one of the smallest we could find, 150cm long and we extended the side wall into the middle room to fit it in without having to dig into the exterior wall to fit it in, although fitting it was a PITA. AS always, the OH soon had it all fittd and I could start the tiling. having looked round at showrooms, we went for couple of vertical mosiacs, one opp the loo so you can see your relection!, and the other above the bath, along the shower line. They look smart although I did have some issues as they are a thinner tile than the rest and it took a bit of time to get it right. The loo was a bit of a pain as we didnt really have many options for its location due to the plumbing already in place, but then we had to get the waste through the floor avoiding the floori beams, which of course were directly where he wanted to go. So he had to use a side bendy thing to mive the waste a few inches to the left. Its not perfect but it works and once the sink was in, it was not too noticable. We're quite pleased with the final look - sorry about the photo's - its hard to get a decent picture of such a small room. But its almost finished, just a couple of little touch ups with the sealant and a glass screen. Even the radiator is up and running. still needs a door! but a curtain works for now. Upstairs the walls were plastered and painted and I'm very pleased with the look. The lounge has also been done and the ceiling repaired from the foot through it - you cant see where it happened. Am very happy with the plasterers apart from the mess they make! I spent a couple of hours cleaning the stairs, ready for painting the edge, only for the OH to paint the walls and not bother cleaning off the excess off the wood, so I had to do it all over again! But after filling and rubbing down the wood, I have undercoated the sides of the stairs ready for the final coat and the carpet. Its not briliant but as the wood is probably over a hundred years old, the buyer will have to accept the odd bump and crack that I couldnt cover. Here are before and after shots. So what else? Here's the lounge with the lights fitted and working. the skirting is cut and just needs to be fixed and I ahve the coving to put up - going for a polyeuythene one from Screwfix which had excellent reviews as its very lightweight and easy to cut. I shall let you know how it goes as i have ever done coving before. We had a chap in yesterday to come up with a plan for the kitchen. As it is such as small space, we wanted to get some ideas to add to the layout that we have come up with. We have gone for Howdens as they are very reasonably priced and they have a sale on now so hopefully we can get a really good price. But thats for the next blog post - I'll have finished the garden wall then too so more photo's. Its all coming together now but still seems to be taking ages to get to that finishing line. I guess we'll ge there, when we get there, no good rushing and making a mess.
- 5 comments
-
- 2
-

-
- bathroom
- plastering
- (and 2 more)
-
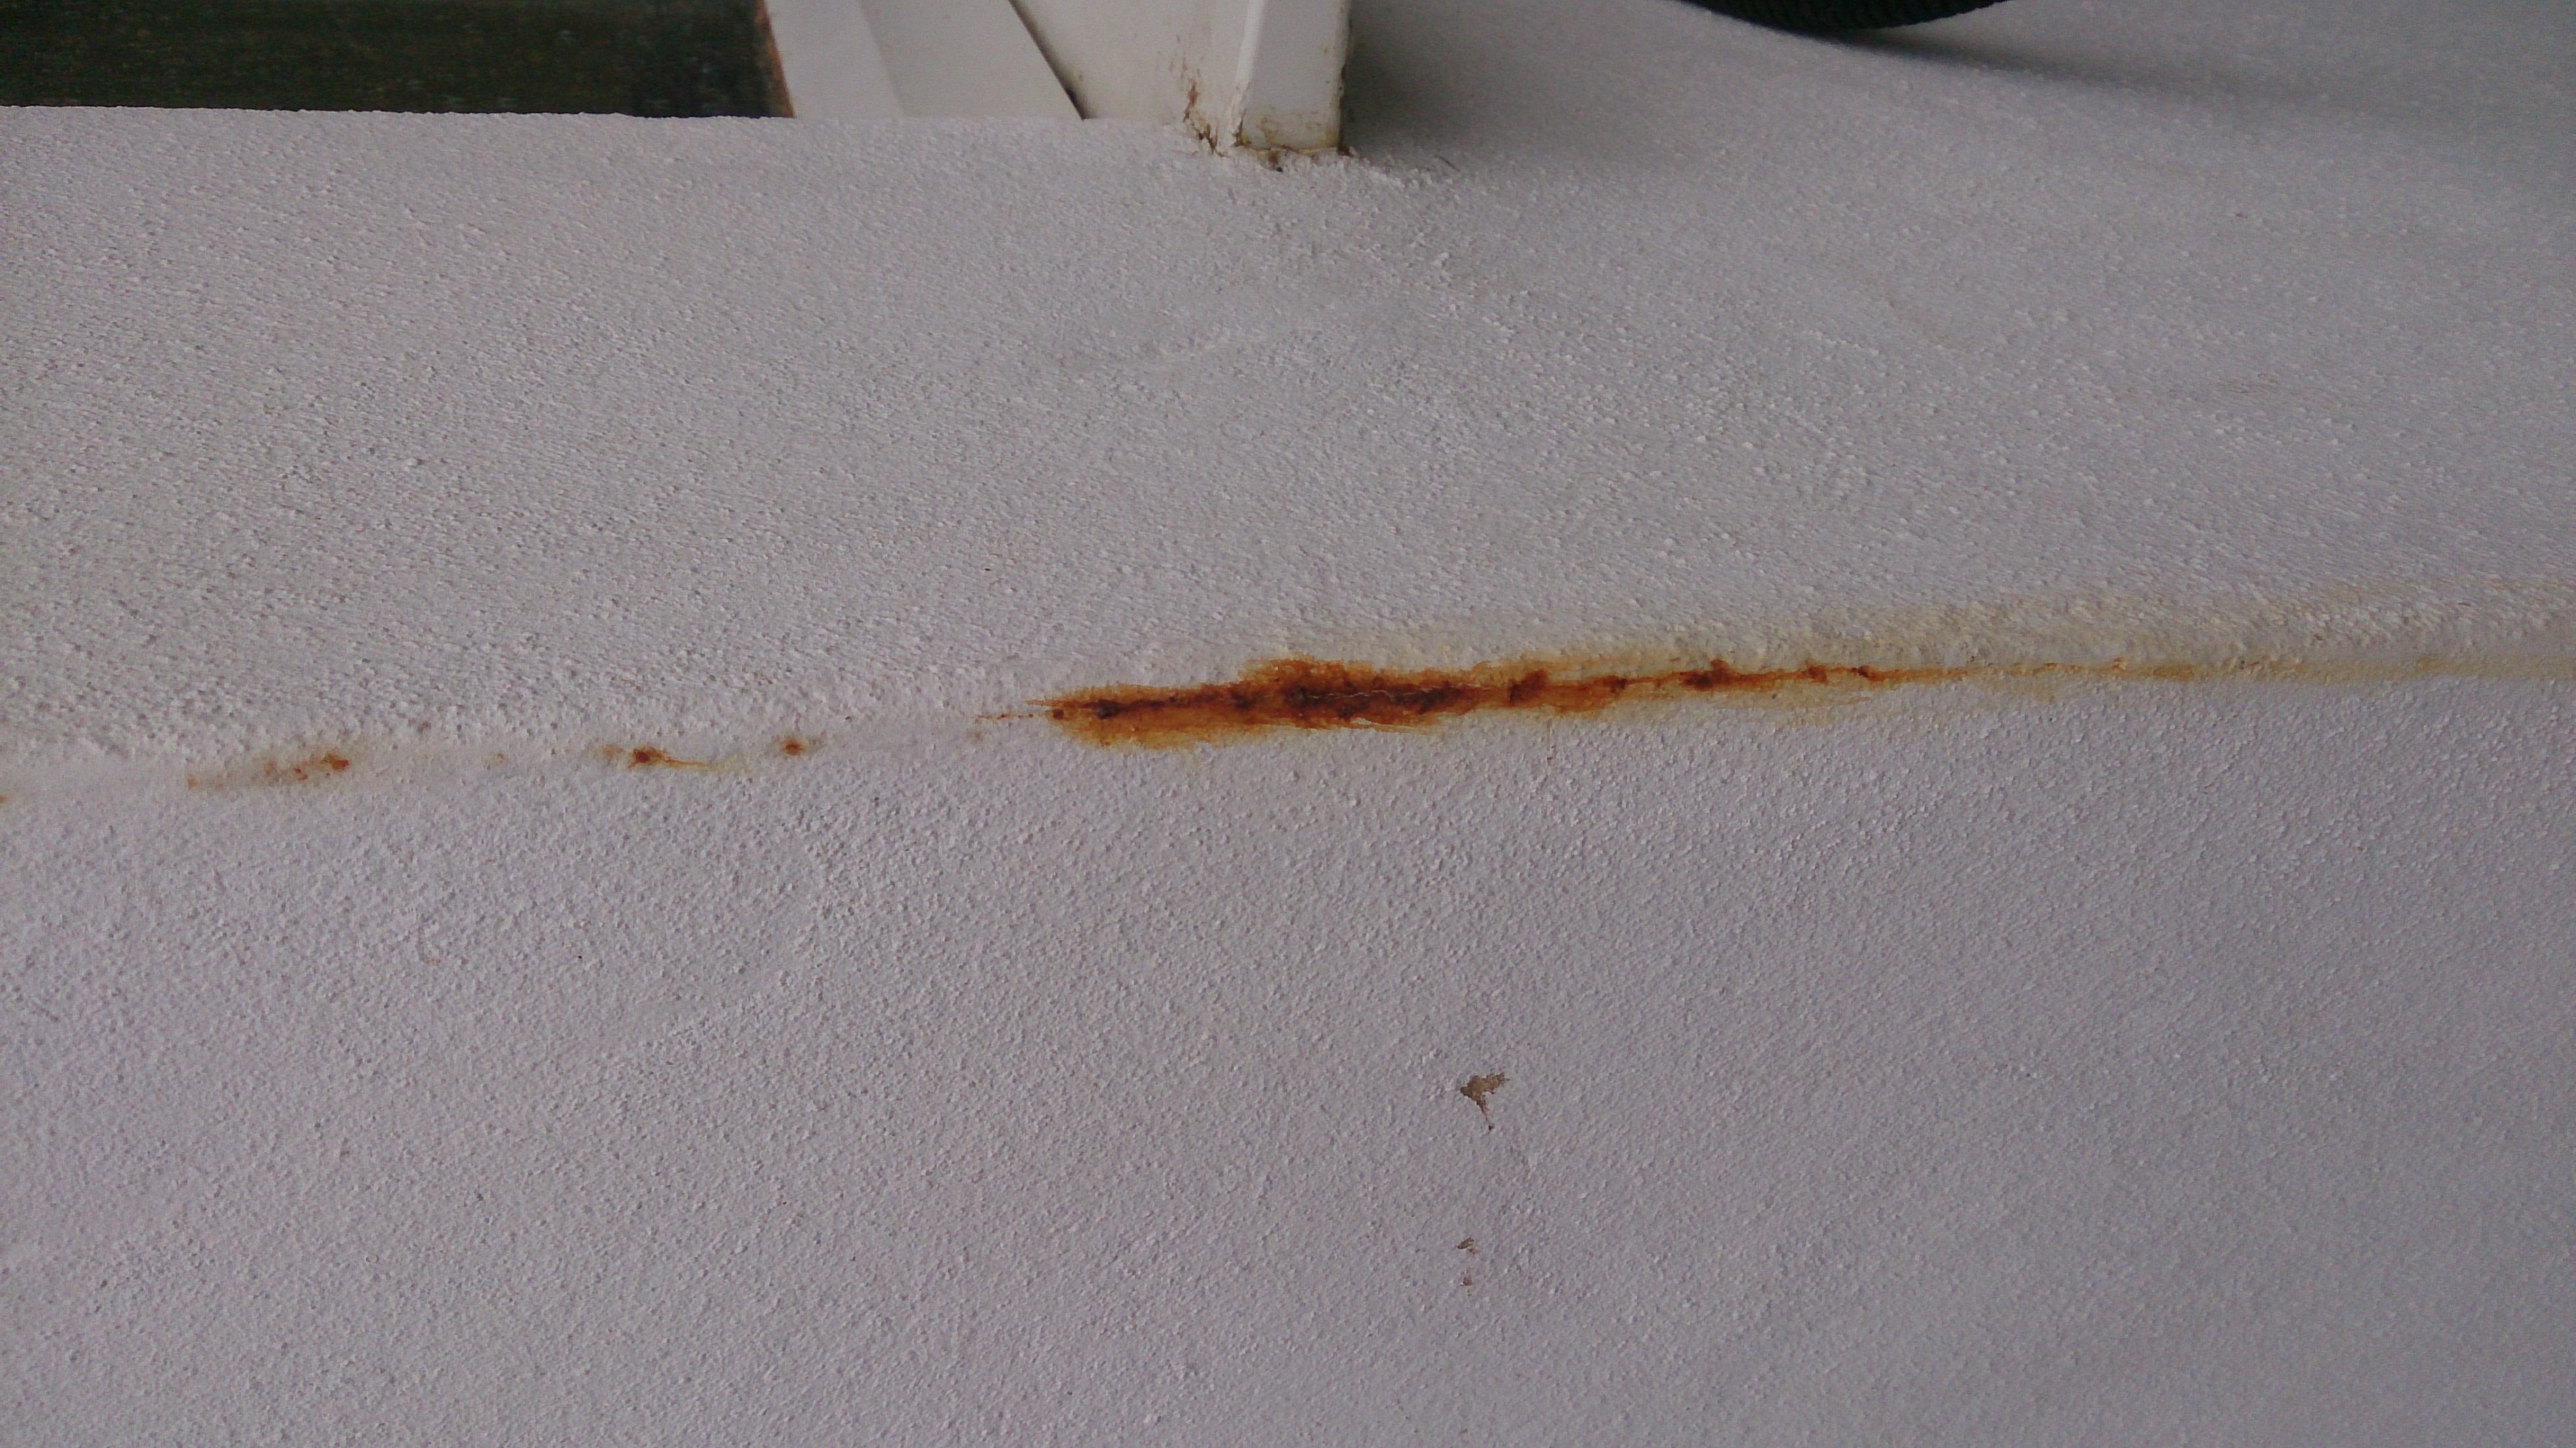
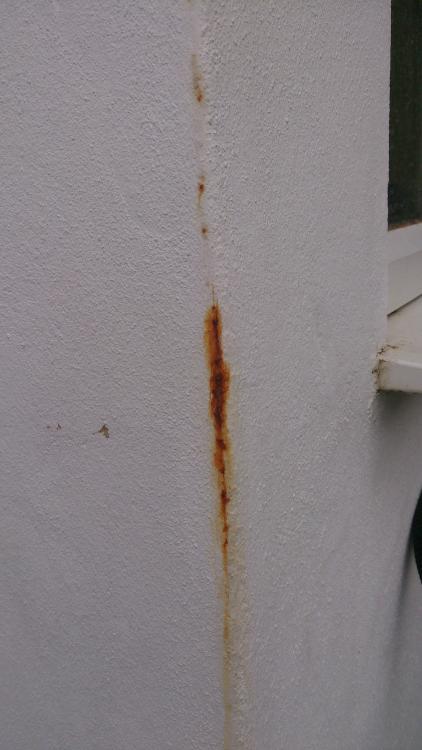
Can anyone give me suggestions for covering the rust showing on the corners of our front porch, in the render? I plan to give it a coat of white paint to freshen it up but assume if I just paint over the rust, it will soon show up. Its on most of the corners both at the front of the hosue on the porch and at the back on the kitchen extension. I wondered about Hammerite as better it has a slightly different shade of white than the rust. Or could I then paint over it?
-
okay, will give that a try. thanks - will let you know how it works.
-
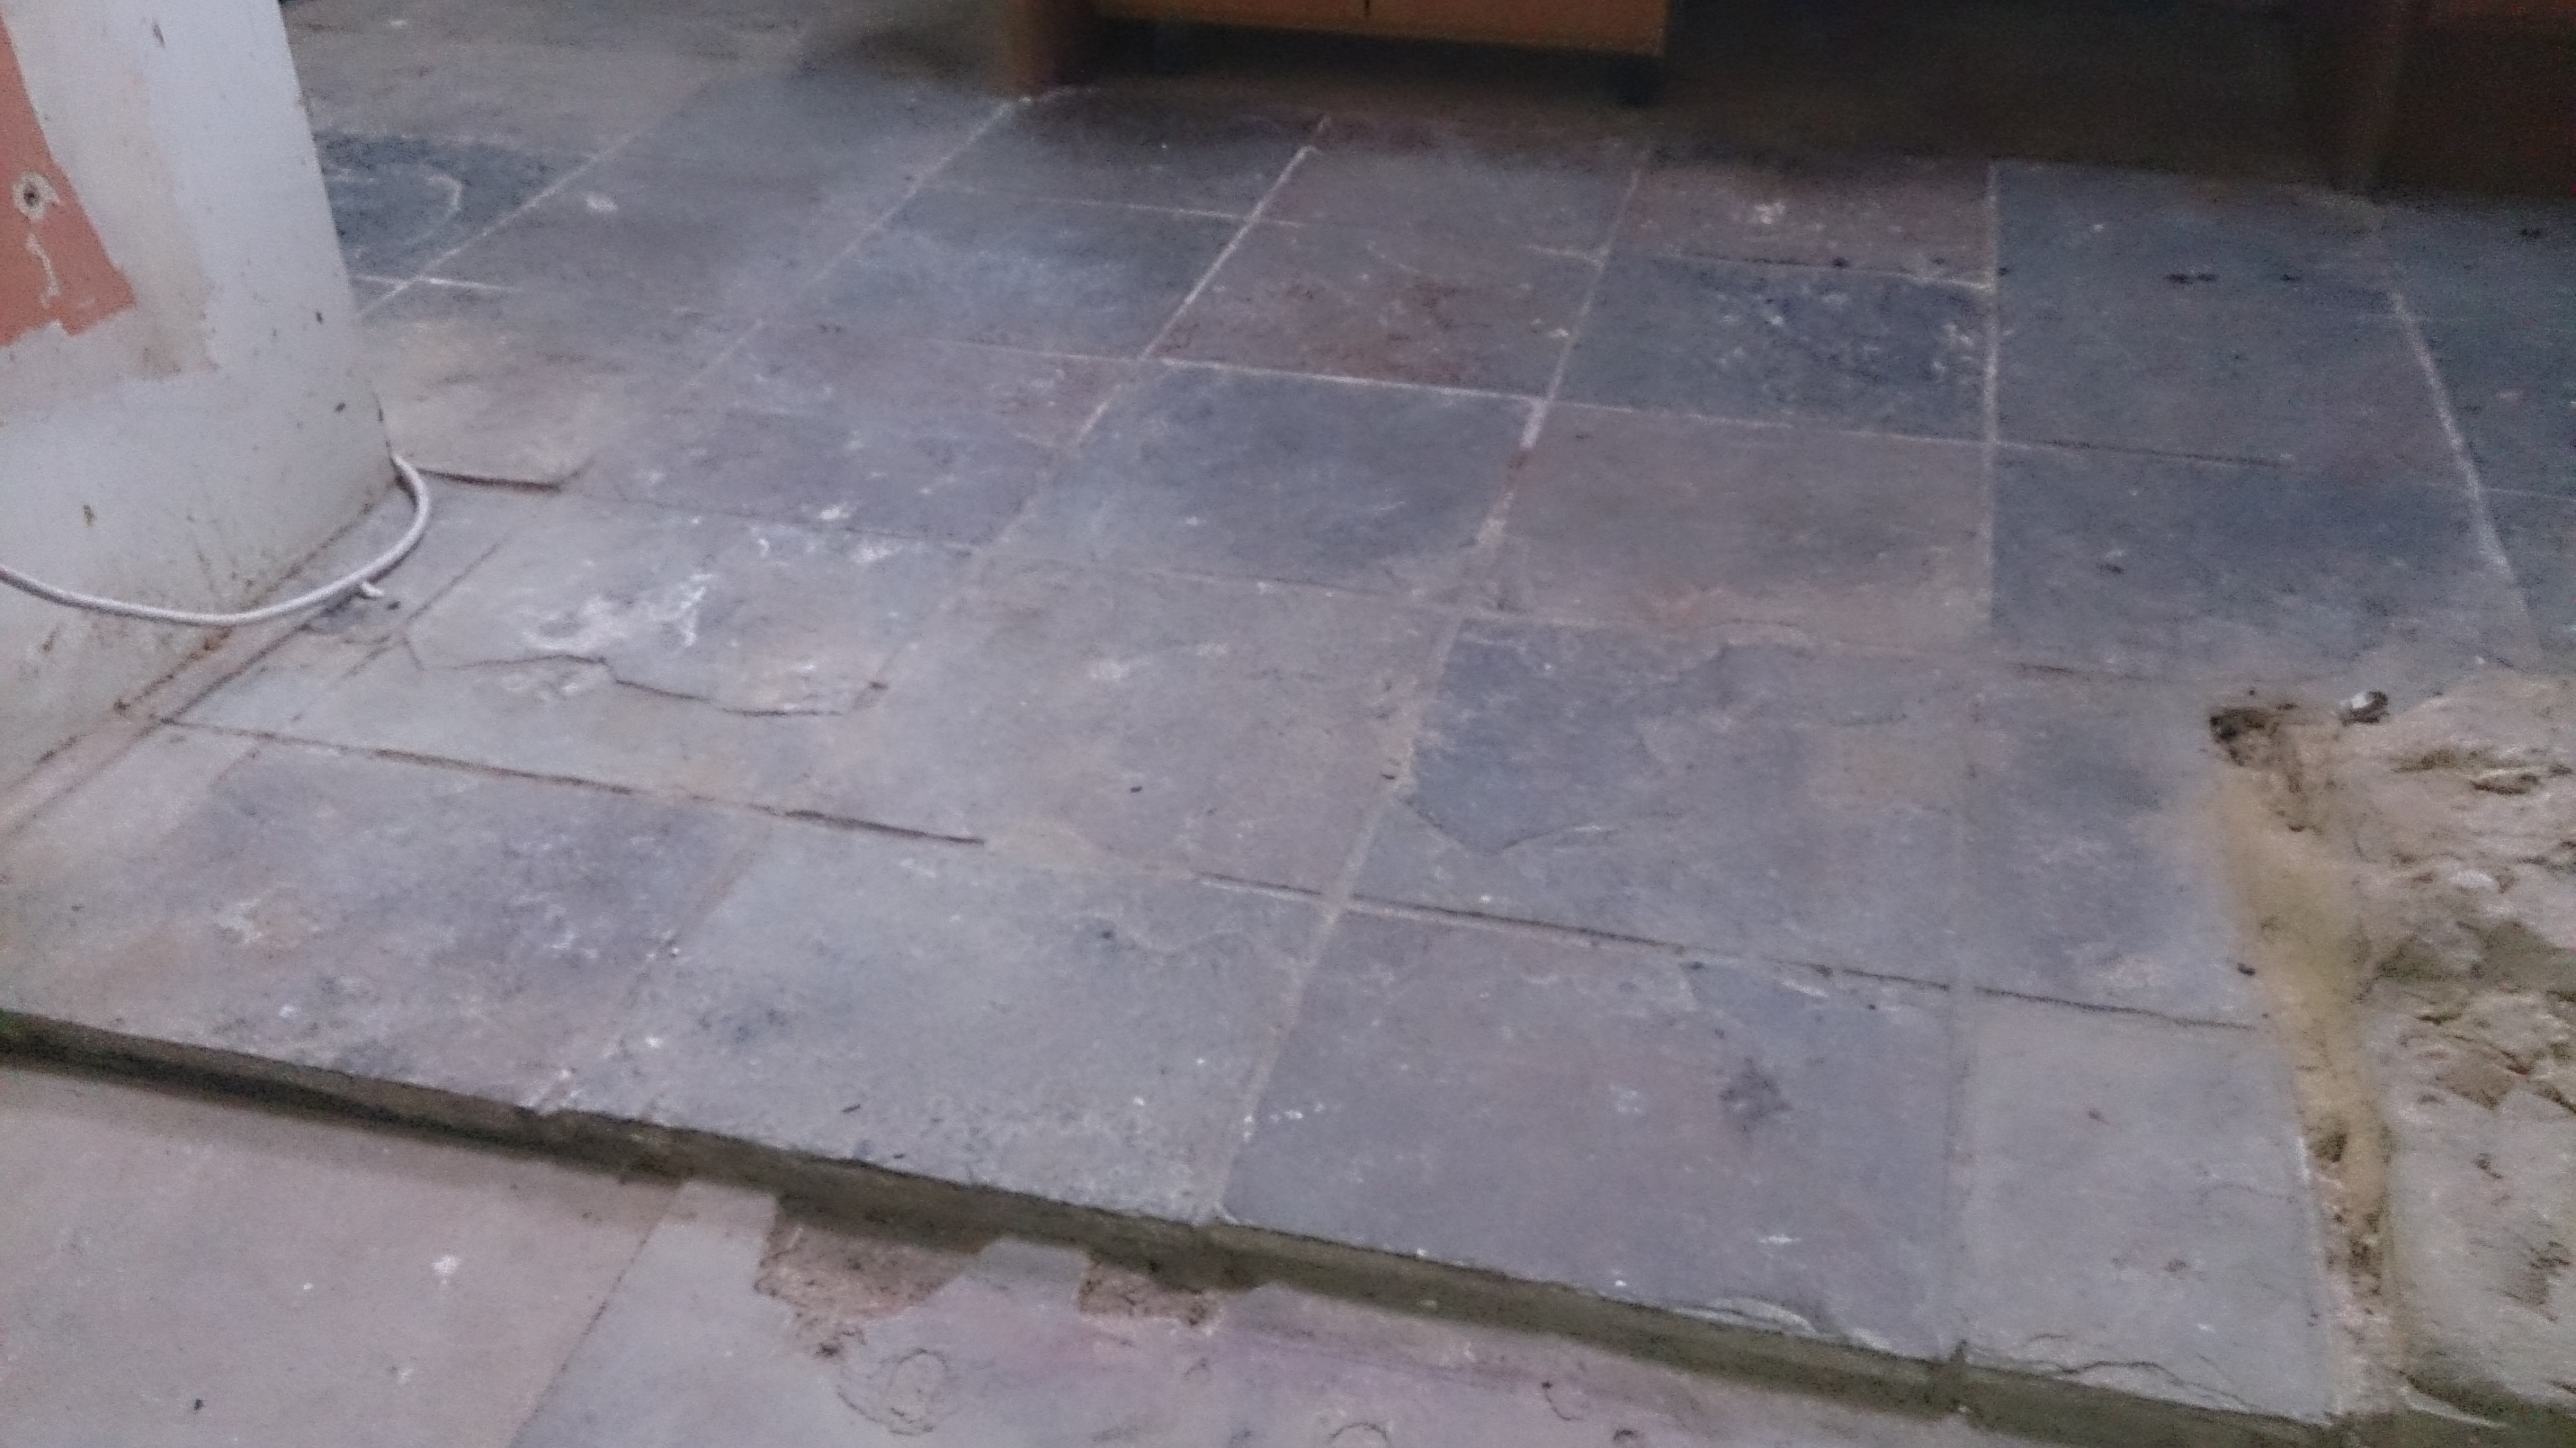
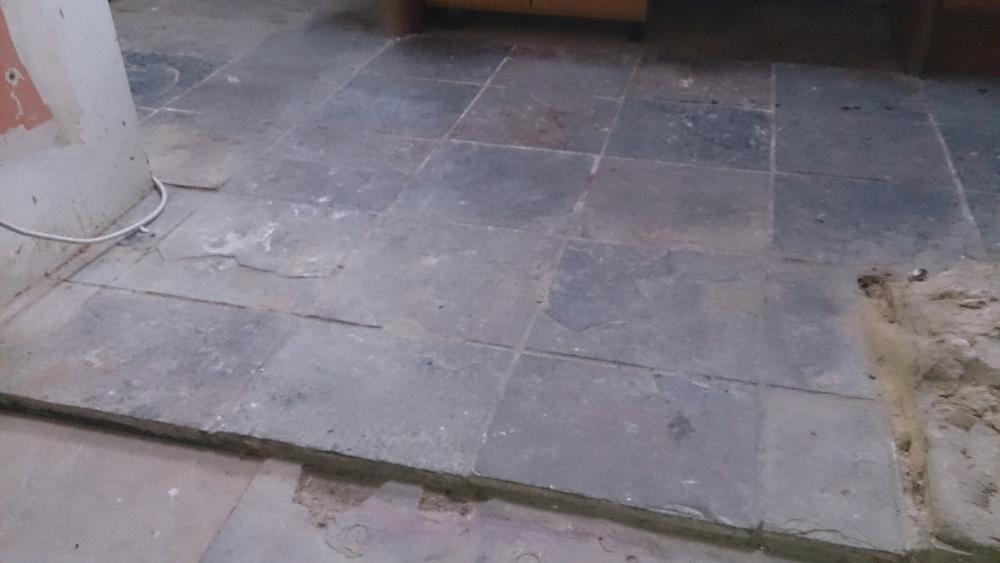
Can anyone give advice on cleaning our kitchen tiles in our renovation. We had thought we would replace them so I have been mixing cement and plaster and not worrying about any splashes, but now the OH wants to keep them. They appear to be stuck down with concrete as I have been trying to chisel them up in one corner with no luck. I can clean them with usual stuff but its the splashes of cement I am thinking about. Is there a heavy duty cleaner anyone can recommend? We plan to start on the kitchen soon so will be clearing all the units away and planning the new layout.
-
Good luck on the build. Can I ask you to look into the Passivhaus standard with the thought that it should not cost any extra to achieve. there are plenty of examples now which prove that well built, low energy houses do not need to cost any more than a standard house yet you will end up with a healthier, more comfortable and cheaper house to run. I can recommend the following magazine for plenty of articles giving inspiration as well as the exampes on BuildHub. https://passivehouseplus.ie/
-
Can see why you dont want this type of downpipe; it adds nothing to the house! Would a classic 'lead' effect guttering and down pipe work better?

-
This is not an easy post to write.....
TheMitchells replied to ToughButterCup's topic in General Self Build & DIY Discussion
me too! Once we have finished on our renovation, I am sure we'd be up for the odd weekend in Lancashire! the banks are right &&$$!!'s.- 62 replies
-
- 1
-
-
- planning
- project management
- (and 1 more)
-
After stripping out the electric cabling in our renovation property, we took it to the local scrap dealer and got over a hundred pounds for the cabling and some copper. well worth the effort.
-
Services.... or not.
TheMitchells commented on curlewhouse's blog entry in Sips and stones may break my bones...
Getting services installed does seem to be one of the biggest hold ups when self building. what a shame that companies cannot just get on a do their job efficiently!- 8 comments
-
- 1
-
-
- electricity
- water supply
- (and 2 more)
-
we are always interested in possible plots! Just a bit too far for me - the commute to bicester would be a tad too long.
-
I too have found TP quite expensive but when busy at our house, they are the only ones local so we do end up using them for stuff we need there and then. Their PB was about the same as elsewhere but apart from that, we use Blanchfords which recently opened a new branch at Bicester, trying to get some of the Graven Hill trade, and they are helpful and have free delivery. Prices are excellent too.
-
Shower, tray, tiles, and all the rest...
TheMitchells replied to Crofter's topic in Bathrooms, Ensuites & Wetrooms
You could have told the rest of us - to save us having to Google it too! -
Its been great reading - thanks for asking all the questions. Maybe this comes back to the need for a simple post with the tips and advice found in that section. If it could be kept at the top of the posts, it can be added to by anyone who finds good advice. I can see which of my scribbles woulld be useful, though I dont always remember where I saw the advice. And most of it is from @Nickfromwales and @JSHarris.
-
thanks but with 37 pages, I may have missed it. will have another look!
-
Okay, we have the walls and floor in our bathroom now - and the bath is being fitted tomorrow. Its now time for me to start tiling the walls. I think I have identified the ceramic tiles - from a local tile shop around £21 per m2. But are there any recommendations for tile ahesive? I have seen some which say waterproof and some shower resistant. The chap at Topps Tiles said I need to add something to the mix to make the adhesive waterproof. We have used moisture resistant PB so I do want to make sure the adhesive and grout is as waterproof as I can. and there seems to be a huge range to choose from. So any pointers in the right direction would be appreciated.
-
CT1 and/or Sikaflex for a shower tray installation?
TheMitchells replied to MAB's topic in Bathrooms, Ensuites & Wetrooms
And remember to NOT seal anything inside the shower tray!! -
Please do it soon!! we are all on the edge of our seats waiting for the plans......