
Lights, ceilings and skips full of wood......

Entry posted by TheMitchells
2867 views
Well the kitchen wall has gone and we love the extra space - shame its only for a while till the bathroom wall gets put back. Our neighbour needed somewhere to store her old sofa and asked if we could keep it for a while so the room is now half full with that. It gives us somewhere comfy to sit in front of the wood burner but it is a pain wehen we have to move it back and forward. Luckily we are concentrating on the upstirs so its not getting moved often.
Most of the last couple of months has been spent sorting out the electrics upstairs as well as preparing the windows of the front bedroom windows for plaster boarding. The OH has been doing the lights and switches upstairs, with the cables in position for the downstairs ceiling lights. Its lovely that we now have working switches although as the hours of daylight are getting longer, its much easier than it was moving portable lights around to where ever we were working.
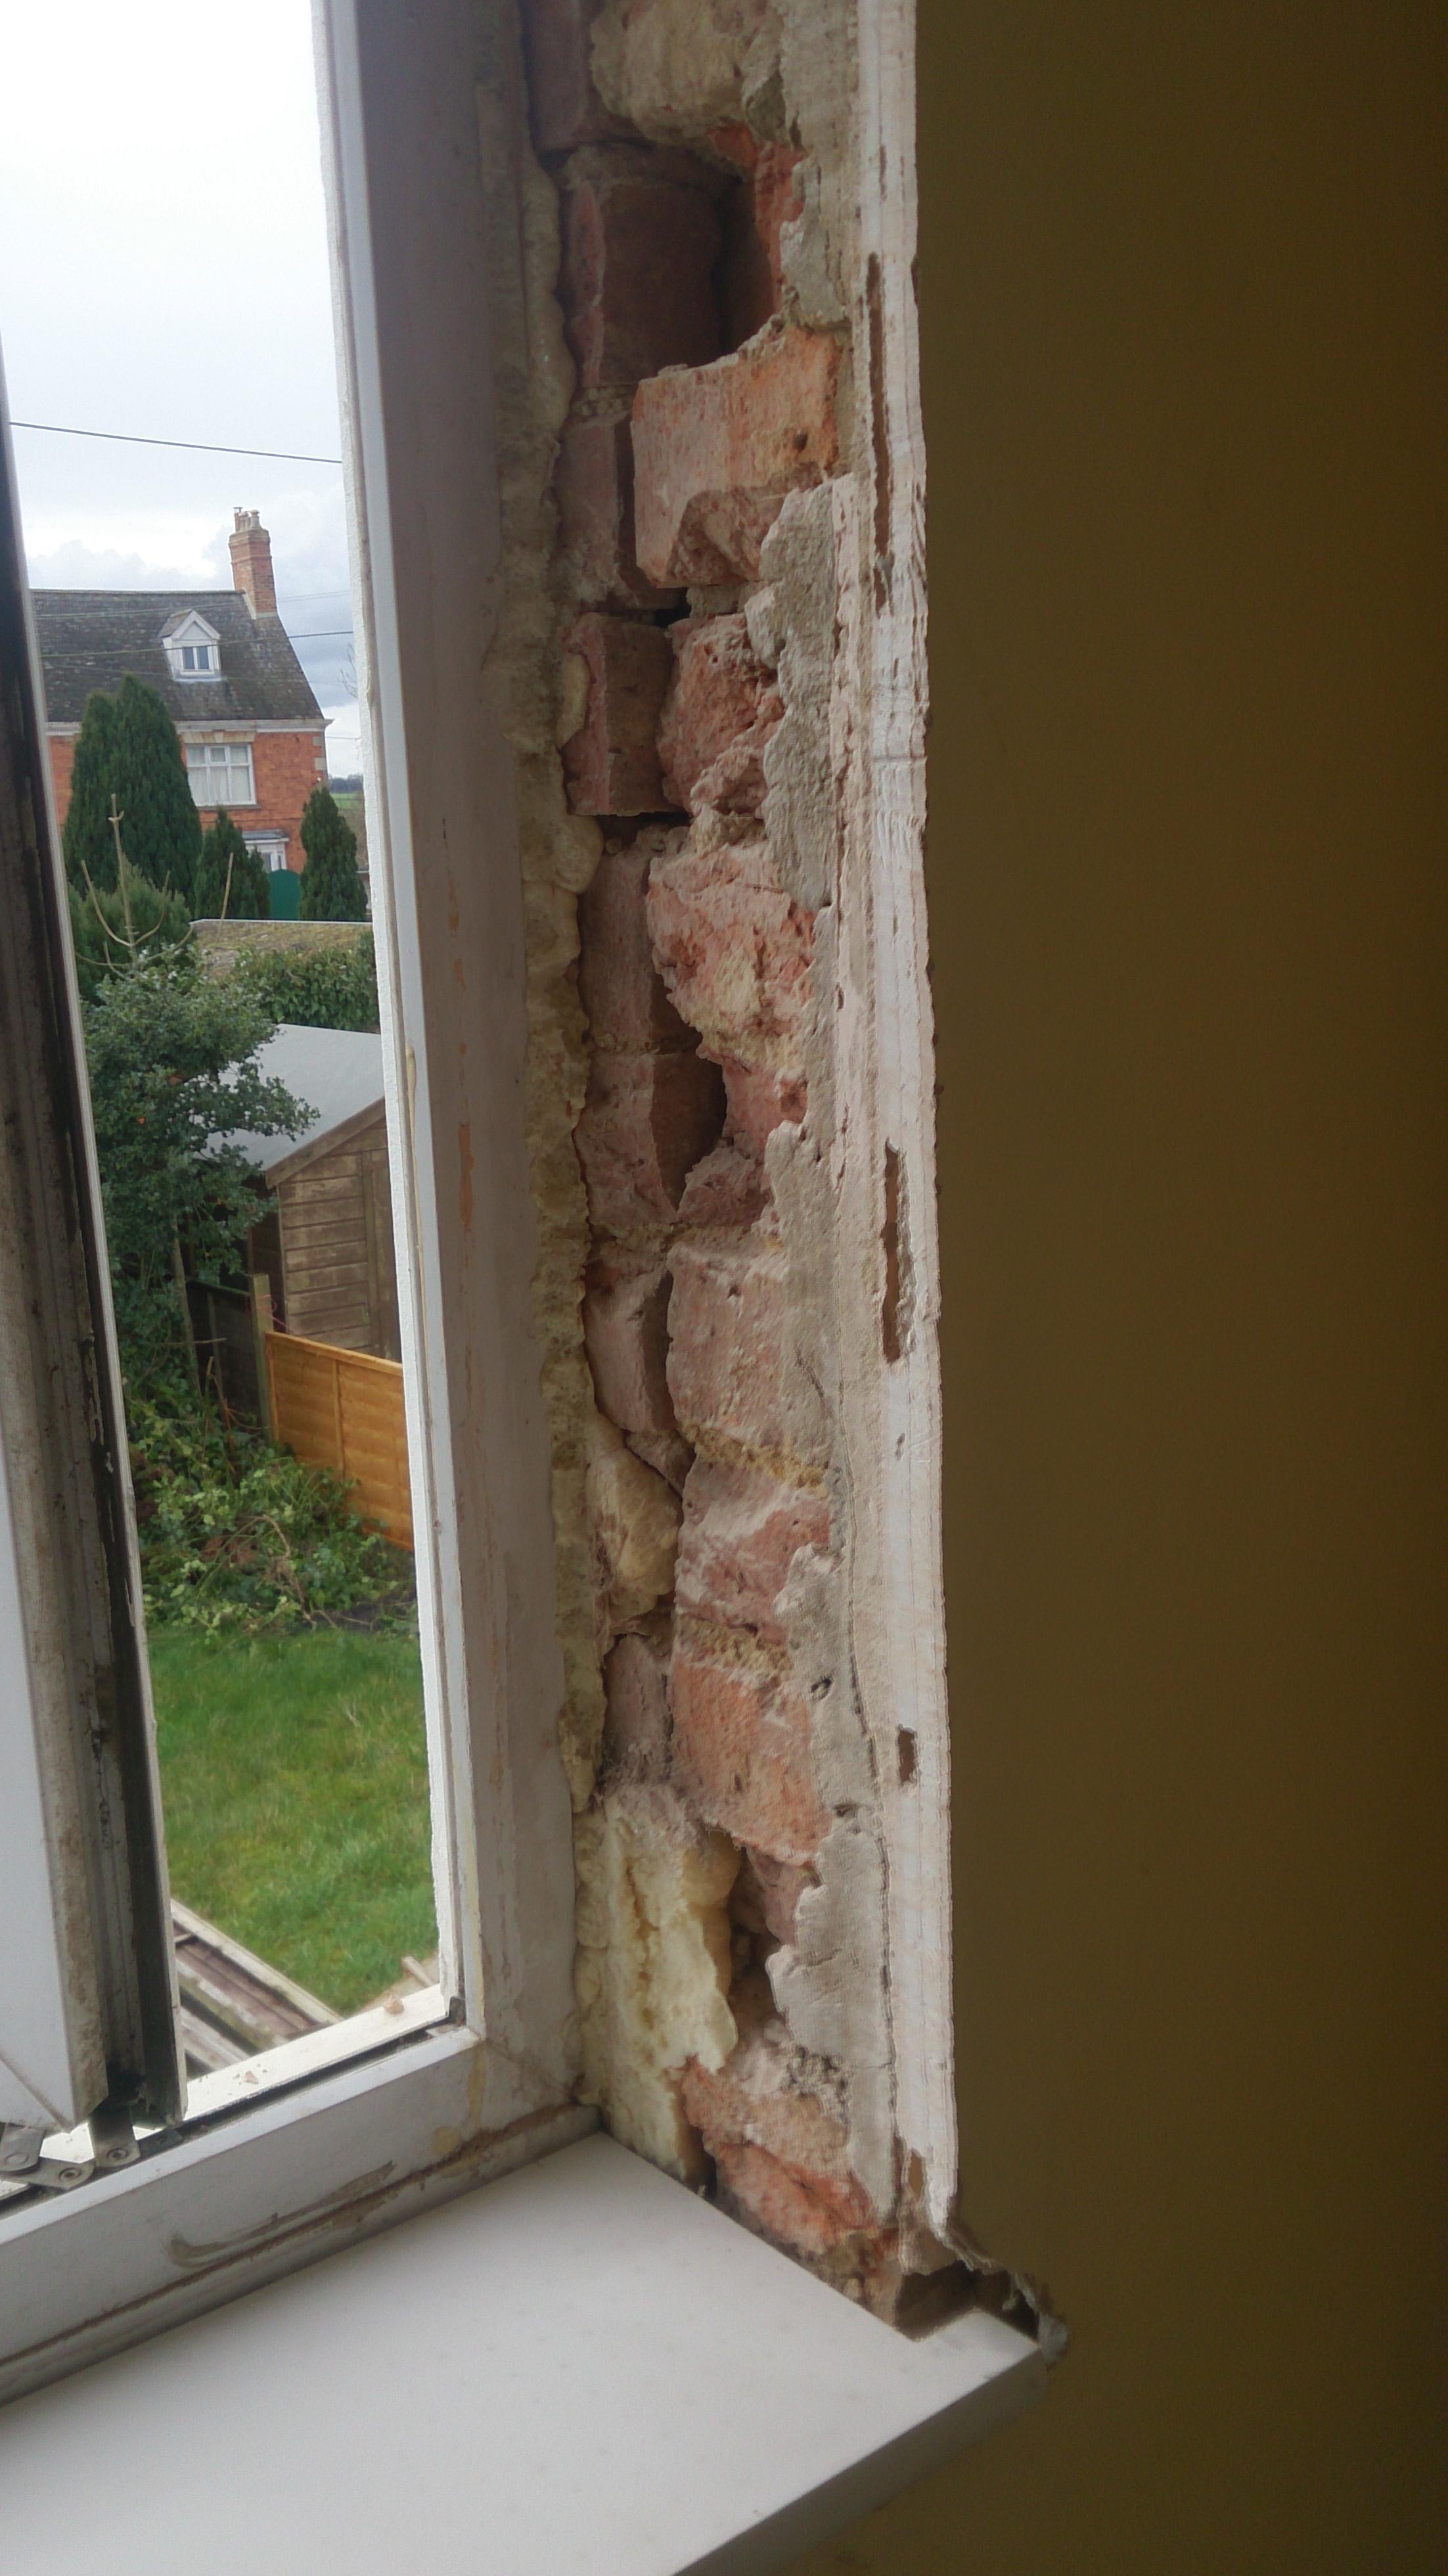
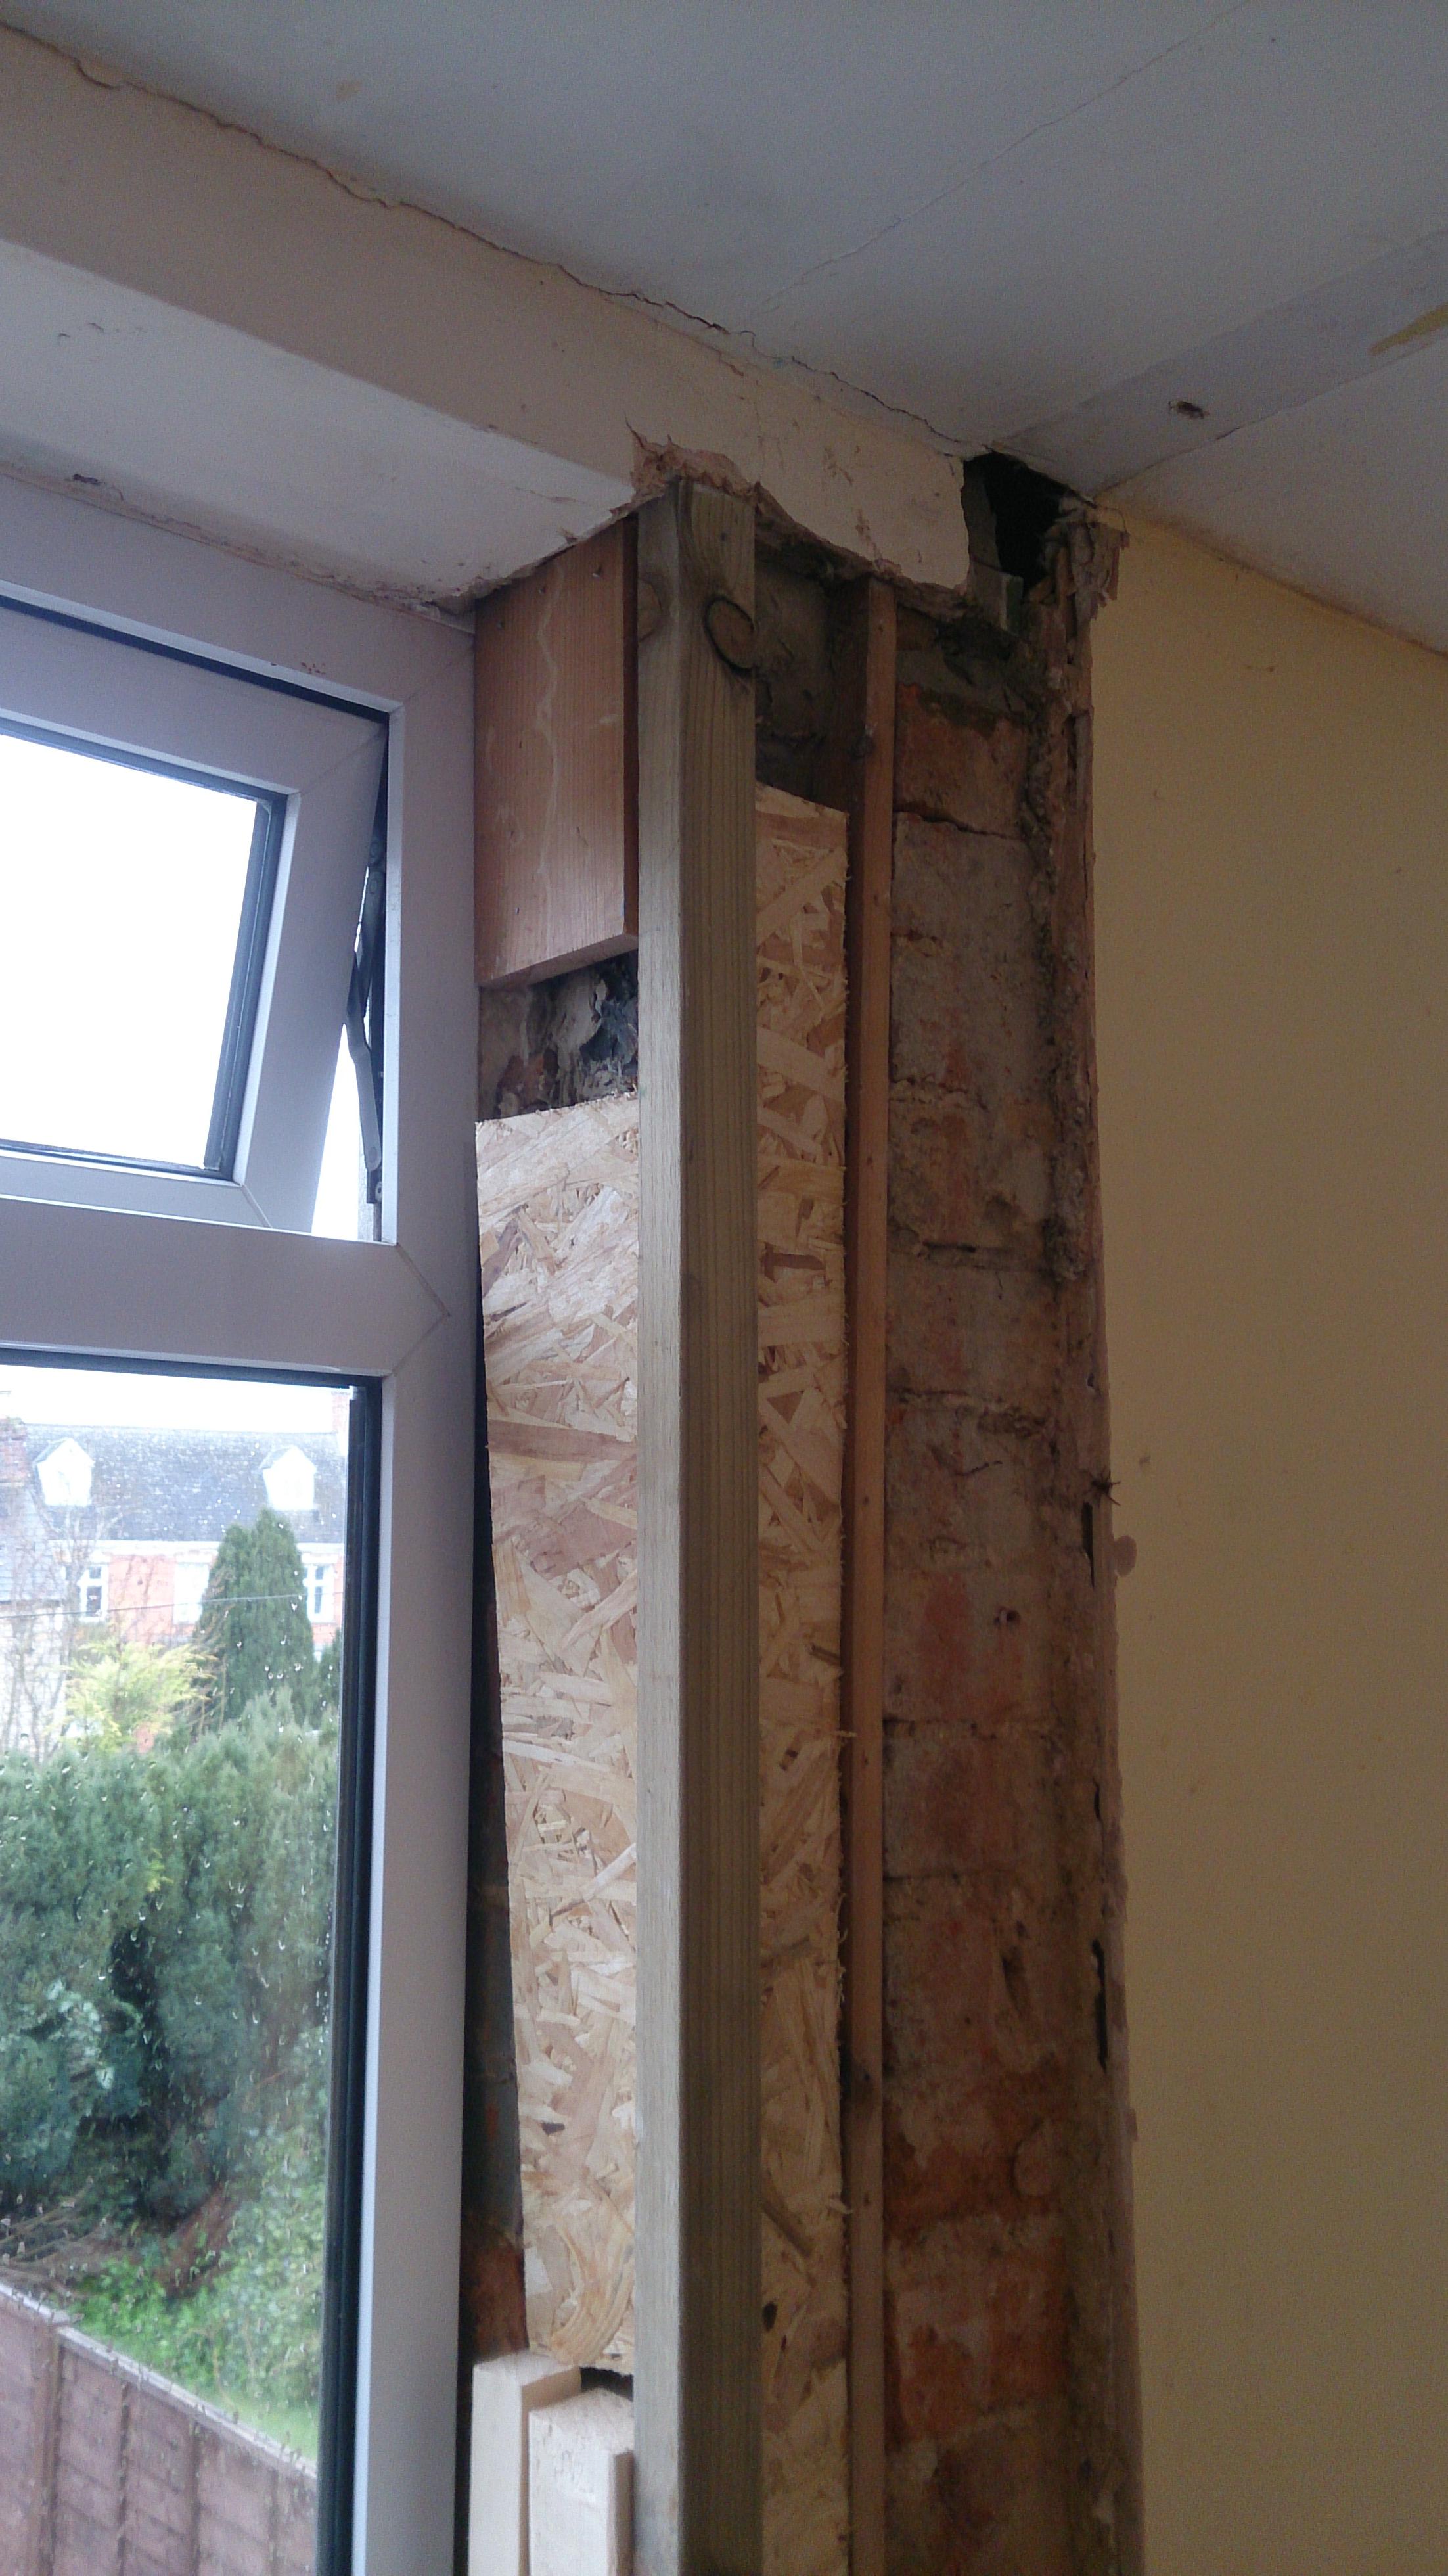
The surrounds of the front bedroom windows were awful and I ended up taking the plasterboard and various bits of foam/wood and brick from around the sides and bottom of the frames, to enable me a) to clean the frames and b) to actually see a frame. It looks so much better and in one part, there was a huge hole behind the plasterboard
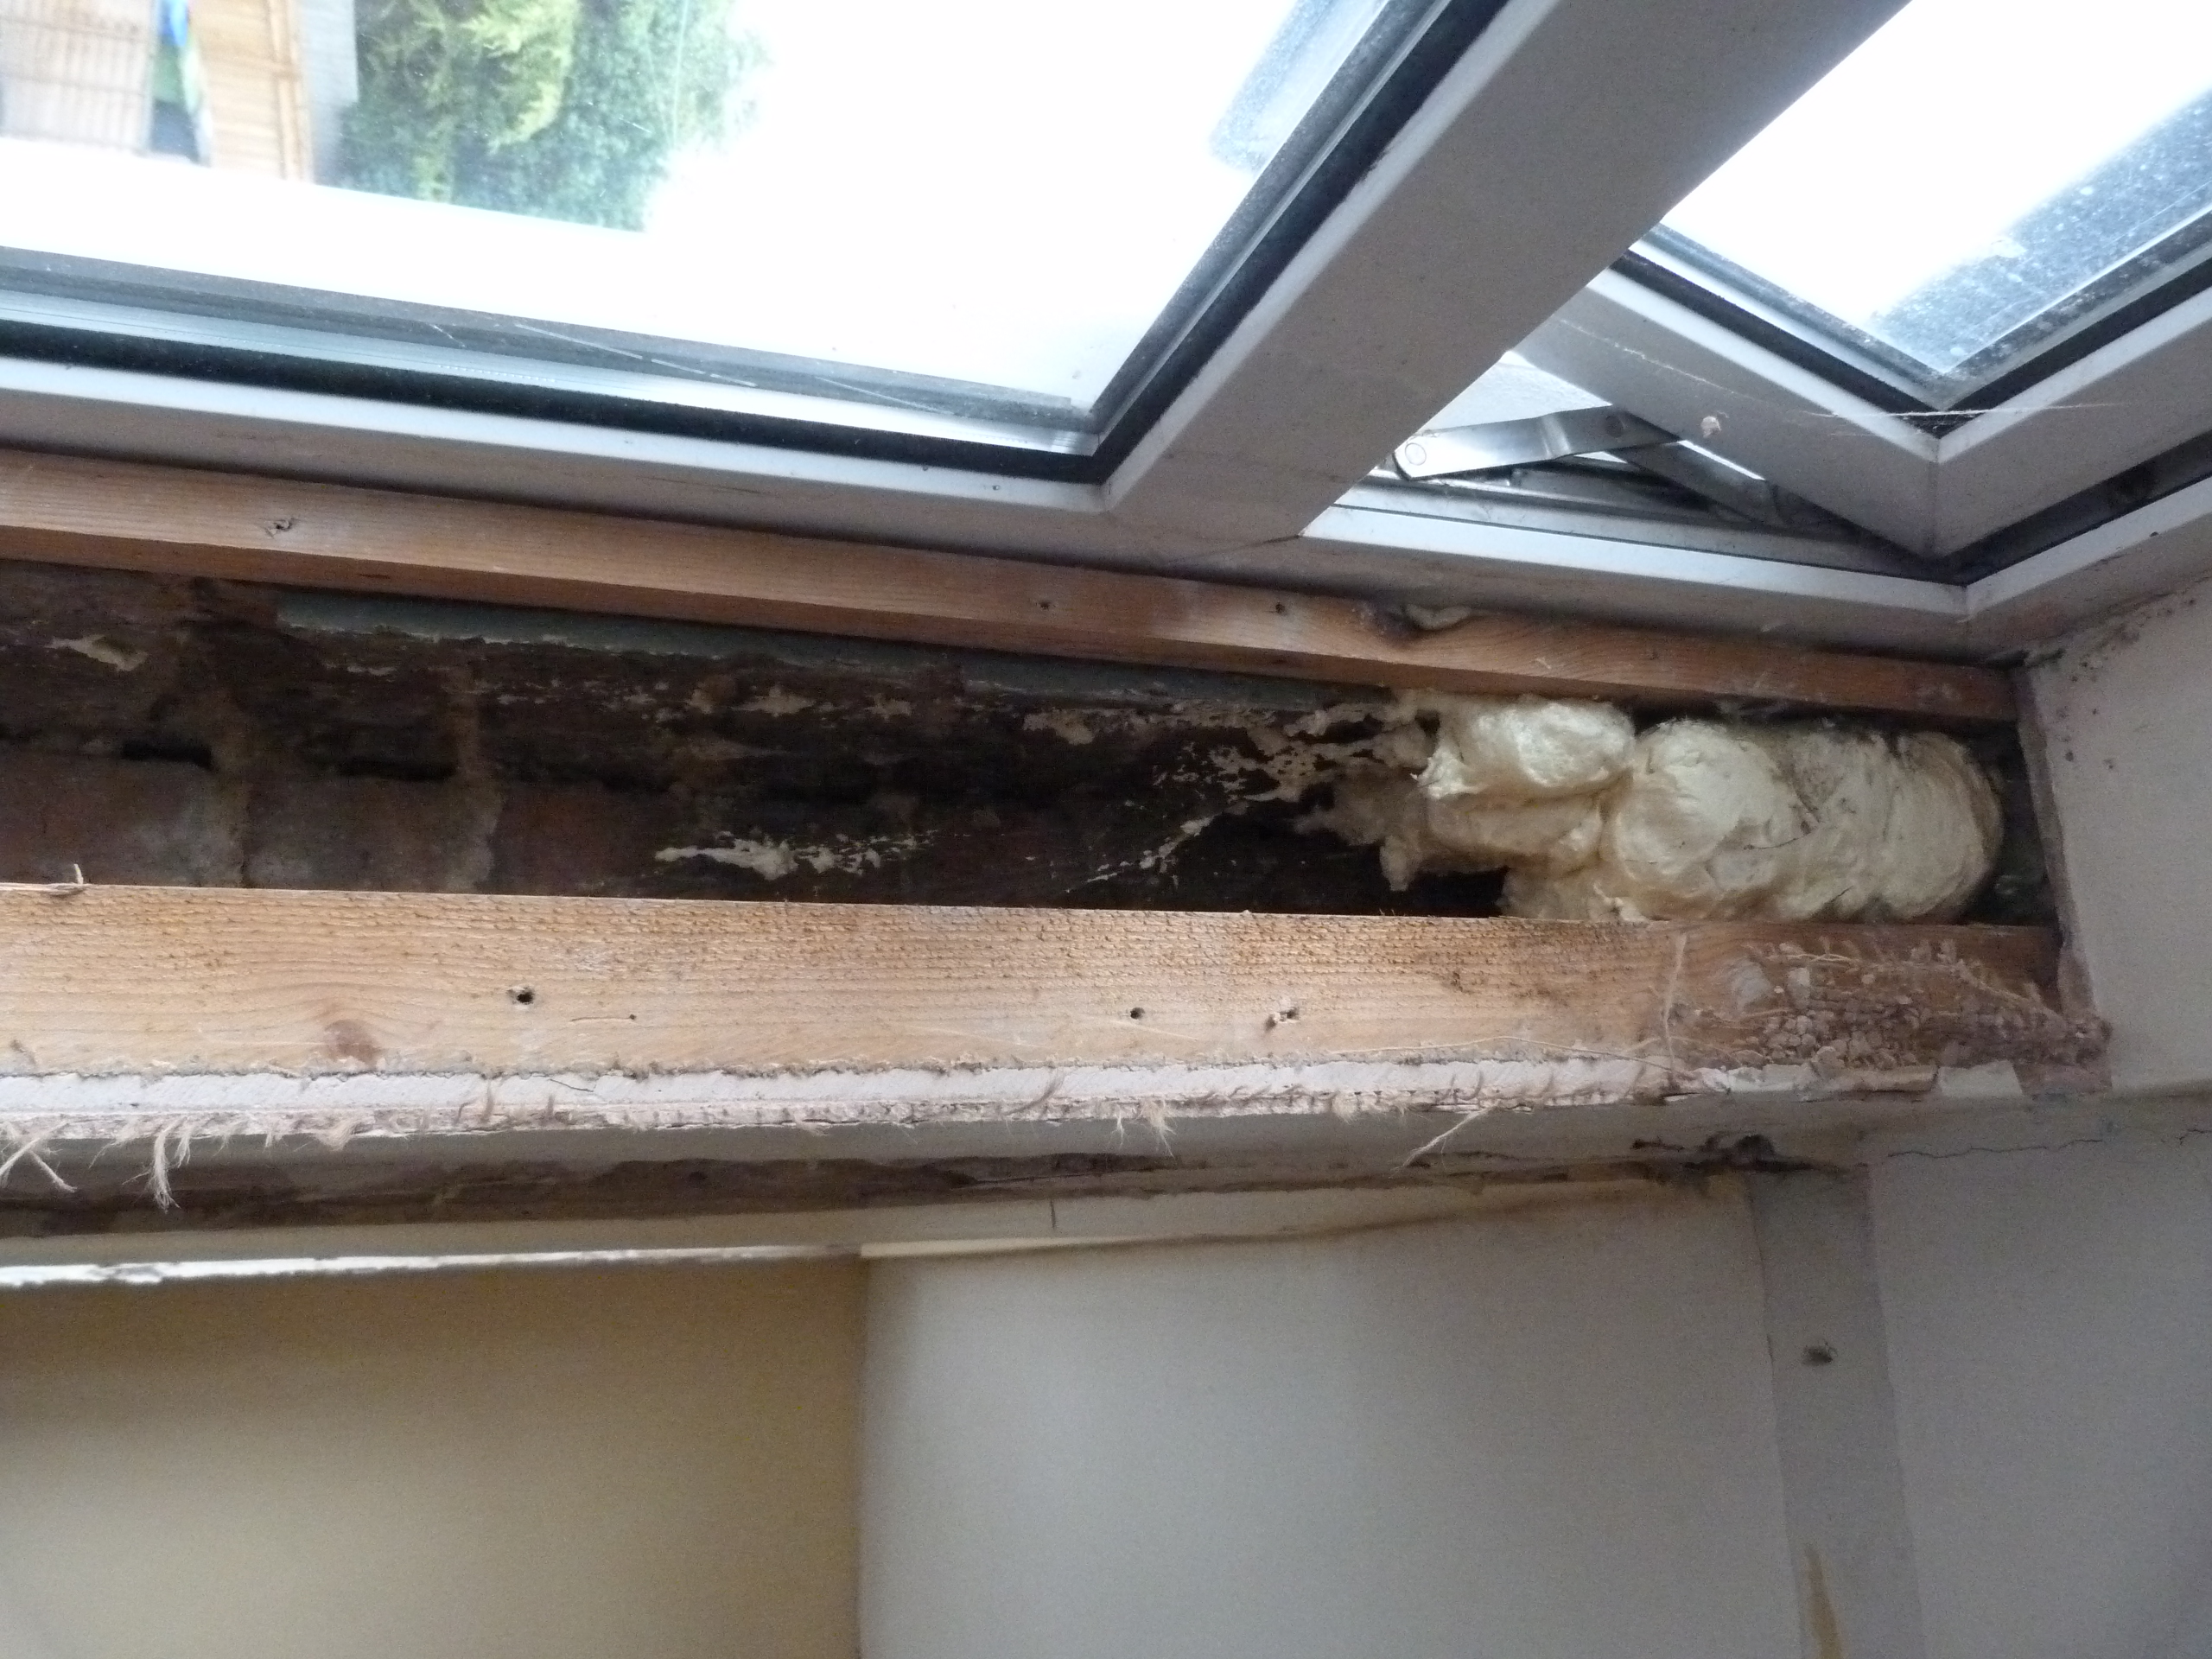
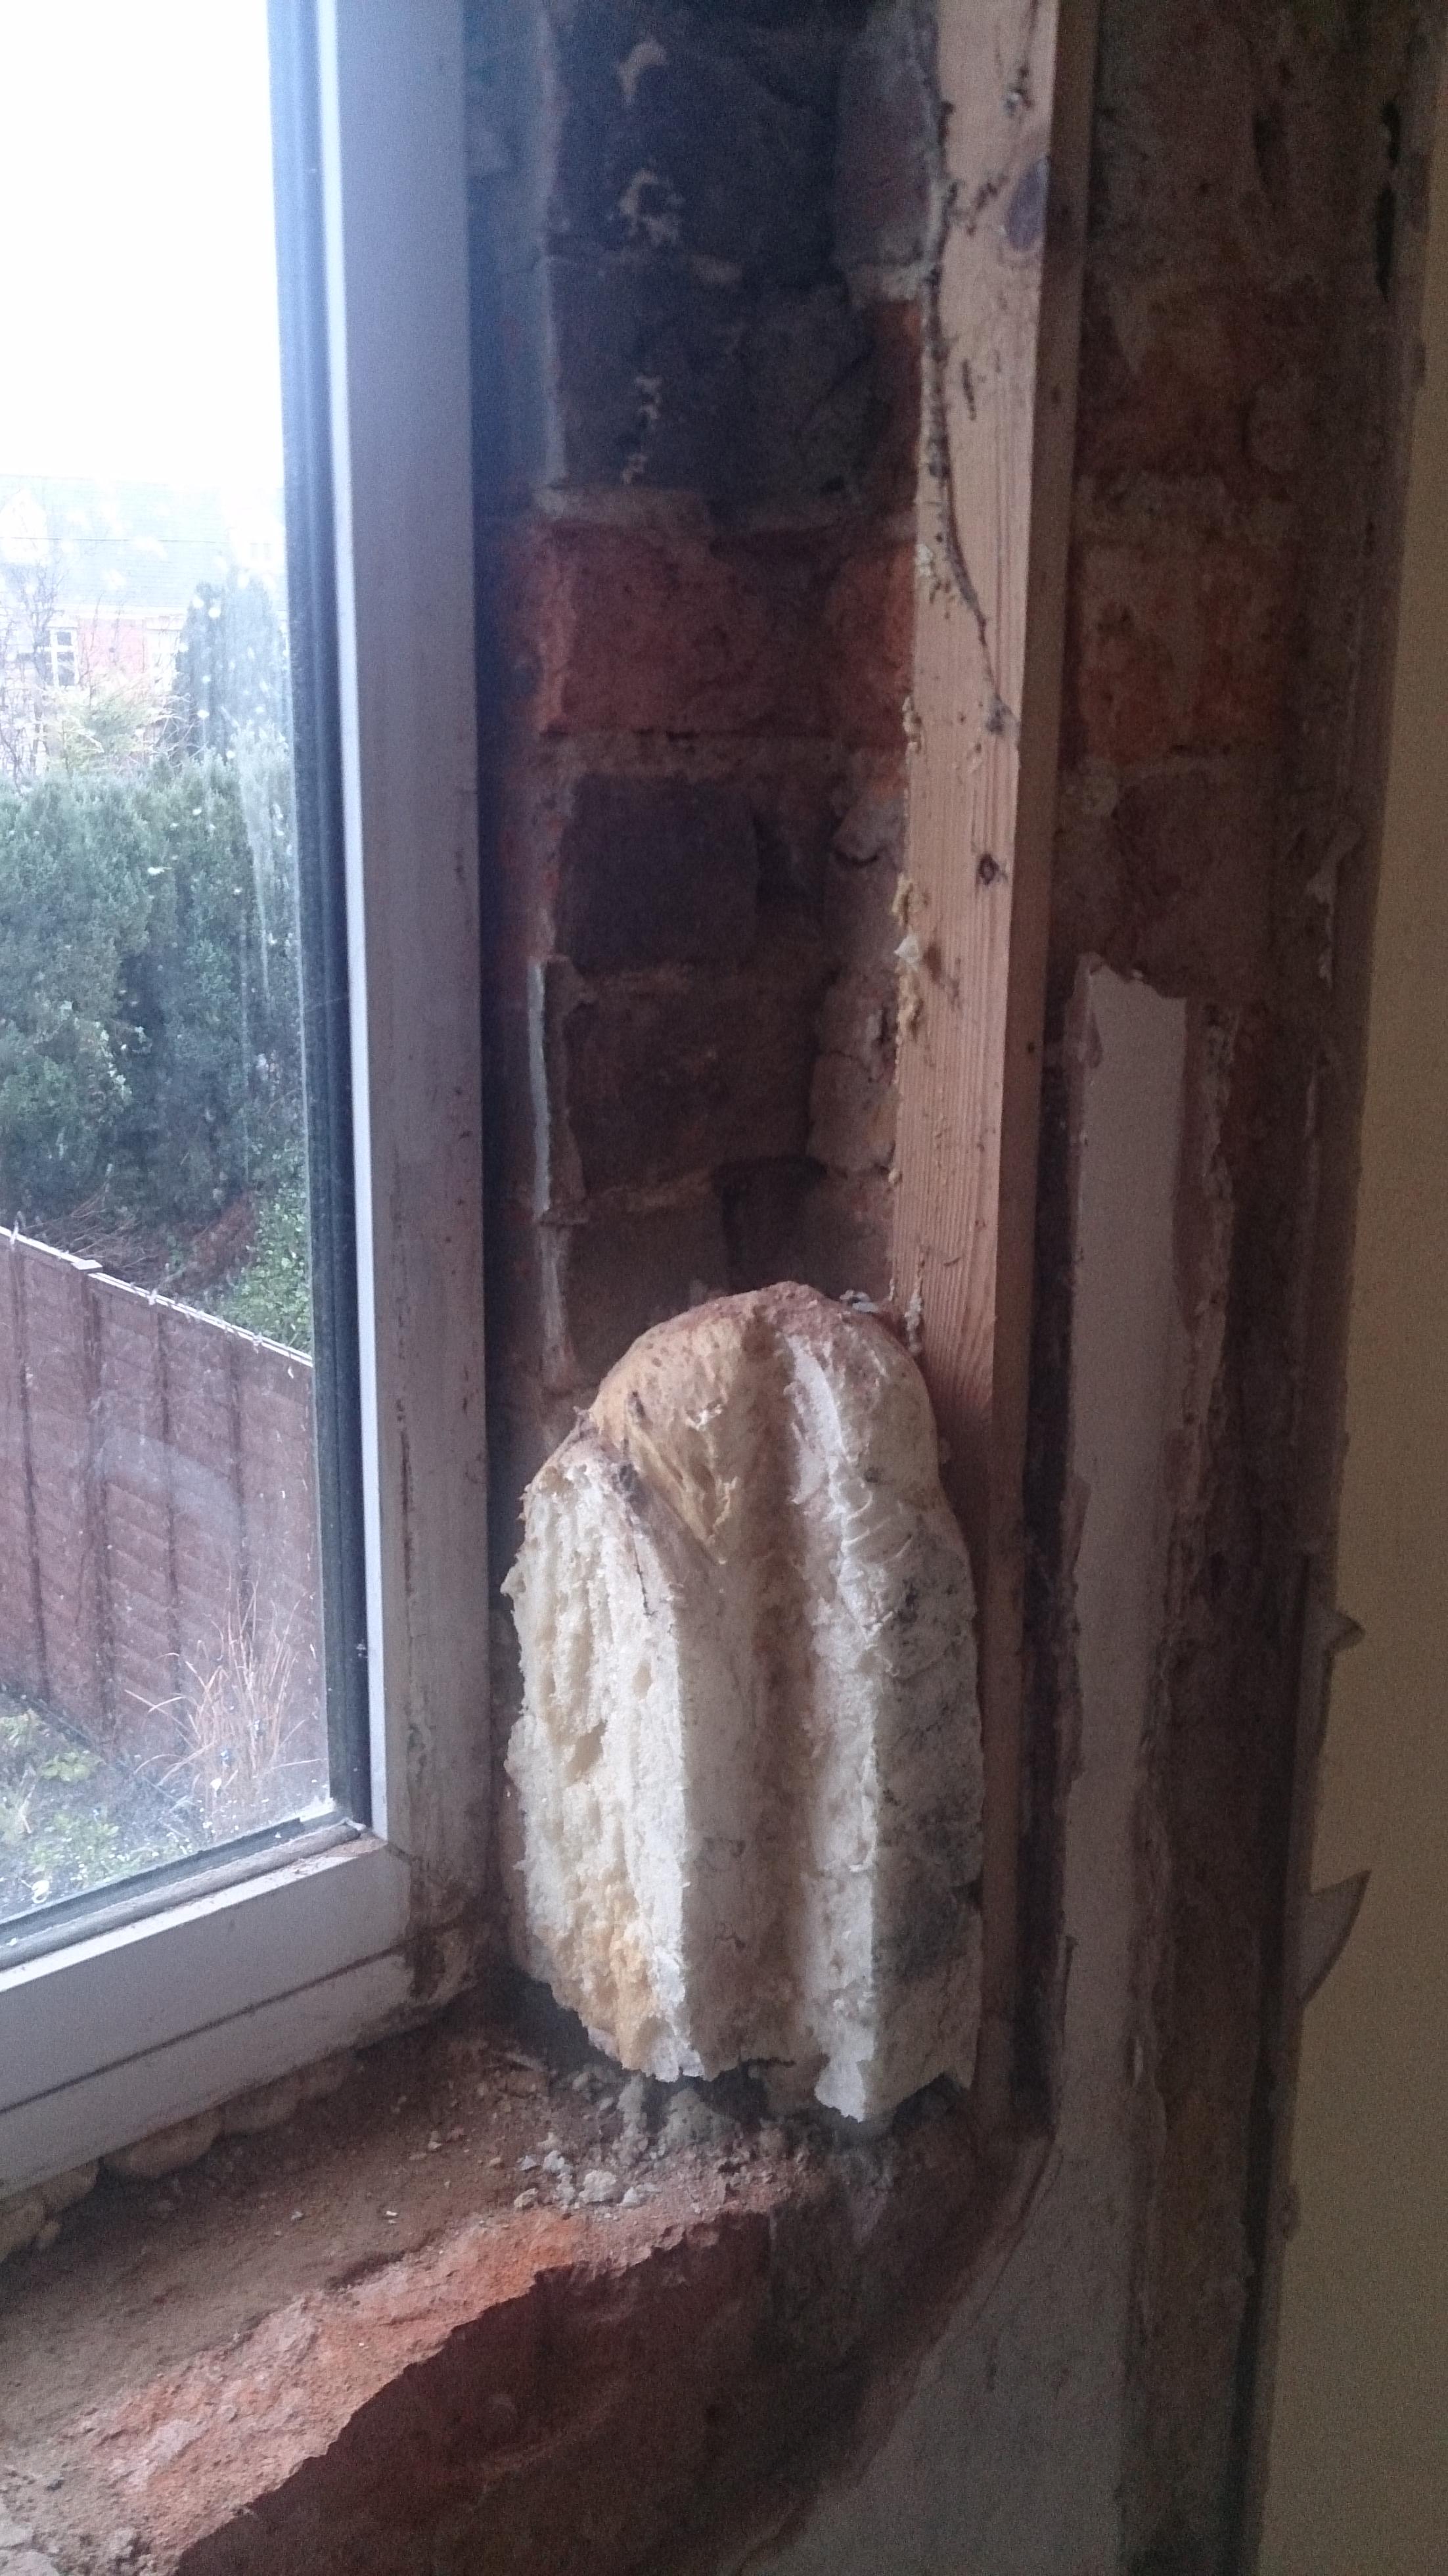
and I ended up building a column of half bricks in the cavity to help fill it up.
I then used low expansion foam to fill in the gaps (I could see daylight at the top of one side) and stuck some pieces of wood at the top of each side, thinking that at least they now have something to screw into if the new owners decide to fit blinds.
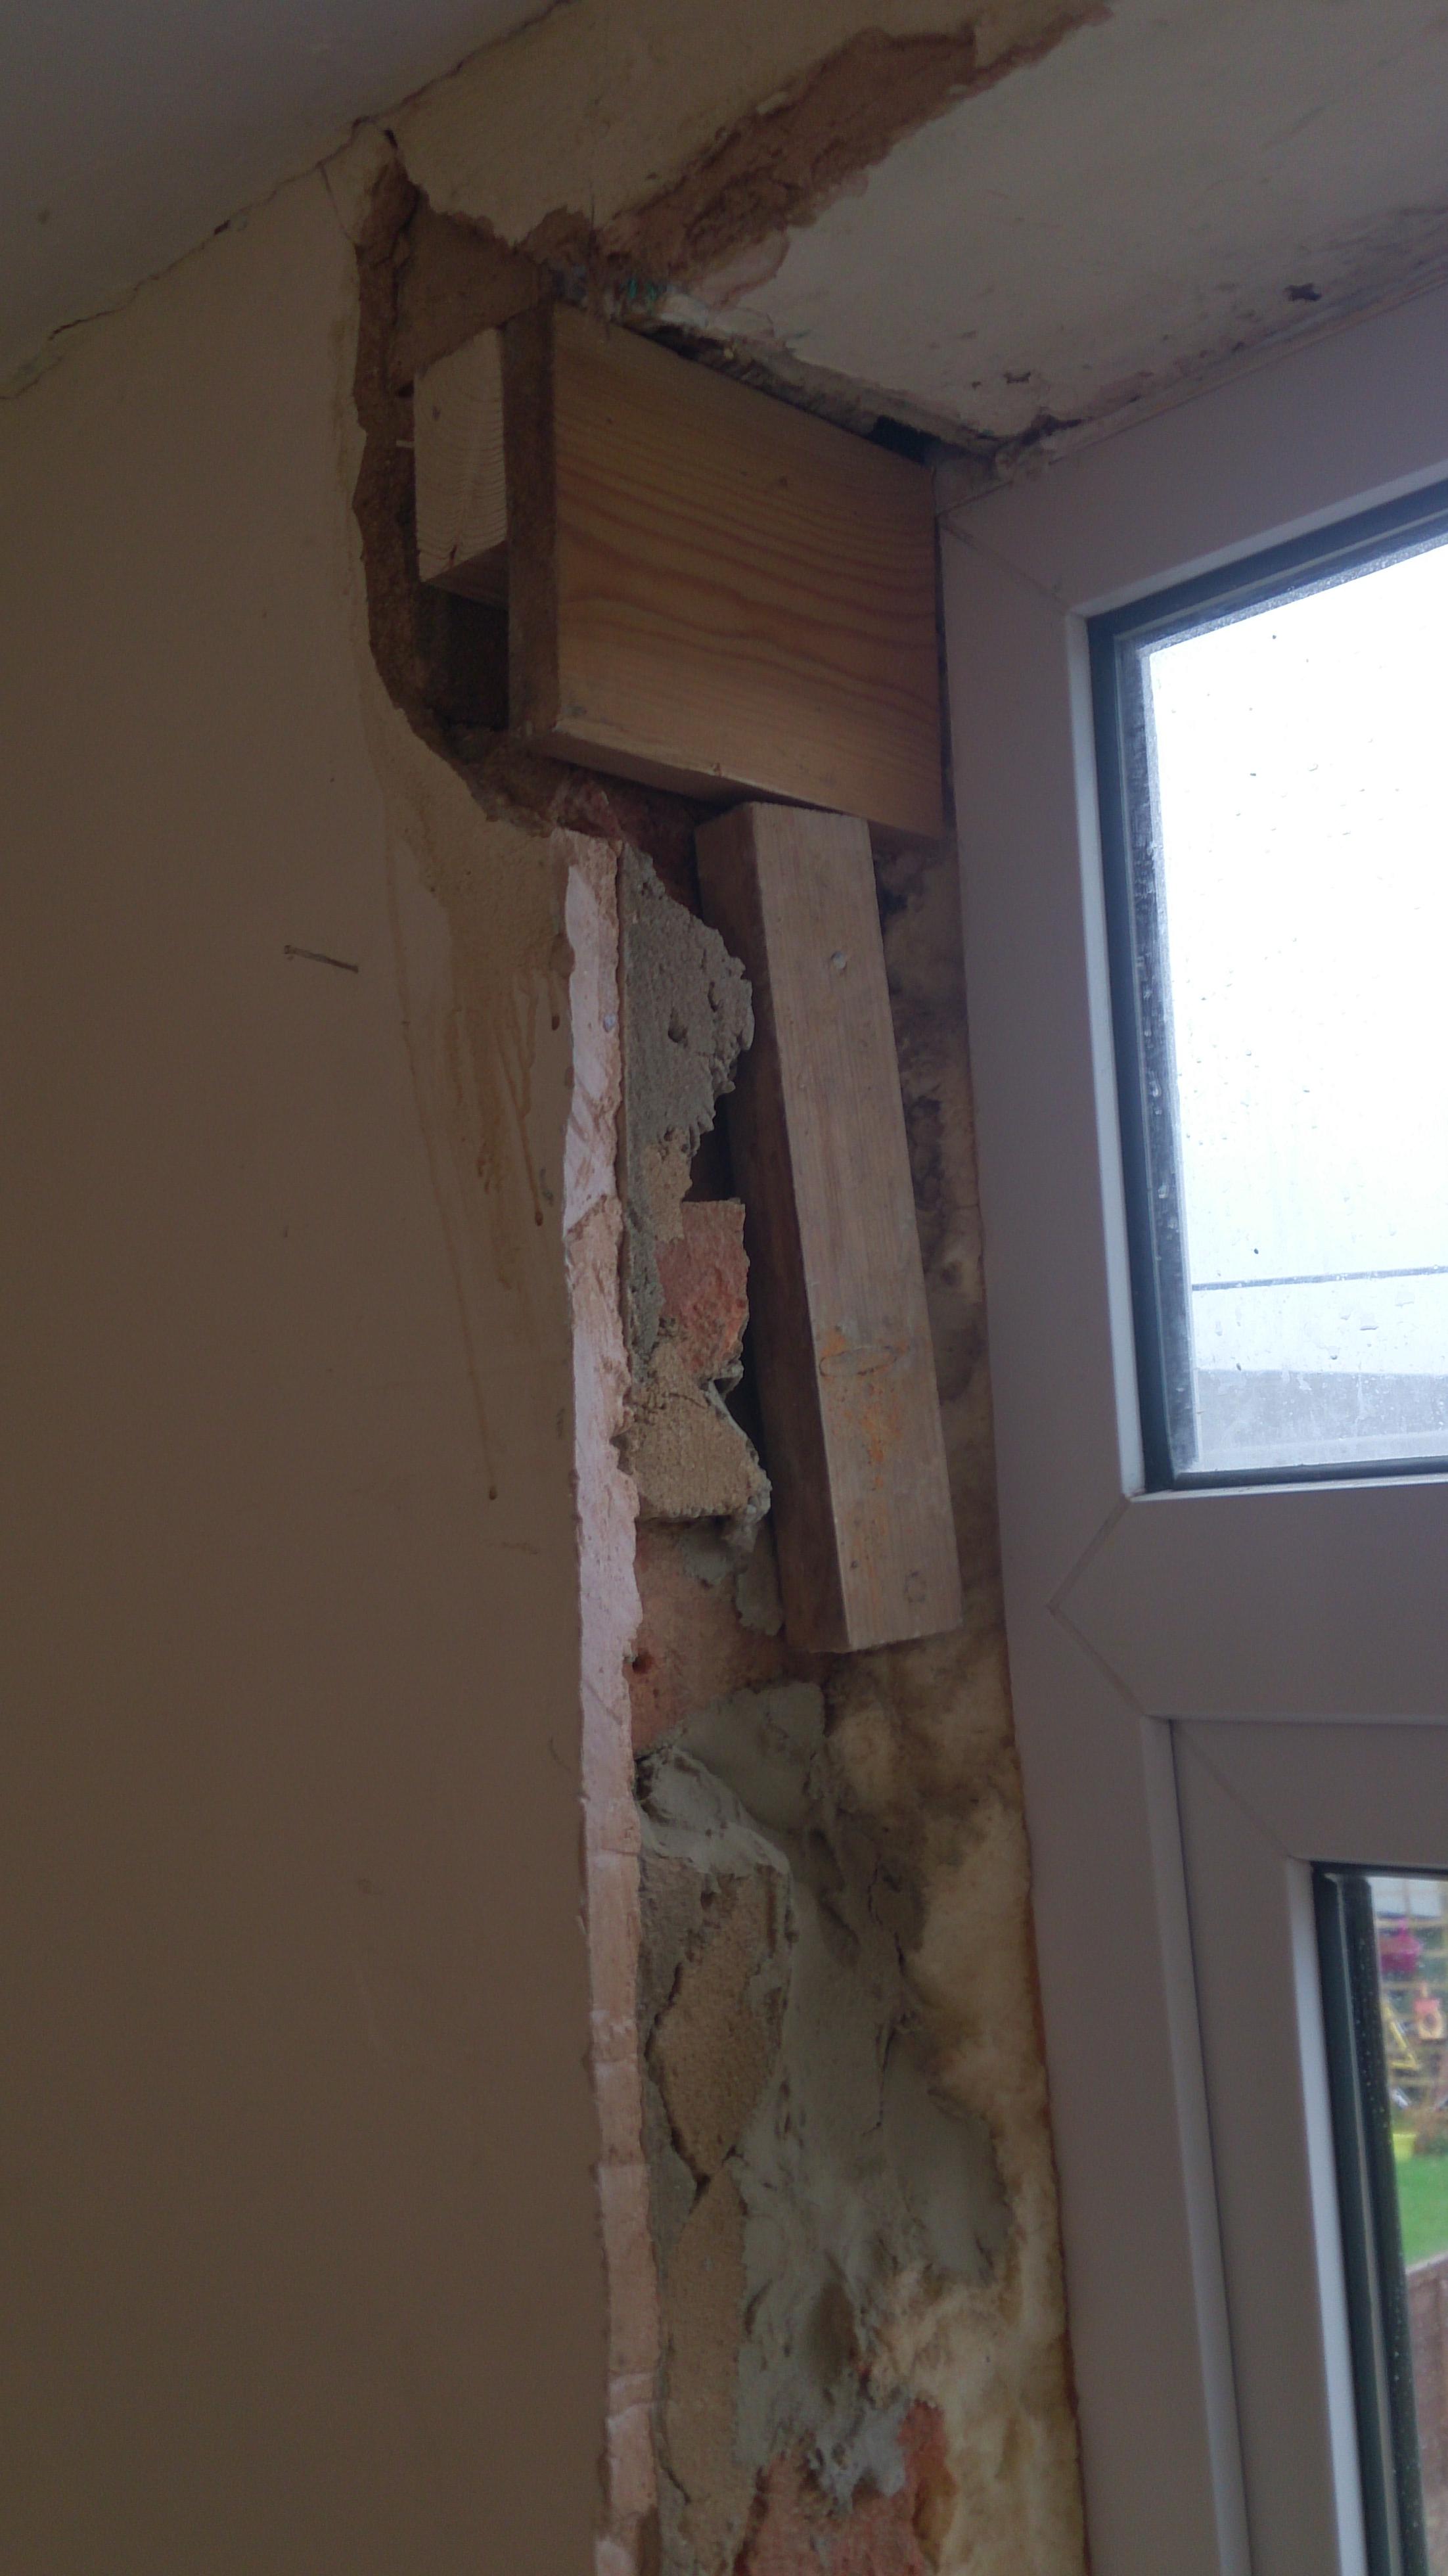
It probably looks a right mess as I used spare bits of wood stuck to the foam to fill out the spaces before fixing the plasterboard to the sides, having already fitted the cills, using the Soudal foam to fix it in place. That worked a treat until the foam gun stopped working!
The OH spent a good hour cleaning it all out, using the Soudal cleaner that came with it. but when we put the gun back on, the foam oozed out in a trickle! Then when we disconnected it, the foam suddenly squirted out all over the place - and its very sticky!!! It was all over the floor and us. ![]()
Eventually, he gave up and we binned the gun - he really did clean out every single bit of it but still it just oozed. So I ordered online some hand held ones which come with a straw and were much cheaper than buying them at the BM - but thats another post!
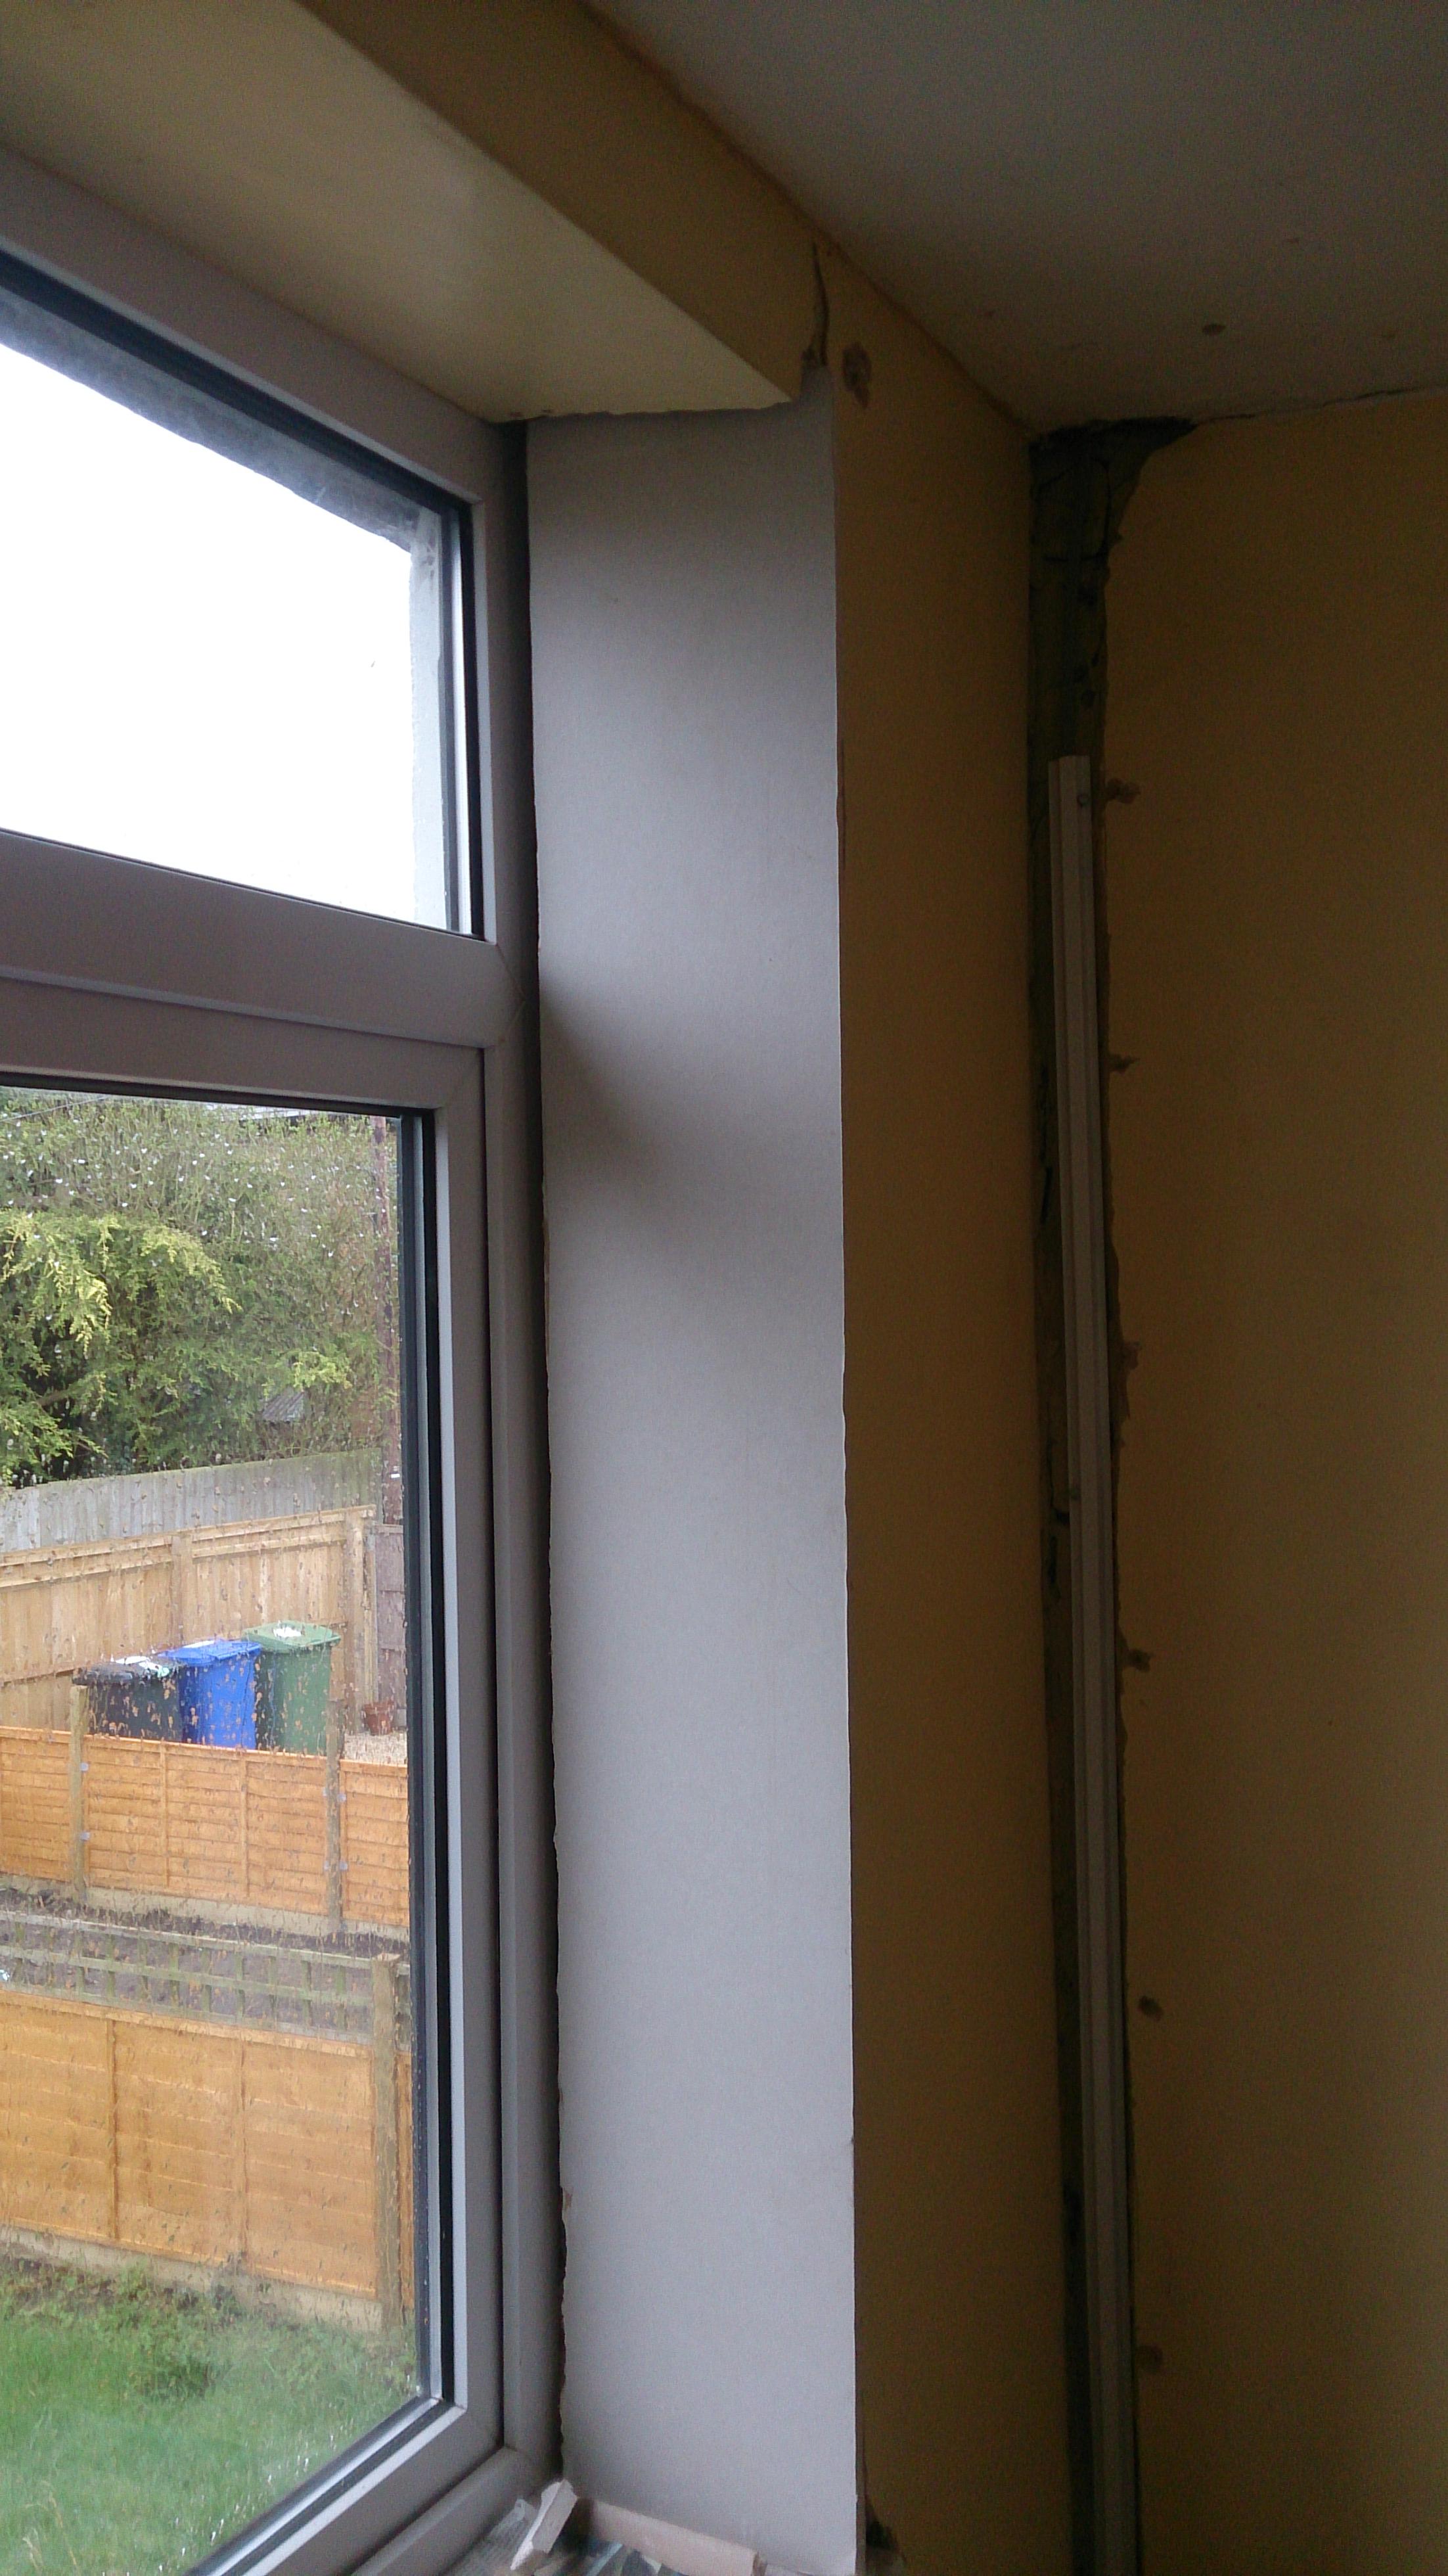
They arrived the next day and I had a go - I was not happy as the foam just oozed out too, till I remembered that I had to hold them upside down and then it worked great. (that wasnt the reason the previous day, we were doing it correctly then) So the windows now had new sides, completely covered in plasterboard and they look pretty good, if I say so myself.![]() And we can see most of the frame too.
And we can see most of the frame too.
Following the advice from a plaster post here, I have been experimenting with plaster and adhesive, to try to make some repairs to the walls.
Downstairs, (actually in most rooms) more of the plaster was loose so had to be removed. but this revealed rather a large crack. This is a wall between us and next door, and next to the chimney breast.
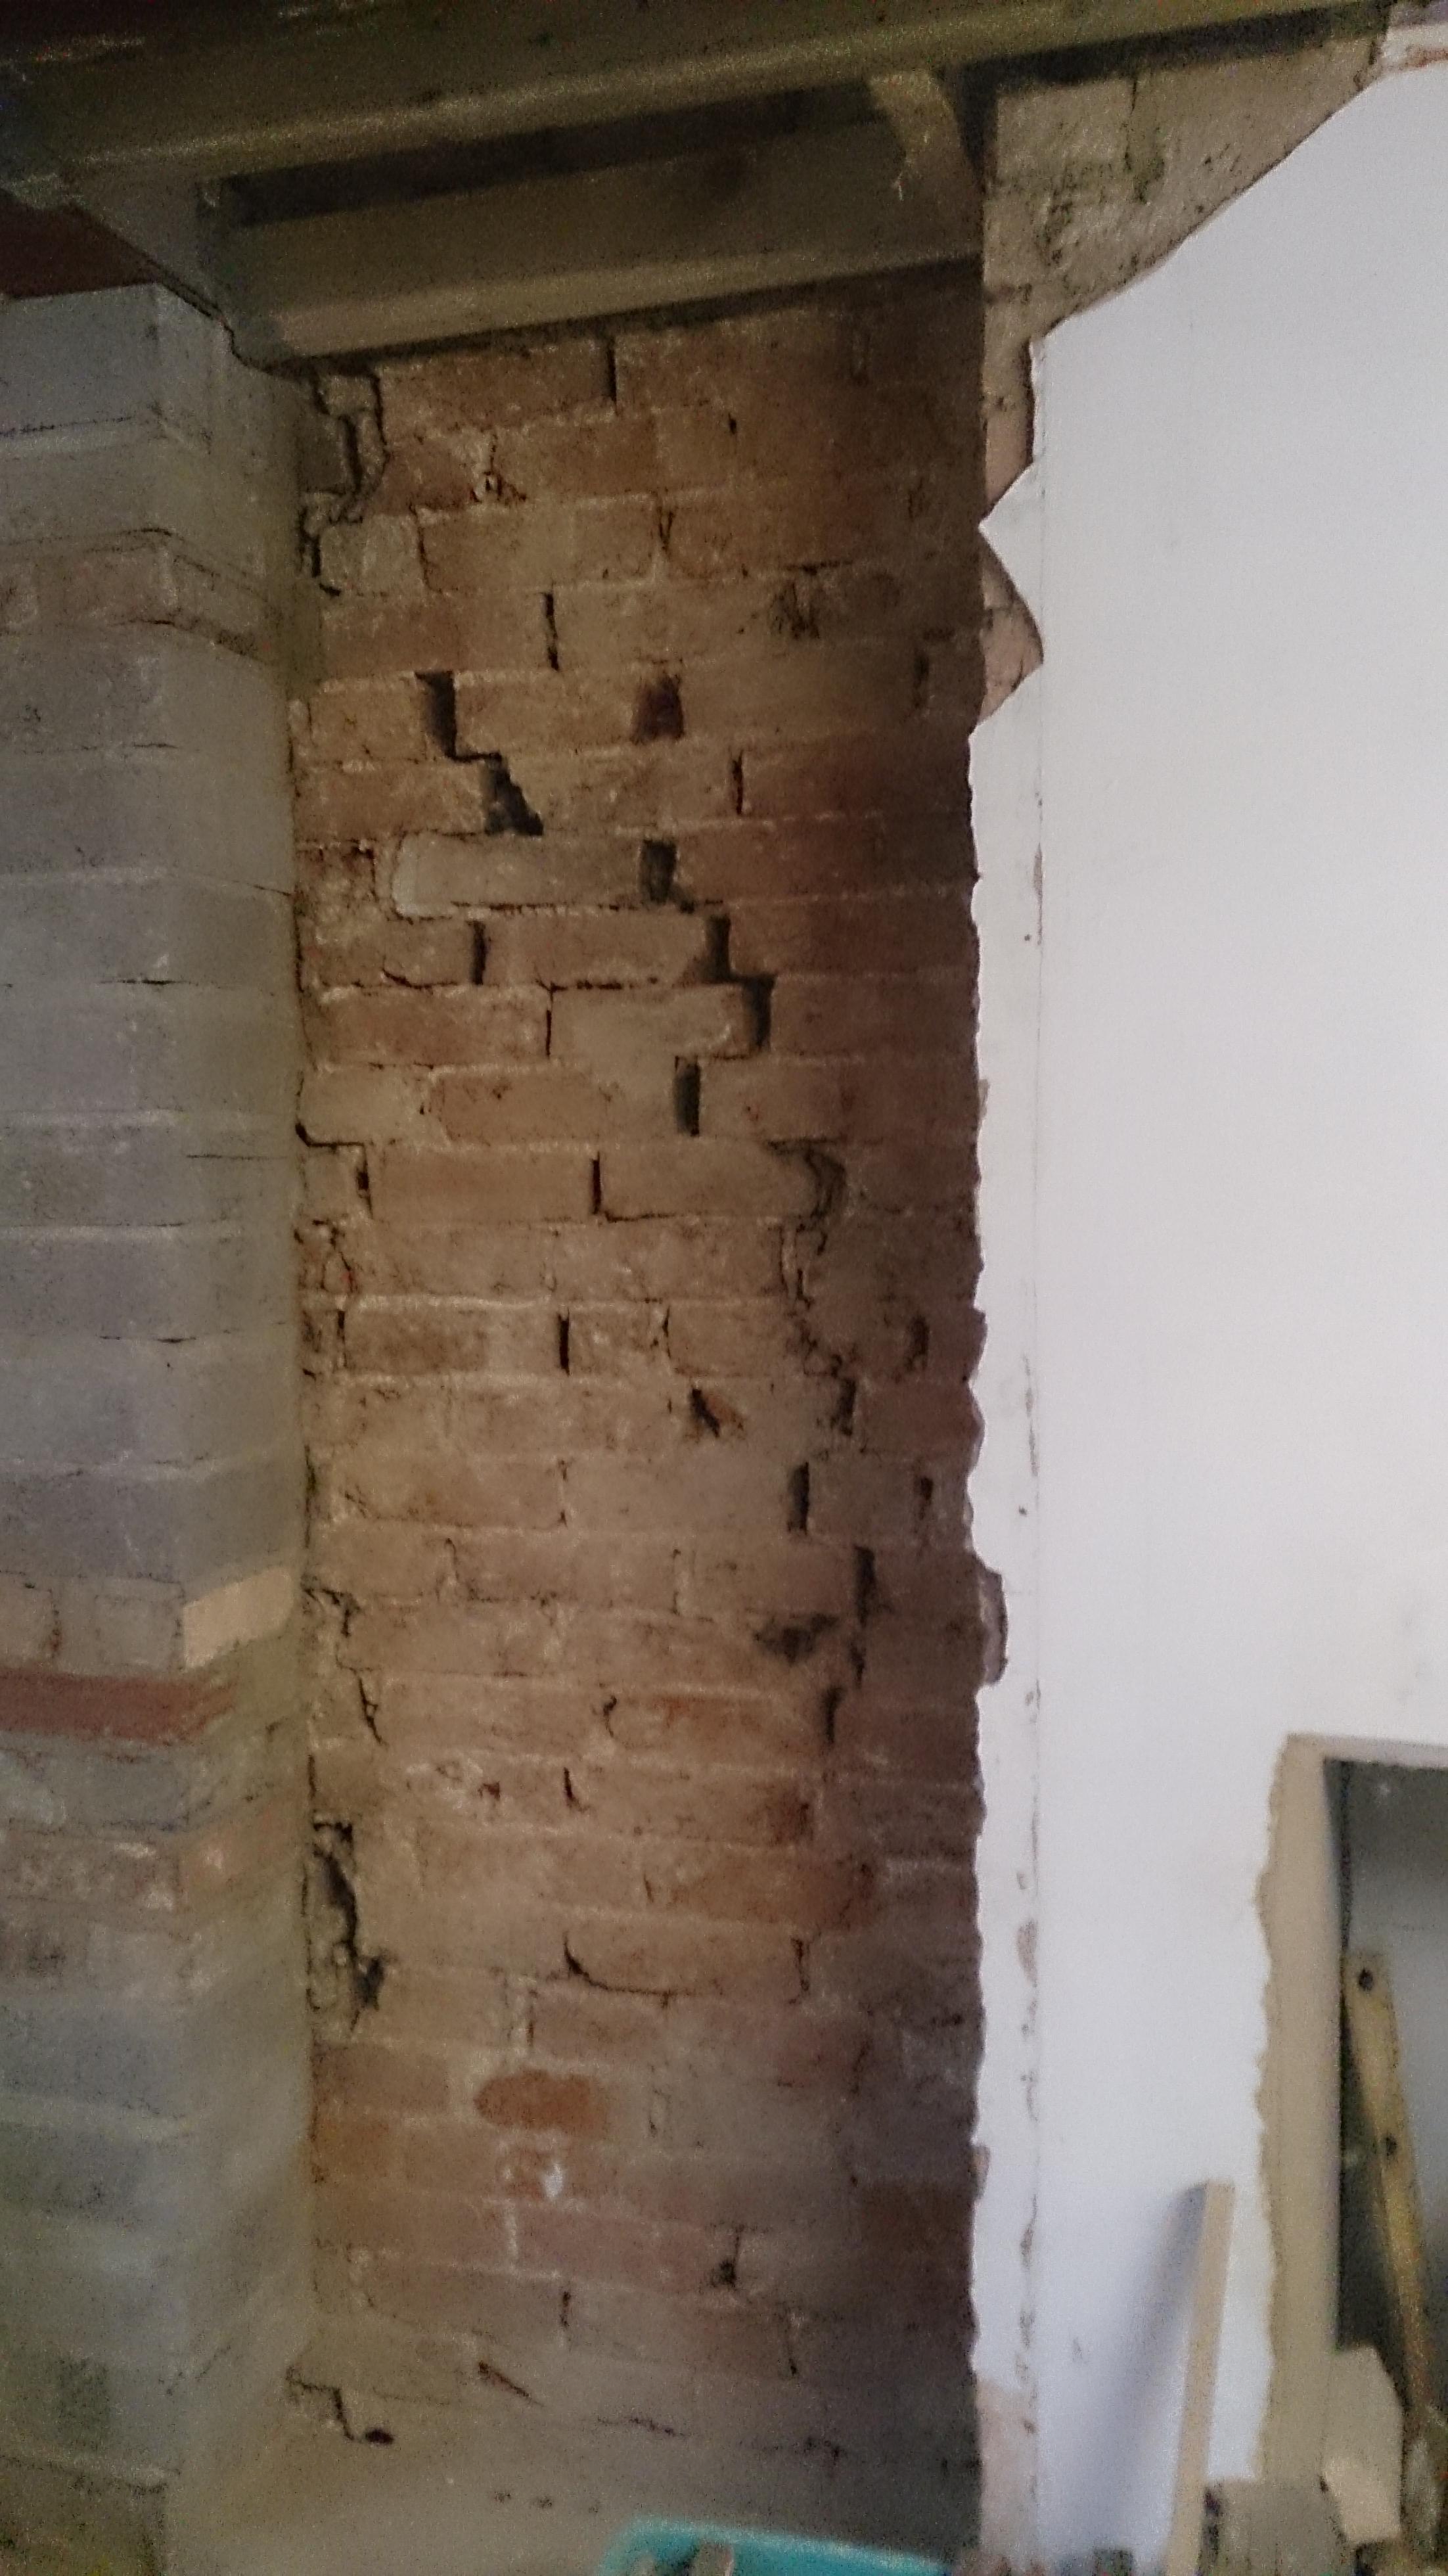
The pillar on the left is the new one which holds the RSJ's between the kitchen and middle room. So I dont think the crack is too much to worry about - I cant see that wall disappearing anywhere - apart from into the cellar beneath! Oh dear, hadnt thought of that,![]() So it was out with the pva then I patched up all the holes with hardwall plaster. I plan to practice my plastering skills on that wall, once the wires are in for a socket or two, when the OH gets round to those. Maybe we'll take a look at the foundations under that wall in the cellar and make sure they exist...... I dont want to spend all that time plastering it, for the whole thing to fall into the cellar.
So it was out with the pva then I patched up all the holes with hardwall plaster. I plan to practice my plastering skills on that wall, once the wires are in for a socket or two, when the OH gets round to those. Maybe we'll take a look at the foundations under that wall in the cellar and make sure they exist...... I dont want to spend all that time plastering it, for the whole thing to fall into the cellar.
One of the things we were concerned about was the way the rear bedroom floor bounced - it was quite a lot.. So we bought some extra joists and the Sawmill kindly cut them down to match the old size of the new ones. I thought the price was quite reasonable - £12 per length - is that good? 110 x 50mm x 3metre.
We added them to the old floor, typically adding one every second old beam. Once the noggins were fitted, the bedroom floor scarecly bounced at all!

One of the big problems were are having with the renovation is deciding in which order to do things. I couldnt sort out some of the walls till the floor is on place. We wouldnt fix the bedroom floor will we have all the lights fixed in place for the rooms below and I cant fit the insulation into the fllor space till the lights are in. we couldnt fix the lights till we had a dining room ceiling so it was time to get the ceiling done now that the new joists were in.
I was a bit worried about doing this as we discovered how heavy PB is when we did the top of the stairs ceiling - my arms were aching holding the boards in place till they were screwed in. I did fnd a large wooden post that I could jam under one end while I held the other but it wasnt ideal. The decision was made to buy 1800x900mm sheets to make it much easier on ourselves. and we also managed to borrow a couple of props which were brilliant. It may not be the best ceiling plasterboarding but it works and I am quite proud of it - for our first attempt (not including the small landing ceiling)
We have even managed to cover the RSJ - using a sheet of hardboard, to make up the difference in levels and give us something to screw the light fittings to, then one of plasterboard. CT1 worked brilliantly! We left it overnight and it was absolutely solid by morning.
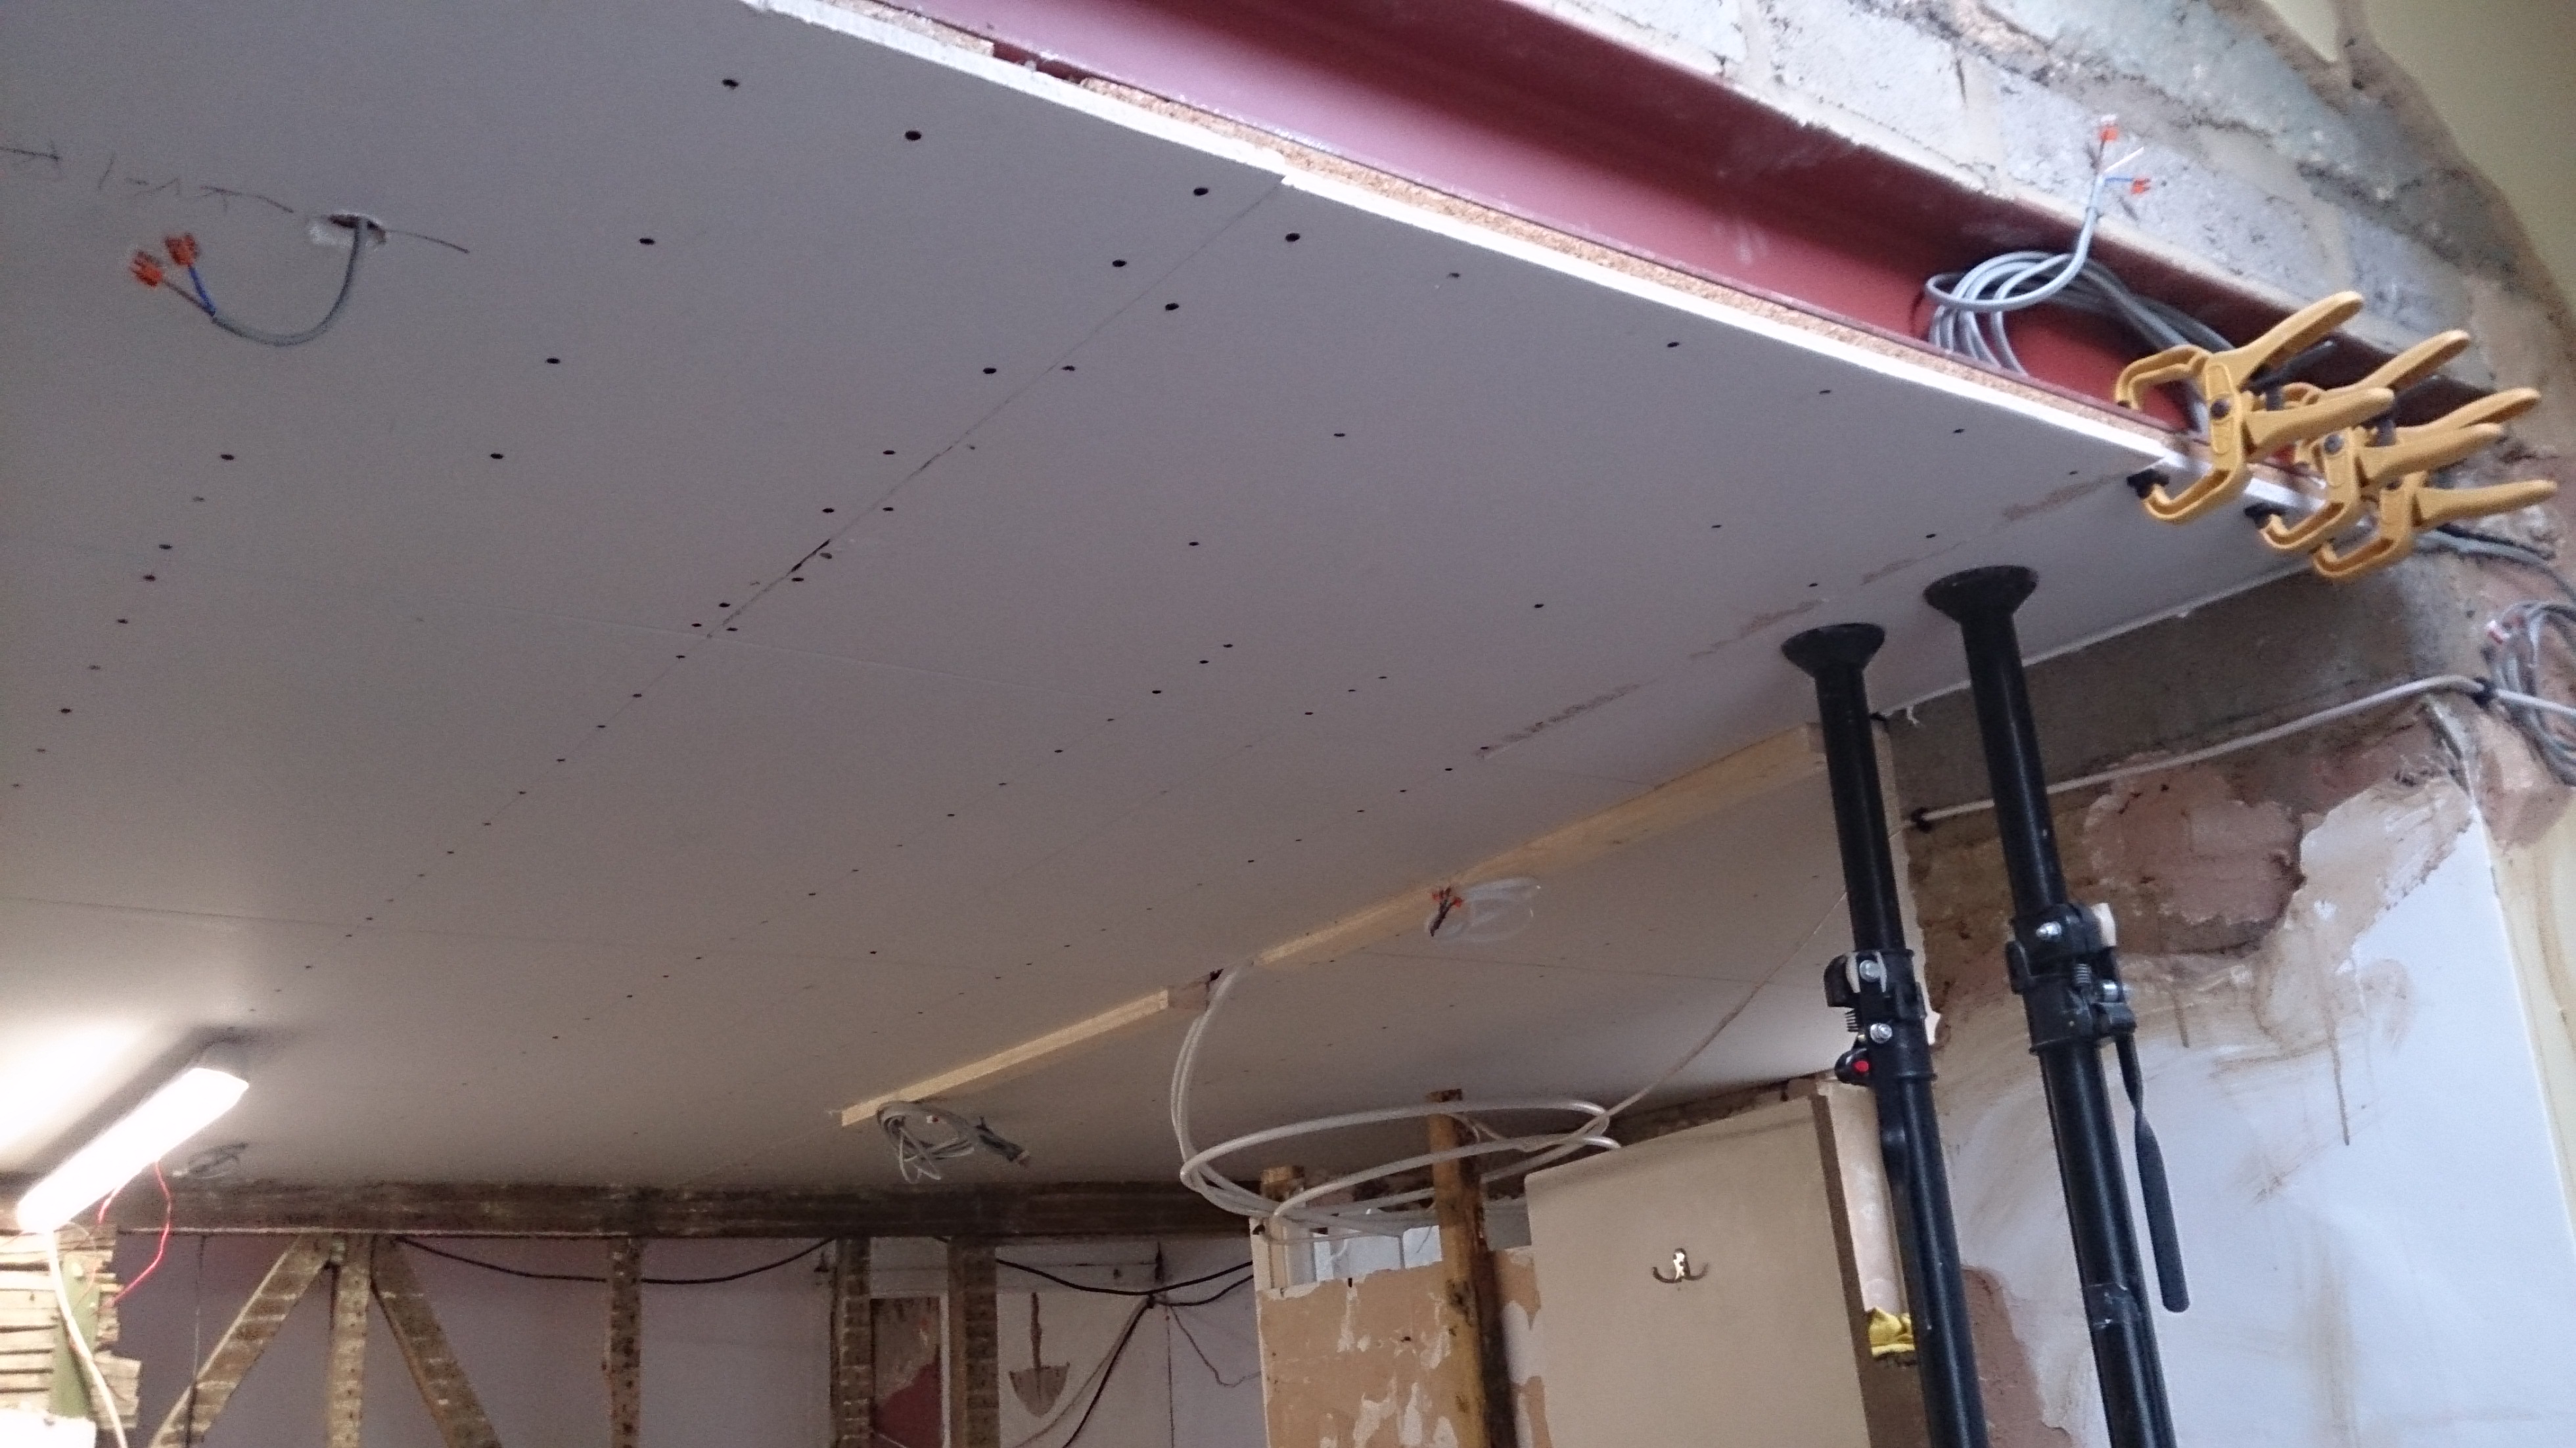
The props youu can see are under a small corner bit left for me to do today.
Speaking of hardboard - a week or so ago, I popped to a wellknown brand of kitchen supplier to find they had moved. The guys were just sweeping the floor, ready to shut up shop. Outside was a huge skip, and I could see lots of nice pieces of wood sticking out the top. I asked if I could take some and while they didnt say I could, they didnt say I couldnt. He actually said they'd be gone in an hour..... And the skip was being collected that afternoon......
An hour later I was back and with ladder, was able to get up to the top and I took out 10 sheets of hardboard, around 4x5ft. It was heartbreaking to see so much wood going to waste - and if I'd found out earlier, I would have spken to the manager to see if we could have had more. However, its better than nothing. And to make sure it didnt look sneaky, I parked in front fo the skip in full view of everyone passing and wore a bright yellow jacket! I'm still waiting for that knock on the door...![]()
Unfortunately once home, we discovered that some of the sheets were slightly thicker than the rest. But three fitted onto the bedrrom floor really well. Most of the old boards were tonge and groove and getting them up to work underneath was horrible, with most getting damaged corners and sides. so we plan to use the best of the two rooms in one and buy new for the other. Its just a shame all the boards were not thick enough to use. They'd have done one complete room.
I am sure they'll all get used eventually.
So with the ceiling fitted, we had to make decisions about where the downlighters were going. The OH had put wiring in for 4 in the dining room and two in the bathroom and today we measured and mused and eventaully made decisions on where they'd go. Then it was down to Denmans to get the lights. They had some new ones whch the OH liked the look of. From KSR Lighting, they are 'three in one' LED downlights. on the back is a small switch which changes the light from warm to mid to white light (6000, 4000 and 3000kelvin), they are fully dimmable and easy to install. At £17 each, we agreed to give them a go. He particularly liked the fact that we could choose which light we wanted, once in situ. We'll probably leave them on the mid setting but they can be eased out and changed if needed. I shall let you know how they turn out. They must have been easy to install as I only left him there for a couple of hours and its all done.
I can now start getting the insulation fitted into the joists before we screw the boards down for good. Then we can get the walls ready for plastering.
Oh, and we've bought radiators so they need to be fitted (or the pipes put in place) too. But I think thats enough for one post. its slow progress as we both have other things which take us away from the house more than we'd like but we're slowly getting there. And as long as we dont start listing all the things that still need to be done, we remain reasonably happy with progress. at least I do - and I am learning all the time. Initially we hoped to have the place ready to sell by spring but thats not going to happen.
Maybe we'll be out for Christmas......![]()
-
 1
1
3 Comments
Recommended Comments
Create an account or sign in to comment
You need to be a member in order to leave a comment
Create an account
Sign up for a new account in our community. It's easy!
Register a new accountSign in
Already have an account? Sign in here.
Sign In Now