Nickfromwales
-
Posts
30977 -
Joined
-
Last visited
-
Days Won
327
Everything posted by Nickfromwales
-

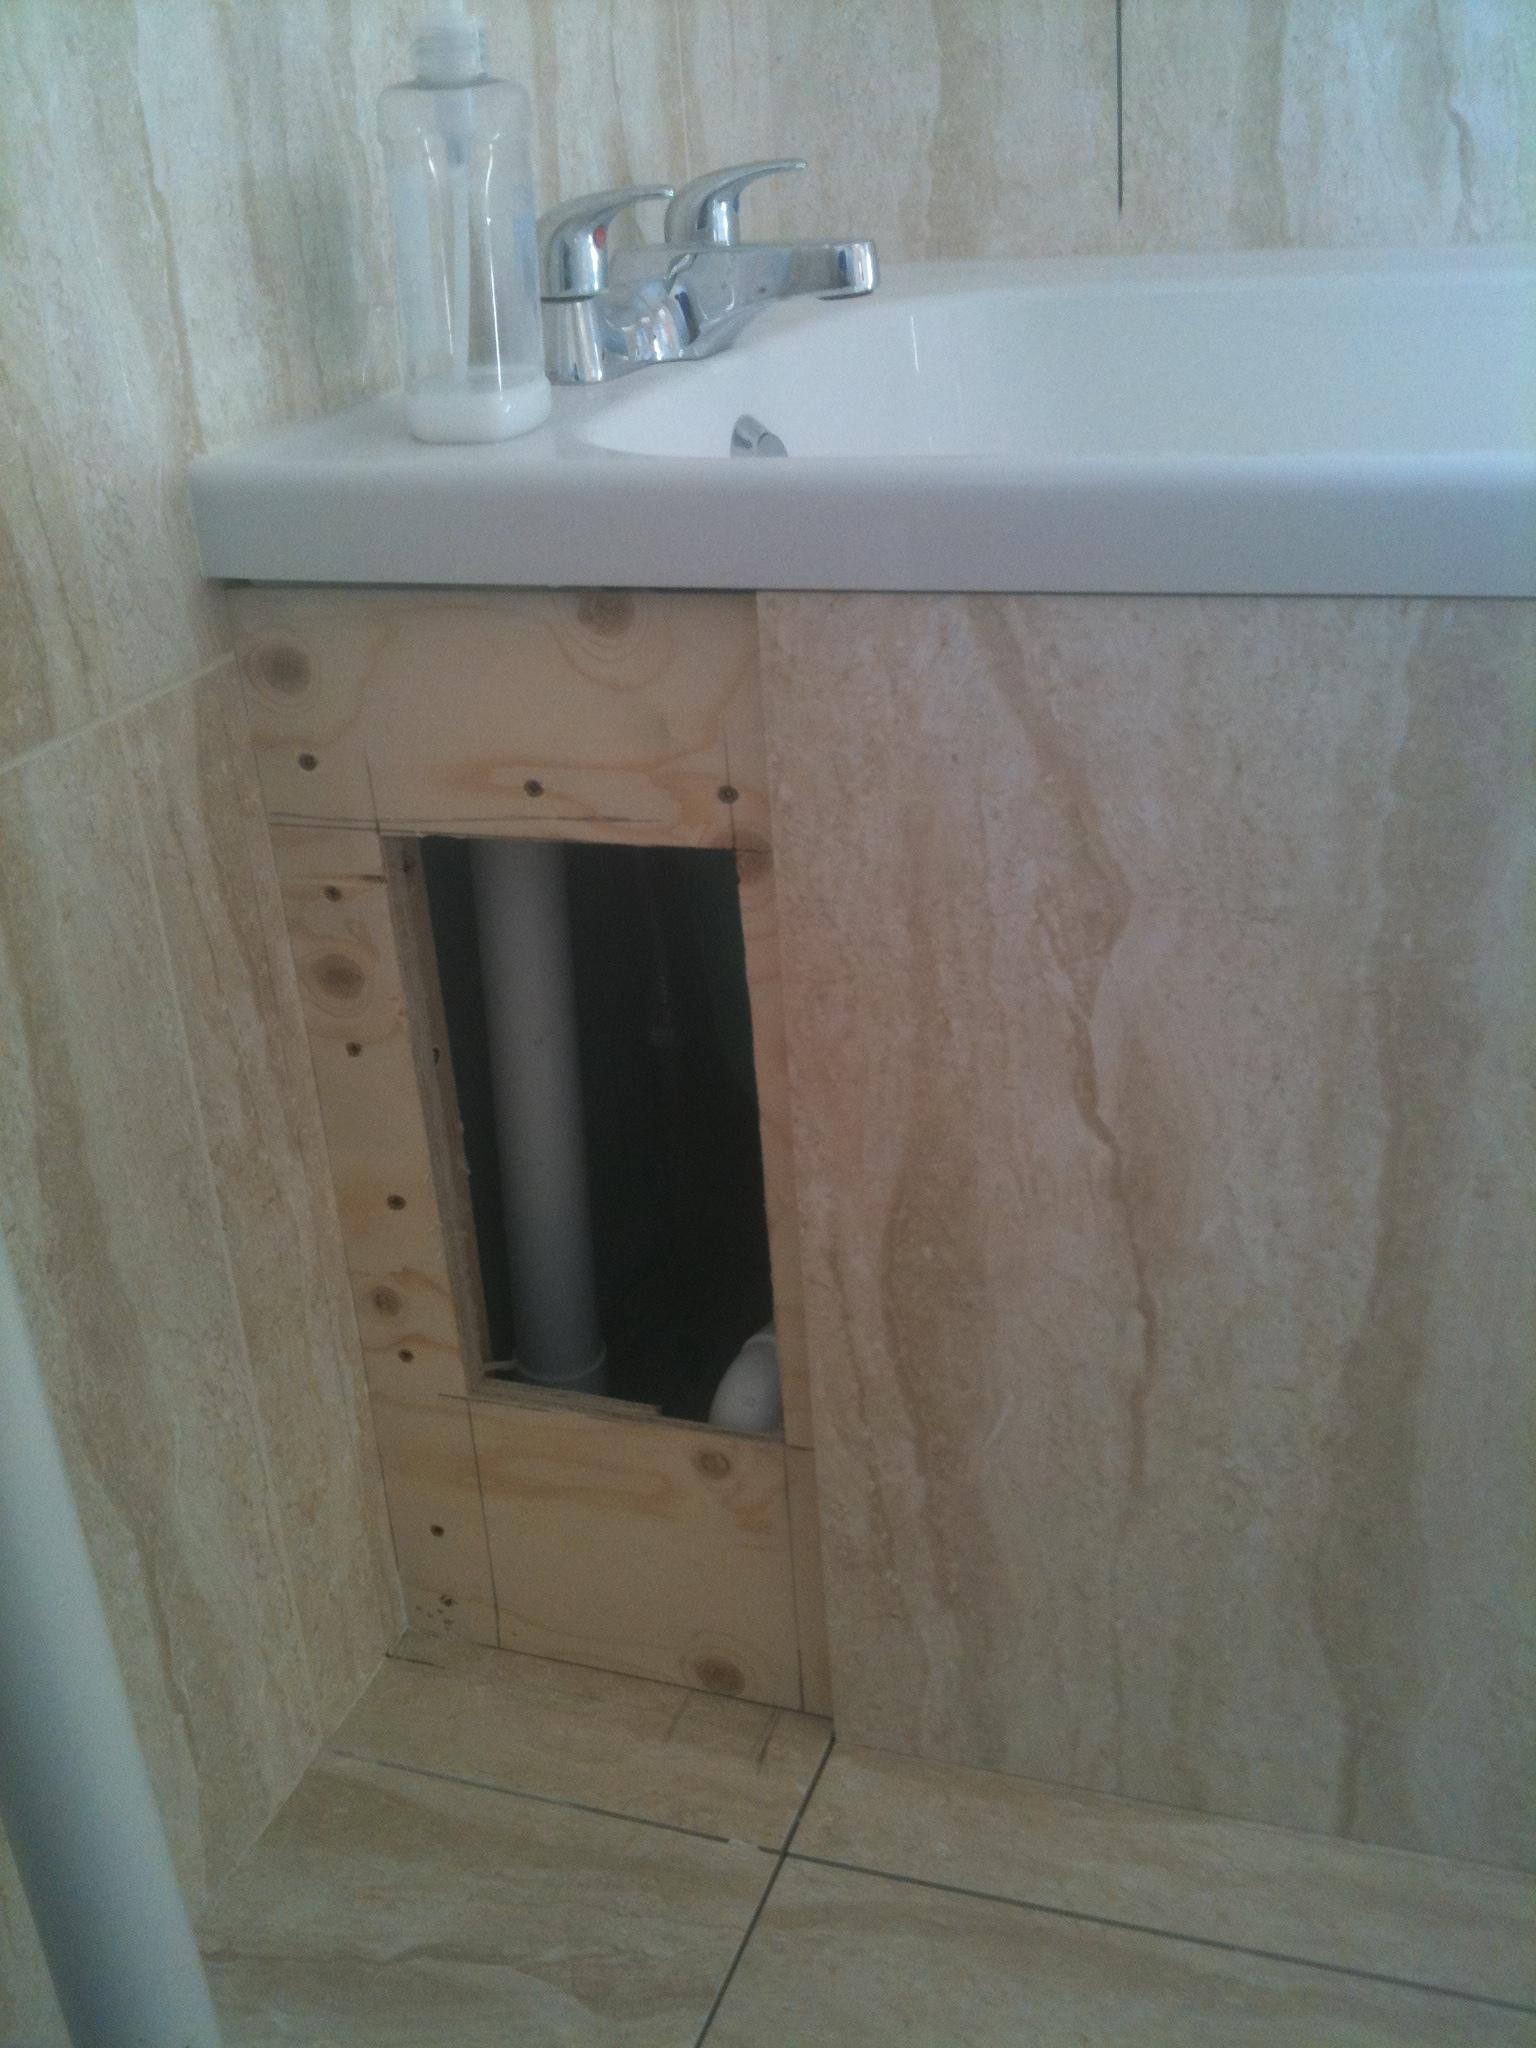
Bath Surround / Boxing In, and concealed pipework
Nickfromwales replied to Onoff's topic in Bathrooms, Ensuites & Wetrooms
I usually cut a section of plywood out and fix a tile on with 4 or 5 50p size blobs of mastic. The tile the gets grouted as normal and looks flawless. I tell the customer to keep at least one full box of tiles, and the idea is if you need to get in ever, you just cover the tile in gaffa tape and whack it in the middle to break it. Remove it and clean up, change whatever and stick a fresh tile back. Fwiw most modern taps are all services from above . I only put an access option on these kind of jobs as there was also an air admittance valve ( on top of the white pipe shown ) so was more worried about that failing tbh.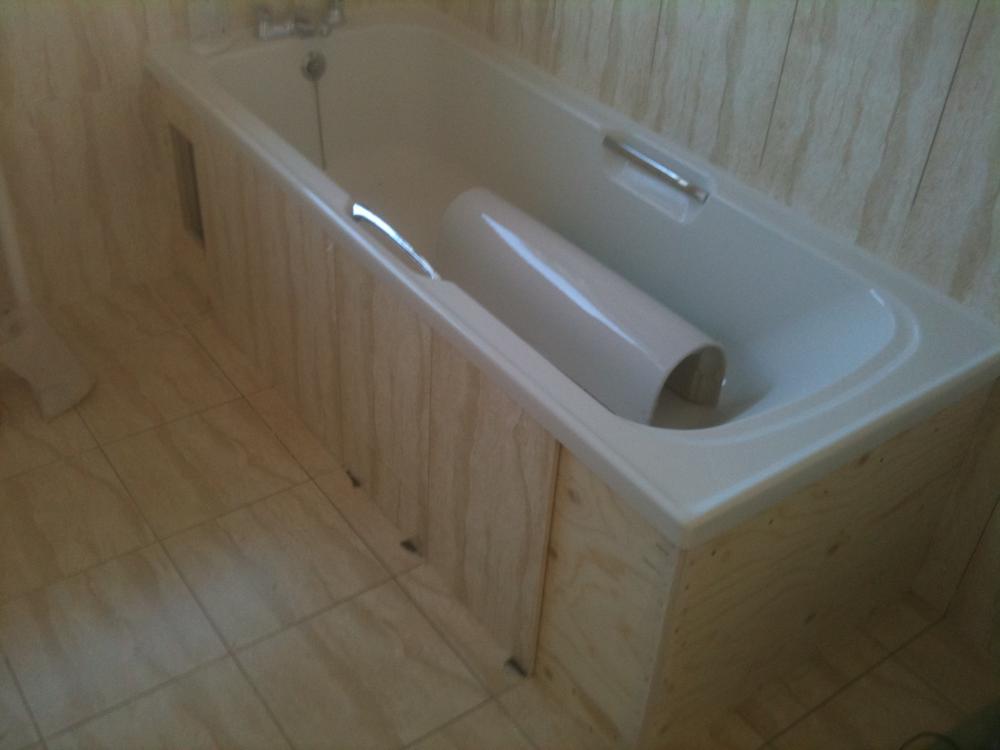

-
Wall or floor, ceramic / porcelain / natural......
Nickfromwales replied to Nickfromwales's topic in Wall Tiles & Tiling
FYI @sphannaby In addition to the above..,.. Remember that the 2- 3mm gap between the top of the batten / ply and the underside of the tray is to allow the bead of SF to create a cushion so the tray can flex slightly rather than sit on the timber directly. That's to allow for movement whilst your in the shower, singing and scrubbing. If your tray has a centre leg or more than one centre leg, leave these wound up and just set the tray by the outer ones. Leave the SF to cure ( 24 hours ) and THEN wind the other legs out to hand tight only. -
Wall or floor, ceramic / porcelain / natural......
Nickfromwales replied to Nickfromwales's topic in Wall Tiles & Tiling
Yup. Don't use the add-on upstands as they're useless without sealant anyway. Plus they come between the side of the tray and the wall, so stop you getting a good fix ( as your then relying on the double sided sticky tape to hold both bonded surfaces together where the upstand goes ). Dry fit the shower tray and set the height and level to suit. Draw around the upper edge with a pencil, and if you can reach do the same at the underside. Fit a batten around the 2 / 3 sides stopping 50mm short of each outer corner ( to allow fitting of the skirt / plinth ). A better option is to cut strips of 18mm ply and fit that like skirting board, so it sits on the floor and supports the underside of the tray in one solid section. Bond that to the walls with the Sikaflex ( SF ) and fix with a few screws going through into the studs, or rawlplug into the masonry. Set the battens 2-3mm shy of the pencil line and put a 12mm bead of SF atop for the tray to be offered down into / onto. Once you've got to that stage, draw the tray 15-20mm or so away, re-goop the top of the ply / batten, and then run two parallel lines of SF around the wall, one at half tray depth and another just shy of the top pencil line. Push the tray home against the SF and move it around a bit of possible to ensure the goop has taken well. DONT FORGET TO MAKE SURE THE PLASTIC FILM HAS BEEN REMOVED FIRST, ( if the tray has it fitted, some don't ). CHECK AND DOUBLE CHECK AS ITS SOMETIMES HARD TO SEE IT . Then follow the method described, in the thread I linked, re forming the SF upstand whilst the SF is all still wet / masking etc. Simples -
We have a site toilet... At last.
Nickfromwales replied to ProDave's topic in General Self Build & DIY Discussion
ugh. -
I somehow missed the part where I recommended the Hitachi gas nailer under my pseudonym. "Sparrow Fart" for the uninitiated. Thanks again, Ian .
-
We have a site toilet... At last.
Nickfromwales replied to ProDave's topic in General Self Build & DIY Discussion
Don't forget to whittle a loo roll holder -
Wall or floor, ceramic / porcelain / natural......
Nickfromwales replied to Nickfromwales's topic in Wall Tiles & Tiling
Have a read of this and see if that will suffice cone back with questions, no worries. -
We have a site toilet... At last.
Nickfromwales replied to ProDave's topic in General Self Build & DIY Discussion
Like his n hers? I bet you get whichever is coldest as your outnumbered ? -
We have a site toilet... At last.
Nickfromwales replied to ProDave's topic in General Self Build & DIY Discussion
Don't you mean bog? Happy days. -
If you don't hear from me ever again...............
-
-
Hmmm, so you didn't keep the living roof then? Congrats ! Piss up and a bbq sounds good to me
-
Thanks Jane. There are many rides at the funfair not just this roller coaster . Feel free to choose another, just please keep your arms and legs inside the carriage at all times until the ride stops ! The managment.
-
Heatmiser UFH wiring centre with TS
Nickfromwales replied to sphannaby's topic in Underfloor Heating
Did they give a reason for including the additional circulation pump ? -
Very well said, and pretty much exactly what we're all about Actis can by all means come here and comment, as long as it's factual and not commercial. I for one would welcome it, but I doubt if they ( after reading the content of this thread fully ) would open themselves up to ridicule as it's doesn't appear that they would be able to defend their previous practices, and I fear it would just descend into a marketing squabble, much as we've seen before. Id be happy to be proved wrong.
-
Soil stack to 110 drain -- the wrong way and right way
Nickfromwales replied to TerryE's topic in Waste & Sewerage
It's what I would do, and have done on just about every stack I've ever connected to. No issues yet, and I'd assume that if shitty black and grey waste water had been leaking anywhere, particularly inside the envelope of a customers home, I'd be the first to know . -
Top access shower wastes
Nickfromwales replied to sphannaby's topic in Bathrooms, Ensuites & Wetrooms
Alternate grille design -
Top access shower wastes
Nickfromwales replied to sphannaby's topic in Bathrooms, Ensuites & Wetrooms
Just bought this McAlpine one. A very good unit, finishes flush, chrome plated solid brass and a huge top access bucket ( hair trap ) for easy full cleaning. Most other 90mm wastes have a sort of mushroom cover which is elevated, sitting on plastic prongs. They don't last long if you inadvertently step on them. I'll be buying the above from now on, and bin / sell the crap ones that usually get supplied with the trays. I'll take some pics tomorrow. -
Soil stack to 110 drain -- the wrong way and right way
Nickfromwales replied to TerryE's topic in Waste & Sewerage
Ah, good point about the 'user definable' height with the adjustable frame of the Geberit. The last one I fitted I purposely jacked up by a good 35mm, above normal WC pan height, as the punter had bad knees. There are 'comfort' height floor standing WC pans around, as well as Doc M suites which also adopt a higher pan level. All jokes aside, and believe me I've done well here to fight the urge, you may well find it a good idea to jack the height up a bit for comfort, and the side effect will be the ease of connection for the ground floor loo. Im not sure about where the hang ups are coming from with having a pushfit at the base of the tee, eg a triple pushfit socket tee, as using double socket connectors, bends and 45's etc is commonplace. Amen to that. You get one shot with these. -
+1 for plasson. I'd not want to overpay for a like for like item, bit this is not a place to buy 'cheap' IMHO. When I bury something, I don't want to have to dig it back up
-
Heatmiser UFH wiring centre with TS
Nickfromwales replied to sphannaby's topic in Underfloor Heating
The next gadget won't run on 1mm2 stranded flex . Re the manifolds, you'll not need the additional circulation pump imo. Mom a previous job I trenched between the house and the garage ( much like the pic above of my current job ) and put a TS in the garage aka plant room. From there I ran a 15mm flow from the TS, around the garage, down into the trench, back up into the utility room, up the wall to the first floor joist space, along to the airing cupboard ( or "hot press" if your foreign ) and up to an Ufh manifold for the ( ground floor ) sunroom single zone / single circuit Ufh. The return was tee'd into the 28mm grouped return for the house radiators and job done. Thinking that the manifold pump would pull the heated water up there was my assumption. To my surprise, the manifold was warm, PRIOR to me fitting controls and energising the pump. The pipe work was all roasting hot and I was bemused as to how, only to then realise that there was a perfect convection loop flowing round like it was pumped! I had to install a 2port valve to STOP the flow for when the Ufh wasn't needed . That 15mm pipe run was over 18 maybe 20m long and up n down like a yo-yo. Point being, you'll be fine. -
Soil stack to 110 drain -- the wrong way and right way
Nickfromwales replied to TerryE's topic in Waste & Sewerage
It's just down to good practice tbh. Reducing the bore at the start of the stack would be a no-no for me. Anyhoo. A ground floor WC will have a 7" pipe centre ( from FFLevel ) where the soil leaves the pan. You'll need a fall in the pipe before it gets to the branch, thus determining the lowest point of the branch. An U/G ( underground ( terracotta coloured )) fitting with 3 sockets may JUST do it IF the socket is IN the slab NOT above it. I'll measure one later and double check. -
Hello stranger . Hope all is well, and we'll look forward to hearing from you.
-
Soil stack to 110 drain -- the wrong way and right way
Nickfromwales replied to TerryE's topic in Waste & Sewerage
How much 110mm is above slab height currently? -
Fair do's, they're motoring along with that . How do they manage the pour when they start going up the gables?