CC45
-
Posts
1255 -
Joined
-
Last visited
Everything posted by CC45
-

A "what fitting" plumbing question
CC45 replied to ProDave's topic in Bathrooms, Ensuites & Wetrooms
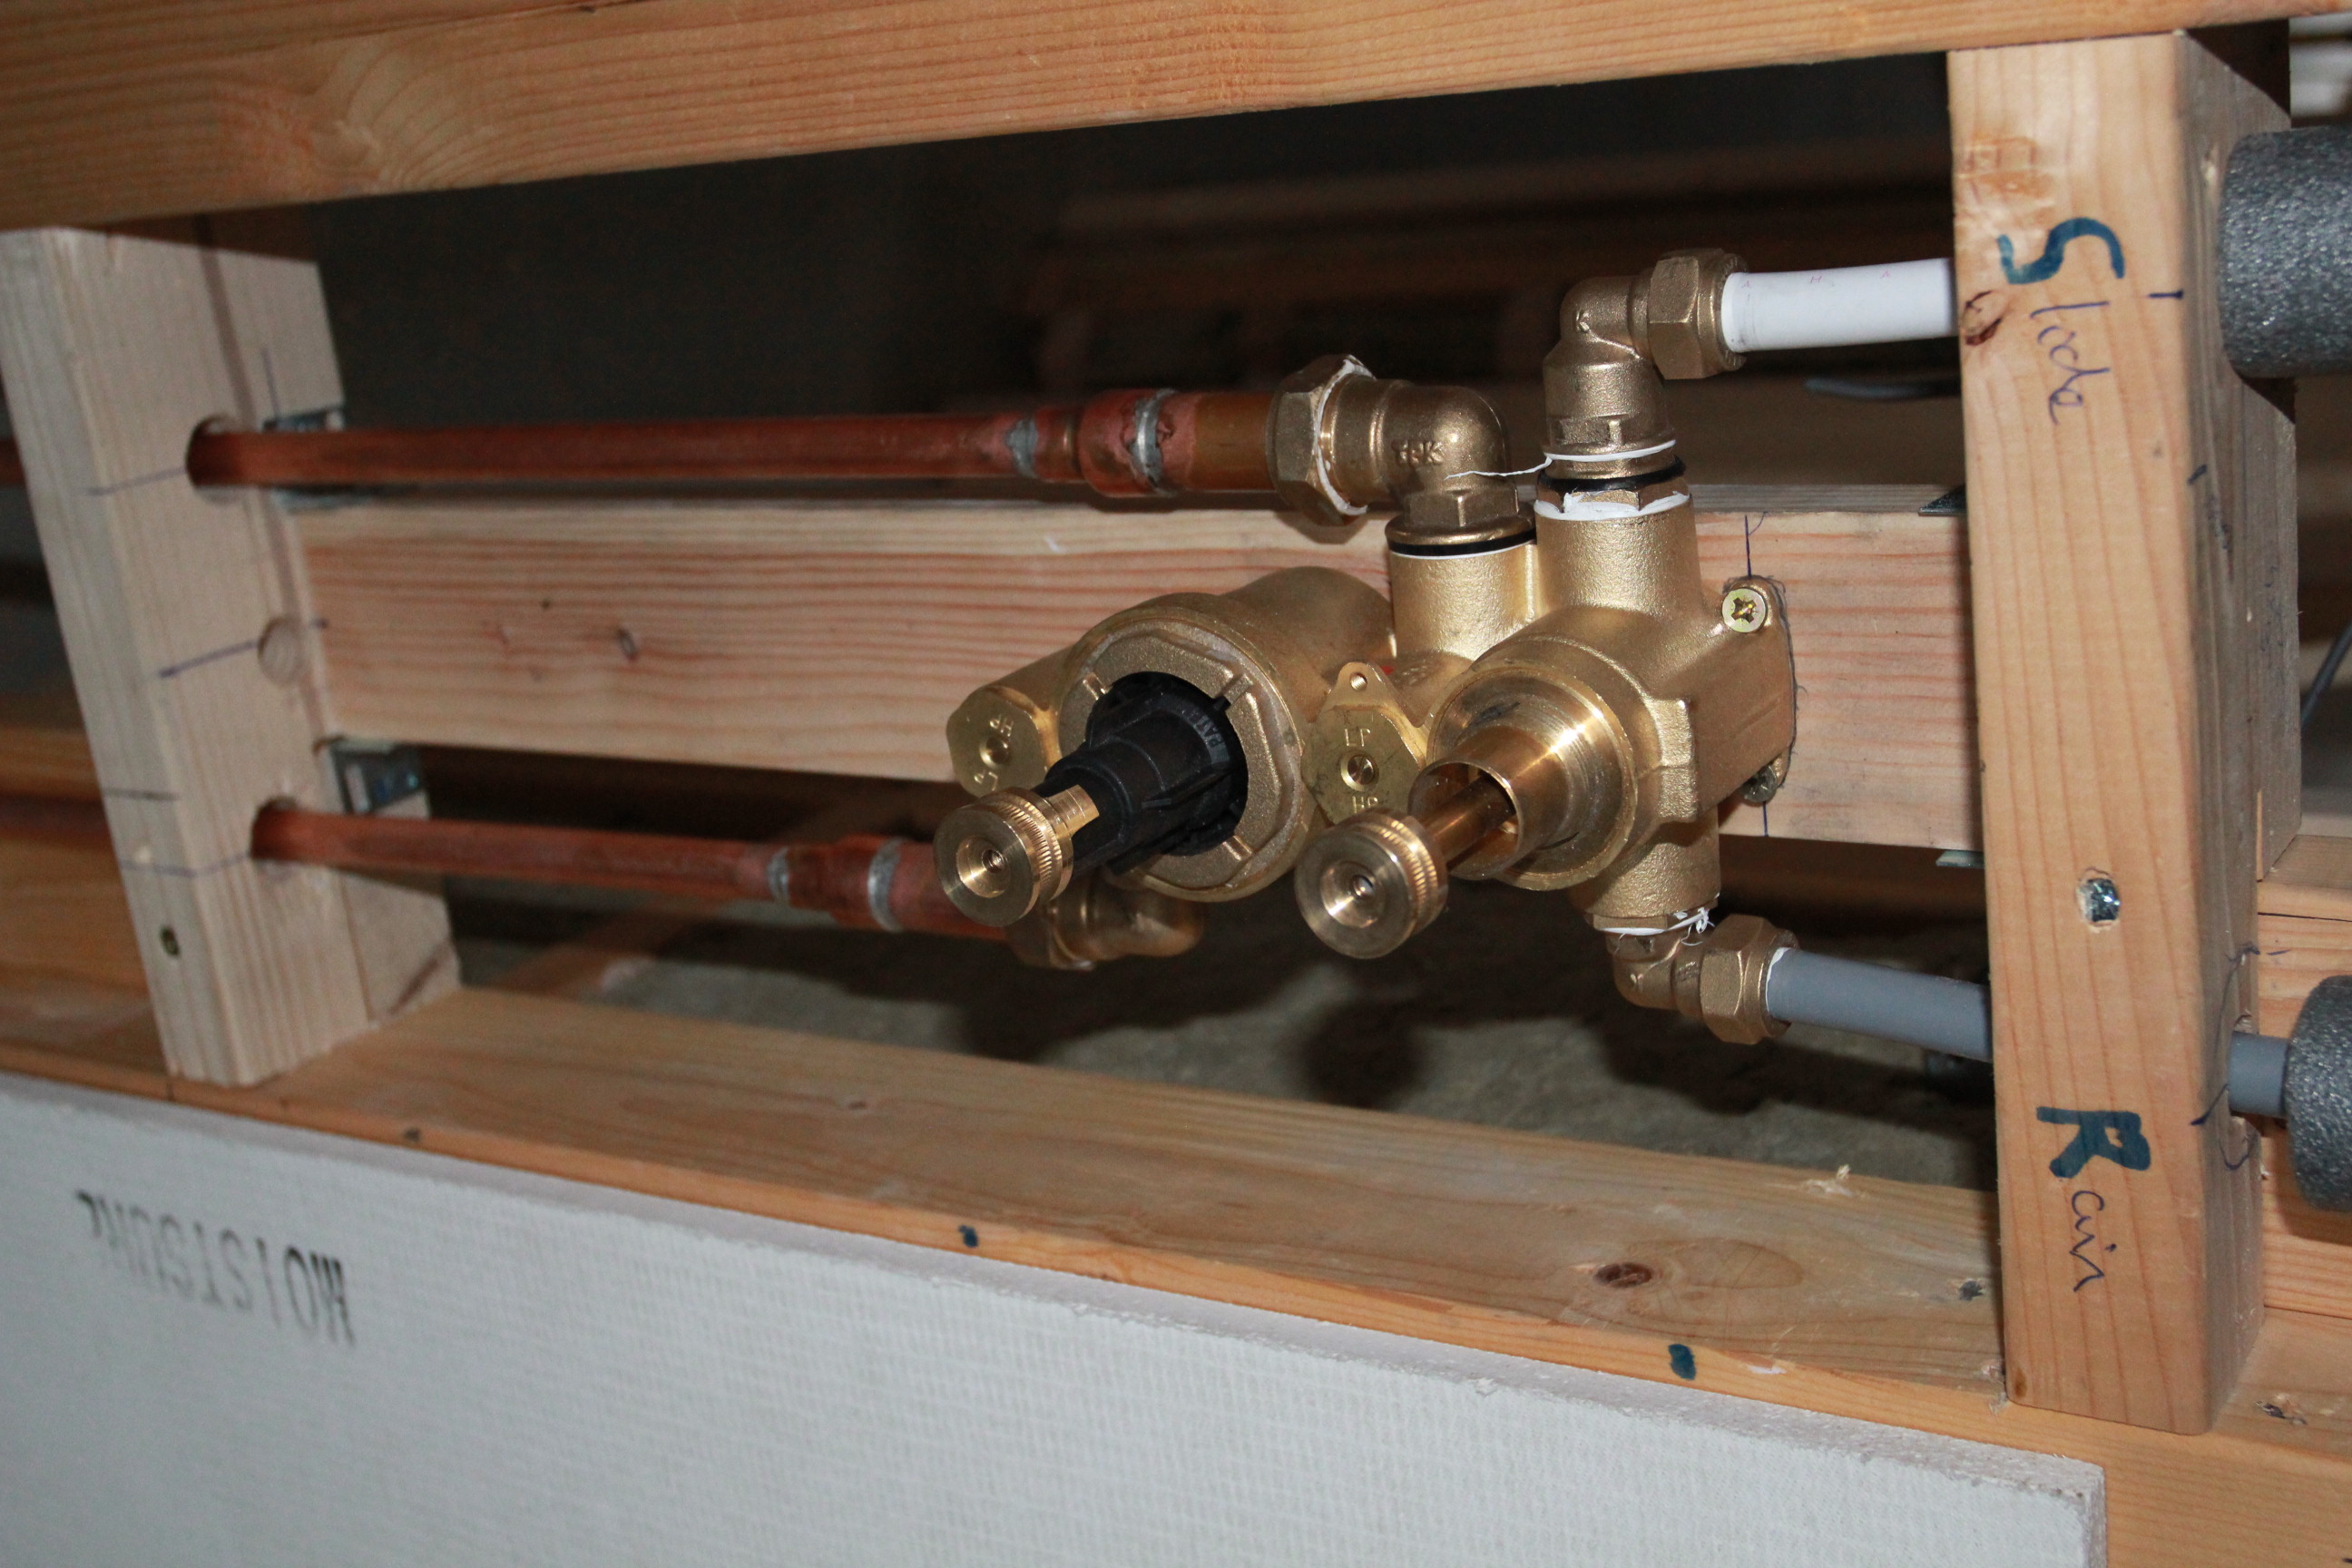
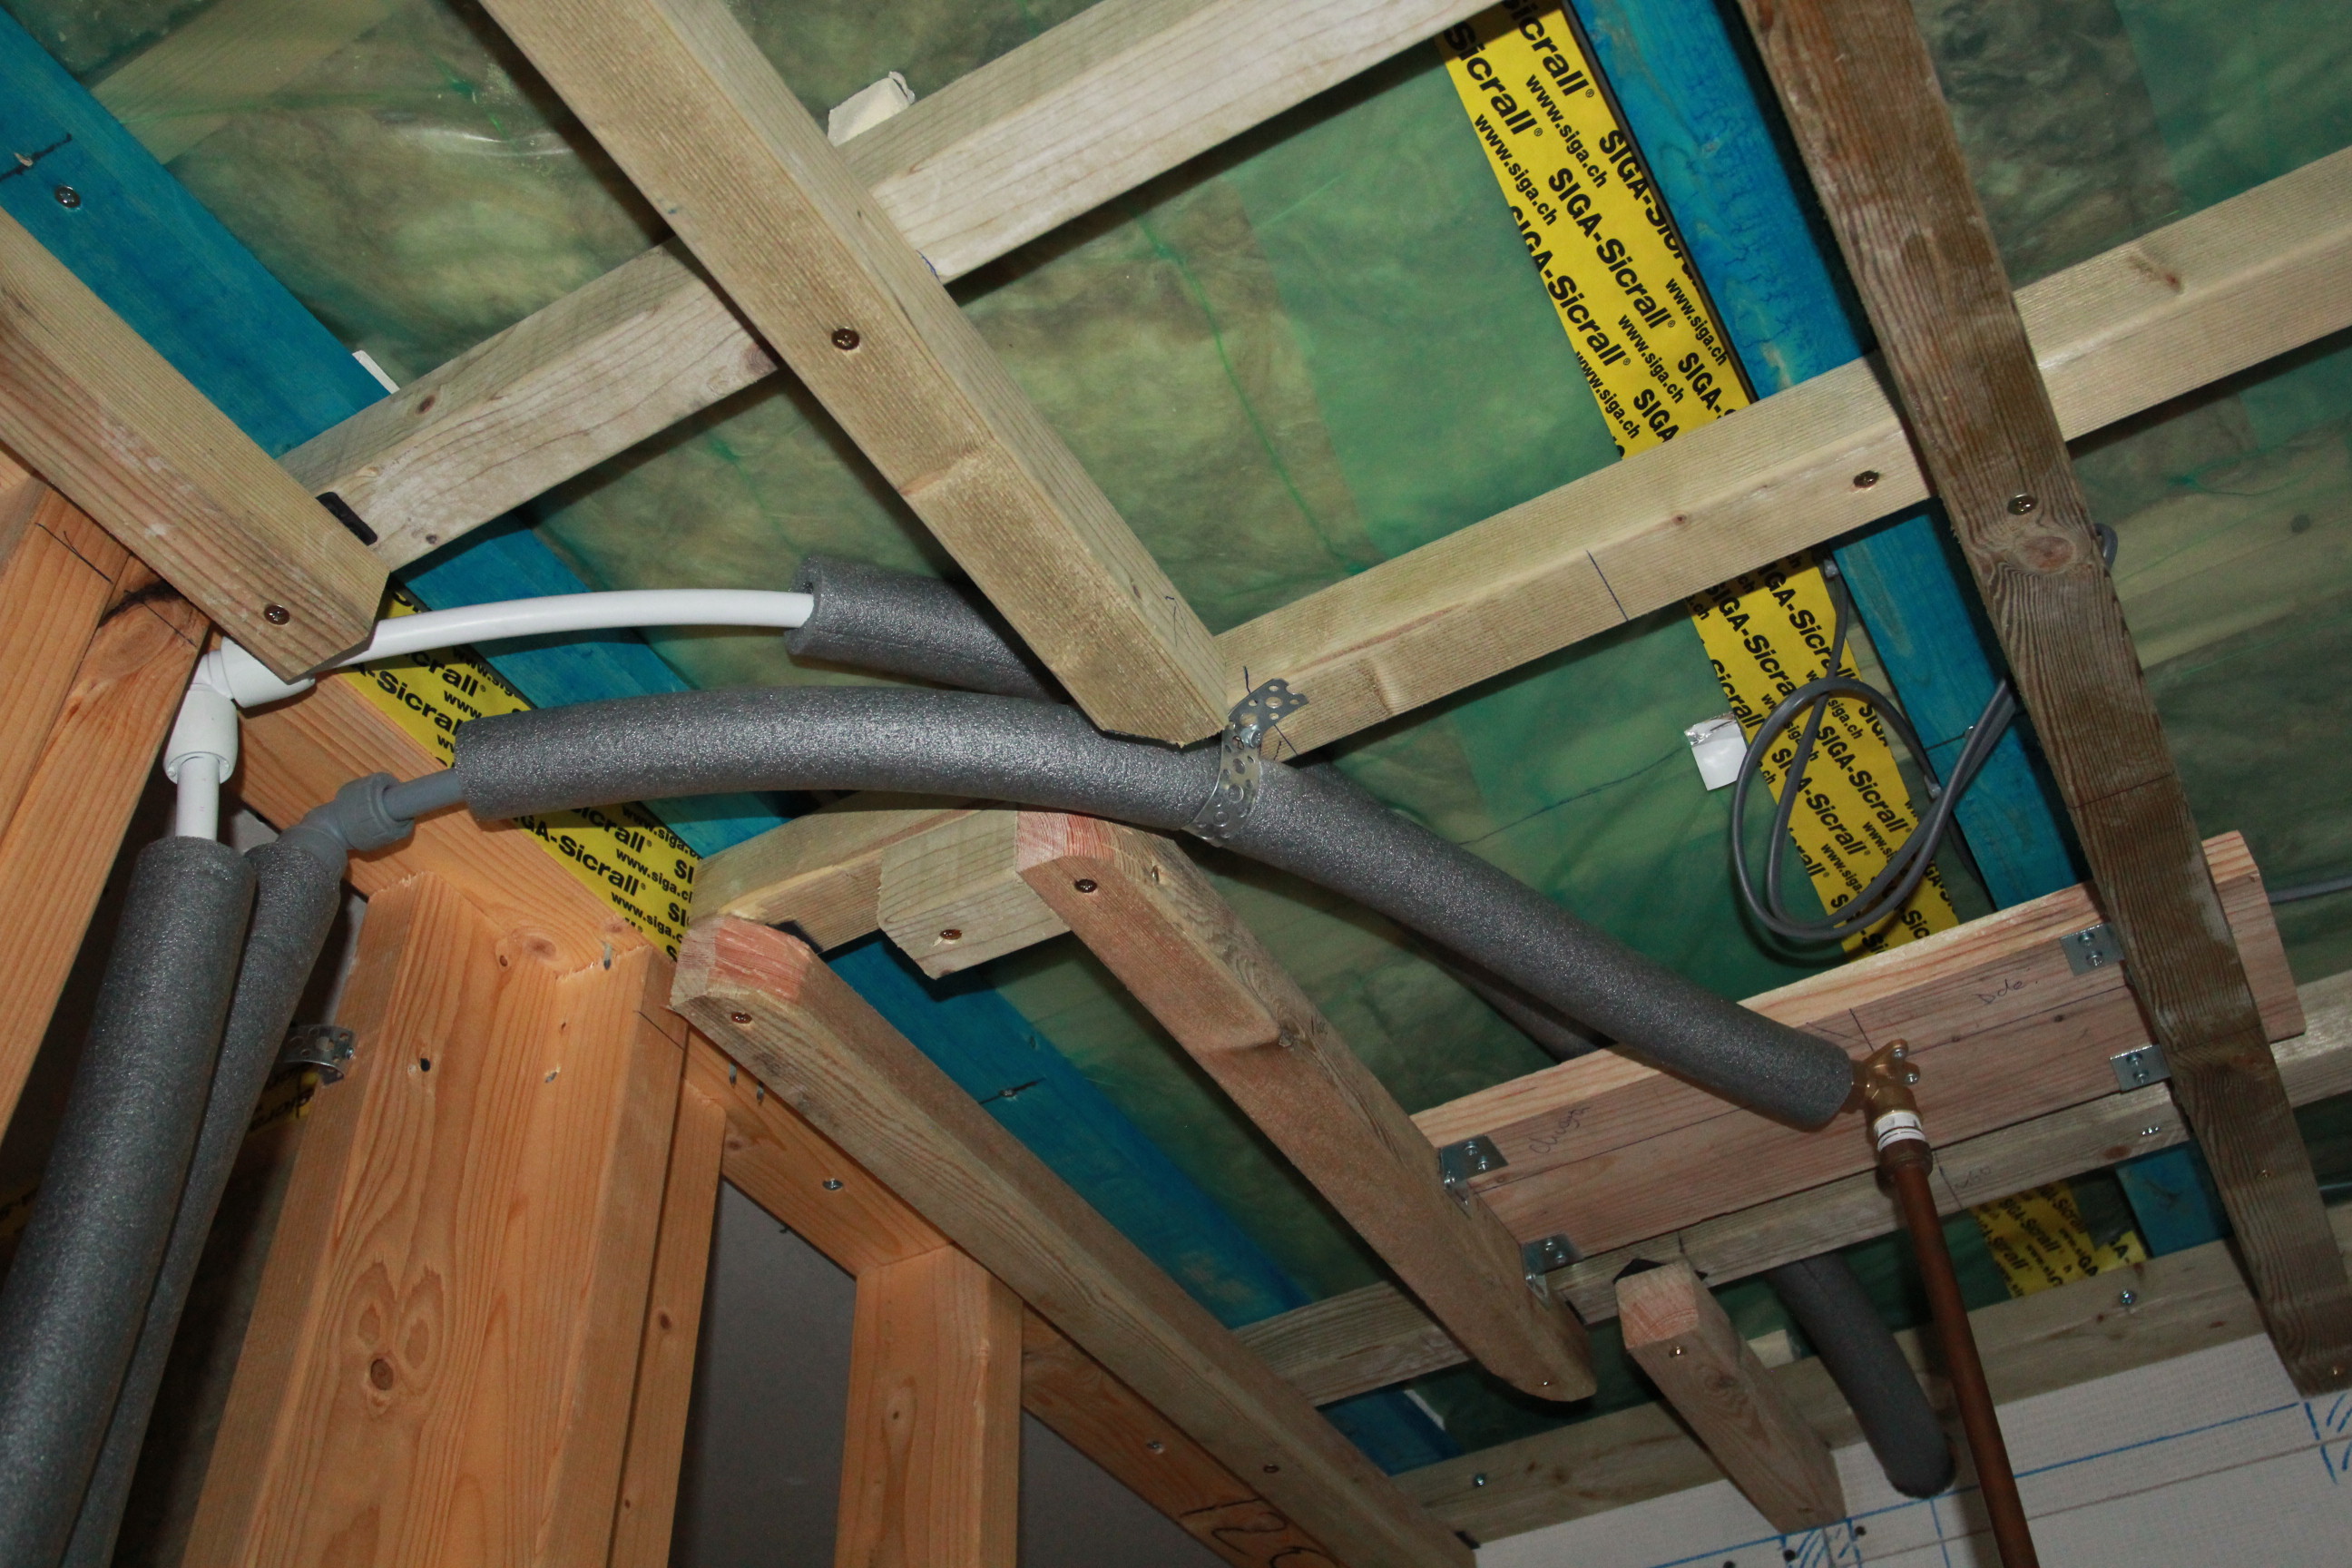
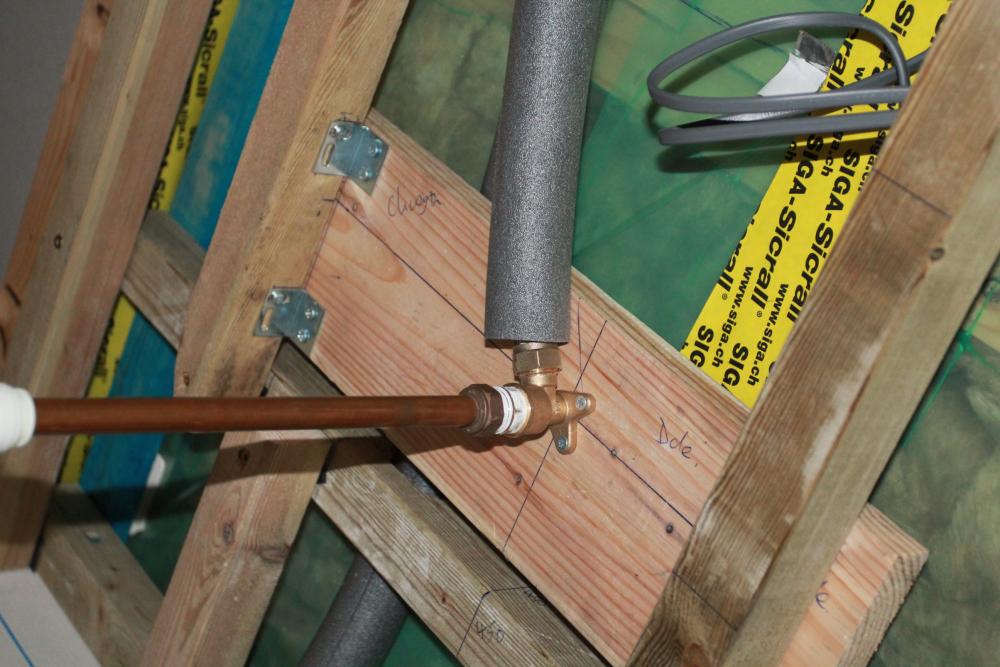
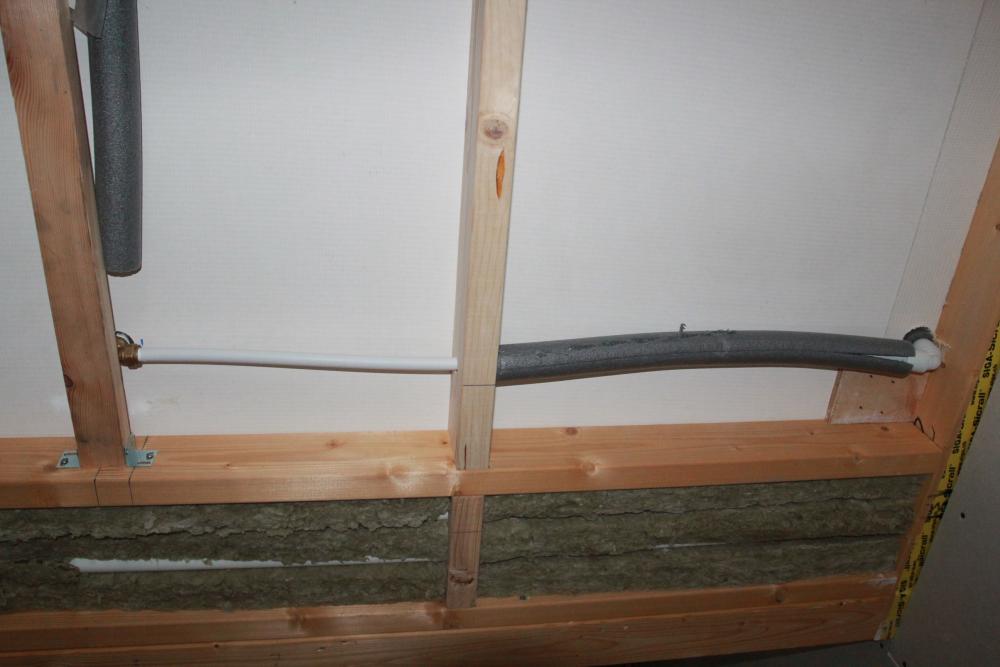
right...... Hopefully these are visible when I hit submit reply. Ignore the various pipes coming off the fittings - its under test (6 bar and no leaks so far). Counter battened ready for led spot lights (didn't want to mess around with the vapour barrier) - got plenty of ceiling height. Any constructive comments gratefully received! PS translation available for those of you who notice the Welsh scribbles.....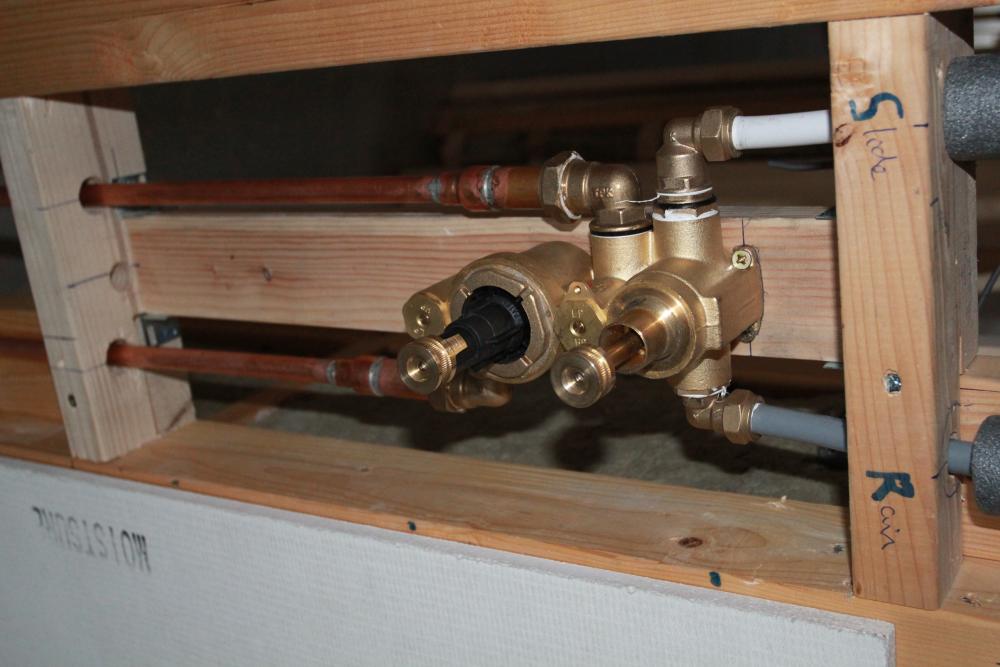


-
A "what fitting" plumbing question
CC45 replied to ProDave's topic in Bathrooms, Ensuites & Wetrooms
Will take some tomorrow night. ? -
A "what fitting" plumbing question
CC45 replied to ProDave's topic in Bathrooms, Ensuites & Wetrooms
Its the slots in the brackets - they need to be swopped so he can adjust the vertical rear timber ply so the fitting does stick out horizontally not sticking upwards or downwards. He cant do that with how he's done that so he will need to be really accurate 1st time. -
A "what fitting" plumbing question
CC45 replied to ProDave's topic in Bathrooms, Ensuites & Wetrooms
The bloke in the video clip. He cant adjust that backing board in or out from the vertical - to adjust the fitting. -
A "what fitting" plumbing question
CC45 replied to ProDave's topic in Bathrooms, Ensuites & Wetrooms
The pic that Nick loaded has got the brackets wrong - how will he adjust the backing board to ensure the fitting sticking out is horizontal? Have I missed something? -
A "what fitting" plumbing question
CC45 replied to ProDave's topic in Bathrooms, Ensuites & Wetrooms
I've just put 3 of these in - tap connections. Generous ptfe and screw in hand tight. I've tested mine to over 6bar. No leaks at all. They arent tapered. I chose to go with rainfall head being fed from the ceiling (false one so plenty of room for pipe etc) rather than a wall mounted one - wasnt too sure about how strong they are. Happy to post pics if anyone is interested. -
Great help here - thanks to you all. I think I will stick to a mat - as a first timer it would seem sensible. Will get the router out to make a trench for the sensor and I like the suggestion of a second sensor just in case. I assume you all tile first then protect the tiles and then skim the walls? If the mat doesnt come with duct - what do you all use? Had a slow day, bit of plaster boarding and then a few hours pressure testing the newly installed shower valve - why do these jobs take so long?
-
Looking for some guidance regarding the sensor cable for electric ufh in bathroom. I'd like to run it in a duct of some sort to allow replacement if it fails but I'm concerned about how much this will affect tiling and the height of the finished floor (timber floor upstairs). Its been suggested that I run it down then under the floor and then bring it up from below and leave it under a tile. If it fails then forget it and just run the eufh for short periods of time. Any suggestions? Thanks
-
We installed a system based on this forums advice - led heavily by @Nickfromwales. Mains gas, 250l uvc, 90l buffer tank that feeds ufh manifold + rad manifold (for upstairs). Plumber who's worked with me on the install had never done this before. Fired it all up on Saturday for the first time. 20l of gas later we have a house at 18deg (the target I set on the one stat installed so far) - with virtually no difference between upstairs or downstairs. Next month or so should see the rads in along with their room stats. Feels good to get it in ready for the warmer weather? Very pleased with it all. A big thanks to all on here who I copied from and Nick for organising the purchase of the tanks!
-
Calculating the amount of insulation
CC45 replied to Russell griffiths's topic in General Self Build & DIY Discussion
Celotex have got a calc on their www. -
I used 225mm celotex - 2 layers, 75mm first and then 150mm. Easier to do now than later!
-
Bath Surround / Boxing In, and concealed pipework
CC45 replied to Onoff's topic in Bathrooms, Ensuites & Wetrooms
Wonder how many of these 51 pages are actually on topic? Of course I wouldnt want to see it any other way.? -
Bath Surround / Boxing In, and concealed pipework
CC45 replied to Onoff's topic in Bathrooms, Ensuites & Wetrooms
Think its bob on ? I have been taking pics, when we are in it will be time for the plog to be born! ? -
Bath Surround / Boxing In, and concealed pipework
CC45 replied to Onoff's topic in Bathrooms, Ensuites & Wetrooms
Having spent 2hrs plumbing tonight and amazed how little I actually got done, its good to come back home and catch up with this thread! Life will be empty when it ends - a bit like when @JSHarris finished his build..... -
Bath Surround / Boxing In, and concealed pipework
CC45 replied to Onoff's topic in Bathrooms, Ensuites & Wetrooms
I bet quite a few on here have 'small unfinished jobs' on their to do list that are two years old...... -
Just fitting these into our showers. Twin with diverters. Seem ok. Good value.
-
Easy to think the worst, nothing you can do at the minute so best chill until you get there.
-
Hi @ProDave any info on floor mounted bath filler? Not long before we need to source one. Ta
-
So the tray has arrived. Heavy and seems well made. Its got to go down on a wood floor upstairs, which isn't overly flat (I didnt put it down). The floor is glued and I've also screwed it down as well. The installation instructions talk about removing the existing floor boards and replacing with a single sheet and then laying the tray down on a cement base. I've got a few qns that I'm certain some of you can answer. 1. Do I really need to replace the exiting floor boards? Not impossible to do but it will take a fair bit of time and effort. I was going to plane / sand the existing ones totally flat - surely they cant move that much? they are glued and screwed after all. I intend to strengthen the joists supporting the tray so that should help further. If the collective advice is to do this then fine. None of the guys on Youtube have done this! 2. Can I use ct1 rather than the mortar? The tray underneath isnt flat - it has raised bits that I assume strengthen the stone resin and acrylic tray. I suspect it should be bedded on mortar.... if so how deep a bed does it need? How strong a mix is necessary? 4:1? 5:1? I would add some plasticiser normally - a good idea? 3. This initial tray is tight to the timber stud work (so much so that I will need to ease out the timber slightly since the 900x900 tray is actually 905x905) - so once the tray is in I will bring down the cement board to just above the tray (so its in effect overhanging the tray) and then tile on top, having first sealed the tray with ct1. Do I need to tank the area before tiling? This tray is in an 'alcove'. 4. Trays 2 and 3 (both 1200x900) are in corners - so for the two sides that are against the cement board do I put the tray against the timber and then bring the board down onto the top of the tray or just push the tray tight against the cement board having first put some ct1 along the edge? I know there's a fellow Welsh man out there who probably knows what best practice is! Diolch @Nickfromwales!
-
I will check when I go to site tomorrow evening.... Whatever the number was it was more than the heating requirement - hence the use of a buffer tank.
-
Its a WB and it only modulates down to 50% from what I remember.
-
Our uvc coil wont deliver more than 18kw so bit pointless getting a bigger boiler. For reasons known only to the plumber (a friend) we ended up with 24kw. We have a ufh buffer of 90l. Bought both when @Nickfromwales organised the Telford cylinders discount a few months ago. Should get it all working in time for the summer....
-
@Triassic - surprising how big a 44mm2 house con look on a picture!
-
We've put inspection chambers where soil runs join. You've got to be able to access them. We also have access to the base of each stack.
-
?