Search the Community
Showing results for tags 'cladding'.
-
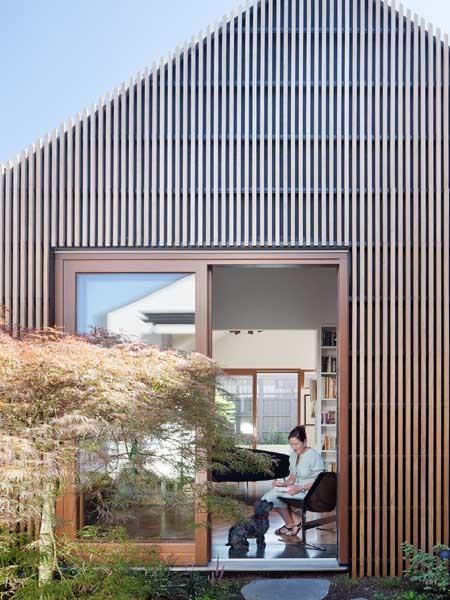
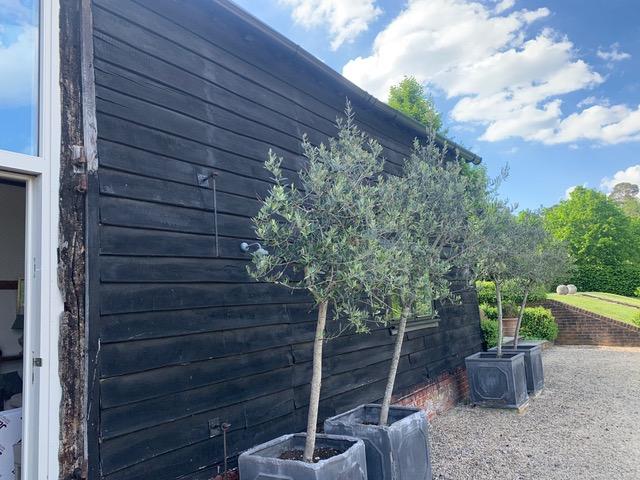
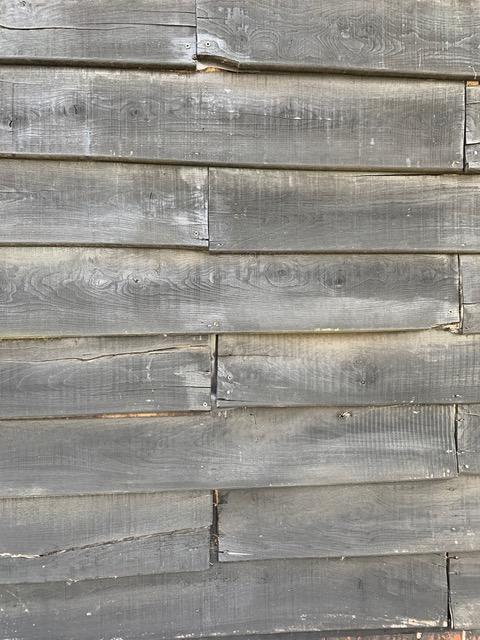
Hi All, I'm just starting a project of remodelling our house, which includes lifting the roof and adding a second story. My intention is to clad the first floor with Siberian larch vertical 44mm x 44mm battens similar to the attached. To test the idea out I will use it on some outbuildings, However I'm finding it very hard to find details in the technique. The outbuildings are brick so I will not use UV membrane, ( i will on the house). I will use chamfered horizontal battens attached to the wall with masonry screws, for the houses I will use thin vertical battens, then chamfered horizontal battens. Then the vertical cladding battens will be fixed via cladding screws to the horizontal battens. All the information I'm finding on line is mainly standard closed joint cladding and does not seem appropriate, i.e. use mesh to stop vermin or details around openings. Can anyone point me to any appropriate information. Thanks Gary
- 61 replies
-
- cladding
- open joints
-
(and 1 more)
Tagged with:
-
I am installing external wood fibre insulation between adjustable wooden joists on the external wall. There will then be a membrane, counter battens, horizontal battens, and vertical larch cladding. At the head of window/door reveals, standard advice is to use a flashing to drain any water at base of ventilated space behind cladding (e.g. https://woodcampus.co.uk/wp-content/uploads/2022/07/9DetailOpenings-vert14-1-15.pdf). In my case, the 240 mm deep joists require closing at base at the head of the reveal, and battens are required to take the larch lining of the reveal head. The only way I can think of doing this is summarized in the attached sketch (hope it is understandable). The cavity behind the vertical larch cladding is vented at bottom and top, but the space between battens at the head of the reveal is only vented beneath the flashing. I can't think of any other way of doing this. If anybody has any alternative suggestions, I would love to hear them. Thank you. Window reveal head.pdf
-
I have question about cables behind cladding, in the ventilation gap. I will be installing the cladding after Easter. It will be brick-slips cladding. The build up will be: 19mm battens, large cement-board backing-panels, and finally the brick slips themselves. Plus insect mesh top and bottom. The question is: in that 19mm ventilation void, how can I later run cables (for lights, CCTV cameras, maybe a WiFi access point, and so on)? I would run each cable vertically from the position down to the base of the cladding, then to underground ducts already buries that all lead back to my plant room. (I don't need to drill though the timber-frame wall.) And I'd prefer not to pre-select the position for the items now so its the general principles I am after. Should I perhaps run some oval conduit in the void in multiple locations just in case? Or not bother with conduit and just feed the cable through the gap later? What have others done? Photo of some battens on my build ↓
-
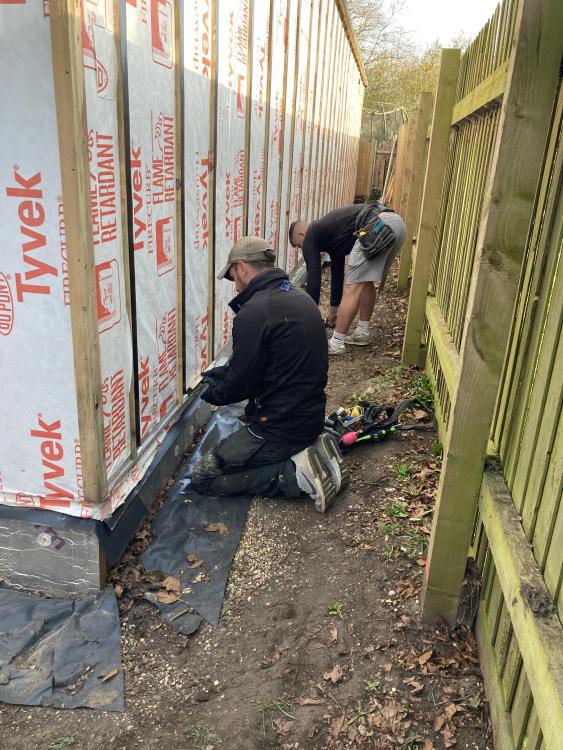
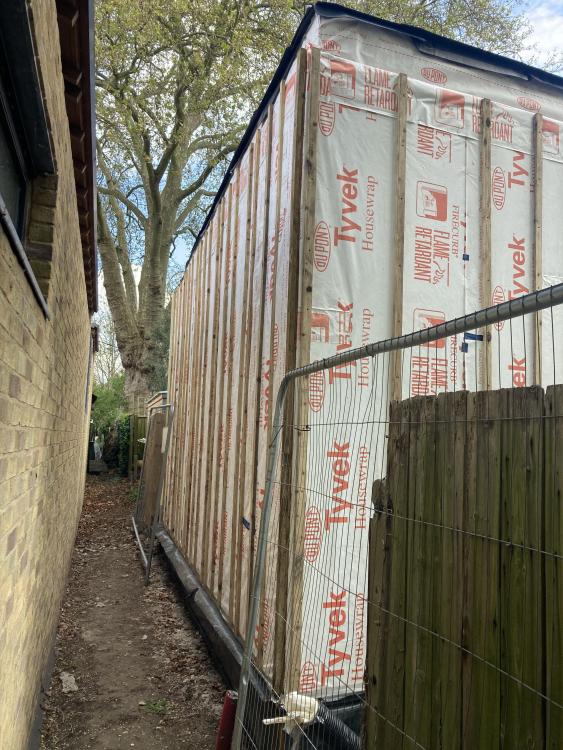
Hi everyone, I'll stick some photos on later but wanted to introduce myself. I've got a 1960's built detached house and have lived here 7 years now. When I bought it the surveyor said the cladding was nearly end of life and the verge fillets had cracks in. I've now installed a dry verge using ubbink batten extension brackets and a dry verge system. The cladding has been removed and I've installed ybs breather quilt over 25x50mm battens which will be counter battened before installing hardie plank cladding boards. Finally I've got an eaves protection system to install when I put the guttering up to make up for the increased protrusion from the wall and need to get window sill extenders (probably pvc fascia board cut to size).
- 1 reply
-
- cladding
- hardie plank
-
(and 1 more)
Tagged with:
-
I'd love some guidance from the great people here. Its about battens for external brick-slips cladding and how to get them flat and true. I've got most of the battens up and and all is going well (see photo). But inevitably I've found a couple of bulges in the racking board which I could try and flatten out. The battens are screwed not nailed so I can easily remove them, Is the best approach to pack the battens with plastic packers for the low spots. And use a cheap electric planer on the battens for the high spots. I can buy a planer from Screwfix for £35. Am I along the right lines? And I'm thinking to aim for a tolerance of 2mm at most. Is that OK?
-
Outside cladding > Cedral Lap planks > Aluminium corner profile (1mm thick, 3m length, powder coated). What tool to use to cut it? Tin snips? Something else? Want a nice clean cut. And want to re-use the off-cut somewhere else on the façade.
- 11 replies
-
- cedral lap
- cladding
-
(and 2 more)
Tagged with:
-
Hi there, looking for some advice on rough costs of block and render for a 1.5 storey self build, approx 13m x 6.5m. We’d originally planned to to timber cladding but I understand that getting mortgages for entirely timber clad houses can be tricky. We’re after a crisp, clean finish so might want to go with a silicone-based render, but happy to be advised otherwise! Thanks
-
I want to improve the insulation of my old barn. I have underfloor heating but the external walls let out all the heat. It has featherboard cladding on the outside which has shrunk so there are gaps on the sides in lots of places. Behind the featherboard is about 50cm of celotex and some black membrane in places then plasterboard. From the inside, you can also feel the cold air in the holes in the wooden beams. What is the best way to improve it? My builders says I should remove the existing featherboard, batten and then put some sort of insulation material and then put new featherboard back on. The council will only let me use wood as I am in a conservation area. Any suggestions for the best type of insulation? I would prefer not to do any work on the inside if possible but that may be the best way to do it.
- 1 reply
-
- barn conversion
- cladding
-
(and 2 more)
Tagged with:
-
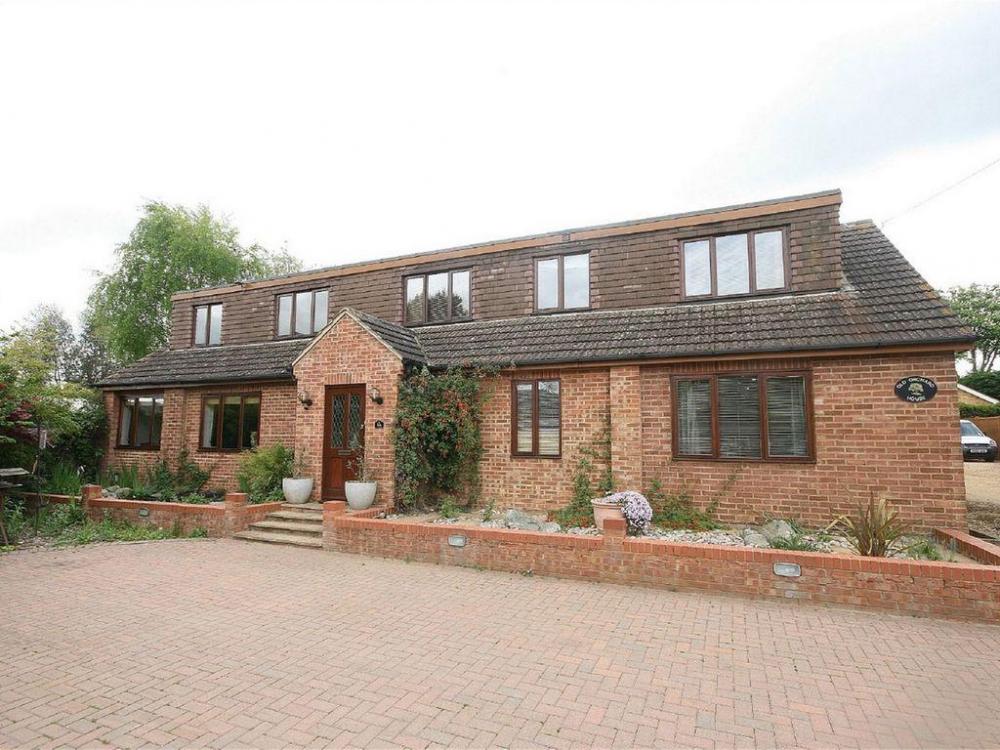
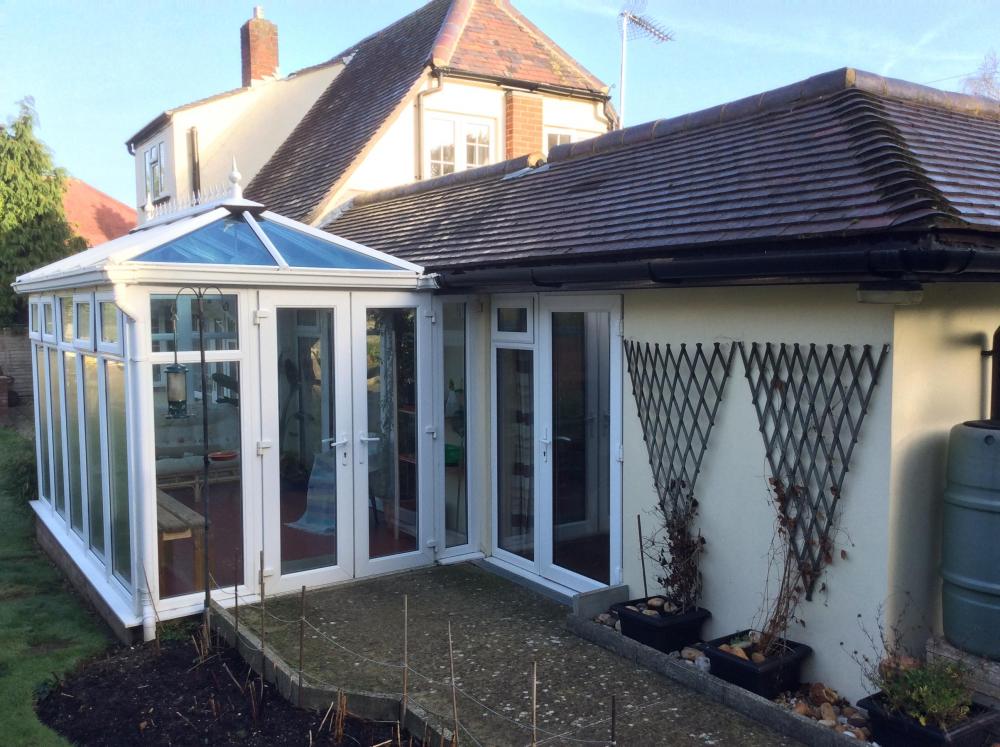
Hi everyone, I am looking for cost effective ways to transform the outside of our ugly house. We are going to remove the current porch which is totally out of proportion with the house and would like something very modern. At the back, ground floor, we now have grey aluminium windows / doors and white render but the box dormer above it and also the whole of the front needs a complete make over. We are on a budget but would like something low maintenance and striking. We also plan to re do the steps and front wall by drive to fit. Any advice welcome - thank you.
-
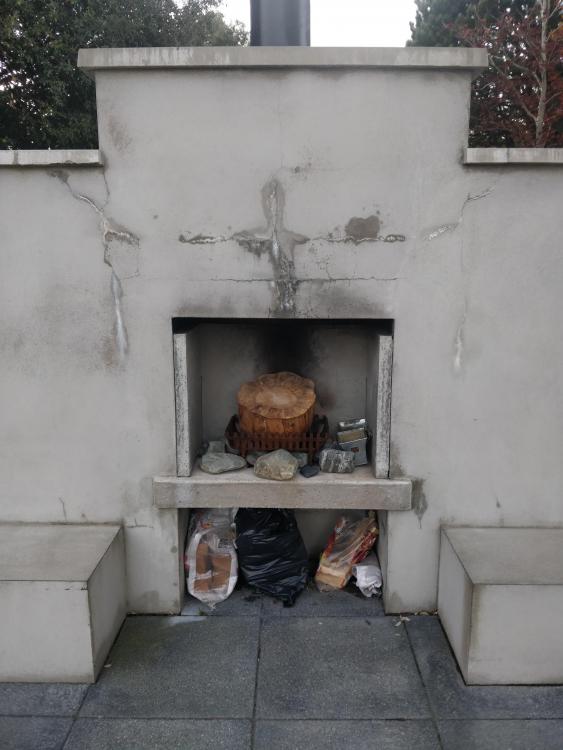
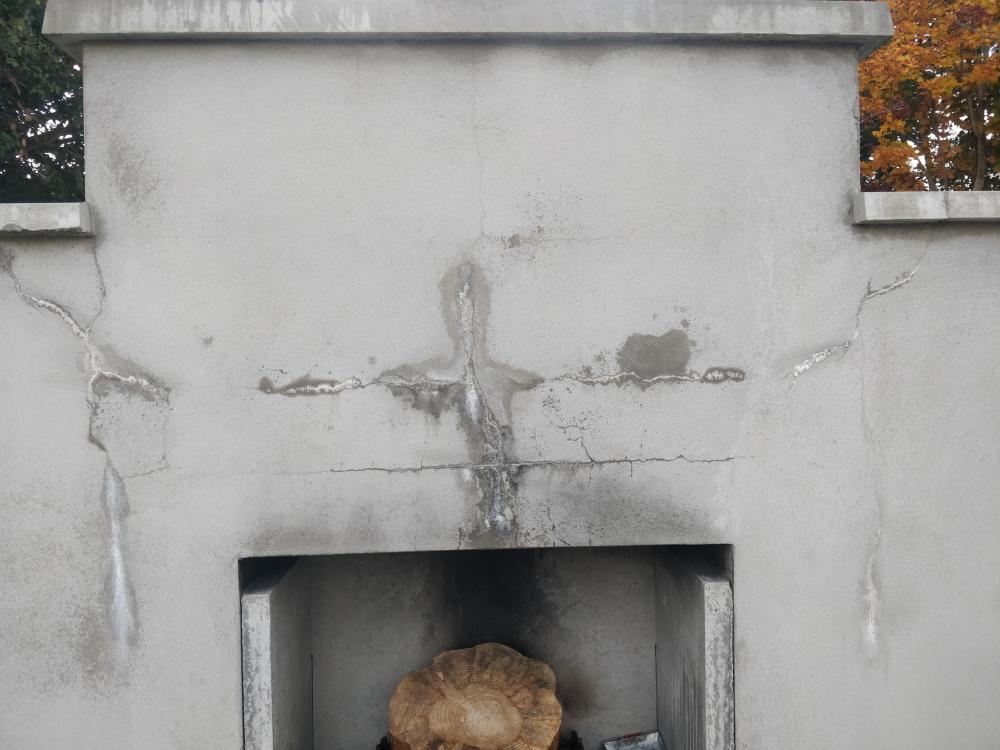
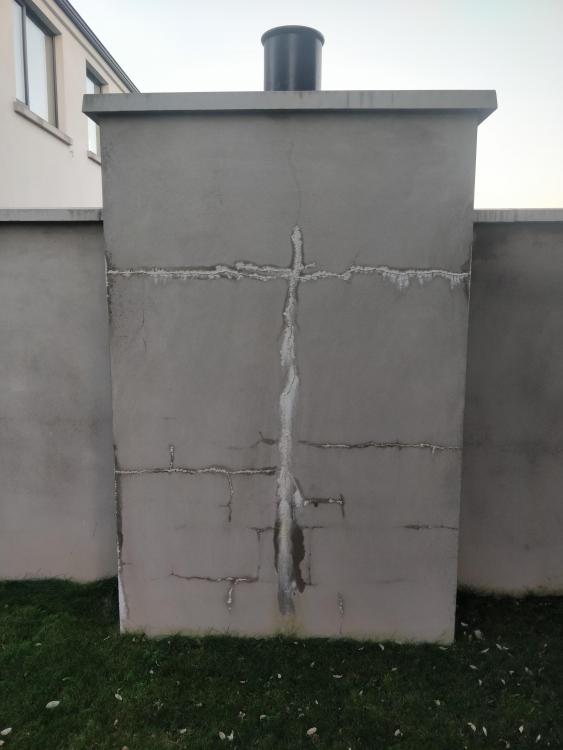
Hi We've an outdoor fireplace which is great except for the fact that the plaster is leeching chemicals (efflorescence??) and looks awful. Can anyone tell me what's going on and suggest either a paint treatment or cladding ideas to cover up the bad look please? Thanks John
- 1 reply
-
- effloresence
- masonry paint
-
(and 1 more)
Tagged with:
-
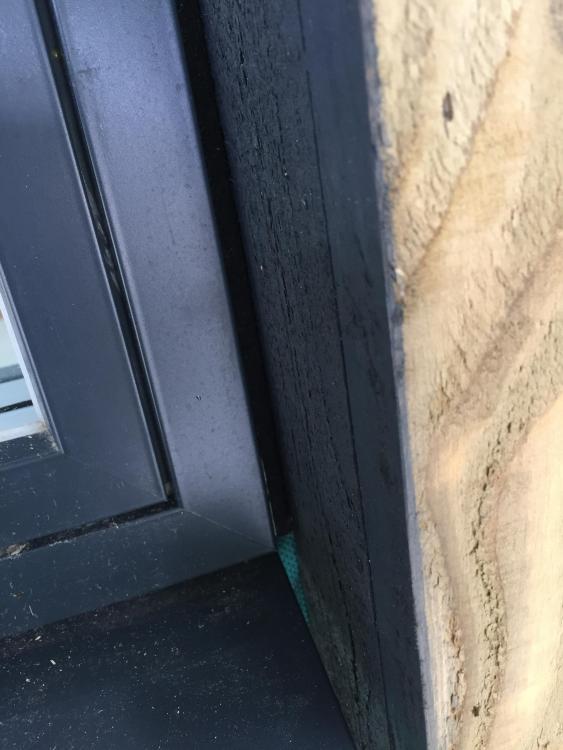
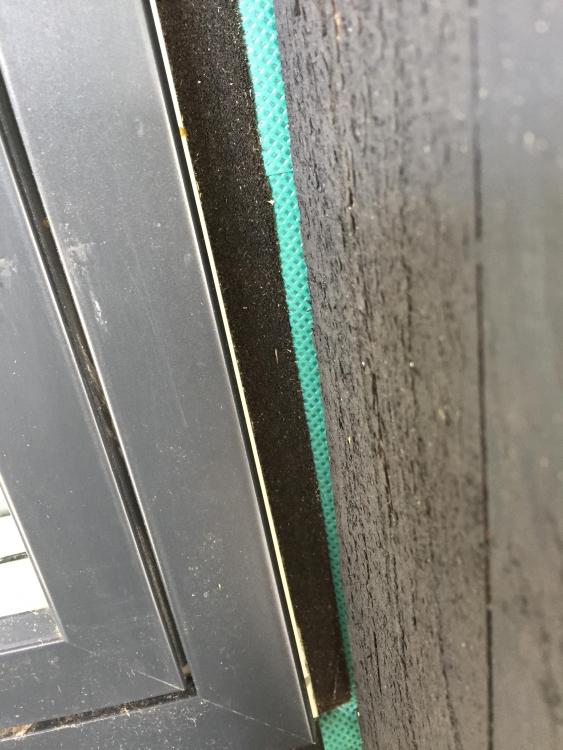
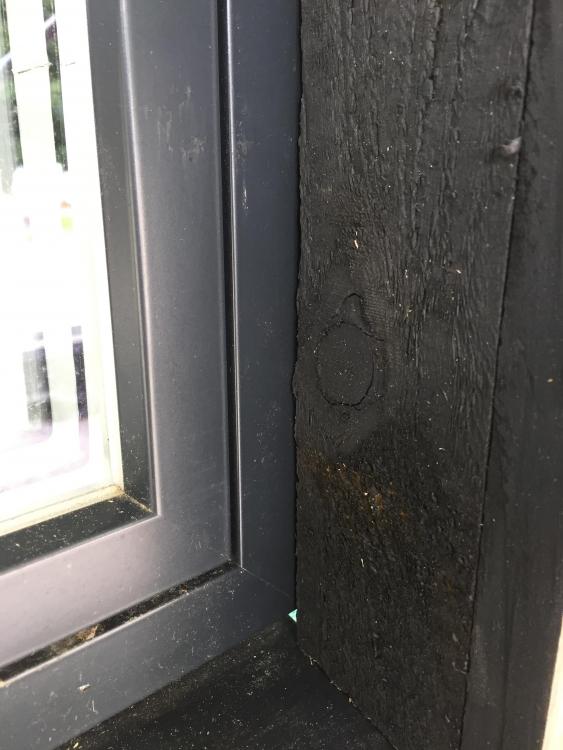
Hi all, I’m looking at the area of cladding that will sit in the window rebate and not sure what to do. Windows are alu clad Rationel and they show on their fitting instructions to leave the Compriband exposed when fitting the cladding rather than hard up against the edge of the frame. My my issue with this, is it leaves about 8mm if a gap between the board and the end of the cill. I like the the idea of running it up against, or even overlapping the frame but am also then concerned with the wooden frame over time being affected by little air flow (if you see what I mean). Ive attached pics showing the area with and without the choices. Any my ideas or examples of what others have done? The wood shown is only a mock up and not the stuff that will be used.
-
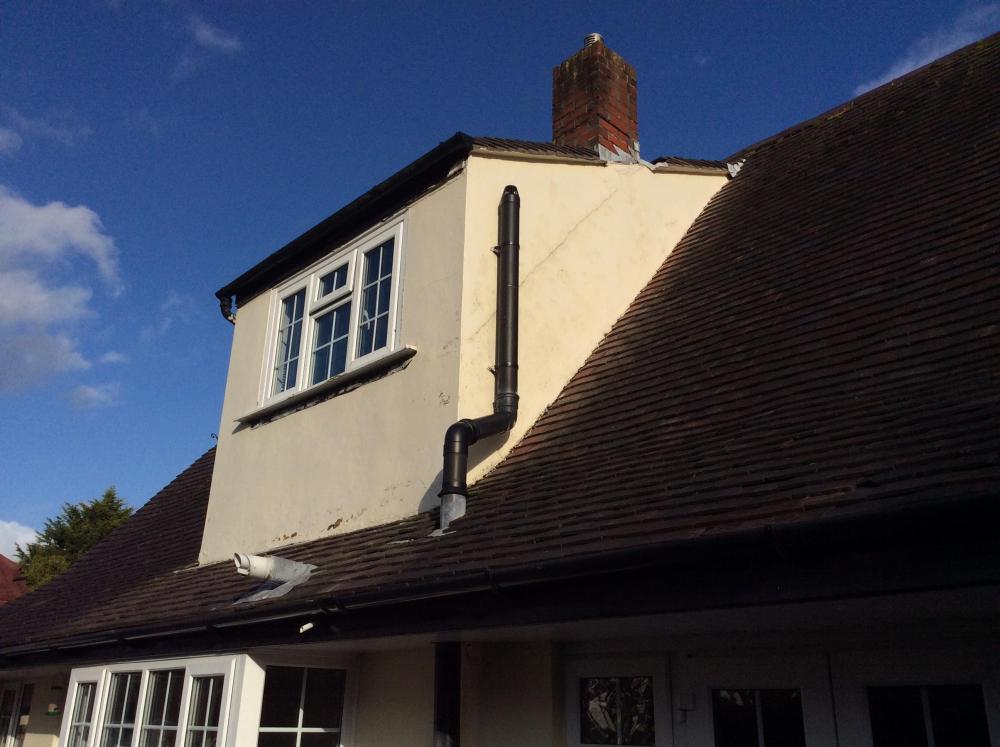
Hi Just wondering if someone could help? As you can see from the attached photo we have a dormer type bathroom. Which if you look closely you will see a crack following the roofline in the middle of the south facing sidewall. I have tried a number of time to fix to no avail. Due to our position not on the coast but close, it can be very sunny and very windy. Therefore I am looking to use a “Cedral type product rather than plastics these seem a bit more robust. Any other types other than Cedral? So the questions are A) Do we just reclad, ie vapour barrier batten & clad? however the overhangs of the roof are not great but doable. B) As there is no insulation in the cavity (see construction notes below). Can we remove all the existing cladding - fill in cavity - with celex or spray foam? Vapour sheet 30mm batten and clad? C) I am tempted to remove the tiles off the (bathroom only!) roof also remove the chimney reboard the roof and then cover with EPDM. I have the two other flat roofs finished like this. Existing wall construction is (inside out) fully tilled - 15mm plasterboard - 3 or 4 inch stud - board (not sure what type) - cement render( not very good). Added complication is the roof has a sloop of approx 23deg (see photos) and standard Marley Rosemary tiles which should be no less than 35deg. The job will need scaffolding so no problem with access. Any help will be gratefully received.
-
Well, it’s over. The company that did our render and cladding has finished and the final bill paid so the warranties can be issued. Now I feel I can blog about what has been an up and down experience. We started looking at companies to do the render and cladding before we had finished knocking our previous house down. The sales guy sat in our caravan in May last year. We felt we had got on top of this at an early stage. One issue we were really concerned about was the joins of the render with the cladding. We were told that the battens for the vertical mounted cladding needed to be a min 38mm but that fitting vertical cladding would require horizontal battens. So double battening needed. The sales guy guy got his render depth wrong (told us 25mm when should have been 19mm). That 6mm matters when you are trying to get battens to fit two different depths of final finish. Should have confirmed sales guy conversation in writing. Lesson learned. Confirmed every subsequent conversation. But didn’t notice that the company cocked up their calculations of area to be rendered / clad. So got a surprise demand for extra money at the end. The experience of the actual time on site can be summarised as follows: Delivery of materials was in mid November. Bizarrely, no one rocked up on site for a further week. Then, no one knew what to do with the materials that were there. Alarm bells were ringing loudly at this point. We had had outsourced the whole job to a specialist company so expected them to project manage it. A project manager was absent for most of the first two weeks with the guys on site working without any guidance with a render system they claim never to have seen. For the record, this was SAS ProWall and the company we used was recommended by the SAS people. Some of the workmanship was shockingly poor. This sort of thing - see the photos. Awful mess on the expansion joint mitre (which would remain visible) and huge variations in the render board gaps. It was down to us to raise this as nobody supervised their work. We had to raise issues a few times, including right at the end for remedial work. It seems it was too much to ask for someone to just do a good job. They all tried to take shortcuts or simply hadn’t a clue how to do what was needed. Half way through the job, one guy was let go. Good job as his efforts at fitting Cedral Click boards were pretty poor. The two teams (Estonian and Romanian) who then came in were good. Finally. The Latvian render team delivered a good final finish but it was a big effort from us to get them to focus on quality. Apparently they “render loads of low cost housing and no one really bothers with the finish”. So, the SAS system involves battens, then heavy render board (which they fitted the wrong way round to start with). On top of the board goes a layer of base coat with a mesh embedded in it. then it needs two top coats in the chosen colour (ours is white) and it has to be 5 degrees or warmer day and night for at least two days to do this. It was December. We were getting worried. But we have been very lucky with a mild winter and they got it all coated by the first week in Feb. It’s a slightly textured finish - hopefully visible on the photo. The Cedral click cement board has to be cut with a decent circular saw. It then has to be fitted so the cut edge isn’t visible. The boards are slightly overlapped and fitted together with metal clips. Each batten has to have damp proof membrane on it (they didn’t know this and we had to tell them). The strips for the ends are colour matched aluminium trims. We still need to silicone the window reveals. But it is done. We are pleased with the overall effect. And delighted that we don’t need to go through this any more or ever again. Difficult company to deal with. We got there but the journey was horrendous at times. Many sleepless nights and days of worry. Plus anger and frustration. But now we can look forward to getting the scaffolding down.......
-
I'm a wee bit perplexed regarding battens to use to attach my external timber cladding to. Battens to be 47 x 50 mm, horizontal cladding 120 x 20 mm. The question revolves around treated timber. I already have some treated battens on site which are yellow in colour. A different supplier's battens are green. Is there any difference between colours/which to use?
-
Hi, I completed a new build last year and was fortunate enough to be able to borrow money from family to complete the build, not I am trying to mortgage it and have hit a blocker on the fact that many mortgage companies don't like Timberframe construction with a modern render system outer leaf. We used a closed panel Timber Frame which was then battened out and had Knauf Aquapanel and Knauf render applied to it, I am told by various people at Buildstore this is one of the best Render systems on the market and I am trying to find people who have been through mortgaging these types of build and who they used for the mortgages. I find it so frustrating how Lenders are so far behind the new techniques which are often a necessity to meet building codes.
- 12 replies
-
- render
- timberframe
- (and 7 more)
-
So the roof is now totally finished- was a beast of a job and having finished the ridge I felt as though I had been riding a particularly fat horse all week. Physically tough doing it without help and using just a ladder, but I'm impressed with the corrugated steel and would happily use it in future. I would seriously consider it for wall cladding as well, as it was much quicker and not any more expensive compared to my larch. I had made a start on the larch wall cladding a few months back, fixing the first layer of boards on the gables. I'm now comfortably past the half way point with the cladding, with only the seaward walk not yet started. It's been a process of trial and error to find ways of getting each board in place ensuring that it more or less plumb and with equal gaps either side. Part of this learning process has been judging what kind of tolerance to work to. The boards are highly variable, from less than 95mm width to over 100mm, sometimes tapering at one or both ends, and often with a bit of a curve to them. So my first idea of using a long spirit level and a wooden block as a spacer wasn't going to work. The first layer was done quite carefully with markings on the battens; temporary nails on these marks located each board whilst I used the coil nailer to fix it in place. For the top layer, I didn't want to use that method as it would leave nail holes in visible parts of the cladding. So the best method for fixing the long boards of the gables seems to be to put small marker nails on the reverse side of each board, spaced to match the gap that is being covered. It's obviously a lot of prep time, but I can do that inside the house during bad weather (it is February in Skye after all), and then when the weather allows I can literally just shove the boards up against the wall and they will be in the right place. Unfortunately my progress is now going to be rapidly curtailed as I become the stay at home Dad- SWMBO has gone back to work, so my day now revolves around the couple of hours nap time that let me sprint down to the house site, baby monitor in my pocket, and feverishly nail some boards on. Next project: self build baby pen...
-
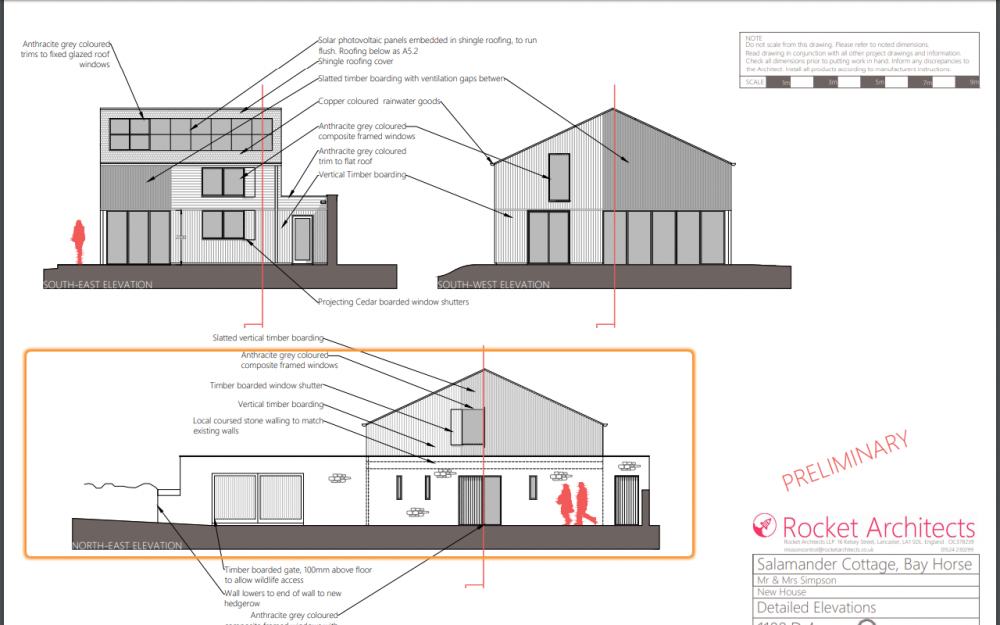
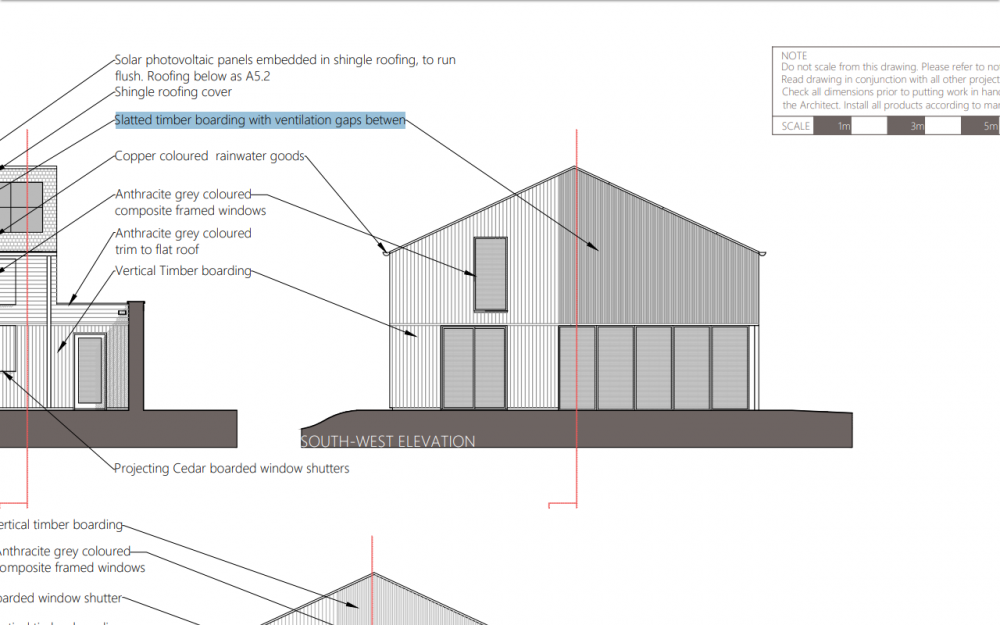
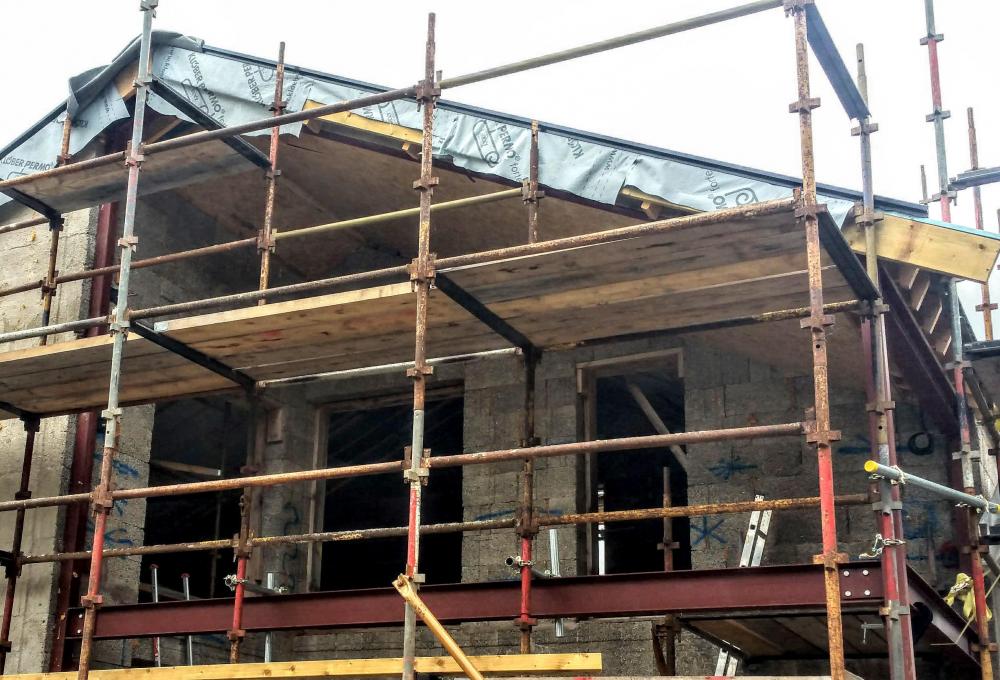
Now that our roof is on ( well, all bar a Velux and a bit of the ridge) I need to give some thought to our cladding. The whole house is to be timber clad; most of it is fine - standard stuff. Have a look at this The area that concerns me is this one: ..... (Text accentuated in blue). The cladding encloses an unheated area (called the Winter Garden - more sexily I heard Piers Taylor call a similar design a Breeze Corridor) Put slightly differently, what we need is hit-and-miss boarding so that the garden below and behind it can get plenty of light and lots of air. This is what it looks like now..... As you can see, the hit and miss boarding has - as yet - no framework to support it - except the steels that surround the area. I need to screw a wall plate all the way round the edge of the steels; that much even I can see. But the cladding (hit and miss boarding) will need a framework on which to sit. Is this an SE job, or use-yer-loaf, or a go and ask to see what local farmers do job?
- 4 replies
-
- winter garden
- twist
-
(and 2 more)
Tagged with:
-
Here's a screen grab of our architect's design: look at the orientation of the cladding...... If I want to change the orientation (of the cladding) on any face , do I have to ask anyone? The reason I want to change the orientation is to help make the East face ( image rhs above the green flat roof) more resistant to driving rain. I want to change it from vertical to horizontal. As some will have read, the east face is sometimes subjected to turbulent gales
-
Two roof gables project outwards from upstairs bedrooms and onto balconies, and these need to have some sort of finish on the inside verticals and underside of the roof. I thought about real timber initially, but I don't want the colour to fade unevenly or have to do any maintenance on it, so I was thinking about some sort of flush weatherboard. There are a couple that I've seen that are okay, but my real dilemma is that we're going to have a brise soleil in front of the high floor to first floor ceiling height window and I would really like them to match as closely as possible to stop the look of the house being too busy with too many textures and colours going on. I can't think of anything other than wood that the brise soleil can be practically made from, but then I know very little about these things. Does anyone have any suggestions re. materials for the brise soleil, who I would approach to have one of these made, and alternatives for the finish on the gable inner sides. Ta very much!
- 10 replies
-
- weatherboard
- cladding
-
(and 3 more)
Tagged with:
-
We have full planning permissions to demolish a stone built cottage and rebuild it with block and render. In addition we will extend, at the same time. Both the cottage and the extension will be a timber kit. The extension will give an addition 100% floor space to the property, and it will be clad in Siberian larch timber. We are currently trying to mortgage through Buildstore. They are quite adamant that any mortgage we take will require the extension to have a block work skin. Is this correct? Has anyone else come up against this? Is there a way round it?
-
We plan to have the ground floor walls of the new build clad with some sort of stone cladding (TerryE, I've been reading your blog notes on this with interest) and I'm favouring one that comes in an interlocking z shape tile format at the moment. Although there is a supplier local to me, I'm having difficulty locating alternatives so that I can compare prices. I think the local guy is reasonable, but that's just in comparison to loose stone cladding that doesn't come in tile format. The tile type is appealing as, I'm guessing, it will take less labour to attach to the building and less (if any) mortar. Can anyone suggest any suppliers?
-
Hi, We need to pick a wood to clad the underside of our porch area and the underside of a balcony. As it is undercover it should never get wet. My wife asked for something with more of a brown colour, I am leaning to brown/grey, we don't want anything too yellow. I am leaning to cedar, one thing I am not sure of is how will it weather if it never gets wet and is not exposed to direct sunlight, will it still weather but just more slowly? Thanks
-
Hi, I need to pick a material to clad the underside of a balcony and porch roof. Would there be a problem using composite wood cladding boards or deck boards. Some cladding says it was not made to be fitted horizontally. The boards seem to come as hollow or solid, although solid might be stronger for decking, I would think lighter hollow boards would be better fitted to the underside of a roof. I have been looking at WPC, Hyperion and Duraclad among others. In general these items seem to come in at around £45+ a square metre, has anyone seen cheaper prices? I want something that looks like wood but doesn't require maintenance. In my current house the wood under the porch has shrunk and requires painting every few years despite not actually being directly exposed to the weather, although I suspect this is due to the fact that the builder used softwood painted white. Thanks
-
Can anyone suggest attractive types of cladding which will come in at £10 per sqm or thereabouts for the material and any trims etc It is cladding for an outbuilding attached to the house, and needs to be: 1 Reasonably attractive. 2 Essentially Maintenance free. 3 Available coloured. ideally terracotta, dark brown or blue, or grey etc. 4 My support posts are at 1.8m centres, so if it could span this it would be good, but I can put intermediate support in if needed. 5 Ideally able to be acceptable on the inside too - the space is an enclosed walkway and needs no insulation etc. Options I am aware of are A Plastisol coated corrugated. About £10 per sqm. B Decking boards - wood. About £8-10 per sqm. Hackneyed theme now. C White plastic ship lap. About £6 per sqm in 5m x 300mm sections. Coloured is at least double or treble the price. I would like to think about plastic decking boards etc, but none of those come near on price. Any comments welcome. Ferdinand
- 2 replies
-
- cladding
- shed cladding
- (and 5 more)

