Carrerahill
-
Posts
2132 -
Joined
-
Last visited
-
Days Won
10
Everything posted by Carrerahill
-
The Build - First Fix
Carrerahill commented on Redoctober's blog entry in Our Journey North of the Border
Anything else is simply laziness! -
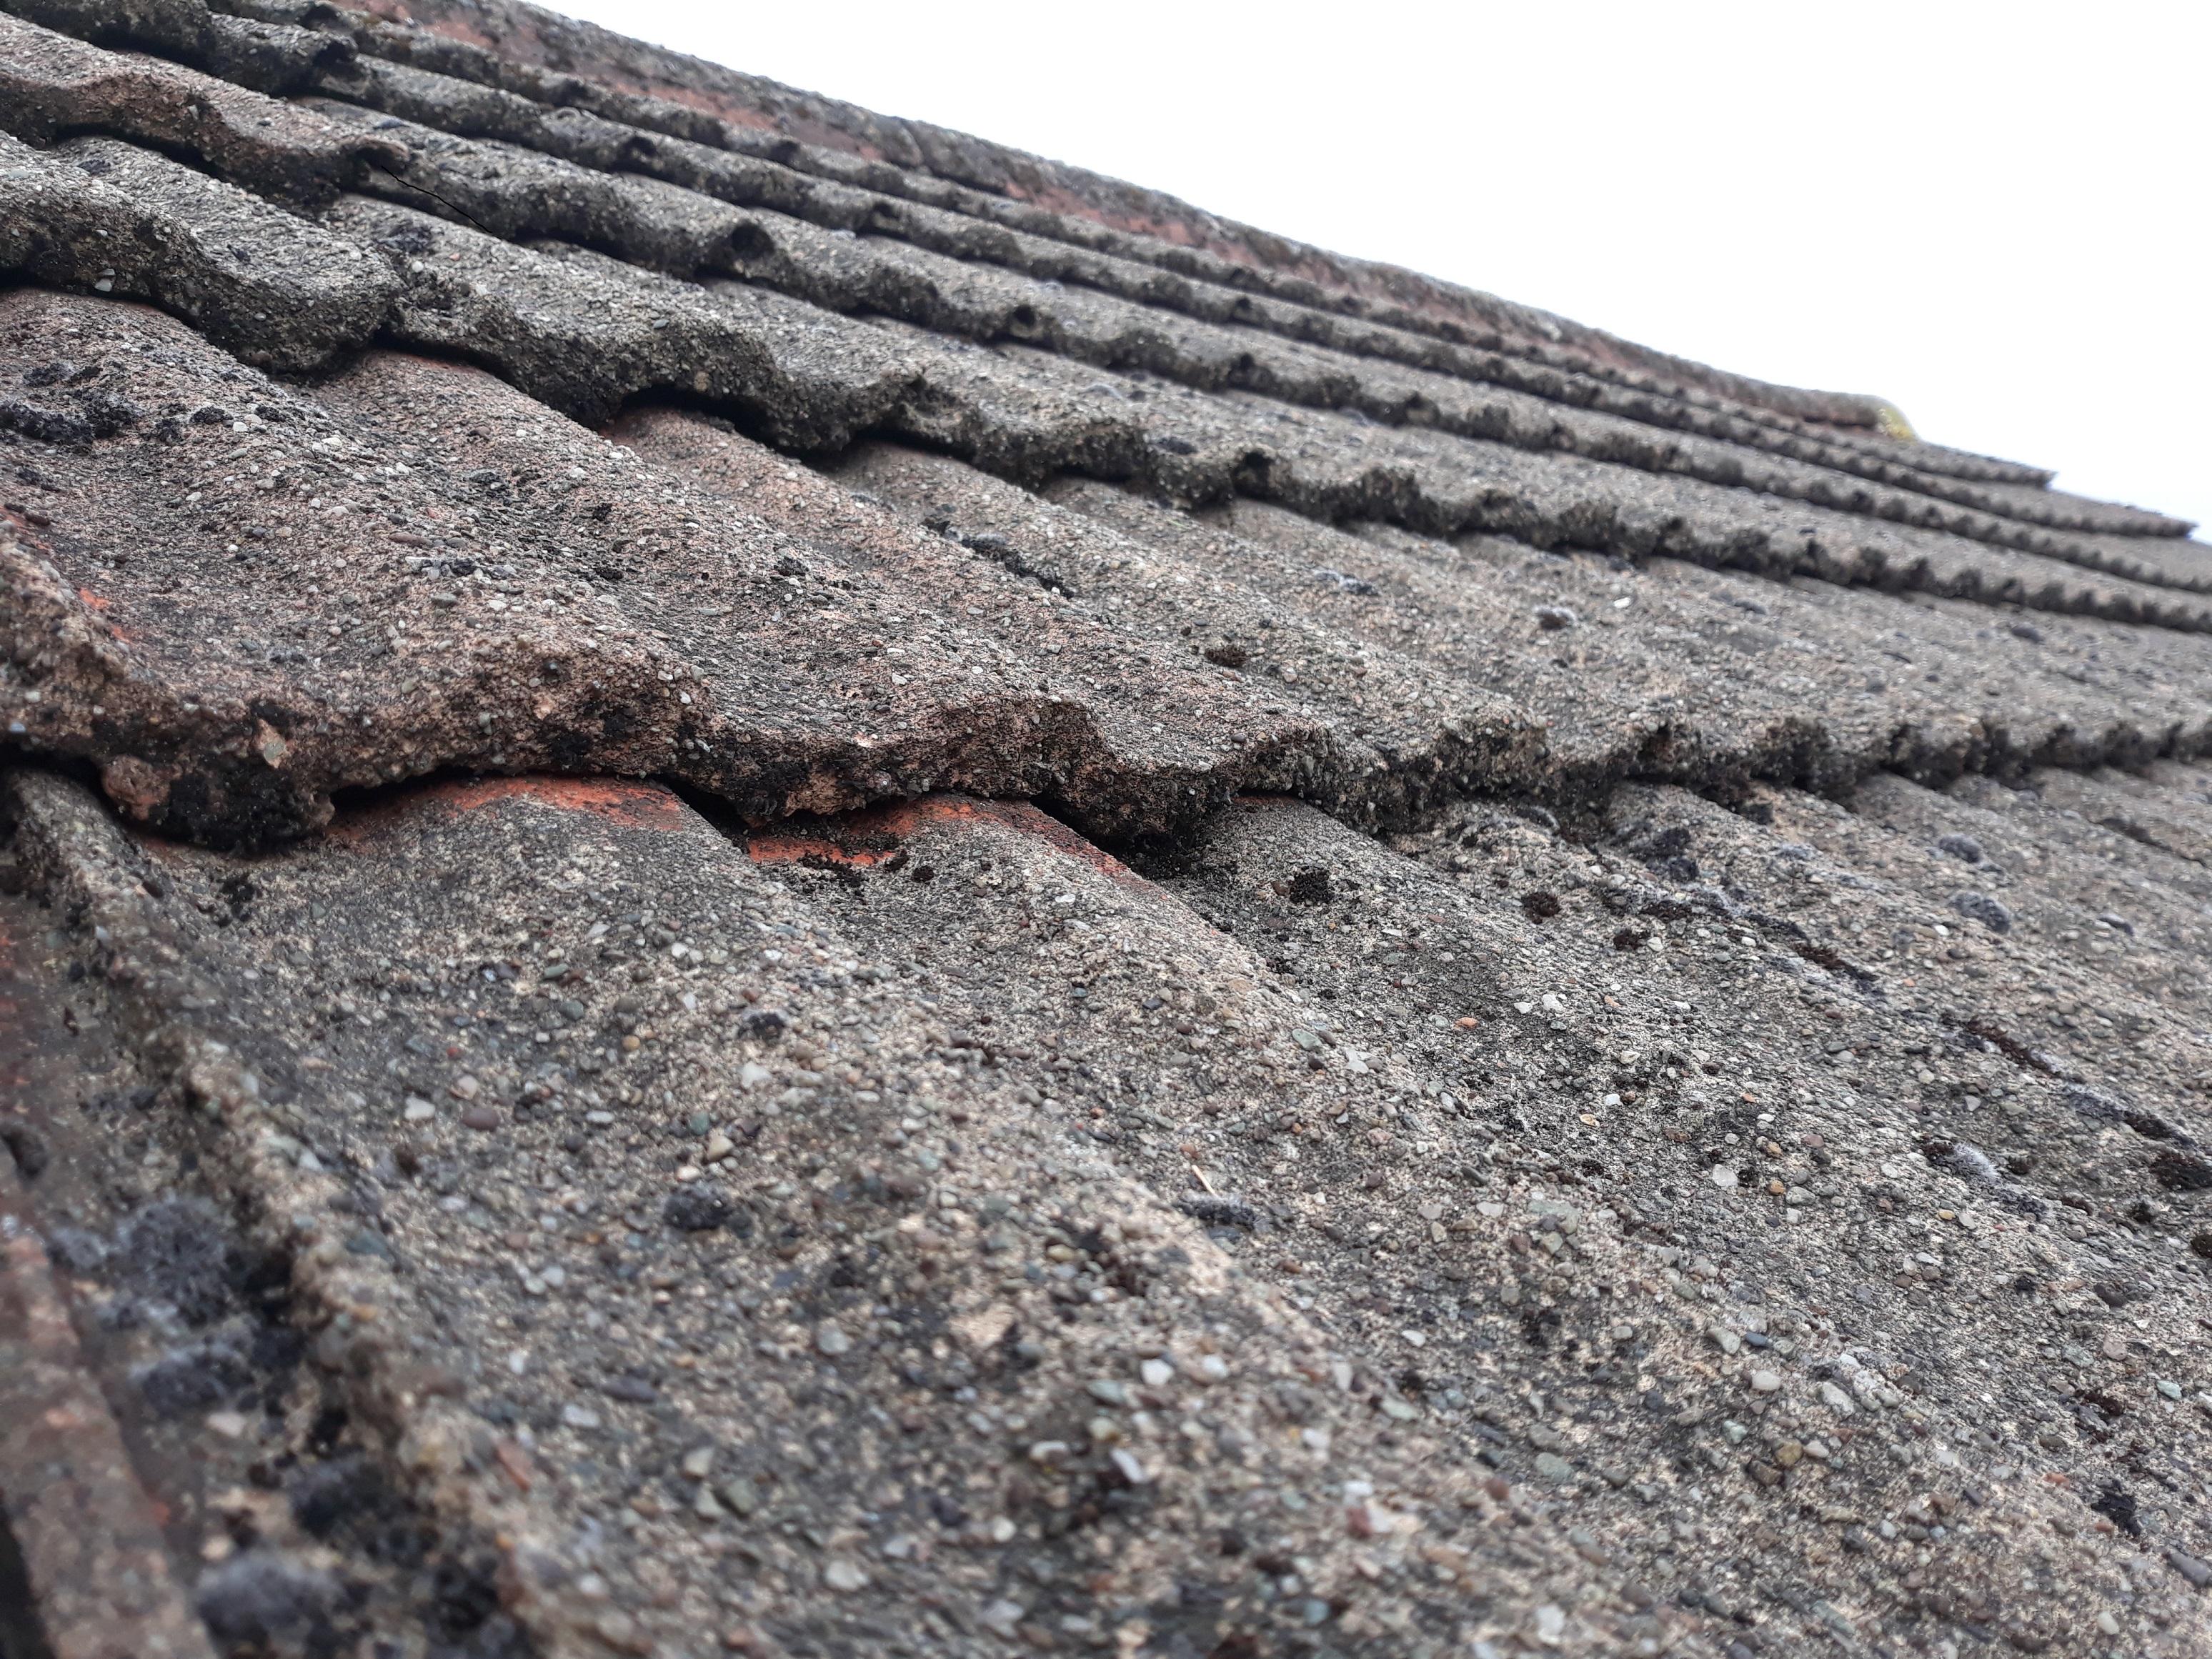
I tried. They are nailed every row and I did not have my trusty roofing crowbar to hand. I don't really want to pull a nail and remove one until absolutely necessary, so I was hoping that someone out there might recognise it.
-
Can anyone identify these? I have looked at about 1000 images and cannot see anything similar. I thought for a while they might be Marley Ludlow Majors or Redland 49's but I have decided these are too rounded for that, but I don't think they are Romans either. My guess on colour is brown or antique brown (basically brown!). Thanks

-
I have just read the install Velfac PDF (well quickly looked, i.e. within first pages the install plates are shown!). Top one is all about the plates, bottom on is general install guide. https://velfac.co.uk/domestic/technical/download-centre/10426,9679/installation-lug-v200-v200i-v200e-edge---dk https://velfac.co.uk/download_asset/23188/VELFAC Installation guide 05-2018_web.compressed.pdf
-
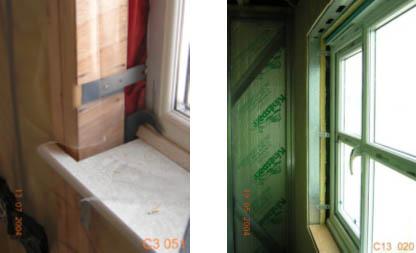
This is how it should look:

.jpg.28b2989779e6cef9b26988d26c0ca976.jpg)
-
That's what it looks like to me, a good sprayed coat of paint - RAL9016 maybe? It makes me mad that some utter muppet comes along and lazily rams a screw through that nice woodwork!
-
This is in my opinion incorrect for this type of window. They should fit a plate or heavy builders band to the side of the windows, i.e. the side that is hard against the wall, the plate/band sits back about an inch or two into the room, you then offer the window up and then screw the plate/band to the window aperture. This also means when it comes to removing them in the future someone doesn't need to dig out filler. Alternatively, can the glazing be removed from these or are they factory fitted and made up? On standard UPVC units you can pop the beads, remove the glass and screw the frame in with the screws then hidden when you refit the glass - likewise with opening windows, you can often screw through the frame and the screws are only visible when the window is open which is not an issue as the open frames of windows are full of latches and levers and screws anyway so another screw won't detract. Another thing, are the windows in final paint? Or is that just a primer? If that is the finished paint then I would also not be pleased at some monkey rubbing a bit of filler into the holes and trying to match the exact colour and finish which from the image looks to be a sprayed finish, possibly a polyurethane paint which will have excellent durability and a bit of Dulux brilliant white will not look the same ever. I would NOT accept this and would have the installer replace the windows (at their cost) that they have butchered. It is just a total lack of thought.
-
Highland Sips Ltd. Perth. James Cook I think was the owners name - good guy.
-
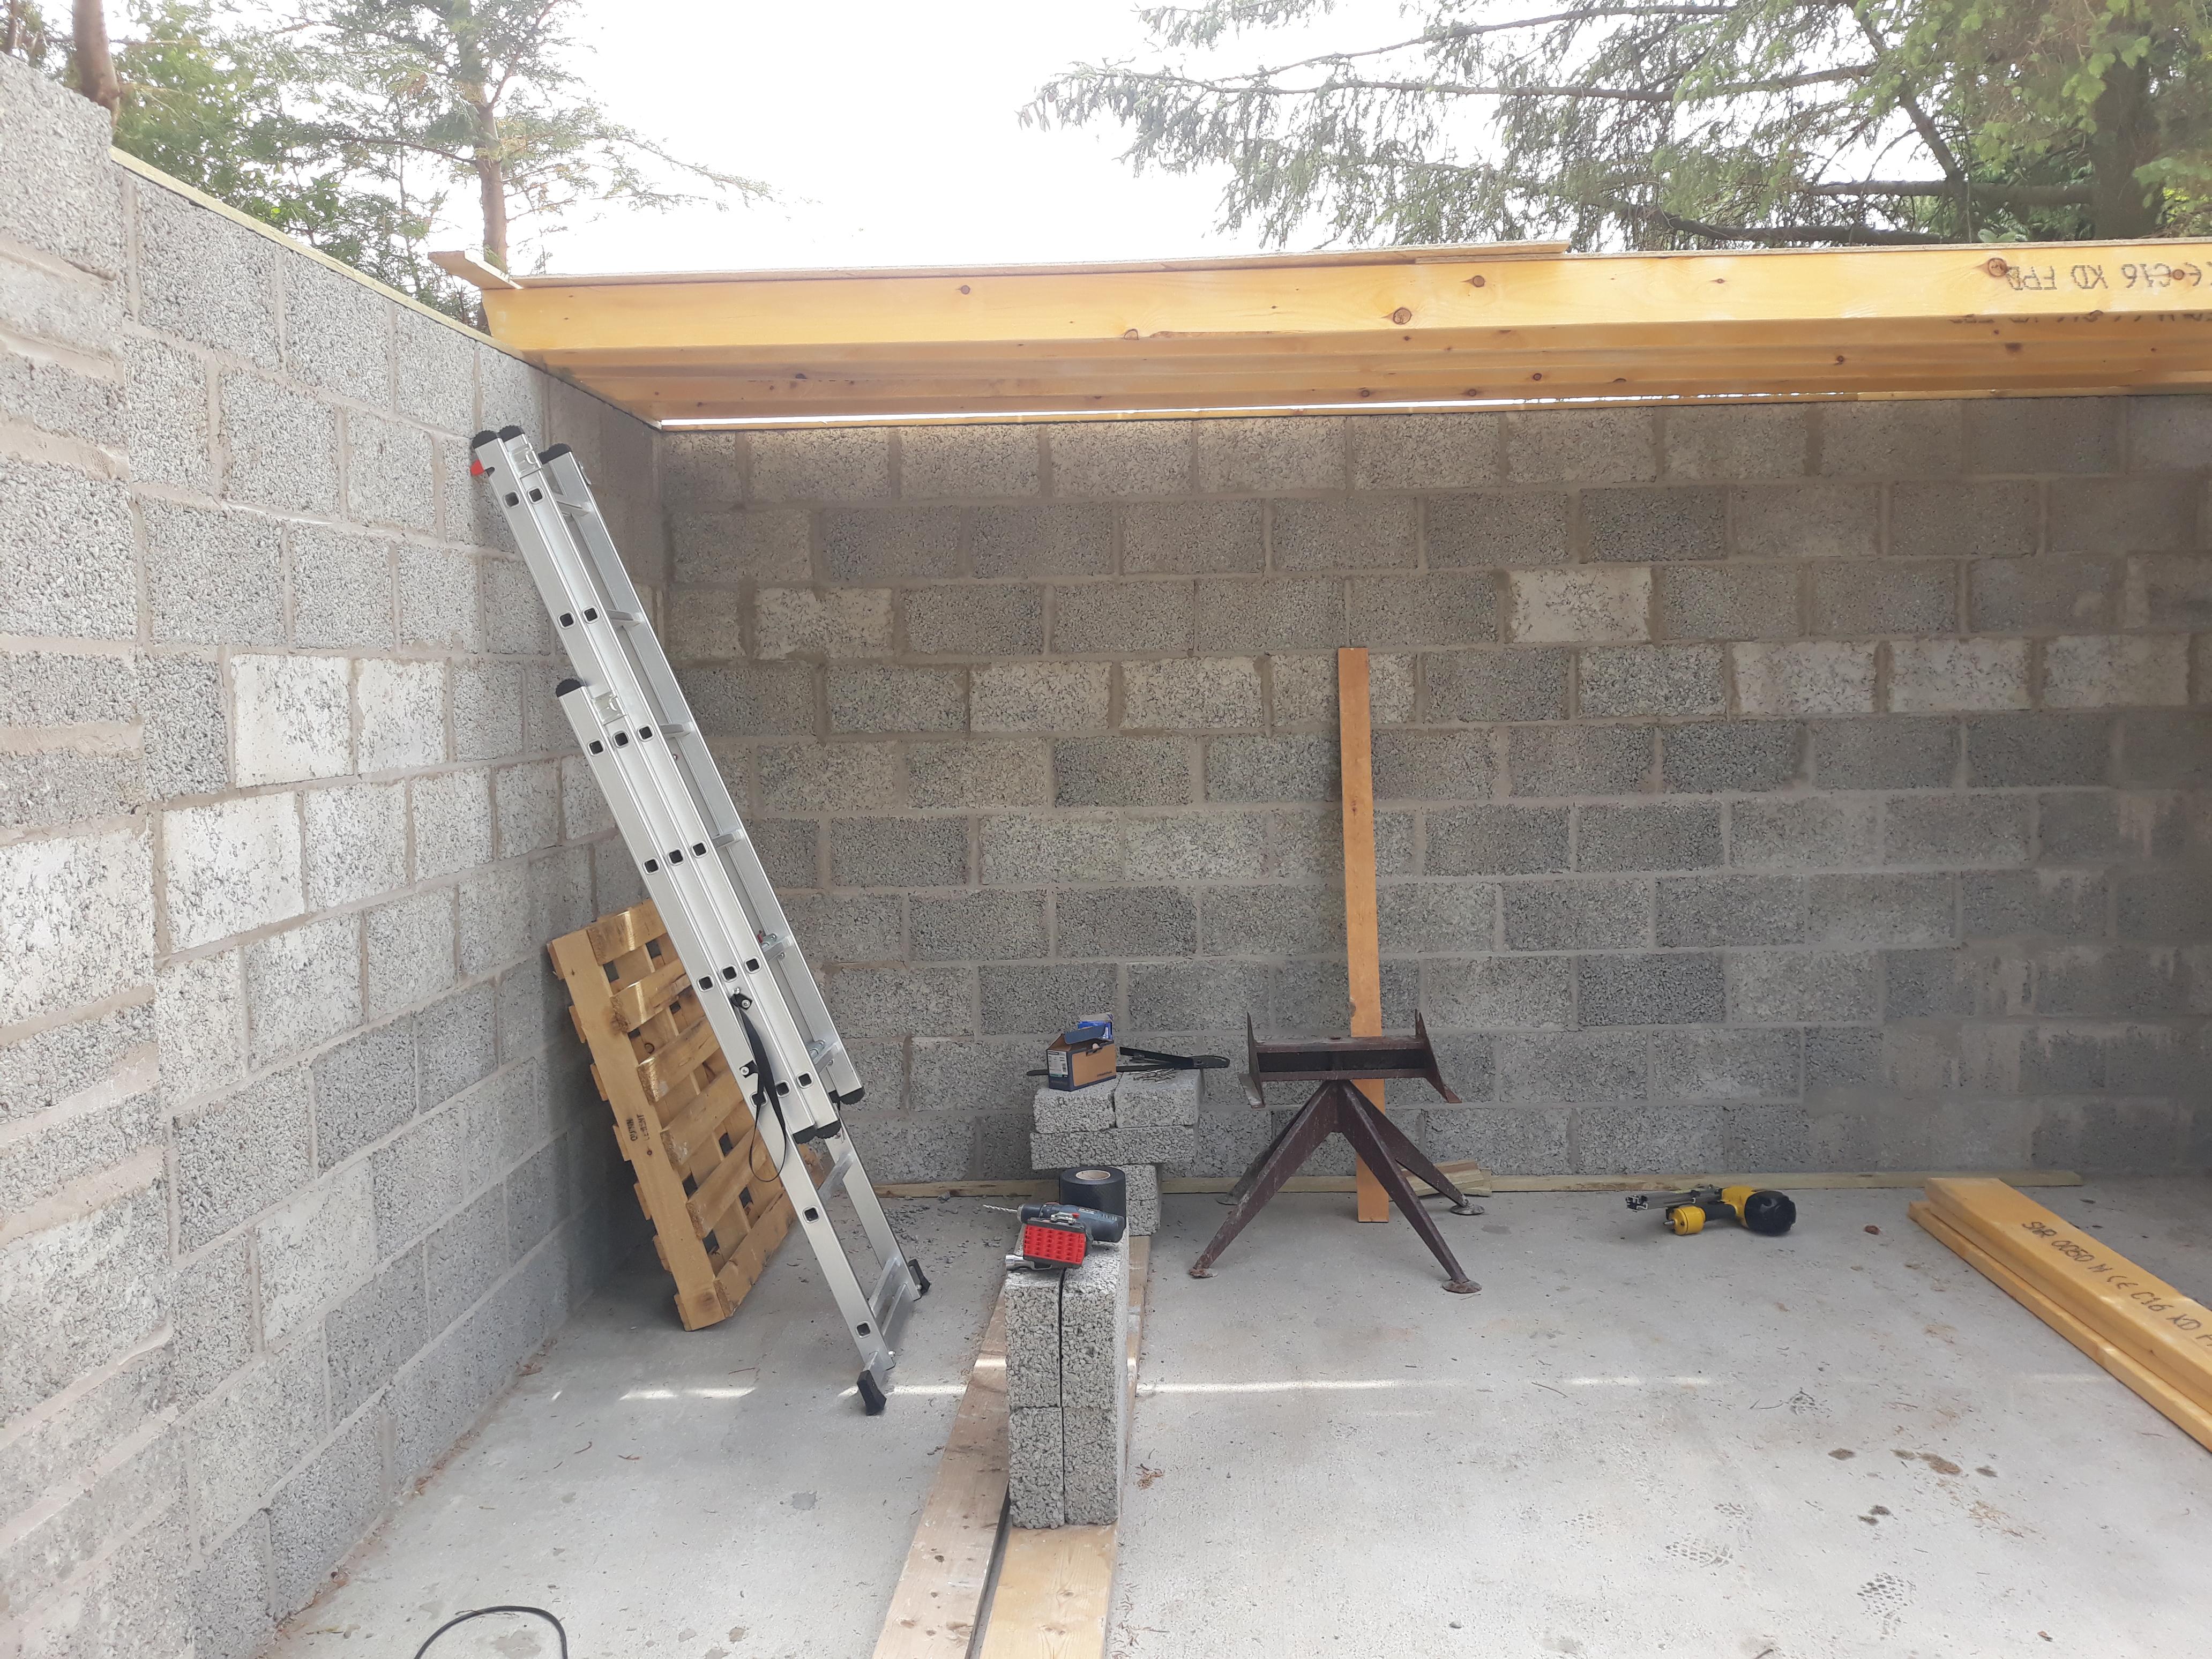
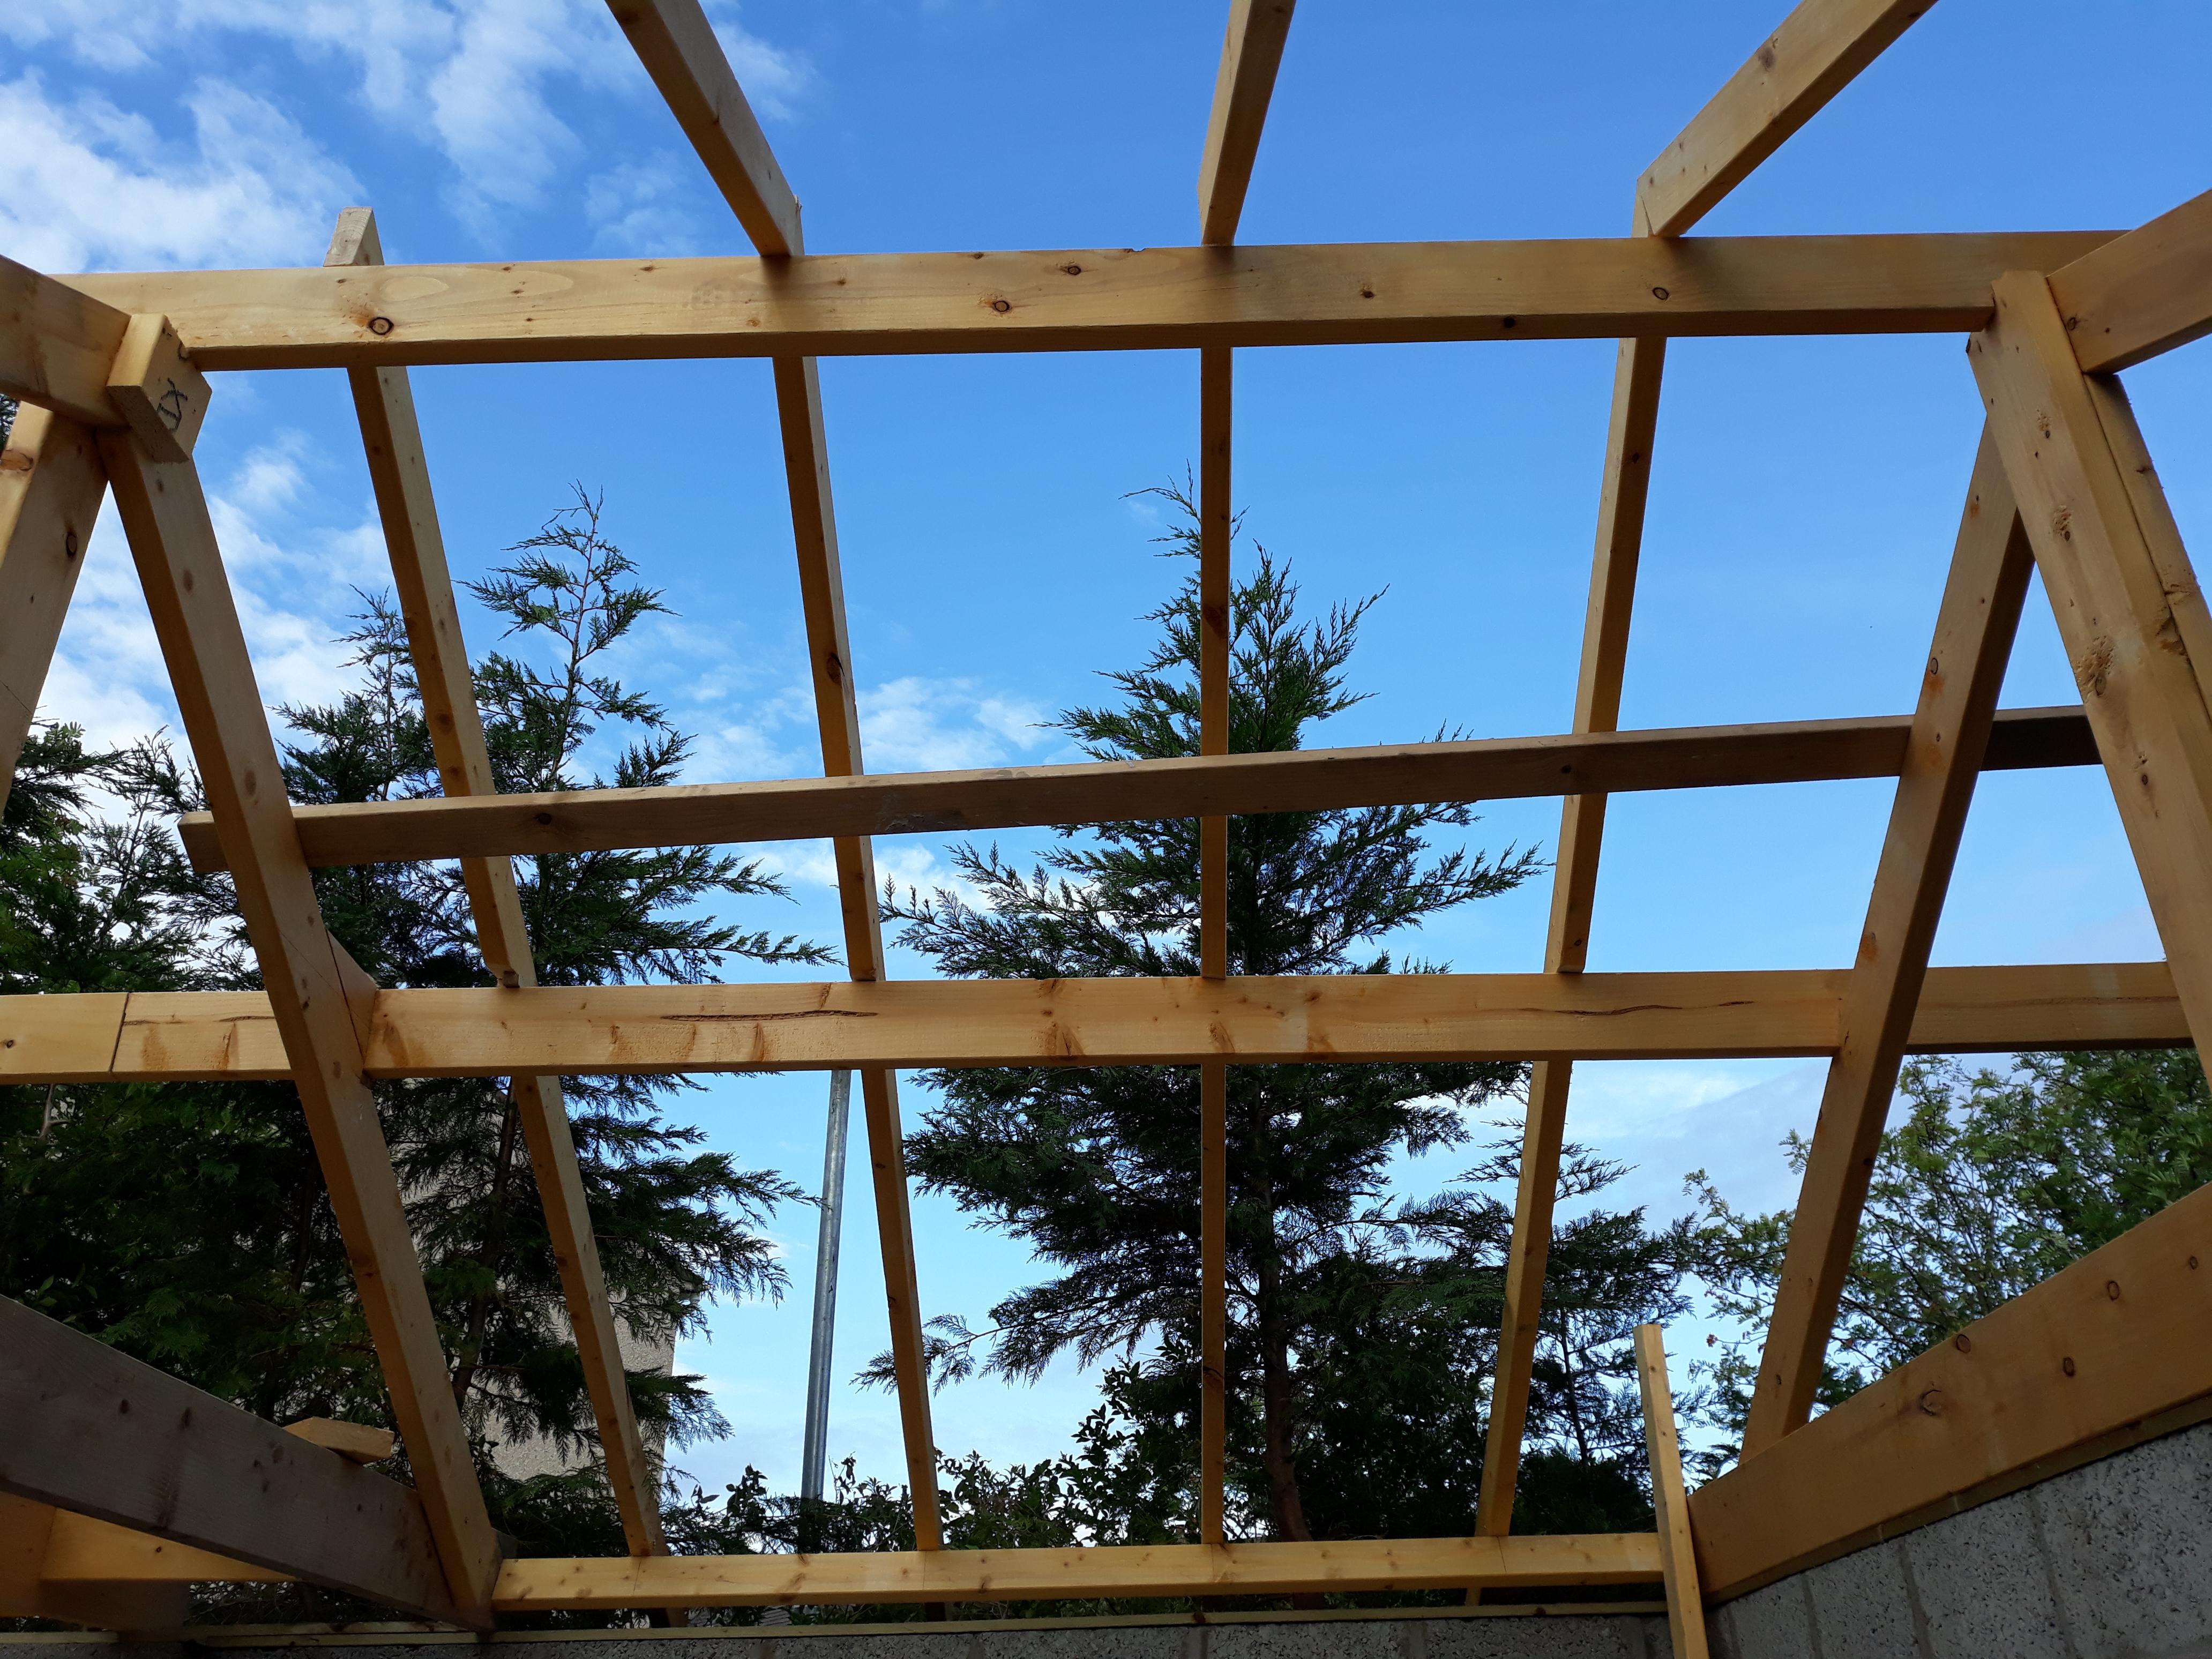
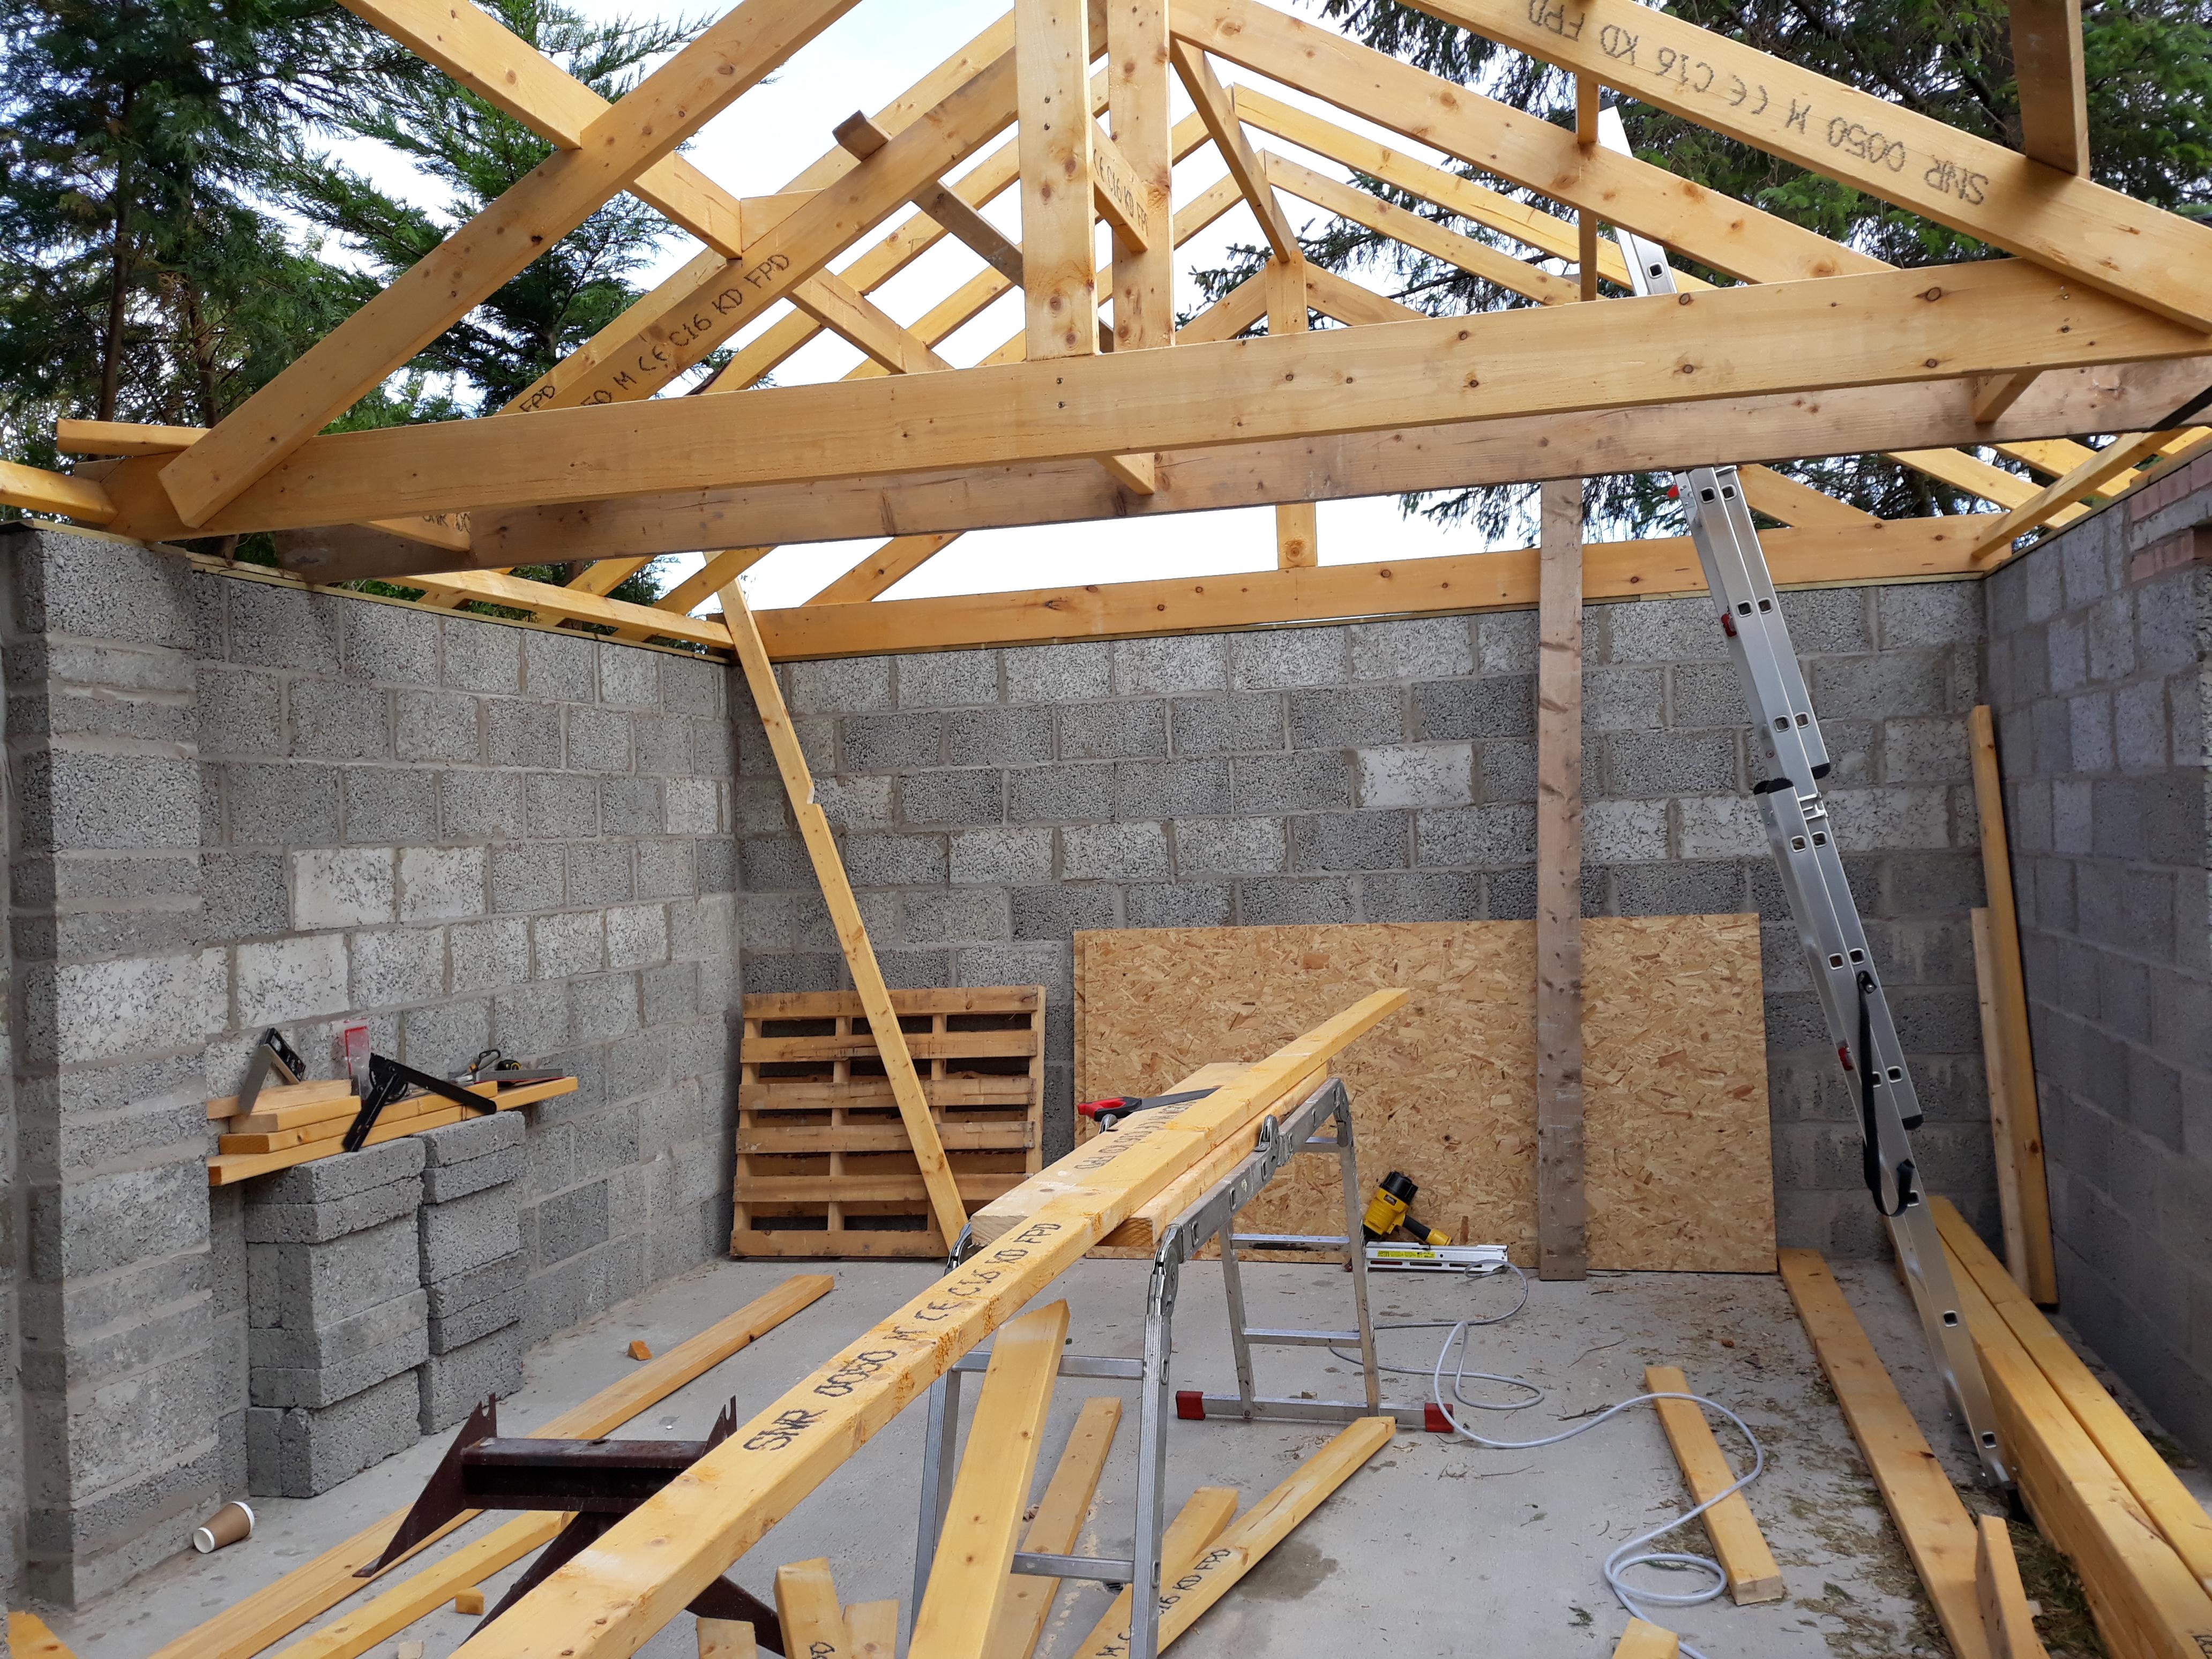
Hi all, I am currently constructing a 30° pitched garage roof (this can be seen over on the garage build). Pretty simple design, 4 trusses, purlins and rafters over the purlins, 11mm OSB over the rafters, I have started sheeting it from the ridge down to within a half sheet of the bottom of the rafters where I will hold of until I confirm the next bits and pieces such as how big I want the overhang etc. So my next stages include boxing out the lookouts for the gable end overhangs, fit fascia boards etc. cut the rafters with a straight face to my required length to get the overhang I want etc. and obviously finish sheeting it up. So here are my questions: 1. Does the roofing sheet come down and over the top of the fascia board, with the roofing membrane running down over this joint and into the gutter, the tile then overhangs over the lot of it? 2. I was going to use a eaves guard, so following on from above, it must sot over the fascia board as it drips into the gutter - should I use these or is it not needed? 3. I note on images and roof I have seen being installed locally often a rooming batten is mounted at the very bottom of the rafter which the last tile sits on, is this correct and if so what about the increased gap it creates at the bottom - is this not a possible wind blown water issue? 4. On the gable ends I have a 200mm overhang, I have not sheeted right to the edge yet as the way it has been laid out in full sheets my cut sheets will go on last, do I take these up to the edge of the rafter or do I overlap the thickness of the barge boards? 5. Does the roofing membrane return down over the barge boards and assuming I use a painted wood or PVC barge board would I simply allow the membrane to come down the face of the board slightly then it will be dressed with a dry verge, so any water that gets under the tile will run down the roof or over to the end, down onto the barge board (behind the dry verge) and down causing no damage? Now lastly I need to order all my roofing materials, roofing is probably the one trade that I have never had to do, so although it is not rocket science I appreciate there are a lot of roofing supplies out there, from vented ridge systems and all sorts, I understand it is fairly simple and from the limited details available online I have pieced it all together but I just want to check my shopping list and not end up with incorrect things or things I don't need etc. On my list so far I need to order battens (I will use vertical and horizontal), tiles, ridge tiles a dry verge system and either wood to paint for my fascias and soffits or PVC stuff, I thought eaves protectors too. Is there anything else I should be considering? Does anyone else have a garage roof shopping list they could share with me? Last of all, does anyone have decent images of their roofing construction, I am looking for photos showing the rafter ends, gable ends and how these details are all formed up. Thanks
-
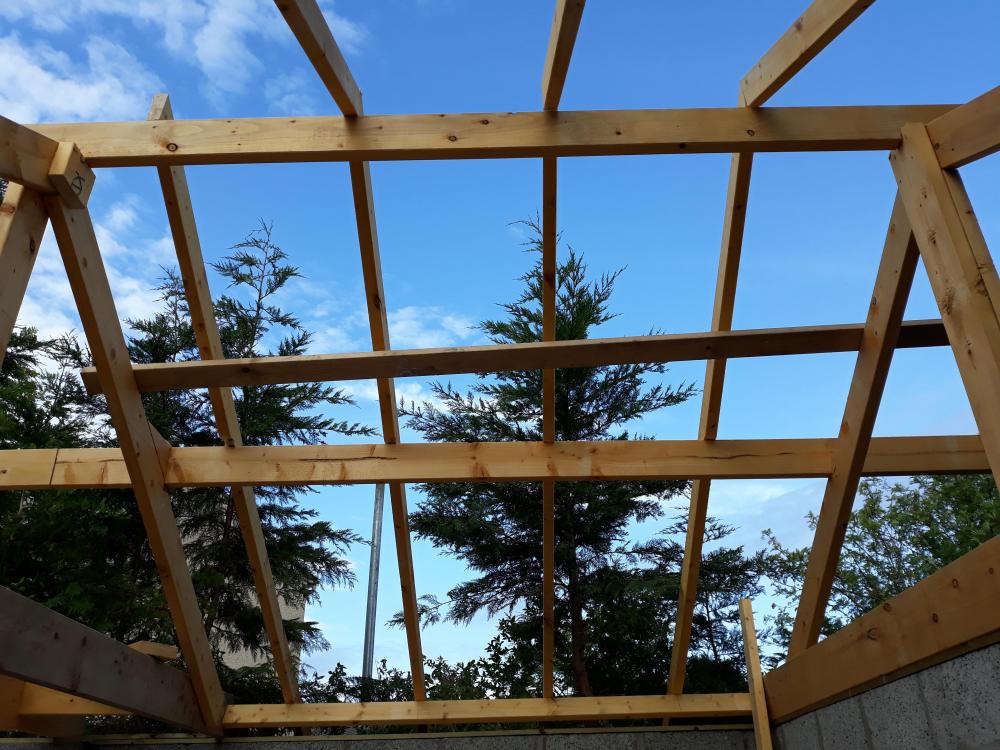
OK the roof truss design was finalised and I built 2 gable end trusses (slightly different design to mid trusses) and 2 mid trusses which sit 750mm apart centred on the middle of the garage, this creates fairly short purlin spans for the 6x2 purlins. All feels very solid so I am happy. I have 11mm OSB sheet ready for sheeting, I believe I am meant to leave a small gap in between the sheets to allow for some air movement and so the edges, if they get wet can breath but what do I do at the ridge? I did a google image search and saw various "methods" some seem to leave a fairly large gap, where the sheet maybe only comes to within 40mm of the apex and some where it looks like they more or less bring one sheet up on one side and butt the other up from the opposite. What have you guys done? I will then staple tyvek breathable roofing membrane on and get some battens (verticals for now) to ensure the membrane stays put until I can get my tiles chosen. Anyway, here we are as of now:


-
Estate Car to carry house doors inside, flat
Carrerahill replied to Ferdinand's topic in General Self Build & DIY Discussion
Volvo V70 all day long. Go for a 2000-2007. It will also give you half a million miles service if the basics are looked after. There are plenty of mint condition ones at this age and they are mechanically spot on (unless some maintenance-phobe had them). Have some fun too and get one that will eat most BMW's, Audi's Merc's etc. out there! The rear seats can be folded down totally flat (if you remove rear seat bases - 4 easy clips and the lot is out) to create a dead flat load bay extending right to the rear of the front seats. -
You will be painting it every 8-12 months to be honest. You can buy 20 litres of floor paint for about £40 from the guys that go round supplying business units on industrial estates etc. anyone who has a painted floor in a business premises knows that floor painting is about a 8-12 monthly maintenance program. For a domestic garage I could recommend the 2 part epoxy stuff, expensive for the good stuff but it should last you a really long time if it is just normal domestic traffic.
-
I am hearing you, but I have this in parts of our business premises and it's been fine in terms of slipperiness etc. It's like they have in Costco/B&Q etc. It's not like the glass finish people put in their homes, but it's very smooth with a slight sheen to it and the epoxy seal is just to stop it staining, it still appears to have some porosity to it. Looks smart. Issue I find with floor paint is that once you paint it that's you, you are painting it every year to keep it looking smart.
-
I am going to diamond our floor and clear epoxy seal. It will look like polished concrete and have a resistance to oil etc. soaking in.
-
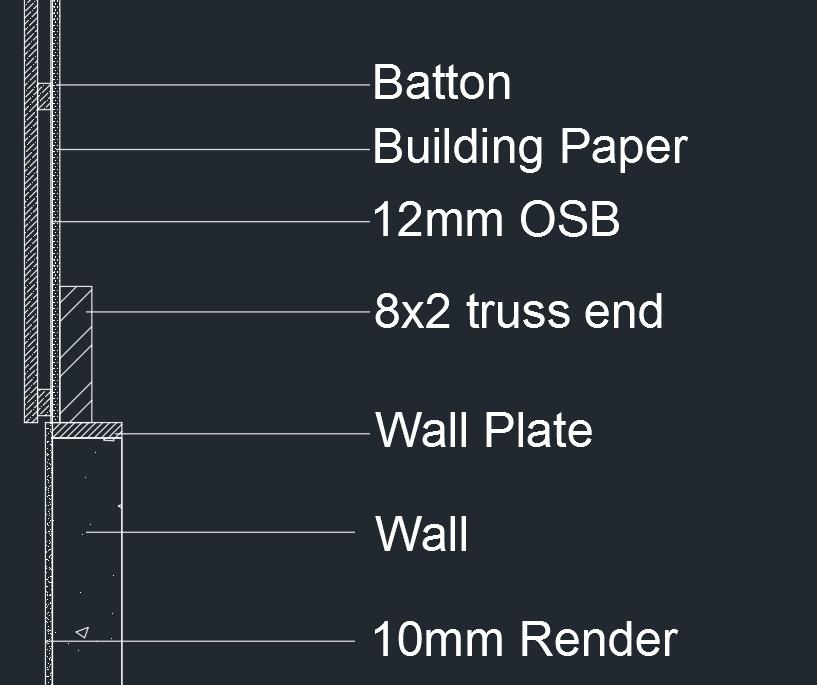
Another question related to the above. I am going to build a gable truss which will be sheeted, wrapped etc. then I am going to fix cladding, I might just use some fence board, maybe some 150mm boards and then maybe a 75mm board down the join the way they often do the cladding on chalets and things. Or I will try and get some of that Marley weatherboard stuff. Anyway the fact is that some sort of cladding will be fixed onto the gable end then it will meet the block work that will simply be rendered. So question is about what I should line up with what. Here is my thinking: The idea here is that the OSB sheet will sit directly inline with the blockwork, then I can run the membrane down beyond the wall so that any water will run past the wall and not potentially onto the wall plate, when I install the membrane I can leave a nice leaf that can overhang the render, then allow the wood to come down an additional 100mm to cover it. How does that sound? Another option would be to let the gable truss sit another 12mm to the outside of the wall, then let the OSB drop down over the wall plate and down the wall a little too.
-
Blockwork
-
4x2 flat option:
-
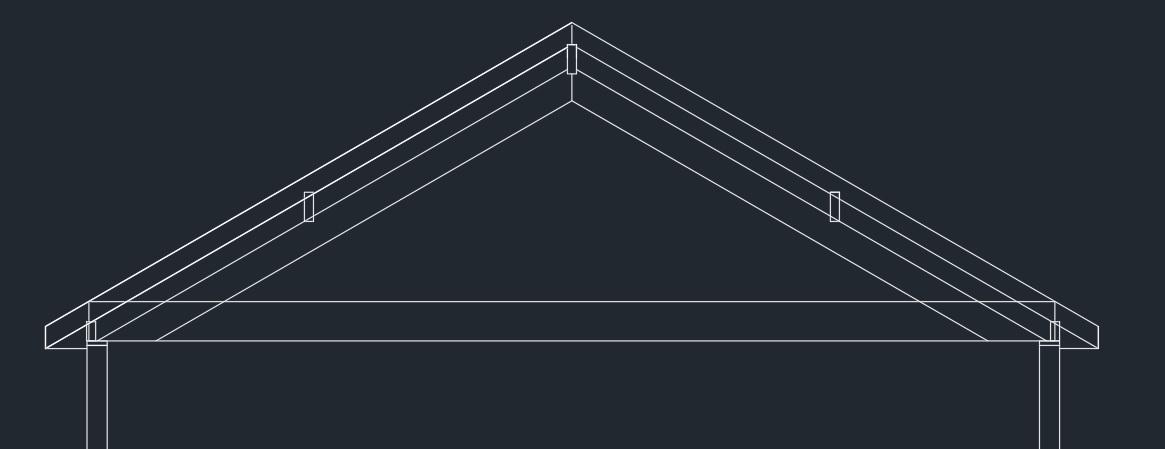
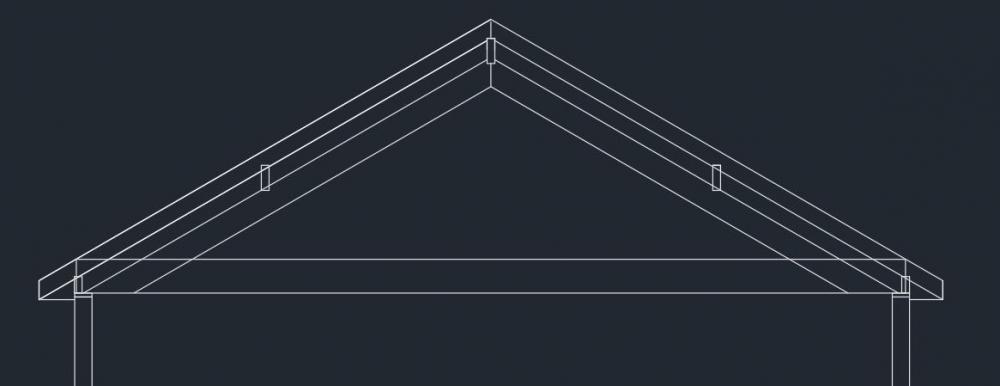
OK. The garage is now built I am happy with it, looks like it is going to be very spacious for my needs. So I have done some quick CAD drawings of what I think I will build for the trusses. Below is a basic exploded drawing showing the roof from the rafters, a rafter showing checks needing cut in the middle then the truss at the bottom. The truss will be an 8x2 joist and 6x2 rafters, Peter said 2x6x2 to give me a 6x4 which I can still do but I am thinking of 2 central trusses now and the gable end trusses so I wondered if I would be fine with a single 6x2 design - I am thinking of weight here as I will be lifting them into place with my brother (well that's the plan) so don't want 2 of us to be up a platform trying to pull up heavy trusses. I could always sister them in situ. You can see from my drawing that the truss is checked at the top to take a 6x2 ridge, then just over half way down another check for a 6x2 purlin then a 4x2 at the bottom which will just sit on the face of the 6x2 but I guess this could also be arranged just to sit on the wall plate? The thinking behind the angled 4x2 is to put roof loading onto the truss so that the wall plate is not being loaded with a diagonal load trying to spread the wall, but I suppose if the rafters are well attached to the ridge and mid purlin then they will not be moving outward anyway. There is also going to be a central spine running from the 6x2's down to the 8x2 that I have not drawn in this version yet. So thoughts please guys. I will also do a 4x2 on wall plate drawing and post that now.

-
Thanks Peter. I will come back to this in a week or so to bottom out the design and price it up - sounds good to me!
-
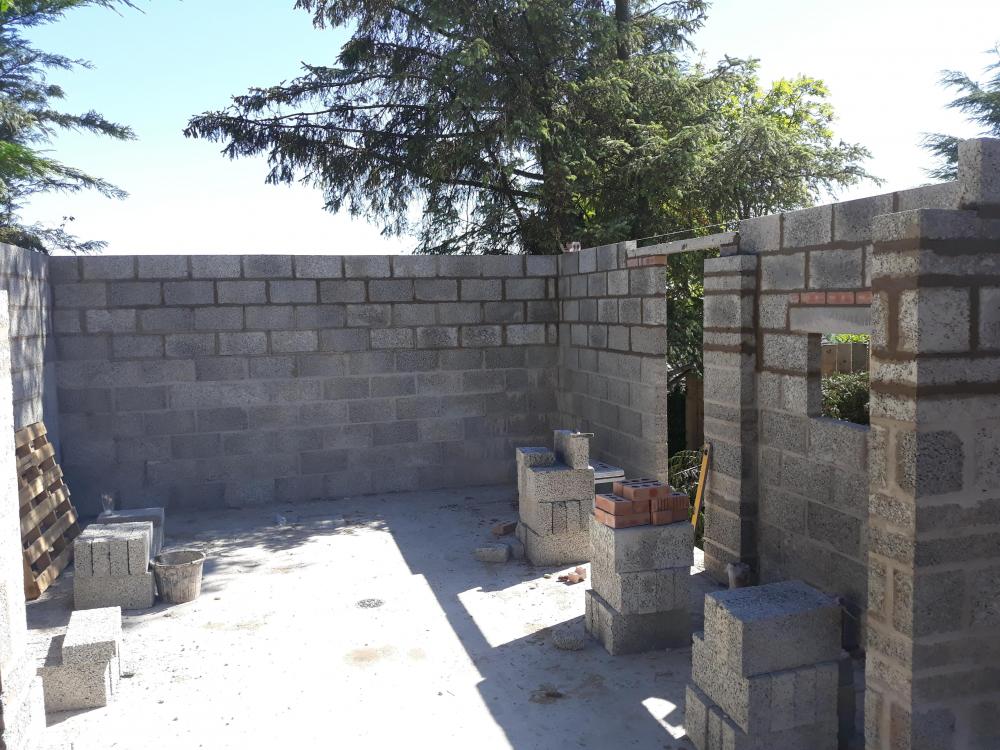
Now following on from above, the roof design - I am going to build it myself rather than buy in trusses (they didn't work out cheaper anyway and they looked like flimsy weak junk). The walls will be 10 blocks high all the way around, the gables are almost certainly going to be built in timber, sheeted, wrapped, battened and clad in cedar etc. There is also a central butt which makes me think I could build 3 sturdy trusses (the timber gables making up 2 of these) and run in purlins over which I could sit smaller rafters and not have joists. I can get some decent purlins from a local building merchant and could use a decent ridge board such as a 8x2/10x2. The idea behind this is that I can maximise headroom - I will probably floor out some of the roof space once I see what storage needs I want but I am going to avoid this for as long as possible as I don't like to encourage hoarding. So I am looking for thoughts here. The only real spec I need to stick to is the roof needs to be about 30° as that's what is on the planning drawing and it will probably have tiles but I may go for those metal sheets that look like tiles - again advice appreciated. I am keen to blitz on with this and start the extension later this summer!
-
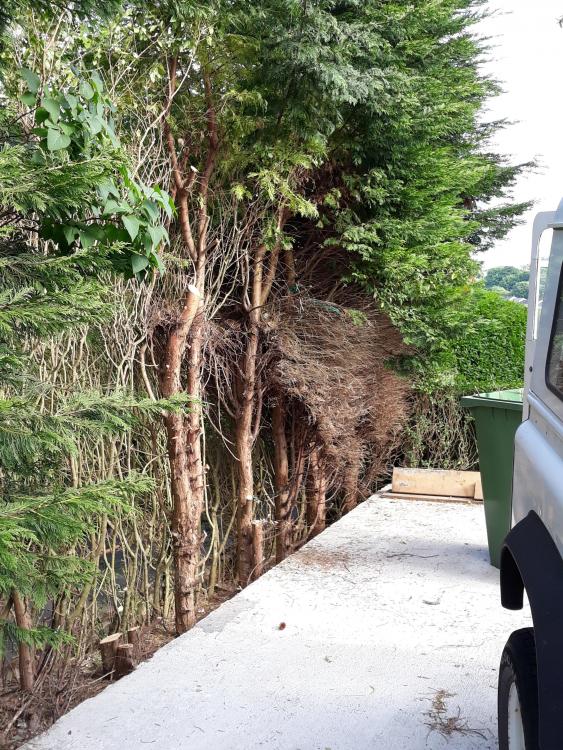
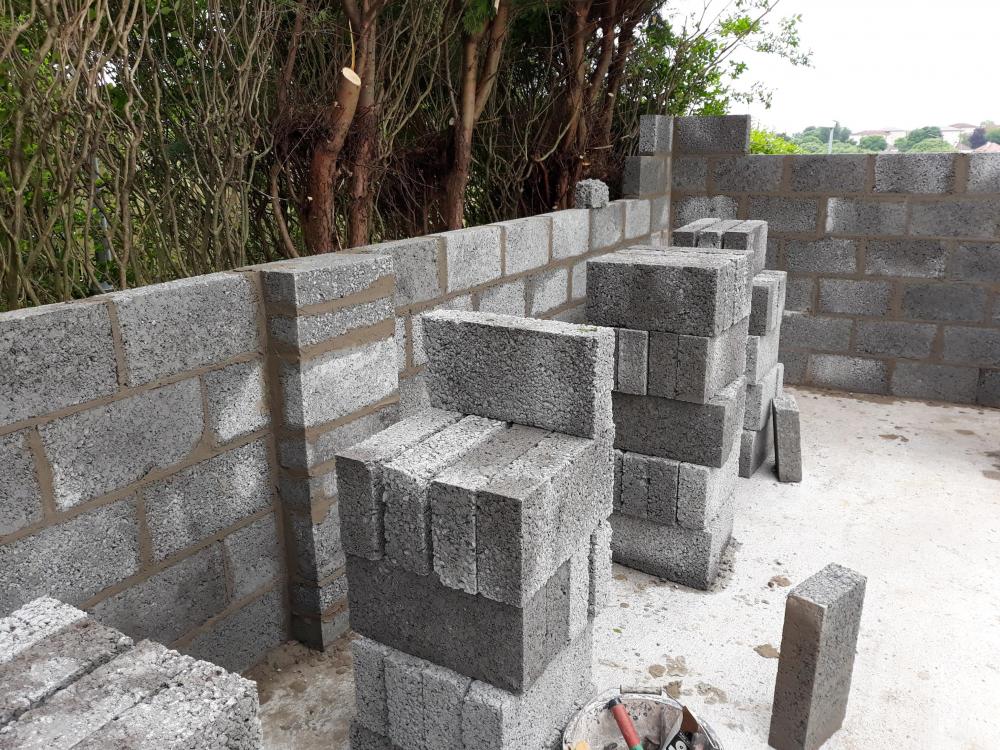
First photo is just the trees cleared back along slab edge, the second shows the progress by about lunchtime on the Sunday. We are sitting at 7 blocks high with front butts and corners higher - we had a bit of a setback on the Saturday night in the form of a 1 in 30 year rain occurrence, the brickie had all the corners up ready to fill the sides in on the Sunday, I got out with tarps as soon as I could but the walls were bleeding mortar and one totally collapsed. We have not had rain for over 4 weeks and it had to rain that night! Anyway, I cleaned all the blocks up and this was all rebuild on the Sunday morning and then progress continued. It is to be finished on the 30th which suits me as then I don't need to think about the roof design till the block is up!
-
Morning All! OK - the block, sand, cement and lintels are outside, the slab is ready (felled a couple of small tree's and gave the others a trim back) I gave it a good clean to ensure good mortar adhesion and I am waiting for my neighbour who is a bricklayer. Don't laugh but I am sitting on ACAD just now tweaking the front door design. The garage is 4800mm wide, I must come in about 1000mm from the left to avoid tree's further along I don't want to remove but I am now not sure if I should go 3000mm wide or 2500mm etc... I have spoken to a roller door company and cannot remember what they said about maximum width, I don't want the block built then find I have gone too big! Also, don't need to think about this for a couple of hours but need to choose my window height! I will upload photos later/tomorrow/Monday.
-
You can get airtight on commercial grade down-lights, most of the tin bashed stuff from China isn't up to much but plenty good for domestic use. You are looking at £120-250 for a commercial down-light that will have all the attributes you need. I have some WILA down-lights which come with all the thermal ratings and are guaranteed air tight - but at £170 a pop they are not everyone's cup of tea. Aurora are OK for domestic use - Chinese made and the chips are over-run.
-
I would be installing a good quality fireproof sealed (IP65 or better) LED down-lights in this space. The bezel on good ones comes with a seal to but this can be made. If you use the right product then it will have all the properties you need. Decent quality commercial grade down-lights would be the best option - if money is of consideration then something like this would work: https://www.screwfix.com/p/luceco-f-type-fixed-fire-rated-led-downlight-white-800lm-8w-220-240v/9966T?tc=IB4&ds_kid=92700030354322698&ds_rl=1245250&ds_rl=1248181&ds_rl=1249484&gclid=EAIaIQobChMIxbuQp_PD2QIVbr7tCh1CIQgqEAQYAyABEgLjuvD_BwE&gclsrc=aw.ds&dclid=CKHLpqjzw9kCFTED0wodDYcKPA Note you can get 2 of these in Costco at the moment for £22. These can also be covered with insulation - good quality LED fittings will under-run a better chip which means heat is less of an issue - which is why insulation coverable fittings are now much more common.
-
Hi All, I have a cupboard on the ground floor of my house, house is a suspended floor which has 50mm EPS between all the joists which helps but it was a bit draughty, not an issue in 90% of the ground floor now as all rooms and hall I laid rolls of underlay all taped and up the walls at the skirting which I then laid a 22mm engineered floor over with glued joints, the kitchen has 9mm ply, screed and tiles so the house is pretty airtight on on the ground floor. Good ventilation exists under the house from the original brick vents. The last remaining draughty area is the cupboard under the stairs, this is no longer a cupboard but rather 2 large drawers and a cupboard as I built a custom storage system into the space. I clearly wasn't thinking it all through because at the time with it wide open and easy access I should have laid ply to seal it all up but rather left it bare boards, the issue now is that with the storage system framework installed it would be difficult/impossible to lay in sheet material, since the drawer and door fronts have gone on last week I have realised just how draughty this cupboard is and the drawers and cupboard and always freezing. Now the frame for the storage system means I have effectively tanked this area and it got me thinking. Do I simply mix up a sand/cement screed and pour it in to a thickness of 10mm to act as a one piece seal? If I did this should I put some DPM so the moisture from the screed doesn't soak the timber too much. I know it would not be recommended method for a floor, but it will never be trafficked. I did contemplate resin but could not cope with the idea of stinking fumes for weeks on end and the constant off-gassing. For the record it would not be easy to seal from the underside of the floor because there are intact dwarf walls to 40% of the underside of this cupboard which would mean breaking through to get access - not keen on that and secondly because joists sit on this wall it would mean loads of custom cuts to make up some sort of sealing system. Thoughts please ladies and gents.