MortarThePoint
-
Posts
2198 -
Joined
-
Last visited
Everything posted by MortarThePoint
-
Opinions on best way to drop a ceiling
MortarThePoint replied to Thorfun's topic in General Construction Issues
There are some expensive profiles out there to do this. First link has an installation animation. ~£35/m seems steep to me, but may be the easiest way to go. https://www.darklightdesign.com/led-profilelement-dsl-profile/ https://www.ebay.co.uk/itm/273214350882 https://www.iluminize.com/en/shop/product/4604-led-drywall-profile-dsl-2m-long-for-floating-surfaces-with-a-substructure-363#attr=
-
Opinions on best way to drop a ceiling
MortarThePoint replied to Thorfun's topic in General Construction Issues
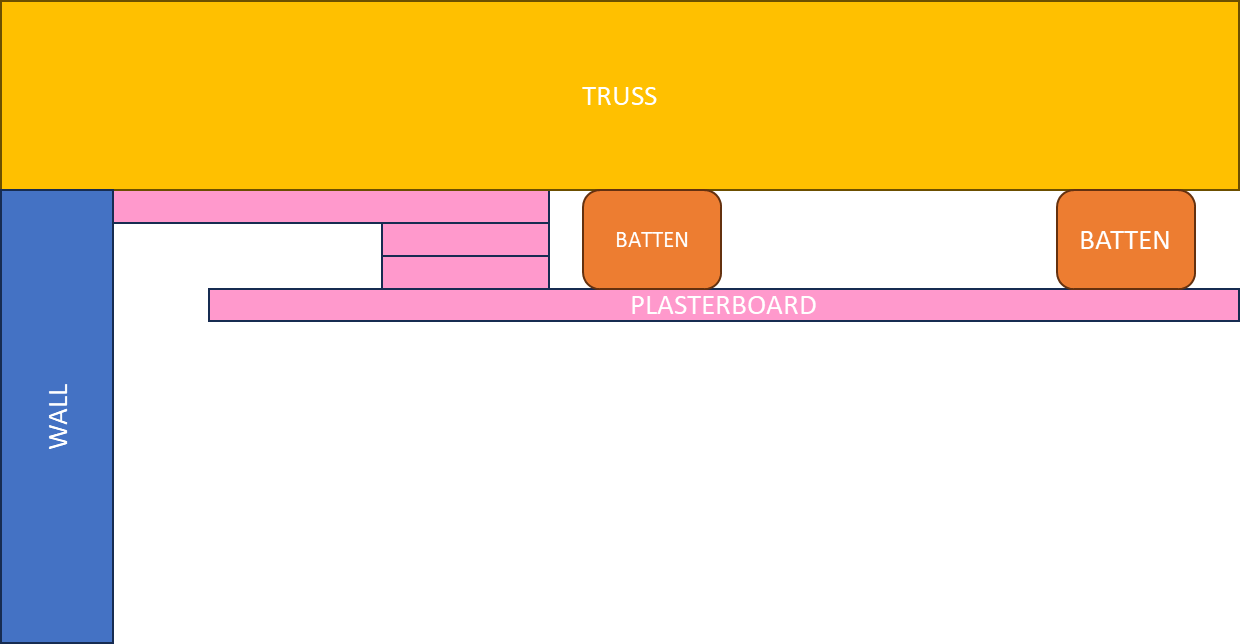
Is the loft living space? If it is, and the house is 3 storey, you will need this ceiling to be fire rated. That shouldn't rule out the battens, but you'll need to something neat with plasterboard (PB) to achieve a fire seal. Lots of strips of PB probably. Also check the fire properties of the LED strips as they may have a minimum distance to timber. PB in the way should solve that though. Something like the image below. If the plasterboard was 12.5mm then you could use 50mm x 38mm battens at 400mm c/c. If using thicker or thinner plasterboard, you could change batten thickness accordingly. Plasterboard strips can be screwed through with long PB screws, ensuring at least 25mm into timber. Also through the bottom most sheet and through the strips. Use a continuous bead of FireStop sealant between strips. You would probably want to use a plasterboard edge bead. No idea if this would meet regs, so you'll need to check that. Is there any indication as to how big the gap dimensions need to be.
-
I was planning to use a tanking kit in the shower but not the rest of the room (e.g. not near bath).
-
Wife is full of opinions but not decisions so probably makes sense to S&C. Also, not a fan of D&D.
-
Good question. Not given much thought but intended to use waterproof tile adhesive and waterproof grout. Any recommendations?
-
Tile thickness may be a factor. If putting onto plaster the tiles sit further forward. One room has a mix of blockwork and plasterboard. One is just blockwork.
-
In bathrooms I plan to have walls that are tiled up to a height and then plastered above that height. How should I approach this? Blockwork background. I can think of: 1. Bare blocks for tiling and put a batten or something on the wall and plasterer comes down to that 2. HardWall and MultiFinish plaster & skim whole area and tile in top 3. Sand&Cement plaster whole area and skim down to a line. Tile over bare S&C plaster 4. Tile bare blockwork before plastering 5. Something I haven't thought of 🙂
-
Wrong Sand - is it still ok for bedding mortar?
MortarThePoint replied to ChrisE92's topic in Landscaping, Decking & Patios
For bedding slabs I think you want sharp sand (check though) and I don't think your 3mm grit will fair well. I would get the bag swapped. The BM may charge a delivery charge, but you should be able to return the grit. Unless of course you can think of something else to do with the grit. I don't know much about laying paving, but was surprised when I learnt how thick the bedding mortar should be. Something like 40mm if I recall correctly. Below is a video I have watched before on this. Don't forget the slope away from the house. -
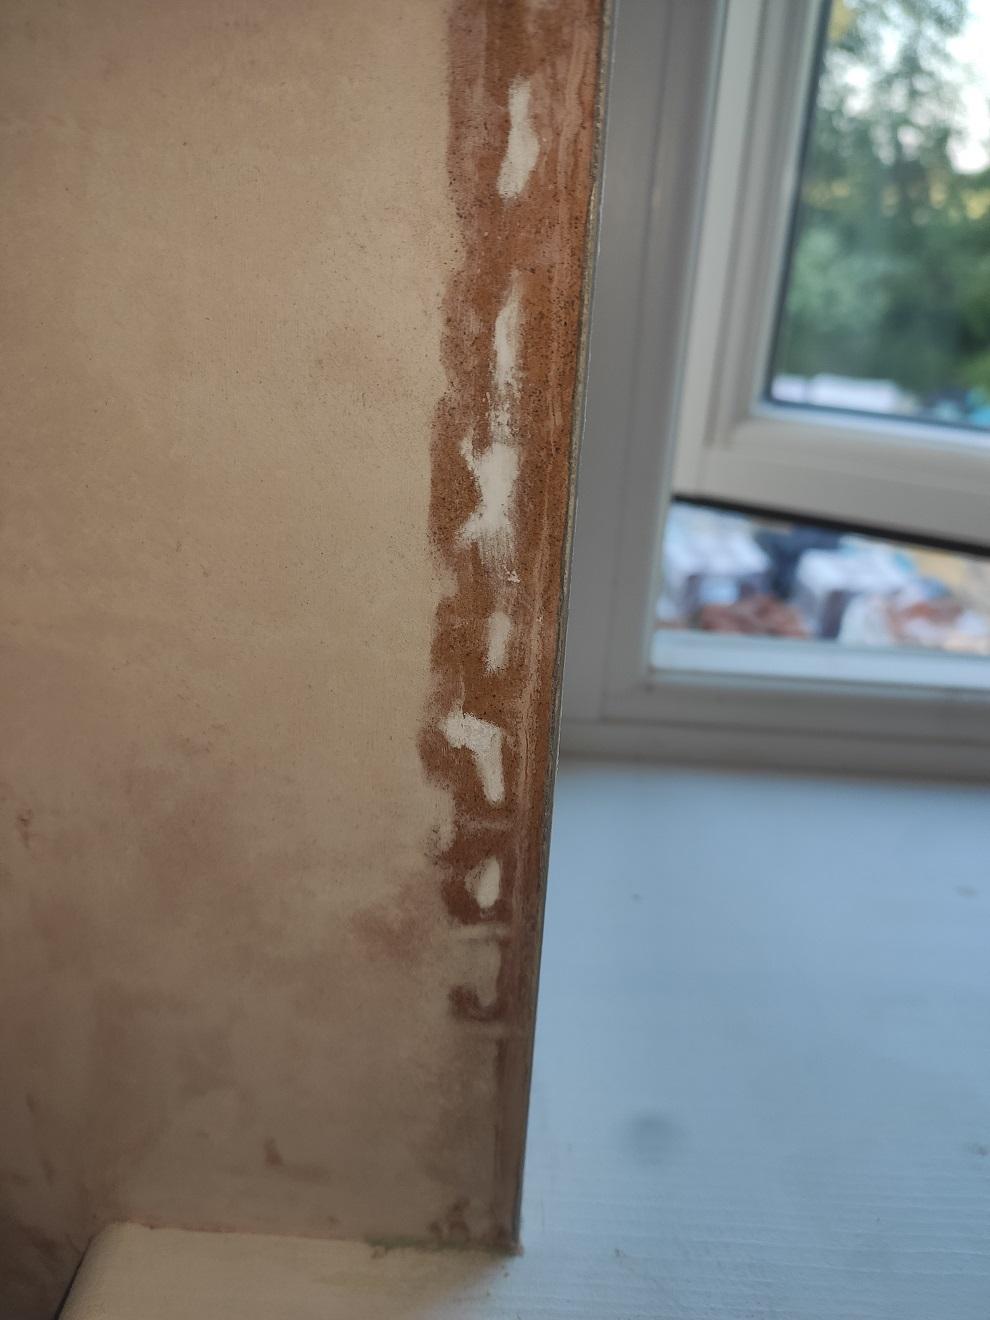
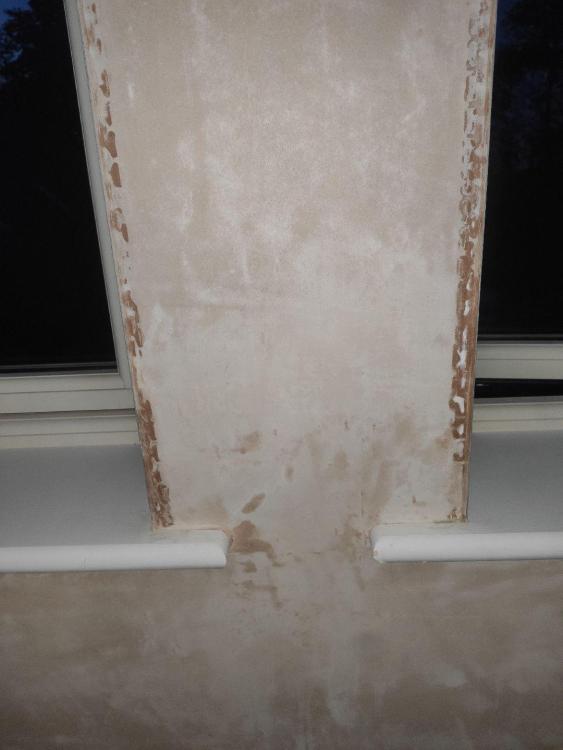
Here's another picture The pillar is one stretcher wide plus plaster
-
I hope that's a joke. These are engineering bricks so shouldn't have much salt in them should they. They will be very low porosity so wouldn't it be unlikely to be coming from the bricks. The first picture is about 3cm x 3cm total area, so the salt itself is about the size of a small fingernail.
-
Plasterer finished plastering upstairs a week ago and will come back in a month or more to do downstairs. Happy with everything. One thing I have noticed though is some salt on the surface of the plaster. Only on a couple of engineering brick pillars which are between windows. Is this because the only path for the water to leave has been via evaporation at the plaster's surface rather than via being sucked into the blockwork like elsewhere? Make up is Knauf MR plasterboard stuck to reveal with Knauf plasterboard adhesive and primed with BG BondIt. Plastered with BG HardWall and then BG MultiFinish skim. I expect would have had Webber pink mesh here. Catnic corner beads. Possible Bonding Coat was used on the Engineering Bricks, I can't remember. It could be the water from both the plaster and the plasterboard adhesive has had to exit via this small area. Only noticed it today (June 13). Probably plastered end of May. Been very hot for last week, though only risen to ~22C inside. Haven't been in room much so no reason to have noticed sooner. @nod is this normal?


-
Opinions on best way to drop a ceiling
MortarThePoint replied to Thorfun's topic in General Construction Issues
A middle ground is a single 15mm layer of Soundbloc (12.6kg/m2) or Soundbloc F (14.1kg/m2). I started a thread when I was trying to understand a lot of PB stuff. Don't forget to add the weight of a 2 - 3mm MultiFinish skim which is 3.4 - 5kg/m2 unless you plane to tape and joint. -
I'm envious of how tidy you site looks. Mine is a tip as I have materials everywhere. Be it inflation, lack of availability or tiles made in Ukraine I've ended up not getting things as needed but as possible. Annoying as it gets in the way.
-
I saw a US video that said pre pandemic 1/2" 8x4 sheets of OSB were $8. That's £6! I doubt we had that in the UK though. Can remember a Chippie suggesting £1/m for 4x2 in about 2019. In 2020 I was happy with £1/mm thickness for basic plywood 8x4.
-
I wonder if they deliver down to Cambridge🤣
-
Says it's damaged stock
-
An excellent price Vs what I've got used to. Are you able to share where this was?
-
Will depend on the window system and whether there is reinforcement in the frame. Get an installation drawing or guide from the manufacturer. Obviously don't want a screw long enough to cause any problems. Fixing the cill to the window frame prior to fitting the combination. I screwed my cill down to masonry (using 7.5mm X 122mm Frame Fixing screws). But that's the recommended approach for my window system (Residence 9)
-
Birthday pressies - Makita?
MortarThePoint replied to CalvinHobbes's topic in General Self Build & DIY Discussion
I splashed out on a very swish Makita combi which is now stuck in Hammer mode. It's heavy. I rate the Aldi tools and the gap isn't large enough to justify the price difference in many cases. They have a DIY event tomorrow so check out their Specialbuys website. -
Opinions on best way to drop a ceiling
MortarThePoint replied to Thorfun's topic in General Construction Issues
You have a deflection head above a non load bearing partition. It's basically a gap (typically 10-15mm) that allows the joists to move vertically without contacting the wall and accidentally loading the wall. Not really relevant at exterior walls as joists are anchored there so don't deflect. -
Opinions on best way to drop a ceiling
MortarThePoint replied to Thorfun's topic in General Construction Issues
I follow you, I hadn't spotted the gap circled in red: You could bridge over that gap with a GL2 or flat metal strip which would add some vertical strength. Actually, thinking about it, when you have plasterboard screwed to the battens the gap will be bridged. If there is a gap at the very bottom then it's academic as you say. I expect the screws you suggest would be OK, but they are cantilevering out quite far. Can you share some information about any required deflection head?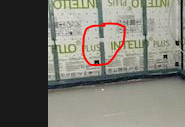
-
Opinions on best way to drop a ceiling
MortarThePoint replied to Thorfun's topic in General Construction Issues
It's not going to end up supported by screed when the screed goes in? Having GL1's and brackets near the perimeter walls looks sensible, but just check if there are deflection heads -
Opinions on best way to drop a ceiling
MortarThePoint replied to Thorfun's topic in General Construction Issues
The bottom of the batten isn't resting on something? -
Opinions on best way to drop a ceiling
MortarThePoint replied to Thorfun's topic in General Construction Issues
Are the battens running vertically or horizontally and what is holding them in place? I think you would normally treat normally have the brackets a fair distance from the GL8, but if you have them close by the GL8 won't be carrying much load. Look out for deflection heads etc though as the closer you have the first bracket to the GL8, the greater the effect of any differential movement. -
Opinions on best way to drop a ceiling
MortarThePoint replied to Thorfun's topic in General Construction Issues
I think that is debatable and timber would certainly take a lot longer, be heavier, give less void and be less performant acoustically. It is also likely to be more expensive.