Onoff
-
Posts
21031 -
Joined
-
Last visited
-
Days Won
206
Everything posted by Onoff
-

Should I use conduit for cables in the service void
Onoff replied to MikeSharp01's topic in Electrics - Other
Tbh I've always thought running cable in the 150mm zone either side of an internal corner is bloody silly. It's the first place Joe Public puts shelf brackets. Keep everything in line with switches and sockets and you won't go far wrong. For that matter, 150mm down from a ceiling.....how many people have just banged a quick nail or two in to hold up coving whilst it's setting? -
Should I use conduit for cables in the service void
Onoff replied to MikeSharp01's topic in Electrics - Other
You know safe zones are 150mm from the ceiling, internal corners and then in line horizontally or vertically of sockets, switches? That cable on the lhs wall up by the roof then looks low. Nothing to stop you running horizontal between sockets down low. I'd run in conduit. You could even use singles if it took your fancy. EDIT: Are you using the "50mm" rule to put the cables deeper than the zones? There's always someone who'll put a longer screw in! -
Bath Surround / Boxing In, and concealed pipework
Onoff replied to Onoff's topic in Bathrooms, Ensuites & Wetrooms
Geberit wall drain time...out of character I know but pic heavy! Bear in mind I didn't plan for this type of drain! So I figured out via the CAD where it's going laterally (I hope) and took the multi-tool to the studwork: I've the DPM that comes up from under the floor EPS layer that lapped up over the front of the "sole plate" this was attached with spray adhesive. Because this wall was damp at one time I also ran a metre of DPM up the wall behind the studs: Behind the floor DPM is EPS stuck to the inner leaf of the cavity wall (the green/yellow painted bit): So took a slitting disc to the A142 mesh: And then did some hacking of the PIR on the floor: Along the edge here I made good and squared off the footings. 25mm EPS sits on the main floor area and lips up over the made good footing Under the 50mm PIR is 30mm PIR + the 25mm EPS in the photo above.- this is over the edge of the footings made good. So under the 30mm PIR is the (blue) DPM then 25mm EPS And it drops in: Got to think about this now as with a 2% fall I'd only have about 60mm at the slab edge (best not forget the fibres :). Maybe a 1% slope and I'd gain +10mm. I also need to push it back into the tapered expanding foam layer behind the studs: Thinking I need too to trim those A142 ends that are a bit near to the UFH pipes. -
-
What photographic trickery is this? Dug and built back in days!!!
-
Not fixed yet...
-
Sometimes nightmares drag on and on and ......
Onoff replied to ToughButterCup's topic in General Self Build & DIY Discussion
https://www.google.co.uk/url?sa=t&source=web&rct=j&url=https://www.arthritisresearchuk.org/~/media/Files/Arthritis-information/Conditions/2057%20Hip%20Pain%20exercises%2014-1.ashx&ved=0ahUKEwi55pmZ4evVAhXEZ1AKHUeeBI0QFgicATAR&usg=AFQjCNFbz7xBnxPrjNCn-EoQsHvqhKzfoA -
It's all here:
-
Sometimes nightmares drag on and on and ......
Onoff replied to ToughButterCup's topic in General Self Build & DIY Discussion
Trouble is that thinking out of the box takes time. It takes a special kind of tradesman to do so. One who can bring something rather than just an average or even below par job. Anyway, just think of the money you're SAVING on gym fees! -
Bath Surround / Boxing In, and concealed pipework
Onoff replied to Onoff's topic in Bathrooms, Ensuites & Wetrooms
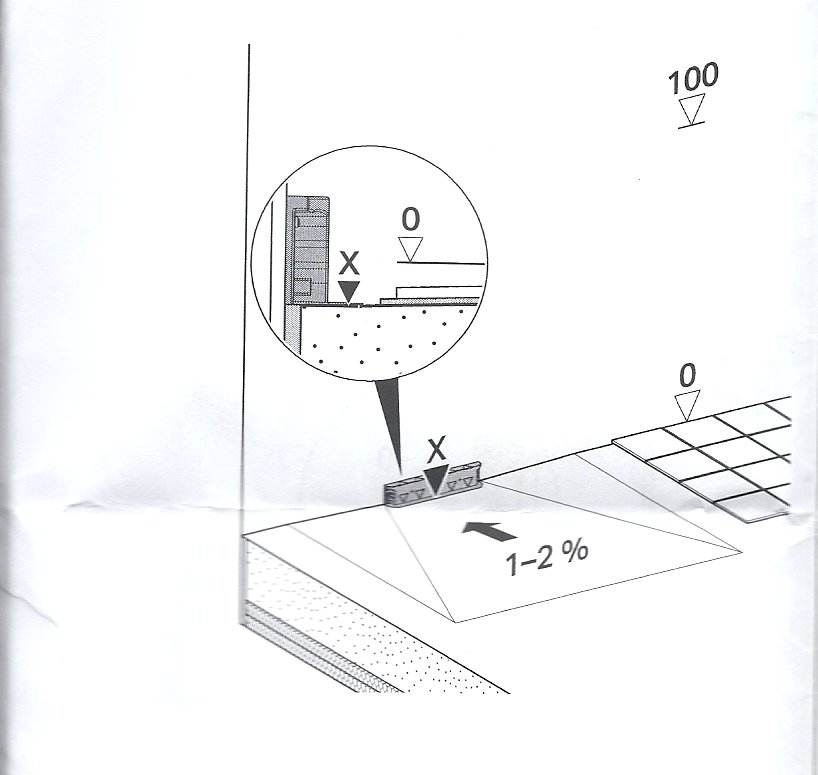
So, to continue I need to finish the floor which means laying the wet room corner to falls. At the moment, as above I've left a bfo piece out of the slab NOMINALLY the right size! Roughly this is how the floor falls to the wall drain: So it needs to fall from "0" to "X". The width at "X" (of the bit with the little inverted triangles on) is 410mm. A couple of PDFs, for the life of me I couldn't print decent resolution JPEGs from AutoCAD (sorry)! Both layouts based on 16 330x330mm tiles NOT mosaics laid in a pseudo Unioin Jack configuration. The magenta (purple) lines are my nominal fall lines to the wall drain. Clear from both I think that the "hole" left in the slab is over size so all 16 tiles have to move left so the tiles on the "flush plate" wall come down over them. Also that all 16 tiles need to move "north" up the page to again go under the wall tiles where the wall drain is. I'll need too to bring in the level edge due to the reduced size. wet_001.pdf I think this looks better as it avoids tiny, weeny slivers of ceramic (cheap seats here) tile. The 410mm dimension has to grow a bit. wet_002.pdf Obviously the cut edges, pointy ends of the tiles are a worry, Do you "file" these down and just be careful grouting? I MAY be able to get these water jet cut for a drink. Is it a case of mark the line with a Sharpie and they can cut to it? I usually send water/laser cutters a DXF file! Will ceramic tiles take to being water jet cut? Mix. I was debating maybe a 3:2:1 pea shingle / sharp sand / cement mix for this maybe made up with 5:1 PVA or SBR, thoughts anyone? I'm likely going to make up two identical long thin, holed (for the mix to get through) triangles maybe of st/st or Asbestolux or even ply that will sit on the fall lines and that I'll "screed" to though I'll likely do a wet 'ish mix. Any thoughts or anything I've missed appreciated! Cheers EDIT: Enlarged view of the preferred one: wet_004.pdf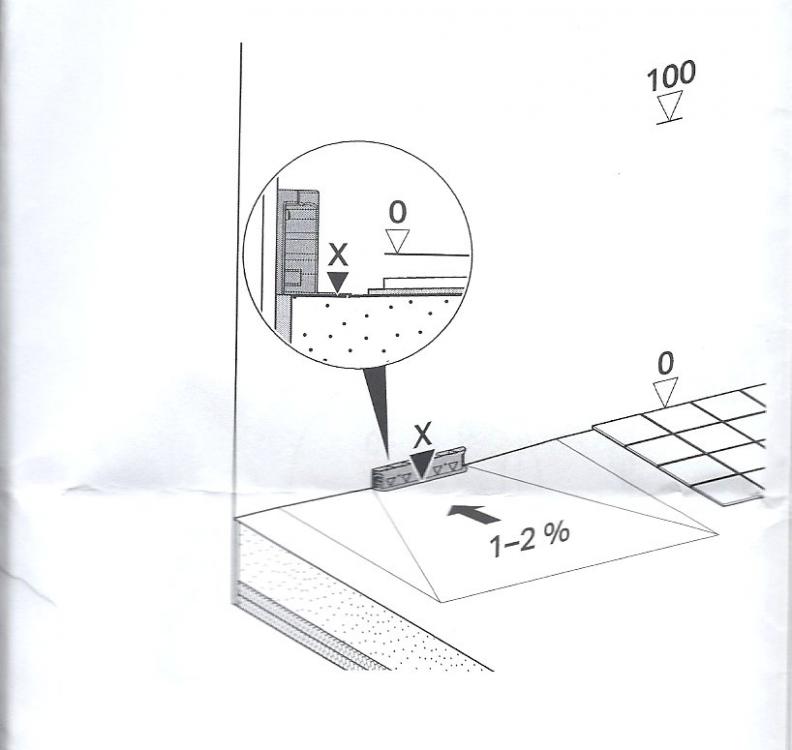
-
I'll have you know I once bought the missus 5L of car shampoo and the same of screenwash for Xmas. I was struggling for ideas and there was other stuff too! She's forgotten the other stuff but likes to remind me on occasions of the cleaning products.
- 24 replies
-
- 1
-

-
- airless
- plastering
- (and 1 more)
-
How about these as an alternative?

-
How accurate do they have to be? Couldn't you get away with a horizontal laser line and dawn/dusk and a stick?
- 18 replies
-
- 1
-
-
- surveying
- topographical
- (and 1 more)
-
Actually referred to here as "butt cream"! Breast milk's the thing for healing cuts and grazes btw.
-
Bet that wiped the smile off your face...
-
As you press the "combined brake clutch control pedal" forward: This assembly coming o/of the gearbox, behind the o/s rear wheel pivots, on the bottom bolt, backwards. Looks ideally placed to interfere with the belt, being so close to the pulley. Slack belt more likely to catch I'm thinking.
-
I remember paying silly money for MTD belts from the local agricultural cum mower "John Deere" type places. Tried finding equivalents from Bearing Services (BSL) without success. They were always just the wrong size.
-
Much simpler than the MTD decks!
-
Tell me! I also have an aged MTD ride on. That gave up the ghost due to the cutting deck pretty much having disintegrated. I was welding thin air in the end. Salvageable if I was a better welder! Another rainy day project.
-
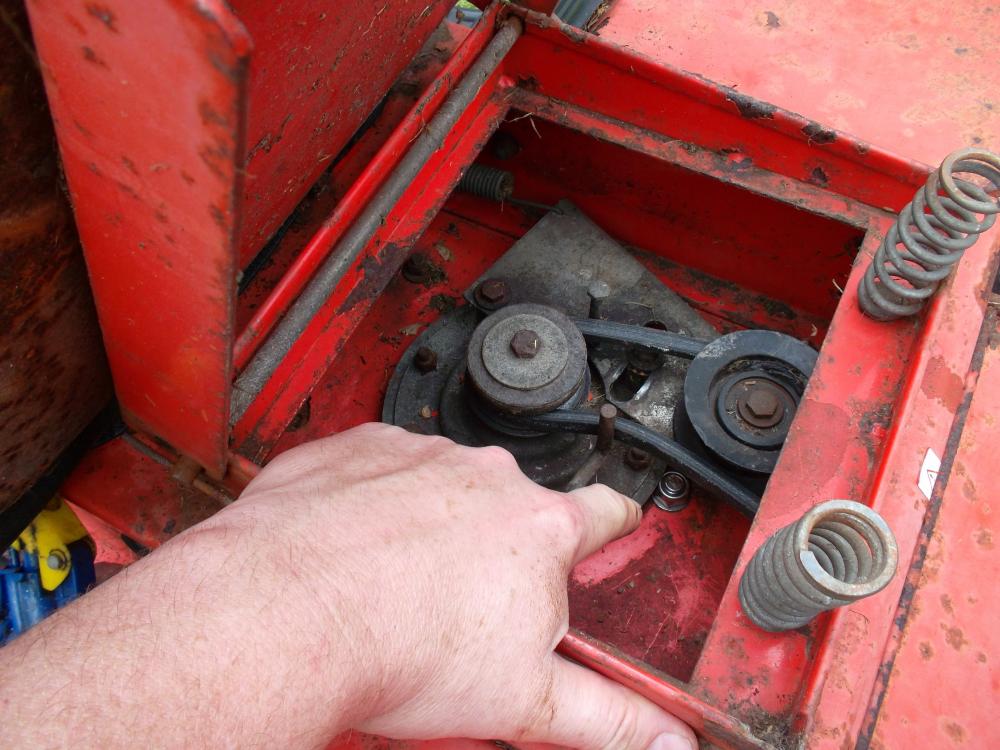
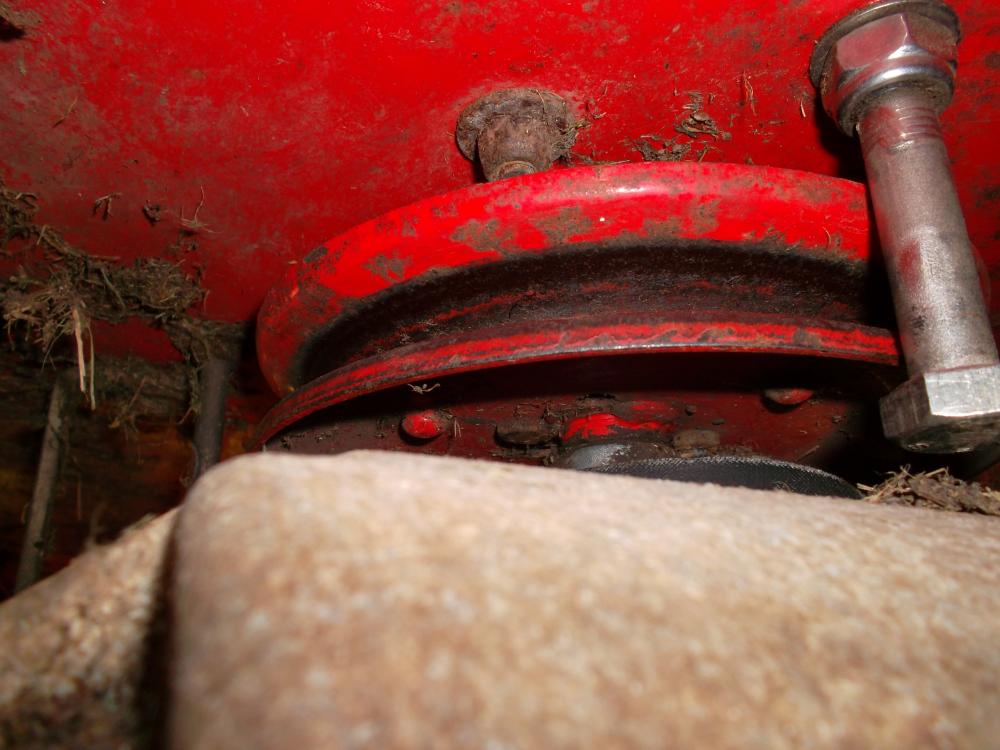
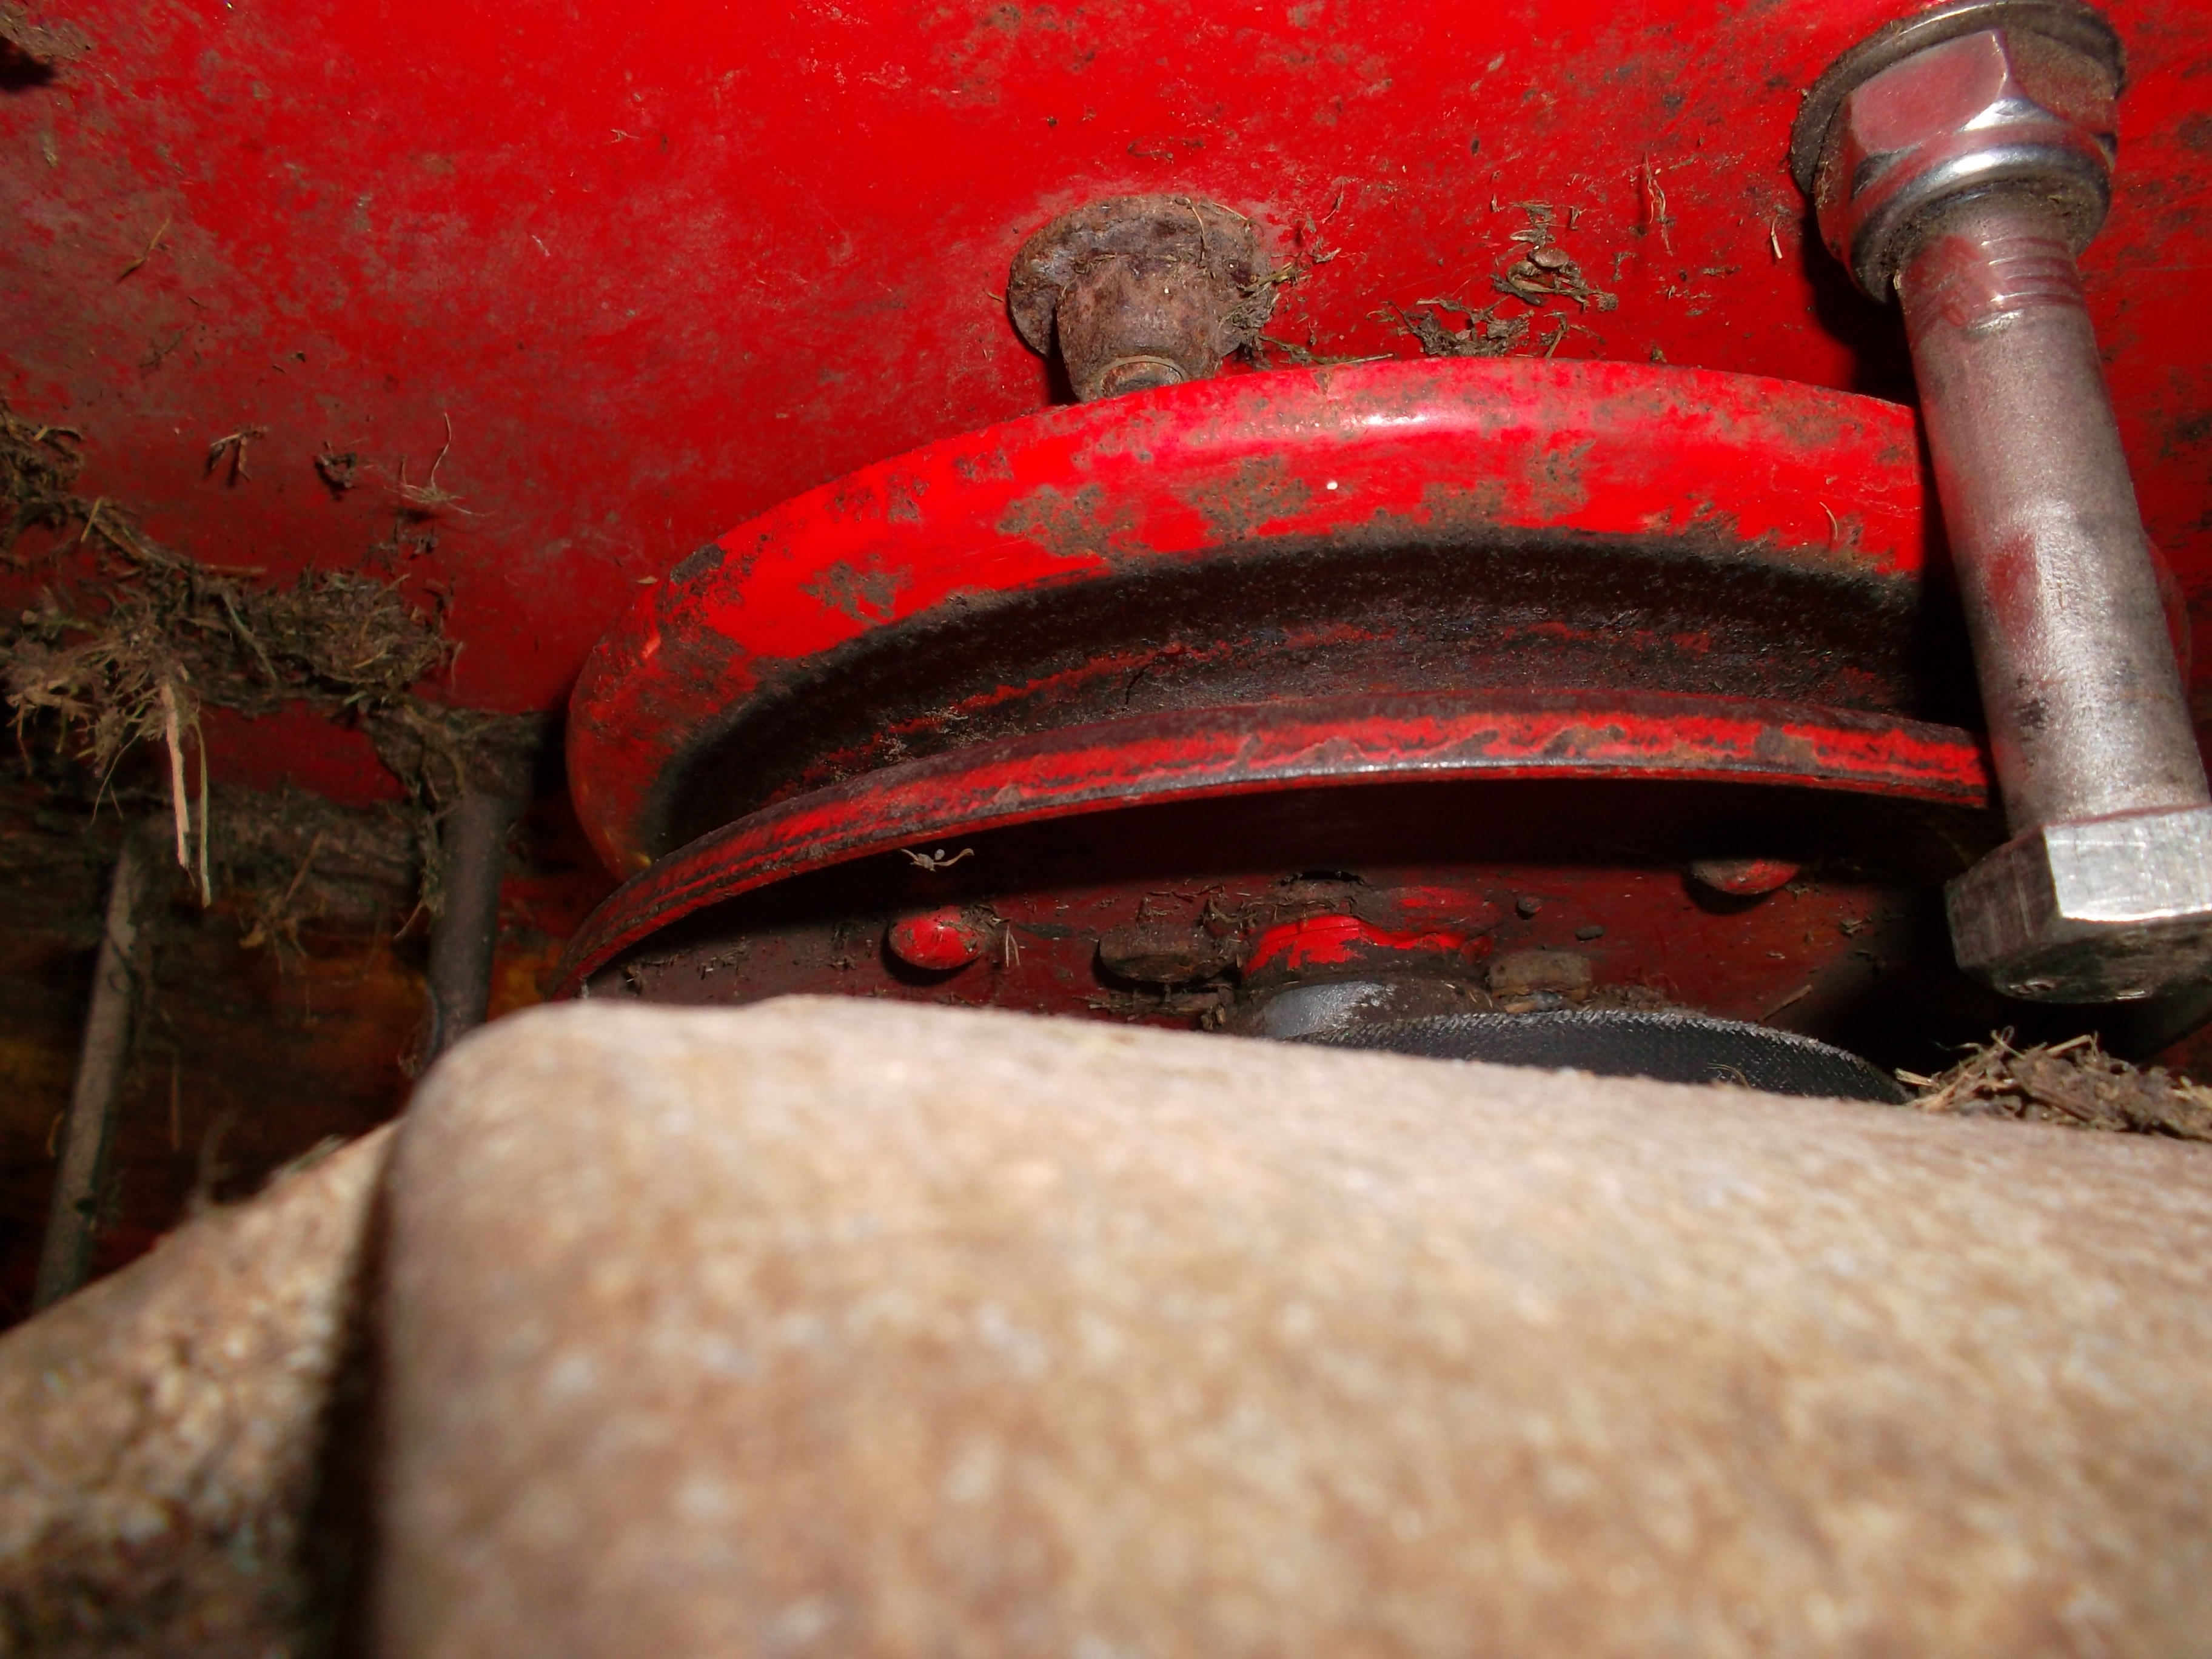
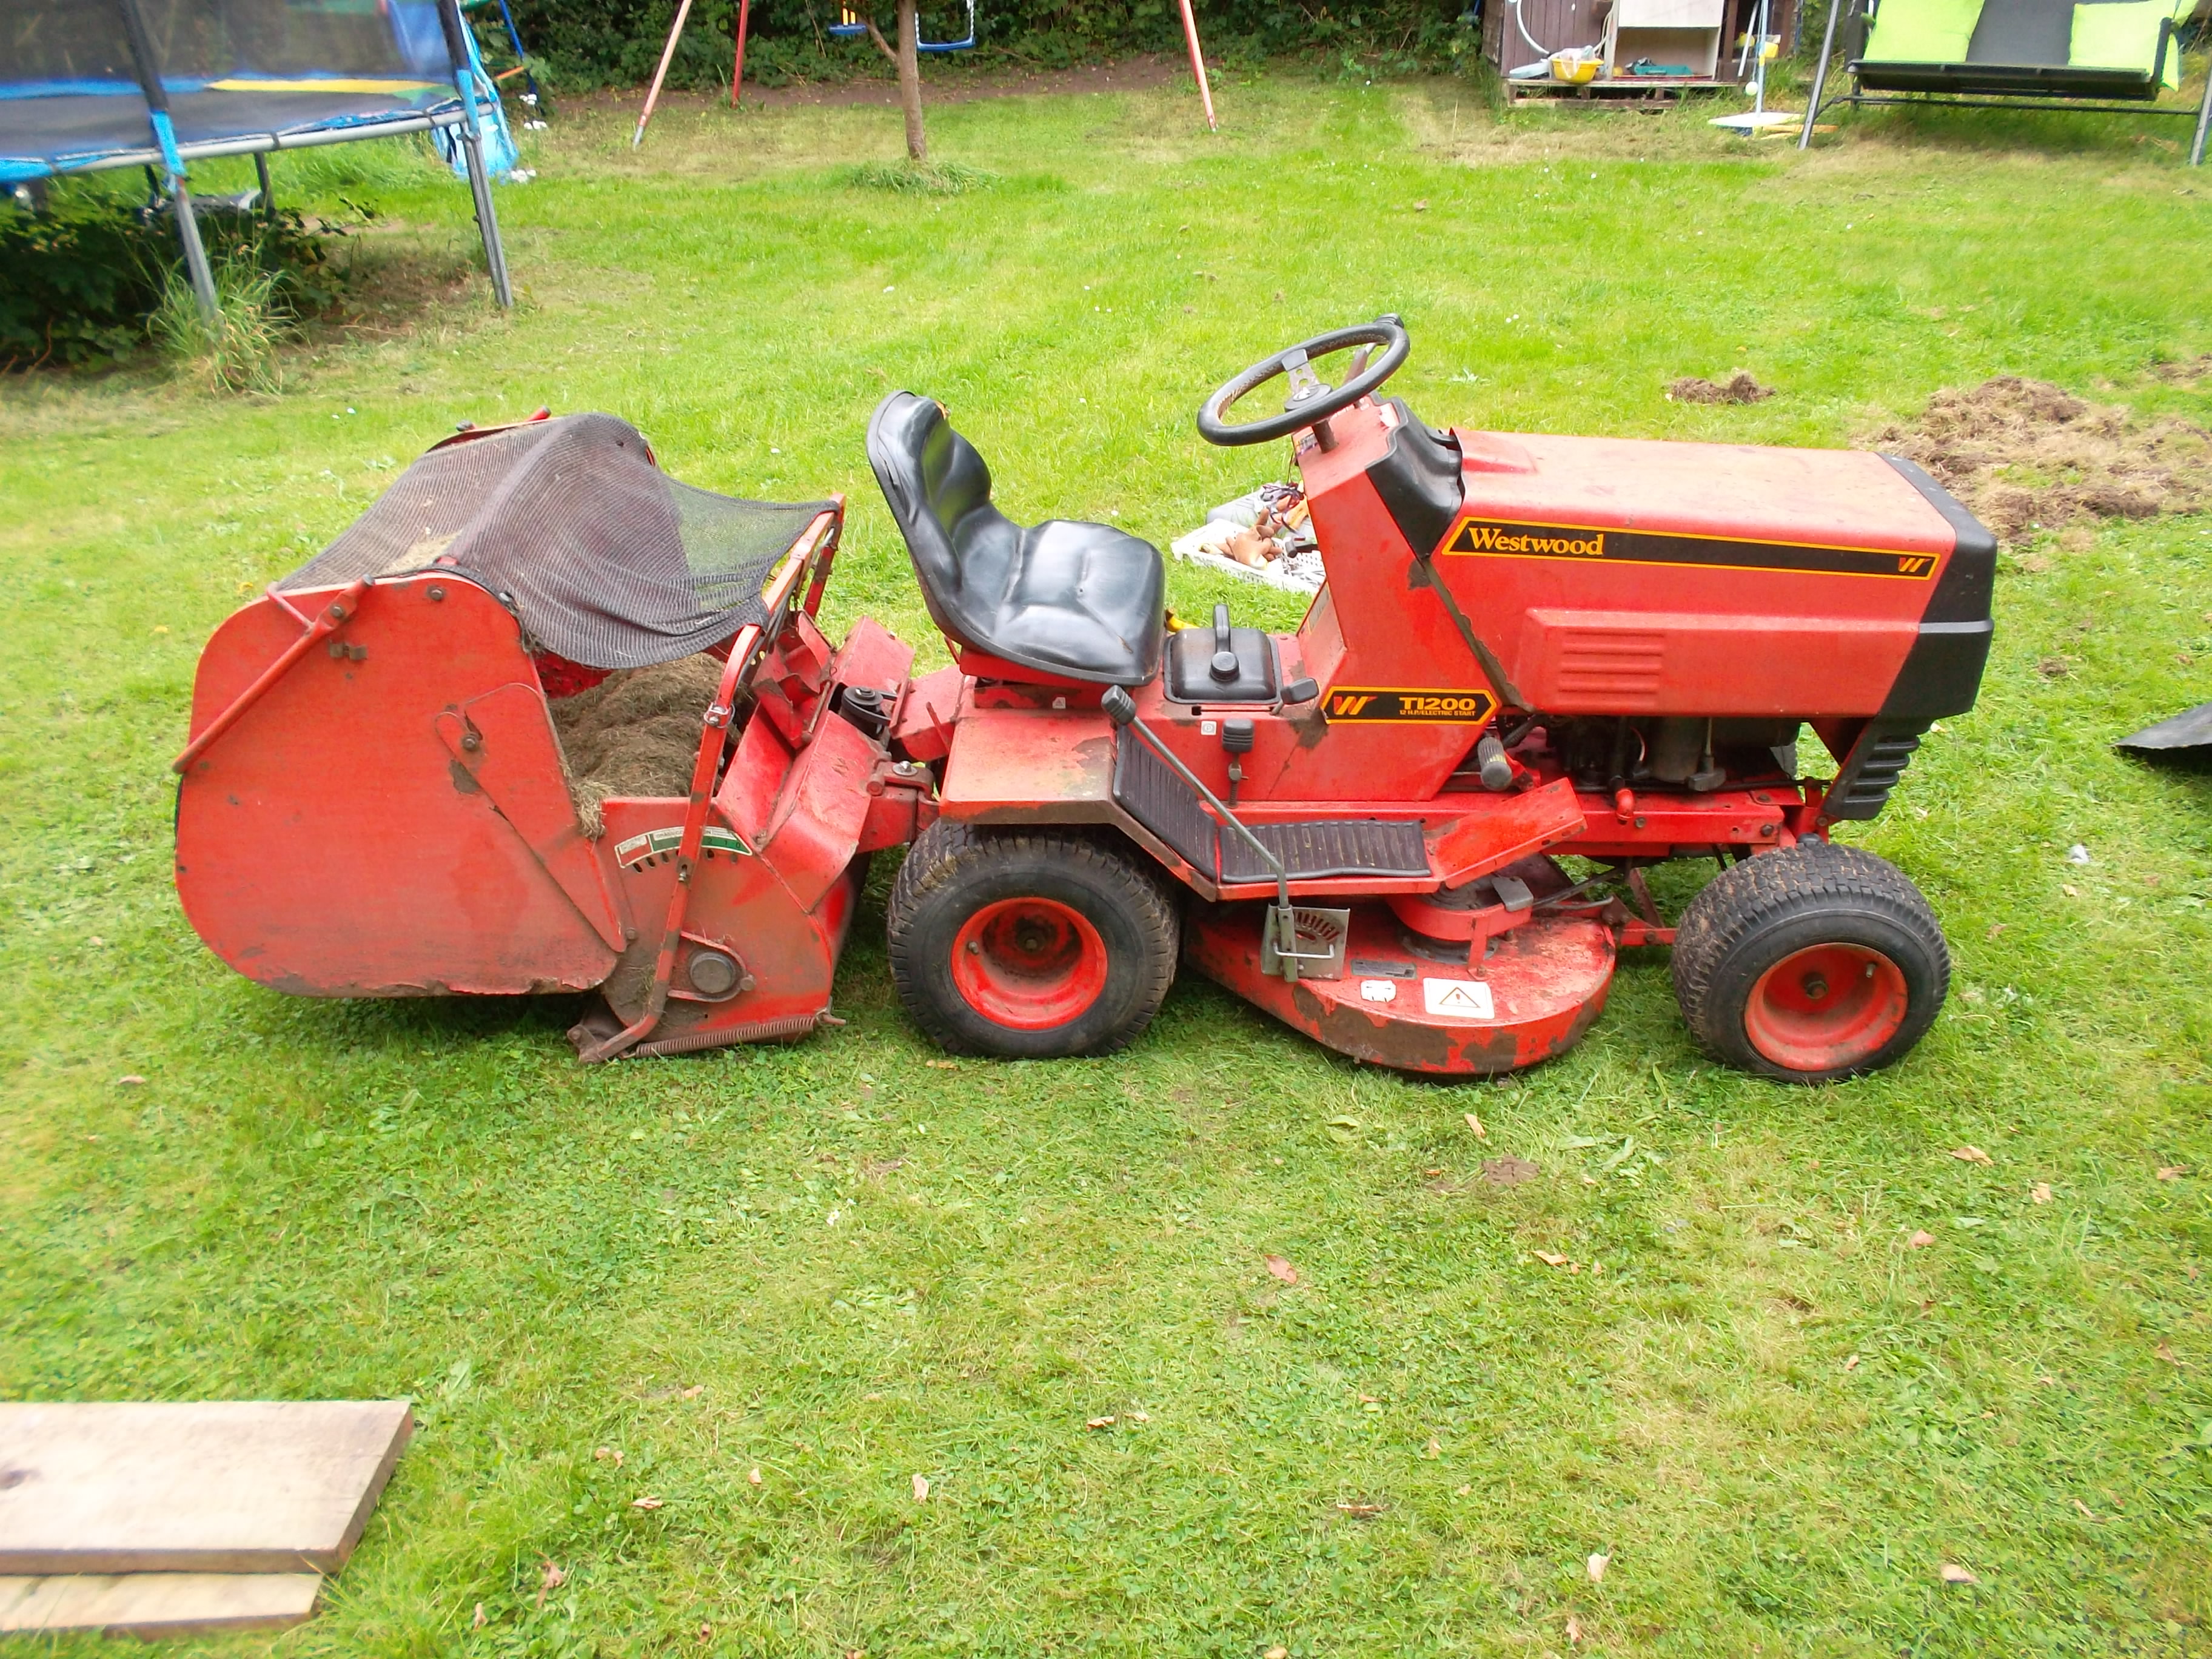
No, nothing, no apparent play. The belt is actually getting a little frayed and has a chunk out of it so maybe that's catching. Getting boring now but there is really NO gap between that added bolt and the pulley. I almost want it up on a car ramp and running to see what makes it come off. Seems it's part number 1688 for the belt, only about a tenner for repro ones off eBay so I'll get a couple. Westwood kindly emailed me a user manual and parts list (hence the circuit diagram above). A bitch to get in gear so something's going on there. There's a rod comes off the brake/clutch pedal and attaches to the side of the gearbox. Doesn't seem to be doing a lot at the mo as in you can depress the pedal but it's not rotating the shaft going into the box. That's a starting point I think. Sod's Law it's easy to get to if you remove the o/s rear wheel.
-
You can wield a router? Have a go! http://www.worktop-express.co.uk/worktop_accessories/stair-jig.html?gclid=EAIaIQobChMI2tak9Nnm1QIVDmwbCh2m9AdbEAQYASABEgL5SfD_BwE Or http://vi.raptor.ebaydesc.com/ws/eBayISAPI.dll?ViewItemDescV4&item=220394156509&category=42938&pm=1&ds=0&t=1496150954000&ver=0&cspheader=1
-
I saw one at a petting zoo the other day made from scaffold boards and tile batten! The battens were barely supporting the treads! I made a really simply wooden router jig to do this. Done with a 6mm bit that the radiussed edges of the timber fitted into a treat. When this was a full staircase, up to the tree house (pre spiral), the stringers were kept together at the ends and the middle with long studding and bolts. This just to back up the glued and screwed joints though not really needed:
-
Ta. Old battery though showing 12V after a charge has no real life so new battery time I think. Pic of the beast in question: Been out playing with the mechanics of it today. Only started on it yesterday as the wife had been using it and said it was hard to get in gear. Took the blades off and sharpened them and tack welded one of the little blade ends back on that was loose. For some reason the belt wants to jump off the rear pulley atop the gearbox all the time. Was just happening in reverse but now more often when trying to pull away in gear. I fitted an M12 bolt to try and stop it but it still does it. Amazed how as the shank is pretty much touching the pulley without impeding it. I'm pointing here to nyloc nut on the bolt I added: And from the underside. You can see where the belt is sitting underneath having come off. Quite how it jumps off the pulley with the bolt there amazes me as I say. Seems more likely to happen if you let your foot off the clutch/brake quickly. Do it very slowly and it happens far less. To get the belt back on I have to loosen that bolt every time now. Garden ornament at the mo! EDIT: That's the badger's handiwork in the background on the lawn. Every year we wake up to random patches that have bee excavated. Heard they're searching for the larvae of certain insects; leatherjackets, cockchafers etc. Not sure what other than they make a mess!