Onoff
-
Posts
21127 -
Joined
-
Last visited
-
Days Won
206
Everything posted by Onoff
-

Help with kitchen renovation/ 1st house.
Onoff replied to zoothorn's topic in Bathrooms, Ensuites & Wetrooms
Screw the pb on and cut into a C shape later on? Extension boxes here. You'll have to stomach the £5+VAT delivery but the extensions are peanuts: https://www.ukelectricalsupplies.com/norslo-pattress-boxes.htm or £3.50 delivery here: http://search.builderdepot.co.uk/search?ts=m&w=extension box -
I walk into the bathroom and look...then I walk back out again! 1st pocket is 377 to datum, pockets either side of shower both 380mm. I'd aimed for 378mm. I'm going to walk back in...
-
Help with kitchen renovation/ 1st house.
Onoff replied to zoothorn's topic in Bathrooms, Ensuites & Wetrooms
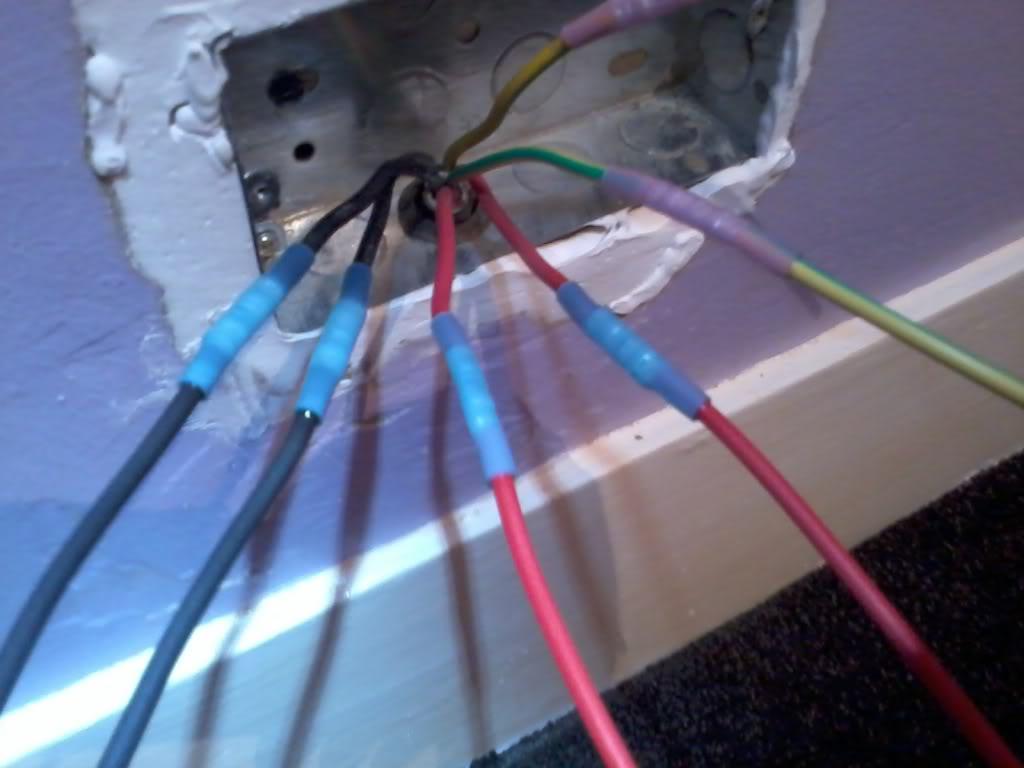
We could talk you through extending wires if necessary like this with crimps as shown or even Wago blocks at a push. Just not sure if doing so will send me over the edge! Let's hope you don't have to. A big difference is all the above was done with the proper crimps etc by somebody competent & tested after with the proper kit.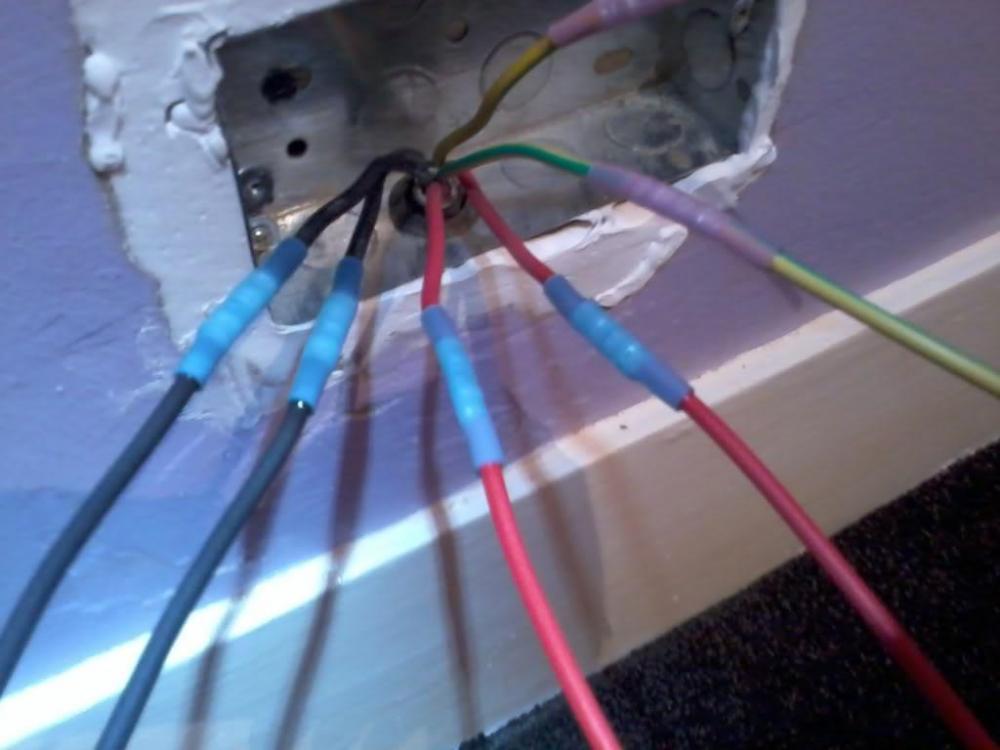
-
Help with kitchen renovation/ 1st house.
Onoff replied to zoothorn's topic in Bathrooms, Ensuites & Wetrooms
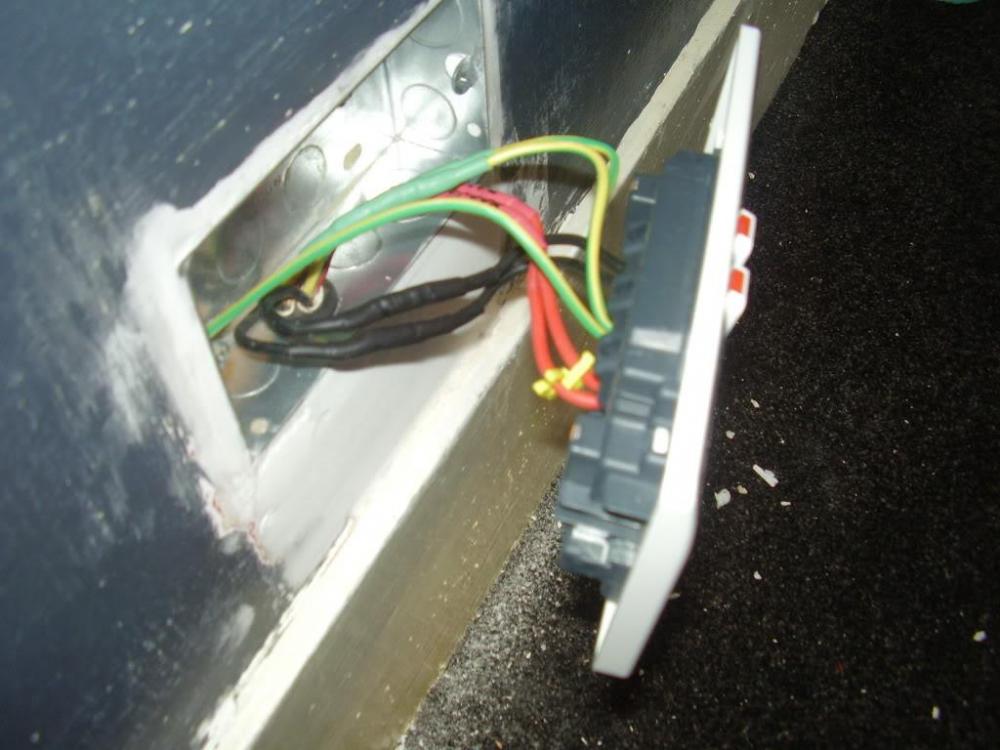
With the power OFF! Will the face plates unscrew and then still connected pull forward the depth of the new batten + the pb? Sometimes you might find you are prevented from doing this by the fly lead, that is the green/yellow earth lead that goes from the brass terminal in the corner of the back box to the earth terminal on the face plate. Doesn't look like there is one on yours. If there isn't enough slack you will have to extend the cables. -
We don't know what it is yet, might be lead!
-
For a general understanding of lighting wiring these might help: p4.pdf p5.pdf p6.pdf Note it's sadly quite often the case that blue wires used as switch wires are not marked with brown sleeving!
-
Help with kitchen renovation/ 1st house.
Onoff replied to zoothorn's topic in Bathrooms, Ensuites & Wetrooms
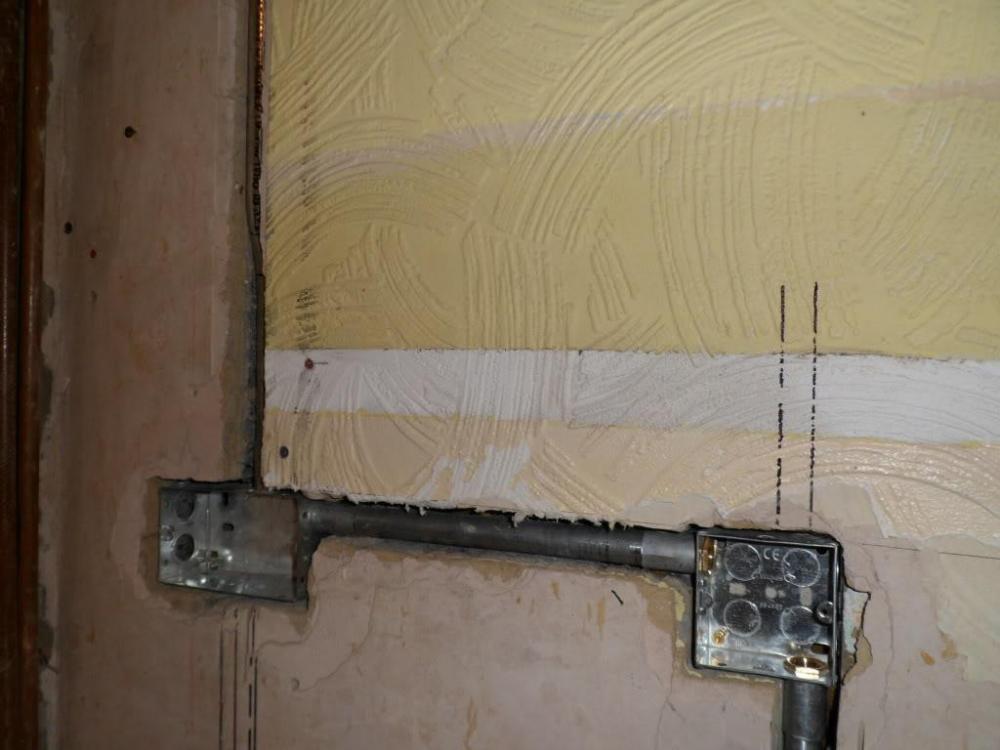
From memory you have one flush double socket and one surface mount single switch of some description up a bit higher? I assume you need to Celotex over these sockets still i.e before you pb? On the double socket you could just back the screws out a bit. That'll mark the Celotex. Ditto the surface mount one. You need to cut the Celotex out first - doesn't matter if your a bit oversize as you can make good with low exp. foam A double socket face plate is approx 146x86 with the screw centres at 120.6mm. A single socket face plate is approx 86x86 with the screw centres at 60.3mm. You could get clever making card templates up from Cornflakes packets or "mock" back boxes from timber with panel pins sticking out at the right centres to simulate screws in order to mark your pb. Back & extension box sizes are here: 20150323152709_0_Appleby2007.pdf -
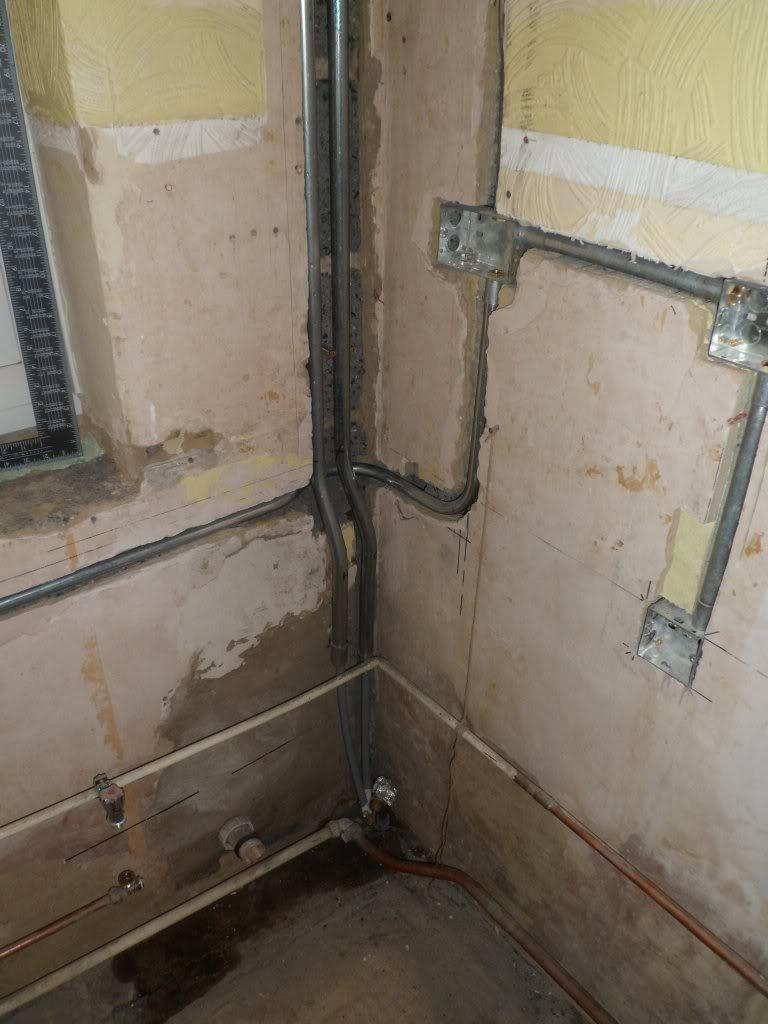
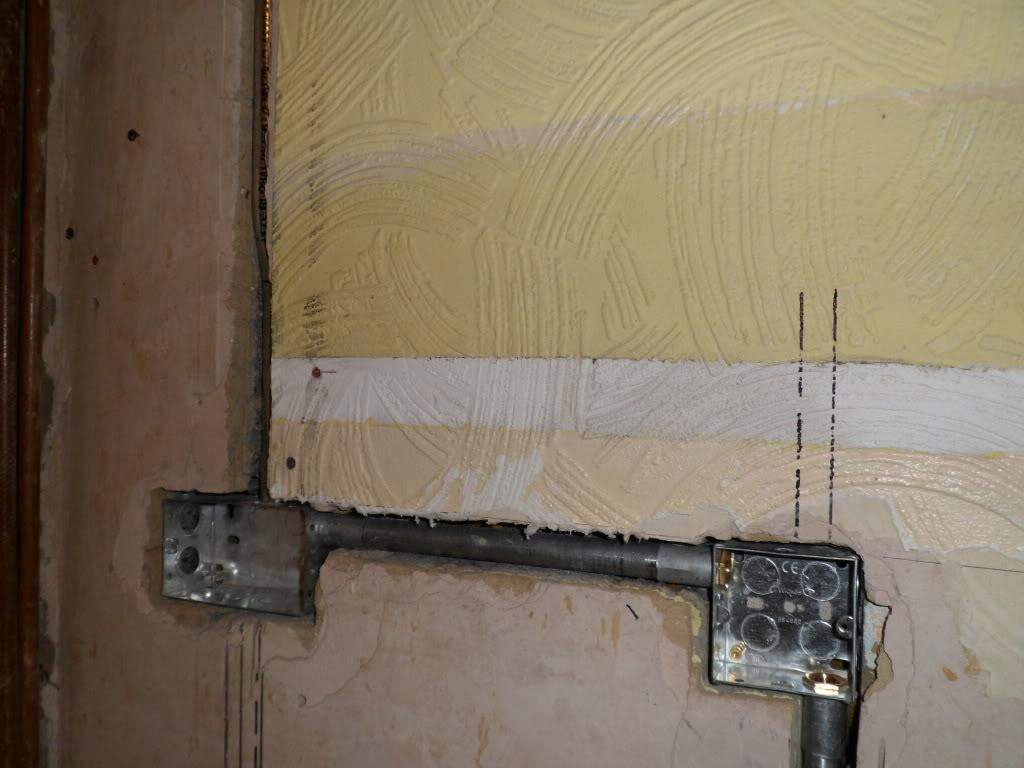
I love my Hilmor! Even used 25mm tube to protect water pipes! I reckon those Bosch multiconstruction must have caused a few upsets going through the wall and conduit or capping!

-
Help with kitchen renovation/ 1st house.
Onoff replied to zoothorn's topic in Bathrooms, Ensuites & Wetrooms
I forget... Was the plan to get the pb fitting best at the ceiling and have the 4"(?) gap down at the floor? You can pack that with off cuts and cover with a wide skirting. There are pb lifters that exist, like a small see-saw or you could make one... -
Weirdo!
-
More "don't upset your builder's wife" in my house...
-
Should be taught in schools I reckon! I've taken off a "tingly" brass wall light before fitted directly above a wall switch ("'cos it looks better") where they've had a screw either side of the T&E kissing the L where its shaved the insulation. "We have to turn the power off to change the bulb or you get a tingle!"
-
I just meant if it gets leaves/moss/bits of twigs in the gravel.
-
Luck! If the pipe is iron it could be rusty as & held together by a wing and a prayer! My trials and tribulations on a 60 year old main: Assuming the original pipe is in good order then you can get iron to MDPE fittings so you can tee off for a site supply. Turn off the water. Dig down & expose. Determine the existing pipe size with a Vernier and get couplers to suit. Cut with a mini grinder and de-burr. Swear and curse as you struggle to bend the short length of New MDPE with the tee on in there. The longer the bit cut out the easier it will be! Plasson fittings btw are better than the ones from Screwfix etc imo. They tend to cope with different pipe diameters too. One side might be 25mm for the MDPE and the other varying e.g. https://m.ebay.co.uk/itm/Plasson-25mm-x-20mm-27mm-other-pipe-universal-coupling-Plass4-MDPE-UTC/391116810730?
-
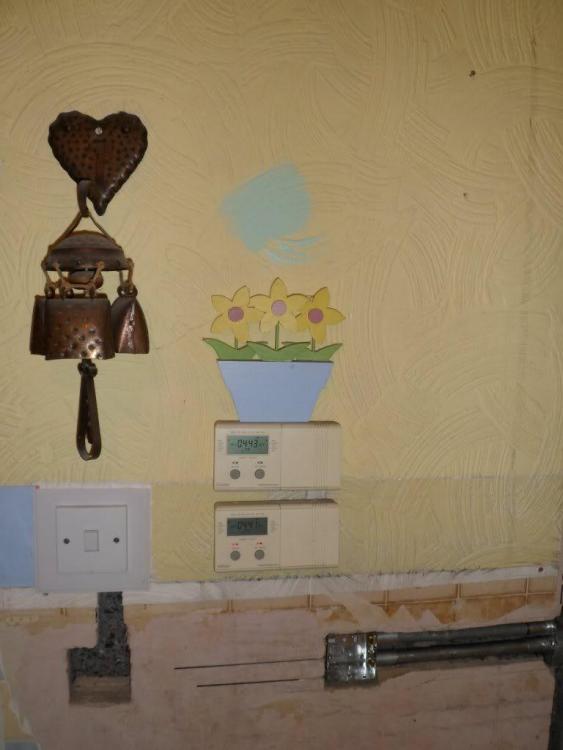
Not trying to teach you to suck eggs but when you look at a wall "accessory" (include in that socket outlets, light switches, fused outlets etc) then if you were to draw vertical and horizontal bands from that accessory, left to right to each wall, up to the ceiling and down to the floor then those bands are generally thought of as safe zones where you shouldn't drill etc. The only thing that should be in those bands is another accessory. Do you mean each bedside socket moves over by 100mm? If the socket has to move too far over then to denote where the cables are you can fit a single gang back box and blanking plate and route the cables through that. Even make connections in there if you have to extend. Tbh Joe Public will often line whatever shelf bracket, wall clock or METAL dinner gong up with the accessory and drill away. Either it goes bang, trips the RCD, is left as an accident waiting to happen or is a near miss like below: (My house when I moved in. I just knew it'd be close even though there was no fault so documented it).

-
Urinals - anyone ever considered them?
Onoff replied to Vijay's topic in Bathrooms, Ensuites & Wetrooms
I knew I should have stuck tape over my webcam... -
Urinals - anyone ever considered them?
Onoff replied to Vijay's topic in Bathrooms, Ensuites & Wetrooms
You reckon? Just measuring up for one now! -
My understanding, from a thread on here not that long ago, was that the 20mm stuff gets wrapped to stop clogging but NOT the decorative top layer of gravel. That can be periodically shovelled out and cleaned / replaced. ???
-
Discount Offers of the Week
Onoff replied to Ferdinand's topic in General Self Build & DIY Discussion
Let's leave @pocster out of this eh? -
Help with kitchen renovation/ 1st house.
Onoff replied to zoothorn's topic in Bathrooms, Ensuites & Wetrooms
Same ideas in fact! -
Help with kitchen renovation/ 1st house.
Onoff replied to zoothorn's topic in Bathrooms, Ensuites & Wetrooms
Get the pb in position. So you know it's going to fit the wall. Move the pb out of the way. Unscrew the socket screws so they protrude a bit. Put the board back in position. Give it a tap with the palm of your hand roughly over where the socket is. Protruding screw heads should mark the board on the back. Position the socket over the two marks, draw round it and cut out. -
@PeterW, would you line the French drain first with something permeable but tough like landscape fabric?
-
Discount Offers of the Week
Onoff replied to Ferdinand's topic in General Self Build & DIY Discussion
20% off until 19.8.2018 with code UKDEST20 https://www.durex.co.uk -
Help with kitchen renovation/ 1st house.
Onoff replied to zoothorn's topic in Bathrooms, Ensuites & Wetrooms
If you don't hit the batten dead centre with the pb you risk missing the batten or breaking the edge as you screw it down. If you've 45mm wide battens then that's 22.5mm either side. Your screws want to go in about 15 -20mm from the edge of the board leaving 5-10mm to the edge of the batten. If you're way off you have to then drive a screw in at an angle, sometimes even put the screw in right on the join. -
Help with kitchen renovation/ 1st house.
Onoff replied to zoothorn's topic in Bathrooms, Ensuites & Wetrooms
He was supposed to thinking about it having been told many posts ago!