


Onoff
-
Posts
21127 -
Joined
-
Last visited
-
Days Won
206
Everything posted by Onoff
-
The blockwork nicely frames and sets of the dungeon window!
-
Too late to incorporate a hypocaust?
-

How many sleeps 'til I can use my drill daddy?
Onoff replied to ToughButterCup's topic in General Construction Issues
Resin anchors, resin anchors, resin anchors! -
Help with kitchen renovation/ 1st house.
Onoff replied to zoothorn's topic in Bathrooms, Ensuites & Wetrooms
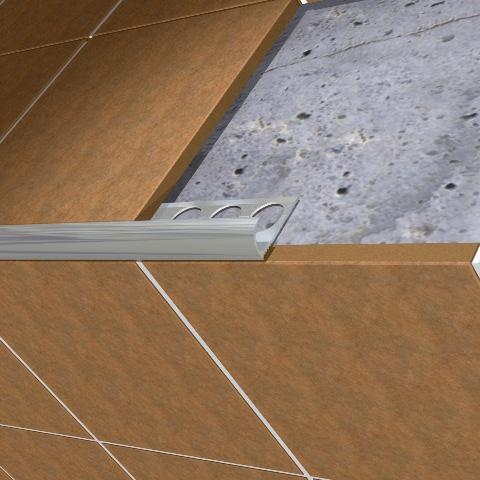
Whatever you're proposing is then now "unconventional" as in its not the norm! You should have used proper tile trim at the outset as you now realise. I was half wondering if you could still use convetional tile trim but hide the perforated side by filling and creating a bell mouth effect edging the window. Attach with small smears of "No Nails" type grab adhesive. That'd take some deft trowel work! You'd need to mask up the trim pre filling / painting the wall. In this pic then, ignore the tile above the trim and imagine that stuck to the pb. If you use timber then again attach with small blobs of "No Nails" type grab adhesive. Chrome angle? Would match the tap! Again fix with grab adhesive. Picked at random. https://www.northantstools.co.uk/product/geneisis-polished-chrome-aluminium-self-adhesive-edge-protector-2-5m-eaa100-91-10mm-x-10mm? Tbh with your woodwoorking skills I reckon stained timber. Maybe distress it a bit, wavy, bark like rear edge etc?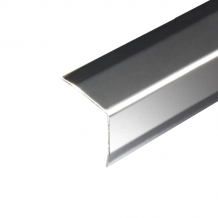
-
The Welsh laser method works a treat, I'm sticking with it!
-
Ta. Just processing that...
-
Cheap seats here:
-
Marking this bottom row of tiles! I'm presuming I need to place a 3mm tile spacer under the tiles that are there already and then put the top of the laser line to the underside of the spacer? Pencil mark that point each end and cut to that?
-
Bath Surround / Boxing In, and concealed pipework
Onoff replied to Onoff's topic in Bathrooms, Ensuites & Wetrooms
Will do. I'll get this bit tiled first and try the basin there. Pedestal will hide plenty. Beginning to think the pedestal is a mistake tbh! -
Bath Surround / Boxing In, and concealed pipework
Onoff replied to Onoff's topic in Bathrooms, Ensuites & Wetrooms
Any way I can "pull" this 1 1/4" solvent weld waste around by 5deg? Suddenly remembered I set it wrong when I did it! Thinking of a chop off/adapt fix: The smallest bend available seems to be 45deg. Tbh the basin might fit in OK and this cause no issue. -
What's the thought here, where in getting the excess adhesive off I've "scabbled" the Aqua Panel underneath making the surface a bit crumbly? Thinking vac it then a smear of tile adhesive before retanking: Ta.
-
Thanks. I once saw a PIRA Sten copy made from square section including the barrel!
-
I'm on the lookout for replica Stirling plans if anyone knows of any. Want to make make one for my brother as an ornament.
-
Insulation for internal stud walls and above ceilings??
Onoff replied to IanR's topic in Sound Insulation
Gyproc Soundbloc at a guess. I know Rockwool batts are better at soaking up sound than pir. -
Help with kitchen renovation/ 1st house.
Onoff replied to zoothorn's topic in Bathrooms, Ensuites & Wetrooms
What about a plain upvc white trim up that edge? For example: https://www.eurocell.co.uk/trims-and-cills/trims-quadrants-and-angles/25mm-d-mould-in-white-x-5m? Or a strip of timber stained to match the worktops? -
Durisol: that's it - the last pour.
Onoff replied to ToughButterCup's topic in Insulated Concrete Formwork (ICF)
Great news! Pleased for you both. -
Would an anti syphon trap(s) help?
-
Looks wrong to me. I'd have expected the lead to go into a slot.
-
Help with kitchen renovation/ 1st house.
Onoff replied to zoothorn's topic in Bathrooms, Ensuites & Wetrooms
Have another look. -
Help with kitchen renovation/ 1st house.
Onoff replied to zoothorn's topic in Bathrooms, Ensuites & Wetrooms
Disagree. Filled corners might look alright now but won't take a knock. -
Help with kitchen renovation/ 1st house.
Onoff replied to zoothorn's topic in Bathrooms, Ensuites & Wetrooms
This is pretty minimal in terms of size: https://www.screwfix.com/p/internal-drywall-bead-2mm-x-2-5m-5-pack/17010? One thing I'm not sure of is how far back the tapered edge face is from the main face of the pb. Plastic is best in this situation as it won't rust of course! -
Help with kitchen renovation/ 1st house.
Onoff replied to zoothorn's topic in Bathrooms, Ensuites & Wetrooms
Not sure what the Knauf stuff is you have but probably ok. One of these? I'd be using Gyproc Easi-fill as recommended to me on this forum. You can get it with different numbers after it e.g Easi-fill 20 with a working time of 20 minutes. Easi-fill 60 = 60 minutes. Pitt you're not nearer as I've 3/4 of a bag left here. The Knauf will likely be just as good. Run your hands over all the screws and if they're not set them just under flush with your special pb bit in the cordless drill. Watch out for screws that have gone in on the piss. Fill each black screw with a smear of filler. Use whatever, an old credit card can be good for this. On the flat face wall where two tapered edges meet, tape the join and fill with the wide joint "spatula". The better you do it the less sanding and mess you'll make. As to the external corners, good luck with this as I don't know how you'll get it looking good without corner beads mentioned many times before! Just found this guide which says it all...with pictures! https://www.bhg.com/home-improvement/walls/how-to-install-corner-beads/ It does not matter whether you have two square edges meeting at the corner, two tapers or one of each! When done sand. Not trying to spend your money but these are brilliant, again if you were nearer etc. The vacuum attachment makes it pretty much dust free: https://www.toolstation.com/shop/p86220? It takes special open weave sanding "mesh" sheets and the dust gets sucked through as its created. Just brilliant. Aldi/Lidl or the diy sheds will do a version that takes standard sandpaper but it'll be a lot dustier! For example: https://www.screwfix.com/p/aluminium-hand-sander-84-x-240mm/12688? Paint with a high opacity paint for new plaster like this: https://www.ebay.co.uk/itm/Leyland-5L-Matt-Super-Leytex-High-Opacity-Ideal-For-New-Plaster-White/112546918401? Again recommended to me on here. Mist coat first (or splash out on plasterboard sealer £££). This Leytex stuff has excellent coverage and allows you to see any imperfections and fill & make perfect. This might be alright on a budget: https://www.screwfix.com/p/no-nonsense-trade-bare-plaster-paint-brilliant-white-10ltr/51004 Top coat paint of your choice. Something for kitchens I'd suggest.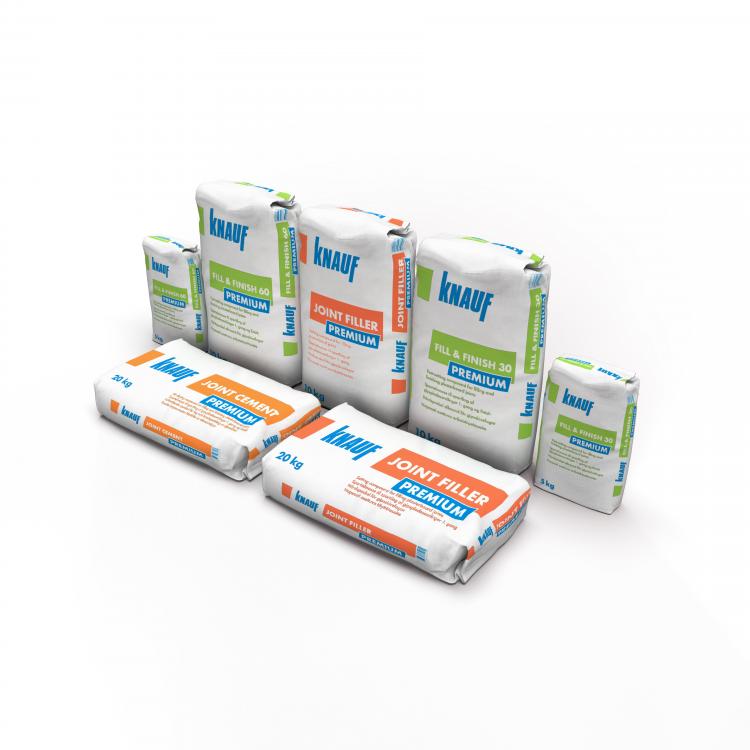
-
30 mile round trip...I should say so!
-
I think my TileTracker type attempt with the angle iron was a failure overall! It leaves big snots of adhesive: In getting them off I've damaged the tanking. & in some cases the Aqua Panel itself. Of course I'll re-tank it but be left wondering about that line!
-
Help with kitchen renovation/ 1st house.
Onoff replied to zoothorn's topic in Bathrooms, Ensuites & Wetrooms
Leave em up! Can't you tell we're all impressed?


