Onoff
-
Posts
21127 -
Joined
-
Last visited
-
Days Won
206
Everything posted by Onoff
-
Lidls do Chateauneuf du Pape for under a tenner...
-
Not sure tbh...it was cheap It plugs into the TV's usb port solely for power. Then plugs into the TV's Ethernet port via the wee lead. So far the phone sees it as a WiFi extender but I can't get it to connect to the internet.
-
Here's a daft question. If you don't have enough "hot" to reach the preset max it just comes out cold?
-
Bought one of these for the old Sony 32". Can't get it going! https://www.ebay.co.uk/itm/300Mbps-Wireless-to-LAN-Adapter-WiFi-Dongle-for-Sony-Smart-TV-Blu-Ray-Player/263491773264?ssPageName=STRK%3AMEBIDX%3AIT&_trksid=p2057872.m2749.l2649
-
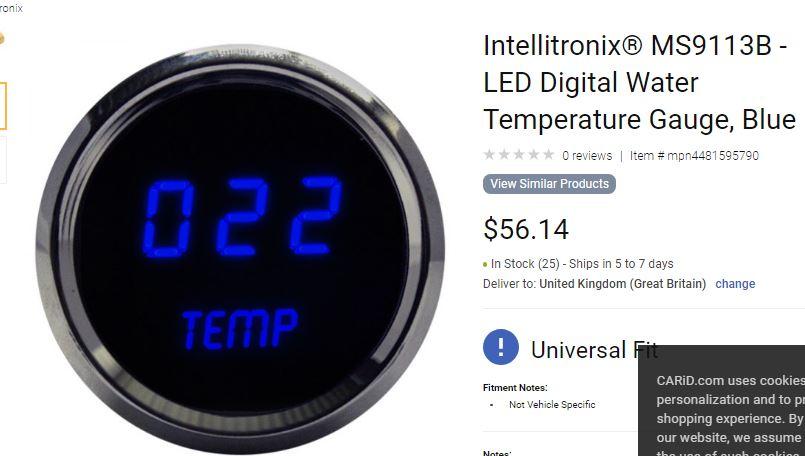
Here I go again... Due to the long pipework runs here at the mo hot water takes an age to arrive even with the pumped shower. I quite fancy a blue LED water temperature gauge set high up on the wall of the mitre: Ideally it'd be very subtle and set in a stainless, IP6* circular bezel. So far I've found this sort of thing. Of course it would only work for the rainfall head as I can't now access the wall outlet pipework:


-
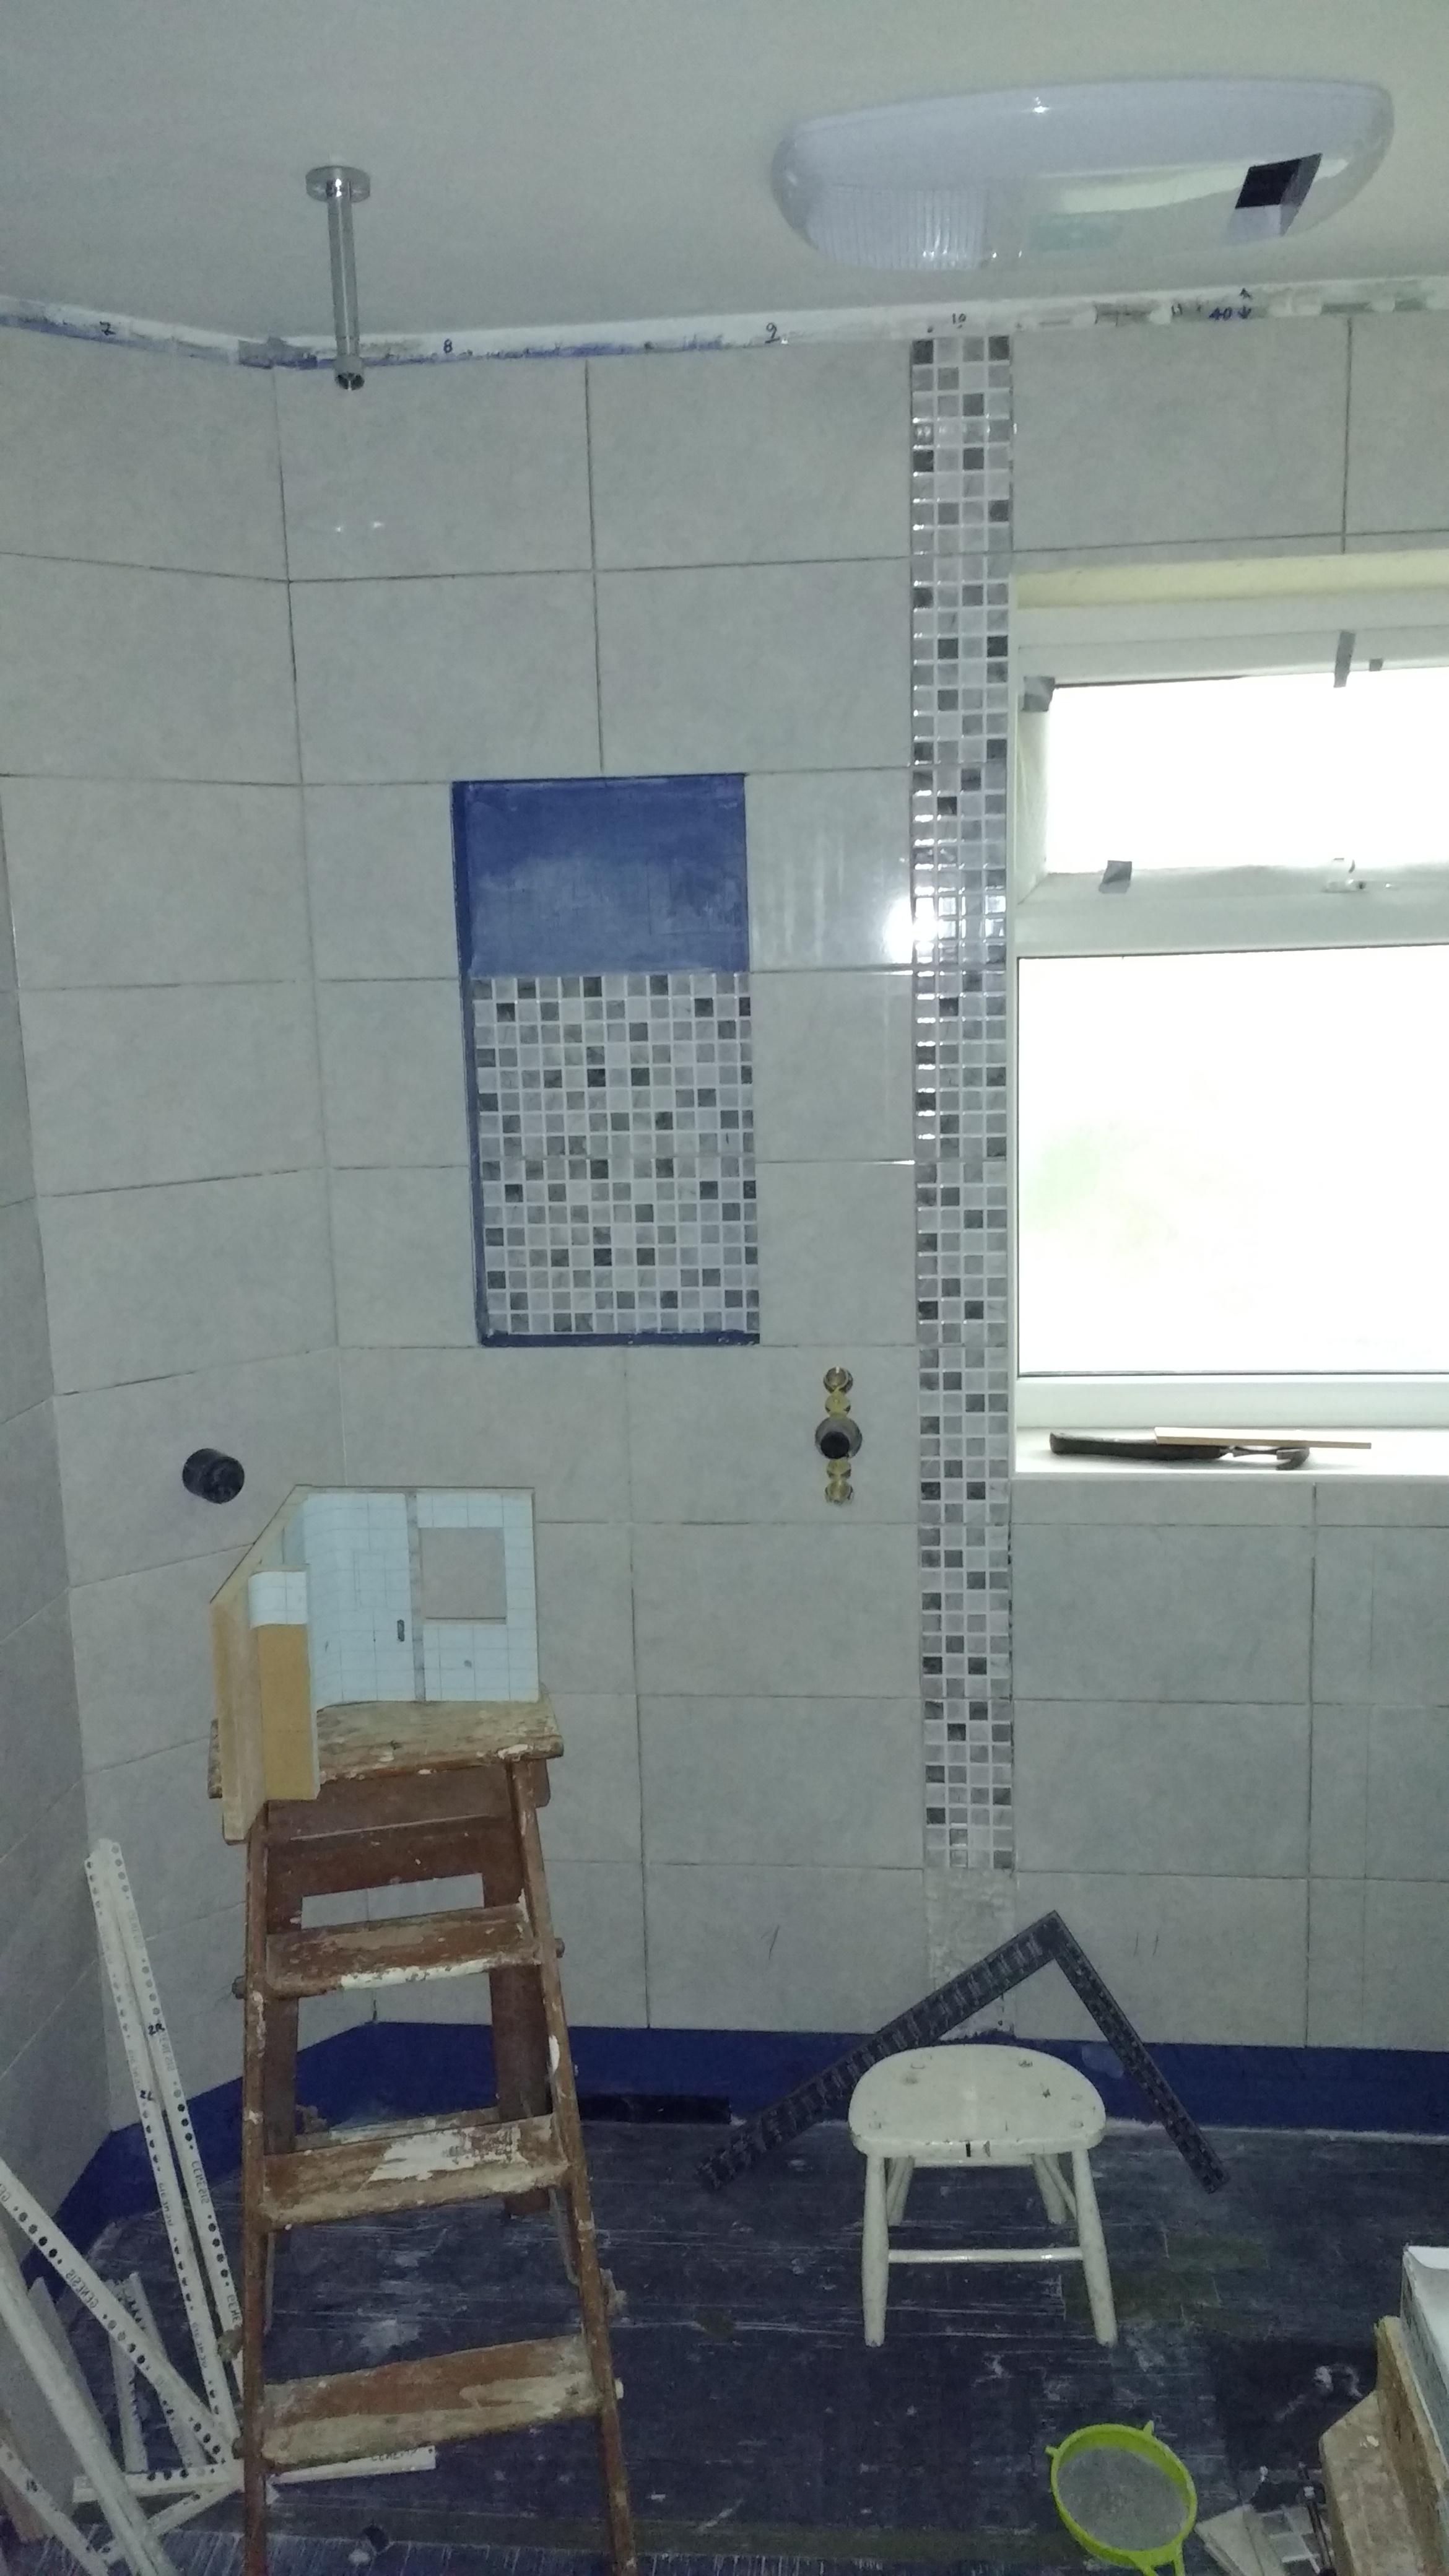
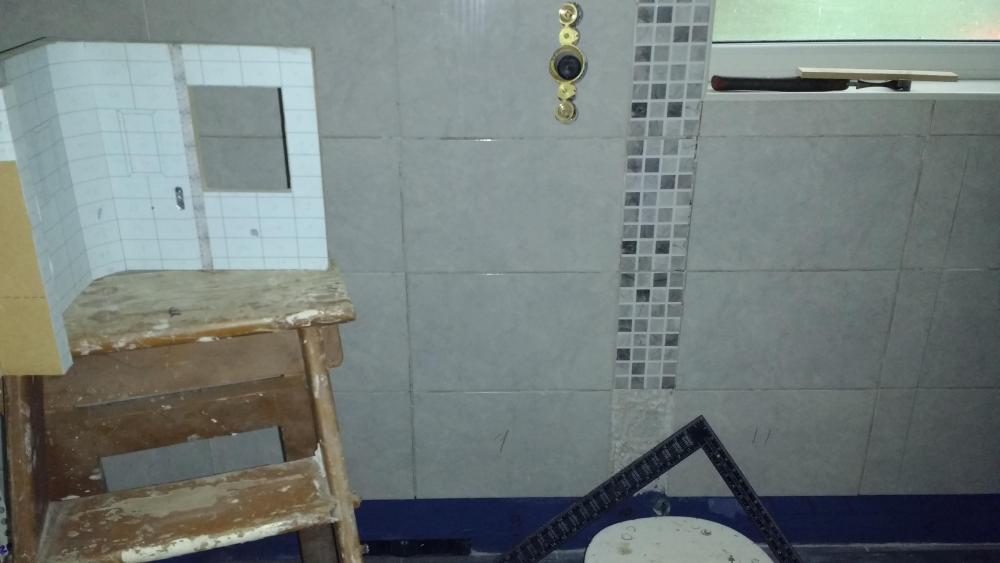
It was bugging me where I went wrong to end up with pissy little rips up by the ceiling. After all the model I made showed reasonable width cut tiles top and bottom. The culprit I thought was the shower mixer positioning. The model had it on a grout line but I put it in the middle of a tile. But no, that wasn't the issue. Decent tile size at the floor and 4 full tiles up to the pocket. So then I'm thinking some form of accumulative error. Not that either... The culprit...ME! The floor to ceiling height is nom 2470mm. I made the model 2570mm! 140mm tiles at the top would have looked better than 40mm! Tbh with slight tweaking I could have had a slightly higher pocket, near full tile at the ceiling and near full tile at the base. Also no rip along the window sill. Never mind.
-
@oranjeboom just did it as a retrofit on an existing bungalow so I'll be picking his brain. He's pretty close to me too
-
Don't know, not much on his website. Guessing just does 28mm DG. That's what the two I've fitted latterly are, these just to replace a couple of wooden originals. http://www.collinshomeimprovements.co.uk/
-
One future option is EWI but I only want to do that if I can get pp to change from a hip end roof to gables. Then the whole gable end would be well insulated bringing this window inside the new thermal envelope. Just looking for my IR thermometer now as it happens...
-
"Some say he can hear a ring pull being popped from inside a short haul jet, we just call him the Welsh Wizard!"
-
There'll be a blind and the window will be right above the towel rail at least. Not forgetting virtually directly underneath the body dryer!
-
I WAS going to take the window out and set it back in further a little while ago. "THEY" all said not to on here! Replacement glass is an option. I use a local guy. Offers nitrogen filled too I think. Just a pitta to take out the beads, measure, wait for him to make it etc. Thinking easier if going to all that trouble to get a 3G one and set it back in further.
-
I worried over that too but no, its as solid as a rock. Backed up anyway by the line of pb screws that attach the insulated pb at the top, bottom and sides into the stud frame then the rear of the pb is stuck to the window frame with EBT. The dpm was lightly scuffed up a bit first with wet 'n dry and cleaned with Multisolve. Spray adhesive on the old (gloss?) painted reveals and dpm then stuck and smoothed out. Lines of EBT on the face of the dpm and the "pir" side of the pb stuck to that, braced to let dry. Idea was as a vcl and draught proofing measure. Tbh that has worked as has the vcl over the studwork wall pre the Aqua Panel and mrpb. All this though focuses the cold spots like the empty wall drain trap and bfo square of cold glass! It's funny as I grew up when "double glazing" came in (White Gold on Netflix is worth a watch btw). Back then early adopters were seen as proper posh! Tbh it probably wasn't that good and the fitting left a lot to be desired. Fitters on a price, super quick at putting them in and no foam or Compriband. All the DG windows here are "gappy" like that except the two I've personally put in and the window above I've addressed.
-
They'll stay on when I'm happy with them. Until then I'm just practising! 2 hours later you could have finished the tiling for me as well as sort her ST!
-
All off!
-
This is where I am with the bathroom window reveal: Cast your minds back: The generic 2G window is fixed in the outer leaf of a traditional cavity wall. This is the original window. Tbh it's in very good condition but (only 'cos of this place ) I'm beginning to question it's insulating properties! The fitting was atrocious. Huge gaps all round, as in near 1" at the top. Similar underneath. The gaps were just covered up with upvc trim. So I Soudal foamed all 4 sides: The cavity closers appear to be sheet steel: In the 60mm cavity I foam gunned in 50mm chunk of eps: Then cut flush and tidied everything to a level with a skin of mortar. I lined all 4 sides with overlapping dpm attached by spray adhesive: Then Sikaflexed 27mm insulated pb to all 4 sides. Note a good thick line against the window that the insulated pb pushed up against. So why, no when I stand near the window reveal does that area feel "cold"? Not a draught per se though a thermal imaging camera might tell a different story. It's just like the whole of the reveal feels like a cooler area of air. Going to check the fan light rubber seals for a start. Am i maybe just feeling it as the walls either side have a vcl and are filled with pir Cheers
-
Clear CT1 used to stick this trim on this time. FAR easier and forgiving for a novice like me than mitre bond! I'm ripping all the ones I did with that off and redoing! Apply a bead: It all squidges out as you press to fit and get the best line aka disguise your slightly wobbly edge. Seems to achieve just the right tackiness to let you position it and it stay there: Clean up with copious amounts of the cheapest baby wipes:
-

Help with kitchen renovation/ 1st house.
Onoff replied to zoothorn's topic in Bathrooms, Ensuites & Wetrooms
Just make sure you tape the joints and whack whatever on. Worst happens you get hairline cracks but the paint will fill it. Tbh the Gyprob EasiFill is very "easy" to sand. -
Asphalt...
-
Help with kitchen renovation/ 1st house.
Onoff replied to zoothorn's topic in Bathrooms, Ensuites & Wetrooms
First one I guess as it says for joints without specifically being "jointing compound". Don't blame me if it doesn't work! I've have as an aside used the small boxes of Bartoline powder before for small patch repairs. Good stuff. -
Got a Wilkinsons nearby? https://www.wilko.com/en-uk/wilko-stainless-steel-scourers-6pk/p/0178483
-
Asphalt to "park" on is a harder beast quite different from roofing asphalt. Look up Polymer/Permapark, Maybe these people: PERMANITE LIMITED Cawdor Quarry Matlock Derbyshire DE4 2JH Tel No.: 01629 580 363 Fax No: 01629 760 993
-
Mice can distend their skulls I think and get through hole the diameter of a pencil. It's why the openings in the brown/white, round jbs are the size they are. It's probably munched through the vcl. When and if it does die you'll know how airtight things are by the smell Still alive I'd guess it's found a way in/out so is living there now. It'll be dragging all sorts of food scraps, small prey in. I found snail shells when I lifted the floor of the dormer upstairs, right in the centre of the bungalow. Squirrels btw have their own pungent, slightly acidic smell. Not nearly as unpleasant as RAT.....unless it dies!
-
Wot I said wasn't it?
-
Does that include the new roof? It'll be another "gut it" job right back to the studs/joists. Get rid of the Artex ceilings, 9.5mm pb walls, hit & miss roll insulation and standard 18mm chipboard flooring. Geberit wall mount frame already got plus no learning curve on that at least! Going to have a nice tray too and make the shower bigger.