Onoff
-
Posts
21126 -
Joined
-
Last visited
-
Days Won
206
Everything posted by Onoff
-

Back boxes and noggins (these are a few of my favourite things)
Onoff replied to ToughButterCup's topic in Electrics - Other
I thought you specifically WANTED to use metal back boxes! You'll love my anal approach to fitting pb boxes! I NEVER use a Stanley knife to do the bulk hacking. Multi tool now rather than the padsaw. Gives lovely neat hole. I wrap tape around the blade to the depth of the pb. When cut I neat pva the cut, exposed edge of the hole and allow to dry. Imo it reinforces the edge. Tbh nobody trying to make a living at it would do that! -
Back boxes and noggins (these are a few of my favourite things)
Onoff replied to ToughButterCup's topic in Electrics - Other
Seems a reasonable link if you're wondering about prescribed zones for cables: https://www.flameport.com/wiring_regulations/BS7671_selected_subjects/zones_concealed_cables.cs4 -
Back boxes and noggins (these are a few of my favourite things)
Onoff replied to ToughButterCup's topic in Electrics - Other
Seen before a fairly thin "socket noggin" with a socket either side, one in each room. Imo a crap idea as in noise and fire transmission route... Are these internal walls? You could go mad and run pvc conduit to save pushing aside insulation later...20mm round pokes nicely into a back box knockout with no need for a grommet. -
Back boxes and noggins (these are a few of my favourite things)
Onoff replied to ToughButterCup's topic in Electrics - Other
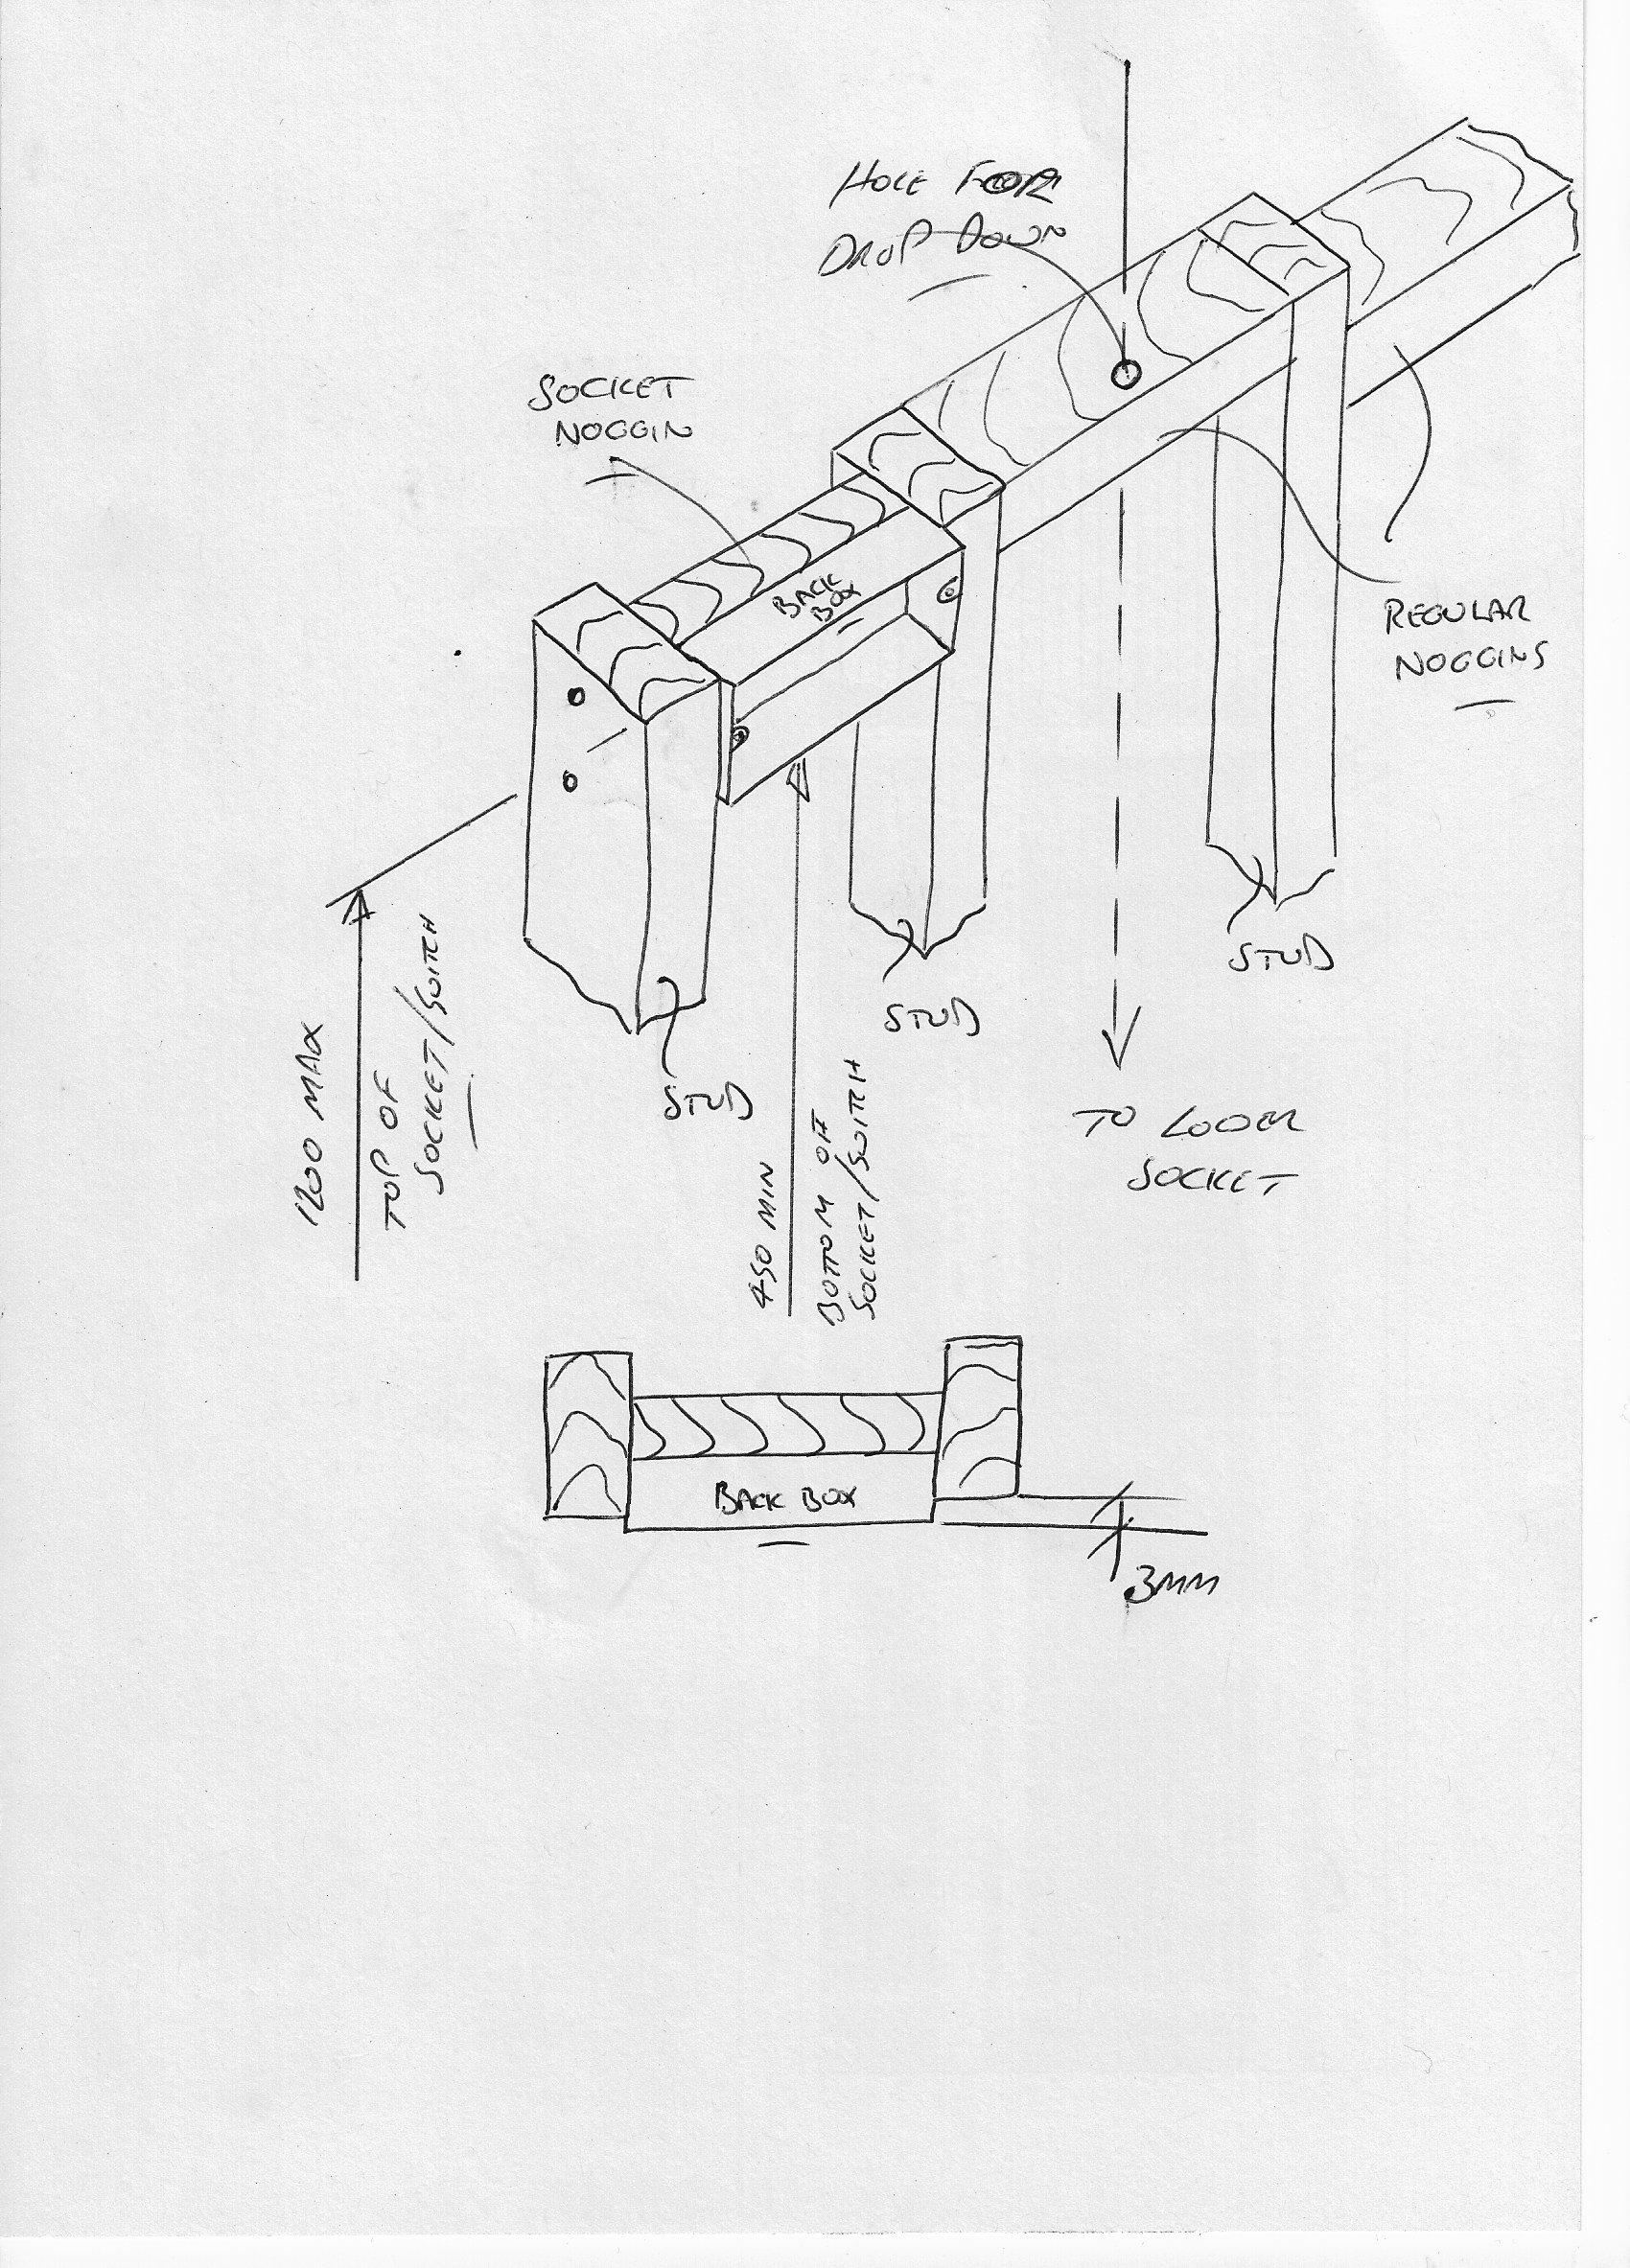
Don't know how you're doing your noggins...staggered? You can do on these lines: If fitting pb vertically you don't have to worry about the boards ending halfway over a noggin. Drill drop down holes in noggins if you think you might want lower (or higher) sockets in the future. If you think you won't how about say a high level socket for a wall mount tv later etc. Same going horizontal if you want. If filling stud with fluffy insulation you can still pretty easily thread cables through at a later date if you want an extra socket.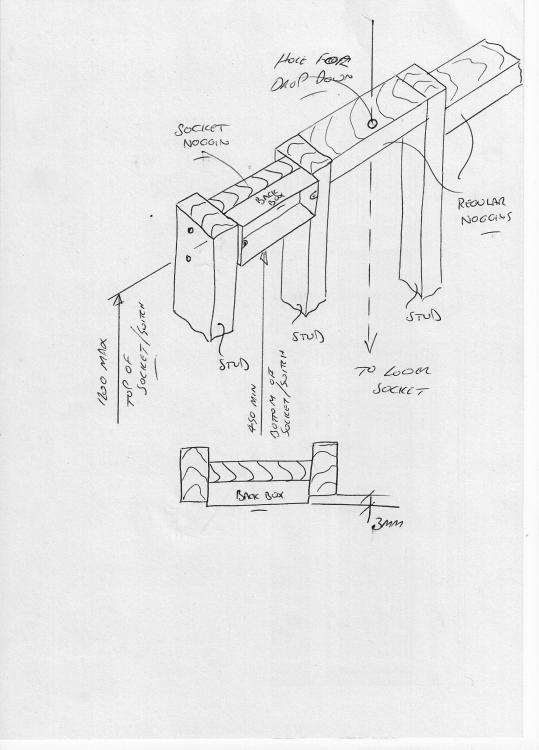
-
Cricket, rounders?
-
PM'd
-
Grand Designs at Graven Hill starts tonight on Channel 4
Onoff replied to ProDave's topic in Property TV Programmes
And that fella worked so hard his diabetes went into remission! -
@pocster, I've just got a 15% off £500 code for Screwfix if you want it.
-
Welcome @eekoh! I imagine you're aware of this story: So...if someone had unidentified droppings could you identify them?

-
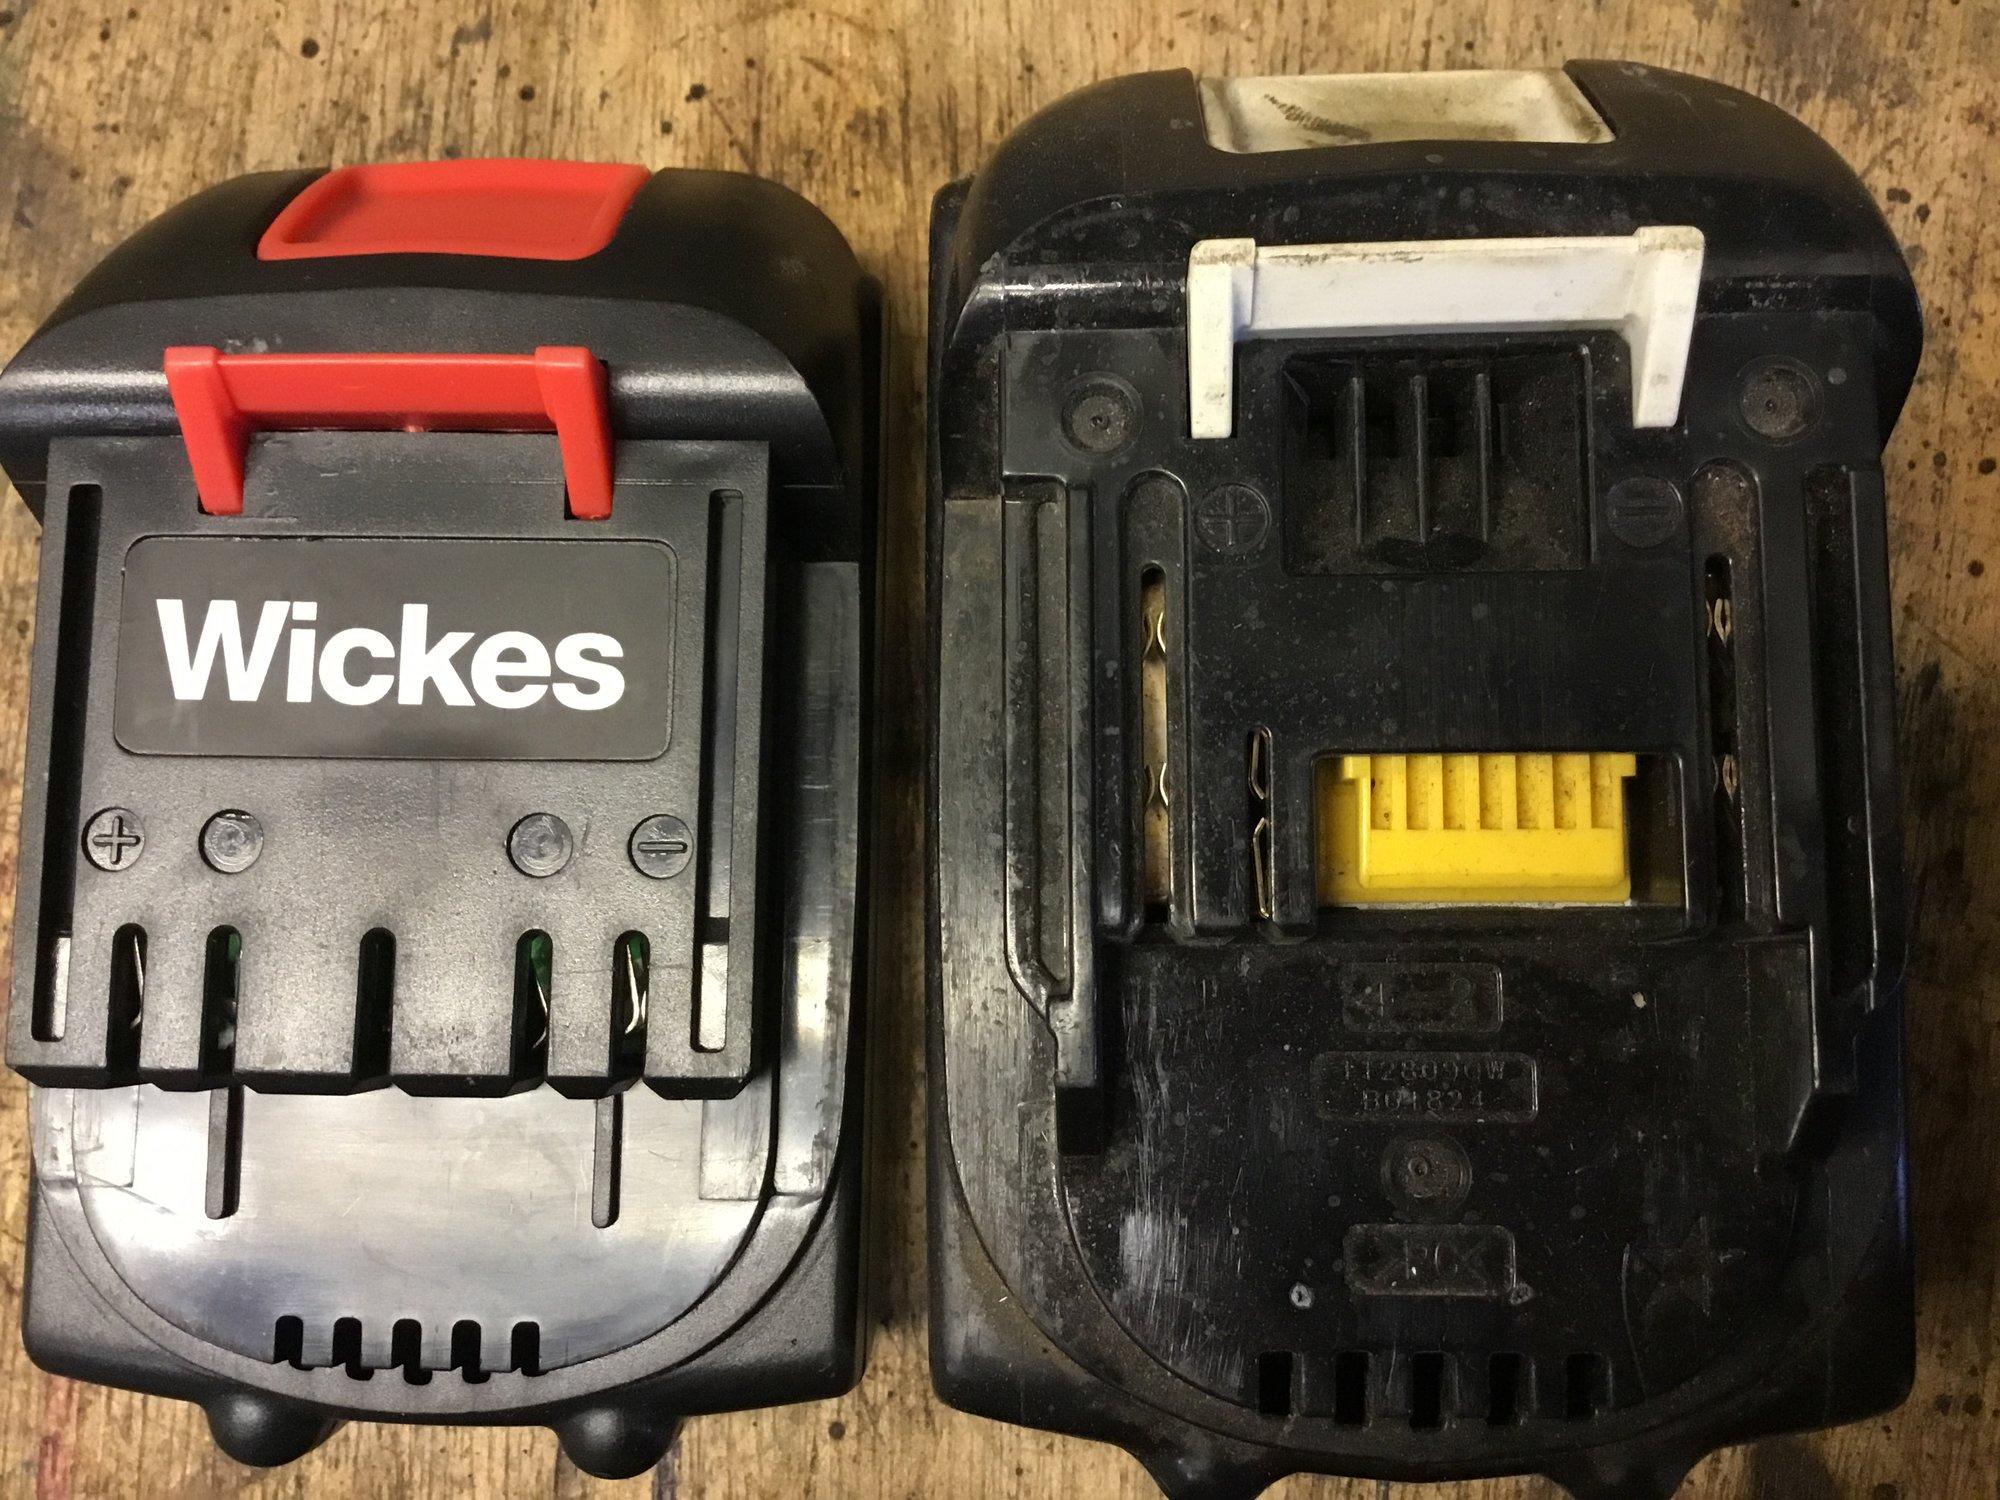
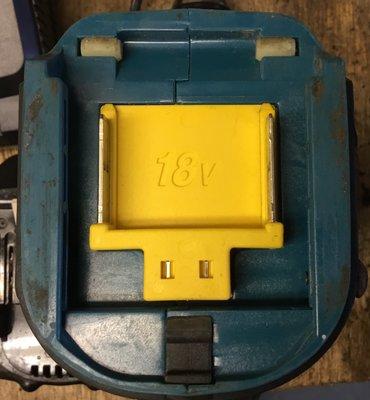
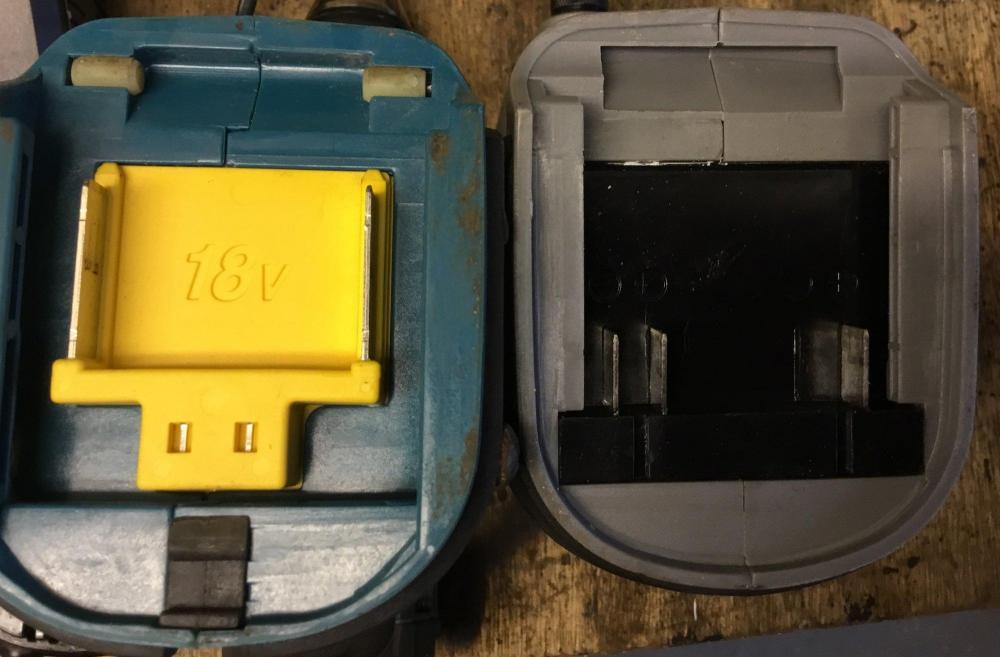
Interesting, found on another forum: "However, I notice that my Wickes el cheapo batteries almost fit. The prongs are the right width apart, the holding grooves interphase, just the metal prongs seem a bit too long and need 10mm trimming off. But they work when loosely wedged in.And the Makita only have two prongs/contacts, instead of three the Wickes has. It it almost like they were designed in the same factory then sent in different directions". He goes on: "Both batteries have three connections, the Makita tool has two connections, Wickes has three, but when I plug the Wickes battery into the Makita drill it works perfectly.I think I could trim the Wickes battery terminals 1/2” and resurrect my far superior Makita drill and driver. £50 Wickes set, versus £350 for the Makita combo.Not sure how much a couple of spare Wickes batteries would be".

-
I too did similar taking blue DPM a metre up the two external walls as my picture above. This sits behind the (again blue) DPM that's under the PIR. The window wall was damp as the outside path was above the dpc and the original bathroom floor was on or at the dpc of the internal leaf. I figured any damp getting behind the wall DPM would go straight down and stay under/behind the DPM under the pir.
-
Sorry, didn't realise you were having one. Think you're right.
-
You want a perimeter expansion strip too I think? I used Polypipe panels instead of an actual sheet of DPM to both isolate the foil from the screed (wet concrete in my case) and to clip the pipes to. .
-
You just beat me to it, I wasn't sure of the spelling.
-
Grindr more like! ?
-
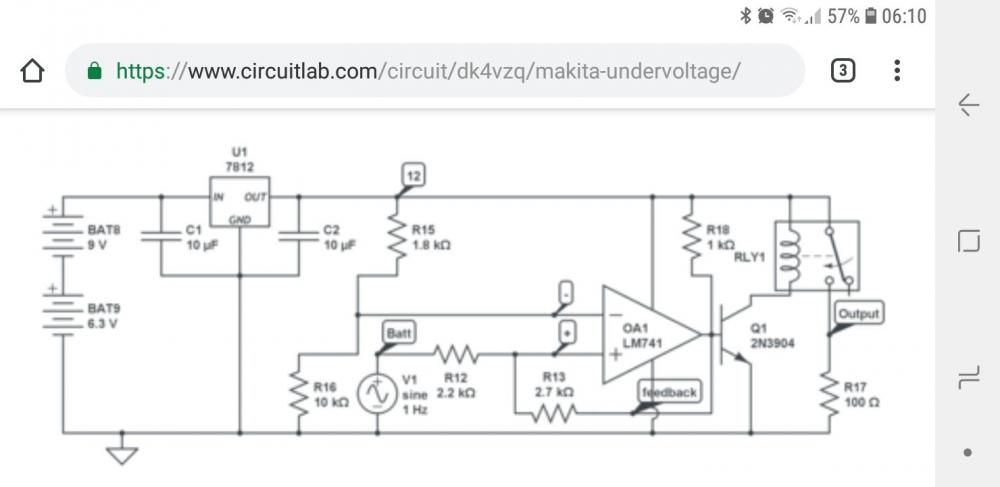
Thanks. Yes I thought the 741 opamp was old/odd. Pretty sure I made an audio mixer years back eschewing the noisier 741 for a CA4032. Something from an R A Penfold book I think. Used to love him and F G Rayer. I was always building something as a kid.
-
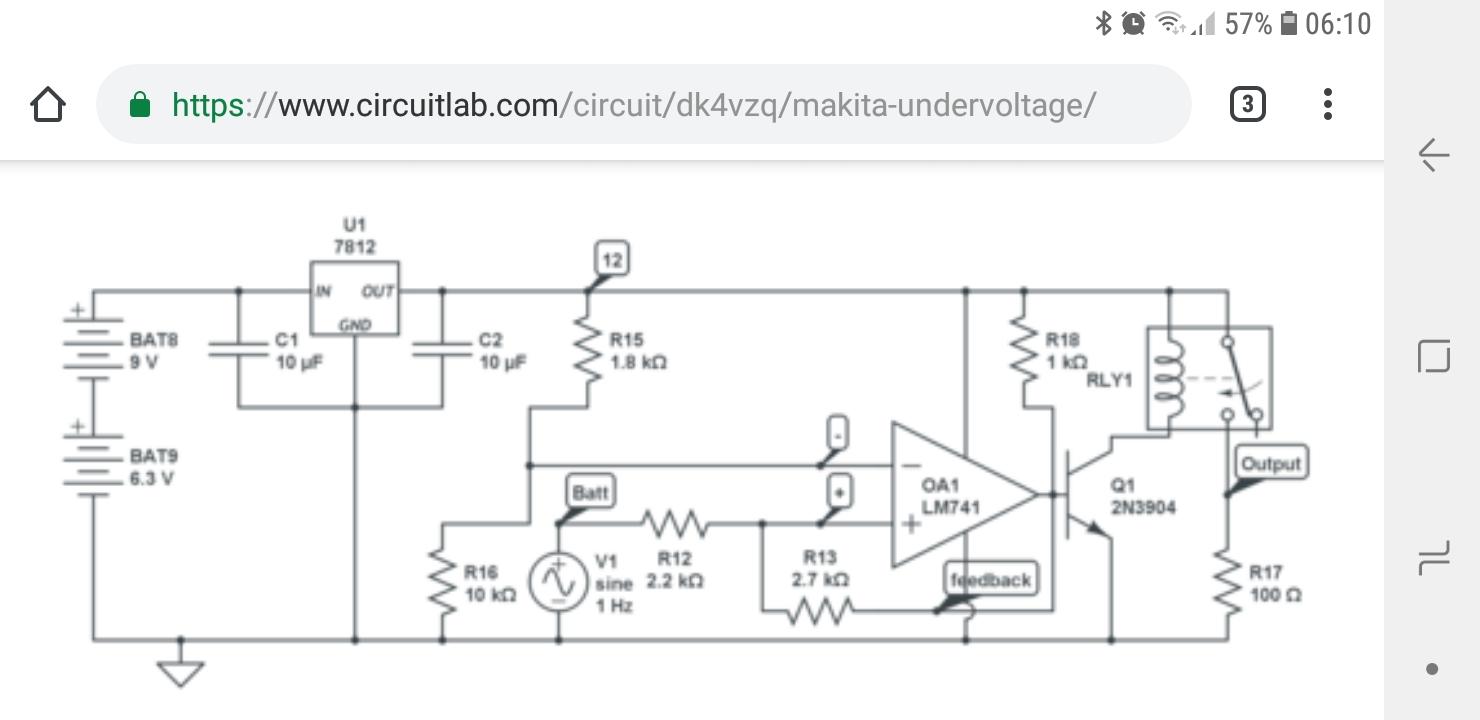
Thanks for that. So what are the 9 & 6.3V cells on the left? Is that the Li-Ion pack itself? Why not 18V if so? V1 is the drill motor?
-
Came across this: http://bl1830-failureprevention.blogspot.com/2013/07/makita-radio-1-cause-of-battery-failure.html?m=1 His Advanced Solution #4 is for installing an undervoltage switch to protect from over discharge. Here's the circuit: https://www.circuitlab.com/circuit/dk4vzq/makita-undervoltage/ Can't say I understand the circuit...the cells on the left...are these the battery cells? Figuring this could easily be built into the space where the old battery slotted in?
-
Looking at my two Makita cordless hammer drills they just have two "tangs" that attach to the battery + & -. The Makita impact driver though has a third tang that engages with the "TH" terminal on the battery. The impact driver also is the only one of the three with the ⭐ symbol.
-
I bought I think it was 16000 45mm collated nails cheap when I did my fence. Don't think I'll ever have to buy any more! Wish I could fix my 90mm air nailer. Even got an overhaul / seal kit from the States to no avail.
-
Just reading on another forum someone tried two, good, genuine Makita batteries on their 18V B&D hedge trimmer. Polarity correct but nothing happened. Thereafter both batteries showed up faulty on the charger. Oh!
-
To make it look posh 'n chromed!
-
You could always wrap it in tin foil...
-
All the T&G chipboard flooring upstairs here was put down with angular ring nails. OMG the noise / squeaks! Whenever I've had carpet up I've tried to cure with Spax floorboard screws.