Onoff
-
Posts
21126 -
Joined
-
Last visited
-
Days Won
206
Everything posted by Onoff
-
No just this one.
-
I suggested battens with 50mm pir in between then mrpb over the top. Would bring the main wall out by about 65mm. He's worried though this would put the bath too close to the rad valve: I therefore suggested maybe raking the bath panel in at the bottom like I've done on mine. Got to admit I'd be taking that ceiling down to see if it's wet from the flat roof above.
-
I only did the perimeter dpc as my walls were rough. Go with the vcl I would.
-
Latchways are sh!t loads of money. All 316 stainless steel. I should know, my firm is a Class 1 Installer. Looks the mutt's nuts if done well. Originally designed to go around the perimeter of yachts etc. Weightanka with a suitable retractable fall restraint system might be an option. You have to ensure you can clip on from a point of safety. Think also of the arc of swing if you were say fully deployed at the max length and fell off the short edge of the roof...pendulum time! Fall restraint is the way to go NOT fall arrest. If you fell off the side of the 3m drop with an arrest lanyard on you'd likely hit the deck before it had fully deployed. Then there's rescue plans, suspension trauma etc to consider.
-
Half a serious question... Would they work in an internal situation? As in in a floor and as part of a wood floor...with UFH in that floor. Keep half thinking of displaying SWMBO's late cousin's fossils ever since I saw similar in the walls of the Natural History Museum. However...a constant reminder of loss...visions of grandchildren going headfirst onto them...are they slippery? Tbh I think they would look better in a hall...
-
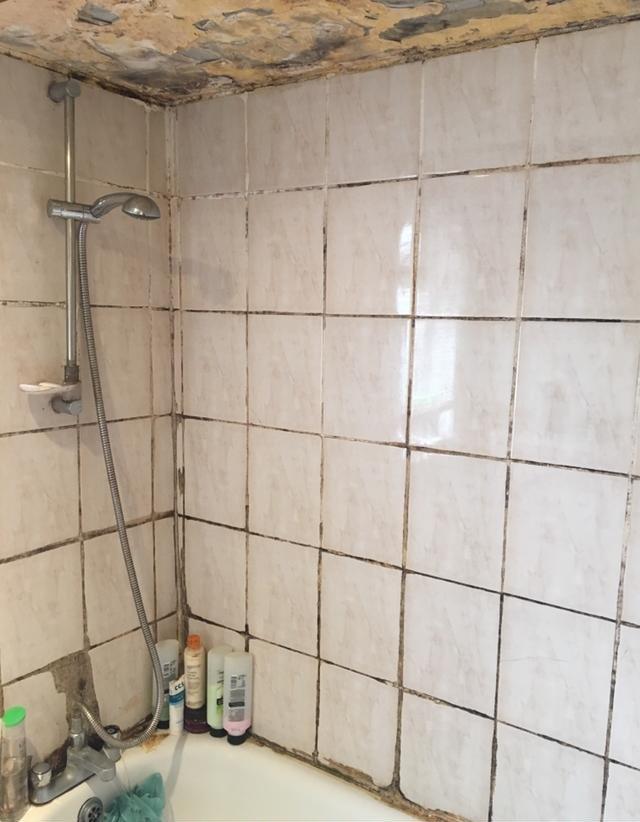
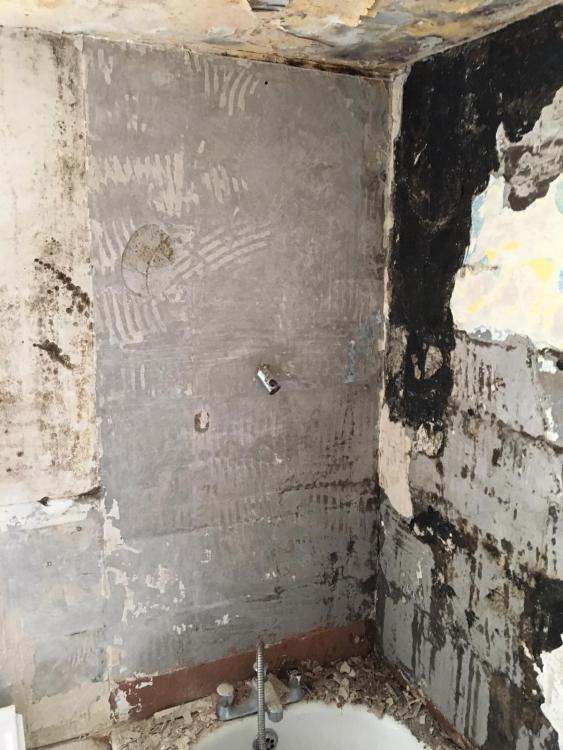
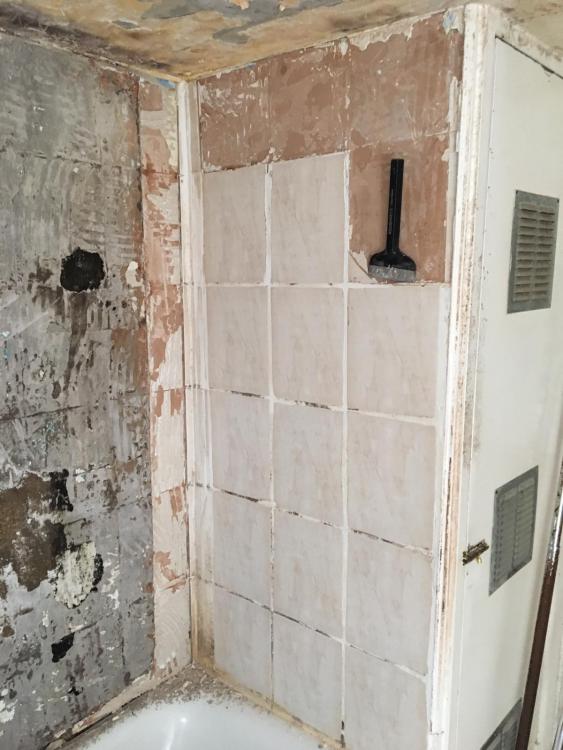
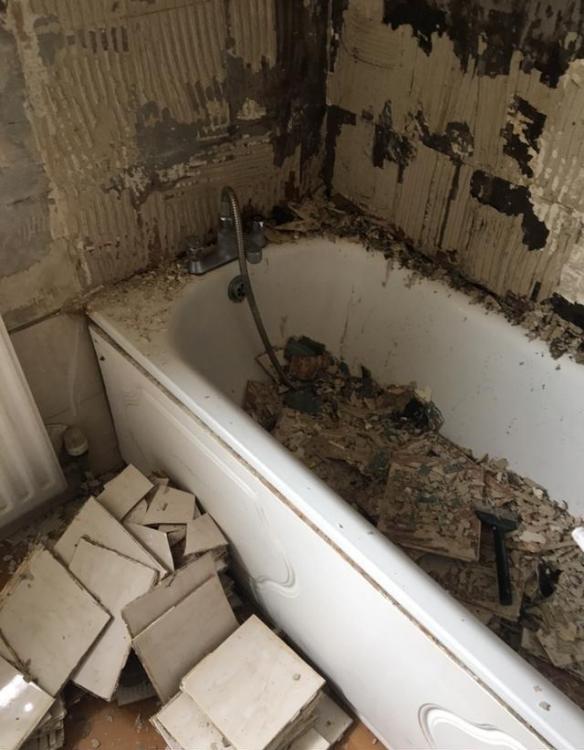
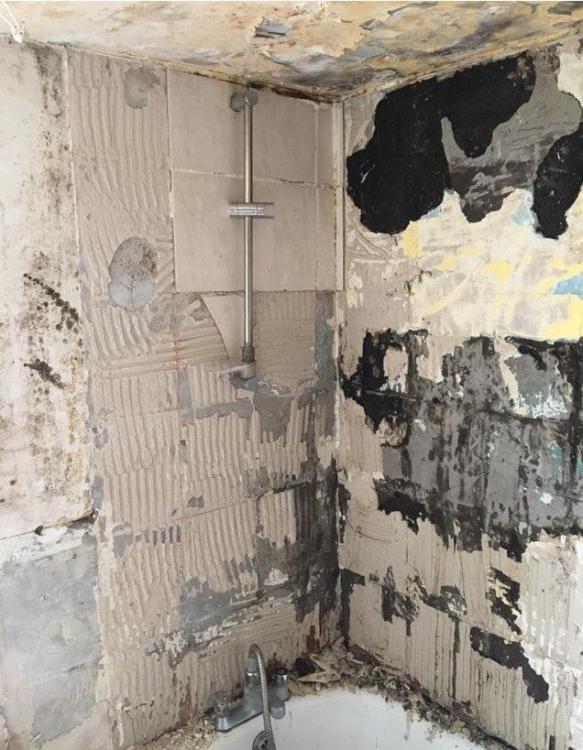
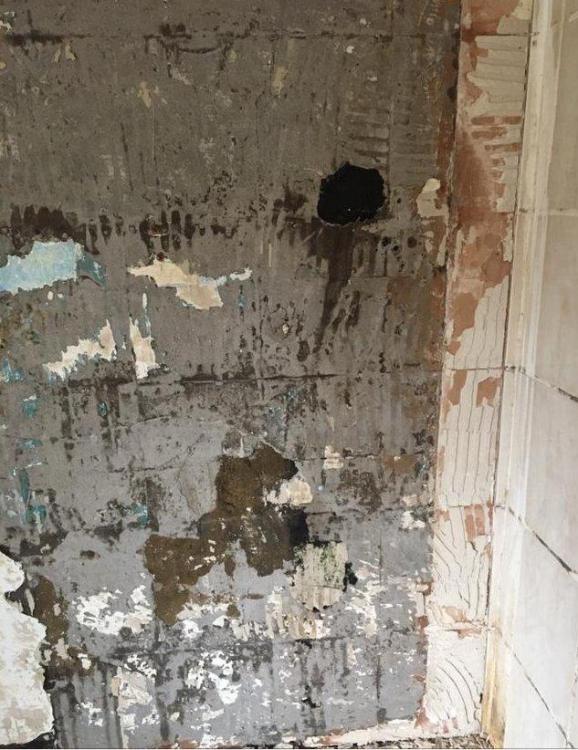
VIDEO of the fan, clearly not mvhr! Guess is they shower and some in the house, not all, just don't bother to switch it on. There's the left hand wall where the shower riser is and taps below. Tiles are stuck pretty fast here except the ones low down by the taps. This is a VIDEO of the main wall over the bath: Then the right hand wall, tiles are stuck fast. If it's brick outside and blocks on the inner leaf my guess is the damp and tiles lifting issue is purely down to lack of ventilation and the constant spray on that wall over the years. What in the way of insulation could he line that wall with? Battens and 50mm pir like I've done?
-
Spiral stairs?
-
Looks good to me. Thinking about it...On two previously damp walls (external path higher than dpc) I just ran a metre high piece of blue DPM a metre up the walls. I then put the stud wall in front of that. VCL (green) went on face of studs.
-
I hereby give up the @onoffcrownfor makingitupasyougoalong to @pocster! ????????????????
-
That's what I was thinking. Tbh my dpm comes up and is glued to the face of the studs. The face of the studs is then covered in vcl and joined to the dpm that comes up. All to make it draught free as possible.
-
As it stands you've no insulation as I see it at the slab edge? Think I'd bring one of those upstand pieces up to the screed height. What is it, 50mm? You could lose that pretty much with the plaster board and skirting and have the flooring just oversail the edge maybe...
-
Similar to what I did then. I spaced all my timber off the wall by a minimum of a 5mm pack and gun foamed the gap behind as a token against cold bridging through the timber. I think your pir upstand wants to come up to the finished screed height. The upstand limits heat leeching through the slab edge as well as guarding against expansion when the slab heats up, to stop it pushing against the walls. Not sure if pir on its own is good for that. I used a corrugated cardboard/eps sandwich against the upstand. Others favour like a rubbery foam strip. The cleverer brigade will be along shortly.
-
Does that wall pir continue down behind the horizontal timber? Ideally you want no gap / a continuation between floor pir and wall pir to avoid cold bridging.
-

How to quieten a fridge freezer in an open-plan living room?
Onoff replied to Dreadnaught's topic in Sound Insulation
Search "accoustic foam fire rated". -
How to quieten a fridge freezer in an open-plan living room?
Onoff replied to Dreadnaught's topic in Sound Insulation
£25 vs £400+ here. No contest! Of course it could be coincidental that in moving the freezer in / out from where it was it's gone back more level! -
How to quieten a fridge freezer in an open-plan living room?
Onoff replied to Dreadnaught's topic in Sound Insulation
Ours WAS noisy... then it died. New thermostat sorted it. See my thread. -
Tbh 6 people using this to shower and proper ventilation is a must which is stating the obvious! (Reminds me I must sort out my bathroom venting not that we're using the wet room corner yet. Oddly enough I want to do something "different" ).
-
I believe they have been round and made various promises but nothing's happened. I'd like to think he has written correspondence of it all but likely not. I've a small dehumidifier I can lend him. He reckons the vent unit is a single room MVHR but I have my doubts on that.
-
I'm doing all I can to help him sort it asap without actually going there! Flat roof above the ceiling he's just said. Was asphalt but repaired a while back (and painted silver). Tenant above has potted plants on it, so much it looks like Epping Forest to quote him.
-
Housing assoc. apparenty. Not too good it seems so he's taken it upon himself to sort.
-
Occupied? Him the missus & 4 daughters currently using this!
-
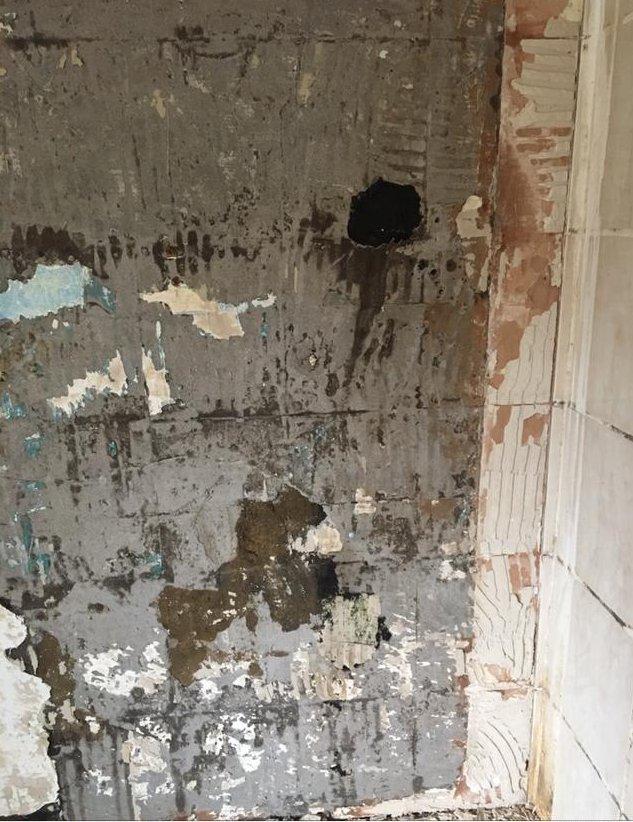
Mate's rented place. He wants to fit a new bath & re-tile. He's stripped the tiles above the bath and reckons there were some hollow tiles and that the blocks behind are damp. First couple of tiles were a bitch to get off, rest more or less fell off. This is an external wall. Brick facade externally. He can't access that to check any mortar joints as a neighbouring glass roof. At this point he doesn't know whether the damp is coming through from outside or has penetrated through the tiles. They do have a shower handset in the bath so this wall (the tiles) get wet. Tbh my money is on the tiles letting water through: He has a working Envirovent in there. Flat roof above that has been repaired. His plan is to overboard. I've told hin to use moisture resistant, (green). Before: With the tiles removed: He's already bought the new tiles & bath. If he hadn't I might have suggested "multipanel" type board. My gut feel is to tank the wall with Everbuild Aquaseal but will it stick to damp walls? Is there anything else he could use? I remember using a liquid dpm from Wickes you applied in two coats. The second one you threw sand at to give a key. Does he need to "stabilise" the walls in any way? One option is that I have an unused tube of Feb Blue Grit he's welcome to. This is made by Everbuild who make Aquaseal tanking membrane and tbh, other than the grit in it the blue liquid element looks and smells the same. At the mo he's just cleared the debris and rigged a temporary shower curtain so they can continue using the shower. Any suggestions for him to move forward. Cheers

-
Good blog entry here ref Icynene:
-
There's a Hell of a lot a waste to trim off level with the timber frame if I recall. Gauging how much the stuff will expand must be nigh on impossible. I did my small shed, well the floor and two walls as a bit of an experiment with cans. Got so bored in the end I did then other walls with EPS.
-
I encased my horizontal 110mm soil pipe in spray foam within the base of the stud wall. Aqua Panel over that then tiles. I was advised here that Rockwool slabs might have been better. End result is more than I could have hoped for, it's silent. Loudest bit is the flushing in the pan. Refill is near silent helped I'm sure by the ex studio acoustic foam tiles I lined where the Geberit frame sits.