Russdl
-
Posts
1733 -
Joined
-
Last visited
-
Days Won
6
Everything posted by Russdl
-
I presume it’s still in its box? Get some rope attached around the box for starters - something to grab hold of when gravity tries to do its thing. My son and I dragged a similar heavy Lusso bath upstairs during the build. We laid scaffold planks on the stairs to make a nice smooth slope and then push/pulled it up, belayed with a rope secured at the top of the stairs. In the photos you posted it doesn’t look like the belaying option is available without trashing your finished walls/carpets, but plenty of muscle as a backstop should work just as well. As we got to the top of the stairs with the bath at a precarious angle we lifted the last two scaffold planks (joined together after the bath had passed) to get the bath horizontal and then slide it sideways onto the landing. Looks like that may not work in your case because of the bannister but you could probably get the bath vertical at the top of your stairs and then with all the muscle around and rope around the box manoeuvre it into the bathroom. Piece of cake!
-
@Selfbuildsarah that went well didn’t it. ~~~ I don’t have a pie chart, but I do know that the pie I envisioned for the whole project wasn’t big enough, fortunately we managed to find enough extra pie to finish off. That doesn’t help does it.
-
It looks like two things going on, it’s got wet at the bottom and soaked it up, as @Brickie says, there should be something other than render for the first 150mm up. The other, and most obvious damage is coming from the water tracking off the slabs down the mortar lines and straight onto the render. You need some kind of drip edge under the slabs to stop the water tracking back to the render (plus the mortar needs to get to the end of the blocks). it looks like there are some weep vents in the wall, do they weep or are they blocked/just for show?
-
How many times a day do you use the kettle? In other words how much is each ‘boil’ costing? No idea what our Quooker cost to run a day producing, on average, 8 or 9 cuppa’s. Perhaps I should monitor it.
-
I guess that’s to the 8/8th not 8/7th?
-
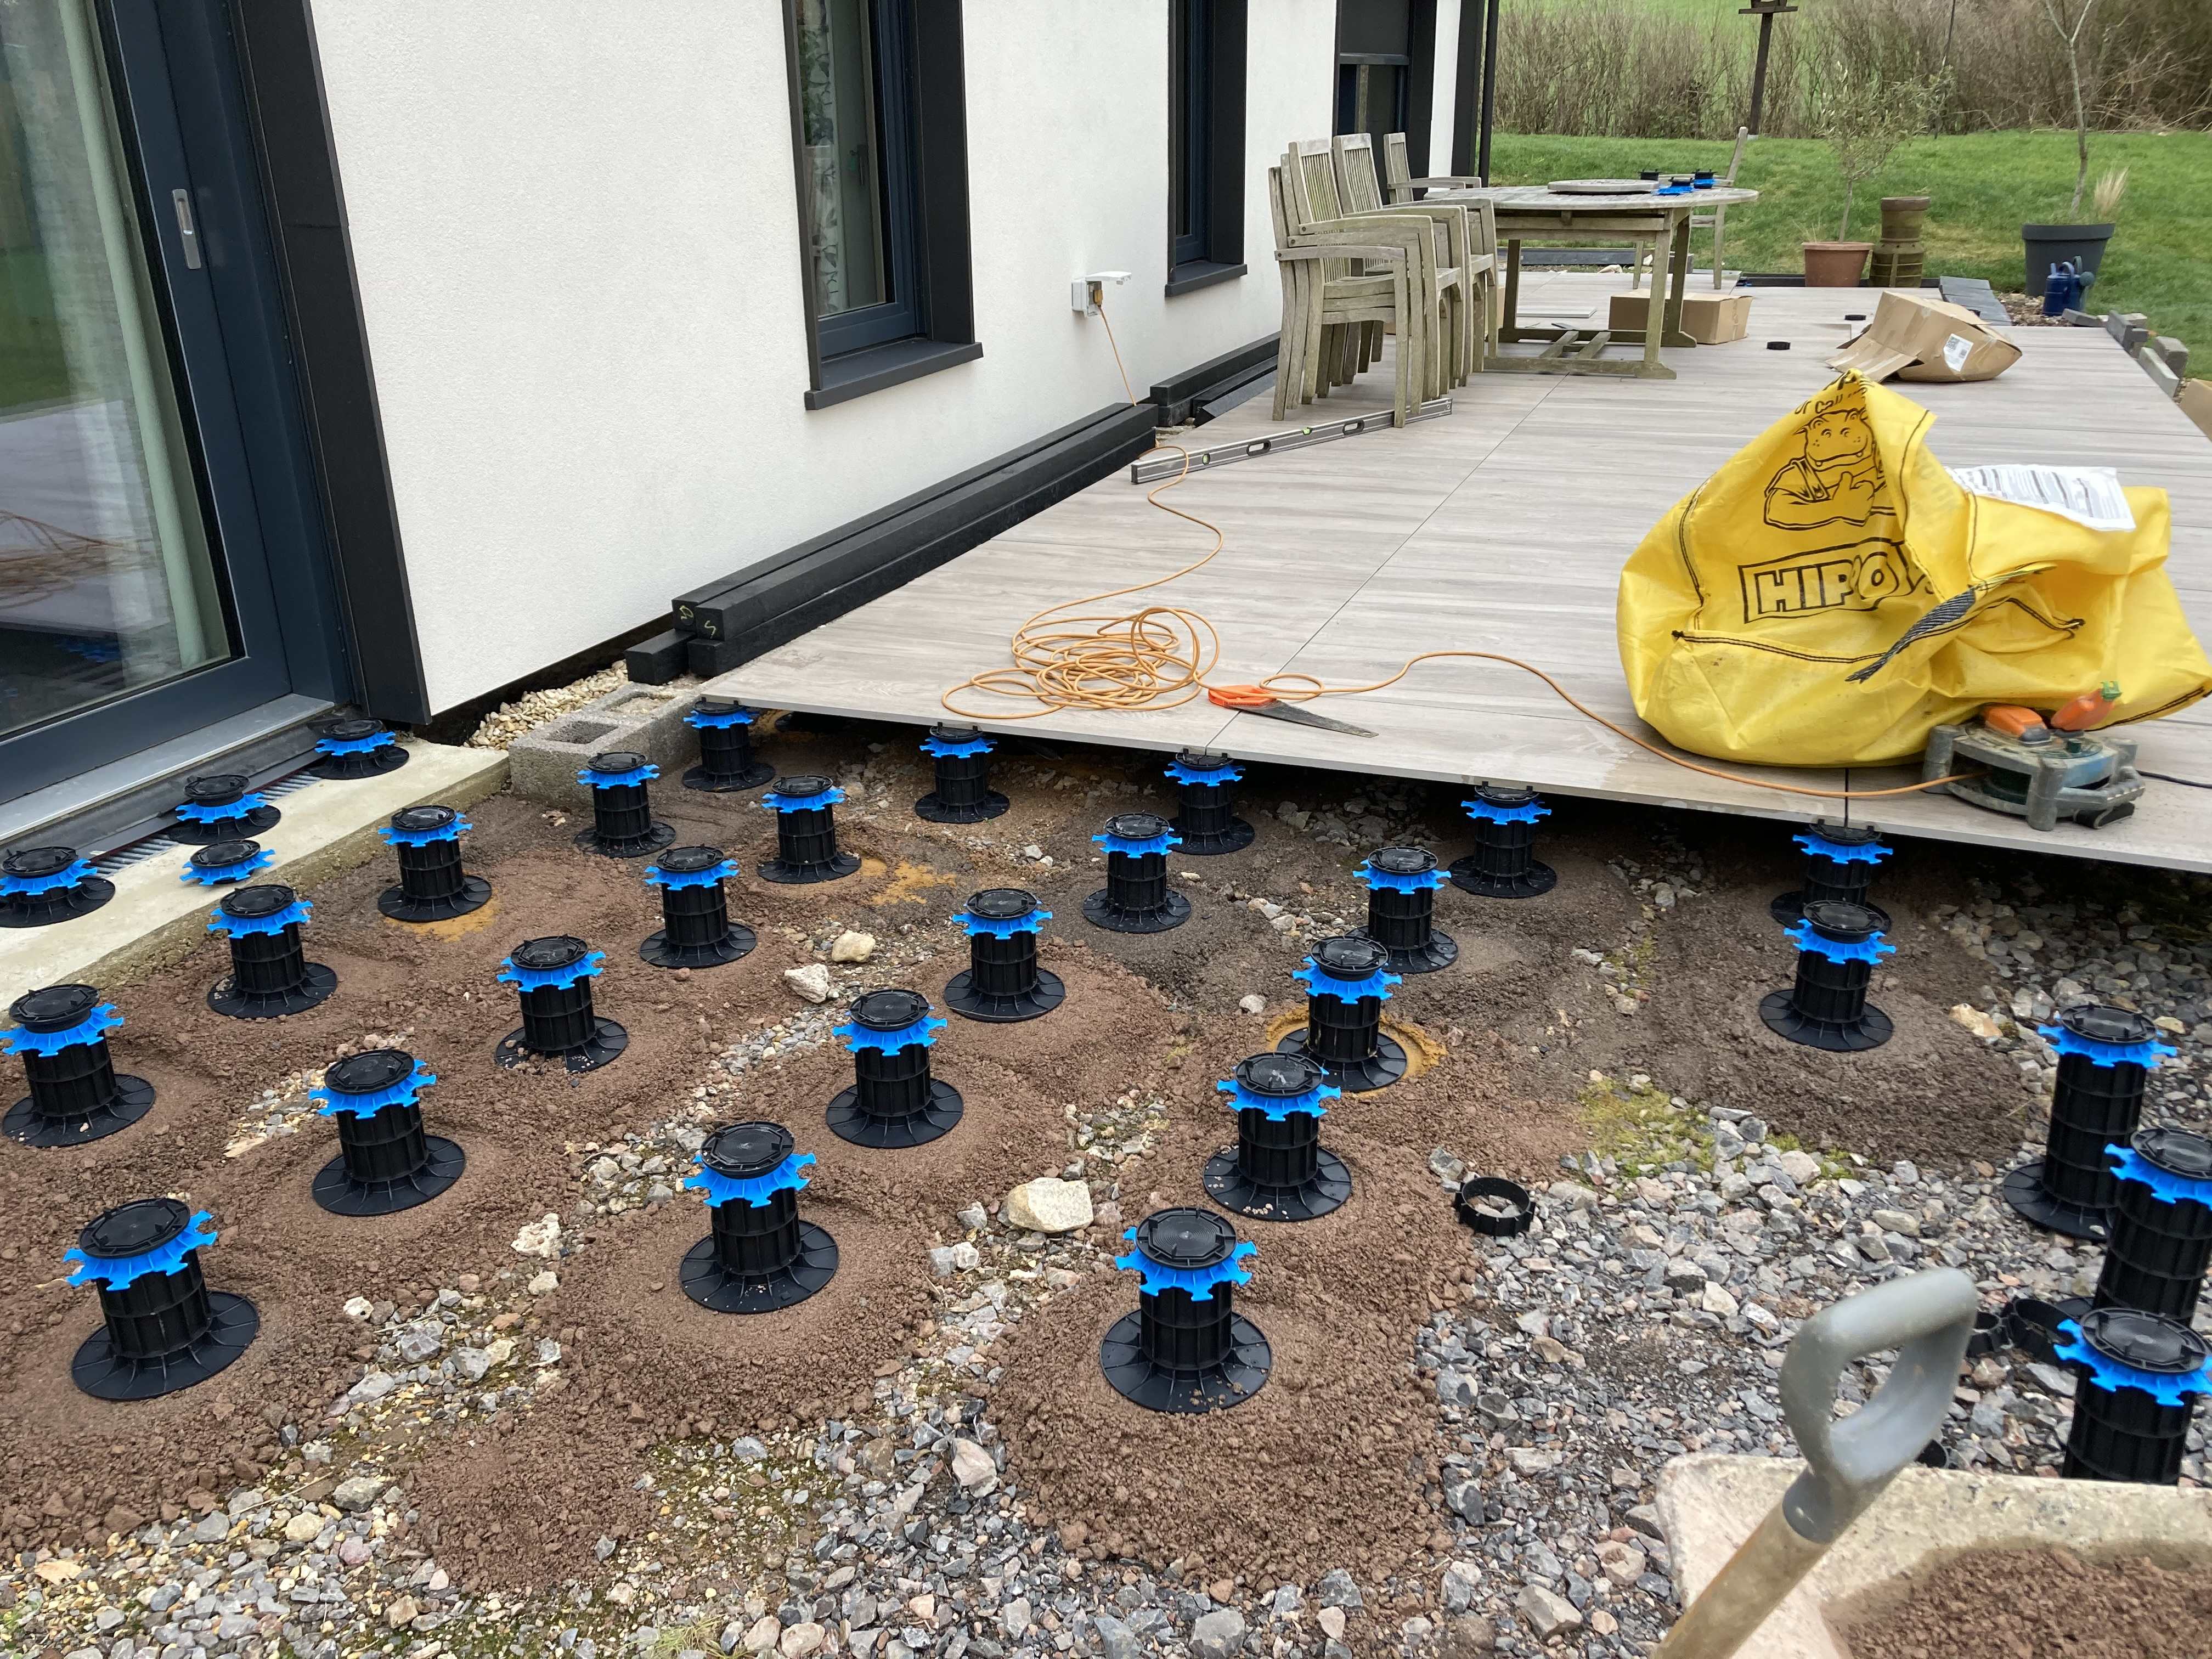
Not much. Here’s ours being put together over a terrible sub base and the finished article from a few years ago.

-
+1 for the pedestal option. I put an ACO drain up against the house and underneath the patio. My pedestals are sat on the ACO and the tiles on top of the pedestals, finishing within 10mm of the window frames. No visible drain.
-
What to do with an old softwood floor?
Russdl replied to Racheljane's topic in Wood & Laminate Flooring
£? -
What to do with an old softwood floor?
Russdl replied to Racheljane's topic in Wood & Laminate Flooring
Is there such a thing that does a decent job? -
As expected, they don’t give them away! As I’ve got some bits and bobs lying around I’ll go with rebuild and if that fails reconsider the pro version.
-
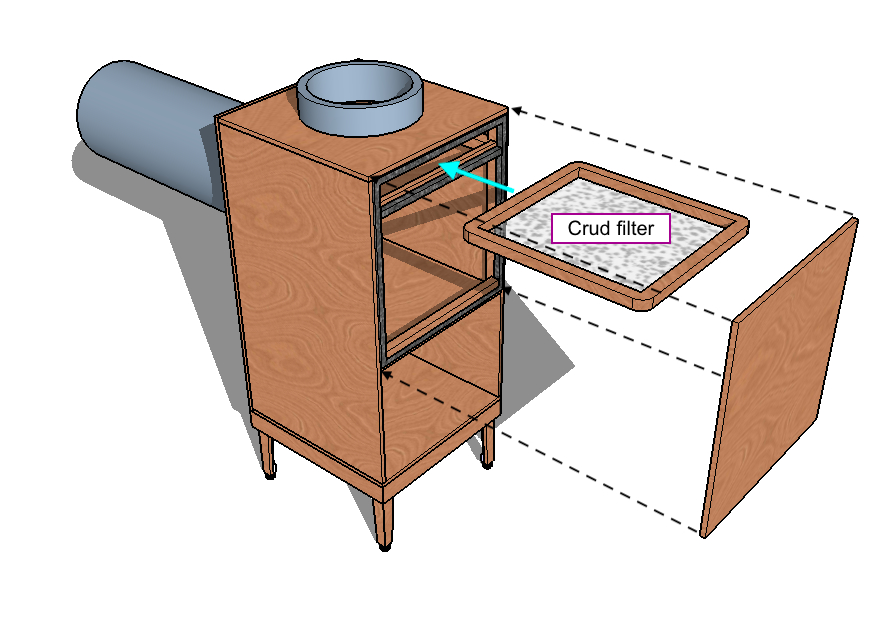
Thanks @Mike, everything was originally built around replacing a 90° bend so that if I screwed it up I could remove my Heath Robinson filter and refit the 90° bend - so the 90° change of flow direction is one of the few certainties. However, I could refit the original 90 and cut out a bit of the straight duct flow for one of those boxes you linked to. I've never seen those before but I suspect they don't give them away - or the filters? I'll take a look.
-
@JohnMo thats interesting, thanks for the link. @Nick Laslett that would prove difficult to get an airtight seal on the current boxes. I was thinking I could do with something like a ply backed PIR - which of course I've now discovered does exist! As I have a sheet of insulation left over from the garage build I think I'll experiment with the local reinforcement idea, or maybe make my own PIR backed plywood sections, or perhaps a combination of the two. What would be the best way of adhering foil backed insulation to plywood?
-
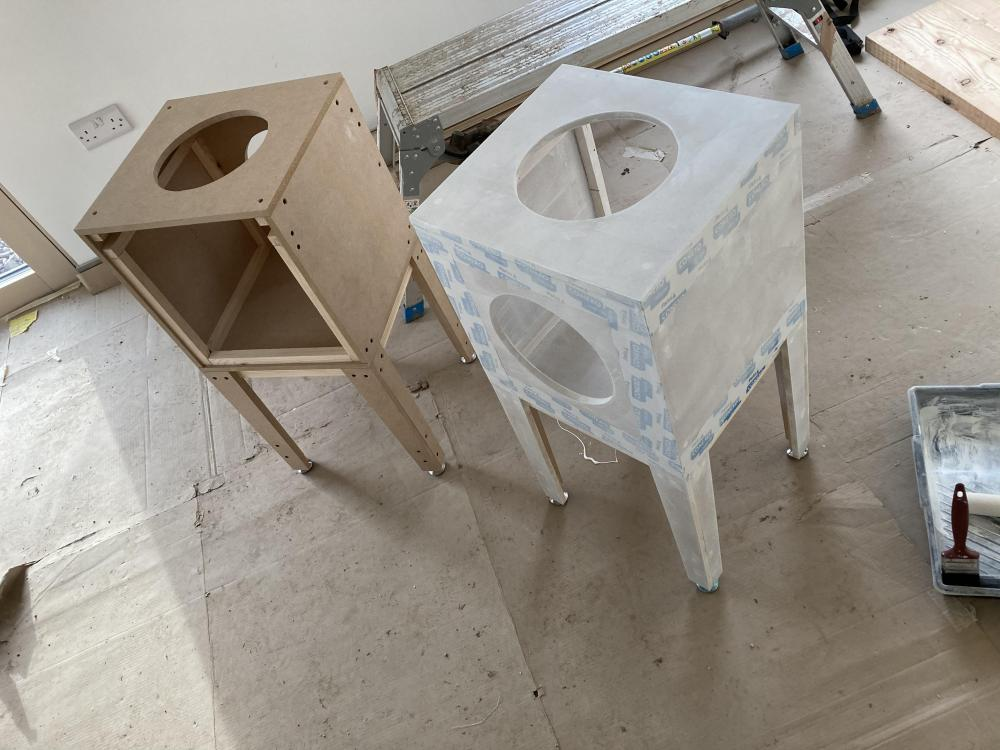
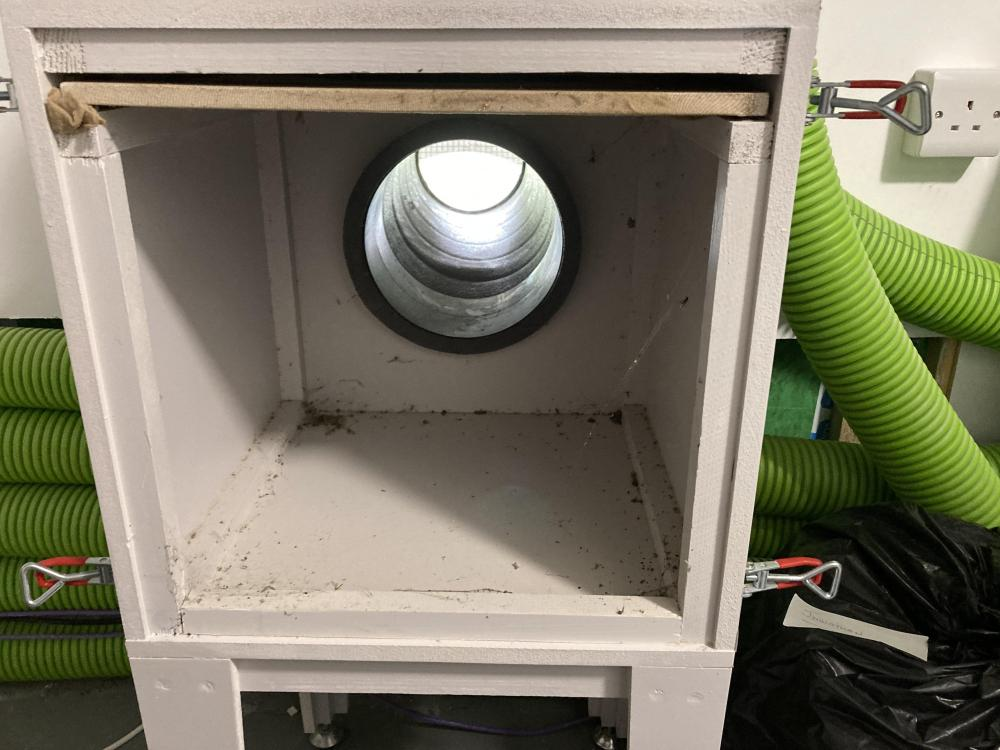
My MVHR pre filters have been a rip roaring success save for one aspect, they need to be insulated. To that end I'm going to be remaking them but what material should I use? It needs to be: 1) A great insulator. 2) Easily cut and joine/fixed. 3) Less than 60mm thick. 4) Relatively smooth. 5) Relatively robust (clasps will need to be fitted). A sheet of PIR or similar fits the first 4 criteria but falls down on the last. Does anyone have any good ideas for the perfect material or am I going to be heading off down the MDF or Ply box that is lined internally?
-
All the fun of the TV pattress.
Russdl replied to MikeSharp01's topic in Networks, AV, Security & Automation
Get a Samsung ‘The Frame’ TV. Satisfies both requirements. Looks like a picture/painting when off (obviously a TV when on) and fits flat to the wall. -
Eclisse Syntesis Flush Pocket Door - Help with head scratcher ?
Russdl replied to Spinny's topic in Doors & Door Frames
Laser level? -
Will a film affect your desired solar gain during the winter months? An external shading solution that can be removed when not required would be your best bet. Can you mount sail shades?
-
@SteamyTea follow Poc’s advice.
-
And that.
-
External shading really does the trick. Right now it’s 32 outside, 23.5 in the double aspect - lots of glass - kitchen and 22.8 in the shaded hallway. No cooling of any description apart from running around to open doors and windows when it cools down at night and leaving the safe ones open all night before running around and closing everything up in the morning when the outside temperature exceeds the inside temp. Also MVHR on minimum during the hot day and maximum over the cooler night.
-
@mjc55 I used foam glass for our detached garage slab, which may be relatable to your pod. Basic details here:
-
We should have installed air conditioning… now what?
Russdl replied to Adsibob's topic in Other Heating Systems
Alternatively, find the nearest location to you on the Weather Underground map https://www.wunderground.com/dashboard/pws/ILONDO538 and that will be a personal weather station near you, probably in someone’s back garden, and that should give you a better idea of the local air temperature. if the temperature defaults to F you can change it to C, settings are accessed via the three bars, top right corner. -
We should have installed air conditioning… now what?
Russdl replied to Adsibob's topic in Other Heating Systems
Preventing the heat getting in is a great plan, but don’t open up to ventilate until the outside temperature is below the required indoor temperature. If it’s pushing 30 degrees outside after when you open up to ventilate it will soon enough be pushing 30 degrees inside and your shading would have been for nought. -
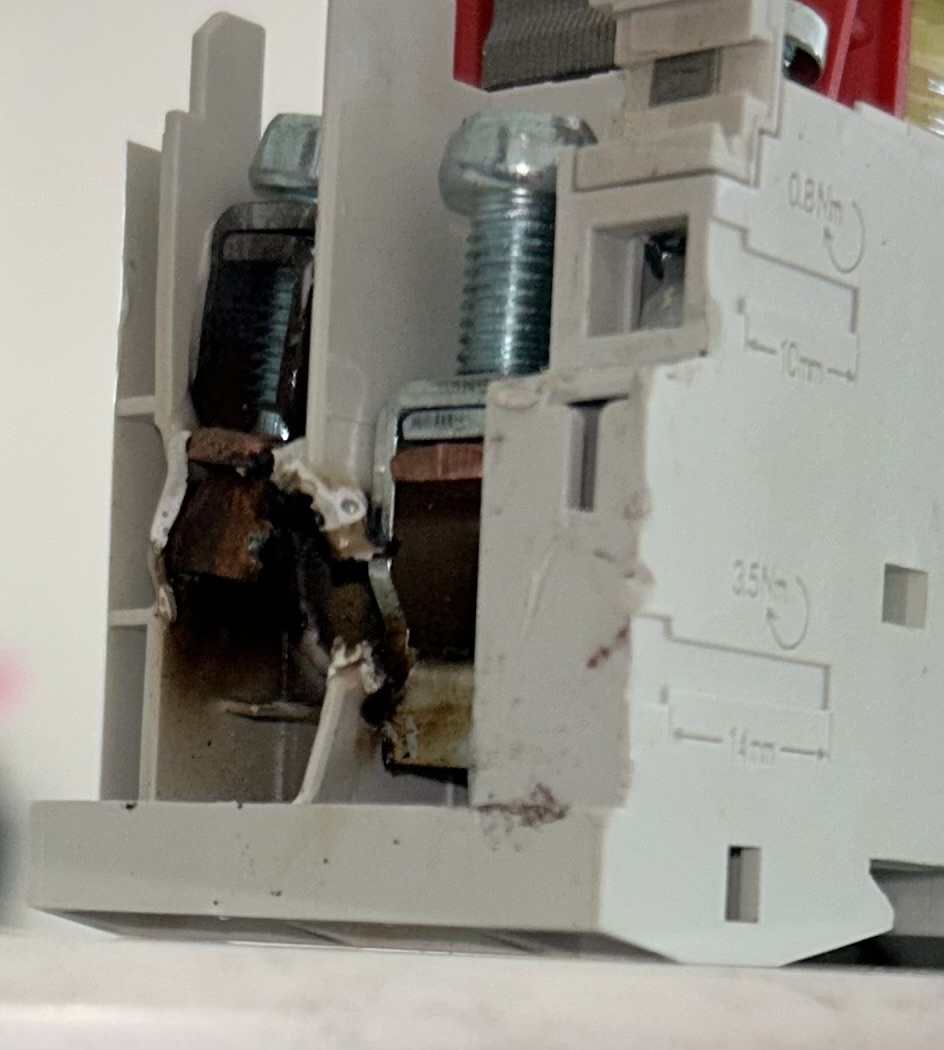
Crikey, that was a long story and similar to ours in some respects but so wildly different in others it must be a completely different situation. For example, I got on very well with all visiting trades - except for one who was described to me as a high functioning sociopath (I had to google that, but it is absolutely spot on). The distribution board in the photo looks just like ours except for down in the bottom right hand side. In those images ⬆️ there are 2 MCBO’s not connected to anything. In our distribution board those 2 MCBO’s are the power for the two Willis Heaters ⬇️ work that was completed on the 28th Nov 2020. Another major difference is you say you’re owed £1100. We are owed £4787 in an unpaid CCJ so clearly a completely different situation. The Last time I looked there were 3 unpaid CCJ’s against the individuals Limited company totalling £26,887, I can post images if you’d like? That may have changed by now but I can’t be bothered to spend another £8 to check, it may be a worthwhile investment for others?
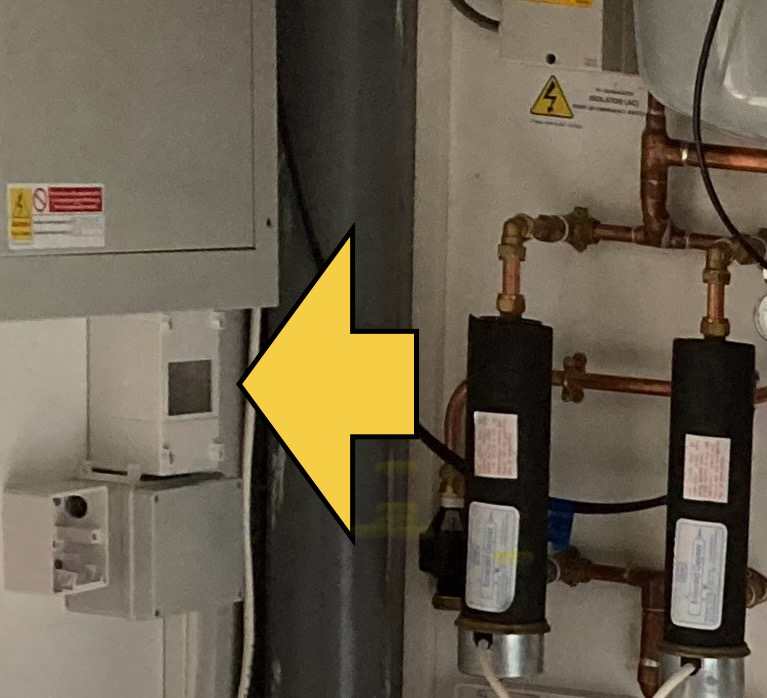
-
The original electrian sourced by the M&E contractor was a top notch professional I would say. When the original electrician became unavailable the seemingly less professional replacement was parachuted in. On the face of it you wouldn’t know the difference, under the covers the difference is more obvious. Thanks to the wonders of modern technology (phone cameras, text messages, emails, site diary etc) I know exactly when this wiring was done and who did it. Just looking at the wiring in the distribution board you can tell this wiring was done by a different electrician. The original electrician’s wiring was incredibly neat and ordered, the replacement electrician’s work not so much. Perhaps he wasn’t fully qualified? It never crossed my mind to ask.
-
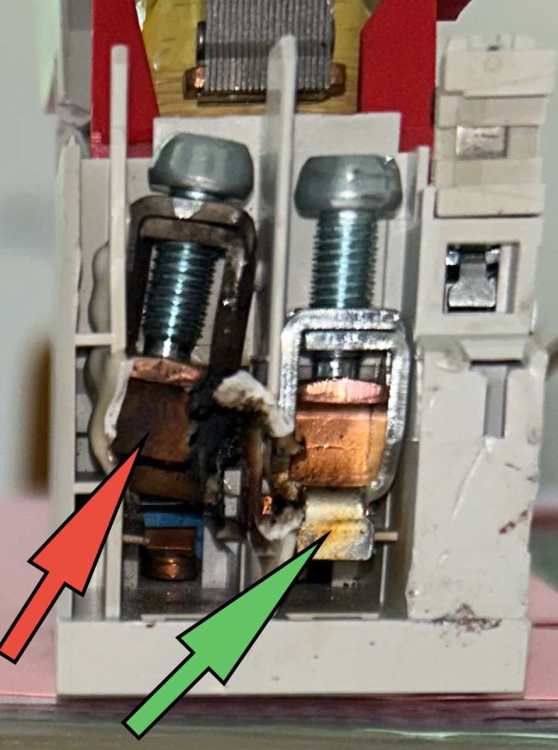
I’ve just pulled the damaged contactor apart, the burnt terminal is done up as tight as a tight thing - there is no way there was ever a cable clamped in there. It must have just been wedged along side or something? The red arrow is pointing at the heat damaged terminal (obviously!!) in the fully closed position, the green arrow at a fully open terminal (with only minor heat damaged). I can’t believe this, I can’t get my head around how a professional electrican could leave wiring in such a dangerous condition.