


vivienz
-
Posts
1378 -
Joined
-
Days Won
15
Everything posted by vivienz
-
I shall be having my internal doors fitted in the next few weeks. I know which handles and closures I want but I'm stumped as to which hinges. Am I over thinking this? Is there an idiot's guide to hinges? I don't have to have fire door type hinges and my downstairs doors will probably need 3 each due to their 2250mm height. But I could be entirely wrong.
-
Are balancing ponds of ecological value?
vivienz replied to Ferdinand's topic in General Self Build & DIY Discussion
We've diverted all the rainwater from the house to our new pond, but I'm not aware of it being counted in any sense. We included it as part of our planning application due to its size, but no one has ever mentioned it apart from the BCO wanting to check what we were doing with our rain water. -
Bienvenue! It sounds like a lovely spot. Perhaps you might consider a blog with beaucoup de photos?
-
Morning after the mist coats and it's a thumbs up for the Lidl sprayer. Heading up to do another couple of coats on the ceilings and that should be them done.
-
I've been painting my Howdens primed MDF doors - getting a good finish with 1 coat of primer/undercoat and 2 of eggshell acrylic, all applied with mini rollers for smooth finishes.
-
The Aldi ones looks better. It's more powerful withh 500W rather than the Lidl machine's 400W. It also has an extra paint reservoir and more nozzles. The Lidl one will do, but it gives a much more textured finish than a more powerful machine, also having to constantly refill the reservoir is a pain.
-
I have just been using the Lidl machine. Unfortunately, the airless sprayer I was using seems to be blocked and I'll need assistance with that. I'm on a tight schedule with painting this week and noticed the Lidl sprayer yesterday so I dashed out and got one. It's a brilliant little machine for the money. I can only get one nozzle size to spray, even with thinned contract matt, but one nozzle is better than none! I've just sprayed the landing walls and ceiling and the top part of the stairwell hole. The result is just as good as with the larger machine, but you do have to do frequent refills of the reservoir and I don't know how it would cope with vinyl emulsion. I'm tempted to give it a go, though.
-
Plasterboarding on yer lonesome ....
vivienz replied to ToughButterCup's topic in Plastering & Rendering
Get some help in. There's nothing unmanly about having an extra body to help. PBs are large and unwieldy, even with a lifter and if you want to get a good close fit with them, there's ni substitute for manual assistance. -
Looking at the supplier website, it's possible that they are certified as they are described as Passiv with a capital p. Not sure, though. here's a link to the tech section of their website. http://www.norrsken.co.uk/technical.php#
-
My windows are suitable for passive but not, AFAIK, certified as passive. The air test on my house prior to insulation and boarding was 0.25.
-
If plasterers were musicians, mine would be Elvis (except my plasterer is still alive, obvs!) or some arena-filling brain-melting rock god, because that's how good his plastering is. Others have been trying to coax Ian to work away for the last 3 weeks and they've had to accept failure as he doesn't travel (far). Anyhow, Ian the Plasterer has now left the building apart from a teensy last bit in the hallway that can't be done until the new stairs arrive, so 99% there. The week just gone saw the most challenging part of the plastering, which was the drop down the stairwell and the box section along the floor/upper ceiling run, which isn't one for a person with the slightest touch of vertigo. To get this done, the temporary staircase had to be removed and a compact but tall scaffold hired in to allow access. A youngman board was run across from the landing to the scaffold stage so that the width of the area could be accessed. As the last of the plasterboard was going up, we packed in as many of those pesky offcuts as we possibly could as this was our last chance to dispose of this within the walls of the house. It looked like some random form of plasterboard modern art as it was going up. Clearly, you can see that the stairs have been removed. Also moved temporarily was the UFH manifold that's been sitting comfortably under the stairs, as we didn't want any damage to come to that whilst Ian the Plasterer was doing his thing. Here's a not very good shot of the boarded stairwell and a peek at the edge of the PB lifter putting the board onto the hallway ceiling. The stairs are now on the floor in the lounge. Whether they will return to their original position depends on how long the permanent staircase takes to arrive, which is unknown right now as I need to have a chat with a couple of people about a couple of things, but I should be ordering it early next week. In the meantime, here's the stairway to nowhere. Back to the plastering, things are looking very different now that it's all done and drying out. The building instantly feels more solid and less like a construction site. The utility room is all done now and I intend to get in there next week with Jeremy's trust paint sprayer and then emulsion. There isn't that much going in the way of units going into the utility - just 4 in total. It will house a fridge, freezer and washing machine, then the units will continue along the same wall and have a work surface running above them. I've deliberately kept it less full as it's useful to have some empty space for all the things that fill up dumping grounds voids that most households naturally have. This is the other end of the utility, going through to the garage. Lying on the utility floor there, you can see my Howdens primed MDF doors, which are destined for upstairs and one between the utility and the main house. I hope to get started on painting these soon. The doors for most of the downstairs are currently in production over in the Netherlands, due to arrive around the 5th April, and these will be fully finished so no need to paint or anything, just add hardware and hang. After some research and a little back and forth, it turns out that the Netherlands is a great place to go for over-height doors. This is because what we consider to be over-height is entirely standard to them and you can get pretty much any size up to 2300 with no bother at all. Very handy for those large doorways of mine downstairs. We've planned to have low level lights in the hallway for some time now and I've copied ones that can be put in flush with the plasterboard and then plastered in (thanks, Barney12!). It sounded like a good idea so I ordered them and they arrived a few days later. Cue panic on my part as they appeared enormous and were way deeper than I was expecting. I had to measure them several times and be convinced that they wouldn't come out of the wall behind them. As it was, only a screwdriver point did that. The lights weigh a tonne - they are moulded plaster of Paris and very odd looking things, but look good once they go in. Here's the side view of the light that needs to be lost in the cavity of the stud wall. What a whopper! And here they are once they've been plastered in. Finishing off on the plastering, here's a view of the bottom part of the scaffold tower that I've hired for the occasion. Even though the stairwell is plastered, I've kept the tower as I need to paint the stairwell and the prep for this means masking the long window, so I need the extra height for this. Ian the Plasterer was cursing the weather that day as the sun was beating in and that long window faces almost due south. He was bemoaning the fact that you could see every single ripple in the plasterboard and even the slightest imperfection stuck out like a sore thumb. Overly critical of his own work as he is, he was very relieved when it was pointed out to him that there will be a brise soleil in front of that window eventually, which will smooth out his ripples in a jiffy. The last bit of plastering is a slight change of plan in the bathroom. Originally, the slanted wall opposite the door was going to be tiled all the way to the top and the MVHR extract hidden with a false panel covered by a tile. After some discussion, it was decided that this would look horrible as the side walls are only going to be tiled part way up. We still needed a work around for where the wall protrudes to house the cistern for the wall mounted loo and decided that continuing the theme of niches in the bathroom, a large portrait-style one above the loo would look good. I suggested that the MVHR outlet could then come down via the 'ceiling' of the niche, but a further move was made and it will be on the right hand side of the niche wall, above the bath, and so be virtually invisible (once the vents are covered!). As ever, a sharp bit of plastering from Ian. Plenty more has been going on inside, but let's step outside for a breath of air as it was busy there, too. The next set of groundworks have started. These comprise the surface water and foul water drainage, the driveway between the garage and the lane and the hard standing to the side of the garage. In addition, the surface water will now all be diverted to the pond, which overcomes the potential issue of how to deal with this on our heavy clay site. I've swapped groundworkers for this stage of the works. Sadly, my previous groundworker came through with a ridiculously inflated quote for the drainage work and as I already had another firm waiting in the wings as I have to install a dropped curb between my drive and the lane, I decided to use them for all the work as they were far more reasonable. I'm afraid there are no thrilling photos of the groundworks as it looks very similar to how the site has looked since the onset of winter - wet and boggy, with a few trenches here and there. However, I'm delighted that the drainage works are progressing, albeit with being called off for a few days due to the awful storms we've been having, as it means that as soon as they are done we can press on with the cladding and get the building properly watertight. As well as the groundworks, the balustrades for the balconies started going in last week. The east balcony is completed and the supports and railings are in on the west with the glass to follow shortly. There was a problem with a couple of panels not being the right size so I'm waiting on those, then the guys will be back to finish the installation. When I first ordered the balustrade, I had a minor panic shortly afterwards. I had requested that all the metal work should be powder coated in RAL 7016 to match the windows and be close to the colour of the slate. The panic was due to my wondering whether I should have gone for brushed steel or something a bit brighter. Come the day, however, the darker shade of anthracite grey was the right choice as it blends seamlessly with the windows and slate cladding on the upper storey, so much so that standing in the lane, the railings disappear and only the glass is obvious. Phew! Here's the balustrade viewed from the balcony. The same from the top of a pile of wood chippings in what will be the garden: And, finally, from the lane. The building looks very austere at the moment, but once the stone cladding goes on, it will be transformed again. It's a bit chilly outside, so let's go back indoors. Work has been continuing on the kitchen and the laminate worktop is in situ now, as well as the sink. Photos on that to follow next week once the clamps are off. I had been pondering the support post for the overhang on the island worksurface, and how to overcome my dislike for most of the ready made options out there. I really didn't want a metal post as it would look incongruous against everything else in the kitchen and so in one of those late night flashes of inspiration that occasionally come along, I decided to ask Harry the Carpenter to clad some timber with the laminate splashback to make a post that matched the underside of the breakfast bar part of the island. Harry did his thing, and I'm pleased with the result. Much as with the balustrade against the slates, it largely disappears into the background of the recess under the walnut worktop. I've been busy sanding and painting and all things decorating. The snug has now had its 2 coats of vinyl emulsion and I'm working my way through the prep for painting my ready-primed MDF skirting and architrave. I hate prep. Tedious, boring, and there's no way to get out of it. However, it will be worth it once all the 'woodwork' is all white and pristine. One thing that has become apparent since I painted the snug is the difference a paint base makes. The neutral colour that I'm using everywhere is called Borrowash, from Brewer's Albany paint range. In the snug and low traffic areas, I'm using standard vinyl emulsion but for the hallway and lounge, I'm using durable vinyl. All in the same shade, just a different base. So what, you may ask. Well, here's the thing. They come out different colours. I chose the colour on the basis of the standard vinyl - this is how it appears in the colour chart and sample pots, and it's a warm grey/beige, more beige than grey. The durable version, however, is much cooler and more grey than beige. I painted the lounge first with the durable stuff and a little while back did one of the bedrooms with the standard emulsion. I commented at the time how the light made them appear to be different colours except, as I now know, they really are different. It's not a problem as I like them both and they aren't next to each other in the same room, but it's worth bearing in mind if you plan to use the same colour in different bases. Here's the snug all painted up, looking out to the hallway. And another of the same. Finally, as I started the blog with Elvis, it seems appropriate to finish it with a bit of a light show. Team Blackmore worked hard on the ceiling feature in the lounge but up until now, it's been uncertain just how well (or not) it would work out with lights. Patience isn't always a virtue and so some LED strip lights on the feature were temporarily rigged up. All I can say is that Team Blackmore had a smile on its face when it saw this. Ladies and gentlemen, may I present the ceiling lights. p.s. I was on site to do a clean up today whilst it was nice and quiet there. There had been plenty of cursing during the week as work on the en suite shower for the master bedroom finally started. Foul things were coming out of both ends of the plumber the day after his curry night and the recalcitrant shower wasn't doing much to improve his mood. I noticed this today, written on a piece of board in the base of the shower recess.
-
Pleased & relieved
vivienz replied to Moira Niedzwiecka's topic in General Self Build & DIY Discussion
So sorry, Moira. A bittersweet achievement, but an achievement, nonetheless. -
Pleased & relieved
vivienz replied to Moira Niedzwiecka's topic in General Self Build & DIY Discussion
Well done - brilliant result and something to move on from. -
I probably have more machinery and technical manuals in my sewing area than OH has in the garage. Add in the various hand tools (e.g. the best way to cut open a buttonhole is with a small chisel) and drafting equipment and it's not a soft and fluffy room. He can have the garage, though. No heating in there!
-
We have a Nilfisk that is effective. It can also be rather fierce, though, and will dislodge ageing mortar between patio slabs.
-
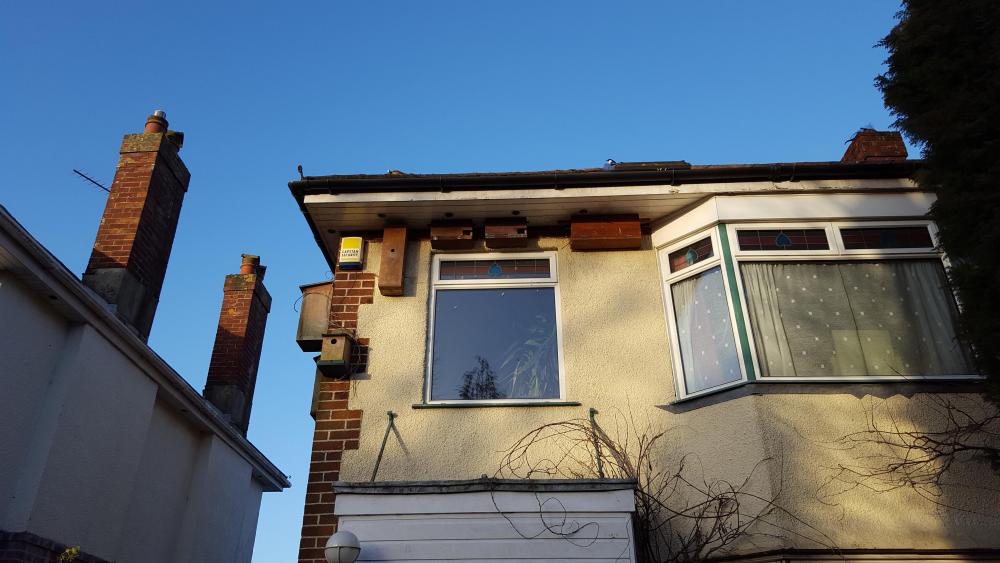
We have several fully populated sparrow terraces. The sparrows roost in them all year round and they are charming neighbours. OH built the boxes which have perches beneath the entrance holes and hinged bases to make it easy to remove old nesting material. The sparrows have a habit of including lavender and bay leaves in their nests. Here's a selection of the boxes on our current house - sparrow, swift and starling. The swifts haven't taken up their boxes, but the starlings love them.
-
Blocks delivered and we're up to the first floor
vivienz commented on Simon R's blog entry in South coast ICF build
Ah yes, groundworks. Way more expensive than i first thought, too, so you're not alone. Nice to get the materials in, though, and worth planning for other deliveries. A way off, but I found the insulation took masses of space and having somewhere dry to stash plasterboard needs thinking about, too. -
It's the start of it looking like a house rather than a building site. Exciting!
-
Thanks, all. I'm having a quooker for the kitchen sink but I think I will use Hudson Reed for the rest. @Nickfromwales described them as the VW Golf of the fittings world, which is just fine for me. Some of them look rather nice, too, which is what really counts - just like what colour a car is! Stereotype? Me?!
-
I shall be buying basin and bathroom taps soon. The choice is mind boggling, as is the array of prices. Are there good reasons to avoid the cheaper ones and are there pricier ones that should be avoided too? For instance, I was looking at reviews of a Grohe tap and it seems that the connection is 12mm when the UK standard is 15mm, so a converter was required. Thoughts, anyone?
-
Can you plant native hedging around the plot? Once it gets established, it can support lots more wildlife than a few nest boxes. Mature ivy is fabulous, too. A rich late season nectar source, provides berries through the winter and nesting/shelter provision all year round as it's evergreen. It's also beautiful grown up posts and pillars to give an architectural impact to a garden.
-
Our permanent bat boxes will be put onto the west face of the stairwell section at a height of 5 metres. It certainly is more than a replacement for the lost summer roost previously there, as it was in a bungalow! For swift boxes, the orientation of choice is north to keep the boxes cool when the chicks have hatched. West or east at a push. You can put them on a south face but the boxes need to have their roof designed to deflect sun. The same goes for many bird boxes - we have some highly successful sparrow terraces on the north east corner of our current house. The recommendation for schwegler vat boxes came from the ecologist. Natural England said that they had no preference for any particular type as long as it was suitable for the species likely to roost.
-
Yet another bump and addition to this as Weekamp seem to have updated their website. I'm getting some of their shaker double doors, overheight, priced at £510 VAT inc. and including glazing, for the pair.
-
Bumping this thread as I've found my over height door supplier and I'm just about to order from them subject to one final query. This is the Dutch website and the doors that I'm having for 2 sets of double doors into the snug and kitchen/lounge, as well as the cloakroom under the stairs (not glazed). Dutch door supplier The website price doesn't include the glazing or any of the hardware. The UK price is £499, VAT inc. and delivery is £50. This price is for a fully glazed and fully finished door, so no painting needed and you can specify the colour (RAL) that you want. They will produce any height you want up to 2400mm - this is the bit that I struggled to get with UK suppliers. The lead time is up to 4 weeks - 2 weeks for manufacture and then they ship every 2 weeks to the UK. This is the UK outlet for the supplier and I've dealt with either Lorraine or Mike, who have both been really helpful. Weekamp Doors UK
-
Does anyone have a couple of Schwegler bat boxes?
vivienz replied to vivienz's topic in General Self Build & DIY Discussion
An update on this. Thanks, @Barney12 for the habibat link - subject to a reply from Natural England, it looks as though these will be just the thing. The dimensions of these are actually better for us than the Schwegler ones, as they are slightly shallower and will fit behind the cladding more easily. Our ecologist hasn't been brilliant on this part, I must say. He was completely unaware of the lack of Schwegler boxes and was just keen to source and install them for us! I've contacted Natural England directly to make sure I have an audit trail to confirm that the alternatives will comply with the license requirements.


