Declan52
-
Posts
4449 -
Joined
-
Last visited
-
Days Won
10
Everything posted by Declan52
-

Minimum Reasonable wall width for good U values?
Declan52 replied to puntloos's topic in Heat Insulation
Sand cement is rough looking. You would have seen it used as a finish on the outside of many a building where it's just rubbed up to give it a sort of smooth finish. In reality it's not but for outside it's fine as it's mixed with sand grains so will never be smooth. Skim is like glass when it goes on as it's just a powdered mix so no fine aggregate. Its this that you paint to give you your final appearance. -
Chimney DPCs and damp handling
Declan52 replied to MortarThePoint's topic in Stoves, Fires & Fireplaces
Only ever used a single large lead tray made to suit whatever the size of the chimney plus enough to turn up on the other 3 sides. A hole gets cut in the tray to allow the flue to come on through then it gets sealed around with sealant and then built on till it's finished height. This would have been done where the chimney breaks through the roof. Trays then get cut into the brickwork above the tray. Never seen a chimney with 3 lead trays before. At the very top I have seen everything from concrete paving flag to slate to dpc used then a strong motar mix to haunch the flue. -
If you have a step ladder go out and prise the lead that's there up enough to take a pic then push it back down and post the pic here.
-
Minimum Reasonable wall width for good U values?
Declan52 replied to puntloos's topic in Heat Insulation
Both saying the same thing just @joe90 has seen more summers than me so goes by the old school terms. First coat is just sand and cement. You wet the wall and put this mix on and it's job is to get the wall perfect. Or you use a sheet of plasterboard and dot dab. Both methods are just used to give you a flat surface to put the skim on. You can't put skim on block wall. Just won't work. 2nd coat is the skim. This is just a powdered mix that gets mixed with water in a large bucket and ends up like cream. This goes on top of your sand cement or plasterboard. -
You wouldn't be able to see any motar though as you can in that first pic.
-
This one.
-
Minimum Reasonable wall width for good U values?
Declan52 replied to puntloos's topic in Heat Insulation
First layer is just sharp sand and cement. Used to straighten any imperfections in the wall. Should be around 15-20mm. Next coat is the skim. Should be only 3-5mm thick and be like glass. If the first coat hasn't got the wall straight then the skim coat never will. -
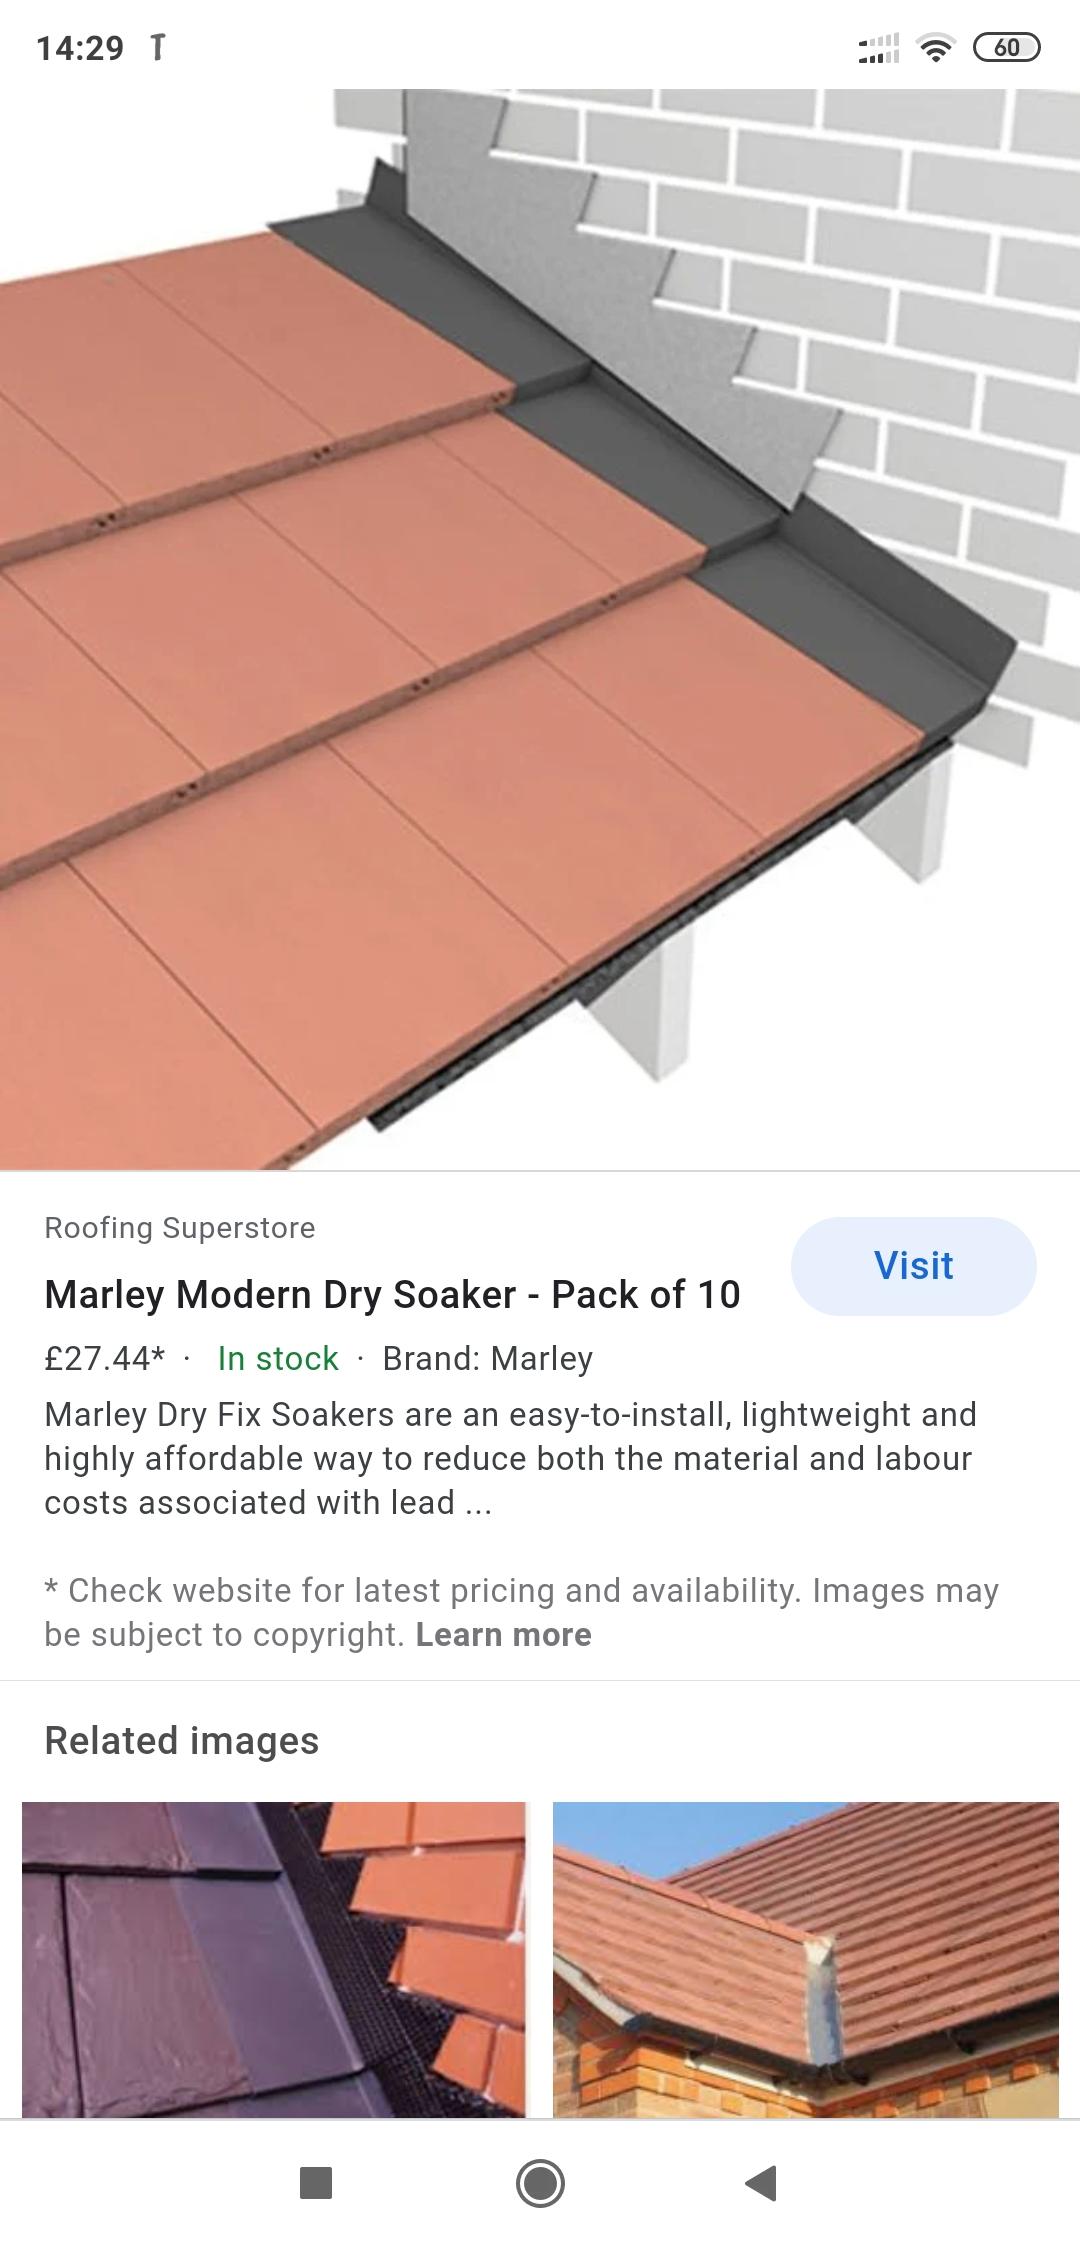
No the big picture. The black bit that's on the red tiles. It's very important. Doesn't matter what's below it, that is going to let a lot of water in.
-
Basically there should be another strip of lead running up that peak and under what you have. When the rain runs down a wall it will hit the lead you have and go out from the building and then drop down where it will come into contact with the missing bit. This bit of lead stops the water going back towards the house and the rain then runs down into your gulley and away. On yours there is what looks like nothing to stop the rain going back towards your wall. Will look like this. Not really important that it's made from lead or plastic but it's important that it's there. Could be why you have the staining on the side brick walls.
-
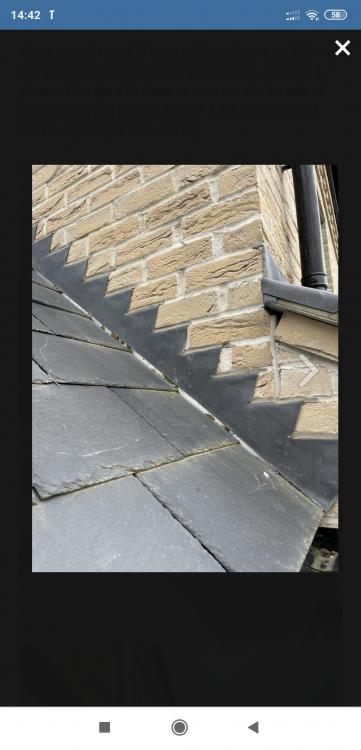
Is there no lead upstand behind them trays going up the peak??? Plus the brickie needs to buy a new pole jointer, that's rough.
-
He mentioned he had the use of one. But with truss that wide they will be on a fairly large unit that hopefully has a hiab.
-
If you get the truss delivered at least a day before, wise move in my opinion, then remember to store them upright. Don't lie them flat on the ground as they will get twisted or damaged. A pile of blocks or trees or scaffolding will be ideal.
-
Normally a 100mm would be enough. If it's 150mm it won't really make any difference. The only important bit it's the measurement to the 2nd post and you take it from the wall to suit how you intend to do your fence.
-
Dig 100mm out and put the post in. Then put the 2nd post to suit your panel/d rail from the wall.
-
Pu adhesive. But make sure you dry fit everything first as when it goes off you won't be able to do any adjustments.
-
I can only find the report for a single borehole as well @Gus Potter.
-
It's your land and as part of your build you needed to dig a trench to put in an electric cable/ drainage pipe/ sewer pipe/ and while doing this as luck would have it you came across the mystery pipe. You just take your time and don't be driving a pick into the ground. Just remove 50mm each time when you get over 700mm down and you will soon find it without breaking it.
-
You just stab them into the hole, open them up and it closes at the bottom and lift it out. It's no NASA type operation. If it's very stiff clay the Spade will break it up first. You will know if it's been dug through before to put the pipe in as the spoil will be all mixed up and not compact.
-
Will be doable depending on what the ground is like. If it's stiff clay the banks will stay vertical no bother. If there is a lot of sand and silt and a high water table it will end up a very wide hole as the banks will collapse. You can use post hole digger in an opening 300mm square and just use a spade to chop it up and the past hole digger to lift the spoil out. When I was doing boreholes each hole had to be dug 1.2m before you started just incase there was any services there. If you hit anything after that then the insurance covered it. Anything before that and you did. Took maybe 30 mins each hole.
-
Here's a good YouTube clip to watch showing how you do a patio. https://youtu.be/igF95S0QkeA
-
Screeding or wall plastering, which first?
Declan52 replied to epsilonGreedy's topic in Floor Structures
The vast majority here are done with wet plaster as well. Very few use dot and dab. -
Screeding or wall plastering, which first?
Declan52 replied to epsilonGreedy's topic in Floor Structures
Most plasters tend to be a little on the larger side and don't like bending down to their toes. If you do this first then your wall won't tend to curve out at the bottom when the screed goes in its much straighter. Plus it's super messy so you don't want all them droppings hitting your nice new screed. -
You need to put concrete in no matter what width of wall your building. So you make it slightly wider than you have planned and do it right. The cost of steel and block and beam flooring wont be cheap or easy to put in place. How are you planning on lifting these beams over 1.5m into the air. They are heavy. As well your going to end up with a void that will be the new 5 star rat hotel in your area.
-
Why would you want to use block and beam on this job. They are very heavy to move around. A wheelbarrow with stone is a lot easier.
-
That's a very very expensive method of doing this job. Remove the wall that's there and dig out the what's needed to allow you to put concrete foundations in. If you are looking to hold back 1.5m worth of height the concrete is easily going to be 1200mm wide at the bottom. So from the front of that wall measure 2200mm and that will give you enough distance for the foundations and a 1000mm gap to allow you to work safely without the fill under the patio causing the trench to cave in. It might just be easier to remove all of what's under the patio. Pour the concrete and build a block wall 900mm wide for 2 courses then step it in to 675mm for 2 courses then 450mm for 2 courses then 225mm till your finished height. Don't forget to leave drainage holes in the blocks to allow water to escape. Once the wall is built and everything is rock hard put a drainage channel behind the bottom course and fill around it with pea gravel. Then backfill with clean stone in the area against the wall and using a Wacker plate run it over every 200mm of stone you put in so each layer is well compacted. Just keep doing this till your at whatever height suits to start the bedding of your flags. Put this down and then your flags. You can use membranes in-between layers of the stone and have this resting on the stone and the wall so it's all tied together. If you want the Face of wall to look like it is now then you will have to add on whatever that stones width is to the concrete foundations otherwise put some render on it.