G and J
-
Posts
1906 -
Joined
-
Last visited
-
Days Won
7
Everything posted by G and J
-
We've followed the above (vertical cladding) the first vertical batten means the slope on the second horizontal batten allows the water to run off into the cavity....or at least that's the plan!
-
Haven't had my coffee yet but you asked for comments. If you then go on to criticise those comments because what you wanted was another answer it dosn't encourage bothering to respond.
-
In the rental we're shortly to move out of we have our dining room table 650mm from wall......far to tight for comfort, feels "mean" and if you have 3 people down that side the middlee person can't get out behind those remaining seated.
-

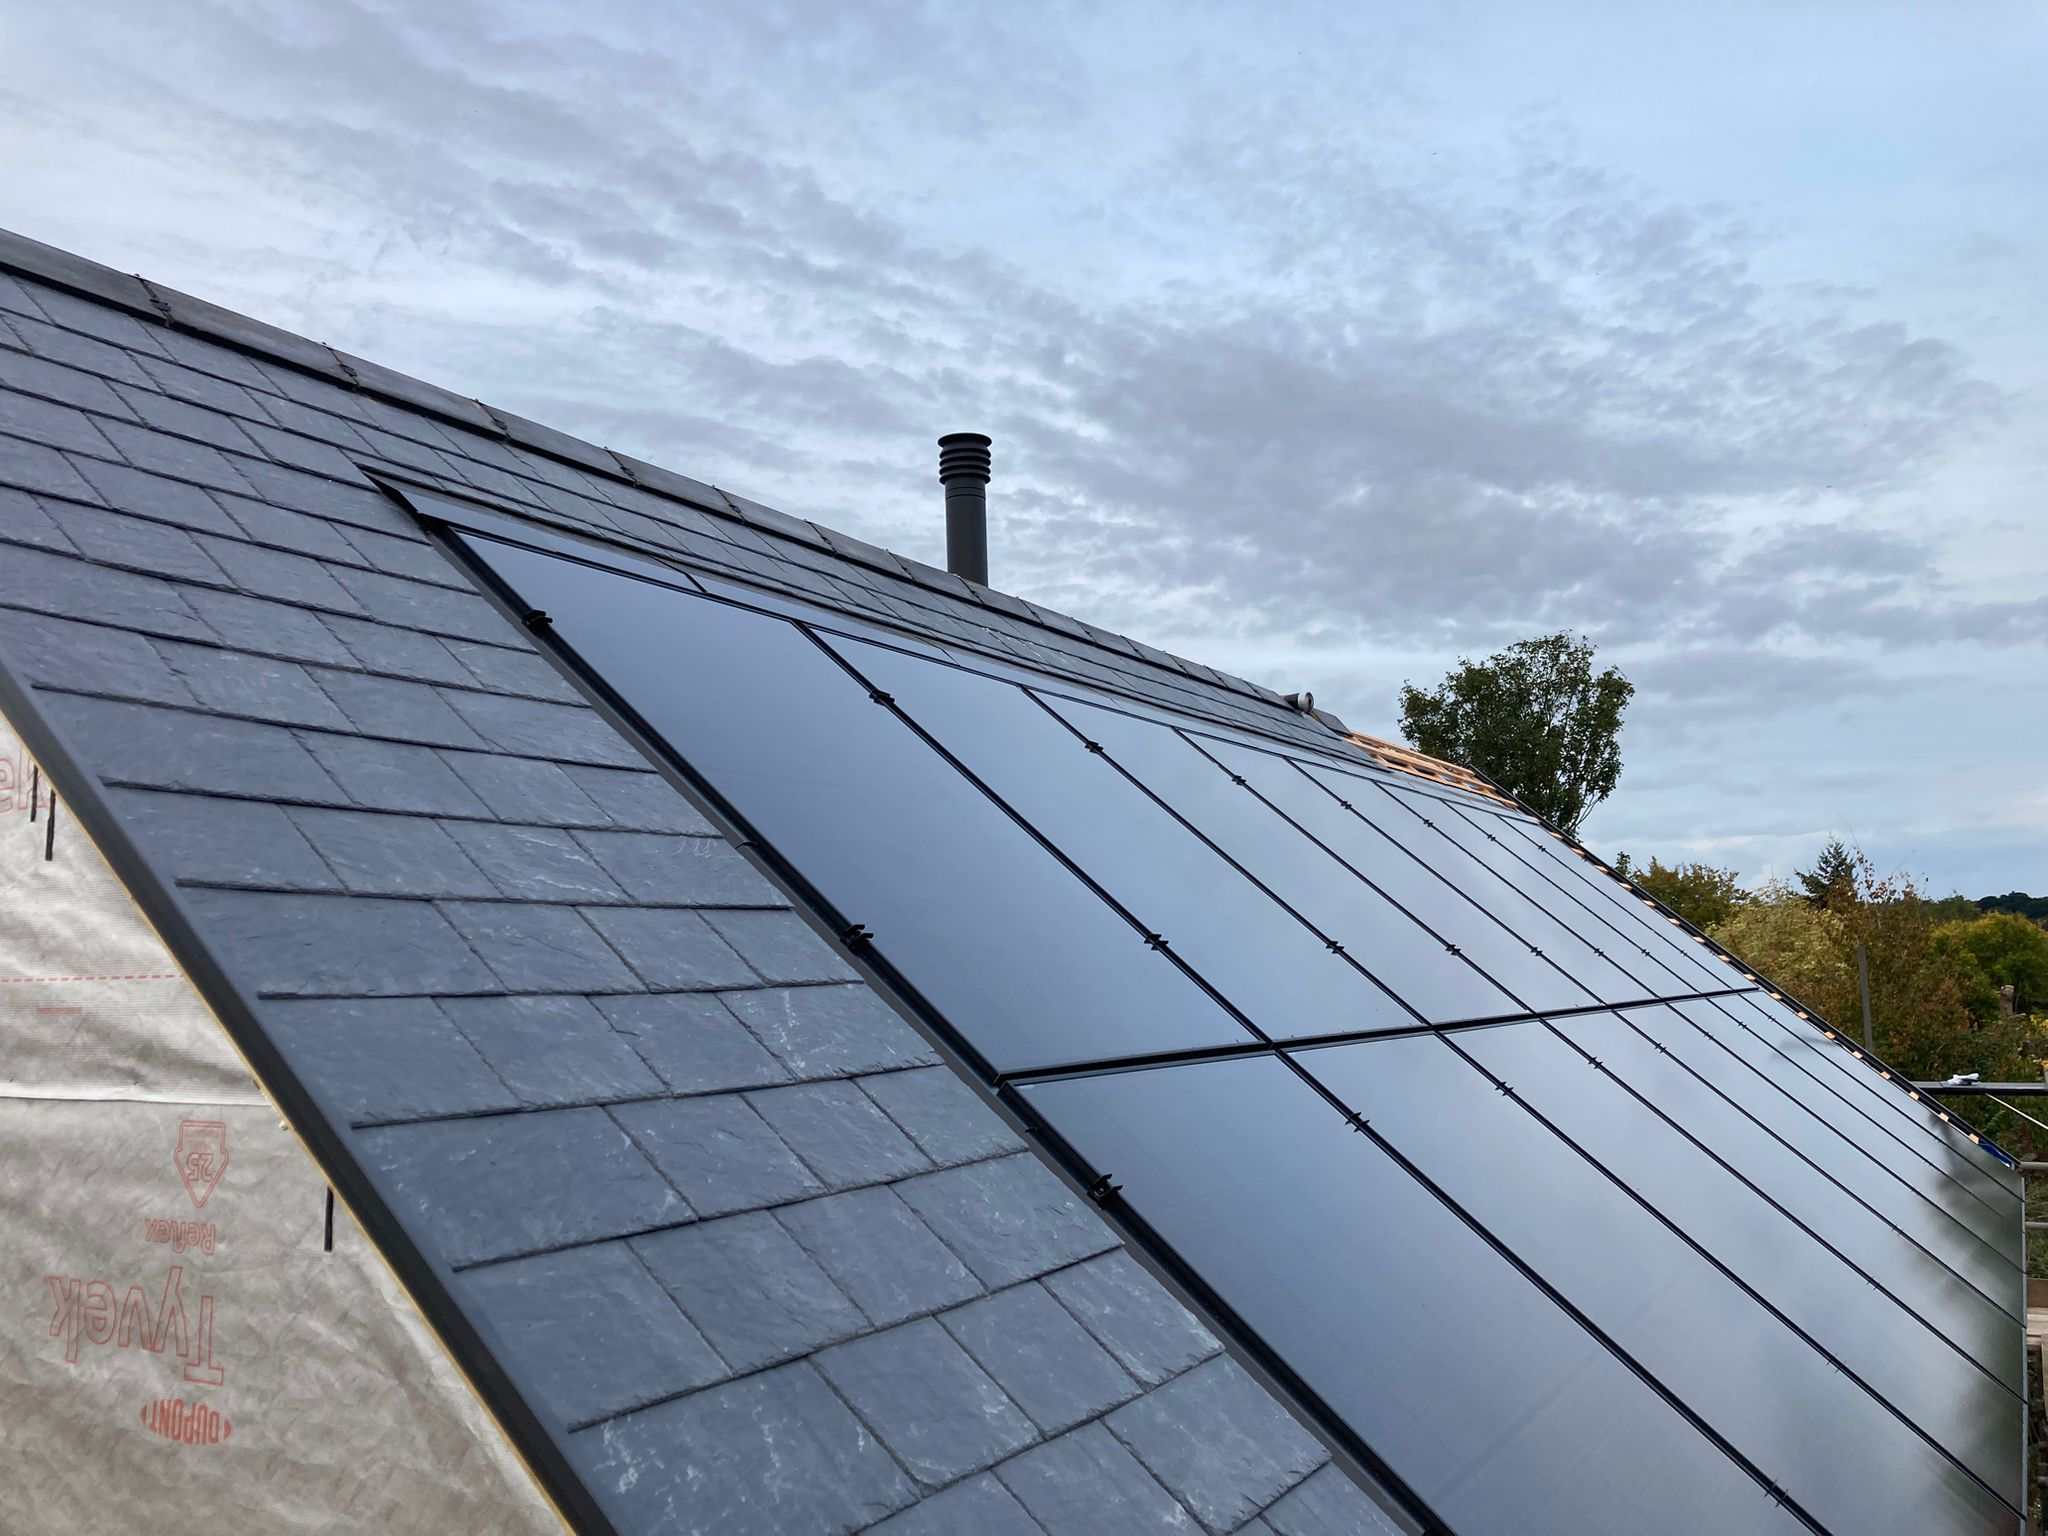
Best breather membrane- air and vapour permeable
G and J replied to ab12's topic in Roofing, Tiling & Slating
Good point, just for clarification ours is a cold roof -
At my wits end with brick layers. Advice please.
G and J replied to flanagaj's topic in Bricklaying, Blockwork & Mortar
Is this ok? Appreciate that you've had problems sourcing a bricklayer, but this wouldn't have been ok for us. Not sure if you're able to be there in the day, but what has worked for us is trying to establish buy in for the project, people have seen us doing stuff and we have made it clear its going to be our home (not a profit making venture), and whilst it can be difficult to pick things up a "sorry, not sure that's right; not what we were looking for; or even know we're being picky" has gone a long way. There is no doubt we've been lucky, but ........ -
Best breather membrane- air and vapour permeable
G and J replied to ab12's topic in Roofing, Tiling & Slating
We did not tape but used the 150mm overlap (permavent) -
Slow progress towards a new home
G and J commented on BotusBuild's blog entry in South East Cornwall Low Energy build
So pleased for you, we recognise the 'stress' generally, but also of starting a build without having sold, and leaving a house with which you've had a strong emotional attachment. -
Best breather membrane- air and vapour permeable
G and J replied to ab12's topic in Roofing, Tiling & Slating
We used this Permavent APEX is a 3 layer breather membrane. APEX is both air and vapour permeable -
Thanks, wider, deep flow gutters being fitted as we speak and yesterdays rain thankfully showed their wide enough.
-
We used kytun t2 with our slate and halves. Bit of fiddling to set out to allow for cladding, but pleased with the results.

-
Hi Alan, we would love to come, but in a frantic dash for move in at end of May, (no it won't be all finished), so unlikely we'll make it. Hope all is going to plan J
-
Cavity closure timber frame
G and J replied to Selfbuildsarah's topic in New House & Self Build Design
We are timber frame, part rendered on block, part timber clad on cement board We closed the cavities in the block with mineral wall batts and have used envirogaf intumescent strips where we are clad. -
The So are we! The issue is flashing, such a big room that however hard he tries the edge doesn't stay wet right across the room. Plastering is excellent.....no issues there.....all other ceilings and walls (new build) perfect, same decorator. Last roll of dice, move to estate emulsion/2 people/12 inch rollers.....have invested so much in this ceiling materials and labour wise😱 next step after that a disco ball and/or dark glasses!
-
Thanks for the response, it is the case that the F&B colours are subtlety different. Hope your solution of going other direction works for you. We've got light both ends so didn't help us (we tried). Last resort exploring spray painting the ceiling, but reluctant as floor already down. We may just have to live with it but absolutely fed up, as its our main living area. Hopefully this is one of those areas we are obsessing about now that will recede over time, but.........
-
This can not be overstated.....we have been extremely fortunate to hit a stream of "gold" that has taken us from one trade to the next, and, keeping them "fed and watered" when on site, paying on the day the invoice is presented has perhaps helped to ensure that as well as recommending the next trade to us, they are happy to vouch for working with us, even though we can be very definite ("picky") about what we want. Sparing his blushes @Benpointer has written an excellent blog, and is a masterclass in keeping trades on track with excellent outcomes. So true, but on a Friday make it 3pm!
-
Did you solve your paint panic @Spinnywe're having issues with F&B dead flat, 56m2........latest attempt with floetrol added. Really reluctant to try another paint on ceiling as going for "drench" and walls already painted
-
Pole mounted EV charger recommendations welcome…
G and J replied to G and J's topic in Electrics - Other
Thank you. So busy trying to get the new pad ready for habitation that I am struggling to find time to research the things needed for sign off. -
Hi folks, there are 28 more sleeps left in our bloody awful rental before moving in to our new pad. Our aim is to get signed off early June, and to get signed off we need an EV point. Ours is going to be on a pole about 5 feet from our electric kiosk, the SWA cable is already in place. I find looking on Google for EV charger points completely bewildering. I understand electrics, and I would probably understand all the various factors if I put the time but I have zero time to put in, I just need one. Therefore I would be grateful if anyone can recommend a pole mounted EV charger untethered, single phase so I guess 7kW, for a couple who don’t have an EV and don’t plan to get one any time soon.
-
Our architects practice suggested something similar, albeit on a timber frame build, Geoff's view was "not keen" for similar reasons, apthough he accepted it looked very neat, but when we sat down with the senior partner to do the final sign off his view "do you really want to do that" and so reverted to external box gutters
-
Agreed, in this case at a very specific point allowing for the steels/load points but also allowed the screeder (traditional dry screed) to go home for the night!
-
We"ve literally just had 88m2 of 1200 x 600 tiles laid by an very experienced (read older just like us!) on 100mm screed, which was laid early dec 25 and has been heated by the ufh Has been laid on a decouplinging mat as recommended by the supplier, whther we needed to is perhaps questionable as in the tilers view slab "would have cracked by now if it was going to". However having it allows more peace of mind (for all of us) in not having room thresholds, especially given size of tiles, and allowed a slight overlap (75mm) of the expansion strip in the screed, which then facilitated cuts working out to give best aesthetics.. In the end our view was they are not coming up again in our lifetime (we hope!) so in the scheme of things.......bit of a slipoery slope cost control wise, but we're at that stage of the build to better understand spend.
-
Cold unventilated loft - condensation risk?
G and J replied to G and J's topic in Roofing, Tiling & Slating
Crumbs, this post brings back memories. We got sign off for a cold, unventilated roof, but we went for a ridge vent anyway. Turns out just having a ridge vent gives ooodles of ventilation. Making the roof truly airtight would have been impossible. So our airtight layer is the VCL above the ceiling plasterboard. Hopefully this will keep our steam out of the loft. -
It depend on your timescales, but building on the above, if you get a good starting trade (in our case groundworker) they can then recommend follow on trades and /or go round local building sites (individual projects) look at the work, get recommendations. Both have worked for us (apart from a decorating "hiccup"!) Eg our screeder came about because our groundworker introduced us to a builder working on a single build nearby, the screeder recommended the plasterer, the plasterer recommended the tackers and so on. We chose to wait for good people, but in practice we were't waiting long as we tried to be identifying the 'next in line' as early as possible. @Benpointer may be able to share how he went about it.
-
Well this got me thinking, as one with aspirations of moving in before completion....so in case it's helpful fir others and with the caveat of "check with your own insurers" our insurers have confirmed our site insurance is valid until we have a completion certificate regardless of whether we move in or not....phew!
-
@craig thank you