
Super_Paulie
-
Posts
771 -
Joined
-
Last visited
-
Days Won
2
Everything posted by Super_Paulie
-
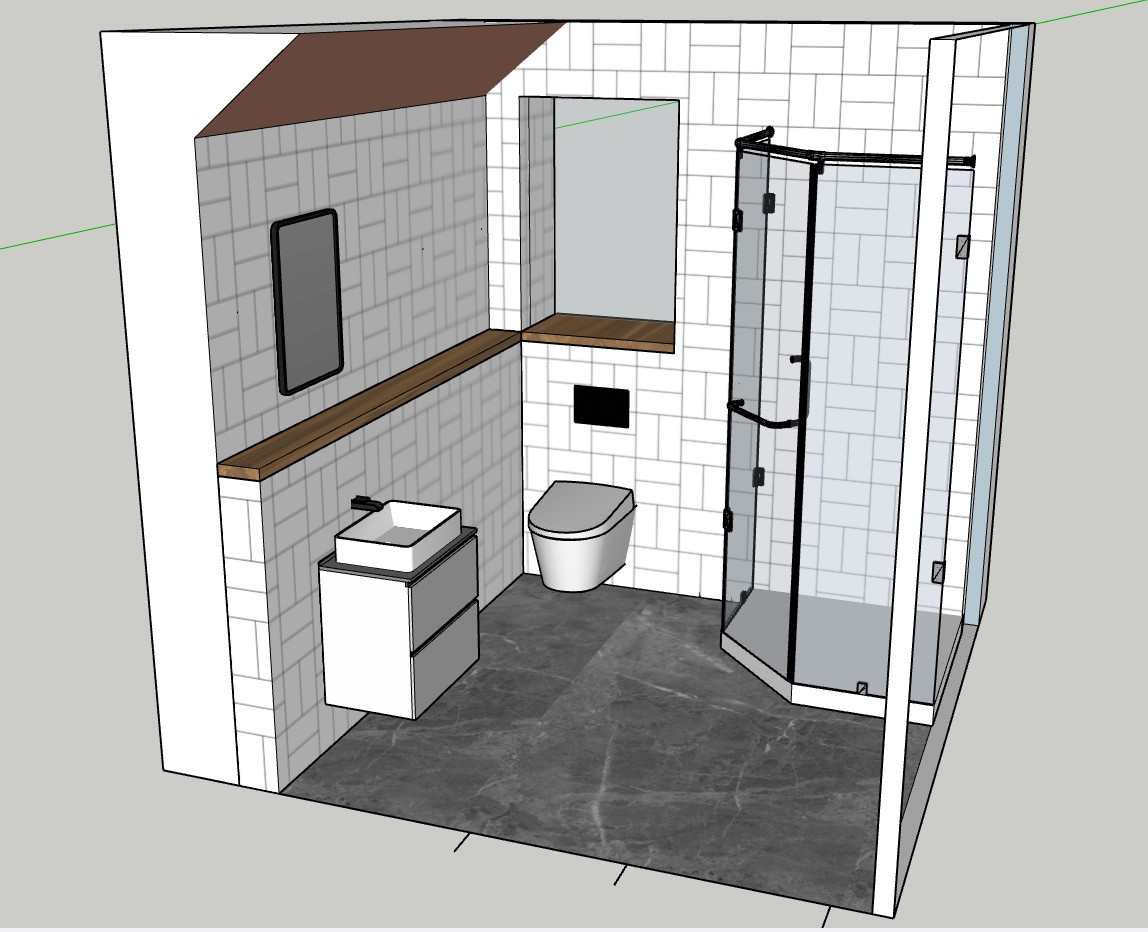
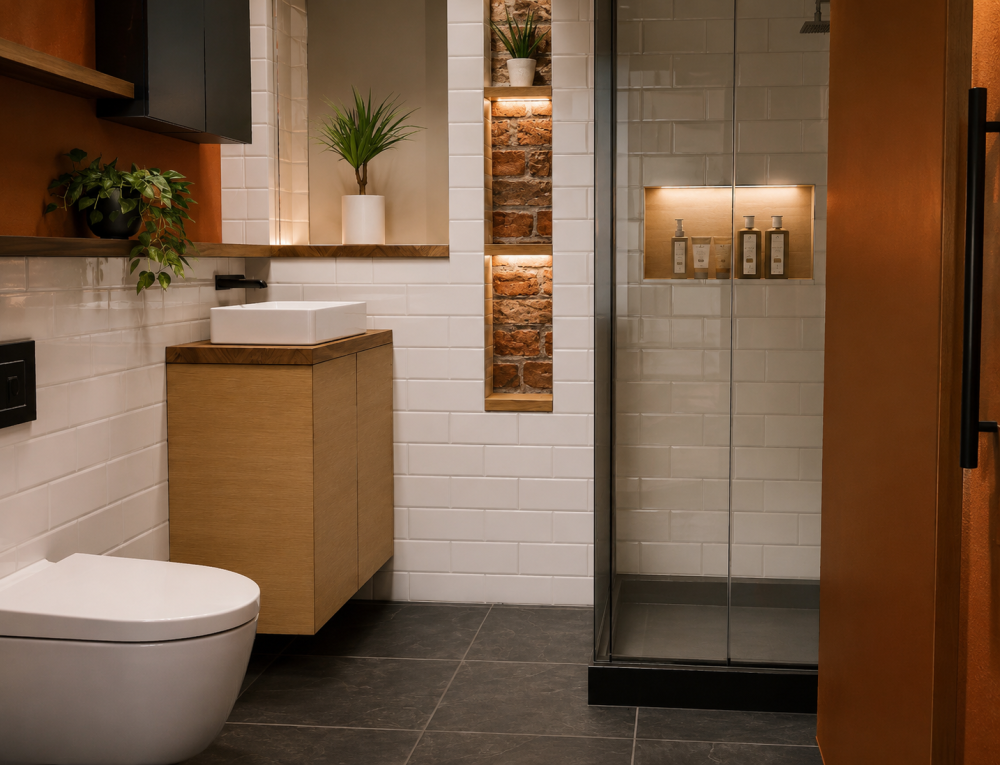
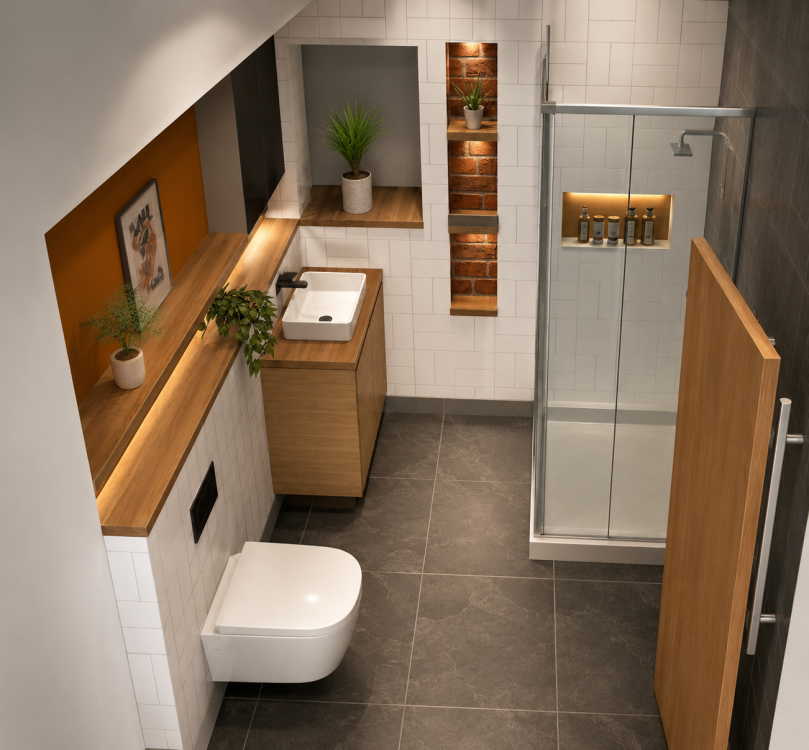
we really want the mirror above the sink so the window scuppers that one im afraid otherwise it would make life a lot easier. Im not a fan of those rounded ones, think my gran had one so seems a bit old fashioned. The pentagon is interesting but ive no genuine experience of one. thats the size ive had on the design. Maybe im better clearing the room, and then dragging things in similar size to see how it works. Nothing seems to really hit the spot.
-
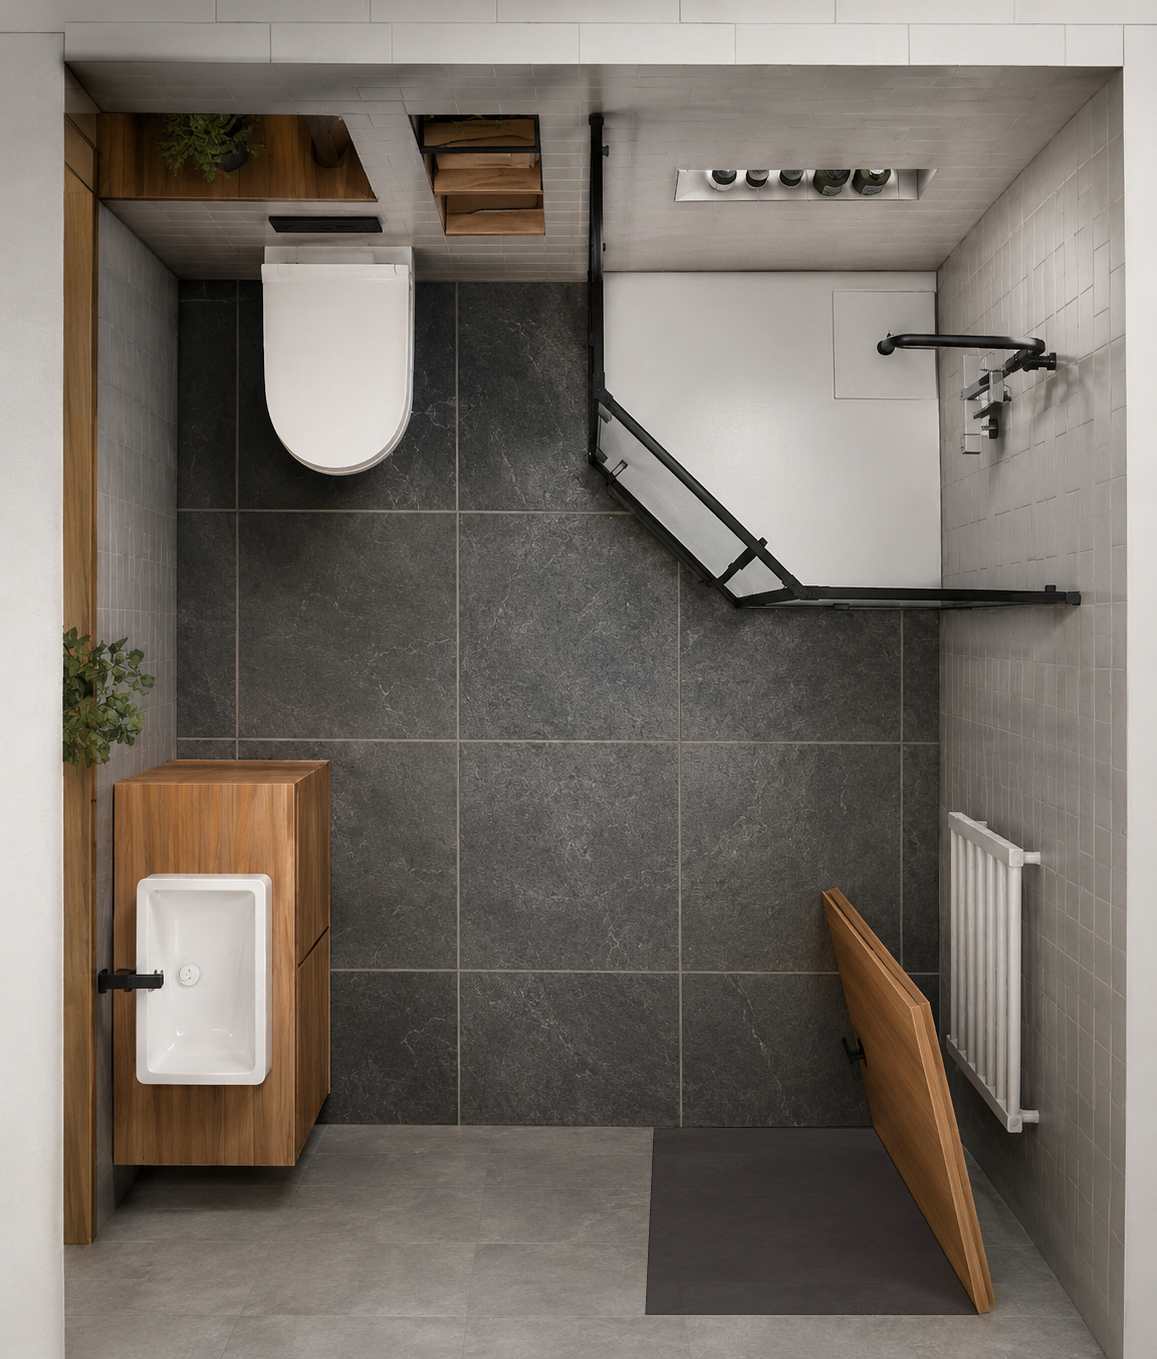
yeah its really tricky and more of a challenge than "fun" which i was kinda hoping for. It sort of brings me full circle to the toilet on the back wall again with the pentagon shower. Plenty of room for me to stagger to the toilet after Sunderland win the Eufa Cup. Window is in the wrong place which doesnt help me but theres not a lot i can do about that now.

-
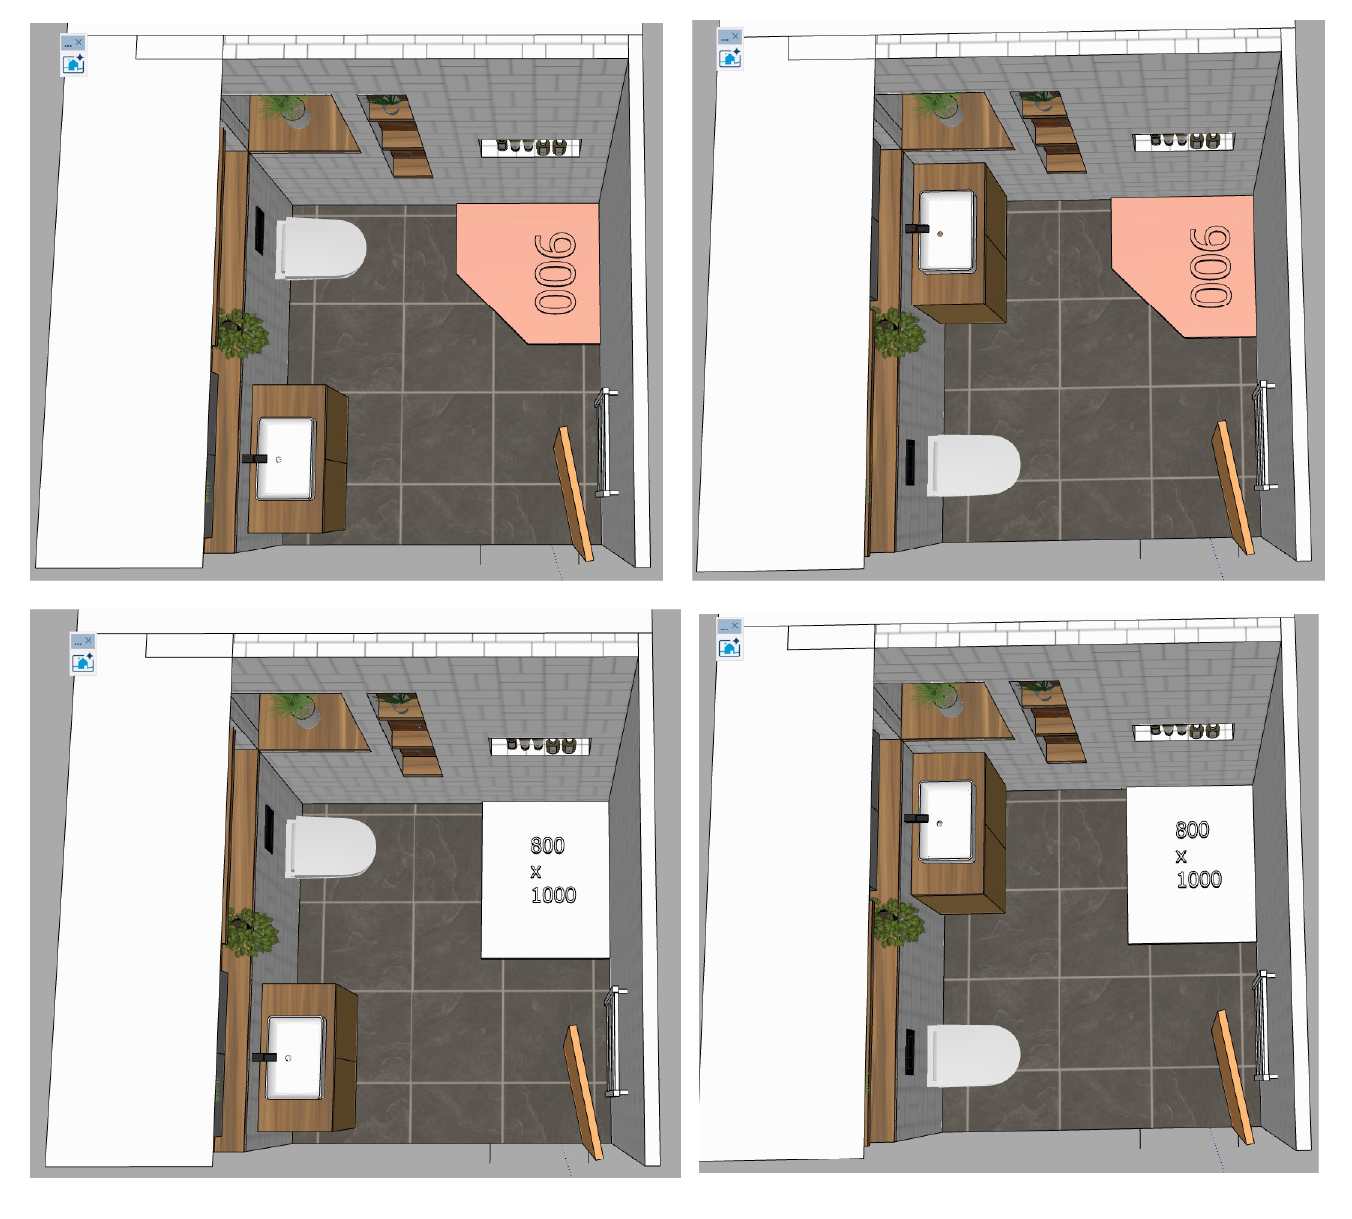
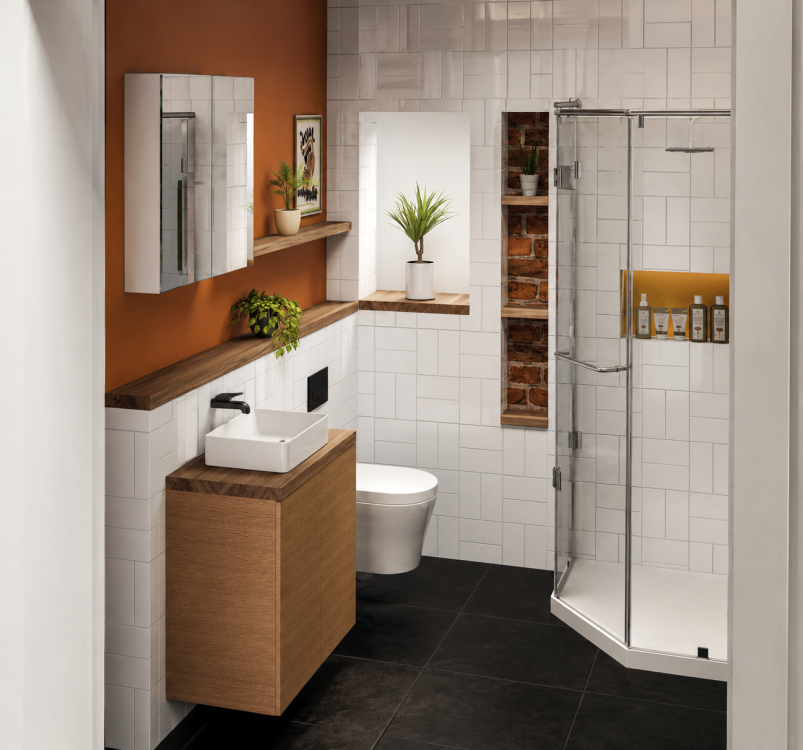
looks a bit too cramped? this is with an 800mm wide shower rather than the 900 pentagon. I was thinking id need more space at the sink, hence moving it down "into the open" but still working on these ideas.
-
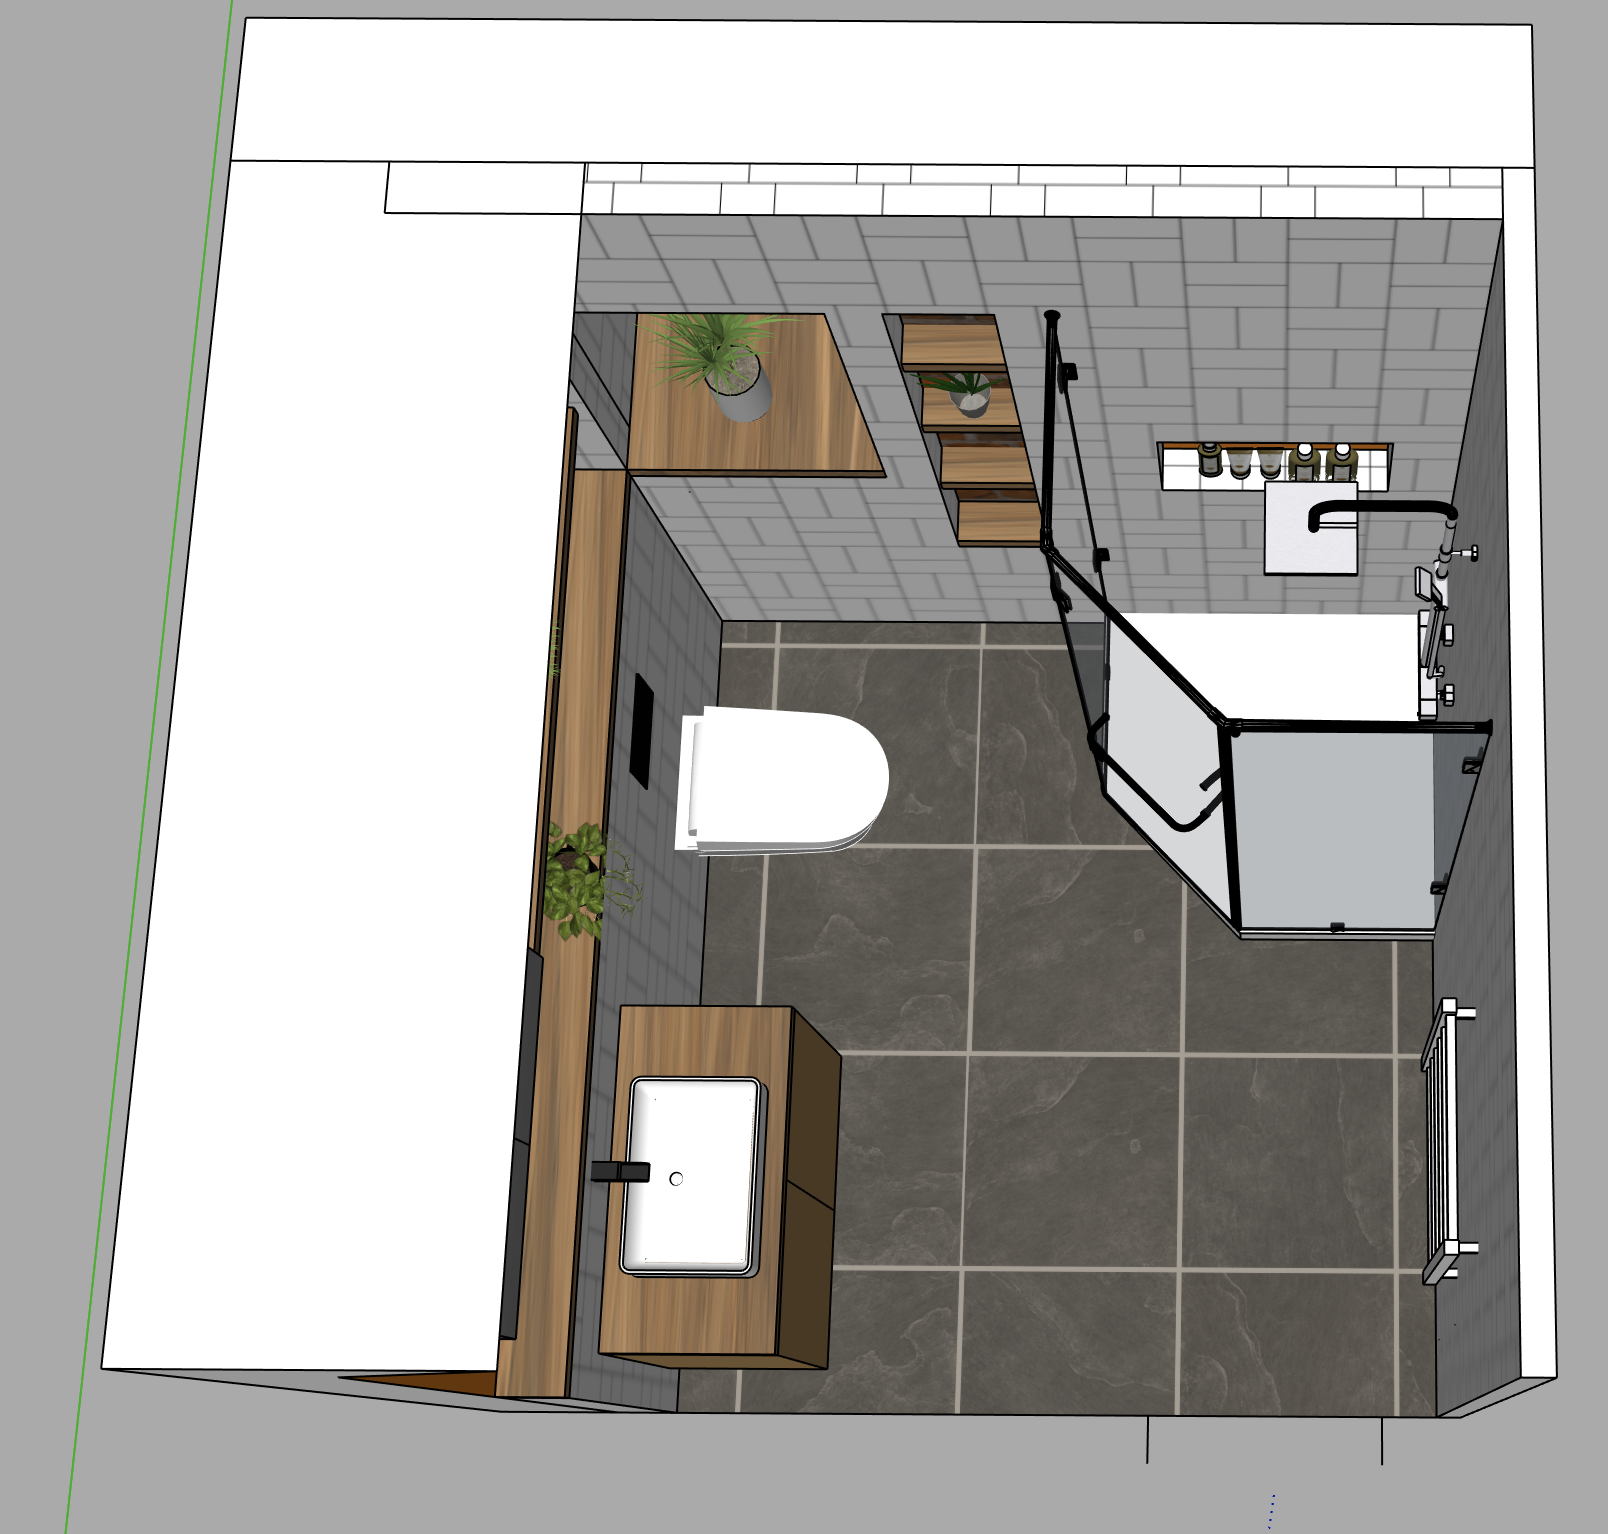
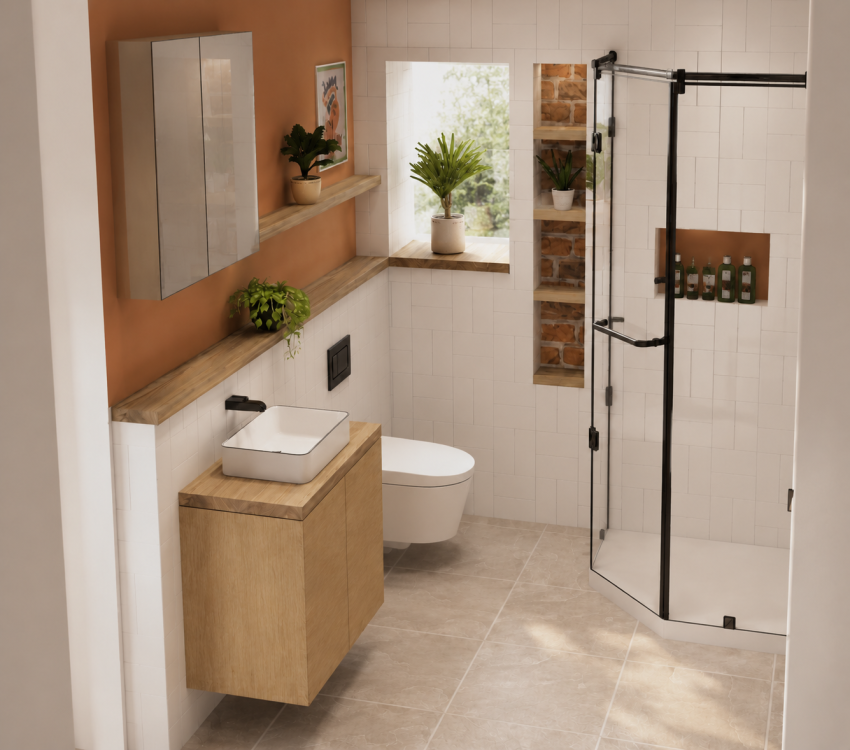
all great stuff, thanks people. See attached for a few top down options of flipping the bog and sink and shower change to a rectangle. The idea of the pentagon shower was to make it feel less cramped, but im not heart set on that idea at all, everything on the table currently.

-
the door is only 610mm and its bottom right looking at from the pictures above. Looking at it unhung it looks crazy narrow, but thats how its always been since 1930, i just replaced the old softwood one for the solid core oak alternative, the size is no issue. Towel rail on the wall where the door opens up to most likely. If it ends up even remotely like these pictures i'll be happy.

-
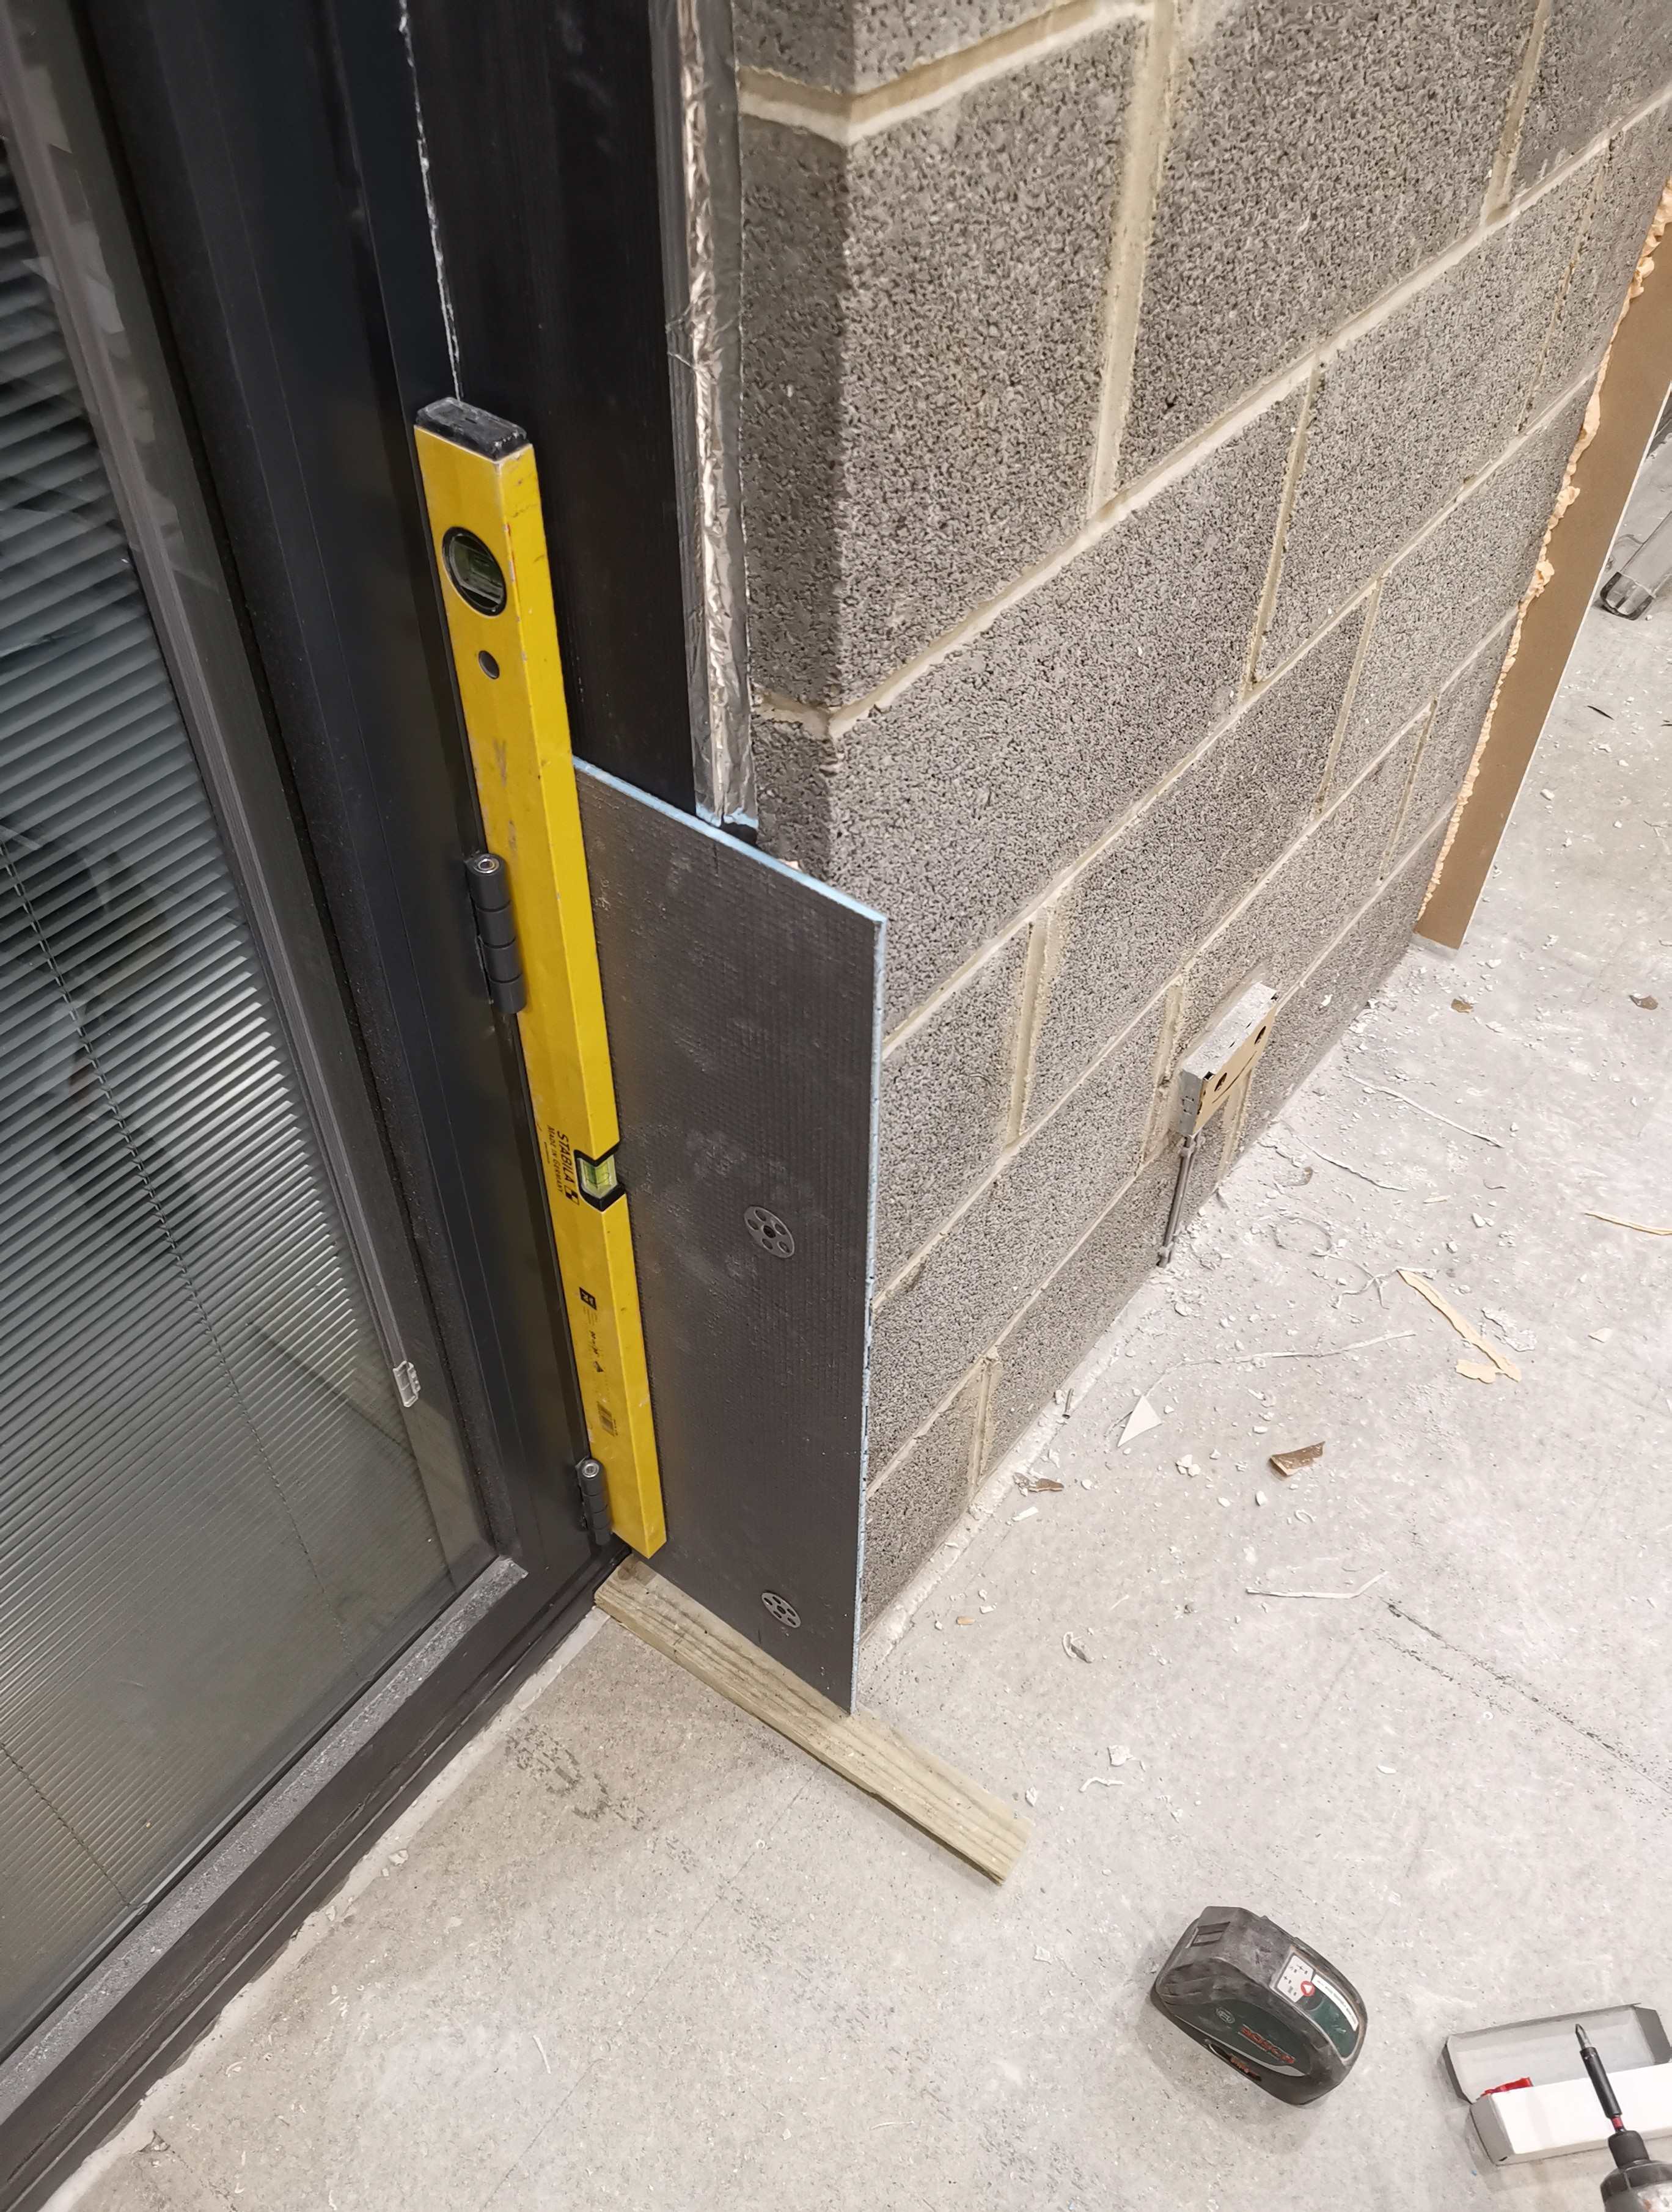
anything is on the table, im only in the early stages here but choices are limited in such a room, anything considered though. The only constants are the soil location and the window. Ive made those changes, i did have the tap in the stud wall, the renderer took liberties and changed it for some reason. I didnt consider the condensation on the brick, cheers for that. I have a section of exposed brick in all the rooms ive worked on so far, bit of a call-out to the original house which i have essentially carved up. I would like to keep that, maybe an insulated board and then original bricks cut into slips...
-
i might be able to make that work...

-
dont worry Nick, one way or the other ive got an agreement for a FOC turd remover 🤣
-
problem i have with that is the shower is really close to your knees if i rotate it to face it. I did want it like that originally as it would mean 1 less bend in the 110mm waste.
-
Zero. At least nothing but a hair-burg I could get from the bath plug. So you're saying don't bother with any rodding points or access ? I mean could keep one on the middle WC branch but then just box it all in, could always cut out the boxing if I need to. Id always follow your good advice chief.
-
wonder if its worth adding a rodding point to all 3 or if its easy enough to manipulate up or down from the main access in the middle of the 3? Could drill out and add removable caps i guess, my only access would be from directly behind the soil, not from the sides.
-
Hmm, the access to the other side of the branch will be internal, boxed in within a wall. Could always make an access panel I guess, probably better safe than sorry. 2x45 instead of 90s might help as well if I have the room.
-
Also just clicked on there are no real rodding opportunities. Take my chances, eat less protein and shave my head?
-
SketchUp for the 3D stuff, Illustrator for the flat drawings. I'm the kind of person that needs to draw things up before my brain lets me do any of the work.
-
I used foam onto my concrete blocks but regs said I needed to use mechanical fixings as well. If you're not getting it checked I'd just use the foam personally.
-
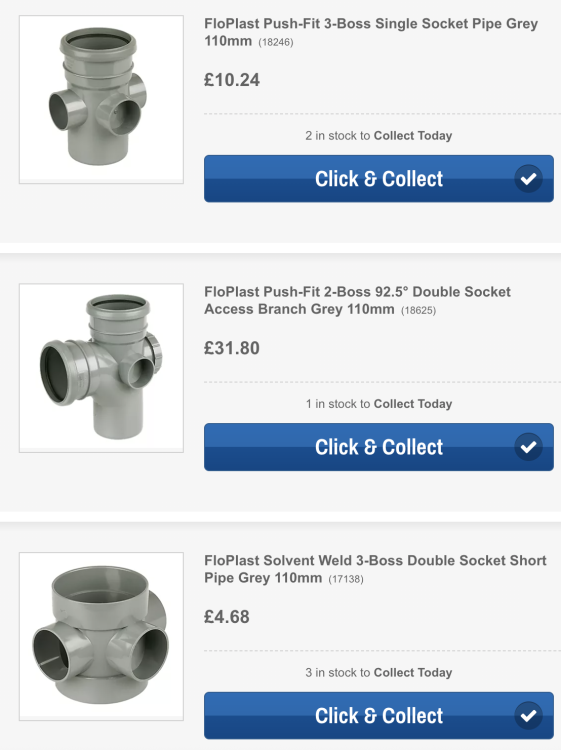
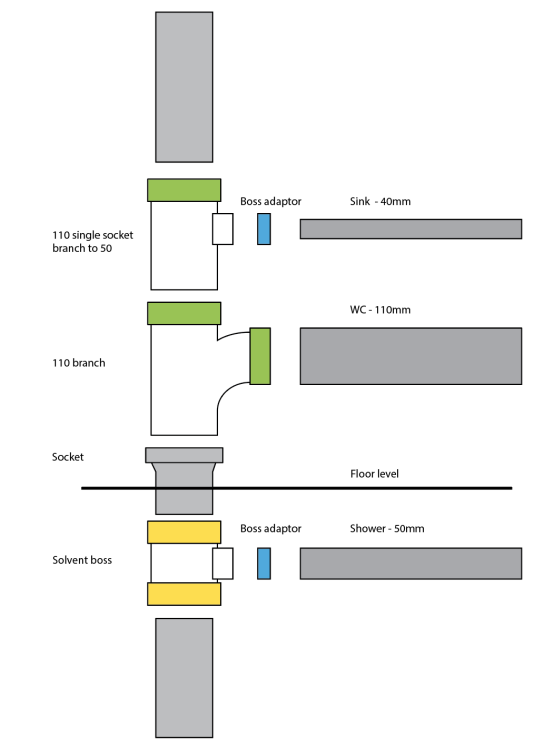
theres no doubt about it, im a worrier and always need positive reinforcement on tasks. Thats why this forum has been an absolute gem of a find during my refurb. Looking at it, the very short stubby solvent weld boss might be the best way to go as its lower than any push fit i can find, that will help with my fall. That means i'll have a weld section on the top as well so id need either a joining piece of straight and then a triple socket boss or even better a socket welded in then i can go with the "normal" push fit boss, could even use the socket i need to cut off the pipe i have in-situ. Not sure why im overthinking this...
-
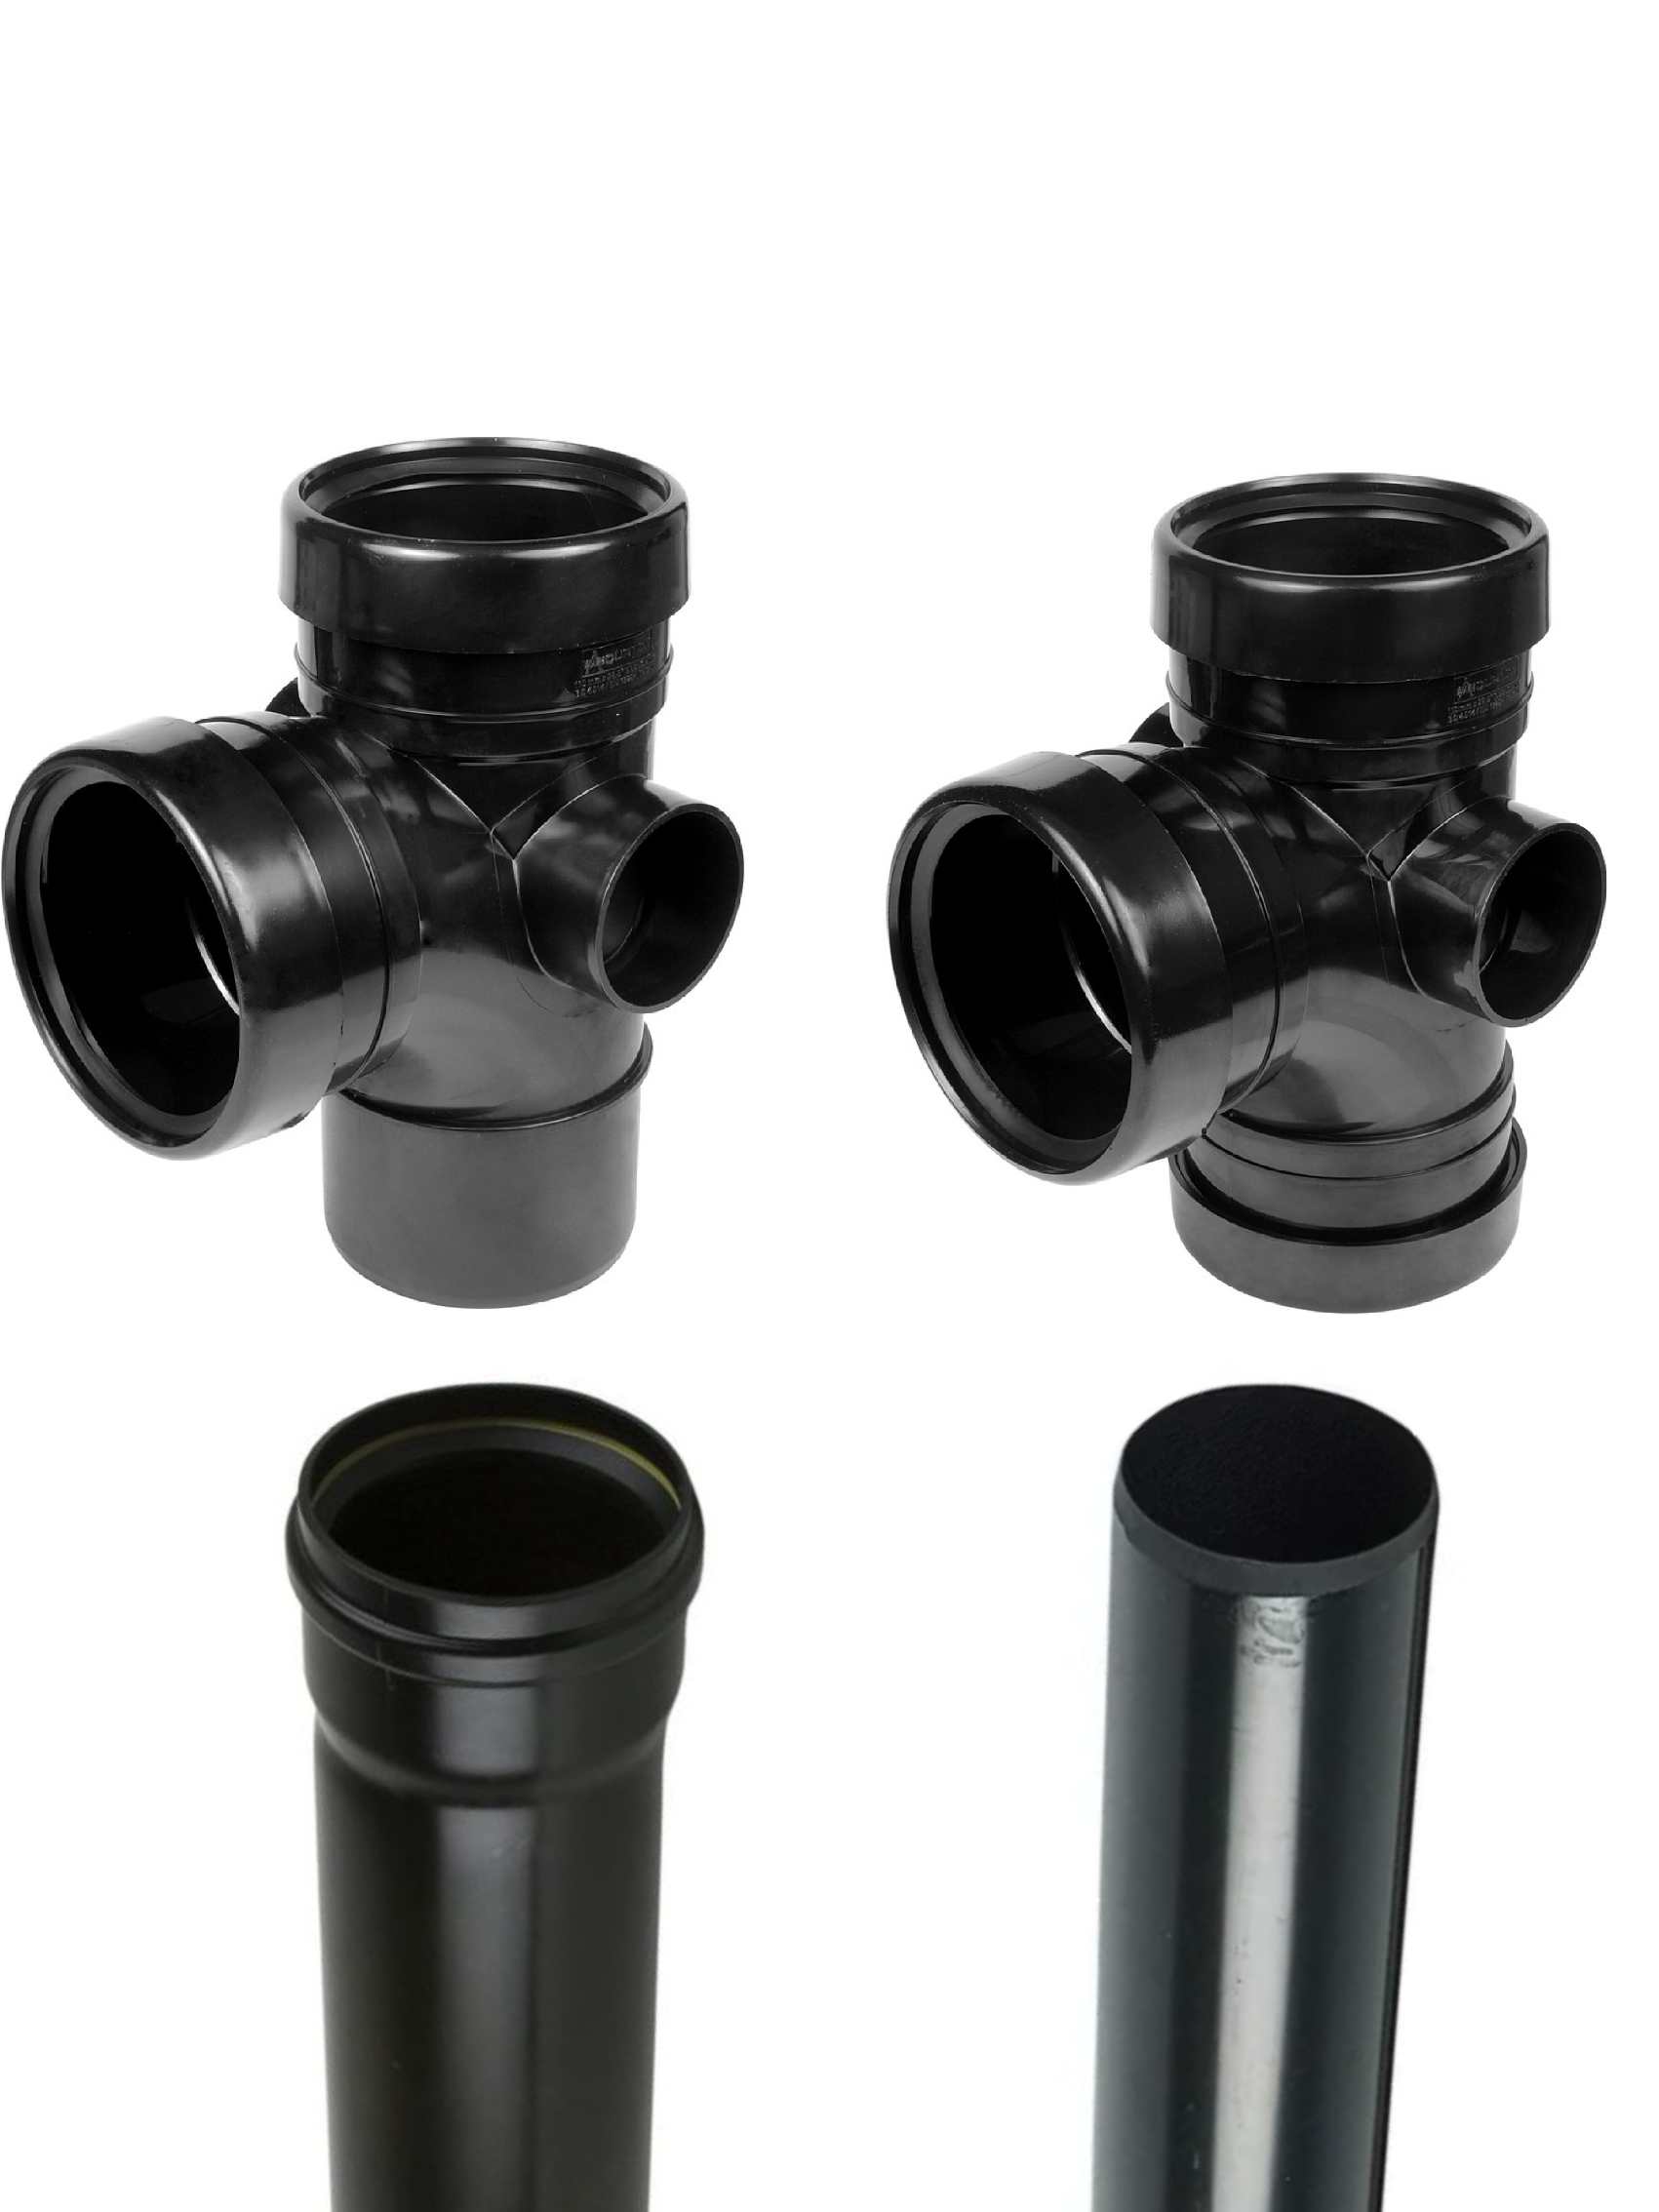
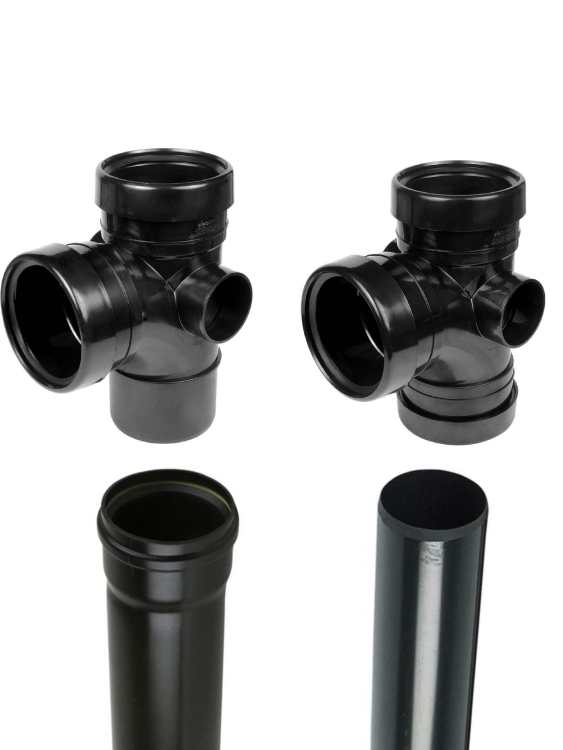
I've only ever built stacks with the sockets at the top of the branches/pipe, one on top of the other (photo on the left). Never used a branch with the socket at the bottom as well, going "over" the stack as on the right in the picture. How trustworthy is the seal on the one on the right, as that's the situation I'll be in once I cut the socket off the soil pipe to reduce it.
-
Do you trust them? Seemed like not having the socket around the outside of the bottom of the branch is asking for leaks.
-
It's more the cutting off the socket on the stack and then how to convert that "back into" a socket really, not sure if trust myself with a branch welded on incase I need to adjust the direction slightly. Would you recommend a solvent weld-to-socket? https://www.screwfix.com/p/floplast-push-fit-solvent-weld-single-socket-pipe-coupler-grey-110mm/13738
-
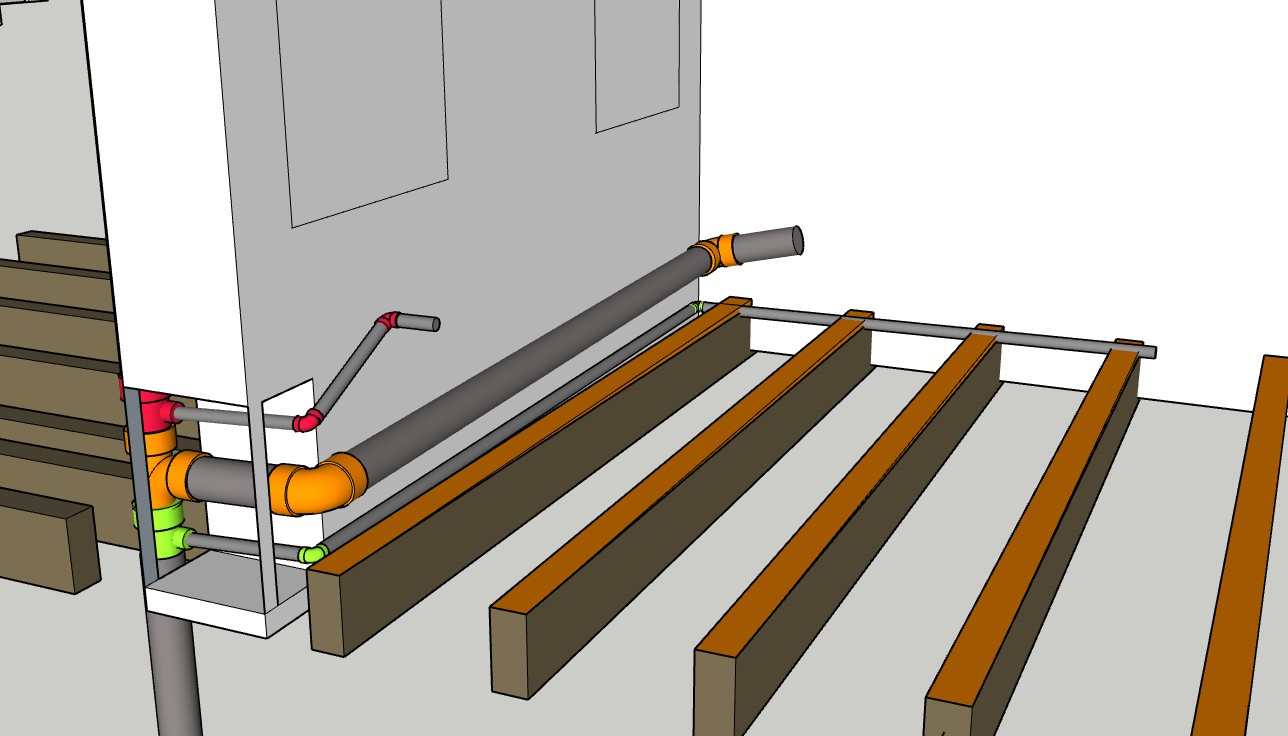
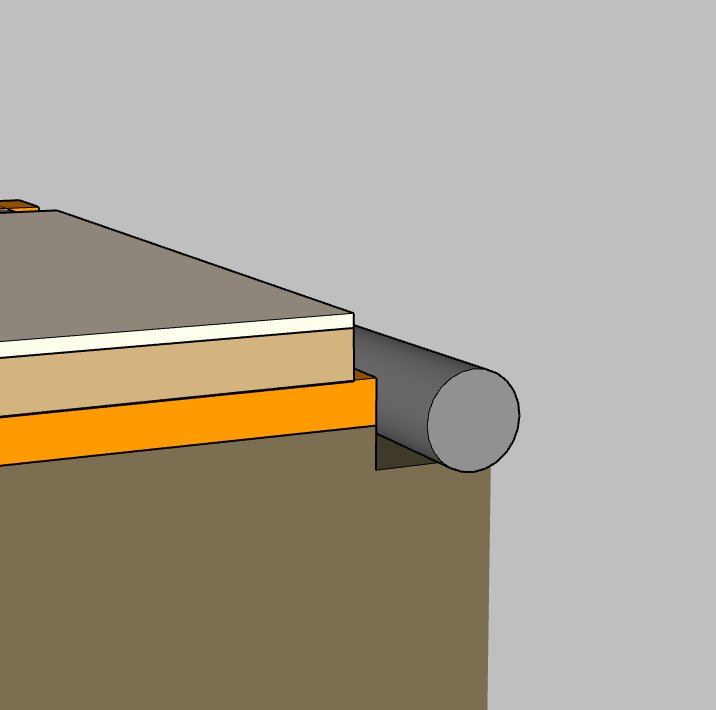
An option is a raised tray and once i get to the left hand wall there is maybe 80mm gap between the brick and the first joist so im good once im there. The joists are 170mm. Ive levelled them as the house sunk onto the beam when the house became open plan, with 20mm timber down at that end fading to 0 at the opposite end. Plus 22mm chipboard and 6mm ply. I was planning on notching all of the above which will give me roughly 70mm to play with if i run the waste close to the outside wall i dont need the subfloor covering as that wall will be studded out anyways. A raised tray is not out the question for me though, havent looked into it yet. Just at rough planning here.
-
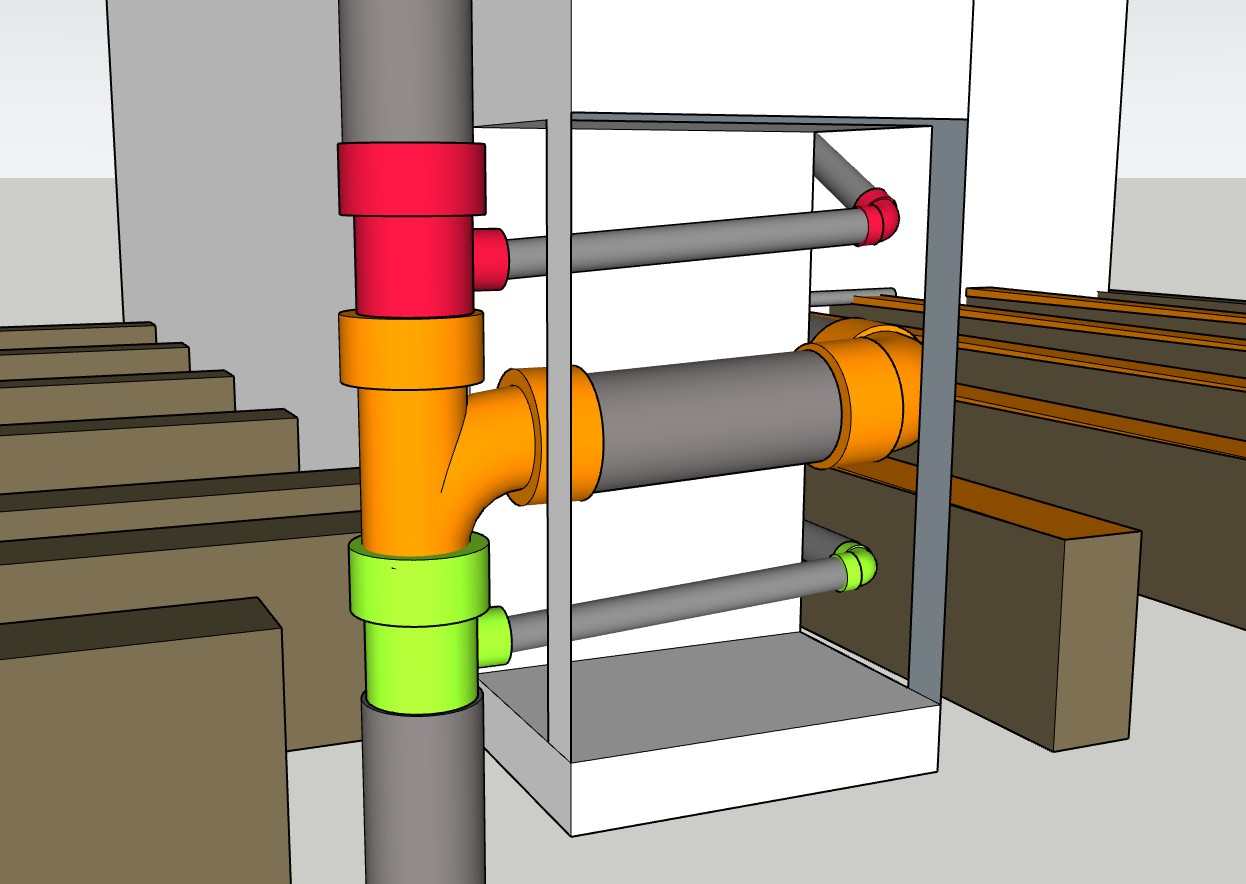
good man and good news. One issue ive got, the stack. To be able to add in the addition lower connection for the shower id have to cut off the socket. The rest of the soil past joist level is already in-situ and i simply cant get to it without major surgery, i can only see the very top before the branch. If i cut off the female socket, remove 4 inches of pipe, whats my best option to add in the first branch to the stack? Solvent weld-to-socket? Female-to-female branch? Anything "on the outside" of the pipe seems a risk. This is the current setup, socket on soil then the branch. Second image is what i need to achieve.


-
im looking at potential layouts for my small, 2.2m x 2.xm bathroom. Before i offer up any designs to the missus, would a run of the 110mm waste like this be ok? im not 100% on this, but if i can move the bog to under the window then i will. It just means i guess 3x bends to get to the stack, which is all internal and the horizontal is around 2m. No access to any outside wall or underneath. Any thoughts guys?


-
When I was stuck for space I used 6mm, foamed on and then mechanically fixed so I could get it plumb and level.

-

Void Behind Bay Window Roof - How bad of an issue is this?
Super_Paulie replied to EinTopaz's topic in Heat Insulation
If you've ever stripped old walls then you'd be surprised how drafty it is through any gap between bricks on the inner wall. Id imagine there's wind howling round cavities so you've got to do your best to stop that, I tend to just rake out and repoint but I do use FM330 if it's easier to do so. -
Void Behind Bay Window Roof - How bad of an issue is this?
Super_Paulie replied to EinTopaz's topic in Heat Insulation
looks like a catnic to me? Id do what you suggest, PIR in there, foam it in and then cover with wool where you cant get to it. Probably not worth using thermalites if the lintel is supported which it surely is.