


Jothetaxi
-
Posts
61 -
Joined
-
Last visited
Jothetaxi's Achievements
Member (3/5)
5
Reputation
-
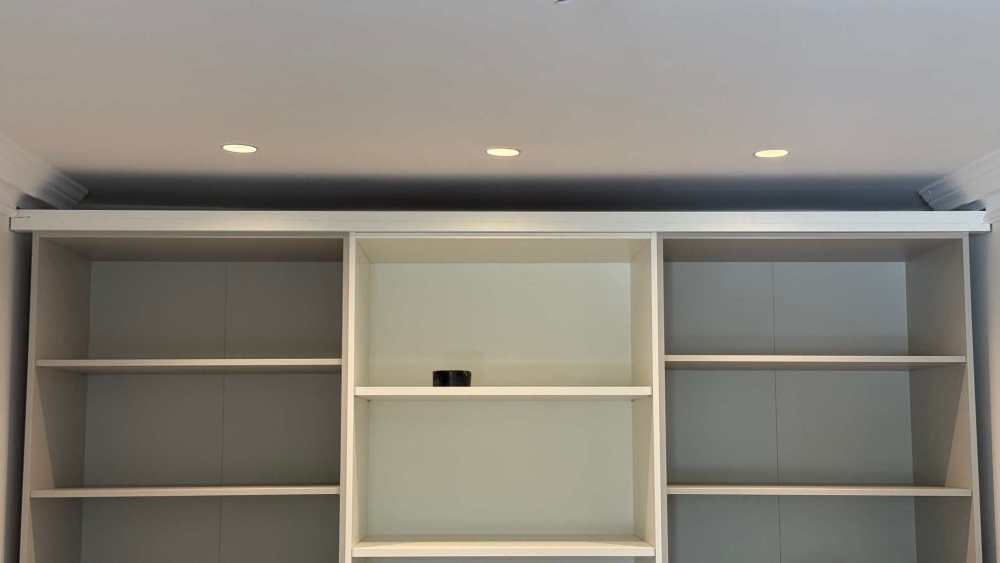
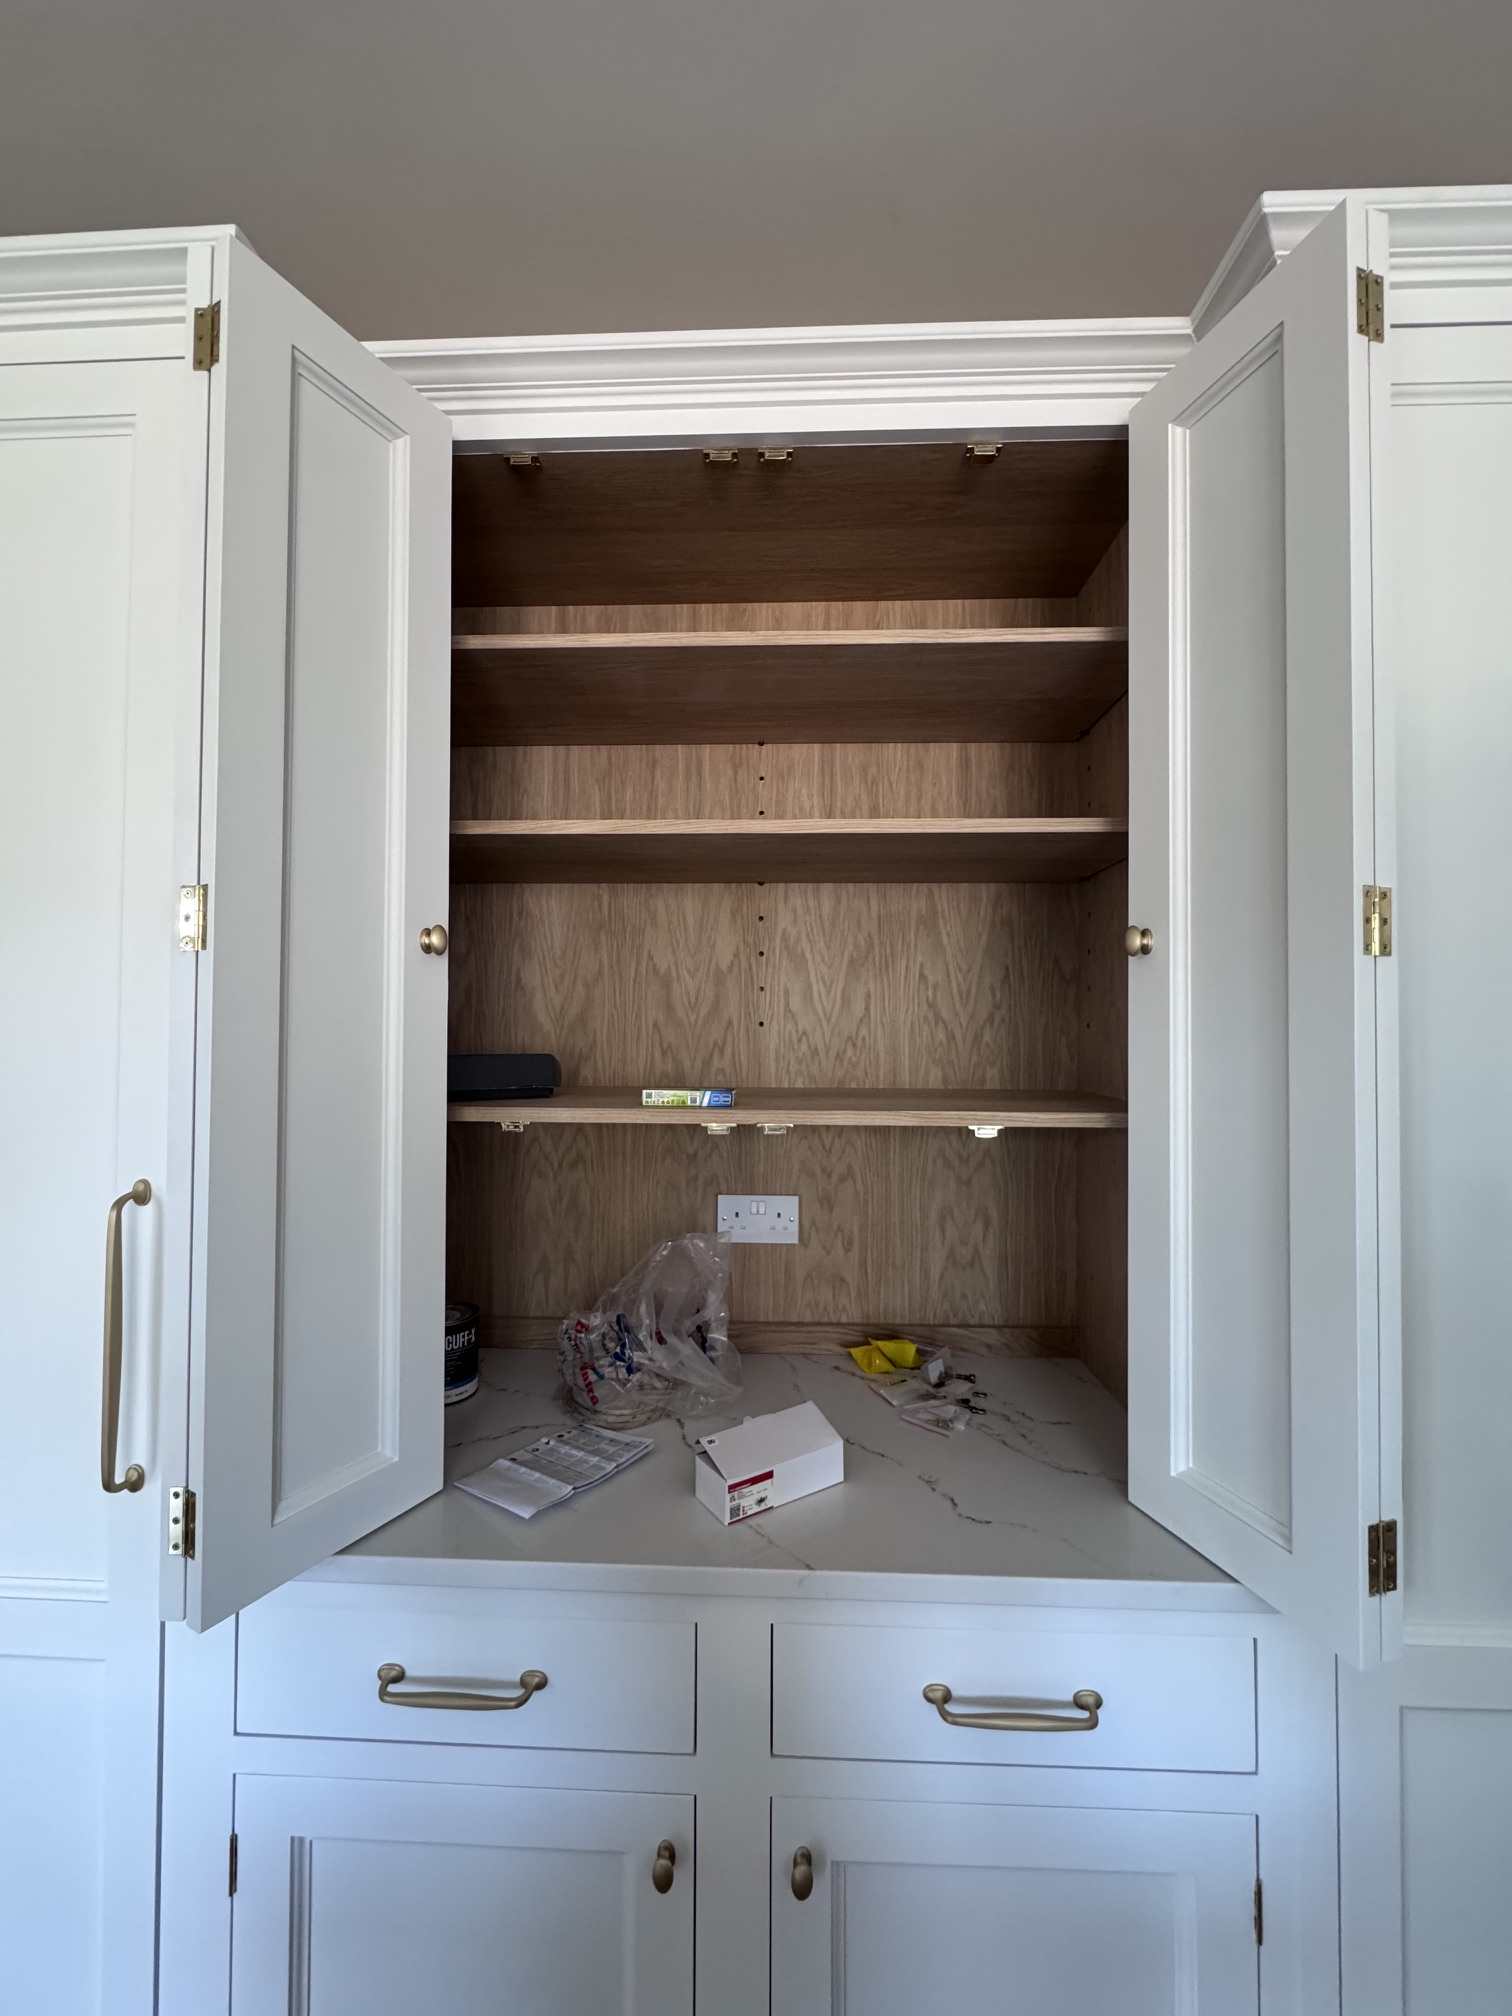
We would like to add an LED lighting strip in a corner profile to the underside of the lower shelf (against the back). I bought a Luxomat PD9-1C-92902 sensor to link up for the lighting. The builders electrician did not complete the job and a new electrician has stepped in. Had a conversation with him about the placement of the sensor, which would preferably at the top underside of the unit, towards to the back edge. We have concerns that it may: 1) not detect movement if too far back or 2) would the sensor detect people through the gaps in the doors when they are closed and turn on and off. Has anyone used one of these in similar situation? I looked at the switches that link to the doors but they wouldn't work as there are two pantry doors and it gets complicated to link up the two. Does anyone have any other ideas? sadly it is a retrofit now. Not a serious issue but would be good to have light here during the darker winter months. Thanks.

-
We looking to get an estimate cost for updating a section of the facade on our home, which we are not happy with. Is anyone able to help give an idea of cost? if there is a quantity surveyor on here who may be able to help. Thanks
-
You are right about that. I think we’ve hit a wall and are totally fed up with all the problems and decisions. Just as we thought we were on the home run, this came up.
-
Thanks very much for the replies. The house has been refurbished and this is where the garage was, so imagine the ceiling is following some of the original joists when boarding. We're on a very tight timeline now so could have done without this. Wardrobes are dead level. Thanks for the detail on the return for the coving - that is what we plan to do; It is working out who can actually cut the coving away, as we are on a very tight timeline. The coving guy says he can finish the end with the return detail and that will look more intentional. Agree with Mr Punter about the infill to the ceiling. I think that is what they will do. Frustrating with all planning involved.
-
Thanks for the reply. This is the only room where the coving fitter has taken the coving past the joinery line. In other rooms he stopped it short so it can be finished before it hits the wardrobes/joinery. I have no idea why he did this here and it has made it more complicated. Just wondering if he can cut the coving away vertically. You can see the line where the coving would not sit straight on the joinery. What a headache.
-
we've spent so long planning the joinery in our home. In two of the rooms the plaster coving was going to run across the top of wardrobes. The wardrobes were designed with this in mind. Plaster coving guy has come to fit the coving above the wardrobes and has discovered the ceiling is out, meaning there will be a large variation and the coving won't be straight. I would appreciate any thoughts on how to finish this. We could add a timber cornice to the top but that would mean cutting back the coving. Absolutely gutted that years of planning have come to this on the day of fitting. Any help appreciated.
-
Thanks for the replies. Much appreciated. We are considering adding holes in more symmetrical positions, then closing up the old ones, if someone like a magicman can make it look ok. Would the tray run along the top of the door opening?
-
I’ve put this post in this area, as I was unsure where else to put it. Builders installed weep holes above our doors in random positions and they look a right mess. We know they are required but it’s the random positioning that bothers us and it draws your eye. I’ve attached photos but they don’t really show the extent of it. is there a way of obscuring these? We know they can’t be sealed up.

-
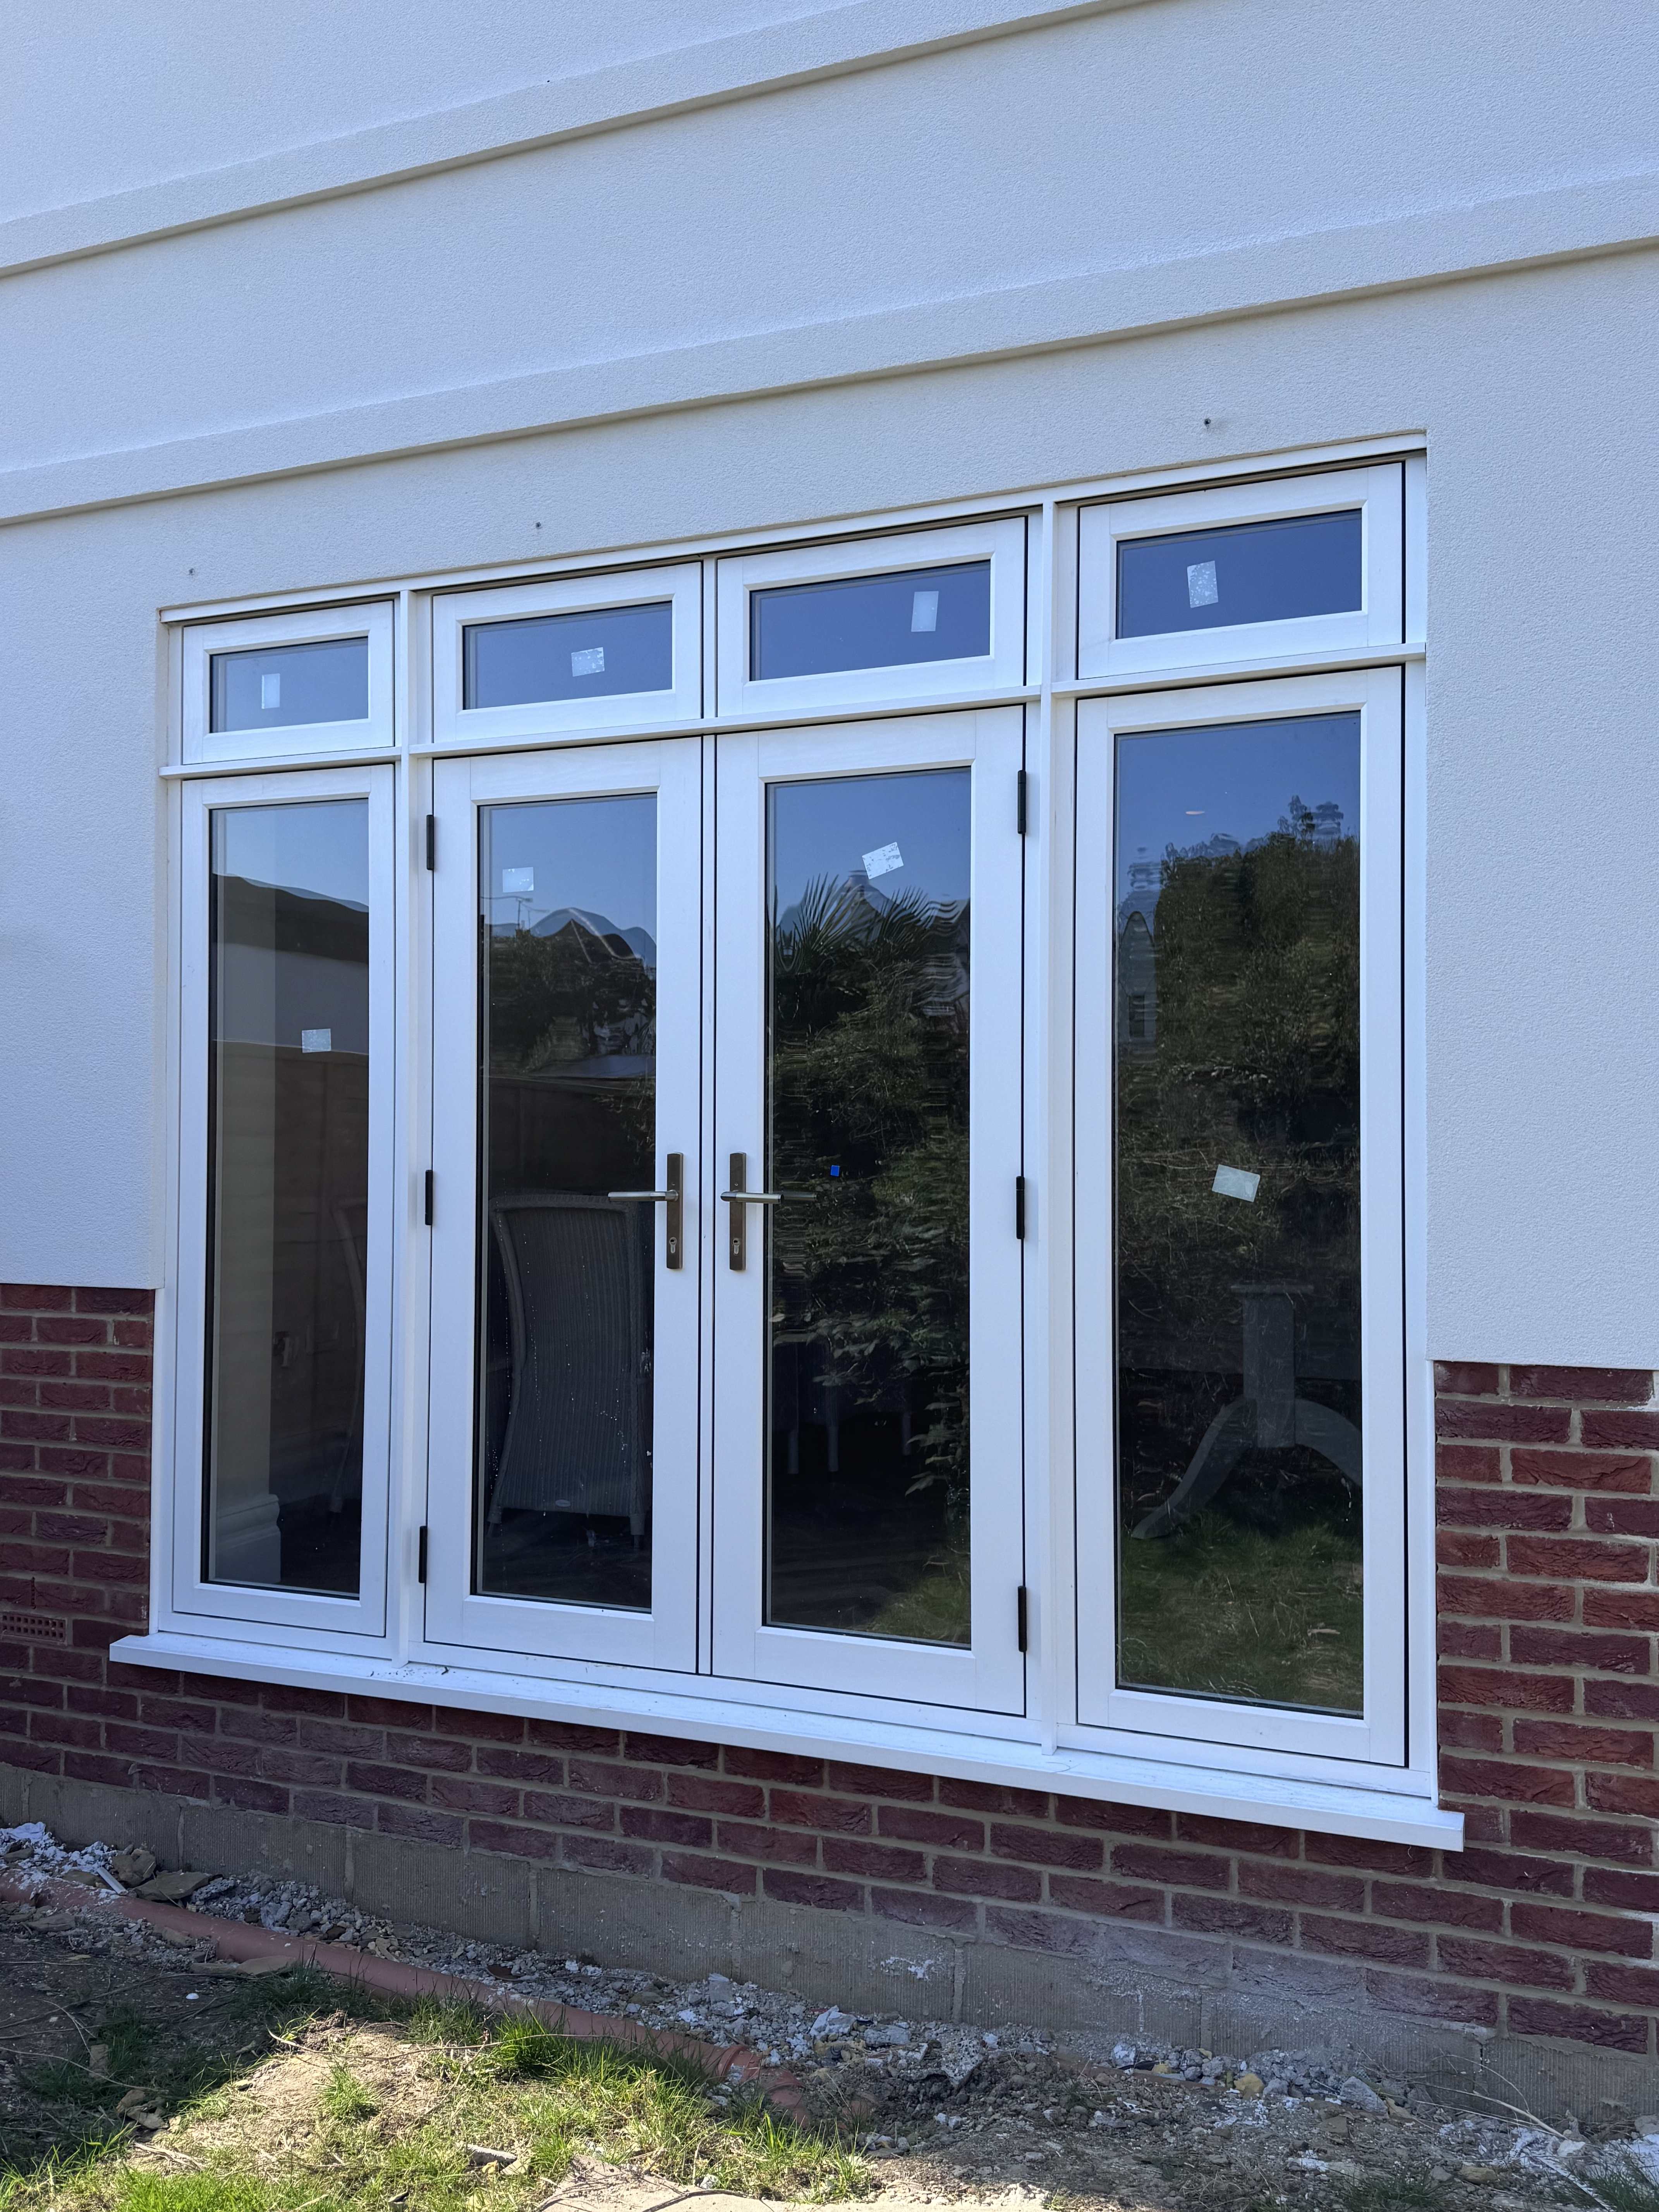
Sealant externally around windows - Silicone Render
Jothetaxi replied to Jothetaxi's topic in Windows & Glazing
Thanks for the replies. Yes, I think we will seal the windows. The window company are sending a mastic guy - thank goodness. mastic guy has suggested white to match the windows. One angry builder already came back and sealed an expansion joint in the brickwork and it looks awful. Mastic guy said he would take it out and redo it for us. I take it angry builders coming back to do snagging items is a recognised thing then? Thought it was just us! -
We had a surveyor undertake a building snag survey post build. One of the (many!) things he picked up was the windows were not sealed externally. The house has silicone render applied to thermal insulation boards. We believe SPS Envirowall was the brand used (but to be honest who knows with our builders!). Windows are Residence 9 UPVC windows. The window installer/supplier is saying that customers do not generally have their windows silicone sealed around the external edges, as they already have silicone render applied to the edge of the window frame. What are your thoughts on this? we thought that if a chartered surveyor picks this up then it must be important. To be fair the window company is via the contractor (but at our request). Any thoughts gratefully received.
-
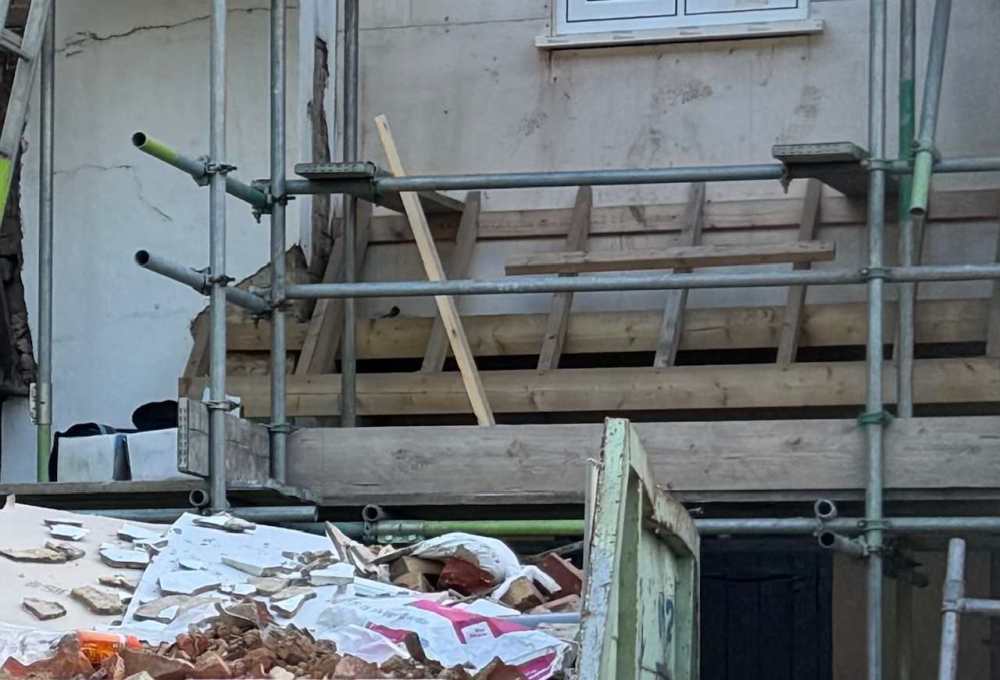
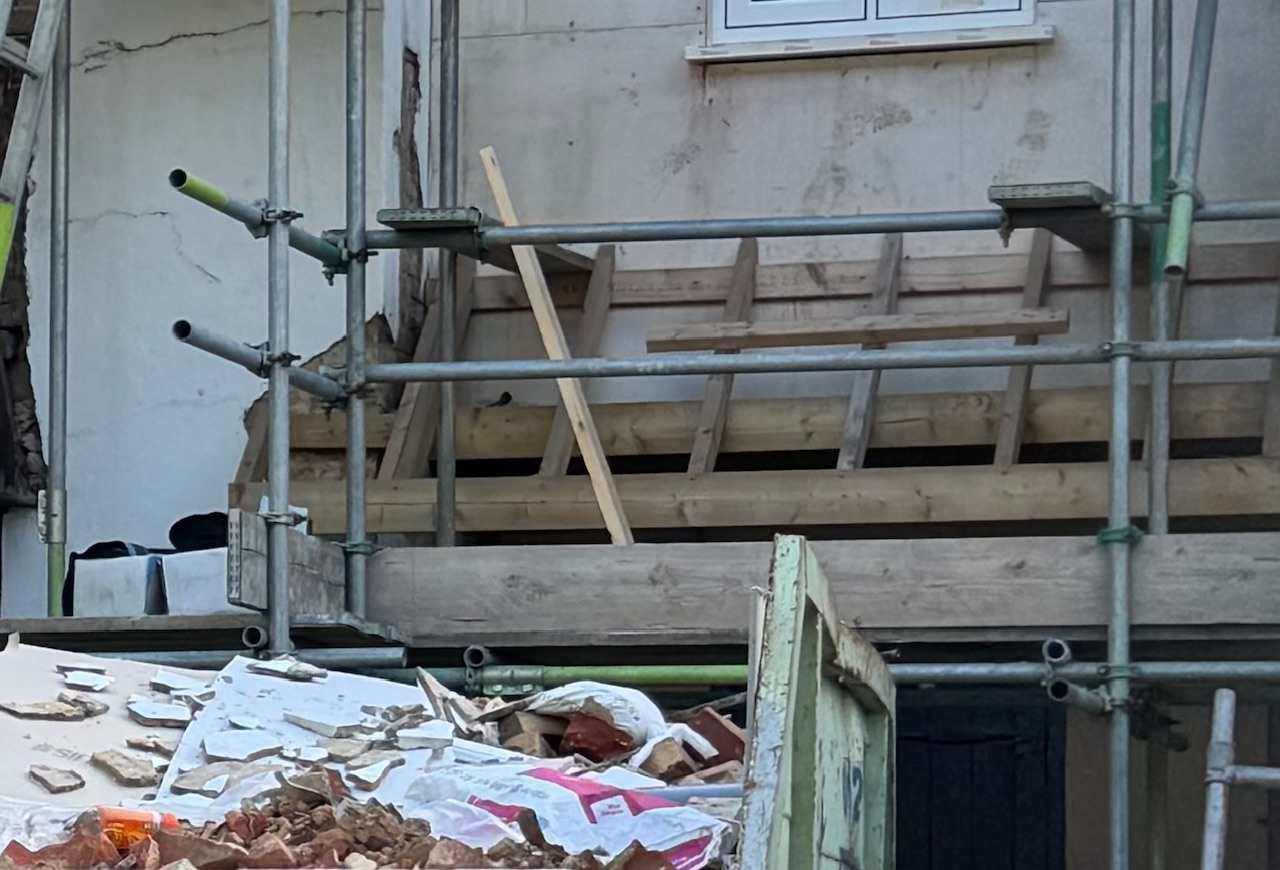
Here are some photos taken during construction.
.thumb.jpeg.46e2bec8fdd333396d2c3e152ac45ea4.jpeg)
-
Thank you - I shall take some more photos and look to see if I have any during the construction phase.
-
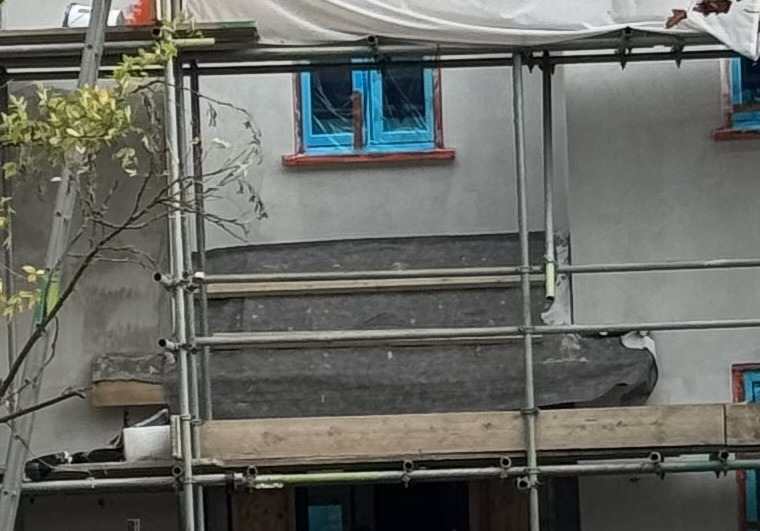
Thanks for taking the time to reply. As the home owners we don't have the technical expertise to fully comprehend the technicalities of what is going on in the drawings, but it seems like the architect also has some questions to answer here? Having had rendering undertaken on our previous properties, as well as seeing local properties in our area with similar canopy finishes, we noted the use of a bell cast bead over the flashing and then noted it wasn't used on our canopy. We noted the addition of a bell cast bead, at the end of a render finish, creates a clean and even finish when it meets flashing and a tiled roof line. To be honest, the initial impression was about the aesthetics of the roof finish and render (plus chipped tiles). In simple terms, we think it looks a mess. Thanks for your reply but we are not happy with it - we will always look at it thinking we are not happy with it. We are detail people who spent a lot of time, money and energy working with the architect on the plans so we expected them to be followed.
-
Thanks for taking the time to reply. As the home owners we don't have the technical expertise to fully comprehend the technicalities of what is going on in the drawings, but it seems like the architect also has some questions to answer here? Having had rendering undertaken on our previous properties, as well as seeing local properties in our area with similar canopy finishes, we noted the use of a bell cast bead over the flashing and then noted it wasn't used on our canopy. We noted the addition of a bell cast bead, at the end of a render finish, creates a clean and even finish when it meets flashing and a tiled roof line. To be honest, the initial impression was about the aesthetics of the roof finish and render (plus chipped tiles). In simple terms, we think it looks a mess.
-
Thanks for reply. This is probably why the architect is saying the finish is to a satisfactory standard. Any ideas on how it can be rectified to look reasonable? or are we talking a full re-design of this area? To us it just looks a mess.


.jpeg.4b0d2f6c5f94205c7acd210930c46ff7.jpeg)