Leaderboard


Popular Content
Showing content with the highest reputation on 04/16/17 in all areas
-
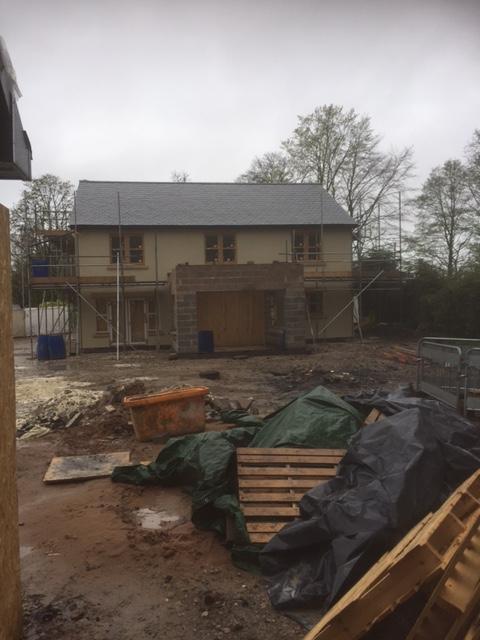
I finished the render off this morning Just the Orangery to do and the two garages I can now get rid of the scaffolding and put copings on the orangery and the GRP on the roof We are going to get the outside looking something like before stating the inside of the house
 3 points
 -
No disrespect to anyone here but most experience will be with your own individual inverter. Why not post the OP question over on TEF: https://talk.electricianforum.co.uk You'll get @binky come along and give his honest opinion as someone who fits loads hence has wide experience of different makes. He is to PV what Nick is here to plumbing.3 points
-
Having gone through the process of considering then discounting travertine as our floor covering of choice, we eventually settled on a porcelin tile to cover those areas (kitchen, utility and vestibule) that were not having oak flooring laid. Unfortunately for us, the person who we believed was going to be doing our tiling (and does virtually all of the builders tiling), at the last moment refused to undertake the work in our house. Quite why I've not been able to establish, nor has my builder. To say I was put out is an understatement. My builder was none too happy either. Fortunately, he was able to pull a rabbit out of the hat a couple of weeks later, in the form of Tony from Australia, a tiler on an extended visit to Orkney. As neither of us had seen his work, we agreed that he would tile an initial small area and decide whether he would do the whole job on that. We needn't have worried, a really nice and hard working guy, he set about measuring and marking out, discussing patterns and the best way to achieve the look we wanted. As the tiles started to go down, we could see the care he was taking, and we are more than happy with the result. Due to insufficient clearance under both the front and back door we ended up creating mat wells for the door to open over, edging the wells with aluminium trim. Moving into the bathrooms, where we had decided to use the same porcelin tiles, we tiled all the walls to half height, and finished with a simple straight edge aluminium trim. In the picture you can see the bulkheads we created to conceal the cistern and give a finished height of 1000mm, and the frame / surround for our bath. Access to the cistern / basin trap is by a removable tile (held in place with silicone). If for any reason we do need to get to the cistern and the tile breaks, I have 6 boxes left, so a healthy supply of spares. In the utility room, the units and oak worktop were fitted. A 50mm offcut strip from the utility worktop was used to create a handrail on the staircase, as required by building control. One of the key uses of our utility is as our clothes drying area. Readers may recall from earlier entries that we have a section of vaulted ceiling in the utility which now accommodates two clothes pulleys. Each pulley can take a full load of washing which means all washing can be hung up above normal ceiling height,out of the way. I fitted the utility MVHR extract in this space to ensure moist air is drawn away, and can happily report this particular feature to be very effective, drying all washing overnight. Through in the kitchen, plinths were fitted, doors put back, appliances installed and the worktop (quartz) lifted into place. On the island, we decided to go with a quartz splashback, and to finish with oak on top. We're very pleased with the finished look. On the other side of the kitchen, we are still undecided how to finish the splashback, so in the interim have a length of quartz. We may opt for tiles, glass or leave it as it is. We also have to decide how to finish the underside of the overhead units. This was something I flagged at the design stage but I was overruled in the quest for a 'clean look'. We have the option of fitting a piece of pelmet or a piece of shelving matching to the doors / carcuses. I suspect the later would give a better overall finish. Next entry: 2nd / final fix electrics2 points
-
Hot gets to taps quicker, cold feed to WC is slightly slower so less noise. 10mm is much easier to thread through to end points too - just have to watch out as I've never found a 10mm to 1/2" tap connector so you have to step back up to connect in 15mm I should do my research better ...!! Hand tightened 10mm Hep2O to 1/2" tap connector ... http://www.jtmplumbing.co.uk/pipe-fittings-c433/hep-o-fittings-c653/hep2o-wavin-hepworth-hep2o-polybutylene-hand-titan-tap-connector-pp212582 points
-
If it's gd quality t&g flooring the short end doesn't have to rest on a joist. When it's all glued up you won't be able to tell any difference between on a joist or a join in the middle of 2. It should all be rock solid. Mine where 400mm joist spacing.2 points
-
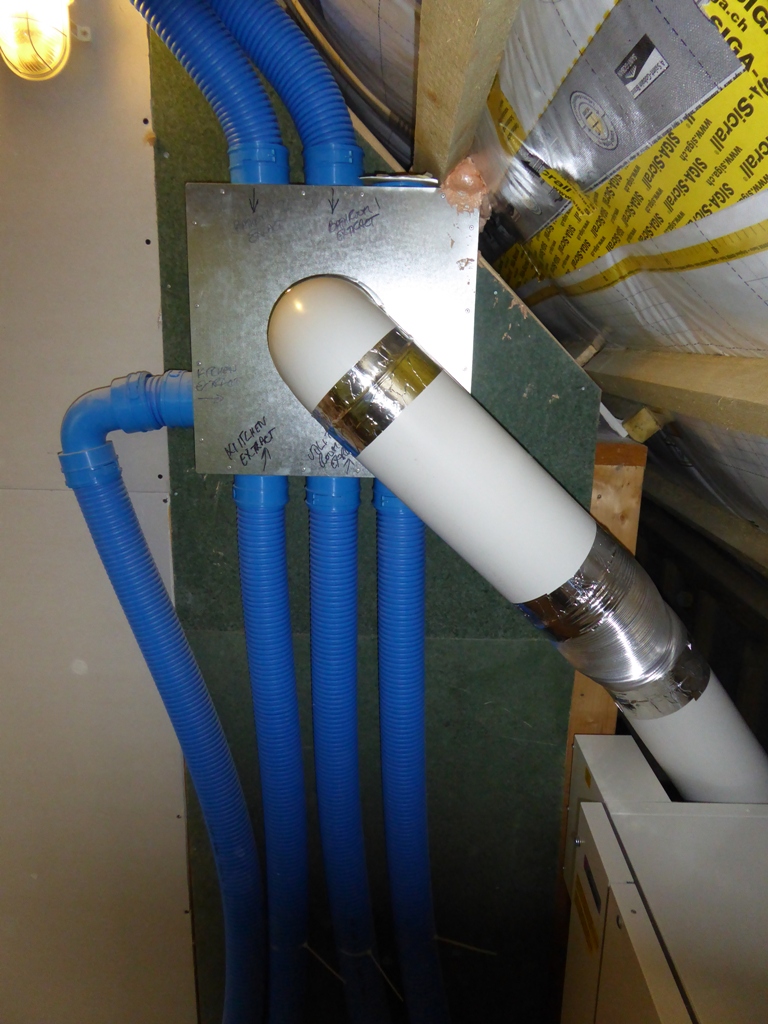
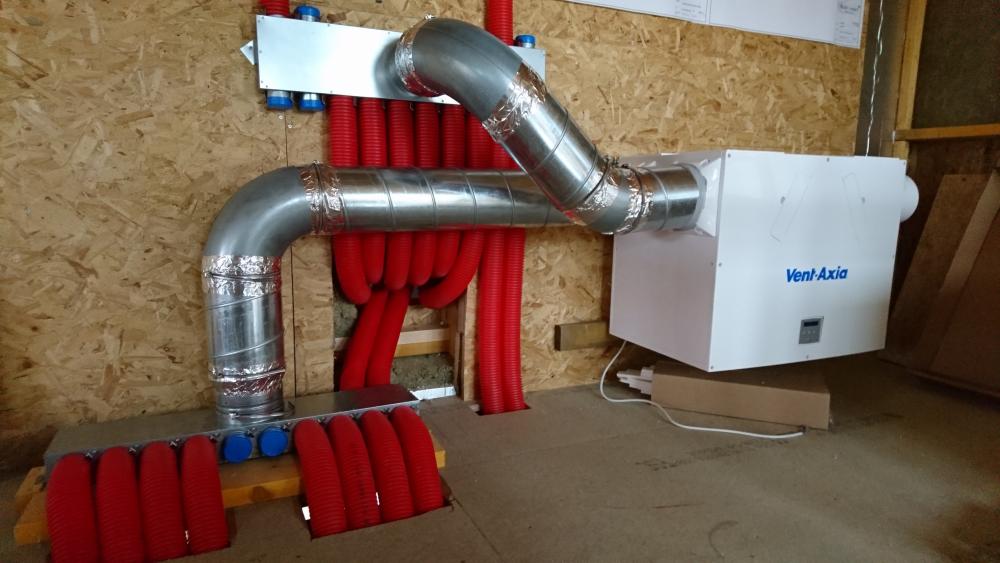
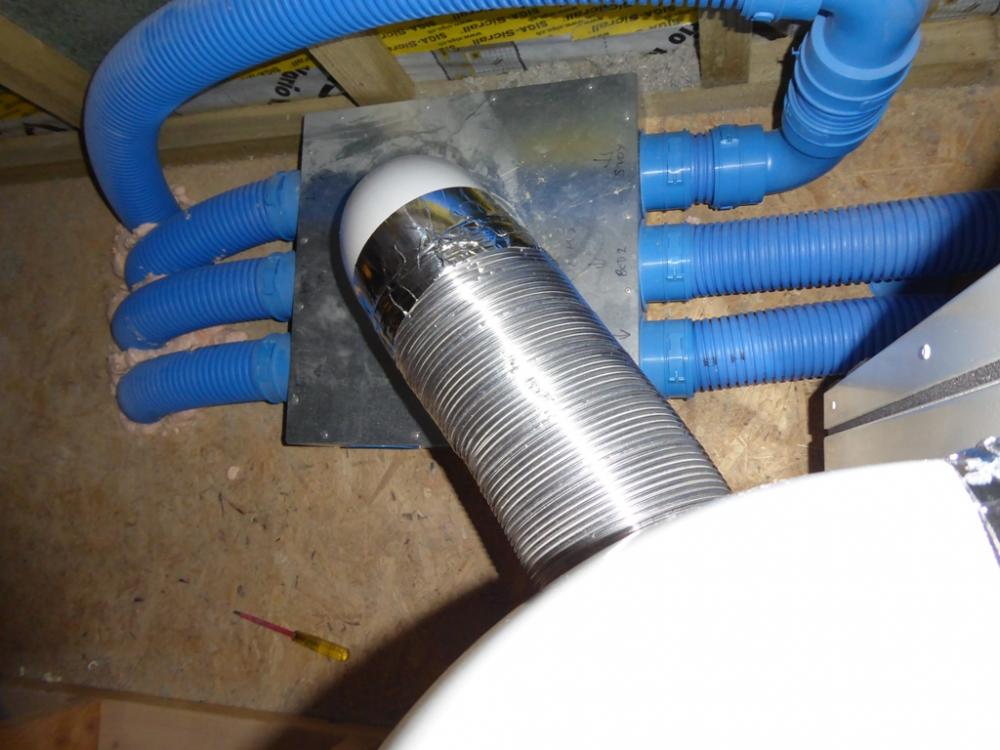
That's ours. Extract on floor, supply on wall.
 1 point
 -
The above photos show the fresh air feed (top) and extract (bottom) for our system. The installations were modified a bit later, when I added the silencers.

 1 point
 -
My Little Brown Bangalow has a narrow side-path at 960mm wide. And there is a damn great gas meter box 220mm deep ie front to back, which makes moving things problematic and even dustbins are a little tight. Q 1 - Simple question - can I get a shallower box for my gas meter? The only option I can currently see is a recessed one, which could be an answer. Q 2 - Can my gas man do such a change or would it be the gas company and forking out a large number of notes? Cheers Ferdinand1 point
-
Not quite... Firstly, is your bathroom all in one room? If so ( assuming you don't have a cloakroom with separate bath / sink ) it couldn't be easier. The 15's come off, balanced, from the UVC and multi-block, then they simply feed the shower and basin, teeing off accordingly. Feed the WC off the same unrestricted branch as the outside tap, and if possible also use that to feed the washine machine. Same balanced 15mm pair to the kitchen sink. Flow restriction to the WC is the main thing imo, but with only 3 bar coming in I'd not lose any sleep if you don't do anything other than tee off where easier.1 point
-
Meter moves are a Transco only job - £6-700 from memory but check their website as it has a decent price estimator on it. Does the pipe come up the wall externally as an option is to use a partially buried box but they need a different type of meter so again I think you get charged by someone for it....1 point
-
Yup, not a job I'd have been envying, but looks better than some I've seen done by builders ( on their mothers side ) round here. ?1 point
-
looks good and a nice bit of trellis to hang on your garden wall when you are done too1 point
-
Liking the diy roof ladder...! You should be really proud of the finish on that - looks brilliant ..!1 point
-
I'd agree, having done hundreds of installs, I've fitted mostly SMA or Fronius at the better end, and loads of other cheaper stuff for jobs on a budget, but haven't done much domestic PV for maybe 3 or 4 years now, mostly only larger commercial or farms recently, so haven't felt qualified to comment, whereas Binky does these on a weekly basis so is up to speed with the latest kit.1 point
-
Oh! We didn't put dwangs under the short joins with our 22mm Caberfloor. Too late now I suppose but sure Caber tng didn't need it.1 point
-
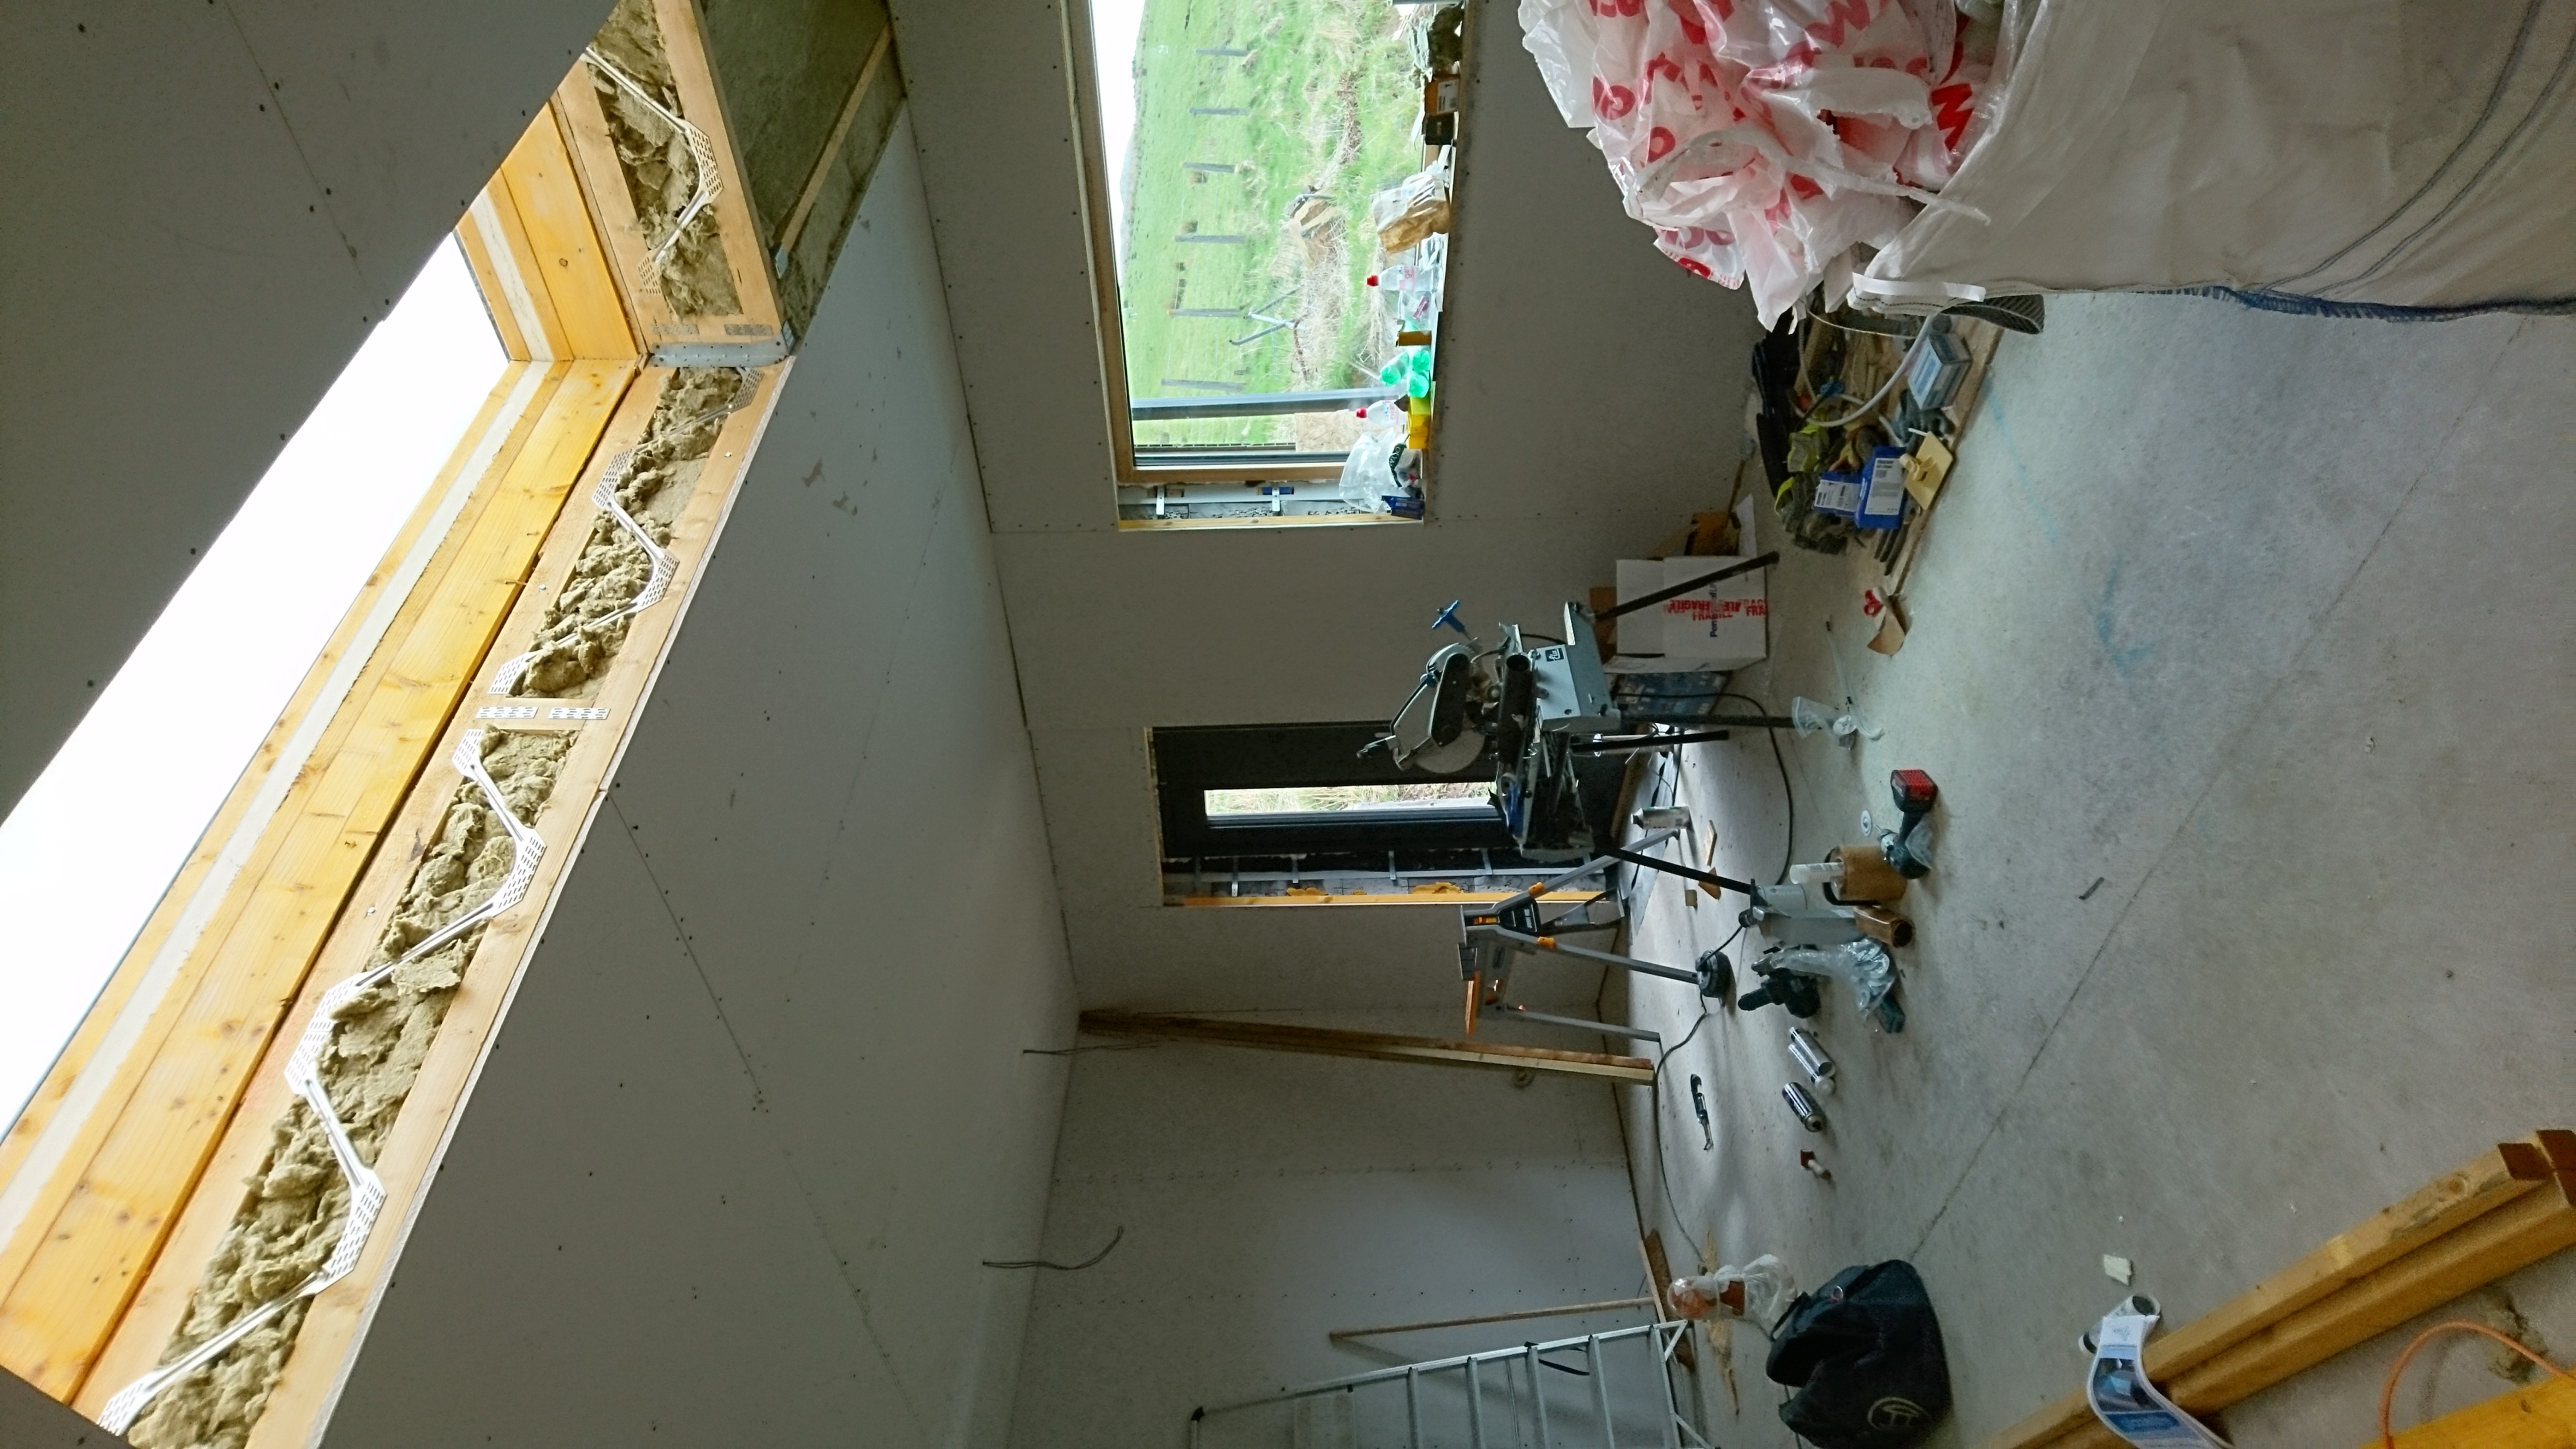
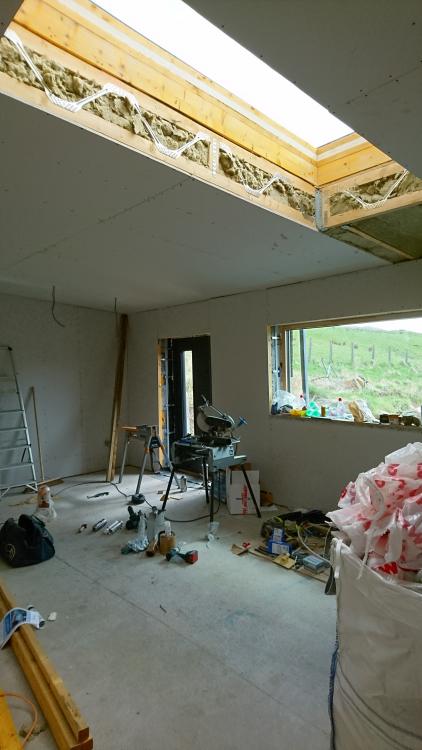
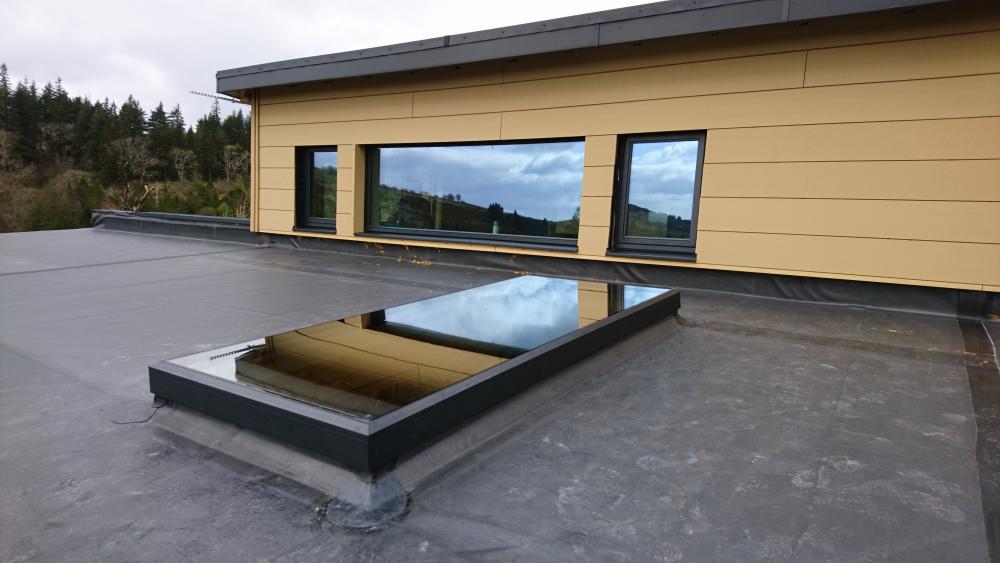
EPDM. It's been down over a year now and zero issues. Inside is not dressed yet, we ran out of drywall screws! Unfortunately it's not quite where we wanted it as we totally changed the kitchen-diner. It's triple glazed with solar glazing again to reduce thermal gain.
 1 point
 -
We are just beside the waterside hotel. Slow but steady. When you say it yeah there is a few builds going up just now!1 point
-
And in...
 1 point
 -
OK thats the puppy I have... If you look at appendix D.2 its a W-Plan they are using BUT there are a number of issues with it how they have it configured The Hot water and UFH feed have to be the same temperature (ie 45c) which does nothing for your COP and is too high for direct UFH Connection If you go direct UFH then there is no circulation pump so you are reliant on the ASHP pump circulating the floor and that will get cut off the moment the cylinder stat drops below the set temperature. The W plan wiring doesn't allow for heating when the DHW is off at the controller so you need to modify the wiring slightly to put power to the off terminal and enable the diverter when the DHW controller is off. Without a buffer tank, the ASHP will short cycle so will be innefficient and potentially cause other issues. To do all of this isn't complicated but it needs the use of a couple of pipe stats, a changeover valve and a relay. So you need 2 of these - one set to the DHW temp (47c) and one to the UFH temp (32c) Immersion Thermostat And one of these - must be the CR5-02 Version - 3 Way Valve And a standard 220v change over relay DPDT Relay Those valves have the benefit they don't burn out synchro motors, and they can drive the changeover relay. Wire the stats to the output pins (pairs) on the relay, with the input pins to the control box terminals marked as "thermostat". Wire the coil to the WH/YE circuit on the valve head so that when the valve opens to connect the ASHP to the buffer tank/UFH then it connects the relay and switches the pipe stats from the "DHW" temp to the "UFH" temp. The DHW "Off" position on the time clock needs linking to the Heating "On" in the W-Plan so that in the event you don't want a permanent hot water cycle then the valve will drive the ASHP to heat the buffer. Both of the tank control stats are used to drive the pump on/off terminals on the ASHP control box. Finally..... the room stat drives a zone valve between the buffer return and the manifold so it only has access to heat when the stat allows the valve to open. I've got this drawn up somewhere but need to find it !1 point