markocosic
-
Posts
979 -
Joined
-
Last visited
-
Days Won
1
Everything posted by markocosic
-
Will widening my connection to Thames Water make a difference?
markocosic replied to hendriQ's topic in General Plumbing
If incoming DCW is 22l/min and you're expecting DHW of 18-19l/min then you may have a problem. What are your blended flowrates? What are the DHW and DCW flowrates needed to meet these? DCW temp varies. Assume 10C. Blended temps vary. Assume 40C. DHW production temps are flexible. Assume 45C for HP or 55C for gas. (being conservative) 40C shower uses about 86:14 in HP scenario or 66:33 in gas scenario. So you have enough DCW to satisfy your wishes or would you be putting in DHW capacity that goes unused? https://www.spiraxsarco.com/resources-and-design-tools/calculators/water-mixing/water-mixing -
Who is designing (liable) and what are their objectives? (comfort / opex v capex / ethics & efficiency / future proofing) Start with outlets. What are your flowrates (blended, hot, cold) and time to temperature requirements? (e.g. I'm fine to wash hands in anything >20C and always dishwash so don't give a monkeys about the kitchen tap hot water whereas SWMBO would freeze to death if washing hands at <35C and insists on washing kitchen oddments by hand in hot water and scattering them about their place) Washing machine and dishwasher and toilets can have negligible flowrates. Then the fixtures. What dynamic pressure do they require? Some are well designed and happily operate from 0.5 to 5 bar. Others are garbage and need 1.5-3 bar else they barely dribble or make a racket. Then diversity. What needs to run simultaneously and (how far) can the flowrates drop when multiple outlets are in use? (e.g. kid brother runs two showers off a 35 kW combi - 10L/min each individually or 7.5L/min each if simultaneous is fine by him given how rarely this actually occurs; bathrooms in use together being rarer than fixtures in use together. Then heat source. If you're in any shape or form interested in future proofing you'll have stored hot water of some form (tank or thermal store) rather than a combi. That will dictate positioning. Combis are cheap. Combis can also heat tanks in addition to supplying direct, and your don't care about the distance from combi to tank quite do much as you do combi to outlet. Tank for bathrooms so that you can utterly deluge a bath or shower at your full incoming mains flowrate. (store the water at 45-48C so that you don't need thermostatic mixer on bath, then use taps designed for a gravity pressure system that can do 30+ litres/minute at 1 bar, fed from you 22 mm off the tank) Combi then to supply ensuite and kitchen/utility directly with neverending supply. Like two boilers but not two boilers. Downside is heat losses in non heating season (from tank and pipework). When gas gets banned or ethics are a consideration you switch to heat pump to the tank and a long pipe run in 15 mm pex to ensuite/kitchen. Fit a temperature controlled and timed secondary return to this so that you're not waiting too long in mornings without keeping it hot unnecessarily overnight and whilst out etc. Combi probably has a keep warm timer on it too. Nothing wrong with viessmann boiler itself. Just their UK operations. The other thread was using the incorrect settings to control the boiler. Changing the setting (after also changing every part on the boiler pointlessly) addressed the issue.
-
I'd fit the gear next to the two bathrooms. 15 mm pex to each bathroom, running past the appliances (sink first, shower last, so that the sink responds fastest), and lagged. I'd run 15 mm pex to the other end of the house too. Either live with the matter ensuite pressure dropping if the kitchen/utility are used and share. Or run two pipes one to ensuite and one to kitchen. In kitchen hot fill the dishwasher and tee kitchen tap before dishwasher so that the pipework up to it is warm more often than not. 14 metres of 15 mm pex gives you a 1.5 litre dead leg. That'll clear in a few seconds..9 secs at 10l/min. 18 at 8l/min. Again lag it the whole way. Check pressure drops at desiredflowrates. Sounds like you have plenty available. If you want to do better then you'll need hot water recirculation and a single 22 pex across the house. Else 22mm is dumb as it comes without recirculation. You'll be waiting an age for hot water. Electric trace heating to kitchen tap is the other inefficient option. Depends whether you use a dishwasher out not... The volumes that matter for response are between heat source and the outlet.
-
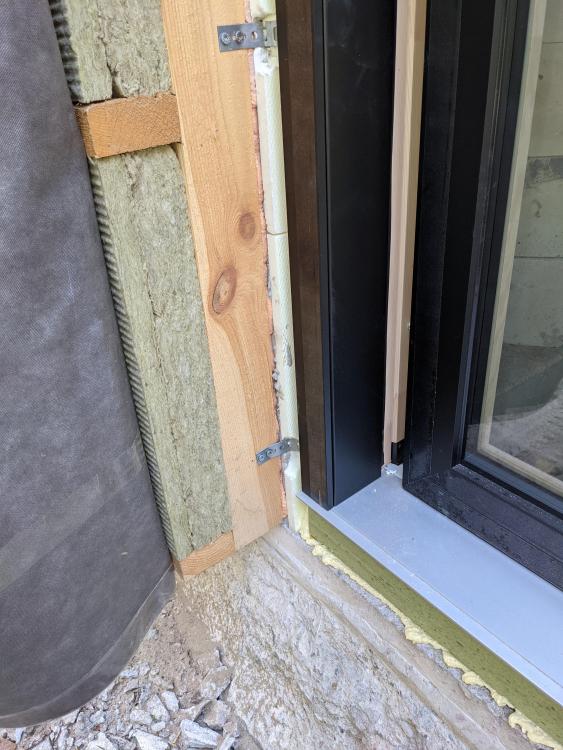
Saw this detail today: Any reason that the membrane can't be the thing holding in the insulation (squishy first then capped by firmer insulation in this case) and the air gap is all above membrane? (in this case it was horizontal battens sat on spacers to create a capillary break)
-
Can confirm that short (20cm across each join every 600 mm) bits of 25*25mm batten nailed to studs hold the dense mineral wool (paroc was35) pieces in place just fine. 1/6th the material Vs full length 25*50 and though 1/3rd the bearing area on insulation there shouldn't be any suction loads on this if you are airtight on the inner side.
-
Board on board cladding - fixing advice / critique
markocosic replied to markocosic's topic in General Joinery
Thanks - good to know there's logic to groove up vs down. On screw Vs nail: If we'd planned to have board on board cladding from there outset I'd have had 195*45 mm studs filled with mineral wool, then 45*45 horizontal battens every 600 with mineral wool fill, and a 95*45 at the top of the wall, then membrane, then 25*50 horizontal battens on top of the 45*45s. This would give 70 mm depth to nail into. 90 mm nails would then work a treat. Having seen board on board of have no issue with the battens being horizontal and the only breathing being in the ~80*22 mm space between the boards. As it is we planned to have lightweight cladding (wriggly bitumen) so the structure wasn't built for it (it has just a 45*45 at the base to take weight then 25*100 vertical strapping to retain insulation so is being adapted. The wood is awful too thanks to their yanks buying up everything this season. (all sapwood, lots of knots, only one "good" face, with cupping the least of your worries vs splitting, twisting and bending, insect damage, etc) So I'm using the "bad" cladding slit into two 25*70 mm pieces as my battens (you can manhandle a 25*70 into shape as you screw it to the building). This isn't thick enough to take nails. Then we're manhandling the 25*140 pieces into a straight line and planar shape as we go. Foot in 80 mm gap. Twist to un-bend plank across 140 mm width. Shove 5mm screw in to pull it tight against the batten. Very little chance of getting it all held in a reluctant position AND gunning a nail in before it moves / in a vaguely straight line. For DIY folks you can take your sweet time with screws, undo it easily if you make a boo boo, and you only need the 25 mm batten not the 45 mm you'd want for nails. -
Board on board cladding - fixing advice / critique
markocosic replied to markocosic's topic in General Joinery
And here we go... After much head scratching forget about trying to line up roof and wall boards. Unless you designed the openings to site your cladding pitch you're never going to get them to like up and an uneven roof is obvious from a mile away. Make a jig to space say five boards at a time. Fit every 5 the one, checking from a datum every 25th. Go back and fit the others. Fit them roughly in position up/down wise only left right matters. You sort endd when she. Fixing centres 45 and 95 on a board that's 140ish mm wide and has a 30 mm overlap works for undoing cupping and twist. 5*50 mm screws for these boards. Battens are 25*70 mm (reject cladding slit into two) use cordless drill not an impact for setting the screws. And if you've got good shoes (e.g. hiking boots / vibram sole then rough sawn timber is walkable at 9:12 pitch (37deg) which was a surprise.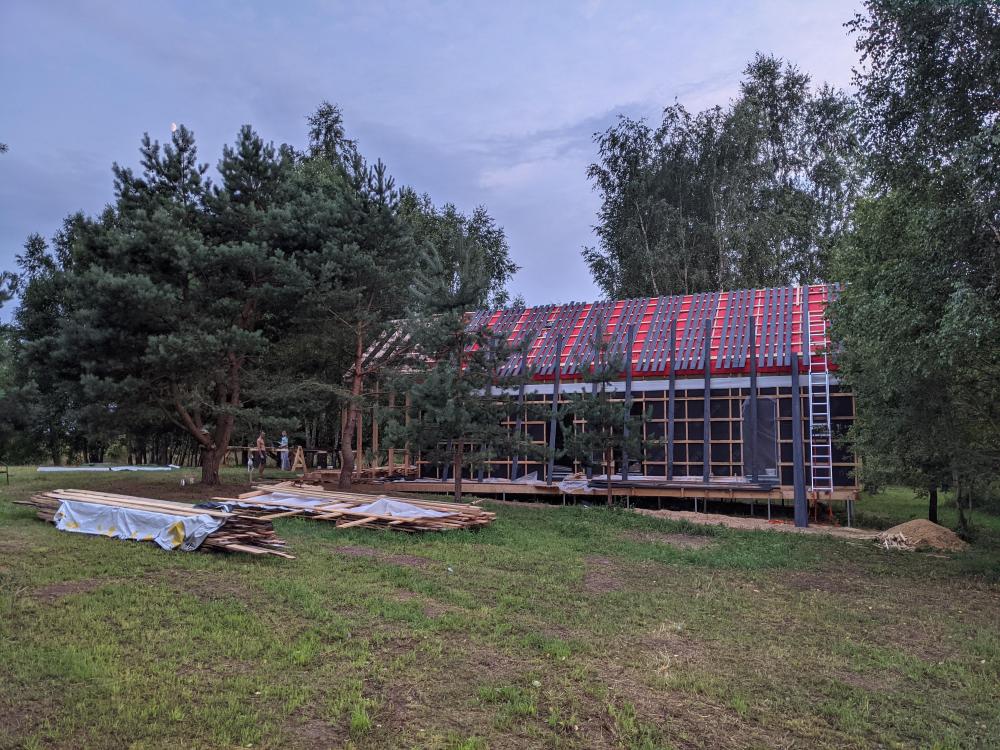
-
Profile 22 (the frame used by modernupvcwindows for regular 2G windows) is shite. It has all the structural integrity and wind tightness of wet spaghetti. Ok for fixed panes. Never again for openers. Never again for their low profile thresholds either (buy a real threshold and set it lower relative to finished fort level). And never again for their blind man galloping horse measurements (cursing and swearing before realising that the French windows differ by 5mm a side). Fair price for what you get if you're Joe retail and delivered when it says it is. But not worth having. Bought rehau euro 70 profile the second time around; with plenty of reinforcement in the frames and bonded in glass in the openers. Screw having parallelograms again
-
Viessmann Vitodens 200-w - initial impressions
markocosic replied to larry's topic in Boilers & Hot Water Tanks
So you've turned off "continuous operation" mode... switching to a non weather compensated "in response to a call for heat" mode...and surprise surprise it's no longer operating continuously? That's the fix. Setting the boiler to not try and keep the side heading circuit hot 24/7/365; and to instead respond to a (non opentherm) call for heat. Not all the random swapping of parts by vaillant. Switch the mode back and you'll restore the previous behaviour. -
Viessmann Vitodens 200-w - initial impressions
markocosic replied to larry's topic in Boilers & Hot Water Tanks
How's the weather? Hot enough that the space heating puppies are already at the weather compensated setpoint? I'd wait for cooler weather to decide that this is fixed. -
Viessmann Vitodens 200-w - initial impressions
markocosic replied to larry's topic in Boilers & Hot Water Tanks
It's working exactly as intended and the manual suggests. The control strategy for space heating being used is not appropriate. This UK Viessmann rep seems to be a tool. Nice but dim or smarter than he looks and paid by the callout? In order to use the boiler in the mode selected the storage heating needs to be fully zoned. If a zone is open (if there is flow when they pump starts up) then the boiler will run until the heating circuit achieves the set temperature. This works great in a system that has radiators and TRVs everywhere with no bypasses. It will run until the pipework within the bigger achieves setpoint then it will stop. It works where there is a towel rail too. That'll always be kept warm even if all your TRVs are closed. Your system design is wrong for this operating mode. If somebody did you a system then ask them to fix it. (using zone valves) If the vendor sold you a m is s-boiler for that system then they'll need to fix the system (using zone valves) or cut their losses and remove the boiler for a refund. If you keep letting numpty or callout collector take the boiler to bits it's going to be a wreck. Every time seals are broken and wires pulled out you're inviting another opportunity for things to be damaged and fail later IMO. -
You're making a bucket.? "U" shaped DPM with screeed inside. Metal shed around DPM. Bad plan? Permanently wet? - Concrete base not much bigger than the shed and higher than the surrounding ground level - Drainage ditch around concrete base (so that water doesn't stay on the concrete base) - Line drain across entrance door (in place of small ditch) - Maybe a flashing around metal shed covering concrete (to direct water away from concrete and off the edge) OR - Concrete base - One course of bricks around the shed footprint - Metal shed on top of the bricks - Screw down the shed - Line drain outside front door - Wooden "skirt" on the bottom of the front door (allows the floor to drain into the line drain; bricks act as your "damn" to stop water running in otherwise' wooden "skirt" can easily be adjusted to fit door<>floor gap as things move) OR Concrete base Metal shed Screw down the shed Treated 45x45 or 25 x 50 mm battens on concrete base Wooden floor on top of battens (allowing the water to go under the floor but lifting yourself up above where it's an issue)
-
Exactly that. You should be anywhere near the high pressure limit. You could: Run up to a "working pressure limit" and the stored hot water temperature in the ta is "whatever it can get to, or 95C, whichever occurs first" If working without the desuperheater a typical "working pressure limit" is a water temperature of 50-55C on R407C/R410A if you have a good (low input <> tank deltaT) tank (I haven't looked for R32 but imagine that it's similar). If you've got a desuperheater and a large space heat load relative to hot water load then you might top out at 95C on the stored hot water unless dialled back artificially. Or you could: Run up to a "tank temperature" limit (without having a clue what the refrigerant is doing) and hope that you don't jack the refrigerant pressures through the roof in the process. Setting a 45C tank temperature in a mild climate with a large coil (so low coil<>tank deltaT) is going to be fine. Aiming for 60C tank temperature (on R407C/R410A - haven't looked for R32 but imagine that it's similar) will cook things. Aiming for 50-55C tank temperature with a small coil (so high coil<>tank deltaT) or low source temperature and no EVI is risking cooking things. Cheap temperature sensors (bimetallic strips) can be horribly inaccurate / have high hysteresis too. Space heat is difficult to get wrong unless doing something seriously / obviously dumb like running it at a high temperature. Hot water is trickier because you do need to run up to the limits of what the refrigerants and compressors can do. Your safe bet is buying the heat pump and hot water tank as a package engineered to work together by (a) people with a clue and (b) people who will warrant the package. (including the COP) Your riskier bet is buying the heat pump from Brand X, a cylinder and associated widgetry from Brand Y, and taking the engineering risk of putting them all together and operating the heat pump within it's operating range for long life. (and it'll be you the client not Phoenix Ltd the installer or local distributor that take the risk) You can do this but be careful. Tank with good heat exchange. Good temperature sensor (ideally one from the heat pump stuck into a dedicated sensor pocket in the right place on the tank not a 3rd party strap on guess-o-meter). Safe setpoint (45-48C). Should work fine. Beware the small print. Freedom (one of the better distributors IMO) advertise the Samsung as delivering up to 60C temperatures down to -2C. That's kinda ok, but to be honest I'd be more interested in -7C or -10C for a UK installation as that's going to dictate how large your radiators should be. (hence advice to design for 45C or below). Other distributors or idiot installers will advertise it as capable of 65C which yeah, it could do if it's hot outside, but this is irrelevant. Dig into the manual and there's a remote sensor with the heat pump (so it isn't trusting a 3rd party sensor to be right) for the DHW and they're advocating a 48C setpoint (perfect) whereas other distributors or idiot installers might say "Oh, but it can do 60C or 65C and try to set the tank to that and watch the compressor die (unless it self protects - I'm not familiar with these but chose it as the first brand name example I found) https://f38ad20b-7d4c-44f2-9ac3-94ddf2ca9af9.filesusr.com/ugd/40079d_271454ec92a740a1894b806a48ff5800.pdf R134a does go hotter. You shouldn't need it in a domestic application. Some vendors use it for simpler heat pumps designed for "robust yet meh" performance in retrofit applications. Personally I think the future for low demand houses is going to be separates...but going full separate rather than trying to bodge a heat pump onto a tank "by other" - e.g. Air to air heat pump for space heat / cooling. Air to water heat pump cylinder (from $999.99 at big box DIY stores in the USA and idiot simple to...plug in) for taking heat from the house and making hot water. Such cylinders are still expensive in the UK but coming down as volume becomes more than zero: https://www.dimplex.co.uk/product/edel-hot-water-heat-pump https://www.electricpoint.com/dimplex-edel-hot-water-cylinder-heat-pump-200l-edl200uk-630rf.html Or better yet: Air to water heat pump for space heat / cooling. (heated / chilled UFH and towel rail) Water to water heat pump cylinder for hot water. These are nicer IMO as the the cylinder chills your slab in summer and you "top up" the slab from A N Other source in winter as required. These with a basic monobloc whose only job is to (directly) serve the slab (control strategy can be as simple as "run a weather compensated loop and keep the return above 21C" will work nicely. https://www.auer.fr/en/products/heat-pump-water-heaters/edel-water-heat-pump-water-heater/ Which is why I'm about to chuck in a state-of-the-ark fixed speed ground source unit with a built in tank (Danfoss DHP-H 6; a rebaged Thermia) myself. ? (it was £600 with 1,000 run hours on it, we have loads of space, and I can get a pipe/digger cheap) Else I'd be seriously considering a totally standalone DHW tank with built in heat pump to cool the house in summer; plus topup heating/cooling from an air source monobloc. Backup would be a 2 kW fan heater or wood fired hot water tank if out in the proper sticks! e.g. https://online.depo-diy.lt/productItem/27620/7154
-
1) Insulate and airtight 2) Space heat easy: - Design for a maximum space heating flow temperature for 45C at design condition (rad size) or ideally 35C (UFH) - Design for a 5C deltaT across emitters rather than 20C (presettable TRV body selection to get correct flowrates at full output) - Design with open zone where possible (usually downstairs open plan one zone, and the only TRV heads fitted upstairs) 3) Hot water can be good/easy or ok/cheap but not both: - Ideally buy a packaged system (ASHP and cylinder from the same OEM) - RTFM for how the device charges a cylinder (how does it decide when it is satisfied) - Pick a cylinder with a large coil if using a cheapo Asian monobloc ASHP that isn't designed for hot water production - Use a larger tank and limit DHW storage temperature to 45-48C The "correct" way to control hot water with little heat pumps is based on pressure in the refrigerant circuit (you keep on running until you trip a "high pressure" threshold, achieving the max possible temperature within compressor/refrigerant limits, rather than running well below the max in order to avoid burning up the compressor - and you use a scroll compressor with vapour injection rather than a rotary) and the "correct" way to generate it by running the space heat and hot water at the same time; generating the (higher temperature) hot water via a desuperheater and the (lower temperature) space heating via the regular condenser. That's more gubbins than you'd like to pay for so the midrange units tend to eliminate the desuperheater, then then the pressure control, then the scroll compressor. In mild climates and for low demands you can get away with rotaries. For harsh climates and high demands scrolls all the way. (CTC, Nibe, Danfoss, some Daikin etc)
-
Reducing road traffic noise by replacement glazing (renovation)
markocosic replied to thaldine's topic in Windows & Glazing
Absolutely. Each piece of glass "passes" certain frequencies and "stops" other frequencies. You want different natural frequencies on each pane so that you're blocking as wide a frequency range as possible. Say 6 mm (laminated) outside and 4mm (plain) inside. Get the "security" frames too (with more latches/locks) as they pull the windows tighter. A chunk of the noise will be airtightness. Try just taping up the current windows. That'll give you an idea of how much windows that seal will contribute. If frames are good you can just swap the glazing units for some with a narrower space and a laminated outer layer as an experiment in one room. Unlikely if it's early 90s and was cheap. Be prepared for a lot of the noise to come through the rest of the building though! Single layer plasterboard ceilings full of lighting/wiring holes with the smallest amount of fluffy insulation above them do nothing compared with an airtight layer plus double layer plasterboard with a denser (mineral wool, dense cellulose) insulation above them. The difference between my house (60s sieve of a cavity wall / single layer dot and dash / single layer ceiling with fibreglass above and cheap double glaze) and the new cabin (20 cm timber frame with OSB lining / mineral infill / 5 cm mineral overlay plus triple glaze) is astounding - but most of that is airtightness. You won't fix vibrations coming up from the ground by fiddling with your building. Fix the root cause (fill the potholes, dig up the speedbumps, and get width restrictions in place instead - the SUV driving spacktards can't aim toffee so will slow down; and the more capable delivery drivers don't get docked pay for suspension damage but do get docked pay for body damage) What will you do when the window is open? (MEV / MVHR so that you can still purge CO2 / breathe even with windows shut?) -
Board on board cladding - fixing advice / critique
markocosic replied to markocosic's topic in General Joinery
The postage to Lithuania would be a bit much ? No milling heads or shanks on those so they'd be as liable to split the timber as regular goldscrews too. I think my wife has sorted a supply of the 70 mm ones without going to the 8 cents a screw place ? -
Board on board cladding - fixing advice / critique
markocosic replied to markocosic's topic in General Joinery
Ruddy 2021...if you see half a dozen screws...then try half a dozen screws...don't expect the same half a dozen screws to be in stock the next week or ever again! Have sourced another two screws to try. Cheapie goldscrews hopefully without wax this time. Fancy C3 rated torx screws that will definitely work but haven't found in 70 mm yet. Need to think how to get these up on the roof AND paint them. it's a 9:12 pitch (37 degrees) and I wouldn't want to walk that / would rather avoid smashing freshly painted boards with a ladder laid on it if possible. I think order of operations (critique welcome) should be: - Fix 25x70 battens to roof using some 'standard' waxed screws that don't need pilots - Pre-cut the ends of all roof boards square. Pre-drill all the roof boards using a jig. - Pre-mark the battens for width (where the every board should go) - Roof monkey at the ridge, Ladder monkey on the ground, and throw a rope with a noose to hoik the board up onto the roof - One string at the eaves to line up the ends of all the roof boards for "height" (maybe make that an "end stop" so that the boards just slide down the roof into position and we need only get the width right?) - Ladder monkey at eaves lines up the width AND the "height" and pops a screw into a pre-drilled hole - Roof monkey at the ridge lines up for width and pops a screw into a pre-drilled hole - Rinse and repeat x150 - Roof monkey pops in the rest of the 4.5 x 50s or 5x50s holding these boards on through pre-drilled holes - Roof monkey can still climb up and down the 9:12 roof using the ~90 mm gaps between boards and the battens - Roof monkey does second / final coat of black on these "inside" roof boards; on the top face including screws AND the weathergrooves - Predrill AND pre-paint the "outside" roof boards - Definitely fit an "end stop" - Noose the "outside" roof boards the same way but stack them somehow? (four boards in a gap, every 4th gap?) - Roof monkey takes their time fitting all the screws AND painting each screw with a dab of paint after it's installed (to paint the screw and seal it to the wood as much as is possible) - The roof largely remains climbable even though all the boards are up there - I can tie a ladder to an "overhang" for when we get to the ends. There is an area of roof at the end (gable overhanging the deck) we are not boarding until later (when we source the deck materials and the underside of the roof materials - not for some time yet) -
Look at it first. Familiarise yourself with 'what do did see' and 'what you might see' in terms of grade A/B and C etc. You want to avoid surprises!
-
Board on board cladding - fixing advice / critique
markocosic replied to markocosic's topic in General Joinery
Doesn't work if screws as waxed sadly. Might get away with it with Toolstation / Screwfix silver/gold screws but everything I find here is waxed by default for installation purposes. Except black phosphated plasterboard screws or silver sheet steel screws. Don't want those though! (high strength and easy to paint the heads but brittle and rust within the wood in the case of plasterboard screws) -
Board on board cladding - fixing advice / critique
markocosic replied to markocosic's topic in General Joinery
It's a reasonably mad thing to do. Less mad than a thatched roof. (those poor souls without trees) Less mad than a horizontal deck. (what are people thinking) Practically the membrane handles the rain fine. We had over two inches today (30C and clear skies the rest of the week...brutal) and it's bone dry below that membrane. It won't handle the UV in the long term though or the weight of the storks perching on it waiting to collect all the frogs after the rain stops etc. That's what the wood is for (UV barrier and the mechanical protection). The paint / grooves are to then keep the wood decent for as long as possible. If it fails...whilst we still own the place...I'll chuck the usual rukki roof at it. ? The Swedes can't make their minds up which way the grooves go (groove up to stop water going onto lower boards or groove down to create a bigger capillary break). My cutter is square so have done with groove down. (Google translate works well) https://www.traguiden.se/konstruktion/konstruktionsexempel/tak/underlag-av-trapanel/faltak/principlosning/ MTS have some plausible sounding guidance: http://www.woodcomponents.ie/wp-content/uploads/2016/03/MTS-Cladding-Detail-and-Design.pdf The Kiwis make a point of one fixing per board only. https://www.renovate.org.nz/1970s/walls-and-cladding/wall-cladding-original-details/timber-cladding/ https://www.buildmagazine.org.nz/index.php/articles/show/vertical-board-cladding @ProDave you're supposed to fix to the battens to allow the boards to move. Timber expands and contracts a lot across the grain. If you fix the boards to the battens then each board can expand and contract independently (sliding a little). If you fix the boards to each other they don't have anywhere to go when they expand and contract. Something has to compress/buckle or stretch/split. One fixing per board (rather than two) reduces the tendency to split even further. This single fixing doesn't work for wide boards on the top though. -
Board on board cladding - fixing advice / critique
markocosic replied to markocosic's topic in General Joinery
Thanks CPD. This is probably as much thinking out loud and a mental note to my future self as anything else! Liking the rusty wall ornaments on your build! ? Mechanically the batten-on-board is a bunch more sensible from a "stop things moving / splitting" perspective. Those "inner" boards are fully supported across their width AND the "outer" battens are almost fully supported across their width. I quite like batten on board in darker colours. She who seems to know what rents / sells prefers board on board so I won't argue! Here I think the batten-on-board tends to get used on the agricultural buildings that are open air. Board-on-board is the local look for residential buildings. I suspect that although mechanically it's inferior (you have less support for the outer boards to prevent cupping) it is usually fitted over horizontal battens mounted directly to the walls; and relies on the fresh air between the outer boards and the inner boards (which is ~100 x 25 mm on these rather than the 10 x 25 mm of batten on board) as your ventilation for the walls / roof. The walls themselves would have been logs with air etc between them. In hindsight, if we'd planned board on board from the outset rather than planning corrugated bitumen then changing our minds at the 11th hour, and I was brave, we could have fitted horizontal strapping to hold the external insulation in place, with a through-insulation batten at the top of the wall / bottom of the roof to carry the cladding weight, then mounted this cladding direct to that batten and the strapping; with a roofing membrane (if any) draped over the horizontal strapping given how step the roof is. As is we have a through-insulation batten at the top of the wall / bottom of the roof, then external insulation held in place with vertical strapping, a breather membrane (so that we could leave the frame up for a while whilst deciding what to do, and as belt/braces for the cladding), then vertical battens as spacers and more horizontal battens before this cladding goes on... (a photo will make more sense later during first installs) Messy but that's what you get for changing your mind. At least she likes the deep window look! -
I think I'm going to need to fill some checking / cracks around knots on painted board on board cladding that we're doing all wrong. Short version: 1-2 mm cracks. Maybe 0.5-3 mm cracks. Can I use a low modulus polyurethane building sealant in wood? https://www.everbuild.co.uk/product/puraflex-25/ https://www.everbuild.co.uk/wp-content/uploads/2017/11/TECNIC-PURAFLEX25-V2.1.pdf Long version: We're using the wrong type of timber (darn yanks buying all the good stuff) wrong time of year, (coulda shoulda woulda started in april), wrong application (roof) etc. This is mitigation. They are (or might be) in the range 0.5 to 3 mm. Mostly 1-2 mm. The filler will be overpainted with an acrylic facade paint. This is flexible but won't bridge large cracks. It'll be black and reach 70C in the sun. The purpose of this filler is to try keep standing water out of cracks that aren't full depth and are on the roof and reduce the amount of drying through to the ventilation gap behind that needs to happen. Ideally the wood wouldn't have these but we've got what we've got and can't afford to bin 5 metre pieces for the sake of a knot or two with checking around them. The boards will be mechanically fixed this summer. They'll be warm (I'll take from a covered pile) when screwed on then get hotter (anthracite in July sun) and colder (winter...) It's debate-able how dry they are and which direction they'll move in and whether there'll be a tendency to open or close the cracks. I'm going with opening cracks as that's worst case! Anybody know about bodging fillers? I'm thinking the stuff used in expansion joints that can do +50% expansion, rather than acrylic (7.5%) or butyl rubber (5%) BUT you're only supposed to use it in joints that are 10-40 mm in width (presumbly to give it half a chance of the expansion not being -100% to +200%) https://www.everbuild.co.uk/product/puraflex-25/ https://www.everbuild.co.uk/wp-content/uploads/2017/11/TECNIC-PURAFLEX25-V2.1.pdf https://www.everbuild.co.uk/product/175-universal-acrylic-sealant/ https://www.everbuild.co.uk/wp-content/uploads/2012/05/EVERFLEX-175-Universal-Acrylic-Sealant-V1.1.pdf https://www.everbuild.co.uk/product/145-butyl-rubber-sealant/ https://www.everbuild.co.uk/wp-content/uploads/2012/05/EVERFLEX-145-Butyl-Rubber-Sealant-V1.1.pdf
-
Board on board cladding - fixing advice / critique
markocosic replied to markocosic's topic in General Joinery
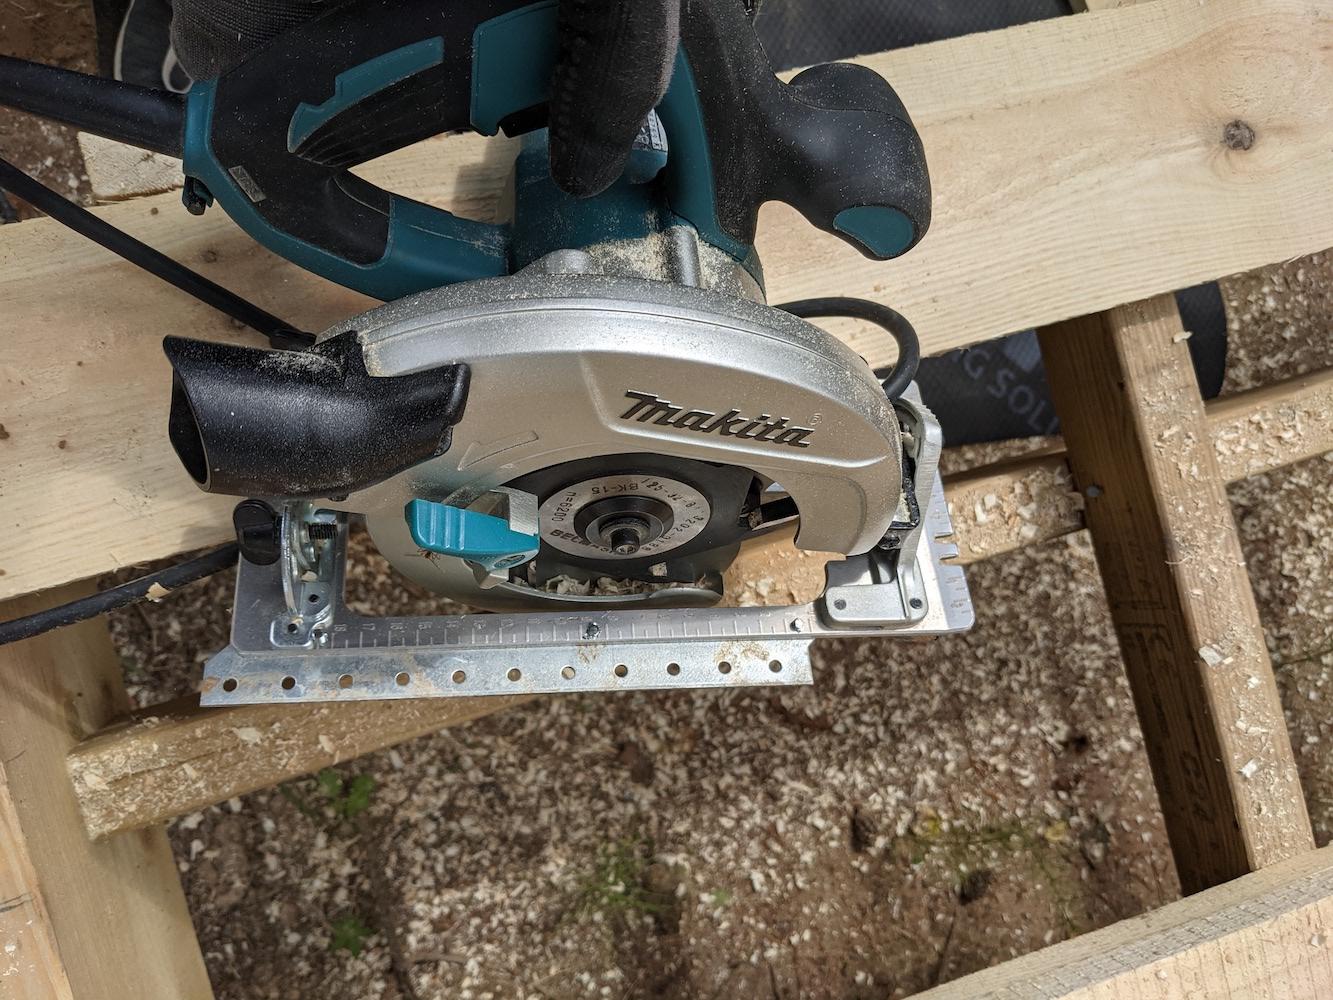
Field update: Screws Painted fat screws all the way. Decking screws are useless for persuading cupping softwood boards to meet their battens. They pull through the face before they pull the wood true. Gold screws are useless for paint. Or, rather, all the good screws that have "milling ribs" under the head and on the shank (which you want to reduce splitting), are also waxed to ease installation. They don't take paint at all and removing it is a ball ache. Painted screws take acrylic paint no bother. Paint LOL at how decent primer and acrylic paint stick to rough sawn wood. If you rest two wet pieces on top of each other and after 24 hours they're as good as glued. The softwood tears before the paint peels; much the same as if you'd glued them together. LOL at how well it sticks to the wife too. She appears to have turned into a Zebra... ? Sand to remove fibrous material. Stiff brush. Prime. 2 hours. One thoroughly brushed topcoat of anthracite. (a cheaper off the shelf colour) 24 hours. Stack. Fit. Worry about how to do the final coat (with black) later. Definitely brush this (stiff 4" fence brush) rather than trying to roller or spray it. You won't get good coverage on rough wood otherwise. If you're worried about acrylic hiding the texture of the wood don't be. It shows through nicely whilst softening some the rough sawn nature of it a little It's more visible in second coat black than in anthracite: We're painting ends to control the drying and hopefully reduce splitting. (a lot of the split ends you get are from the end drying faster than the middle of the board, and being unable to shrink far enough because the middle is still fat) They'll get re-trimmed and re-painted in situ but we figured it's worth painting the backs (for drip edge purposes) and ends (to control drying until they're cut and repainted) Weathergrooves Tedious but not as tedious as painting. Buy a decent saw. (and go with the 1.6 kW 190 mm one not the 1 kW 165 mm one) Install your 8mm kerf blade of doom. Lose the standard saw guide and rig something altogether uglier. Yes they're self drilling screws through the aluminium baseplate. Yes you could make something prettier but no I didn't as frankly a €90 inc VAT saw is a consumable and three holes are unlikely to make it useless for other purposes. Quick jig hung off the side of the proof-loaded eventually-to-be-naughtliy-tall-deck frame. Leave space between your "width stop" and your "end stop" for the chips to fall through (else you'll always be cleaning out the corner) Eat sleep groove repeat. Productivity is ~0.6 km/hour. Suggest 45 boards at a time for health and safety (vibration white finger) purposes - that blade being can be shoved along as fast as 1.6 kW will go (motor power is a limit even with the 125 dia on the 190 mm machine) but it doesn't have many teeth and the chips are huge. Wood There was a day not so long ago that "double cut" used to be a log sawn into boards and shipped. These days it's a log sawn into boards, graded, all the A/B grade removed for reprocessing, and the C grade shipped as double cut. We knew this but...don't under-estimate the labour involved in sorting through random mixed length C grade to find the best bits for each location. (long enough, and either one good face with two edges or one good face with four edges) I'm a little worried about knots and check marks. May need to invest in some flexible sealant for these where they're on the roof. We'll see what it looks like after a few heating/cooling cycles in the anthracite base before deciding.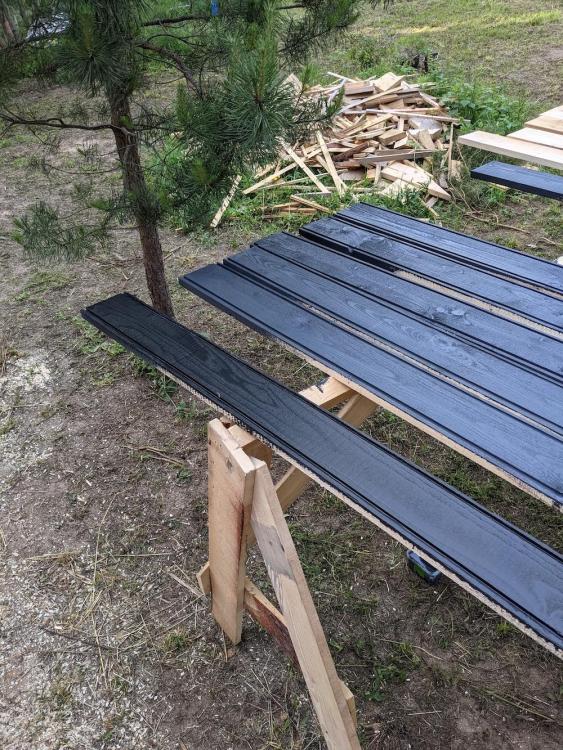


-
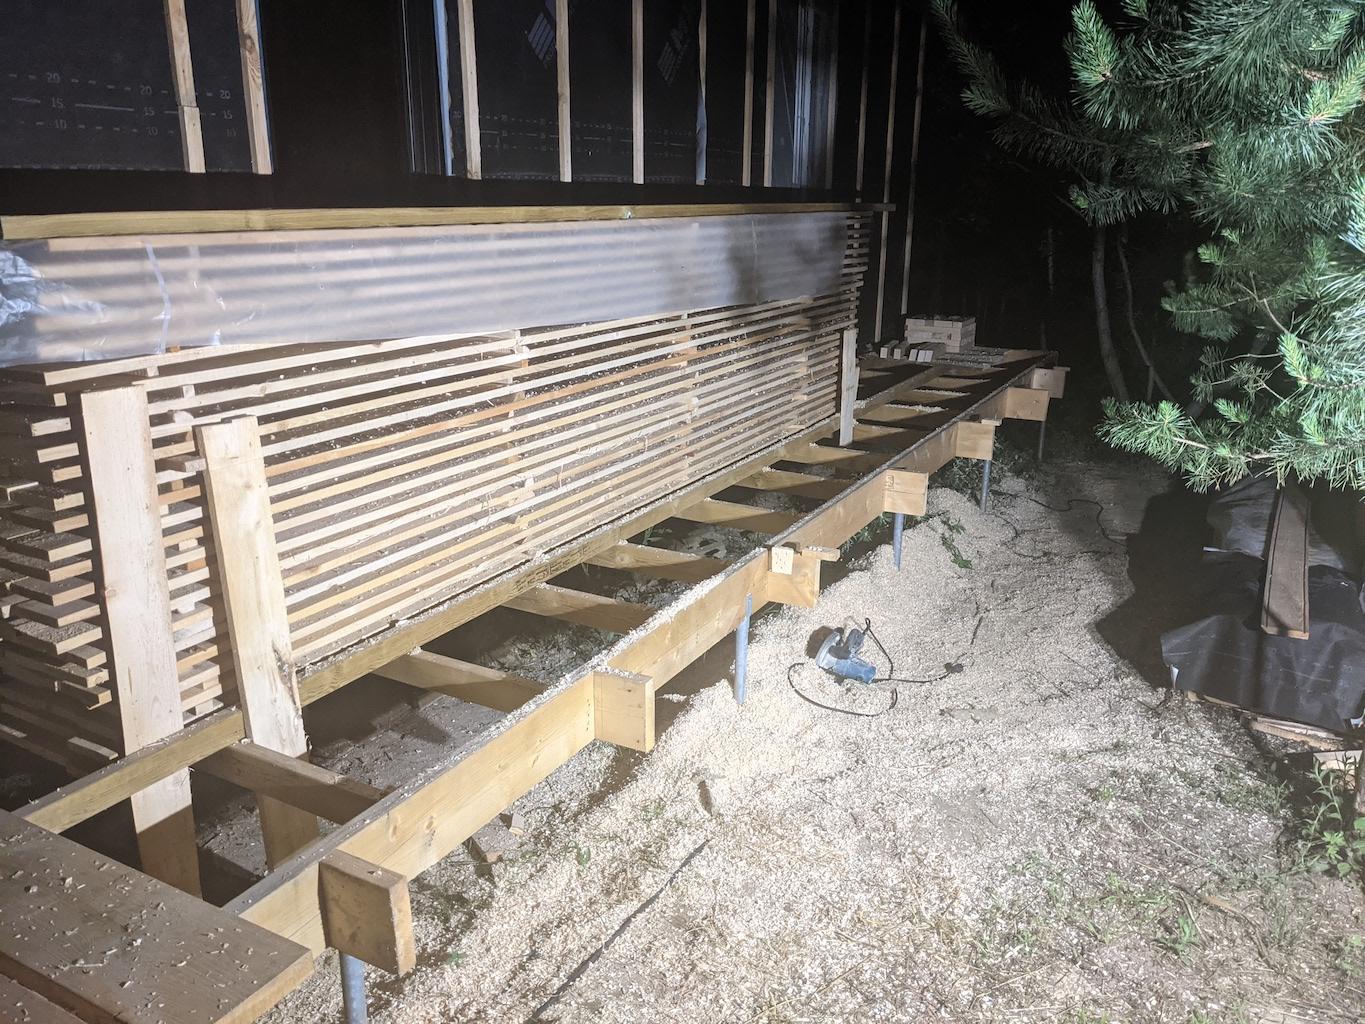
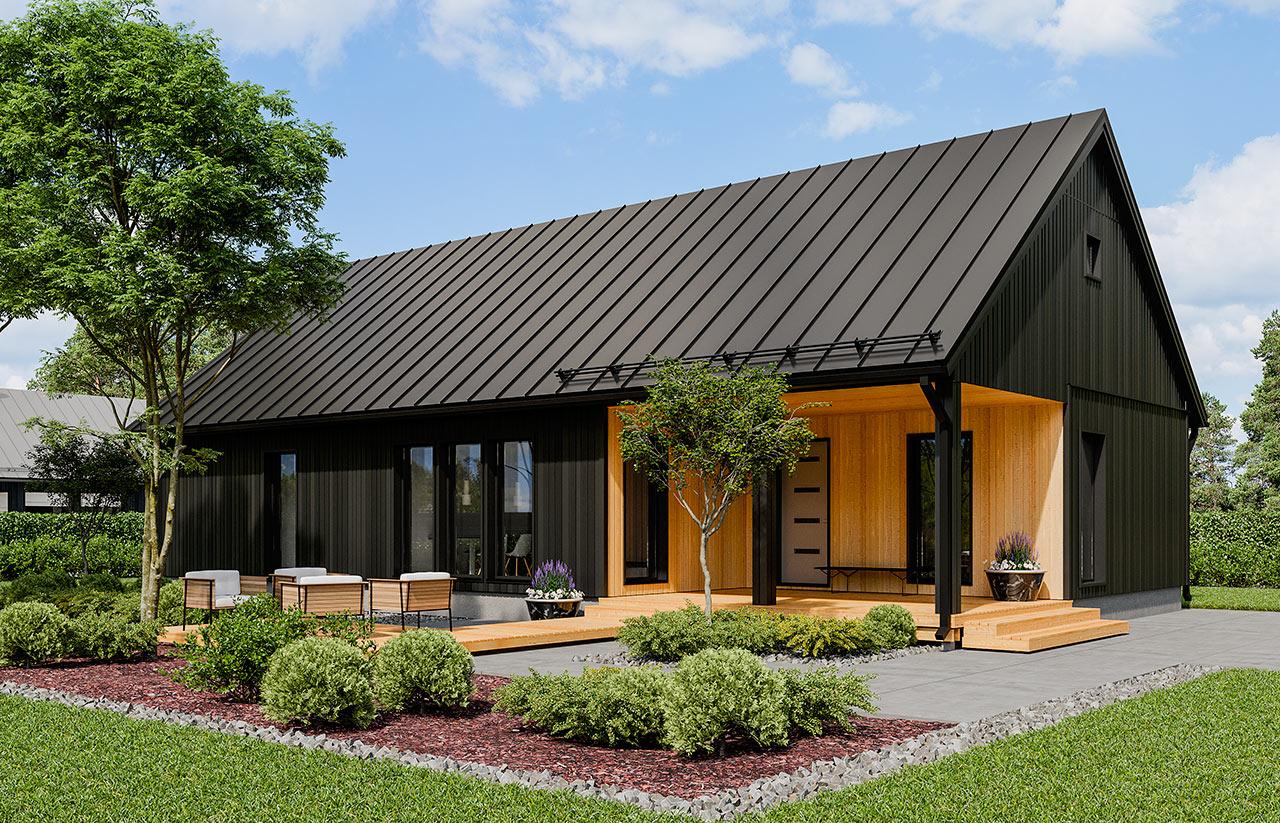
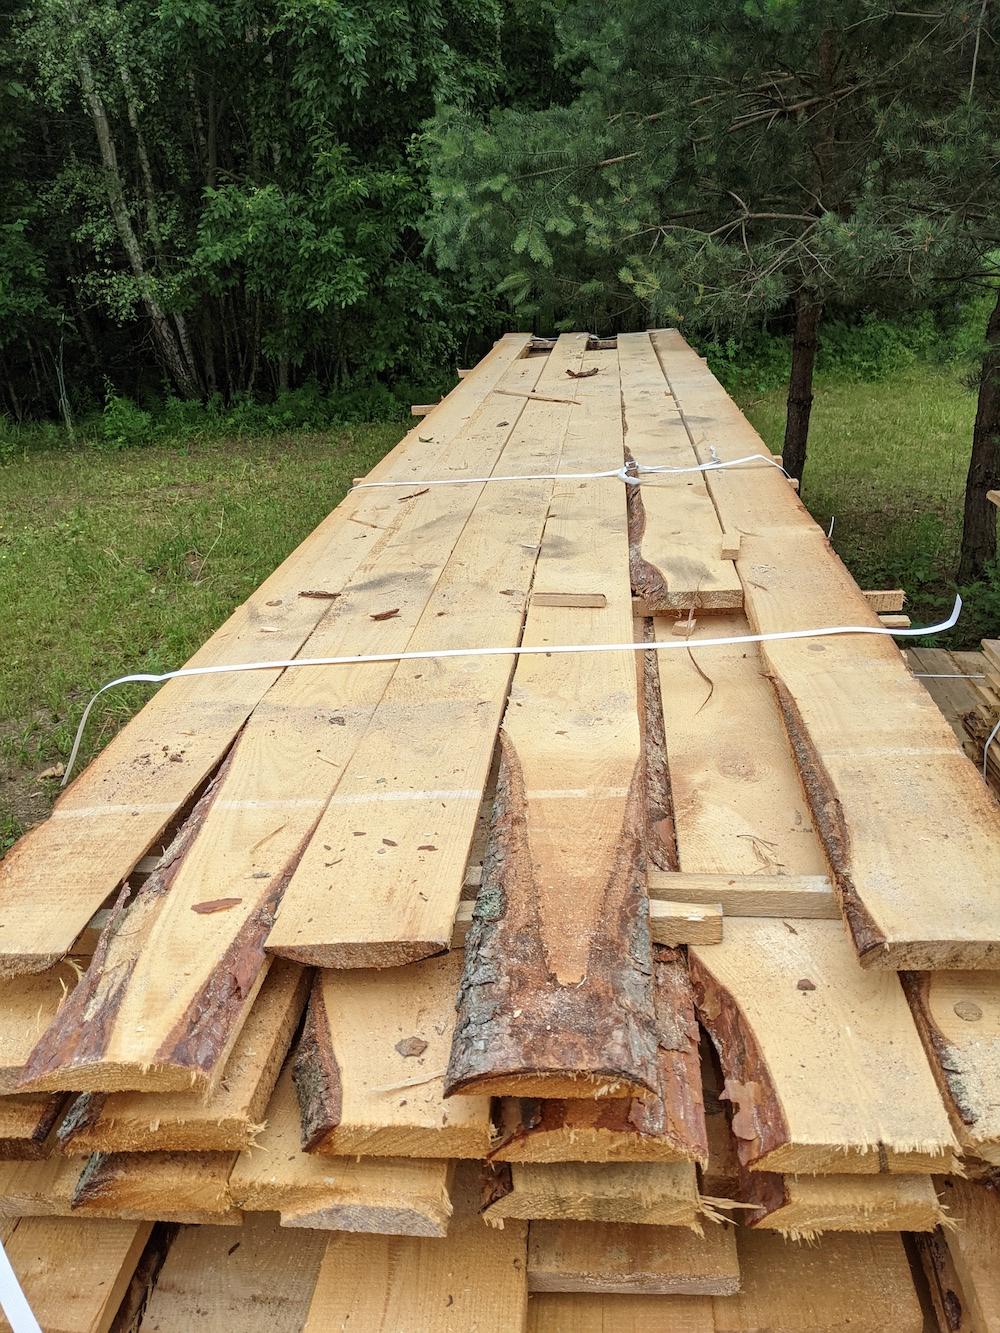
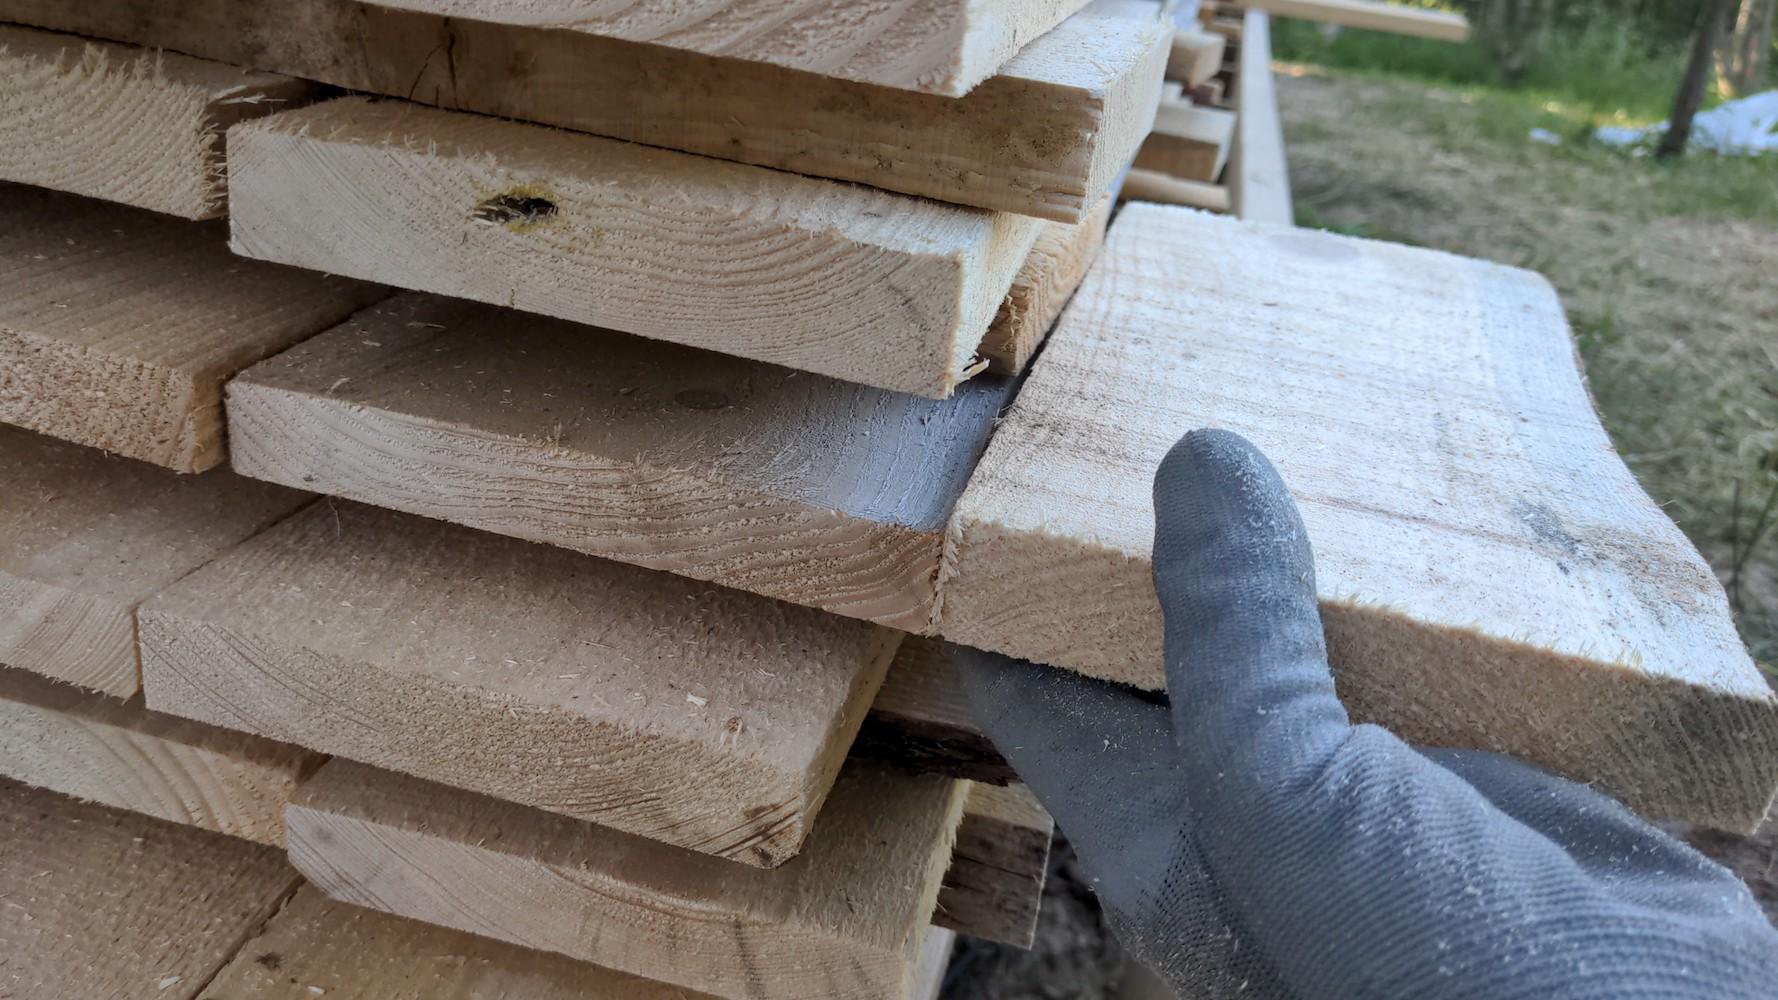
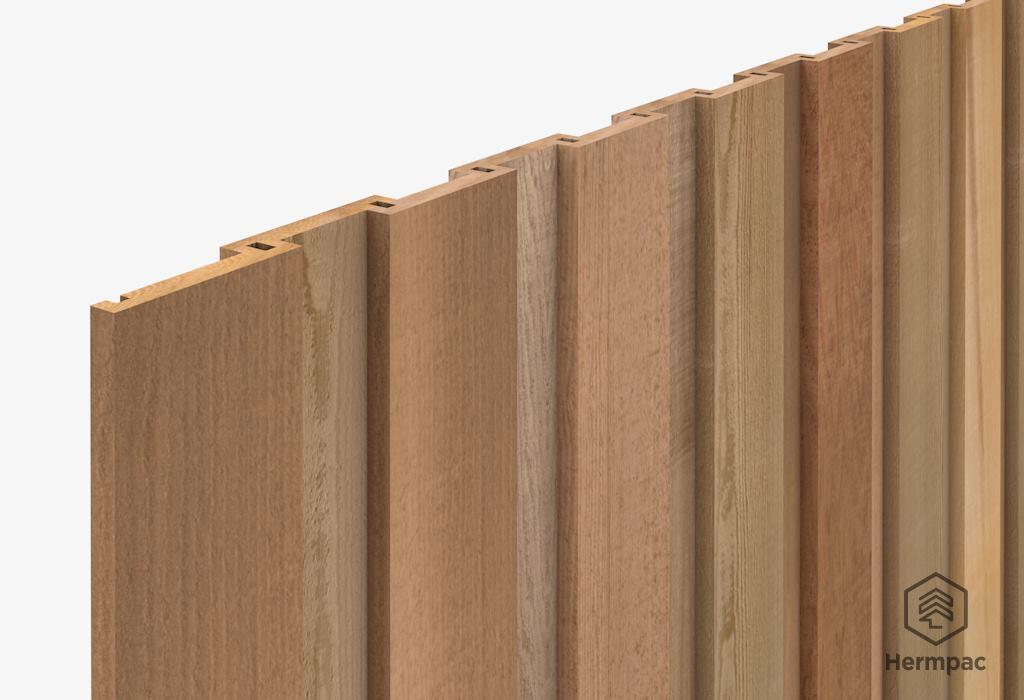
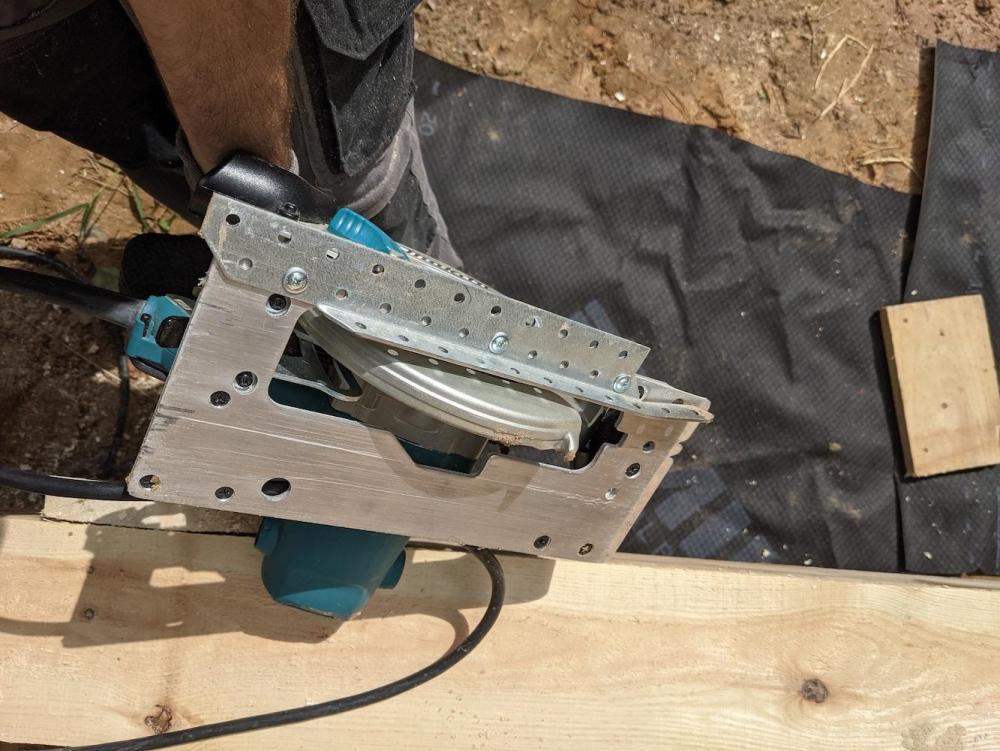
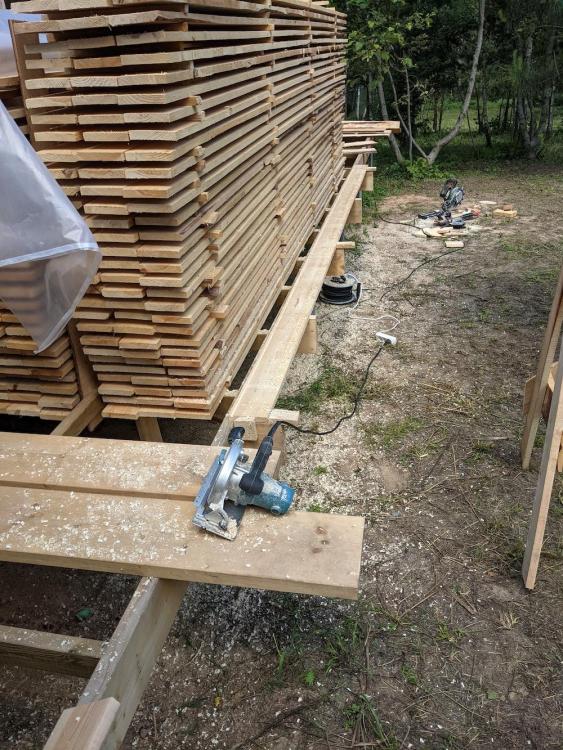
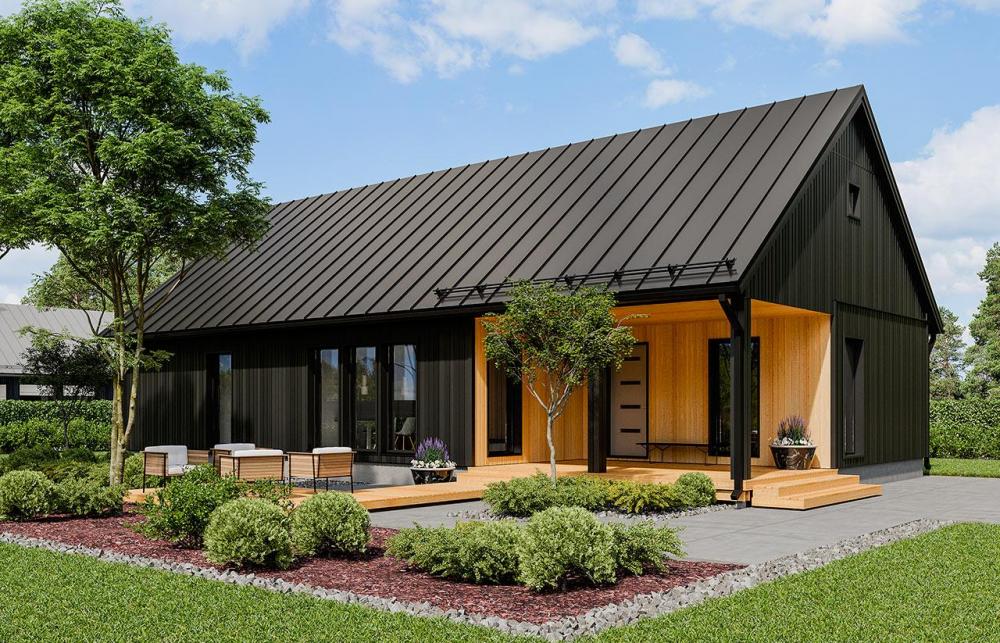
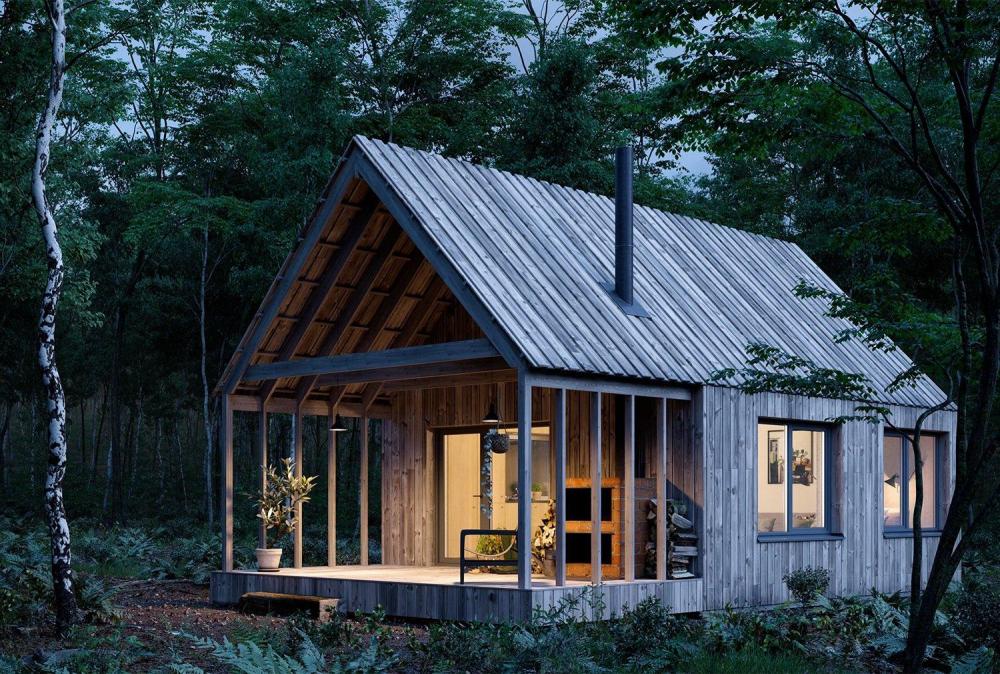
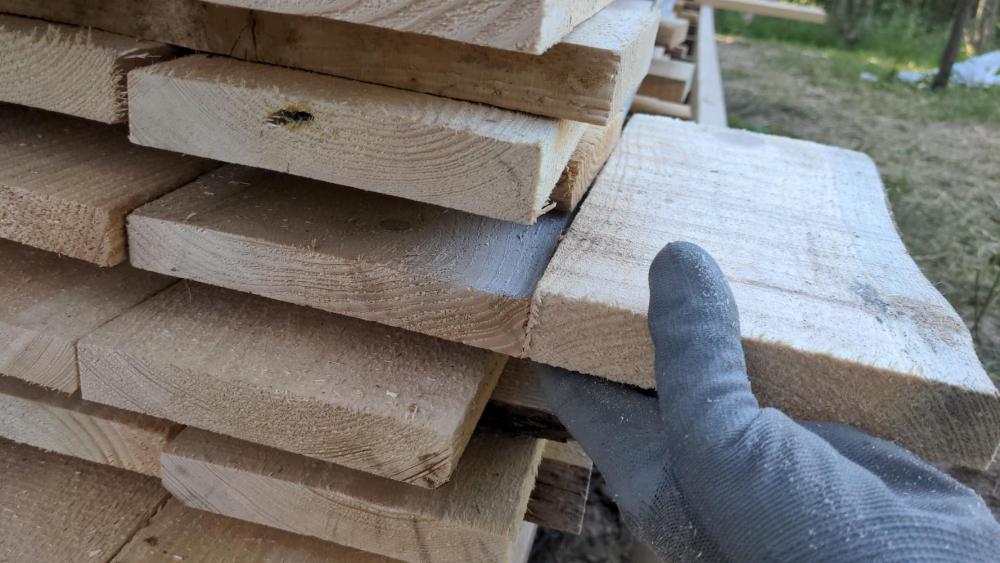
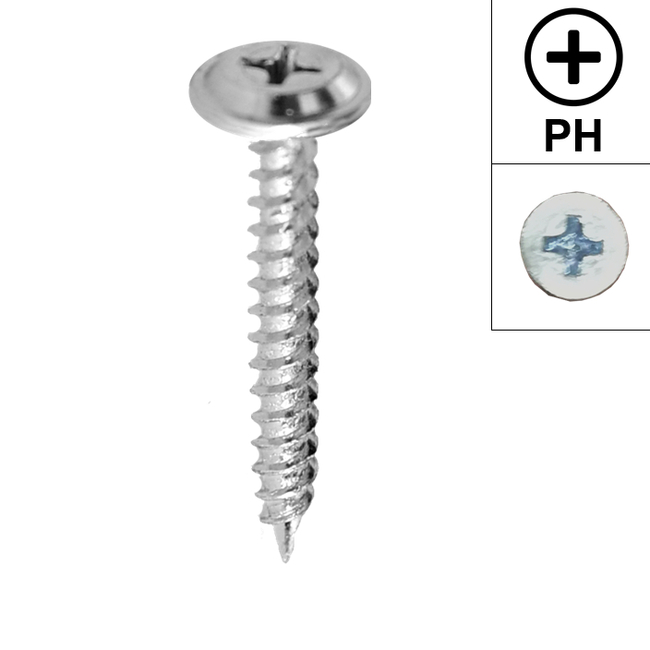
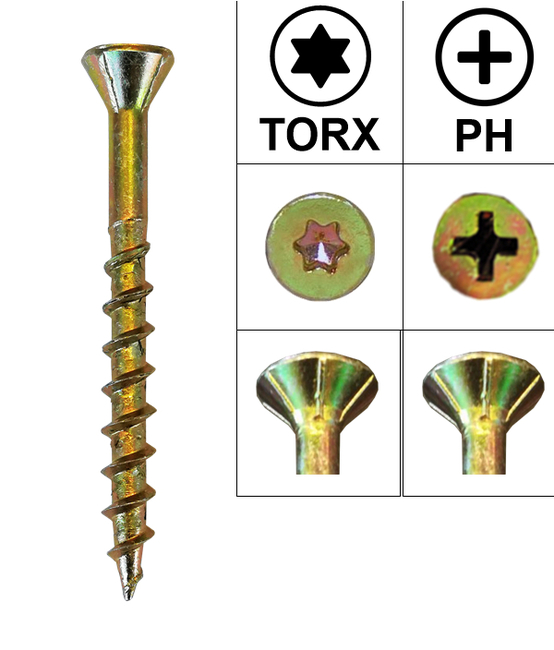
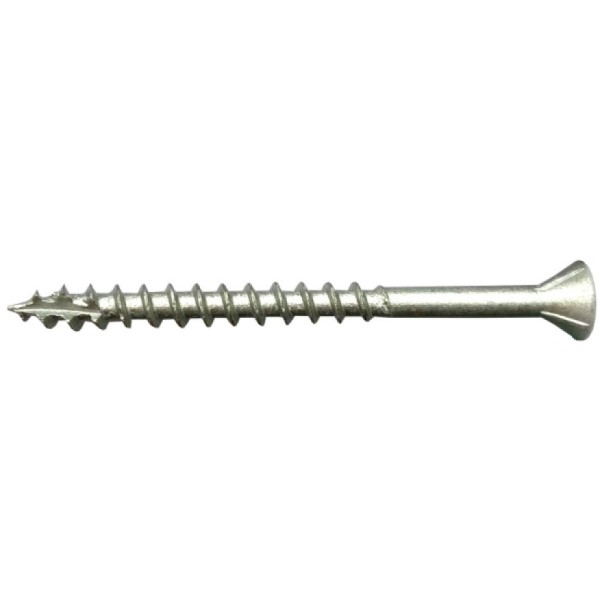
I'm trying to choose how to fix our cladding on 'the practice cabin' and would appreciate some advice / critique / war stories please. ? Specifically: - Which screws should I use? (wide head or narrow head) - How wide can I space them? (70 mm or 90 mm) - It is insane to use regular (gold) screws if we're painting over the top with arcylic wood paint? - Can you improve on the general detail? (other than not doing this!) I like this: (painted board on board facade with "rukki roof" standing seam steel) She likes this: (weathered board on board facade AND roof - rukki roof is perceived as too common out here So in the spirit of happy wife happy life we're going to do painted board on board for both walls AND roof: I'm fully aware that this is a daft roof covering but at this point I'm committed to giving it a go with the promise that the cuteness / timelessness of it will be worth it. Labour: Me. Can lift >10kg. Can cut straight. Will climb roofs. Has no sense of style but likes to build things rather than bodging them where practical. Her. Can lift <10 kg. Can paint straight. Won't climb roofs. Knows what enduring styles vs instagram fads are but has no sense of built vs bodged. Tools are basic DIY. LIDL chopsaw, pair of makita circ saws, einhell cordless drill driver / impact, plus a monster trend router and worktop jig that we were given. Neither of us are joiners and we like nothing more than dismantling everything we've just put together because we forgot a layer / fitted something backwards / changed our minds etc. Anything "you get one shot then you're wrecking it back out" is a risk. (pouring concrete, laying tiles, plastering walls, etc) So much as I'd like an excuse for a compressor and a nailgun etc I don't think we want to nail or glue anything unless given a very good argument for it. Areas to cover: The design is a scaled up version of the grey cabin shown above. Each "plane" of the roof is 4.6 diagonal x 16 metres Each "side wall" height is 3.5 x 12.5 metres The north gable end is 7 x 7 metres The south gable end (underneath a 3.5 metre roof extension much like the silver cabin) will be decking boards. We're leaving this and the deck until the sawmill has decking boards again. (everything is heading west at the moment) Studs and rafters are 600 centres. There's 50 mm of mineral wool on the outside, then 25x100 furring strips to hold it in place, then a membrane (to give time to clad things / catch any rain that does come through), then 25x50 mm strings just to hold the membrane in place. Roof pitch is 9:12 so readily walkable once you have horizontal battens. Currently there aren't any horizontal battens. Cladding material: The boards are ROUGH sawn and nominally 150x25 mm. 6 months ago €5/m2 would have got clean boards with 8 corners and 4 good edges. In the current climate...you get what you get and you're grateful. On paper it's a mix of pine / spruce. Looking at it I'd say mostly pine and I'd guess it's from logs trees no more than 300 mm diameter. (so some of the grain runs in interesting directions) Lengths ordered were 3.7m and 4.9m. Lengths supplied are anywhere from 4m to 6.5m and working out which is which is an exercise for the reader. (An "I can give you a delivery date for miscellaneous wood that's probably long enough; but it you want it graded and trimmed you're paying double or waiting until winter" type situation.) Finished sizes are in the 140-150 x 20-25 mm range depending on how dry the board is now vs when it was sawn. Some are bone dry and almost look like planed wood. Others are possibly twice the weight and look like they were chainsawn into planks. I'm busy grading / rough trimming / stacking these at the moment. We have "good" boards with 4 edges along their length; no holes/bad knots; no major twist or bend or cupping. These are going to be the "outboard" boards. We have "ok" boards with 4 corners at the bottom end and 2 edges; no holes/bad knots in the centre; some twist or bend or cupping allowed. These are going to be the "inboard" boards. (2 good edges upwards and 4 good corners downwards so that from the ground you see good ends and the bad edges are turned inwards/bad ends hide inside the eaves/ridge) We have "good but short" boards that are going to go above/below doors and windows, and be gut down into "fillers" for the eaves And we have "bad" boards. Some are straight but have holes in them. Some have splits in them. Some have twist/cupping in them. My plan was to rip these into the "25x75 mm" horizontal battens that will support the cladding. This photo gives an idea of how bad the upper ends of the "ok" boards are. We're expecting to have lots to choose from (the order was for 150% of nominal requirement ignoring the door/window holes) and cut many of the "poor" roof boards into "better" wall boards or even "great" battens. I've added some extra spacers in that stack and ratchet strapped it tight whilst it dries some more. Perhaps they'll decide they like their new shape. For fixing purposes let's assume that I'm trying to tame these boards though! Layup / Weatherproofing The house is broadly weathertight / airtight as-is. The membrane is NOT a UV proof type but as long as we hide it from the sun I'm not overly concerned about water making it through the cladding. The house is on ground screws so you've got ~500 mm fresh air under the whole thing. There's an accidental "25 x 500 mm" cavity between membrane and the mineral wool thanks to how the insulation was fitted. (less at roof level where it droops to guide rain away from the battens) Then there's a 25 x 550 mm fully drained cavity formed by those retaining battens on top of the membrane. (more at roof level where the membrane droops) I propose using "25 x 75 mm" horizontal battens spaced every 450 or 600 mm. This increases the effective cavity to 50 x 550 mm except where those battens are. I don't propose cutting an angle on top of them. These will be dead straight and aligned so that fasteners above the tops of windows/doors can match fasteners on the rest of the wall. I propose assuming a nominal 140 mm board width and 30 mm overlaps. This will add lots of 80 x 25 mm vertical cavities outboard of the horizontal battens. I propose cutting 8 mm wide and 8 (?) mm deep weathergrooves within these overlaps to "improve drying of the overlapping area" and form a capillary break / internal gutter especially for the roof. This is what I mean by weathergrooves: Router-ing 5 km of that would be epic but it isn't *too* laborious (cuts at walking pace) using this wide kerf blade of doom on the circular saw: The eaves and verges will be sealed by sticking short "filler pieces" in like in that black example with the white windows. The route for breathing is base of wall (500 mm off the ground), vertical channels to the eaves/soffits (which form a box section linking the tops of the wall channels / bottoms of the roof channes), then sloping channels up to the ridgeline. The ridgeline will be the limiting factor. This is to have a /\ shaped metal ridge capping leaving 80x25 mm gaps along its entire length. I'd guess 360 x 25 mm per metre either side of the ridge. 1 mm insect mesh there. 1 mm insect mesh at ground level. These are getting painted with a "15 year" acrylic. (more flexible than alkyd albeit not as sticky / longer lived than sludge paint albeit not as easily refinished) https://www.senukai.lt/p/gruntas-medienai-pentacolor-wood-primer-balta-10-l/4ke7 https://www.senukai.lt/p/emulsiniai-dazai-pentacolor-villa-novus-antracitas-10-l/5ulv Rough sawn + quick 80-grit to remove splinters + quick brush to remove dust then primer (white) to crate a good base. Then one topcoat (anthracite) before fitting and probably a second topcoat (black) before fitting. Then the final coat in-situ and on top of all the fixings. (maybe important later) Black is the wrong colour. We know. It'll probably be +70C in summer and -20C in winter seasonal swing. Or +70C during the day and 20C at night daily swing in summer. Red or grey would be more sensible (maybe as low as 50C in summer?) but this cladding is just going to have to suffer for fashion. Winters here (baltics) are very dry though; so I don't think we're going to add too much humidity change added on top of the temperature swings. Airtightness is expected to be ok and vapour from inside minimal. The moisture will come from outside air at night. End grains get painted. Visible faces get painted. Overlaps get painted. 30 cm of backside gets painted (the drip edge). The rest of the backside doesn't get painted to aid drying into cavity and save on paint. This article suggests coating on all six sides but given that the building isn't a sieve dumping vapour from inside I think ok to leave the back unpainted: https://www.buildingscience.com/documents/building-science-insights-newsletters/bsi-015-stress-relief For mental notes paint is ~€6 per litre and anywhere form 6-12 m2 per litre (assume 6) and there's double the area to paint that the wood covers due to overlaps etc. Works out at about 600 m2 per coat. 100 litres per coat. €600 per coat. Ouchy. Fixing... Here's where I'm least sure about the least worst approach. Some say nail softwood cladding. Nails are cheap. Nails are fast. Some say use one nail per "inboard" board (in the centre) and two nails per "outboard" board (at 25% and 75% of width, so nominal 37.5 mm and 112.5 mm on a 150 mm board) in order to avoid splitting the wood as it expands and contracts. I don't like nails. They're a bit permanent for my liking. It is difficult to drive them "flush" at the best of times and arguably you want to "over drive"t hem a little bit to keep tension on the wood as it expands and contracts. Any "over driven" nails on the roof are going to catch water. It's more difficult to pull twisted banana boards tight with nails. (you've got to push the board down then nail it whilst holding it down) And you need fatter battens to show the nail who is boss (the pull-out strength out of the batten wants to be much higher than for the thing you are attaching with it) which won't let me use 25x75 mm battens. I think screws are better. Which screws and where though? Lengths need to be ~50-55 mm for the "inboard" boards and ~70-80mm for the "outboard" boards and for the horizontal supporting battens to the house. Really I'd like to use two screws on the "inboard" boards as they are the bendiest ones that want persuading into place. If we say nominal 140 mm width and 25/75% then these are at 35 and 105 mm. (35 mm in from the sides, 70 mm width between screws). That's right on the edge of my 30 mm overlaps. Could I push it to 25 mm and 115 mm so that the screws are under the overlaps, or is that +20 mm to 90 mm width between screws going to make a material difference to splitting? Is it worth adding a relief groove or two to the back of these boards? (run "weathergrooves" down the back of them to "break their back" and make it harder for them to cup) Or is that going to make them more prone to splitting rather than cupping? Should the screws have little heads or big heads? Do I need to buy coated screws given that they might be underneath boards and/or painted over? I can buy "decking screws" that have little heads: https://online.depo-diy.lt/products/7872#5578 https://online.depo-diy.lt/products/7872#5585 (1.9 cents each in 55mm, 2.8 cents in 75mm - with ribs under head but without ribs on shank) https://www.senukai.lt/p/medsraigciai-4-2-x-55-mm-ruspert-zali-tx20-200-vnt/d251 https://www.senukai.lt/p/medsraigciai-4-2-x-75-mm-ruspert-zali-tx20-200-vnt/d25k?mtd=search&pos=regular&src=searchnode (3.3 cents each in 55mm, 3.8 cents in 75mm - with ribs under head and on shank to clear out the hole in cladding board) I can buy "outdoor wood screws" that have larger heads, self drill tips, and under head/on shank milling cutters: https://online.depo-diy.lt/productItem/134739/0 (2.7 cents each in 55 mm, not currently available in 75 mm) Or indeed "wood screws" with larger heads, self drill tips, and under head / on shank milling cutters: https://online.depo-diy.lt/productItem/5569/0 https://online.depo-diy.lt/productItem/5571/0 (1.5 cents each in 50 mm, 2.1 cents each in 70 mm) Or "screws for OSB" that have small heads and are essentially decking screws without the coating for that matter: https://online.depo-diy.lt/productItem/134716/0 https://online.depo-diy.lt/search/4.2 65#134714 (1.1 cents each in 55 mm, 2.2 cents each in 75 mm) Or go totally the other way with pan heads through pre-drilled clearance holes with their heads proud of the cladding: https://online.depo-diy.lt/productItem/5975/6718 https://online.depo-diy.lt/productItem/5975/6718 (1.7 cents in 50 mm and 2centre in 75 mm) Here's some side by side. 5x70 "outdoor wood screw" (5c each), 4.2x50 "outdoor wood screw" (2.7c each), 4.2x55 nice deck screw (3.3c each), 4.2x52 cheap deck screw (1.9 c each), 4.2x55 OSB screw (1.1c each) I have no experience here. What's best for mauling recalcitrant softwood cladding into place without spitting it to pieces or pulling through the face? I've bought some to try but I can't recreate the weather cycles and some hard won lessons would be good! Gut says painted deck screws or painted outdoor screws. The heads are VERY different sizes though. Costs I've added the costs for my own sanity as I'm going along here. 4.7 metre board supported every 450 mm with two screws is say 12x supports or 24x screws. 140 mm nominal width and 30 mm overlaps is 9 boards per metre is 216 screws. 16 metres of roof is 3500 screws. 2 sides to the roof is 7000 screws. 3.5 metre board every 450 mm is say 8x supports or 16x screws, 150 per linear metre. *26 is 4000 screws. North gable call it 2000 screws. Attaching battens to house call it 3000 screws. Bad heads snapped dropped on the floor lost in the car or generally evaporated 1000 screws Every cent on screw price is ~€170. I'm guessing <€600. Not the end of the world in any shape or form. Paint €1800-2400. Wood was €3000. ~10-15/m2 materials if I add blades and whatnot. Labour.... ?


-
Structural raised deck - spans / timber sizes ok?
markocosic replied to oranjeboom's topic in Landscaping, Decking & Patios
Life expectancy: - Space your ledger away from the brick wall. Sandwich something waterproof / non-rotting between the ledger and the wall. - Space any "decorative boards" that cover the other end of your "beams" (a skirt around the deck) away from the beams so that the beams can dry. - End grain of post wood must stay dry. Cover the tops of posts with DPM or similar. Let the bottoms of posts free-drain into pea gravel if they're buried. Not brick. - Ideally you don't bury wood. Cast concrete pillars into the ground (dig round hole, shove a concrete-in post base into the hole hanging from a temporary frame to set them all in the right position, then fill hole with concrete) Afterwards bolt the posts on top of them - again with an air space to dry the end grain. Alternatively cast your pillars (all to same level) then screw a post base down before attaching the post. Note your posts can't carry any side loads once this is done. You have to use diagonal braces. But it keeps them dry and it will effectively last forever. https://online.depo-diy.lt/productItem/7839/7973 https://online.depo-diy.lt/products/7973#7864 etc UK I guess the closest is: https://www.toolstation.com/post-base/p29420 https://www.toolstation.com/post-base/p82691 https://www.toolstation.com/concrete-in-sleeper-base-anchor-bracket/p75498 etc - The ends of joists finish under the centre of a deck board. The ends of joists that "join on" to a longer run don't touch each other. Again all to keep end grain of joists dry. - Boards don't start/end/join on top of joists. Boards overlap the joists and drip into fresh air. You need double joists where boards join for this to work. - Joists should stay drier / last longer if the tops of them are covered with something waterproof and wider than the joint (e.g. 47 mm joist with something 60 mm wide on top). Don't know how composite boards effect this. (you're protecting the joist in the gaps between boards then immediately mashing a screw through it so perhaps pointless) FWIW if seriously considering "concreteing-in concrete posts" rather than "pouring concrete piles then bolting wooden posts on top" and local enough I found these folks very competitive: https://ellistimber.co.uk/